AKG Acoustics HT420 wireless microphone transmitter User Manual 20140130 QSG WMS420 CMYK des
AKG Acoustics GmbH wireless microphone transmitter 20140130 QSG WMS420 CMYK des
Contents
- 1. Quickstartguide
- 2. Online-Usermanual
- 3. Manual supplement
- 4. Full manual
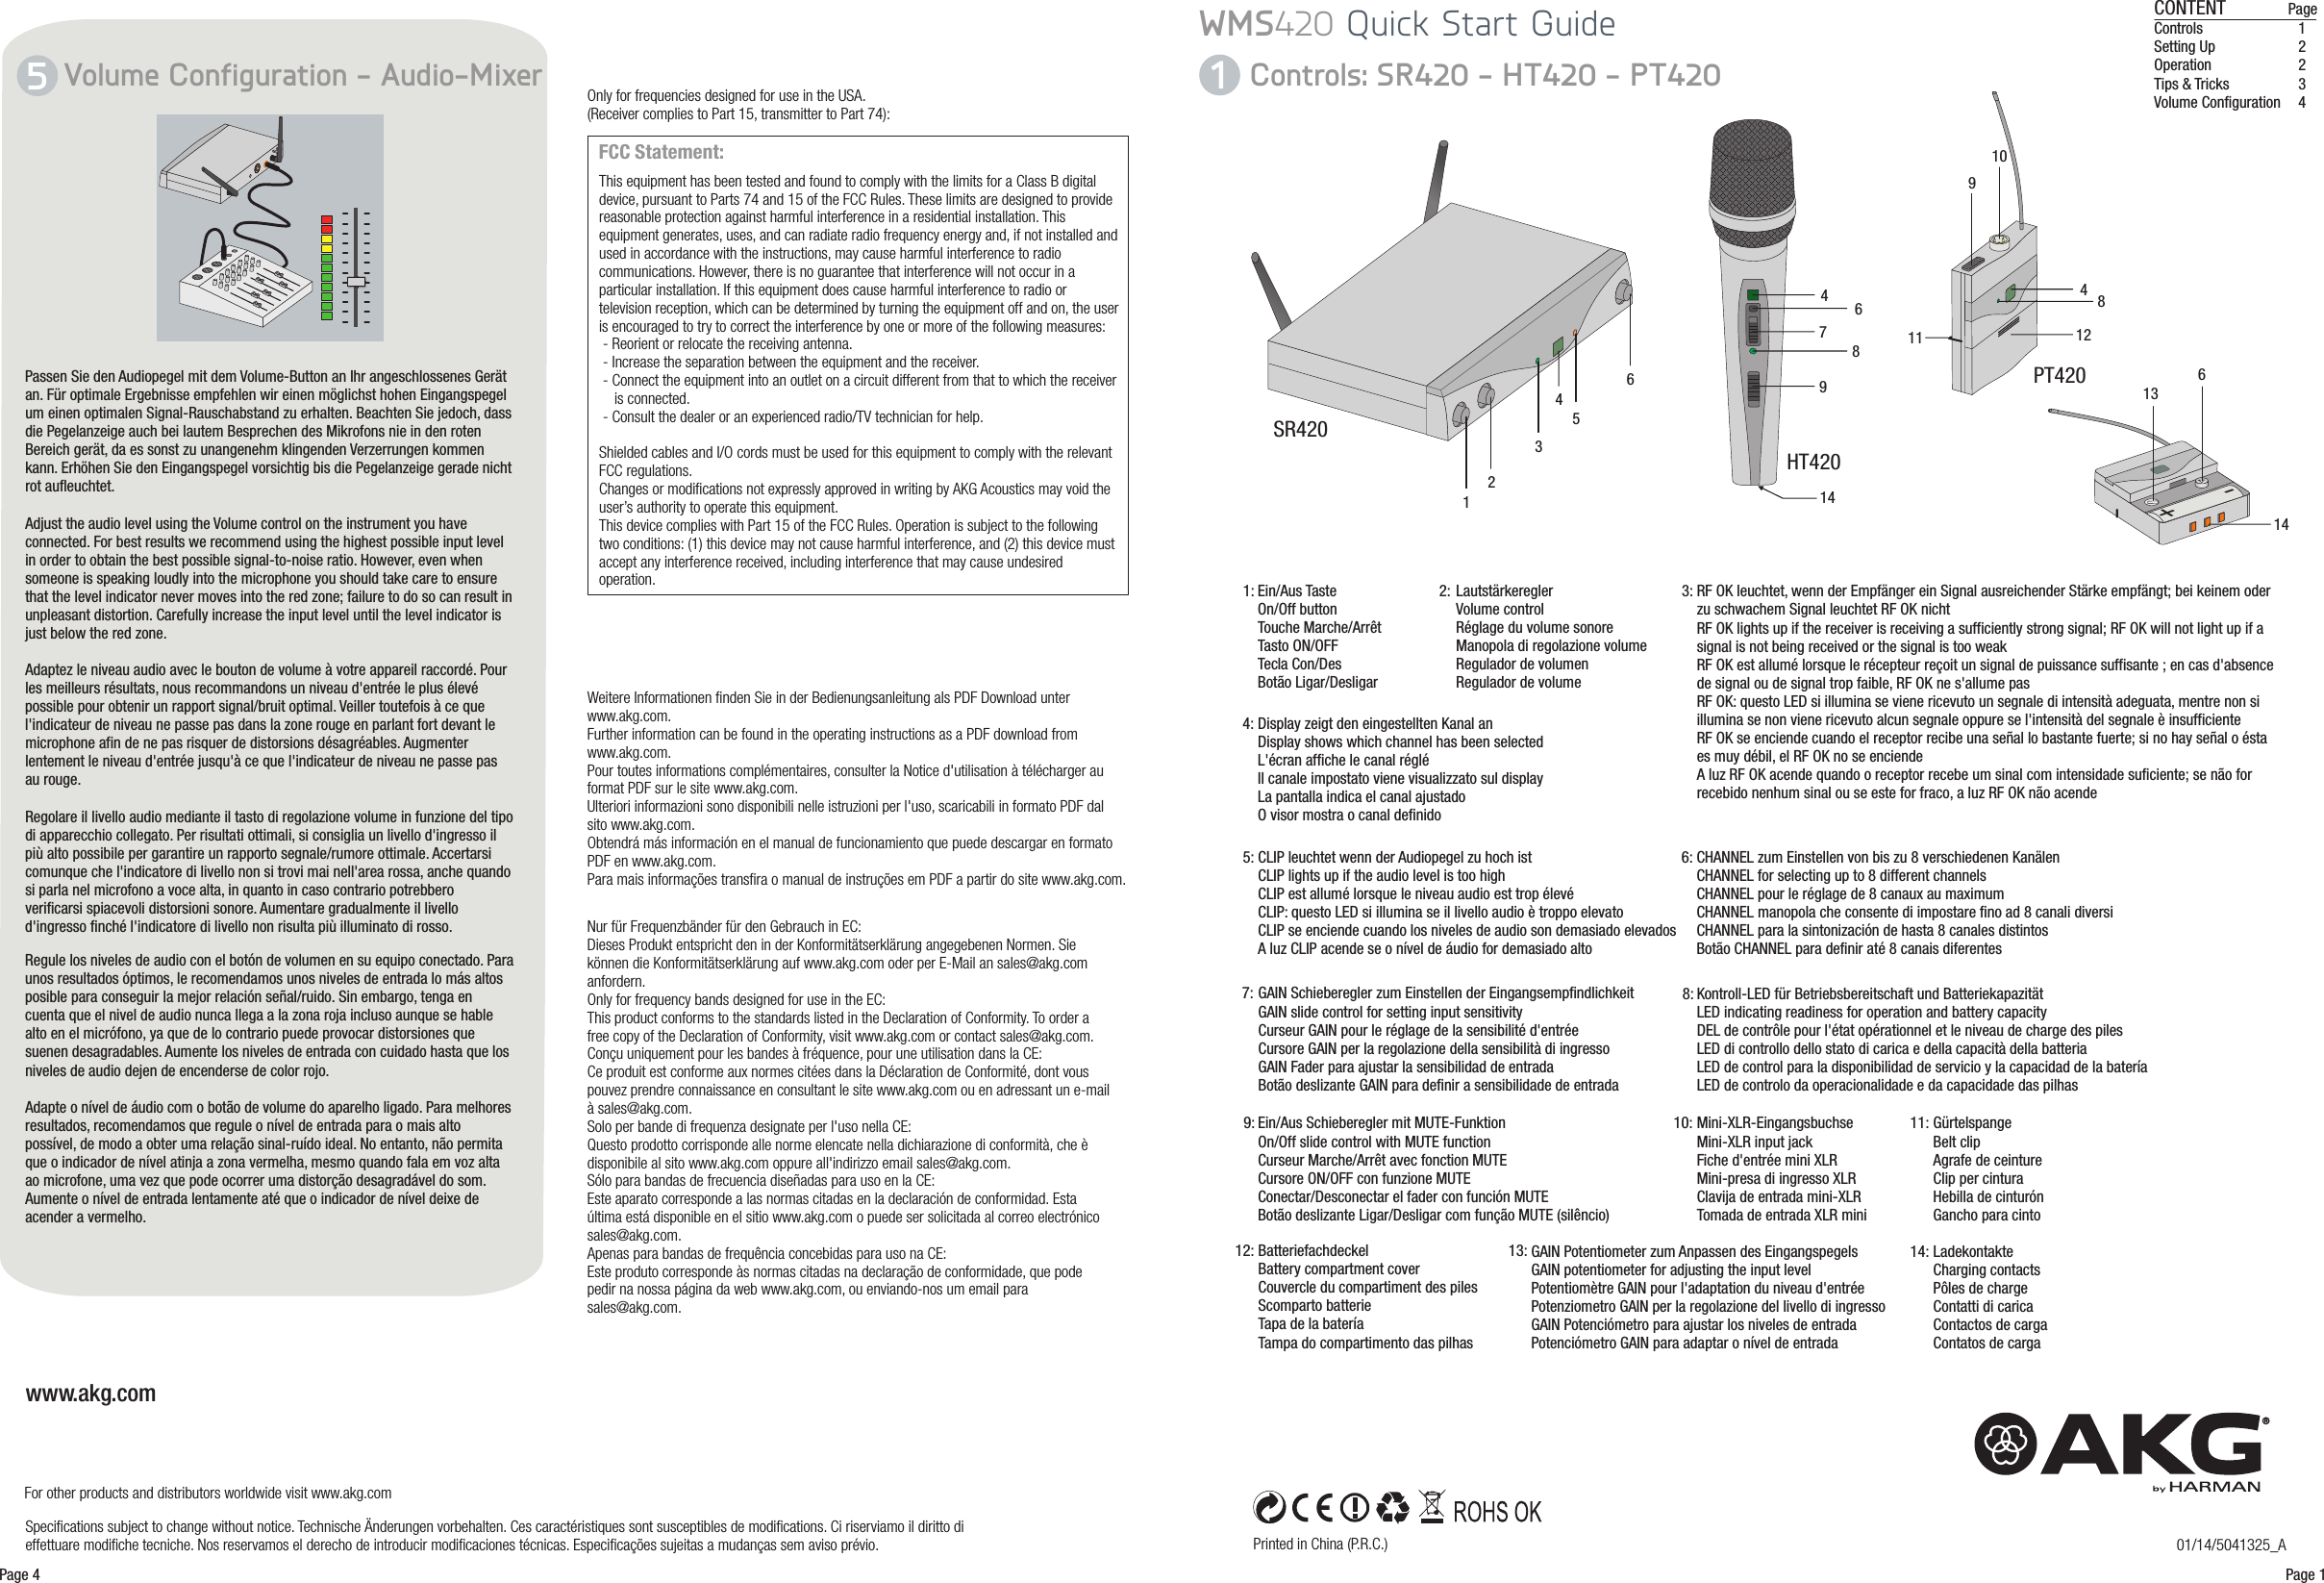
Quickstartguide