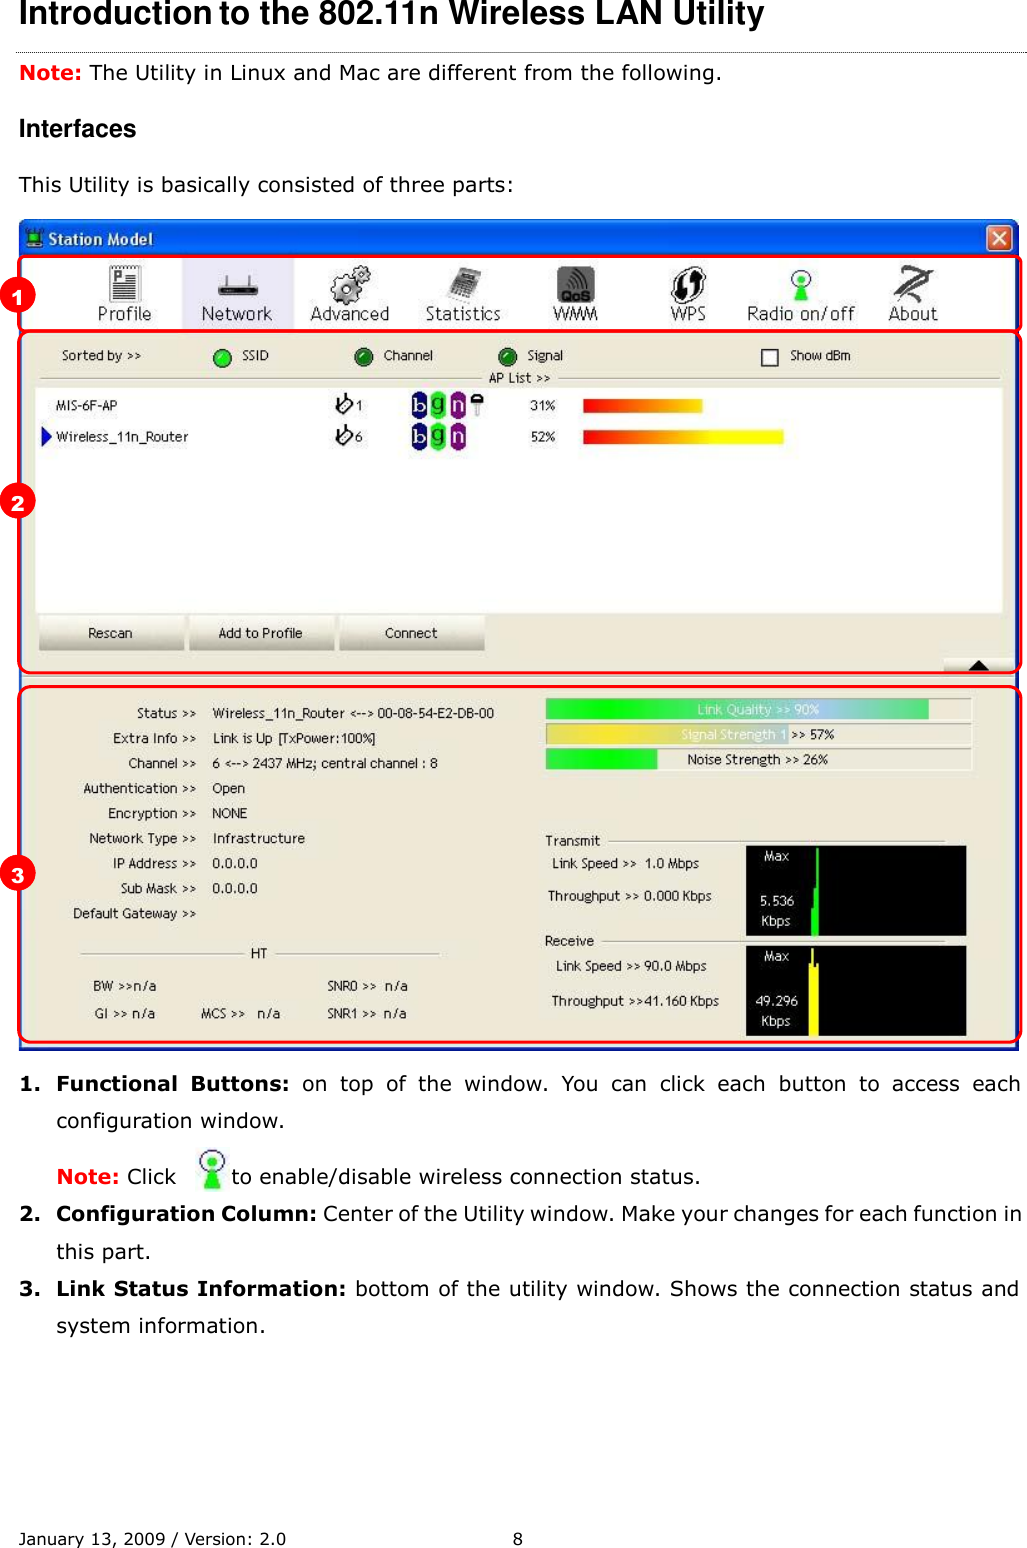
ALFA NETWORK TUBEUN Outdoor Long Range USB CPE with N male connector User Manual 11n USB
ALFA NETWORK Inc. Outdoor Long Range USB CPE with N male connector 11n USB
UserManual.wiki
>
ALFA NETWORK
>
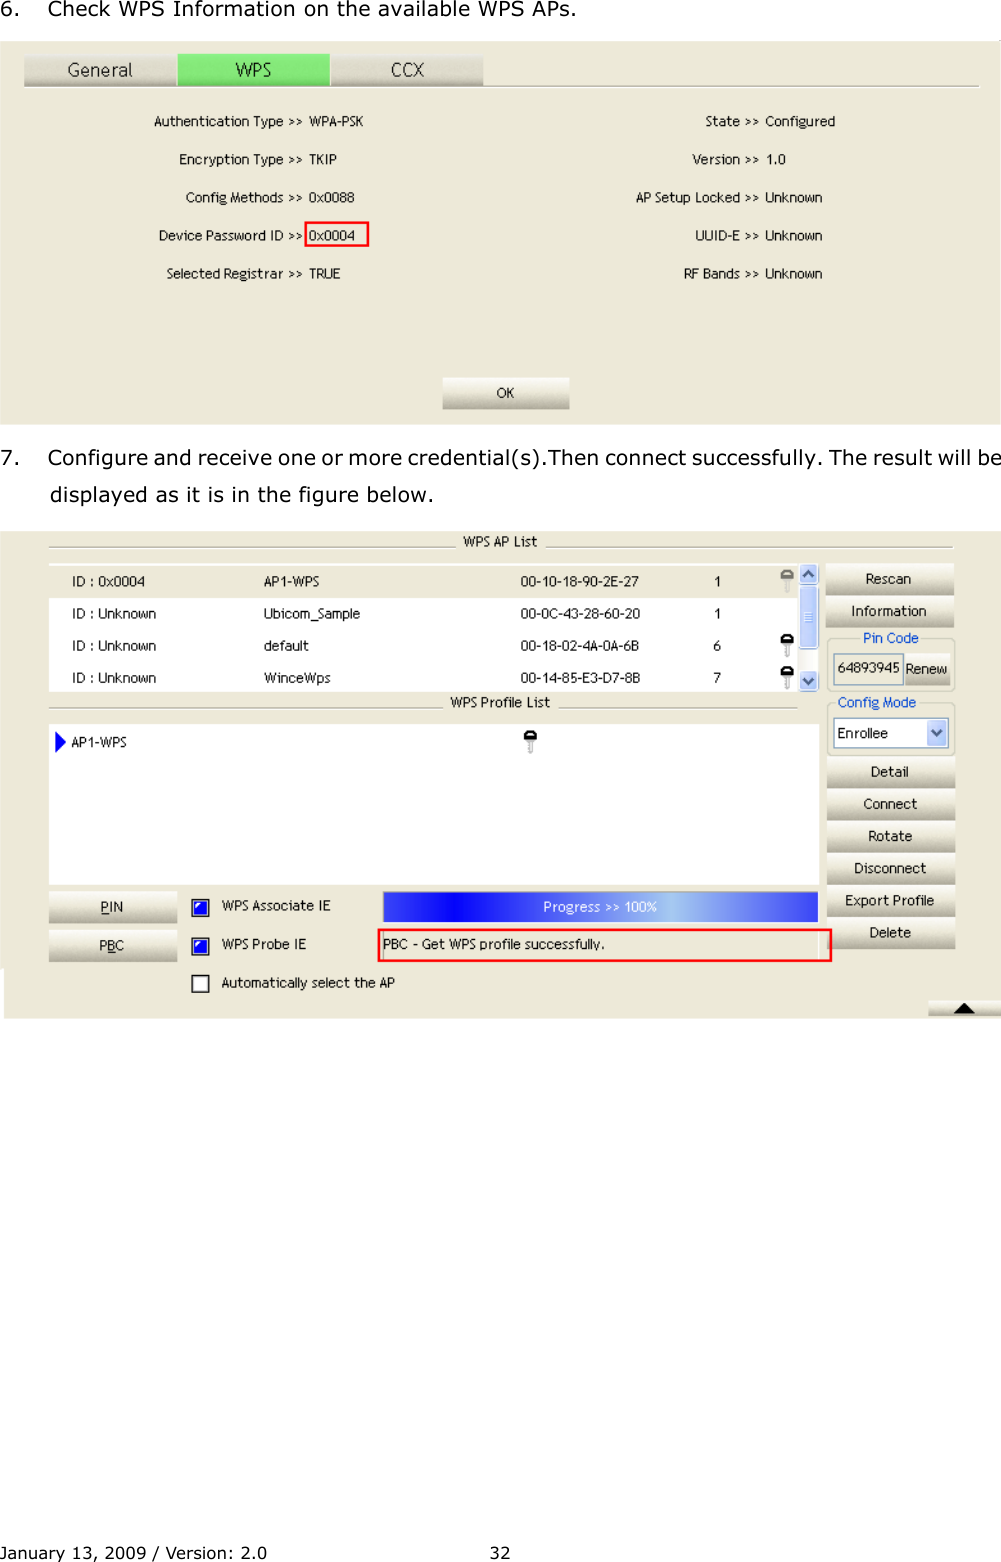
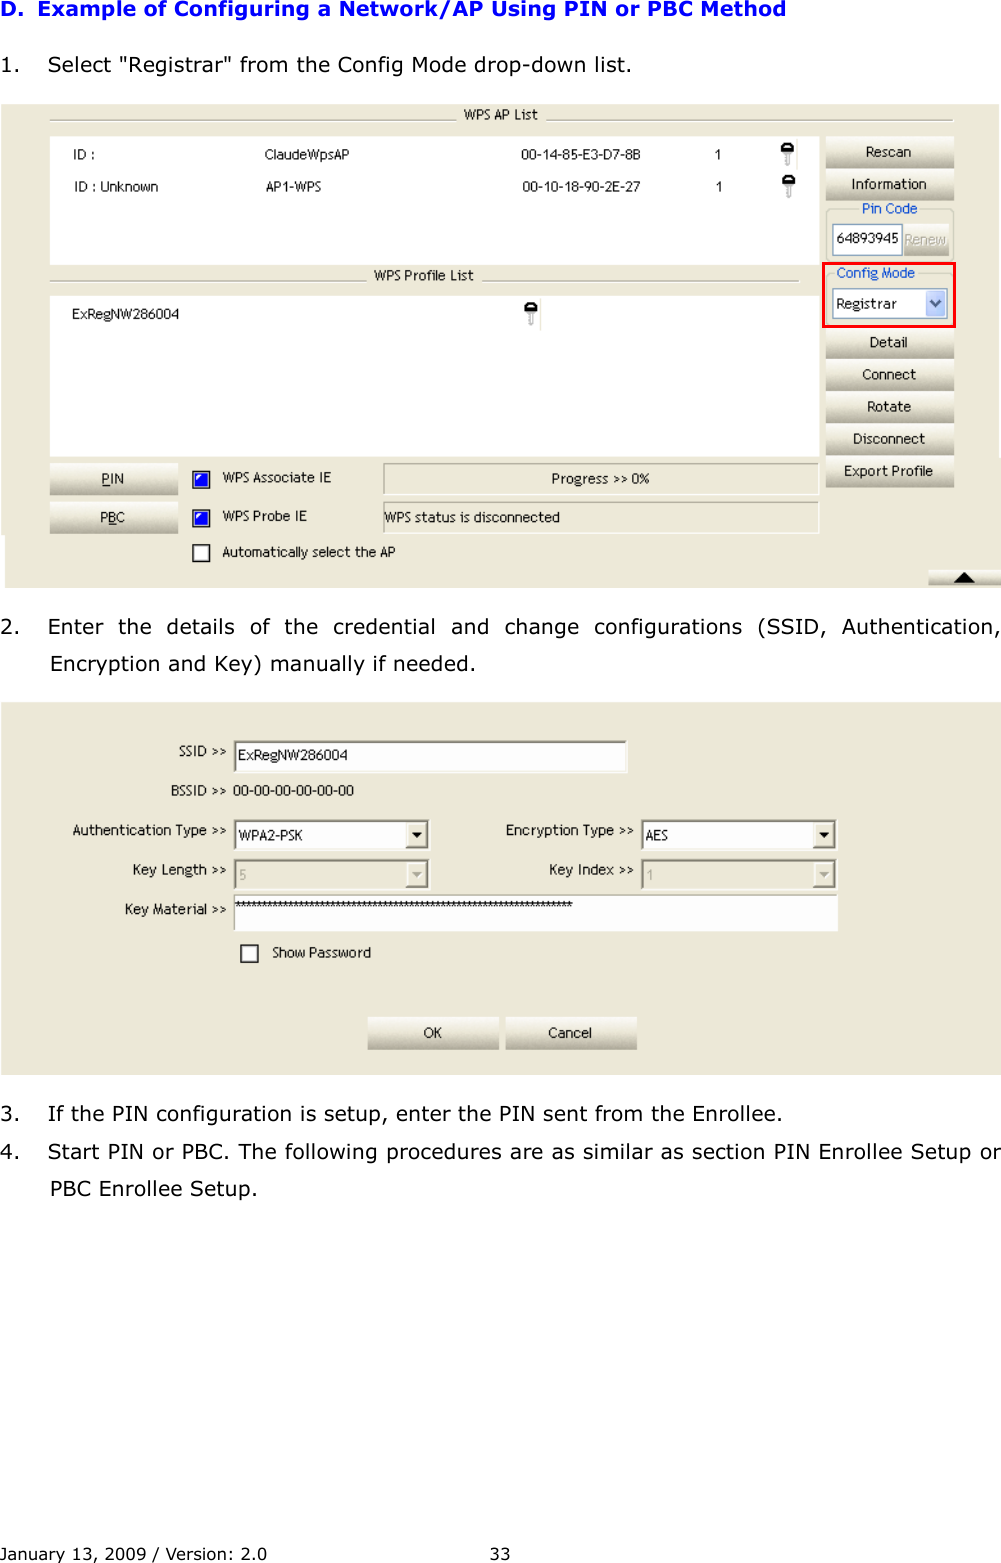
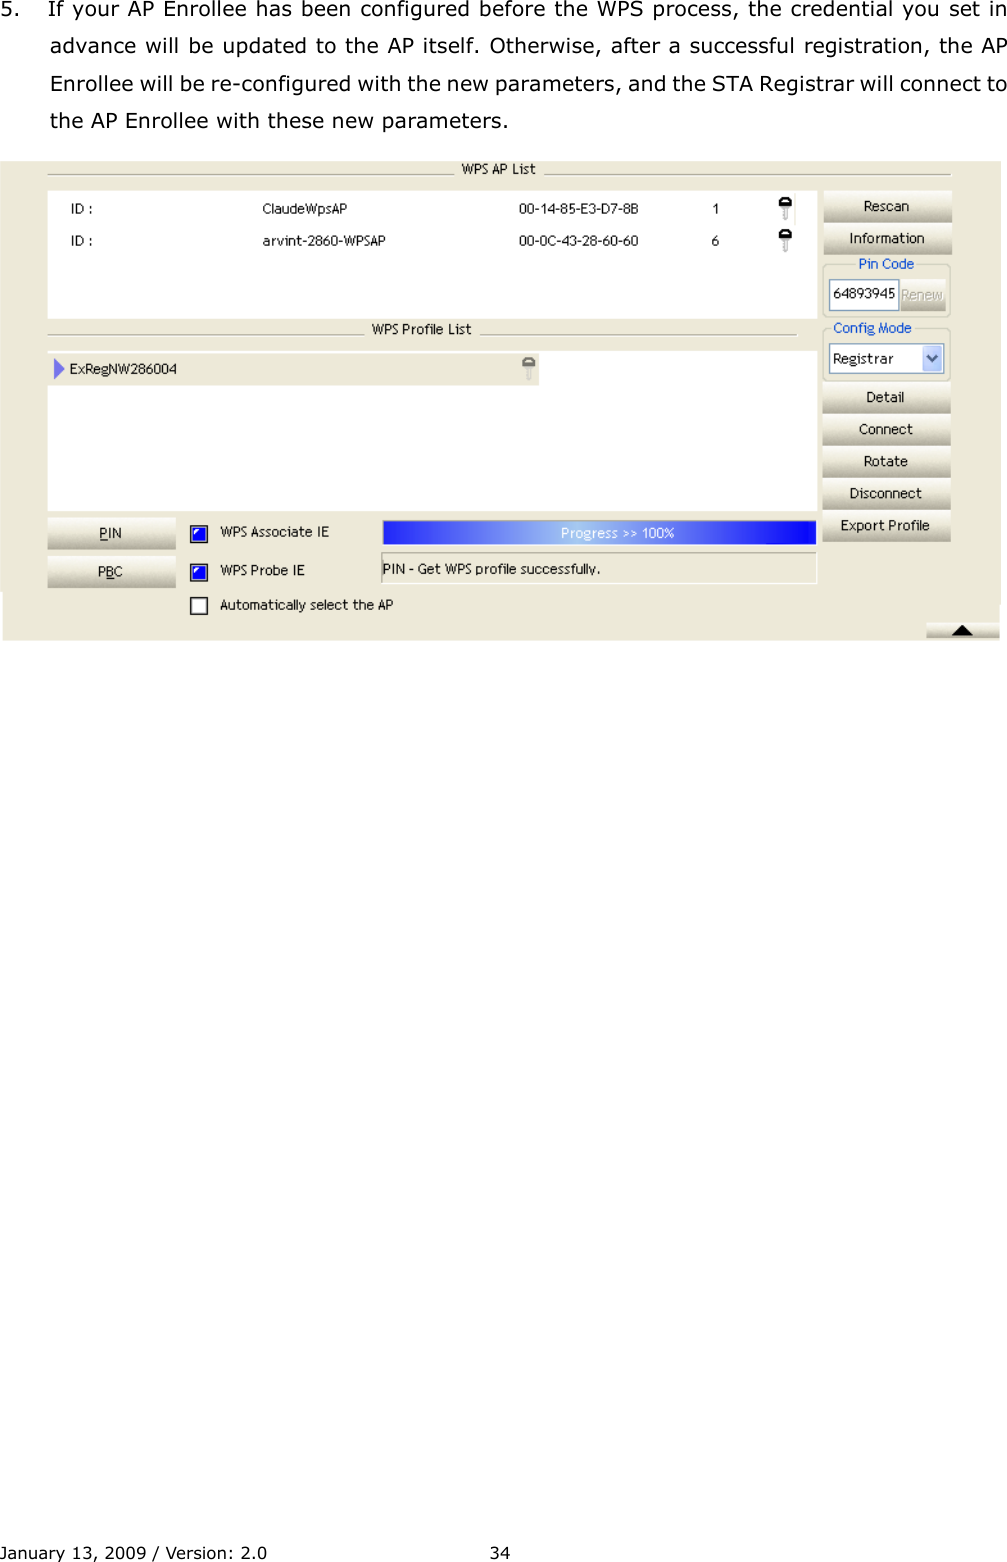
TUBEUN User Manual
User Manual
Navigation menu
Upload a User Manual
Namespaces
Wiki Guide
HTML
PDF
Info
Views
User Manual
Discussion / Help
Navigation


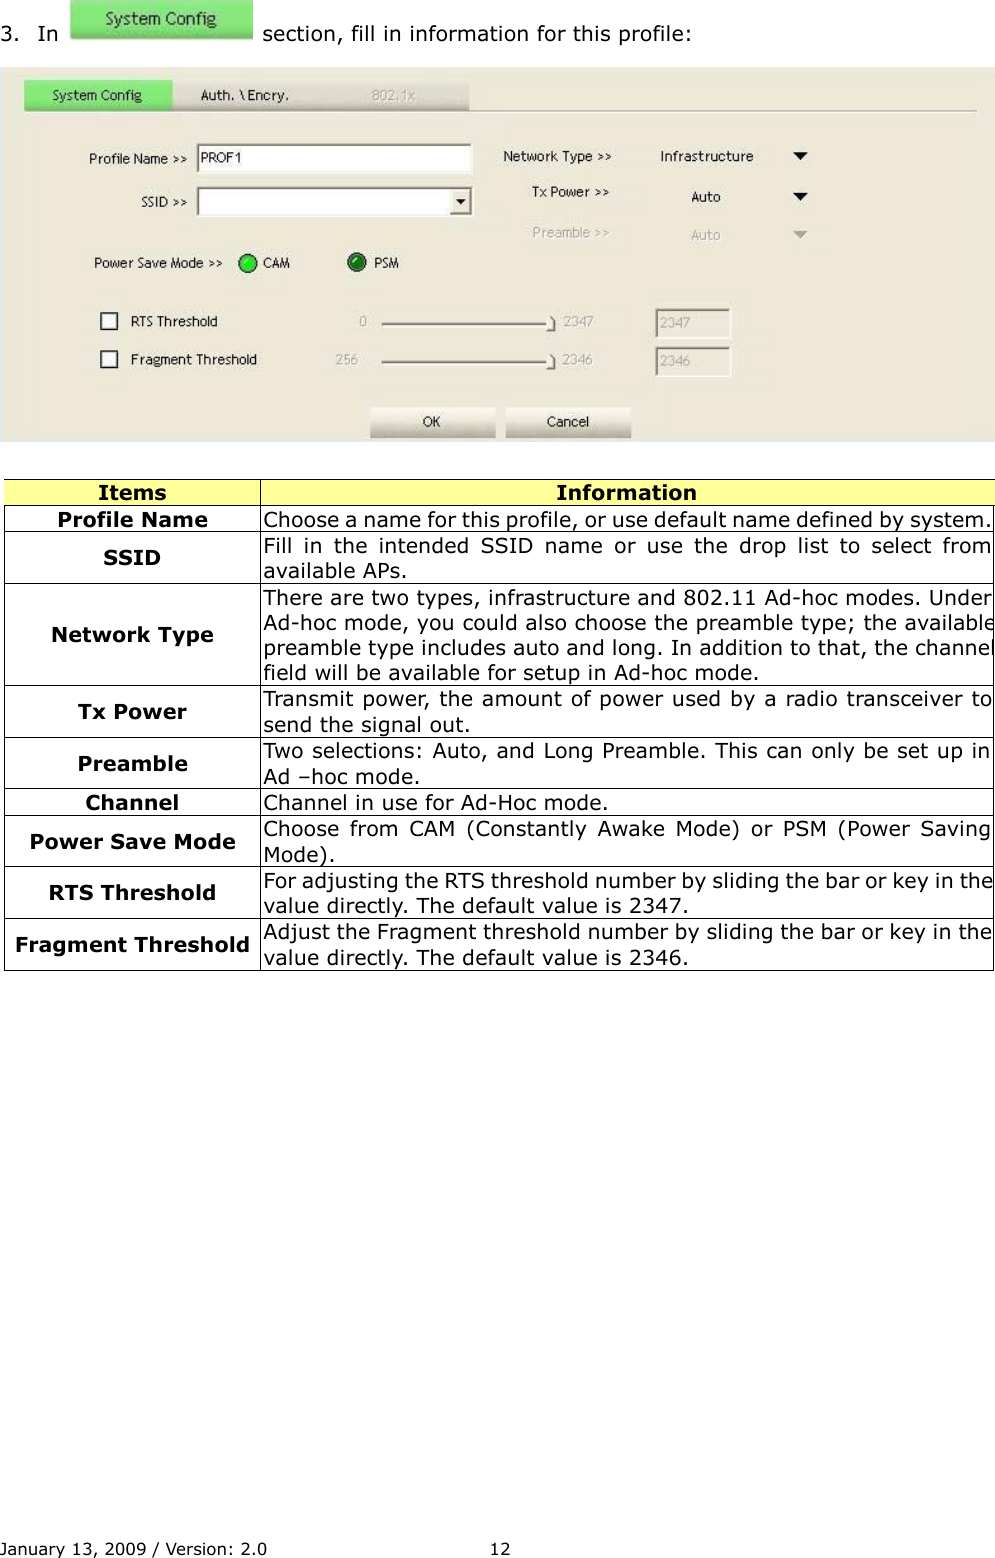
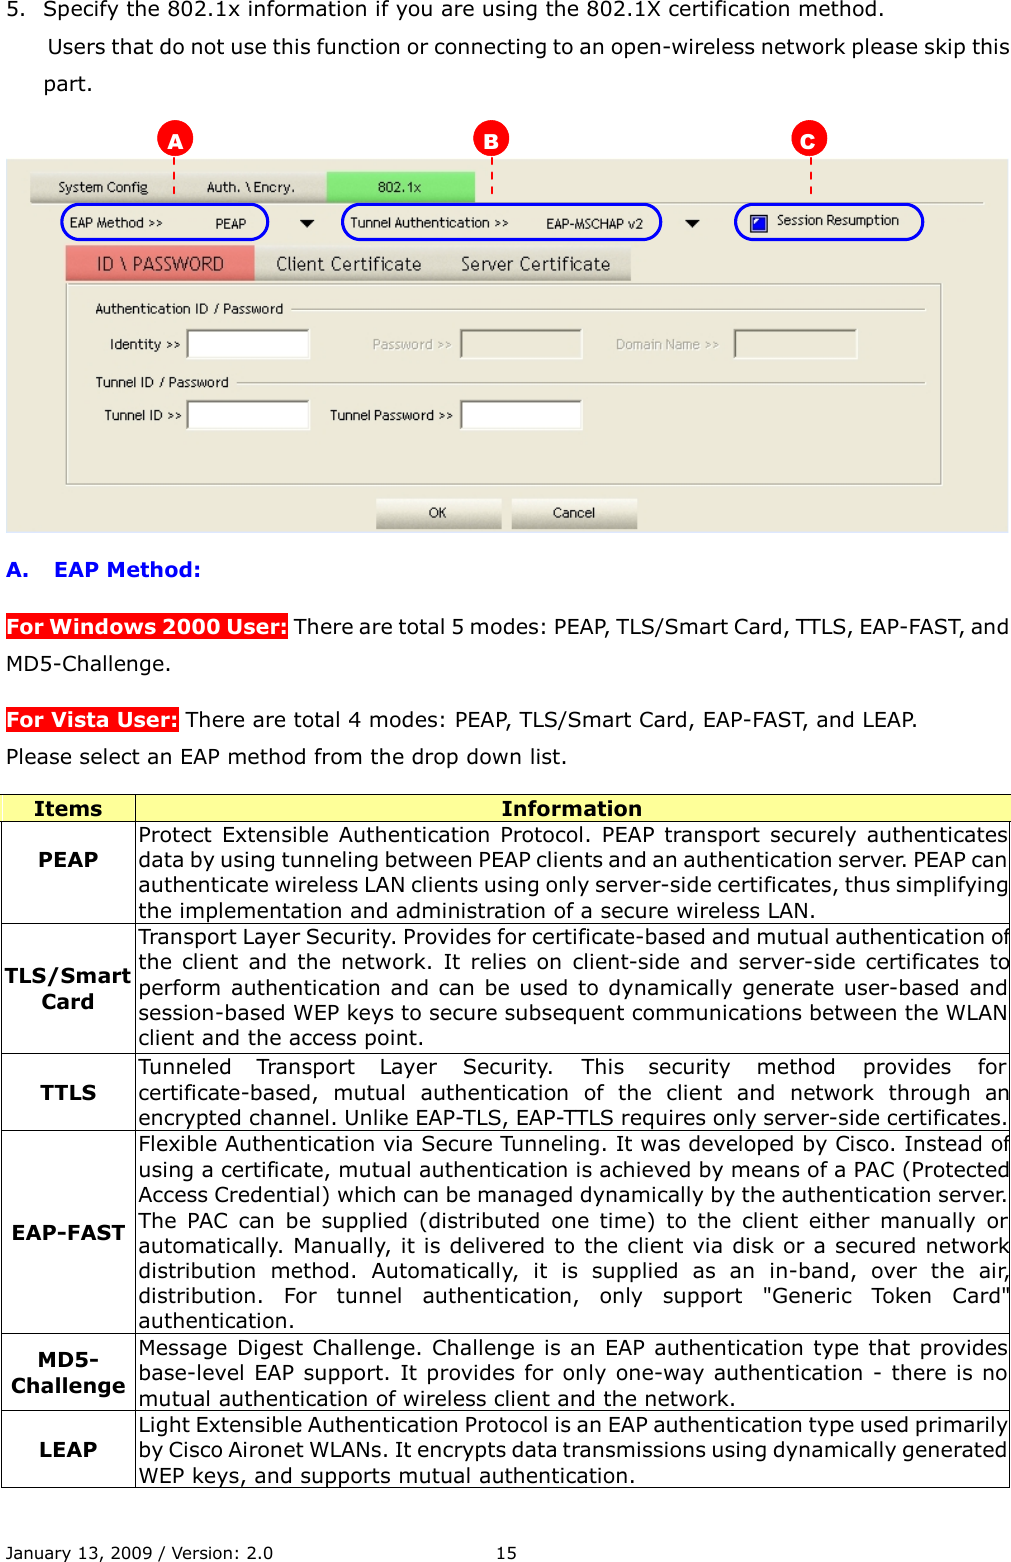

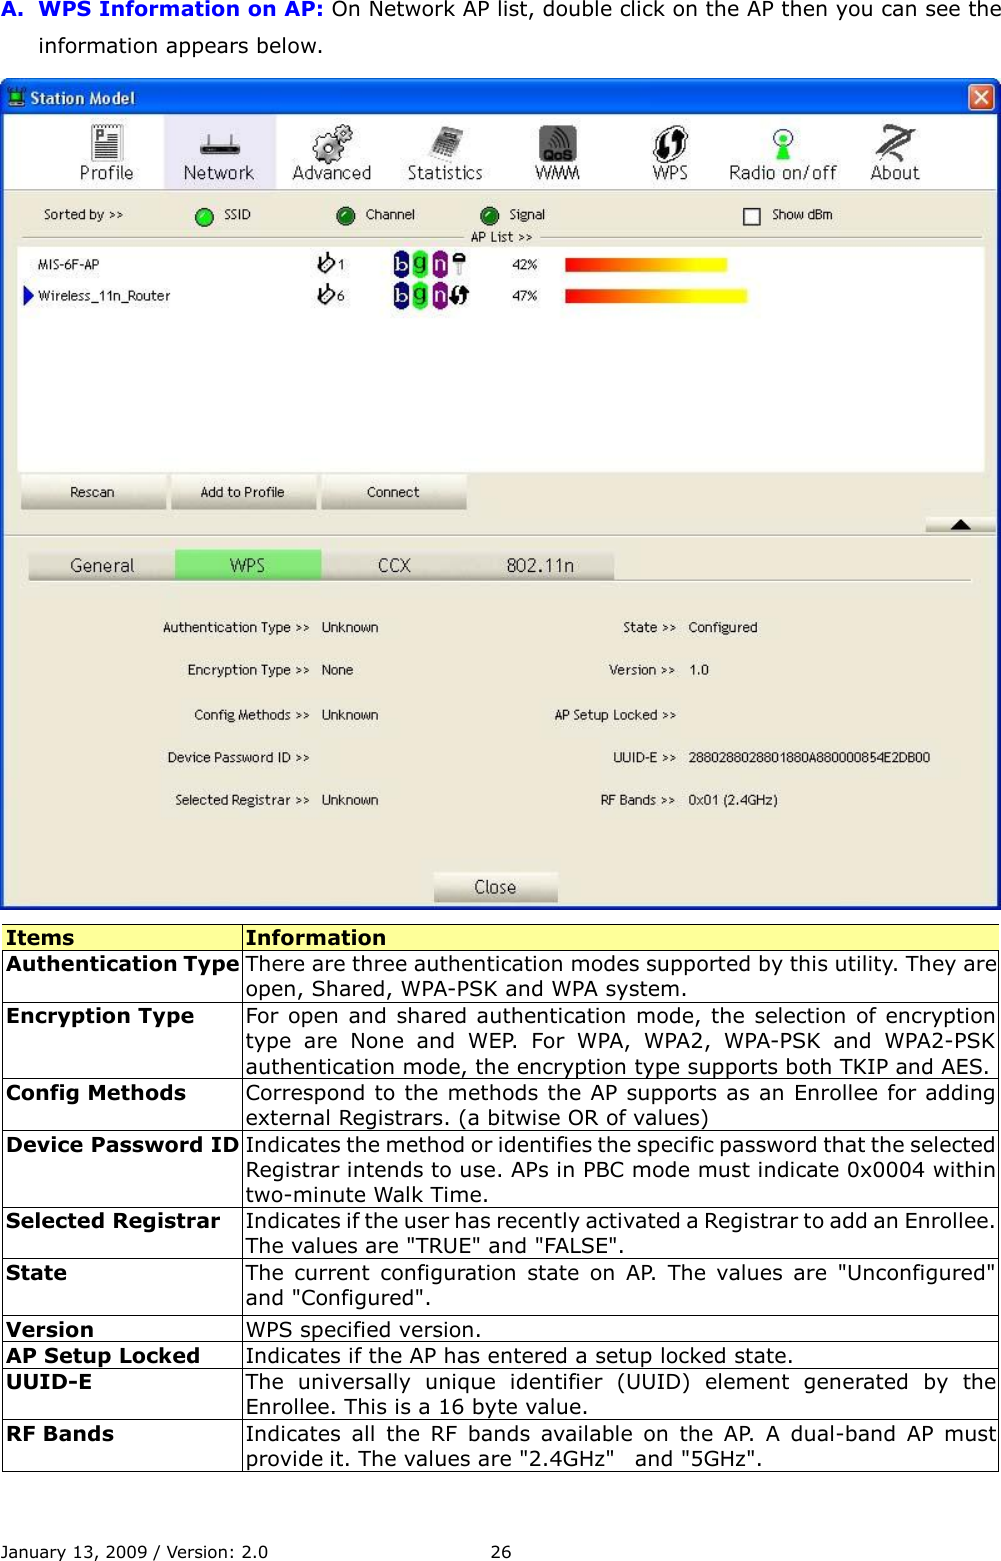
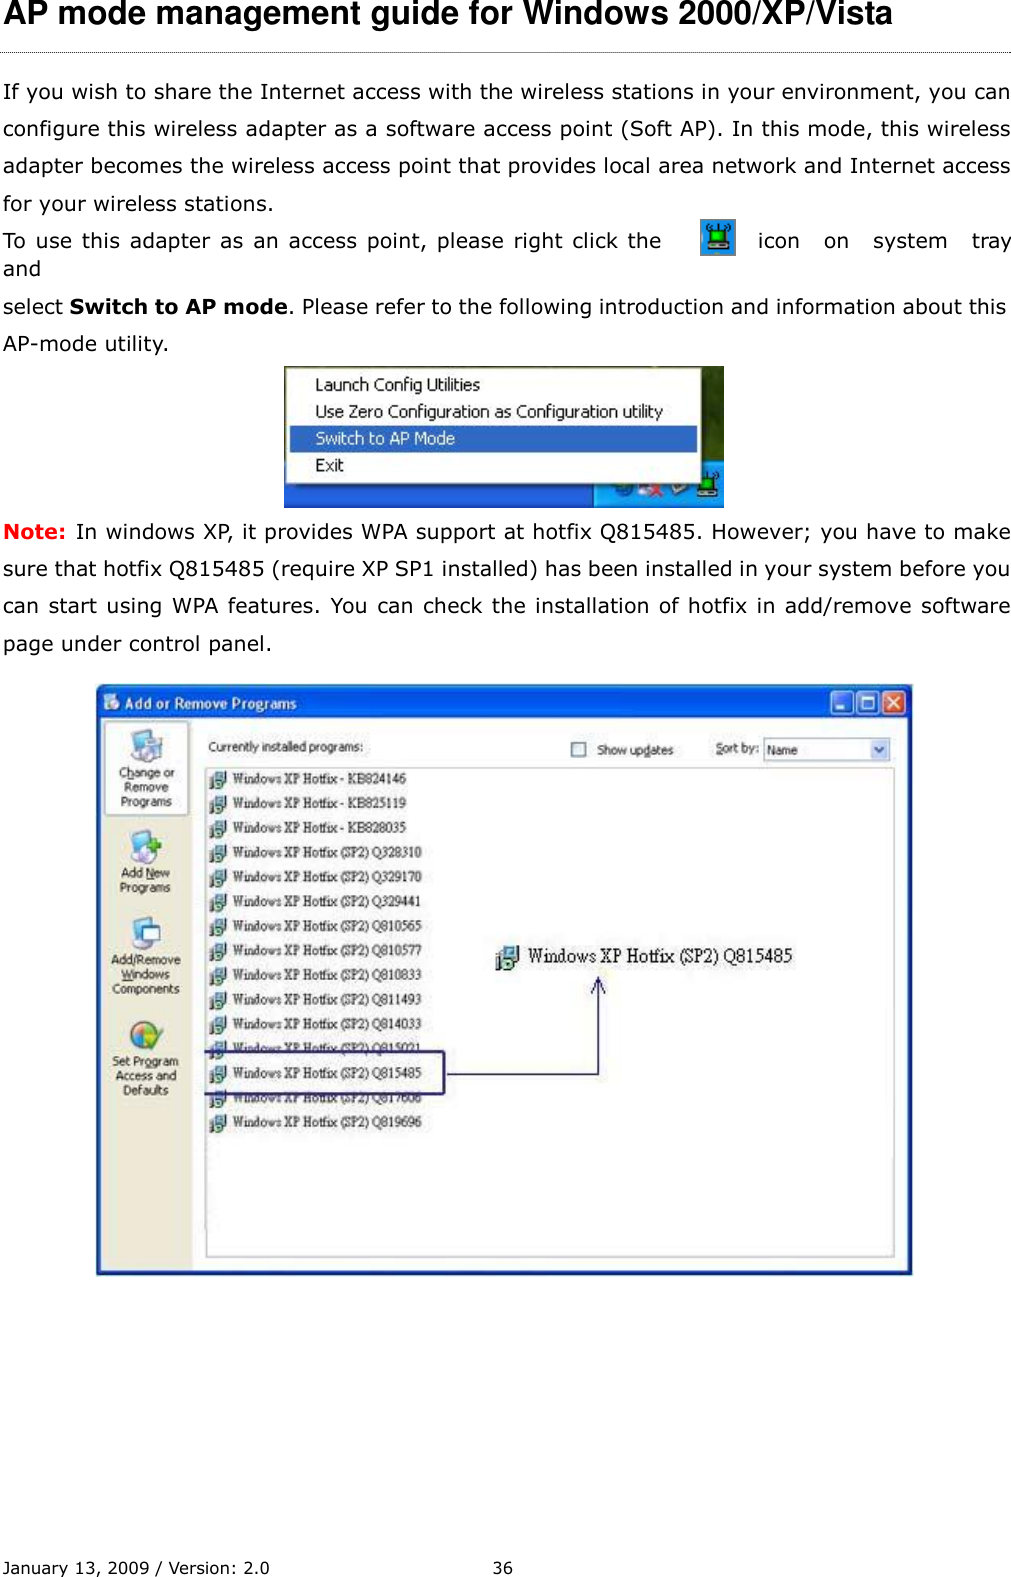

![Config This page provides overall configuration to this adapter. Please find the following items for identification to each field. 1 7 2 8 9 3 10 11 12 4 5 6 13 14 15 1. SSID: AP name of user type. User also can select [Use Mac Address] to display it. 2. Wireless Mode: Select wireless mode. Only 2.4G is supported. January 13, 2009 / Version: 2.0 38](https://usermanual.wiki/ALFA-NETWORK/TUBEUN/User-Guide-1536162-Page-43.png)
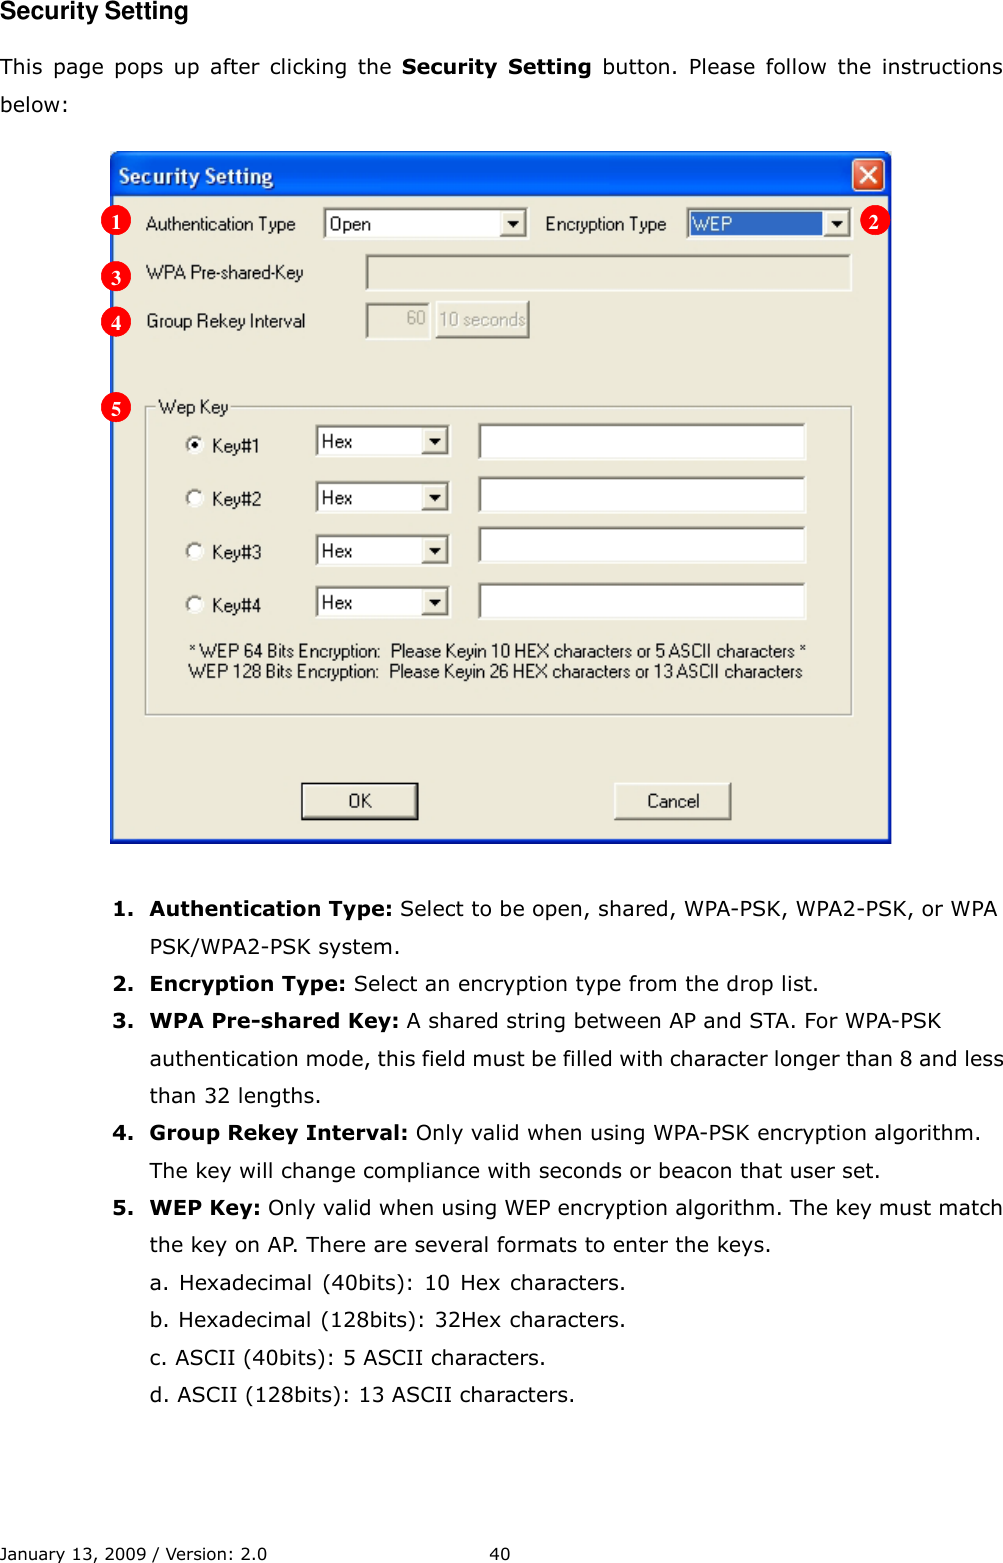
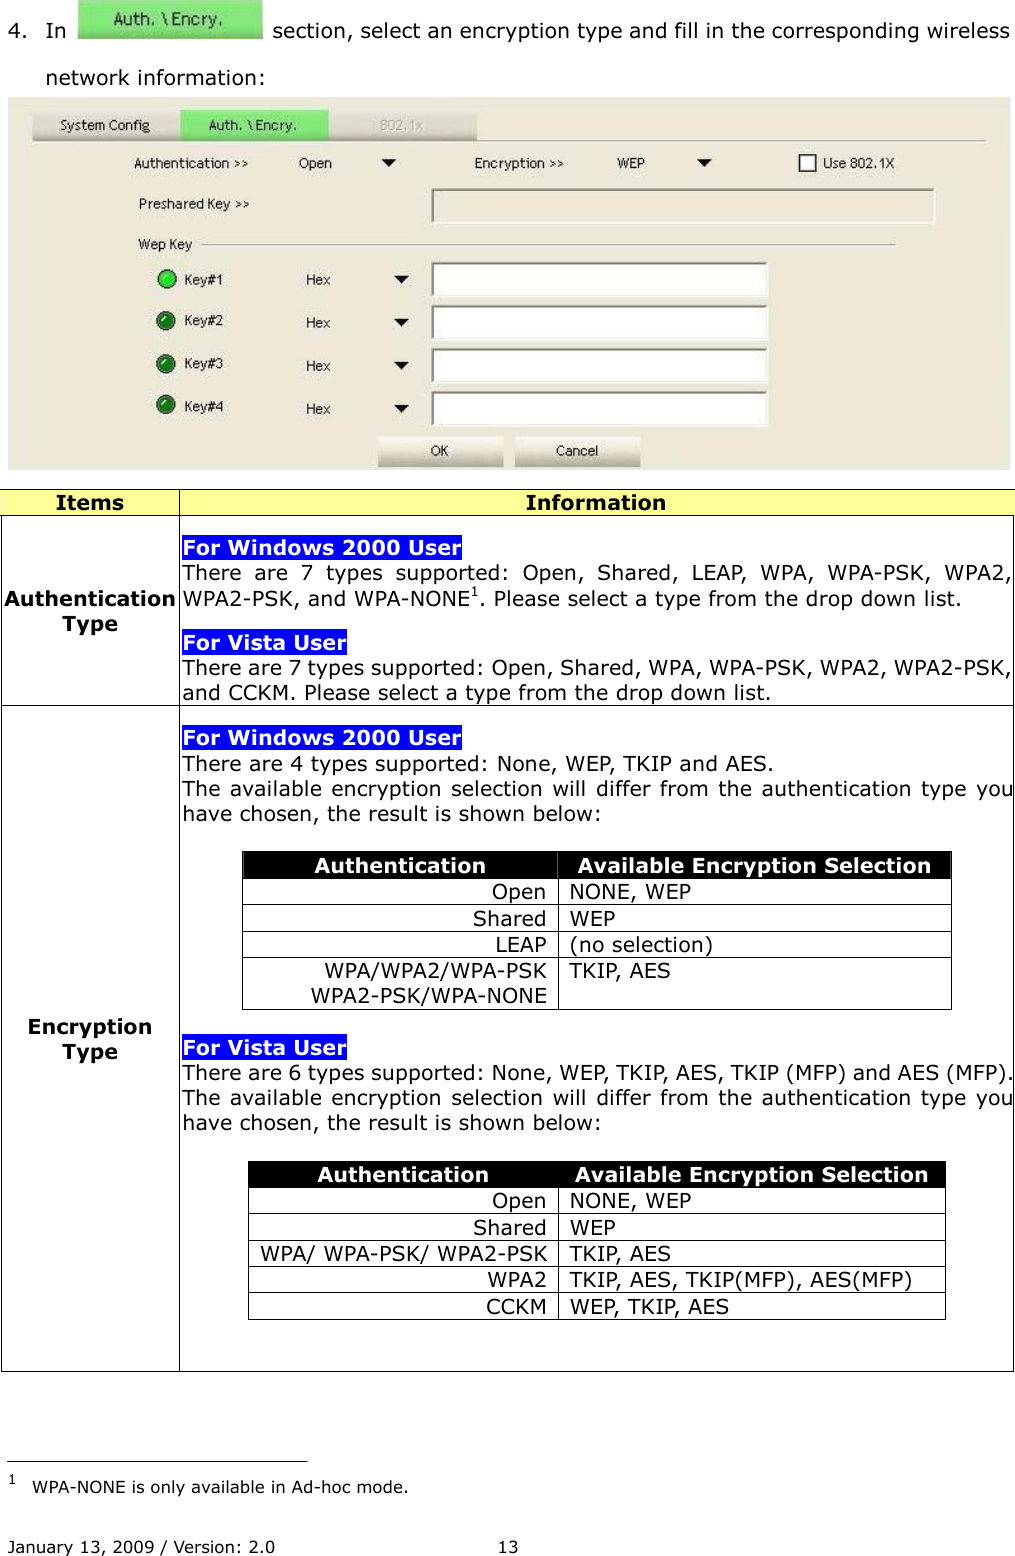
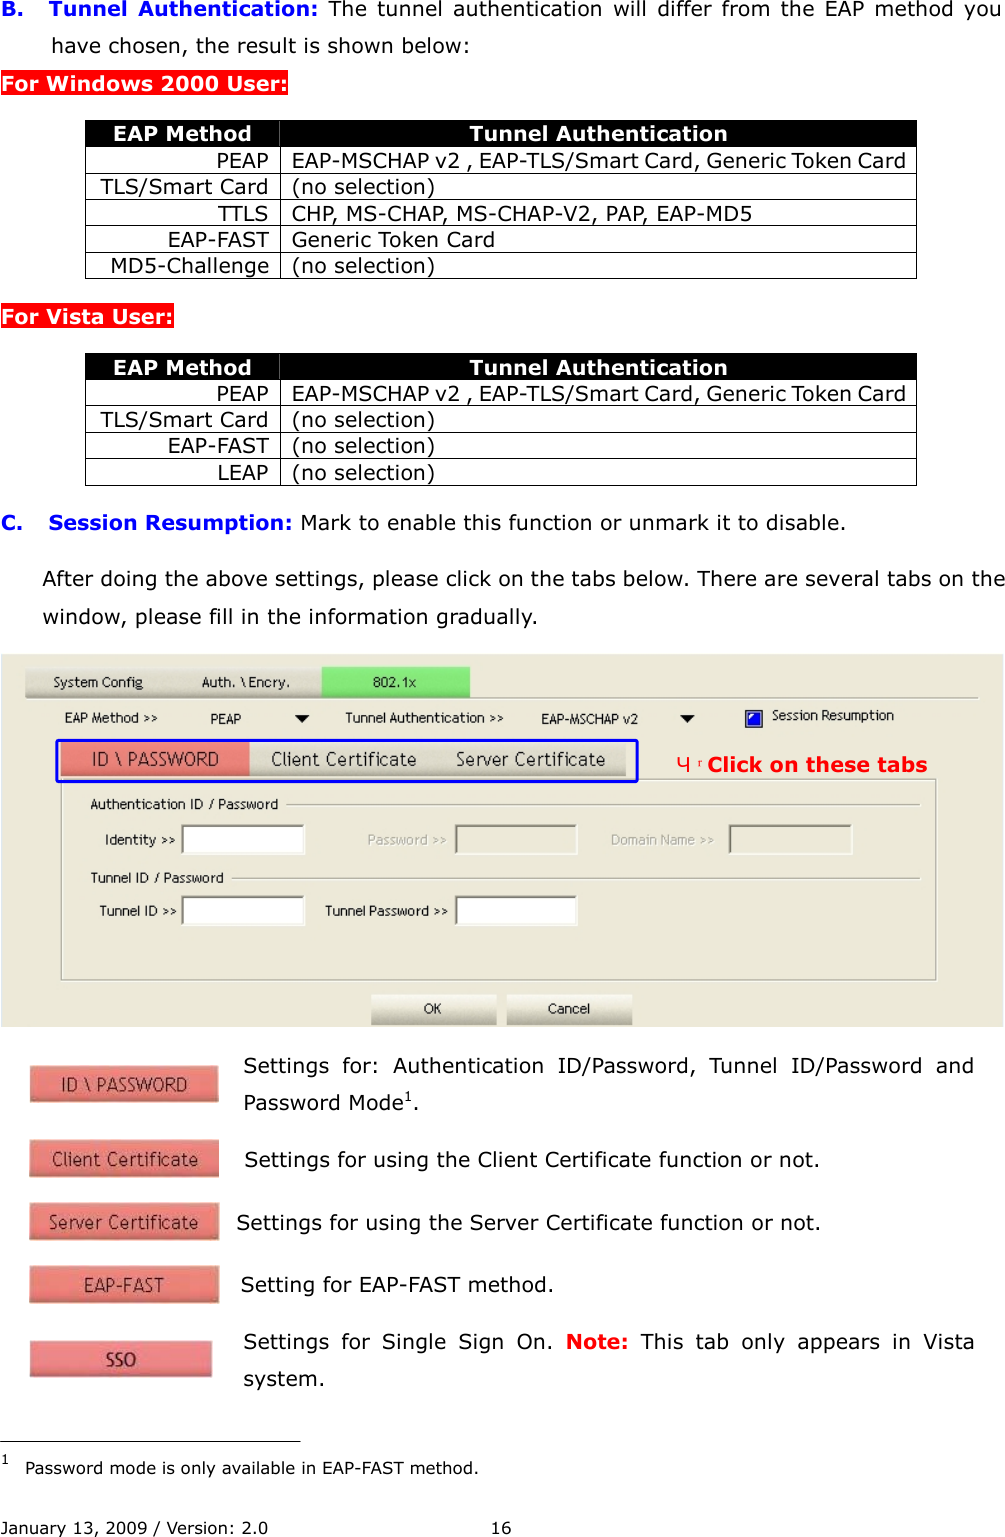
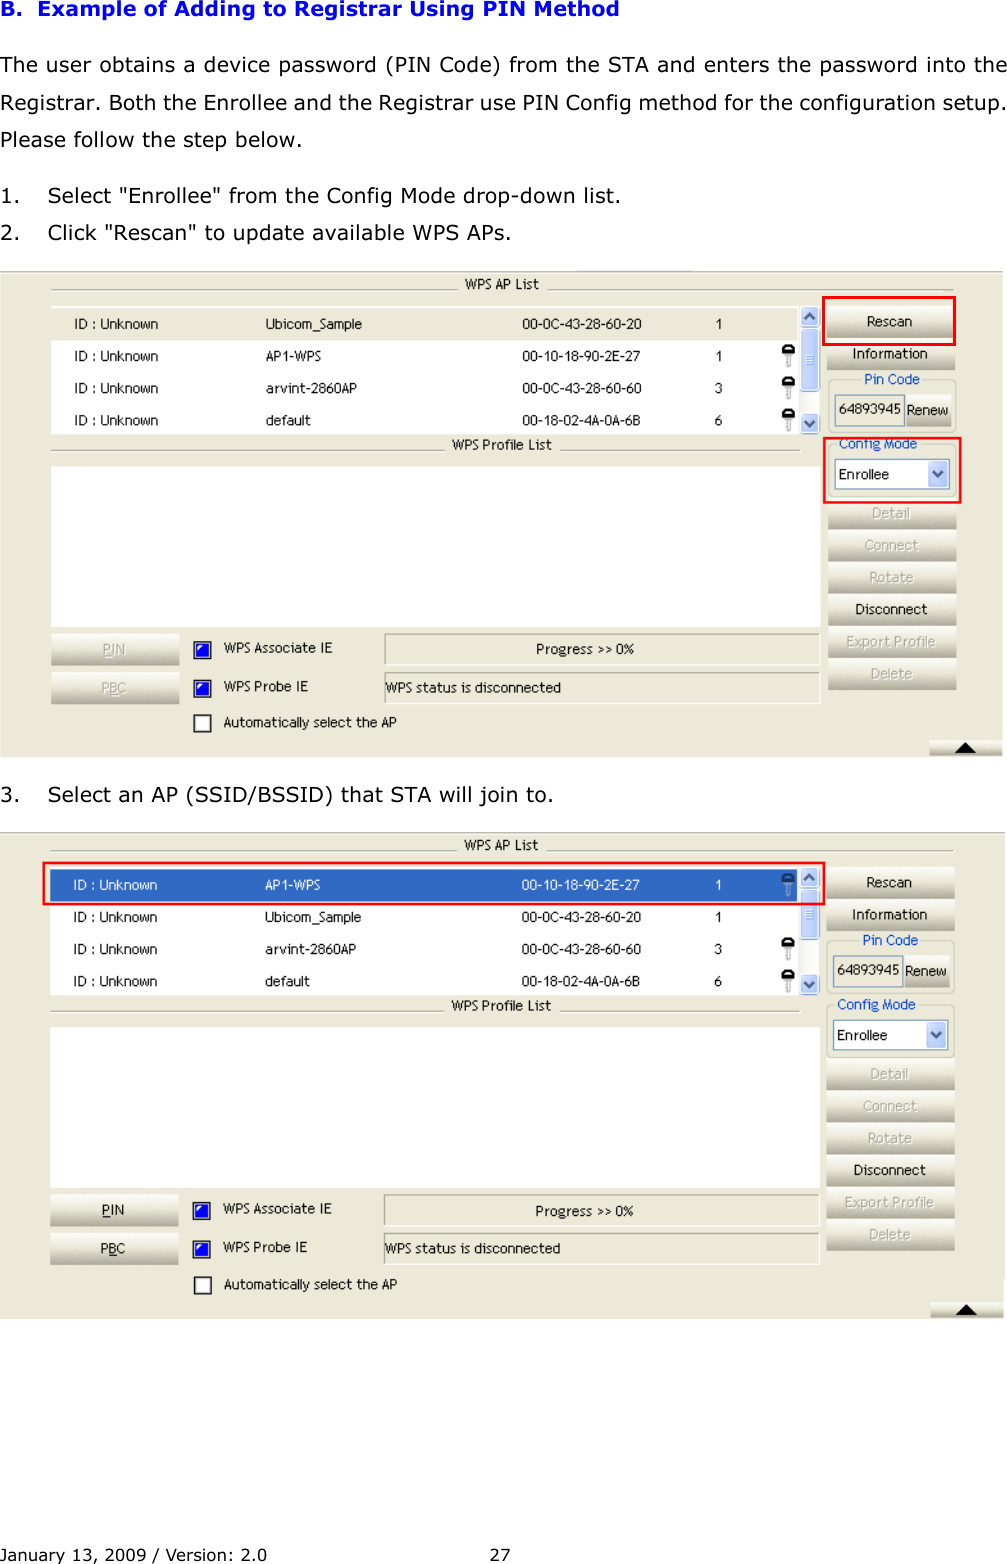
![Access Control This function filters users to use this device by designating MAC address. Please refer to the following chart for introduction. 1 2 3 4 5 6 1. Access Policy: Choose a method to process access control from the drop list to determine the MAC addresses that you designated are allowed to access the AP or not. 2. MAC Address: Add allowed (or denied) MAC addresses to the MAC address list. 3. Access List: Display all Mac Addresses that you designated. 4. Delete: Delete Mac addresses that you selected. 5. Remove All: Remove all Mac address in [Access List]. 6. Apply: Apply changes. January 13, 2009 / Version: 2.0 41](https://usermanual.wiki/ALFA-NETWORK/TUBEUN/User-Guide-1536162-Page-46.png)