ALL BEST TECHNOLOGY S1-BT Alarm clock bluetooth speaker with FM radio User Manual s1 BT 10 28
ALL BEST TECHNOLOGY LIMITED Alarm clock bluetooth speaker with FM radio s1 BT 10 28
Users Manual
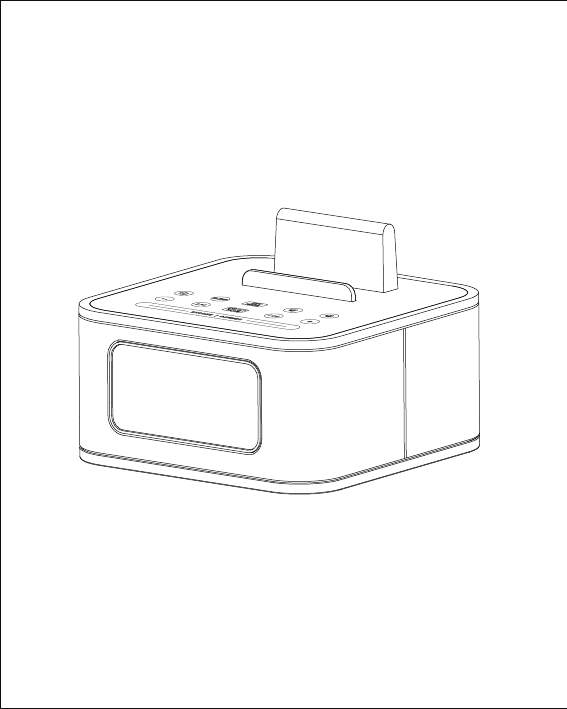
Bluetooth Alarm Clock Speaker
User Manual
S1-BT

1. Product Features ……………………………………………………1
2. What is included………………………………………………………1
3. Specification Parameters……………………………………………
2
4. Diagram of the LCD Display & the Buttons………………………3
5. Operating Instruction…………………………………………………5
5.1 Power ON……………………………………………………………5
5.2 Set Time………………………………………………………………5
5.3 Set Alarm Time………………………………………………………5
5.4 Alarm Function………………………………………………………6
6. SLEEP Function under ON Model…………………………………6
7. Play Music from Mobile via Bluetooth………………………………7
7.1 Operation……………………………………………………………7
7.2 Answer the Phone…………………………………………………7
7.3 Hang up………………………………………………………………7
7.4 Play Music……………………………………………………………7
8. FM Radio Operation…………………………………………………8
9. Play Music from Aux Jack……………………………………………8
10. Back-up Button Battery……………………………………………8

1
2. What is included
1. Product Features
(1) Elegant and fashionable design; simple setting
(2) Bluetooth speakerphone for conference calls
(3) 3.2 inch LCD display screen
(4) FM Digital Radio
(5) 3.5mm audio jack for connecting other audio sources
(6) Stereo speaker, providing superior quality sound
(7) USB port allows for traditional USB Charging for most devices
on the market
(8) Dual Alarms
Open S1’s box, and you will find
S1 Body Unit 1 PC
Power Adaptor 1 PC
User Manual 1 PC
Audio Cable 1 PC

3. Specification Parameters
- Bluetooth Version: CSR 3.0+EDR
- Bluetooth Profiles: A2DP, AVRCP, HFP, HSP
- Receive range: Up to 10 meters
- Operation Voltage: DC 5V 1.5A
- Output Power: 3W + 3W
- Driver Unit: 4Ω 3W 2 in
- Frequency range: 40Hz-20KHz
- S/N Ratio: >65dB
- Distortion Rate: <1%
- FM Frequency Range: 87.5 ~ 108MHz
- USB Port: DC 5V 1A
- Product Net Weight: 0.69kg
- Product Size: 138*138*100mm
2
3
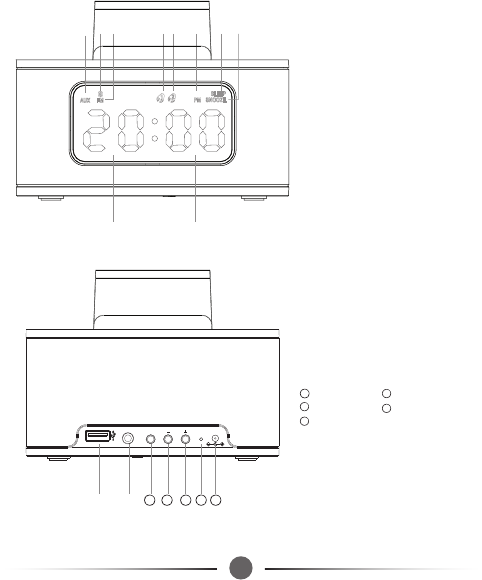
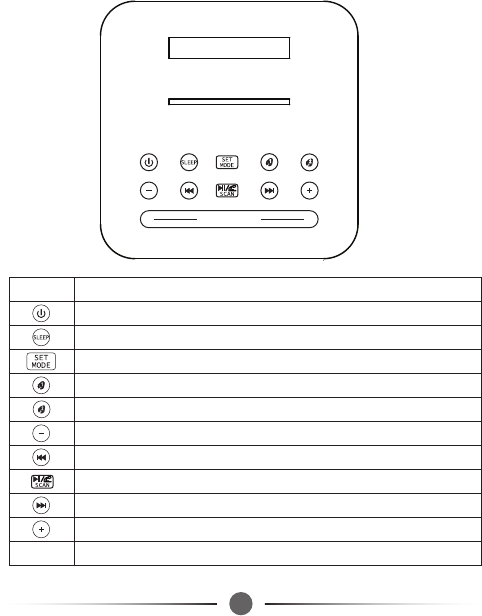
4. Diagram of the LCD Display & the Buttons
① AUX IN ② Bluetooth
③ FM ④ Alarm 1
⑤ Alarm 2 ⑥ PM
⑦ SLEEP ⑧ SNOOZE
12
13
11
⑨ USB Jack ⑩ AUX IN Jack
Time Setting Volume down
Volume up FM Antenna
DC 5V Power Input
14
15
① ② ③ ④ ⑤ ⑥ ⑦ ⑧
HOUR MINUTE
AUX IN TIME
DC 5V
⑨ ⑩
12 13 14 15
11
4
Function
Power ON/OFF
SNOOZE 90-80-70-60-50-40-30-20-10-00 Minute
Switch Modes; Alarm Time Setting
Time Setting of Alarm1
Time Setting of Alarm 2
Volume down/ Adjusting Alarm Time
Skip Backwards last Song
Bluetooth, Play/Pause, Answer the phone and Hang up/Auto Scan FM Station
Skip Forwards next Song
Volume up/ Adjusting Alarm Time
SNOOZE, Display Brightness Level (3Levels: 1-2-3)
SNOOZE | DIMMER
Button
SNOOZE | DIMMER

4
5
5. Operating Instruction
5.1 Power ON
Connect the power adaptor into the jack on the back of S1 labeled
“DC”, and then plug the power adaptor into the wall outlet. The LCD
display turns on. Press to turn on the unit.
5.2 Set Time
Under any mode, press “Time” to set time. Press “+” or “-” to switch
the Hour mode between 12-Hour and 24-Hour. Press “Time” to
confirm it. Then Hour figure and MINUTE figure begin to flash. Press
“+” or “-” to adjust the HOUR and press “Time” to confirm it, then press
“+” or “-” to adjust the MINUTE and press “Time” to confirm the setting.
It exits the setting in 10seconds if no operation on any key.
5.3 Set Alarm Time
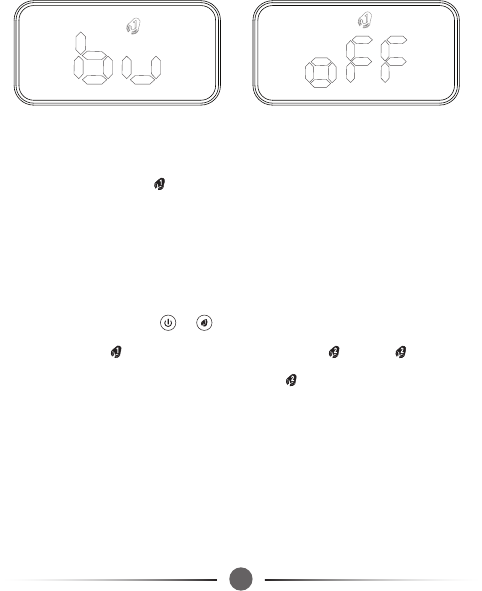
Under any mode, press to enter alarm time setting, icon displays
in the LCD. Press some times to display OFF/BU. (OFF- none alarm
is selected). When BU icon appears, press “SET/MODE” to enter alarm
time setting. The HOUR figure begins to flash, then press “+” or “-” on
the top side of the unit to adjust the figure; Press “SET/MODE”, the
MINUTE figure begins to flash. Press “+” or “-” to adjust the figure. It
6
Alarm Ring Source - BUZZ Alarm OFF
will exit the setting in 5 seconds if no operation on any key.
5.4 Alarm Function
1) When alarm1 is on, icon is flashing in the LCD and the alarm ring
tone is becoming larger and larger. Press “SNOOZE” to activate the
Snooze function. SNOOZE icon appears in the LCD. Alarm will be on
again in 9-minute snooze. The alarm can last for 30minutes at most if
no button is pressed (including snooze time).
2) To stop alarm, press or . Alarm 1 is one-off alarm.
3) Setting Alarm is the same as setting Alarm . Alarm works
everyday. To turn it off completely, switch to OFF mode.
6. SLEEP Function under ON Mode
Press “SLEEP” to set timing shutdown time from 90-80-70…….OFF.
Choose the time, it will store it automatically in 3 seconds and exit the
setting. To see the remaining sleep time, press “SLEEP”.
6
7
7. Play Music from Mobile via Bluetooth
7.1 Operation
Press “MODE” to choose Bluetooth mode. Go to mobile settings, turn
on Bluetooth and search Bluetooth devices. Connect “ MUANGTHAI”.
When it is successfully paired, you will hear a sound of “DU”. Play
music from your mobile now. (When Bluetooth is connected, press
“ Mode ” to switch it to other mode, Bluetooth will be OFF automati-
callyand get disconnected with mobile. When switching it to Bluetooth
mode again, connect “Smart one” manually or automatically.)
7.2 Answer the Phone
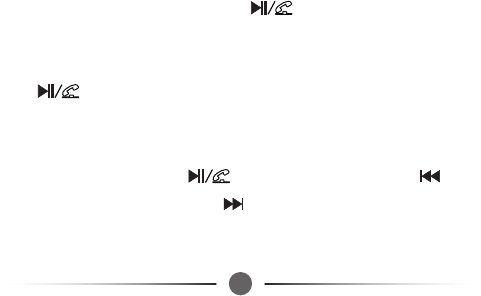
When a phone call is coming, press to answer the phone.
7.3 Hang up
Press to hang up when having a phone call.
7.4 Play Music
When playing music, press to pause the music. Press to
skip backwards last song; Press to skip forwards next song.
8
7. Play Music from Mobile via Bluetooth
7.1 Operation
Press “MODE” to choose Bluetooth mode. Go to mobile settings, turn
on Bluetooth and search Bluetooth devices. Connect “ MUANGTHAI”.
When it is successfully paired, you will hear a sound of “DU”. Play
music from your mobile now. (When Bluetooth is connected, press
“ Mode ” to switch it to other mode, Bluetooth will be OFF automati-
callyand get disconnected with mobile. When switching it to Bluetooth
mode again, connect “Smart one” manually or automatically.)
7.2 Answer the Phone
When a phone call is coming, press to answer the phone.
7.3 Hang up
Press to hang up when having a phone call.
7.4 Play Music
When playing music, press to pause the music. Press to
skip backwards last song; Press to skip forwards next song.
8. FM Radio Operation
Switch the unit to FM mode, Press and Hold /scan to auto
scan radio station and store the scanned stations accordingly. The
frequency starts from 87.5MHz to 108MHz and skips at every 0.1
MHz in scanning process. Once catching a station, it stops a second
and store it, then continues the auto-scanning. When it scans from
87.5MHz to 108MHz or stores 20 stations, it will stop scan automa-
ctically. Press or to select the station.
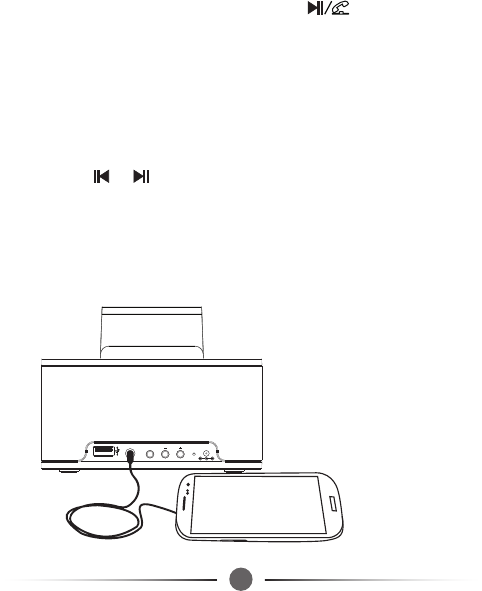
9. Play Music from Aux Jack
Press “MODE” to switch the mode to AUX IN, pug in the 3.5mm
audio cable into the AUX IN jack. Play music now.
AUX IN TIME
DC 5V
76
9
10. Back-up Button Battery
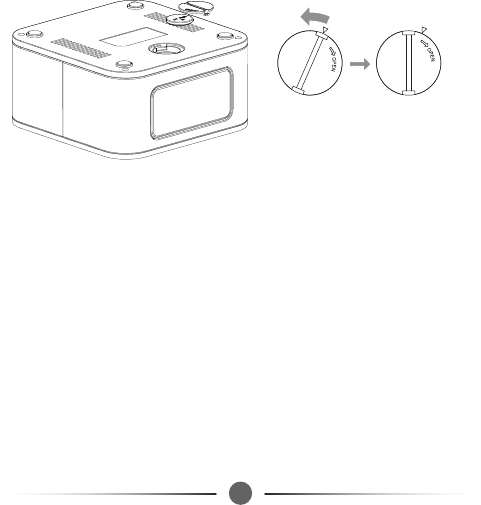
The 3V button battery is to retain the alarm/clock setting in case of
a power failture. It can not display the alarm/clock time.
FCC Statement
This equipment has been tested and found to comply with the limits for a Class B digital device,
pursuant to Part 15 of the FCC Rules. These limits are designed to provide reasonable
protection against harmful interference in a residential installation. This equipment generates
uses and can radiate radio frequency energy and, if not installed and used in accordance with
the instructions, may cause harmful interference to radio communications. However, there is
no guarantee that interference will not occur in a particular installation. If this equipment does
cause harmful interference to radio or television reception, which can be determined by turning
the equipment off and on, the user is encouraged to try to correct the interference by one or
more of the following measures:
-- Reorient or relocate the receiving antenna.
-- Increase the separation between the equipment and receiver.
-- Connect the equipment into an outlet on a circuit different from that to which the receiver is
connected.
-- Consult the dealer or an experienced radio/TV technician for help.
This device complies with part 15 of the FCC Rules. Operation is subject to the following two
conditions:(1) This device may not cause harmful interference, and (2) this device must accept
any interference received, including interference that may cause undesired operation.
Changes or modifications not expressly approved by the party responsible for compliance
could void the user's authority to operate the equipment.