ALT GROUP BABYMOOV A014202 Premium Care II User Manual A014201 BC 63 Manual 05 FCC
ALT GROUP BABYMOOV CORP. Premium Care II A014201 BC 63 Manual 05 FCC
UserManual.wiki
>
ALT GROUP BABYMOOV
>
A014202 User Manual
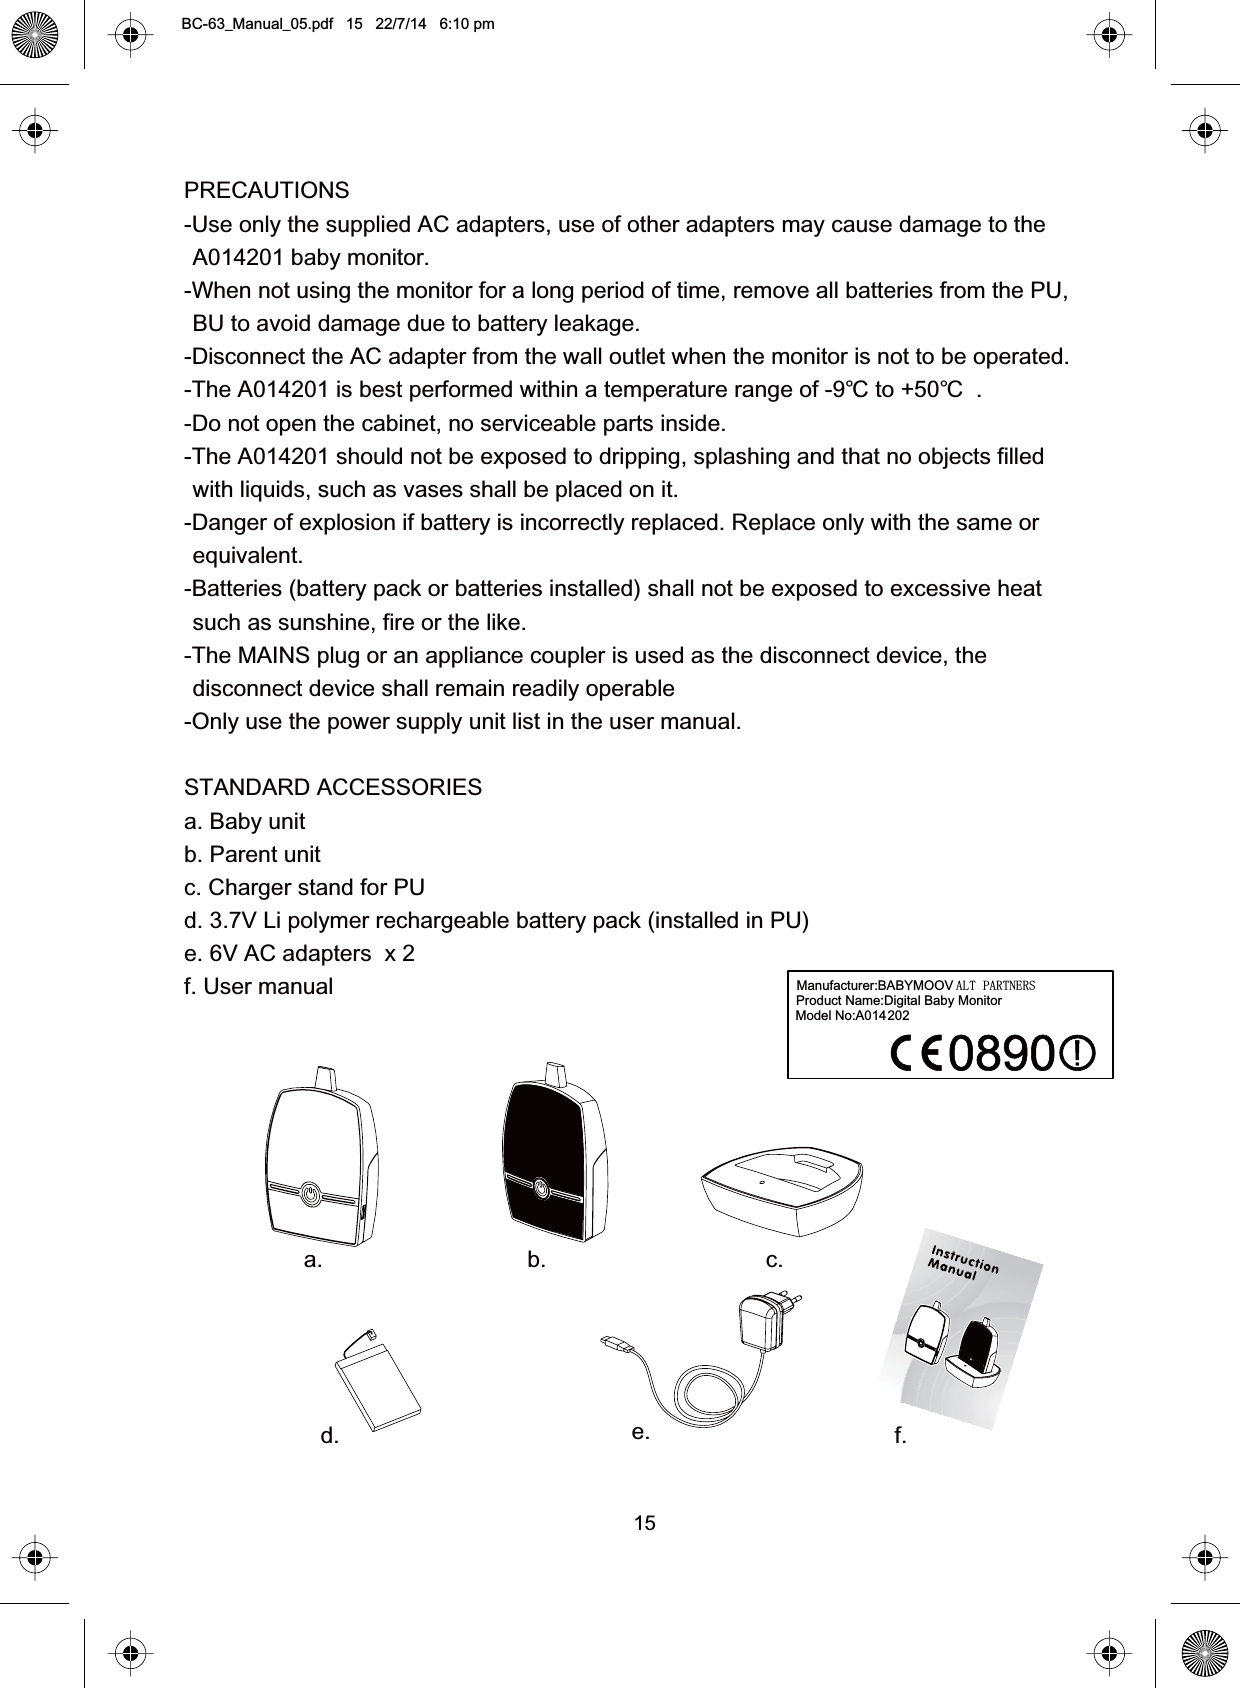
A014201(BC-63) User Manual Rev01
Navigation menu
Upload a User Manual
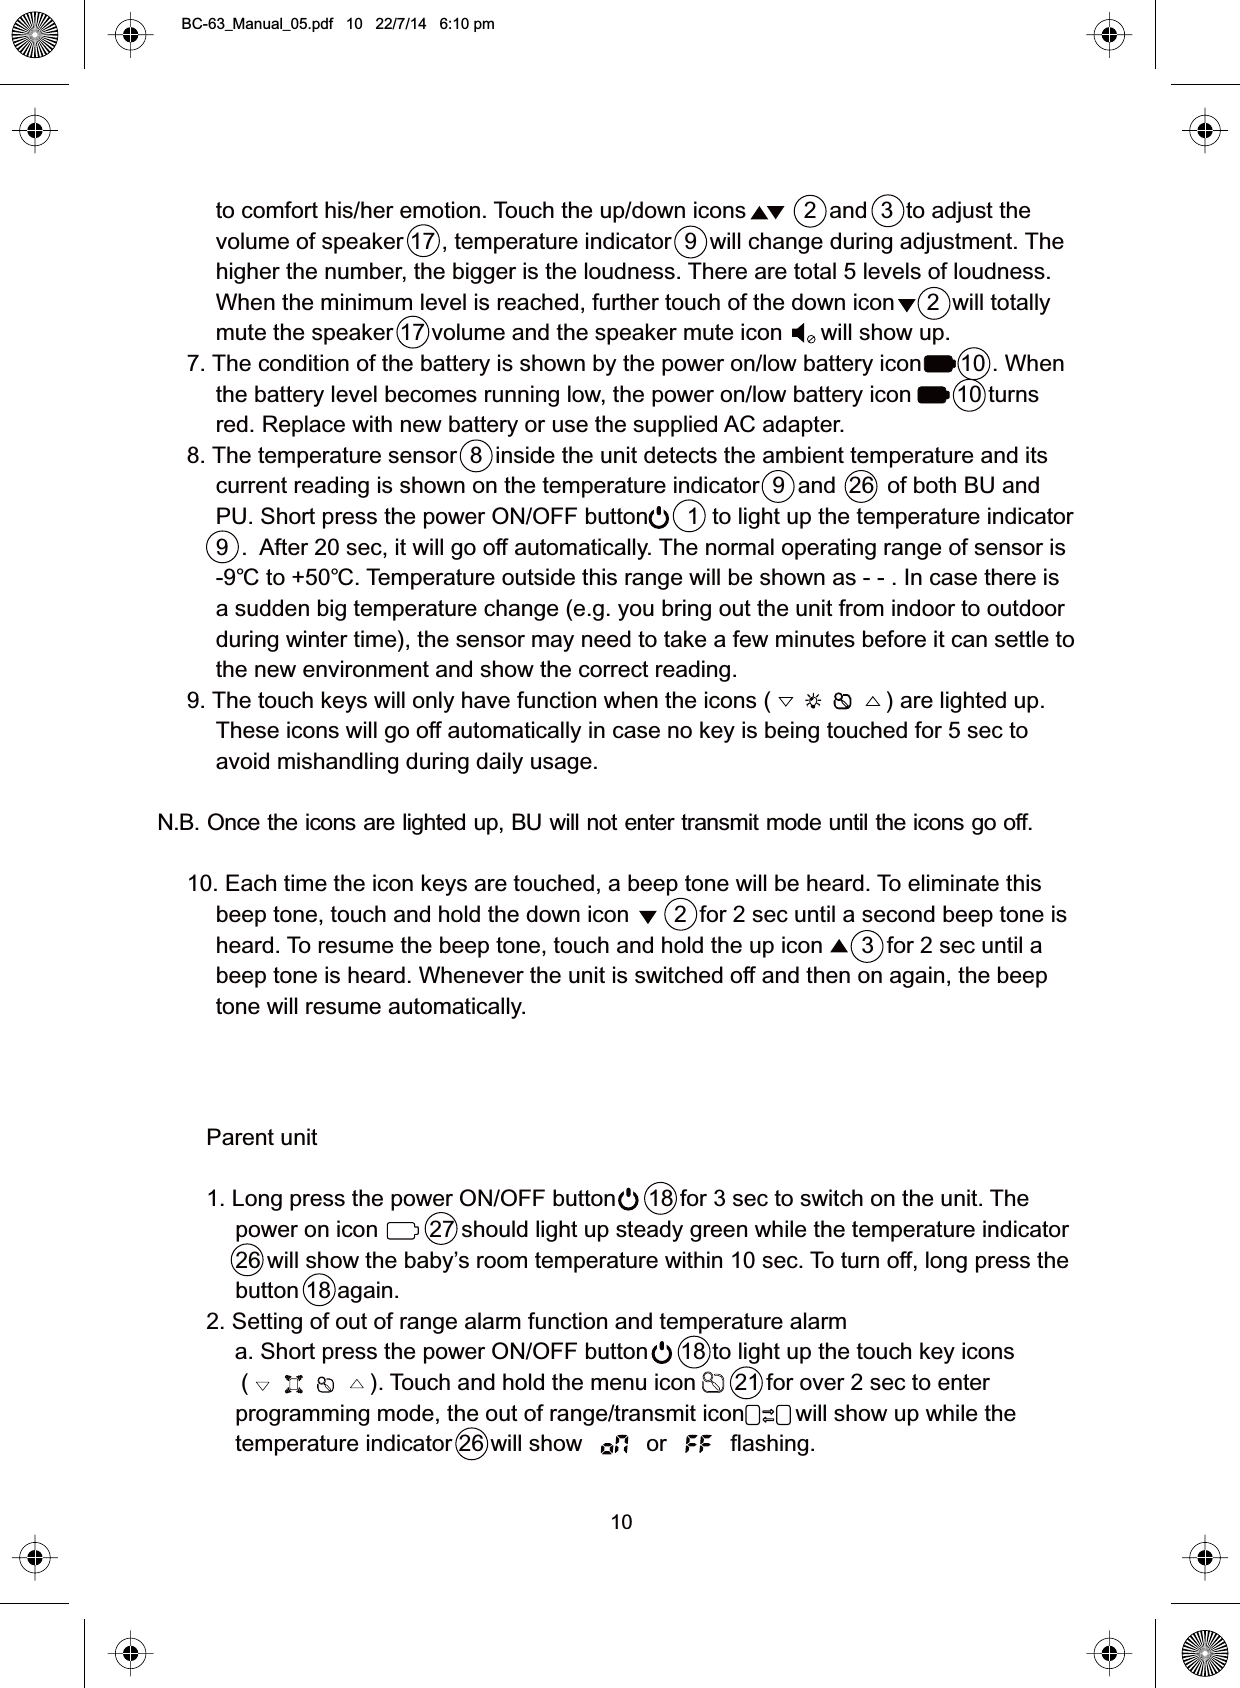
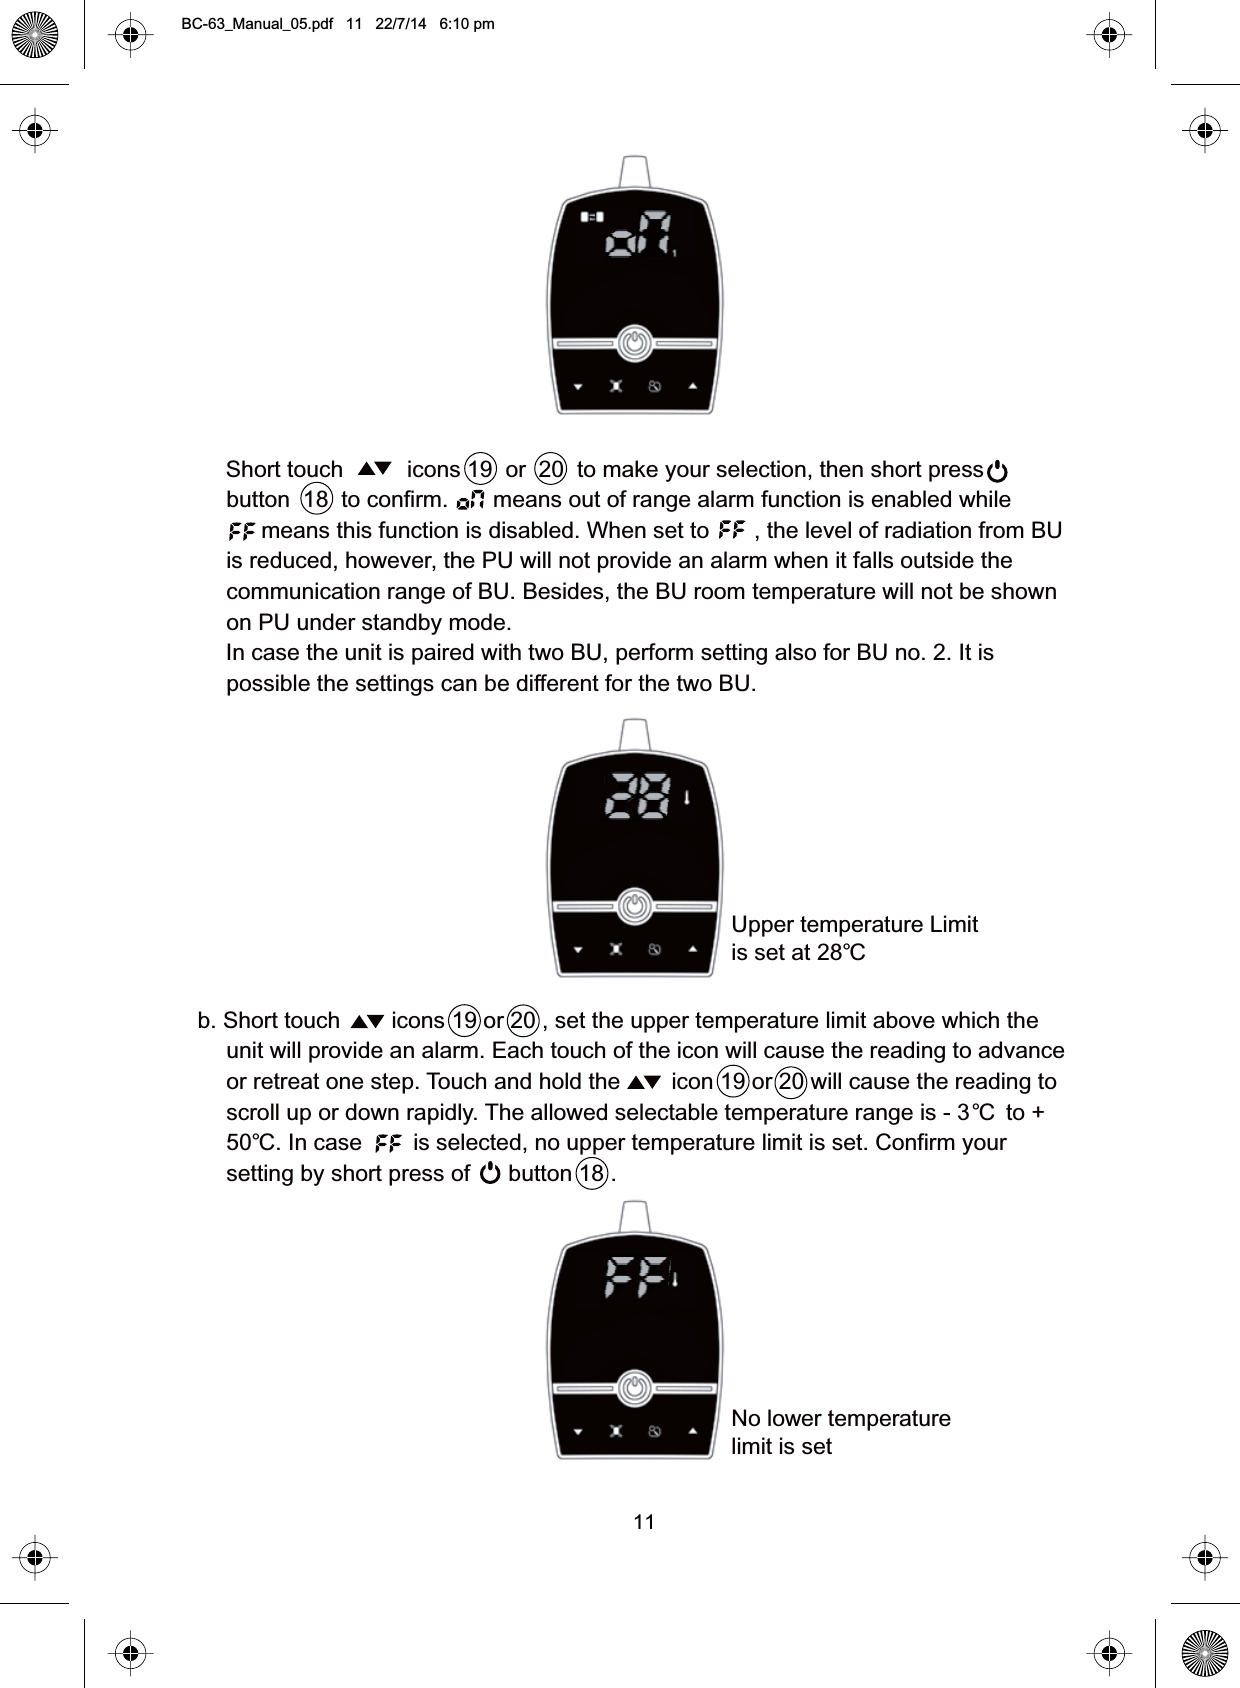
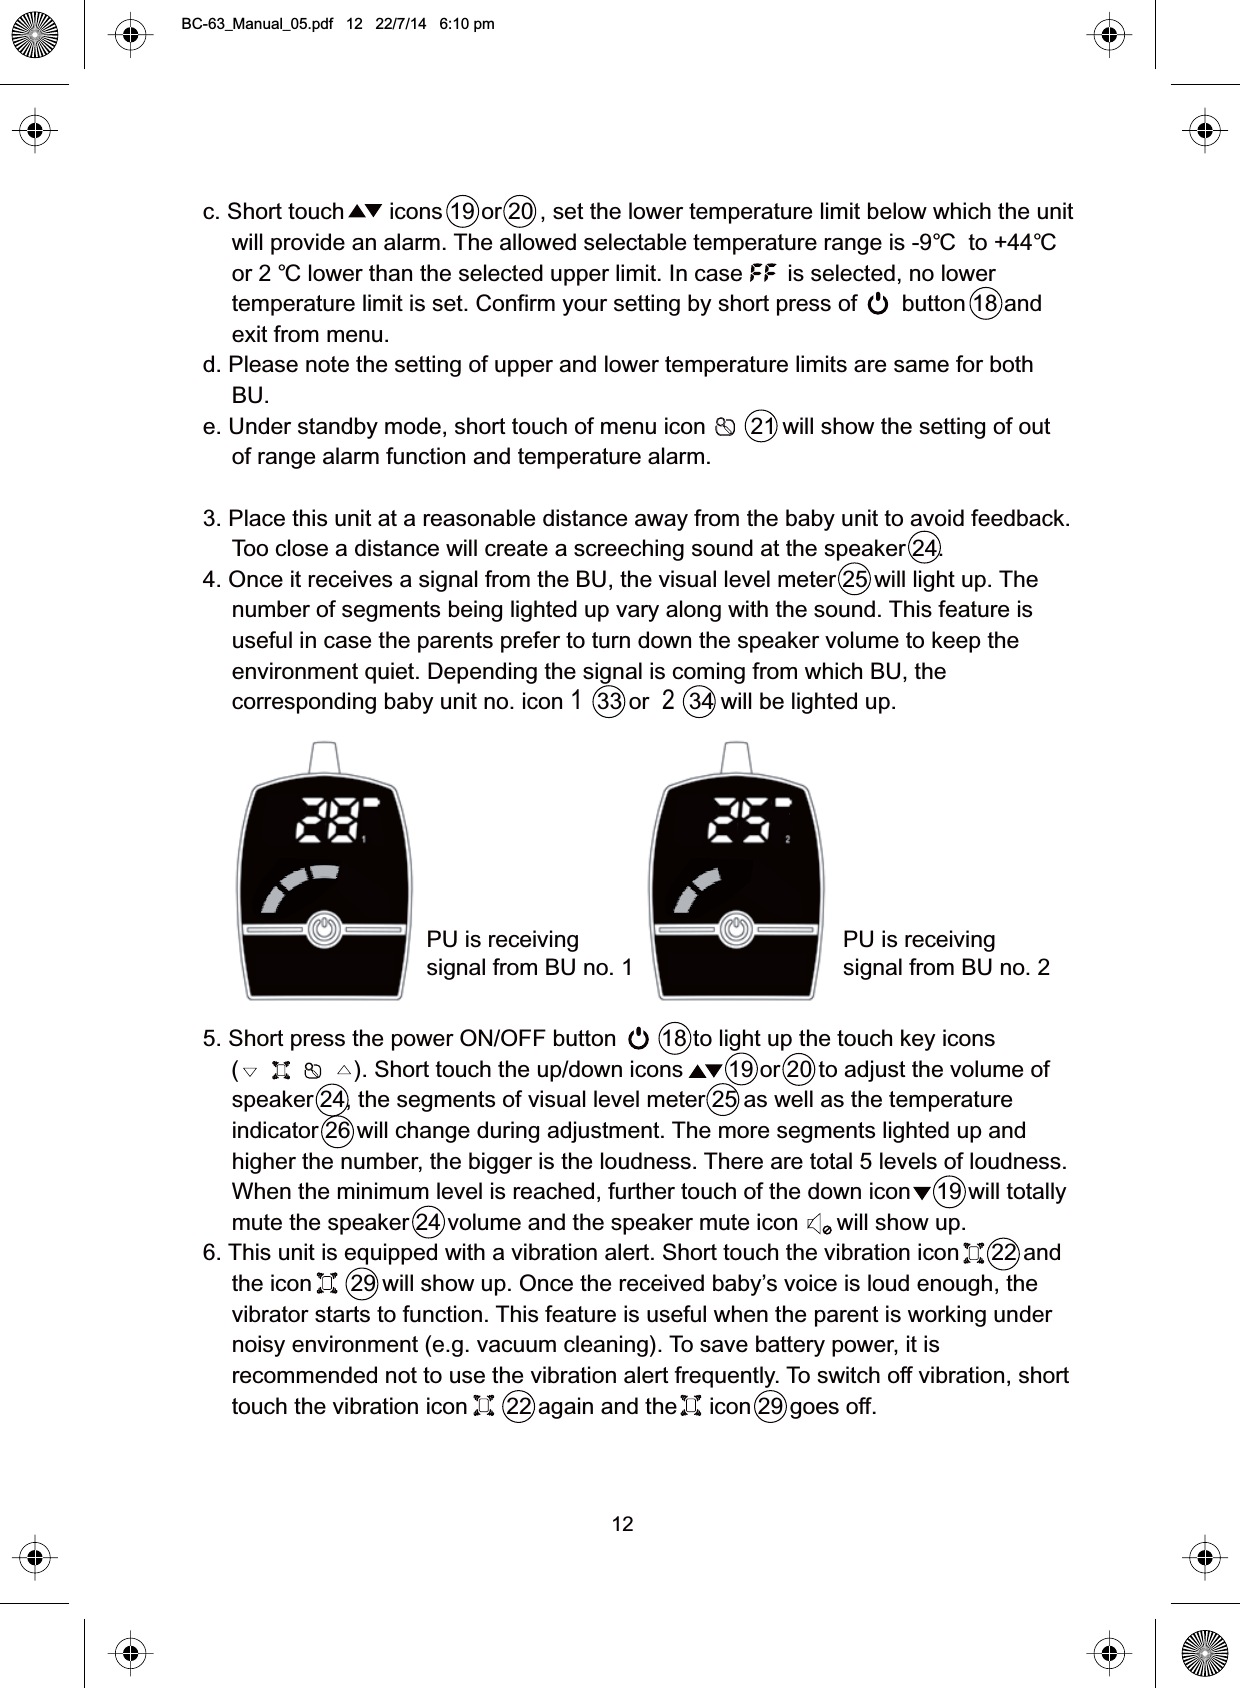
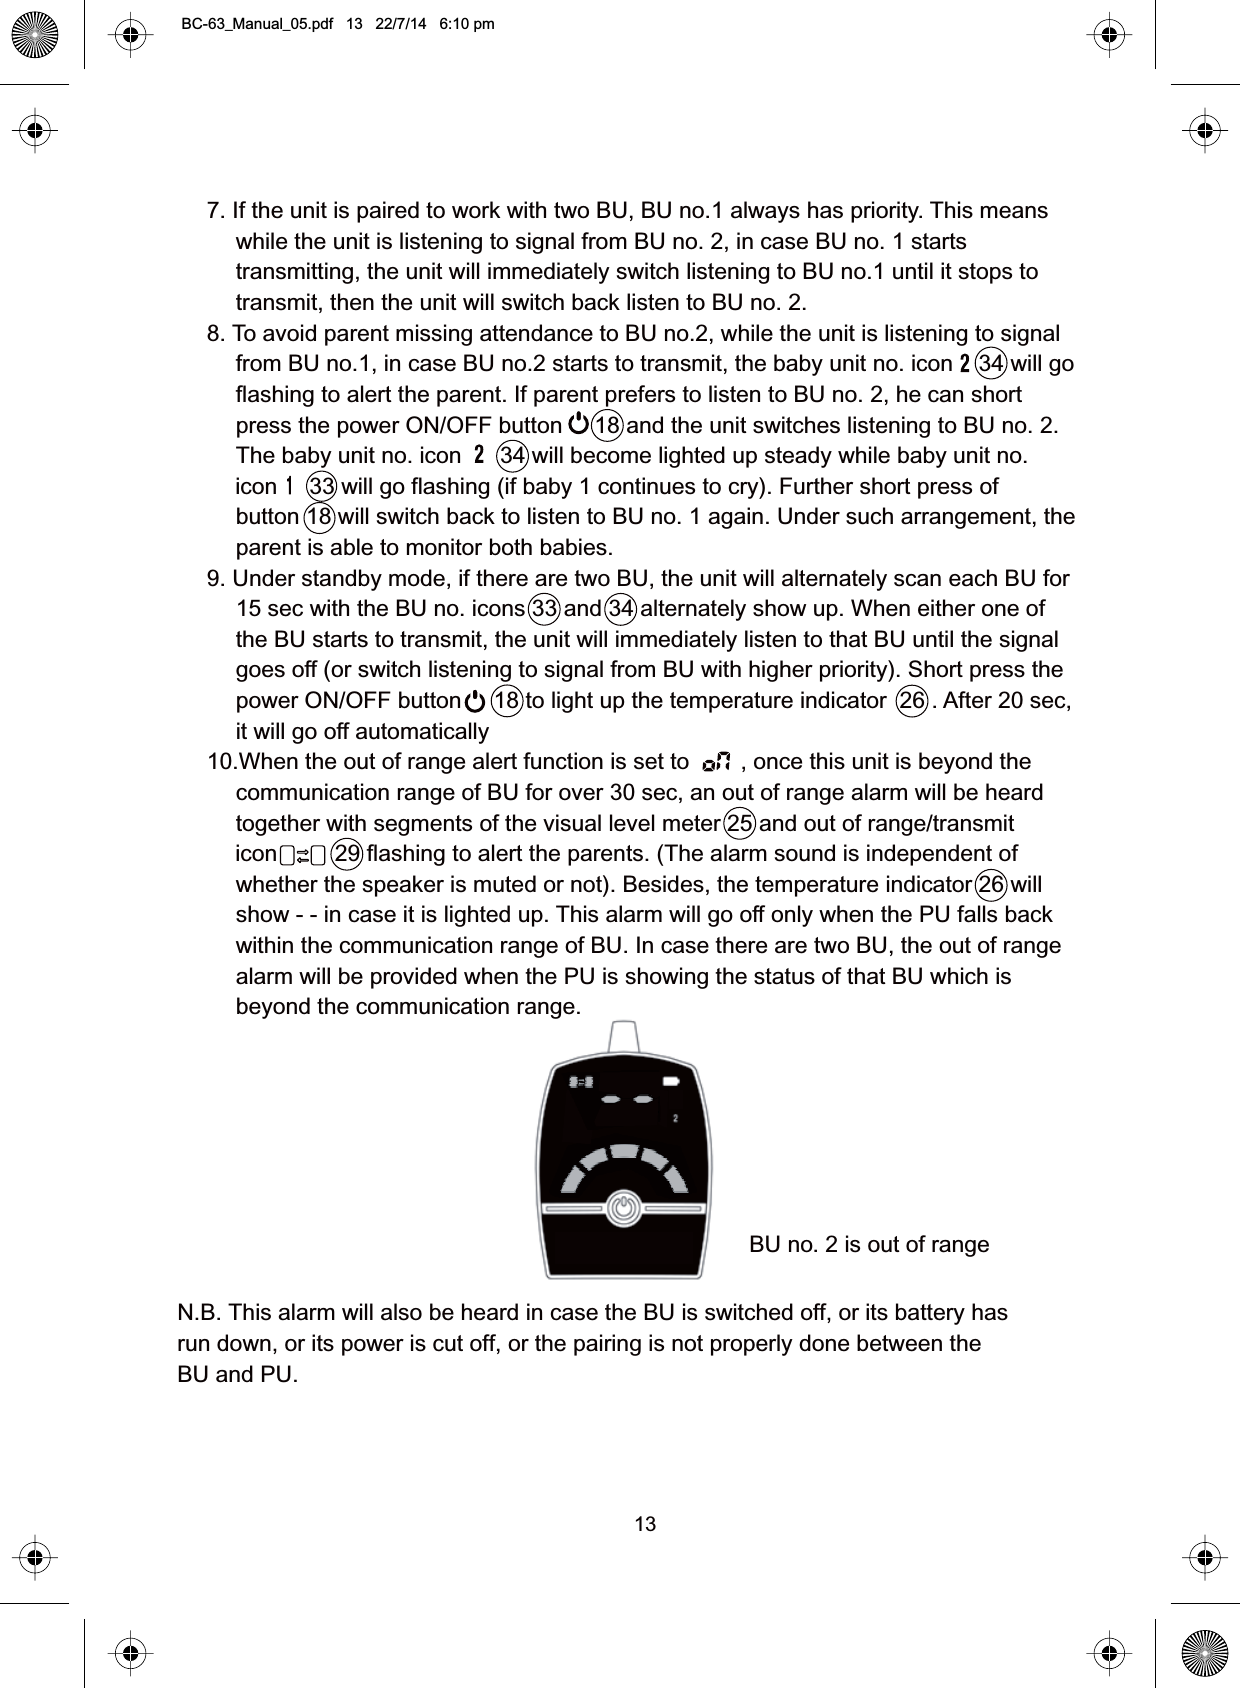
Namespaces
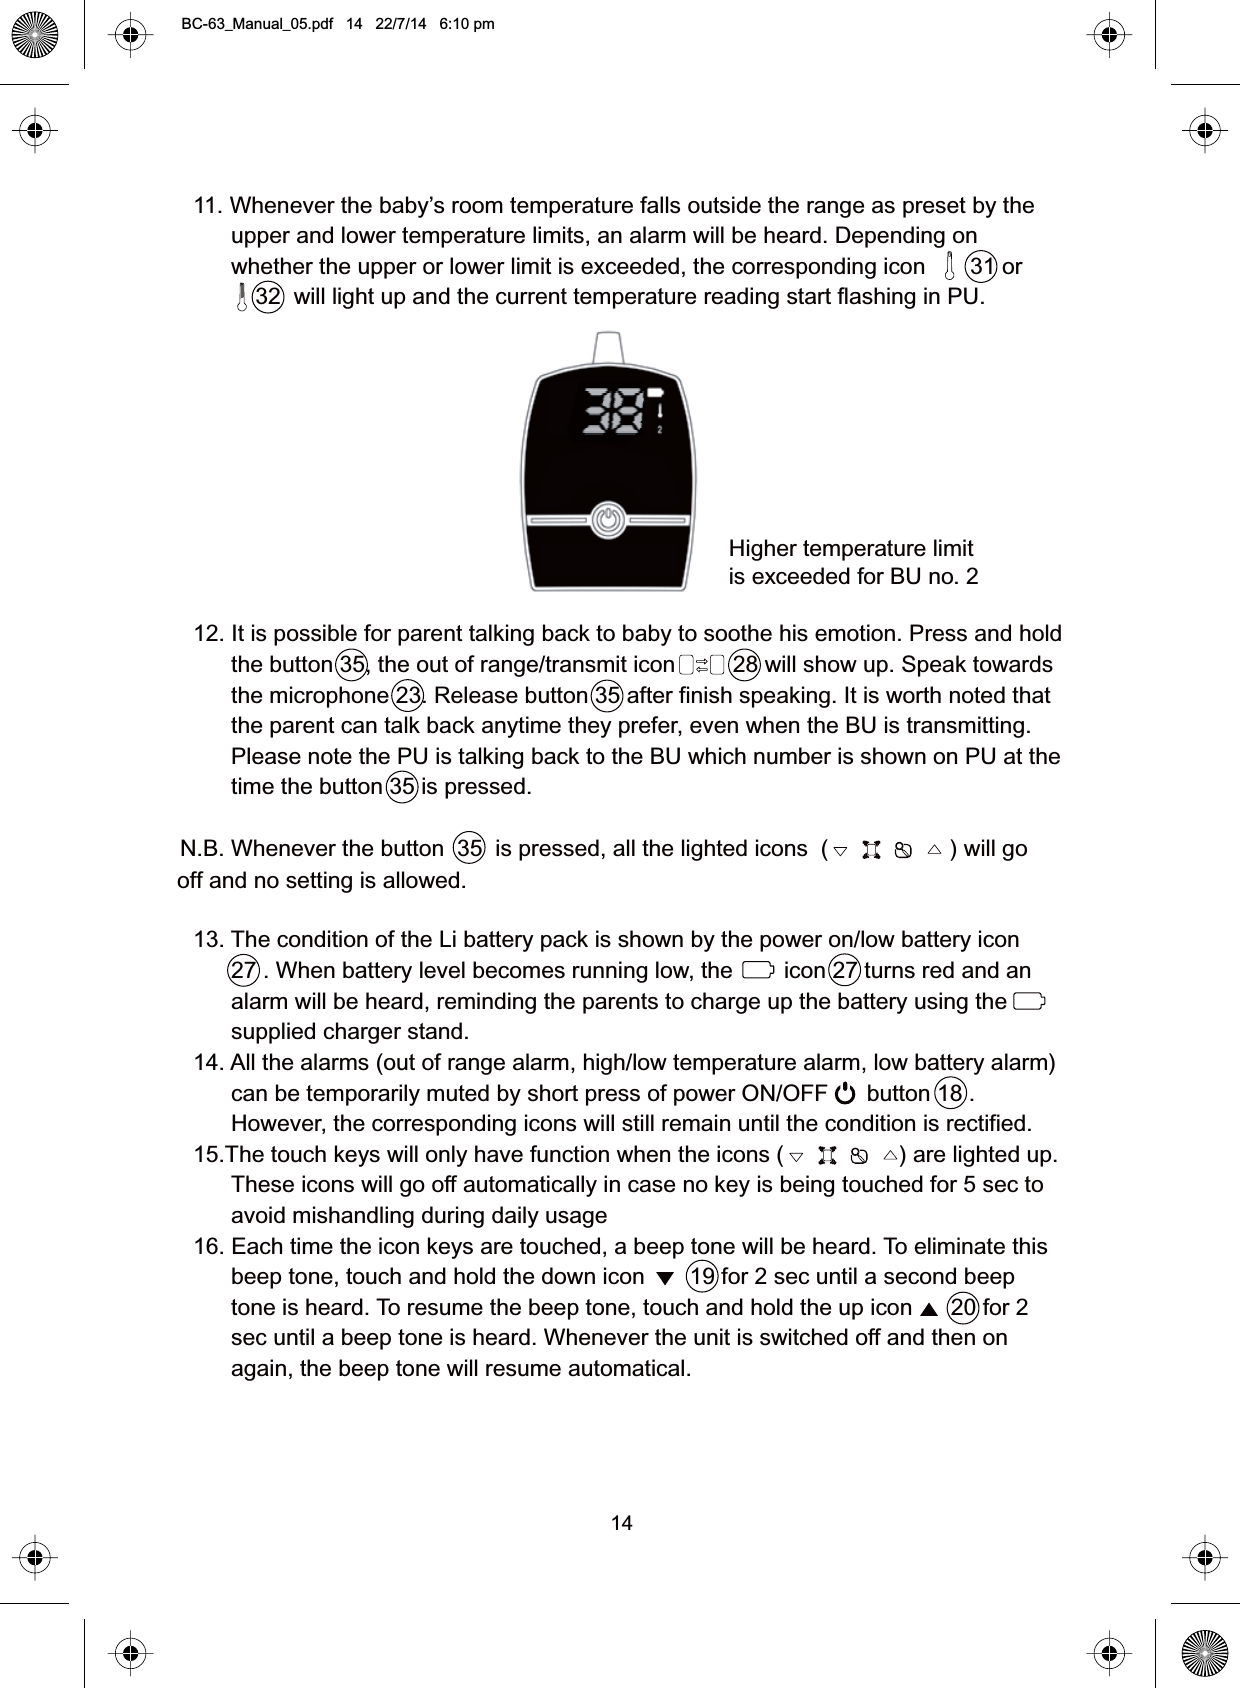
Wiki Guide
HTML
PDF
Info
Views
User Manual
Discussion / Help
Navigation