User manual
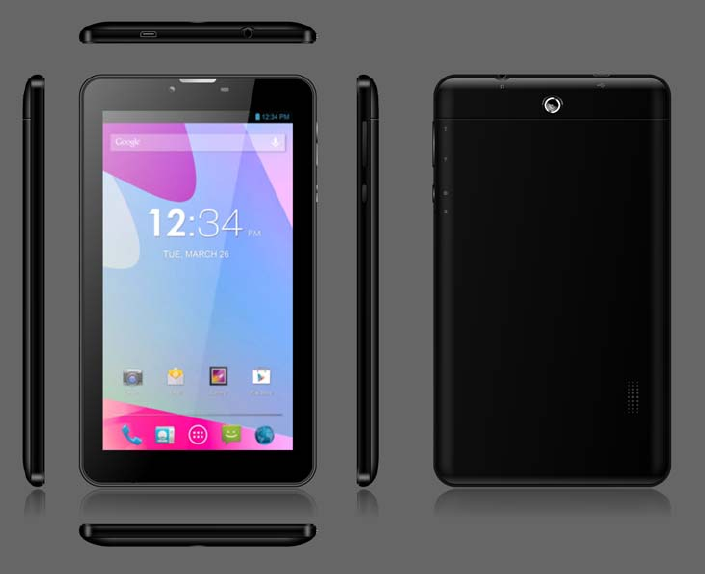
AOC Tablet User Manual
Model: A724G
1. Introduction
1.1 Acknowledgements
Many thanks for you choosing this product. The product belongs to MID (Mobile Internet
Device), which is a kind of mobile internet device, small and exquisite, and also
portable. It is also equipped with a piece of touch LCD of high definition, which can
be used to watch videos and pictures of high definition. It supports installation of
multiple application programs on office and entertainment. The fantastic operation
interface will give you a brand-new user experience.
This manual systematically introduces diversified functions, using skills and matters needing
attention of this MID, please read this manual carefully before using it.
1.2 Safety Notice
Before using MID, please read information in this section, and make your children learn
about the information. About more detailed information, please refer to safety instructions
and matters needing attention.
Please don’t use MID when you are driving.
In medical places, please observe relevant stipulations and regulations. And in regions
near the medical devices, please shut down MID.
Please shut down MID or enable the airplane mode when boarding, so that the wireless
signals will not interfere control signal of the airplane.
Please shut down MID neighboring electronic equipments with high accuracy, otherwise,
breakdown of electronic equipments may be brought about.
Please don’t dismantle the MID and its accessories on yourself, and only the authorized

agency can maintain this MID.
Please keep MID far away from magnetic equipment, radiation from MID will erase
information stored on the magnetic equipment.
Please don’t use MID in places with high temperature and inflammable gas (such as
nearby gas station).
Please put MID and its accessories in places beyond children’s touch, please don’t let
children use MID without supervision.
During using of this MID, please observe related laws and regulations, respect privacy
and legitimate rights of others.
Please strictly follow up by relevant explanations in this manual when using USB data
line, otherwise, MID or personal computer may be damaged.
Please don’t use the MID in humid environment such as bathroom, etc., and the MID
being soaked or rinsed by liquid must be avoided.
1.3 Abbreviation/term
Abbreviation/term Full name Explanations
MID Mobile Internet Device Mobile internet terminal
WIFI Wireless Fidelity
Wireless Local Area Network
based on IEEE 802.11b
standard
TF Trans Flash Alternate name Micro SD,
super miniature storage card
SIM
Subscriber Identity
Module
Subscriber Identity Module
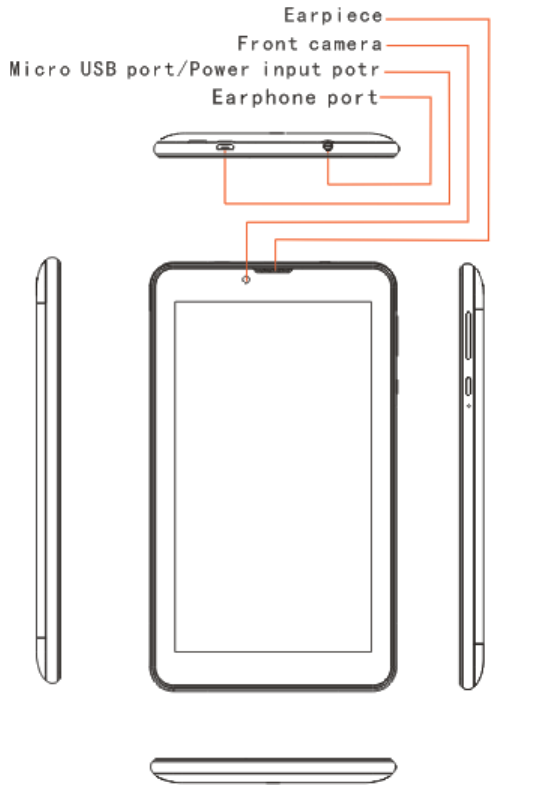
2. Brief introduction for MID product
2.1.1 Wireframe for MID complete machine (front)
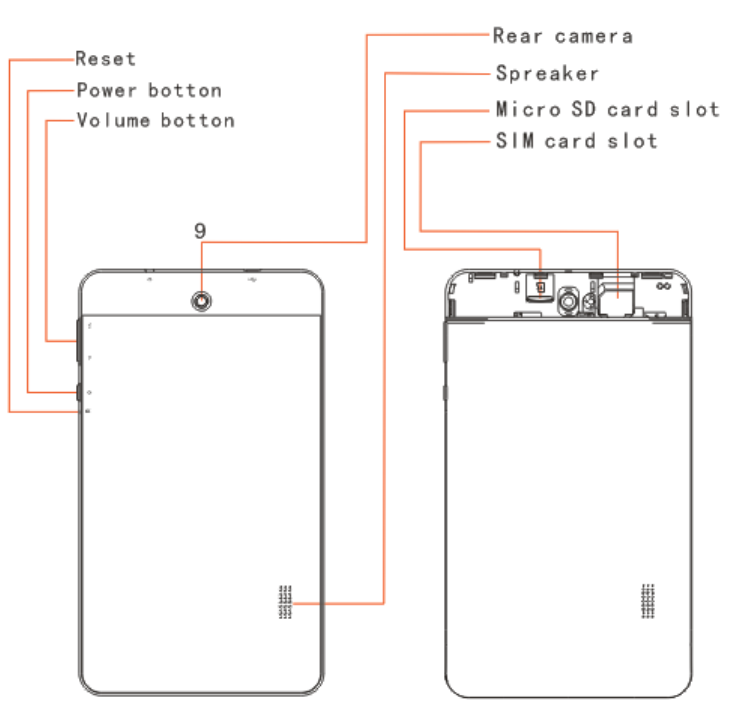
2.1.2 Wireframe for MID complete machine (back)
2.2 MID state and notice
Iconograph for notification
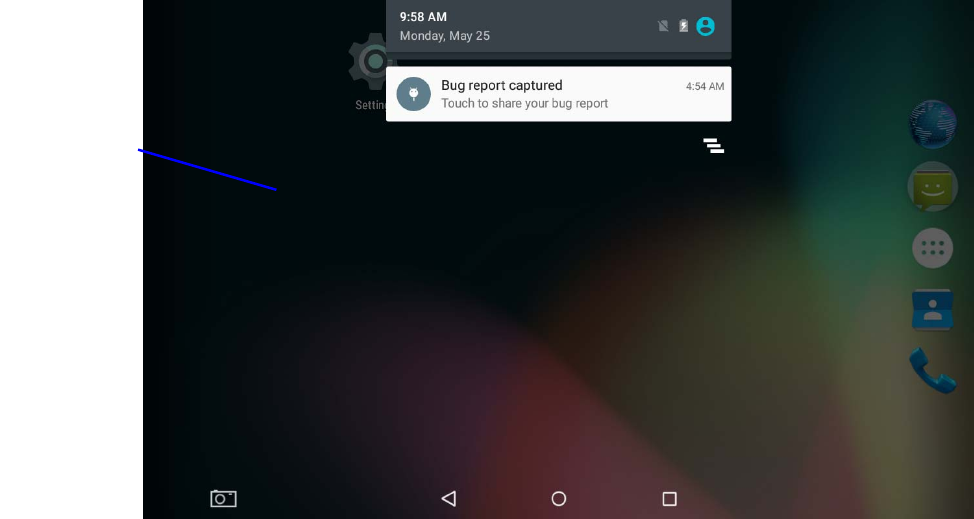
When a prompt message shows on your notice panel, please click the column box and slide
on the screen with your finger to open the notice list. Click options needing to check to see
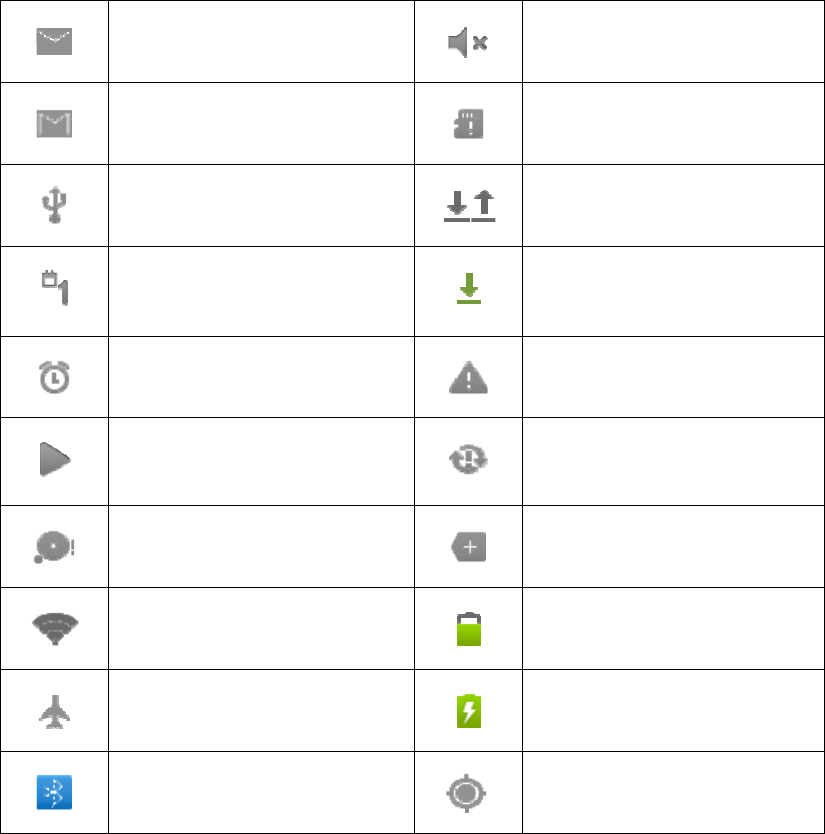
detailed information. Then you may click the message box and slide upwards to close the
message window. The following are iconography for icons in status bar:
Mail notice Mute
Gmail notice
Without SD card
Computer and MID are
connected through USB line
Uploading/Downloading
Events waiting to be done Downloading finished
Alarm clock opening
General notice (for example:
synchronous error)
Playing music In data synchronism
Insufficient space of SD card
More
WIFI service is connected,
network is available
Battery symbol
Airplane mode
Charging
Bluetooth is already connected
GPS
3. Quick start
3.1 Key function
Descriptions for key function:

Power key Press this key for a long time to start up
Under starting up state, press this key for a long time to pop up
shutdown option
Under starting up state, press this key to close the screen
Under starting up state or when breakdown appears, press the
power key for 7 seconds to make your device enter into shutdown
state
Multitask
key
Press this key to open the list of the recently opened apk
Return key Press this key to return the last operating step or the previous
operating interface
Homepage
key
Press this key to return back main function interface from any
interface
3.2 Starting up and turning off
Starting up
Press the power key for 3 seconds, you can see the starting up picture. After the system is
started, the machine enters into screen lock state, please unlock according to direction
indication of sliding icon on the interface.
Turning off
3. After pressing the power key for a long time, the shutdown option will pop up.
4. Click Power off.
3.3 Unlocking and closing of the screen
The machine will close automatically when the screen is left unused
1.After the screen being left unused for a period of time, the machine will close screen
automatically, so as to save battery power.
2.Under screen on state, press the power key, the screen will close immediately.
Turning on under screen off state
If the screen is in off state, you can unlock the screen by pressing power key for a short time .
After opening, the screen will enter lock state, swipe up the screen by your finger , the screen
will be unlocked. Press icon and slide leftwards, you can enter the camera function.
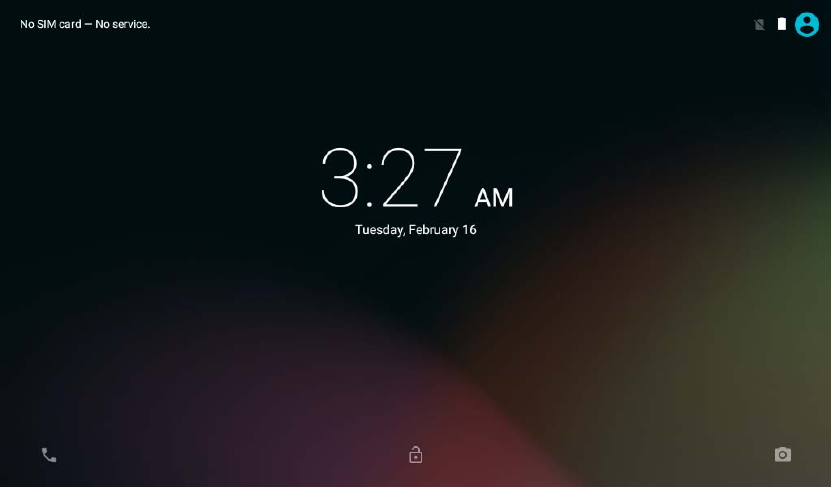
Figure 3-1
3.4 Use of touch screen
Operating mode in MID
There are various ways to skim the main screen, menu and application program, etc. on your
MID.
Click to select
When you want to use screen keyboard entry, and you want to select items on the homepage
interface such as application program, you only use your finger to click.
Press on
If you want to unlock the available option of a certain item (such as textbox or link in the
webpage), or move shortcut on the homepage interface and menu of main program, only
press the item.
Slide quickly or slide
Quick sliding or sliding means doing rapid vertical or horizontal drag movement by using
finger on the picture.
Drag
Before you starting to drag, you must press it with your finger and impose a certain pressure,
and don’t loosen the finger before dragging to the wanted position.
Rotate
Aiming at most of pictures, only turn the MID in side direction, the screen direction can be
shifted from cross direction to vertical direction. For example, when you input characters,
watch cinema, etc.
3.5 Homepage interface
All application programs on the machine will be displayed on the main menu screen. You
may use application program, shortcut and user-defined mode to set wallpaper of your
homepage interface
Skill: in any application programs, you can press homepage key to return homepage
interface.
Custom homepage interface
Change desktop wallpaper
4. Press blank region on the homepage interface to pop up the menu.
5. When the menu popping up, choose source of homepage interface wallpaper you want to
change.
6. After clicking source of wallpaper, click picture you want, and then select “set
Wallpaper
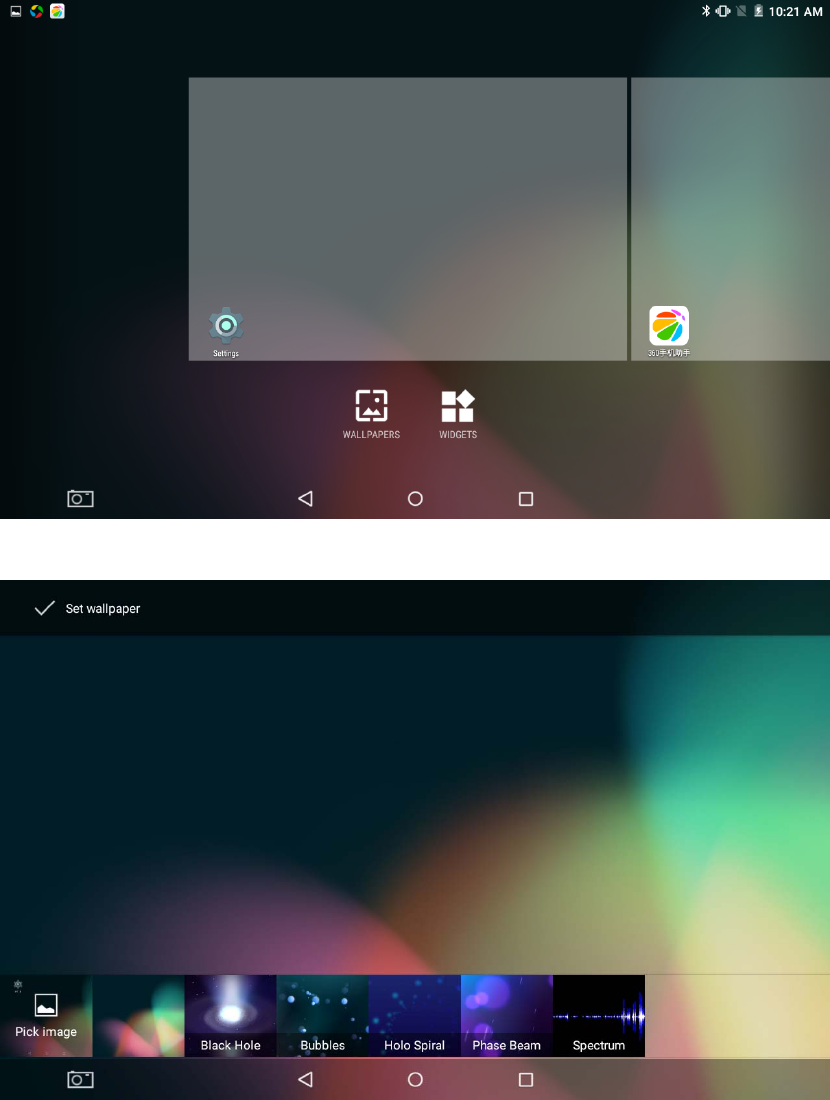
wallpaper”.
Figure 3-3
Figure 3-4
3.6 USB connection
Storage setting of MID
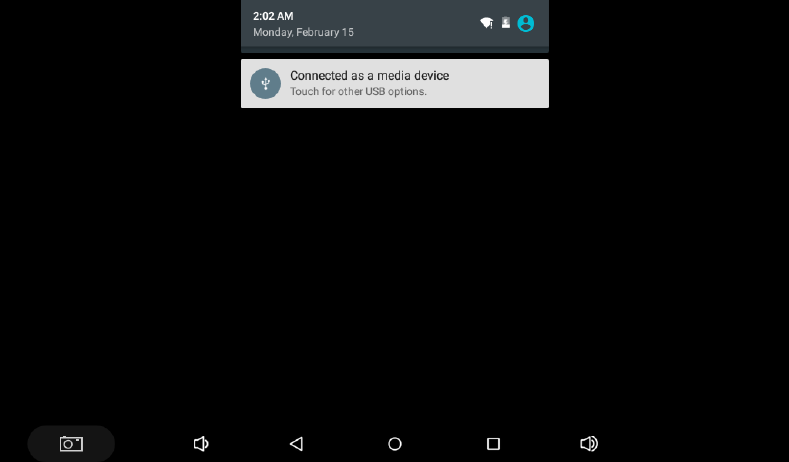
Please follow the below steps before uploading/ downloading files:
5. Connect the tablet with the computer via USB cable. The Notice bar will prompt the
notice information.
6. The computer will install the MTP drive automatically (for win7 and above version.
Drive need been download from the Internet for Windows XP system.).
7. After the MTP drive is installed, the USB is connected then.
Figure 3-5
Copy the document to storage card
6. Connect MID and computer together with USB cable.
7. After the MTP drive installed automatically, it connects with the computer successfully.
8. Open your computer, in my computer, examine content in “removable disk (x)”.
9. Find the document you want to copy, copy it to “removable disk(x)”.
10. After completion of copying, click “safely remove hardware” in taskbar of your
computer to unload.
Content of MID storage device
3. NAND FLASH storage device, space for MID to store document itself.
4. TF removable memory card.
3. The two above-mentioned storage devices both can be visible through connection with
your computer with USB.
Attention: when your MID is connected with USB cable, if you start up USB storage
device, you will not visit the memory card through MID, if you want to
view memory card in MID, only disconnect USB cable.
3.7 Memory card
Copy the document to storage card
You can transmit document between MID and computer, such as music and picture, etc. If
you want to see documents in MID, only click the file browser to look through content in the
SD card.
Delete documents on the storage card of MID
4. Find document you want to delete.
5. Press the document name you need to delete, a file menu will pop up.
6. Click delete.
Removing storage card when the MID is in starting up state
If need to remove storage card under starting up state of MID, you must unload the storage
card firstly, to avoid failure or damage of the storage card.
5. In the homepage interface, press the menu key, then click setting.
6. Pull the setting menu downwards, then click storage.
7. Click SD card setting.
8. Click to uninstall the SD card.
4. Connection Establishment
4.1 WIFI Connection
Your MID can be connected onto Wi-Fi network:
7. On the homepage interface, click and select the menu key and pop up the menu setting;
8. Click and select the System Setting;
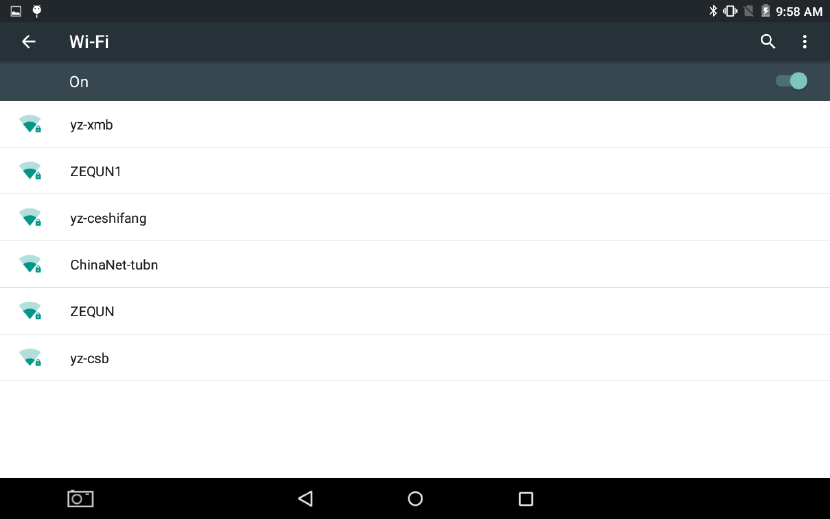
9. Click Wi-Fi and open wi-fi switch;
10. After opening Wi-Fi, the Wi-Fi network can be scanned automatically from the
equipment in the windows on the right.
11. Select the Wi-Fi network required to be connected, if the password is added, pop up the
password input windows and input the corresponding password.
12. Click the Connection
Figure 4-1
4.2 Bluetooth Connection
Function of Bluetooth:
4. You can exchange the files between two Bluetooth ready devices. You can exchange
the files with other computers, mobile phones and pda.
5. You can synchronously exchange pims data with mobile phones, pda and laptop to
support the bluetooth ( data of outlook E-mail address).
6. You can exchange the electronic name card with mobile phones, pda and laptop to
support the bluetooth.
7. You can connect the keyboard, mouse and joystick to support the bluetooth.
Application of bluetooth (Figure 4-3)
6. Setting procedure of entering into bluetooth: set -> bluetooth, open the bluetooth
equipment
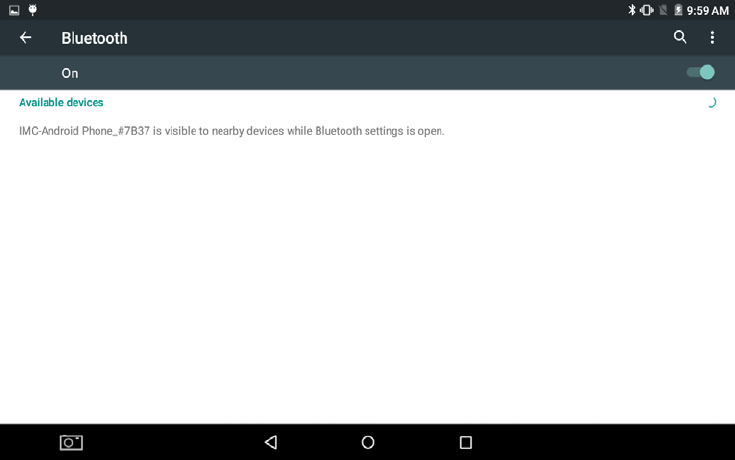
7. Name of equipment: you can randomly change the name of bluetooth for your MID by
pressing Menu key.
8. Detectability: open this function by clicking the place for name of bluetooth, which
indicates that your MID bluetooth can be searched by other bluetooth equipments, this
default time for this opening is of 120 seconds.
9. Scan and look for equipment: you can detect the equipment desired to be connected by
utilizing this function.
10. Bluetooth: after employing the scan to look for the equipment, all bluetooth equipments
searched by your MID can display under this function.
Figure 4-3
5. Communication
5.1 Camera
Camera functions
5. Click and select the camera;
6. The system enters into the camera interface;
7. Click and select the Photo button and easily take the photos;
8. Set such functions as photo, storage location, white balance and focal length regulating;
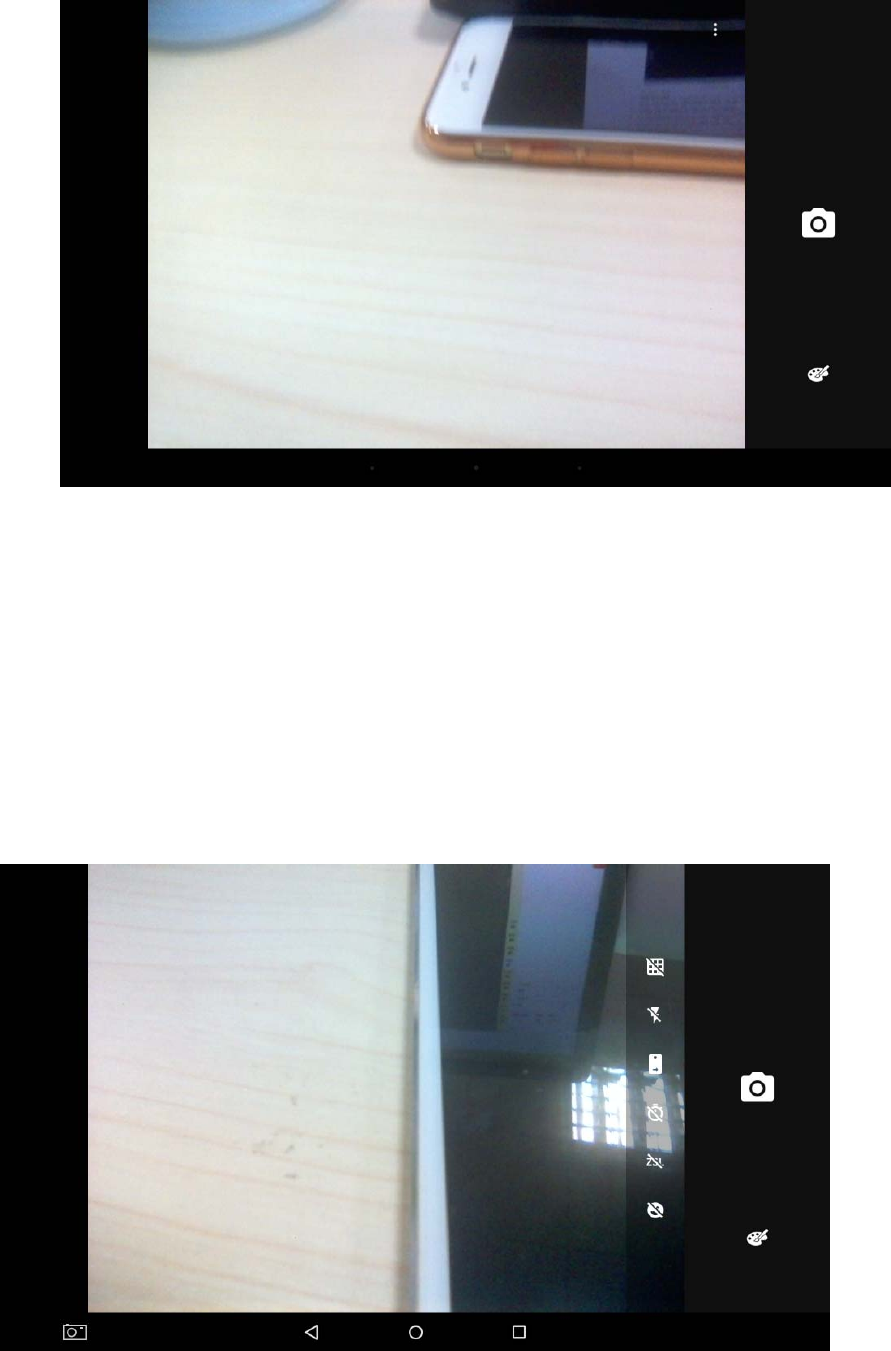
Figure 5-1
Videotape function
6. Click the videotape icon and turn it as video recorder mode;
7. Click and select the camera button to take video;
8. Click o n gear icon to set setting functions - resolution and video quality;
9. Switch 720P and 480P high-definition video recording.
10. Click and select the video recording button, end the video recording, and observe the
previewed video.
Figure 5-2
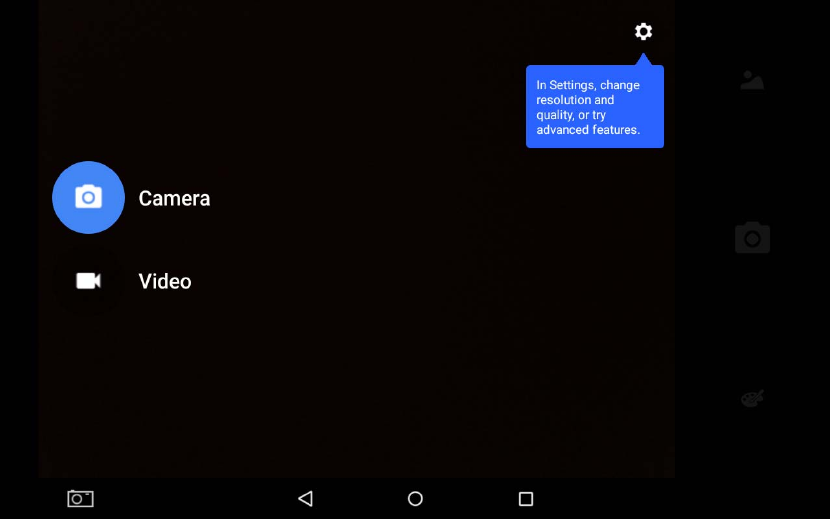
Figure 5-3
5.2 Mobile phone / Data
Mobile phone
6、Press power key to turn off the MID;
7、Insert the SIM card;
8、Press power key for a long time to start up;
9、Detect the Wireless communication network service;
10、Click on the phone icon, dial telephone numbers.
SMS function
1、Press power key to turn off the MID;
2、Insert the SIM card;
3、Press power key for a long time to start up;
4、Detect the Wireless communication network service;
5、Click SMS Icon;
6、Edit text messages;
7、Send text messages.
Note: Your SIM card provider may offer data plans for connecting to Intenet when WiFi
access is not available.
6. Other Applications
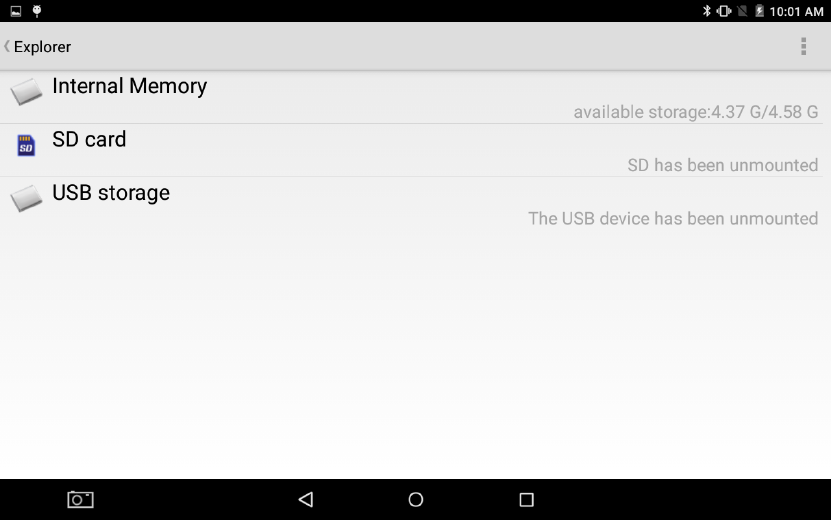
6.1 File Management
Browse files
Slide the desktop to locate the File browser (Explorer).
You can use the file browser to manage, edit and delete the files and folders, or to create
sharing and FTP server to achieve resource sharing.
Figure 6-1
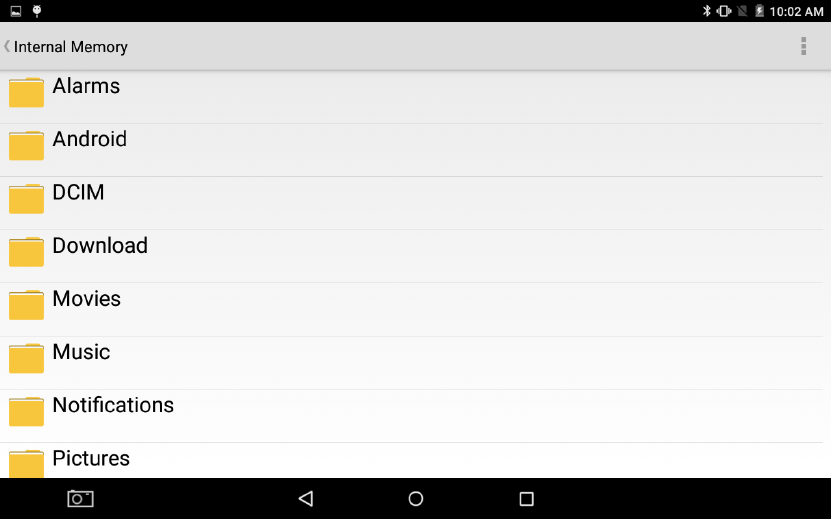
Copy files
6. In the file browser, press and select the file you want to operate.
7. Pop up operating menus, including Copy, Delete, Move,Paste, Rename, Send and
Create shotcut etc.
8. Click Copy file or folder.
9. Click into the folder you want to paste, and pop up menu by pressing the Menu key.
10. Click Operate and then click Paste.
Delete files
4. In the file browser, press the file you want to delete.
5. Click Delete.
6. Click OK to delete file.
Folder setup
7. In the file browser, pop up menu by pressing the Menu key.
8. Click Create.
9. Click Folder.
10. Click pop-up window and input the name of the new folder in the text box.
11. Click OK to create the folder.
Figure 6-2

7. Specifications
8. Troubleshooting
Problem Solution
The device will turn itself off after a
few seconds
Check that the battery is charged.
No sound is heard Adjust the volume level
Check if audio file is broken
Screen is hard to see in bright light. Adjust the screen brightness in the system menu.
Avoid using the reader in direct sunlight.
Data on the screen is corrupted or a
program is not responding properly
keep power button for long time to restart your Tablet
PC
Can't copy file into the device Check if the device is connected to the computer
correctly.
Check if the memory space is full.
Check if the USB cable is broken
LCD Display
Size 7 Inch IPS Screen Capacitive Touch Screen
Resolution 1024*600 pixels
OS Android 5.1
CPU INTEL® ATOM™ x3-C3230RK Quad-Core 1.2GHz
RAM 1GB
WiFi 802.11b/g/n
Camera Front 0.3M,Back 2.0M
3G Built-in
Built-in Flash 8GB
Capacity Expansion Support Micro SD Slot (Max. 32GB)
Power Supply Built-in 2400mAH Lithium rechargeable battery, 5V@1.5A
Working temperature -4 ~ 40 ℃
Languages Multiple languages
Dimensions 190*109*10.5mm
Accessories (Optional) Adapter, USB cable, Gift box etc.

FCC STATEMENT
This equipment has been tested and found to comply with the limits for a Class B digital
device, pursuant to Part 15 of the FCC Rules. These limits are designed to provide reasonable
protection against harmful interference in a residential installation. This equipment generates uses
and can radiate radio frequency energy and, if not installed and used in accordance with the
instructions, may cause harmful interference to radio communications. However, there is no
guarantee that interference will not occur in a particular installation. If this equipment does cause
harmful interference to radio or television reception, which can be determined by turning the
equipment off and on, the user is encouraged to try to correct the interference by one or more of
the following measures:
-- Reorient or relocate the receiving antenna.
-- Increase the separation between the equipment and receiver.
-- Connect the equipment into an outlet on a circuit different from that to which the receiver
is connected.
-- Consult the dealer or an experienced radio/TV technician for help.
This device complies with part 15 of the FCC Rules. Operation is subject to the following two
conditions:
(1) This device may not cause harmful interference, and (2) this device must accept any interference
received, including interference that may cause undesired operation changes or modifications not expressly
approved by the party responsible for compliance could void your authority to operate the equipment.
Changes or modifications not expressly approved by the party responsible for compliance could void
the user's authority to operate the equipment.
SAR:
standard operating positions accepted by the FCC with the Phone transmitting at its highest
certified power level in all tested frequency bands, although the SAR is determined at the highest certified
power level, the actual SAR level of the phone. While operating can be well below the maximum value,
in general, the closer you are to a Wireless base station antenna, the lower the power output. Before a
new model phone is a available for sale to the public, it must be tested and certified to the FCC that it
does not exceed the exposure limit established by the FCC, Tests for each phone are performed in
positions and locations (e.g. at the ear and worn on the body)as required by the FCC.
For body worn operation, this tablet has been tested and meets the FCC RF exposure.
Guidelines when used with an accessory designated for this product or when used with an
accessory that contains no metal and that positions the handset a minimum of 10 mm from the body.
Non-compliance with the above restrictions may result in violation of RF exposure guidelines.
The highest SAR value for this model when tested for use at the ear is 0.37 W/Kg and when worn on the
body, as described in this user guide, is 0.887 W/Kg (Body-worn measurements differ among phone
models, depending upon available accessories and FCC requirements). The maximum scaled SAR in
hotspot mode is 0.887 W/Kg. While there may be differences between the SAR levels of various phones and
at various positions, they all meet the government requirement for safe exposure. The FCC has granted
an Equipment Authorization for this model with all reported SAR levels evaluated as incompliance
with the FCC RF exposure guidelines. SAR information on this model is on file with the FCC and
can be found under the Display Grant section ofhttp://www.fcc.gov/oet/fccid after searching on FCC ID:
2AEB5-A724G.