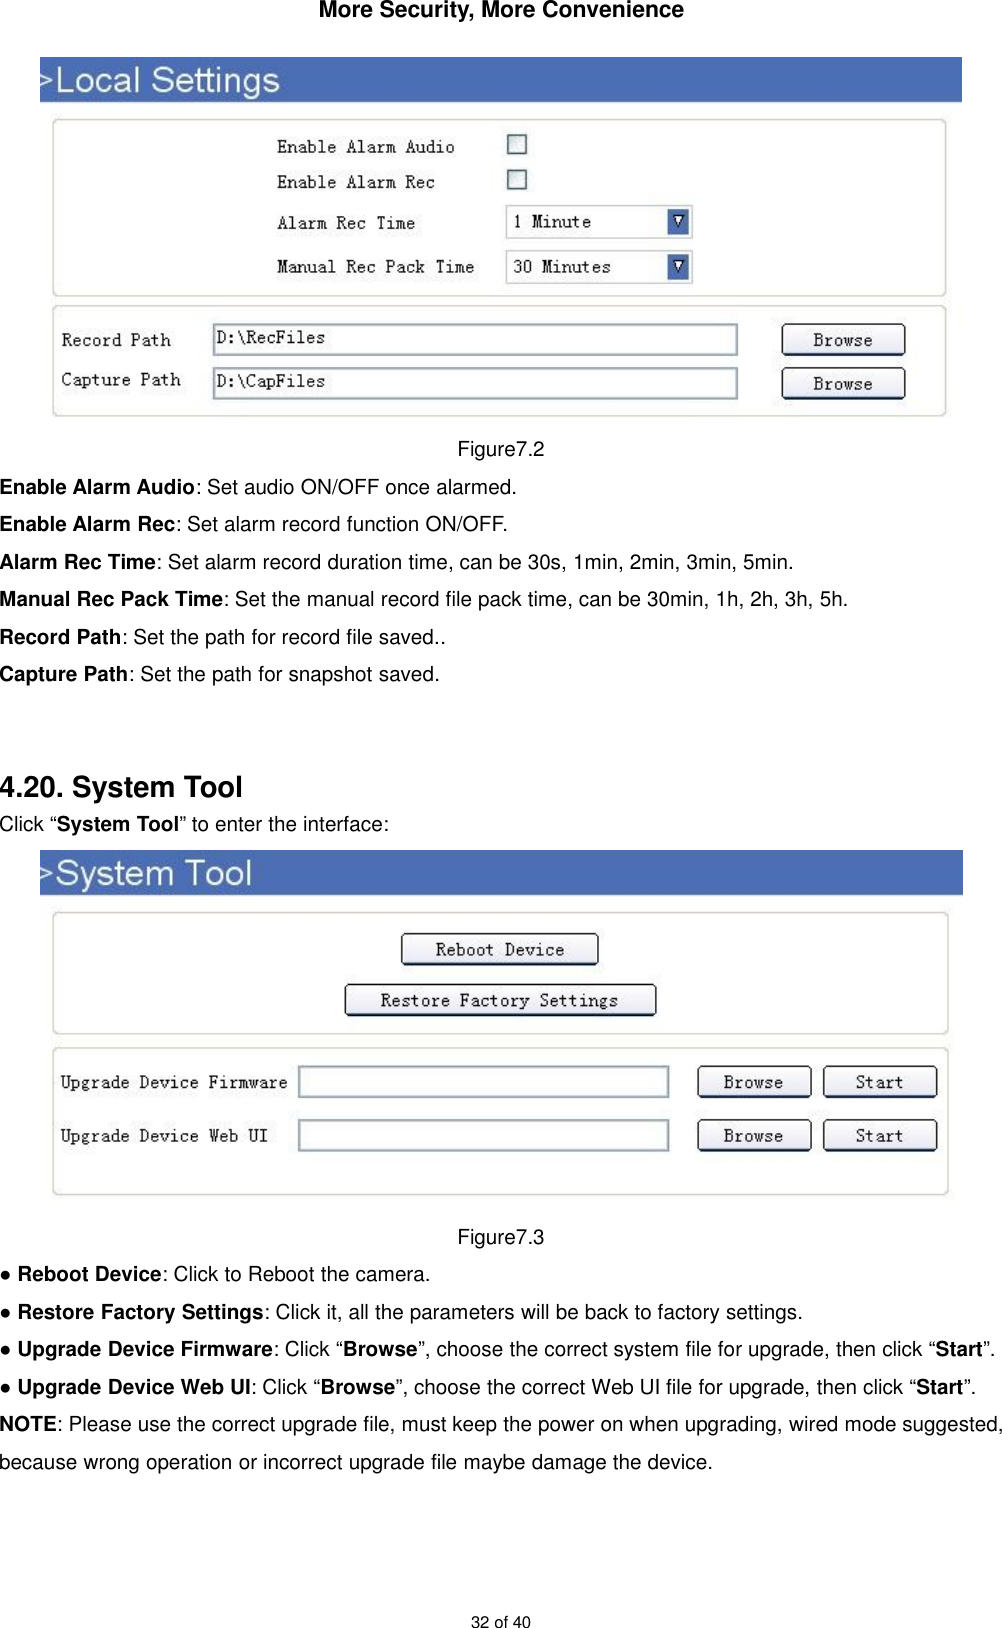
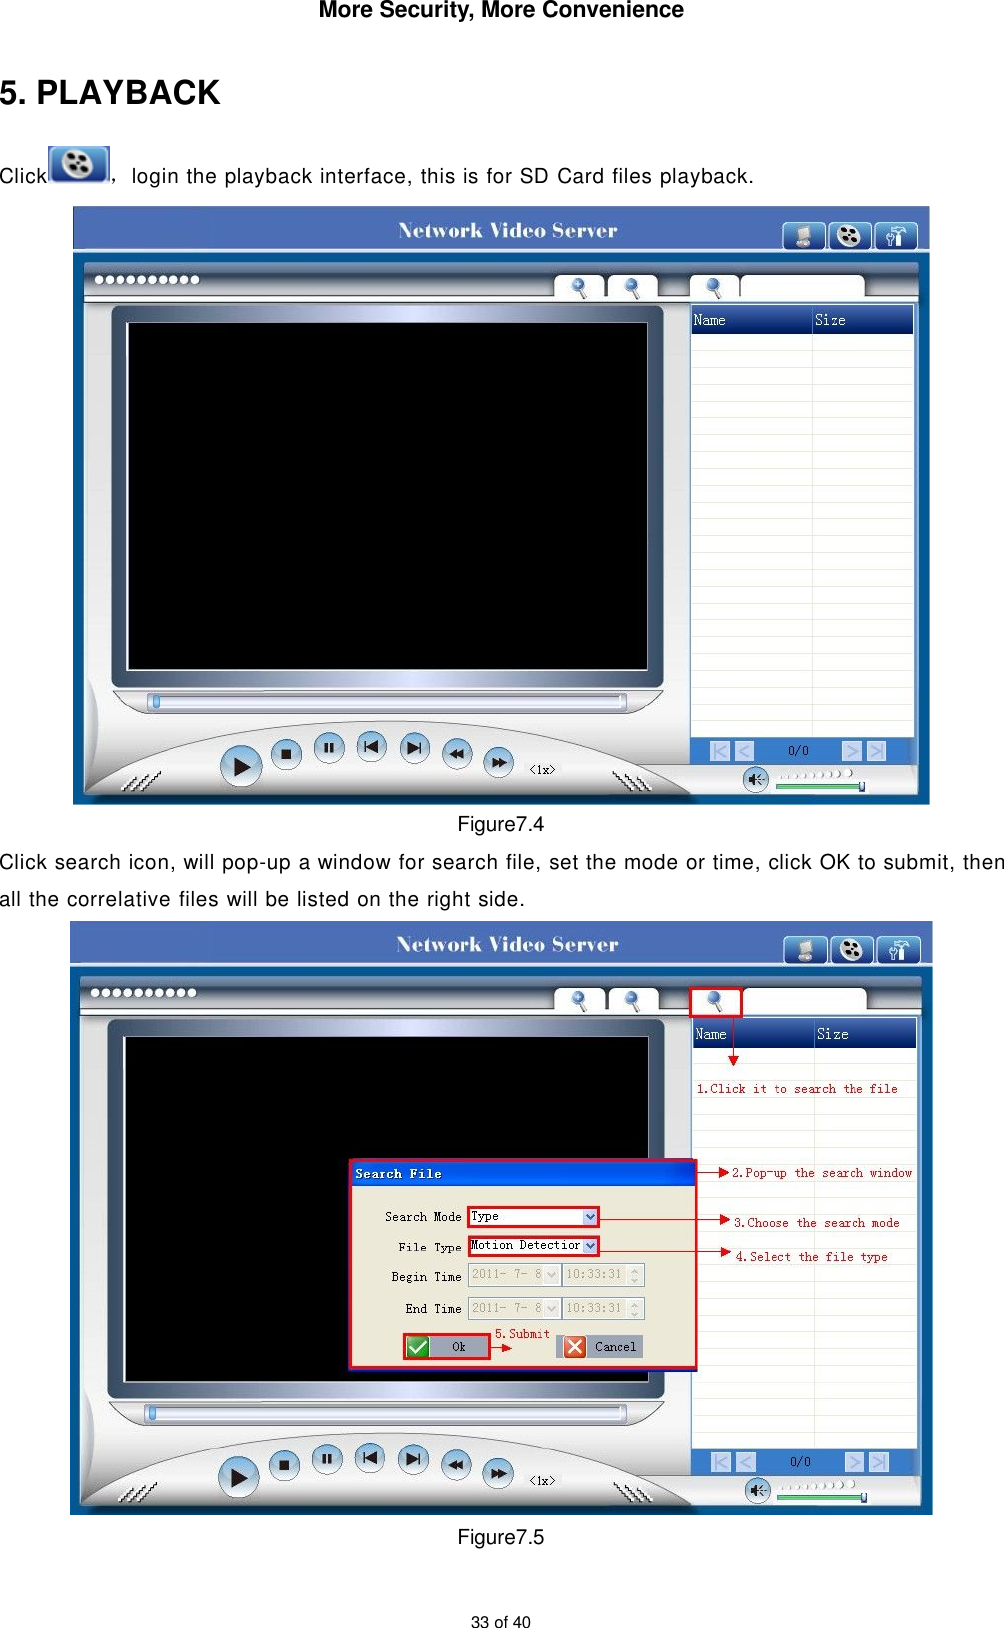
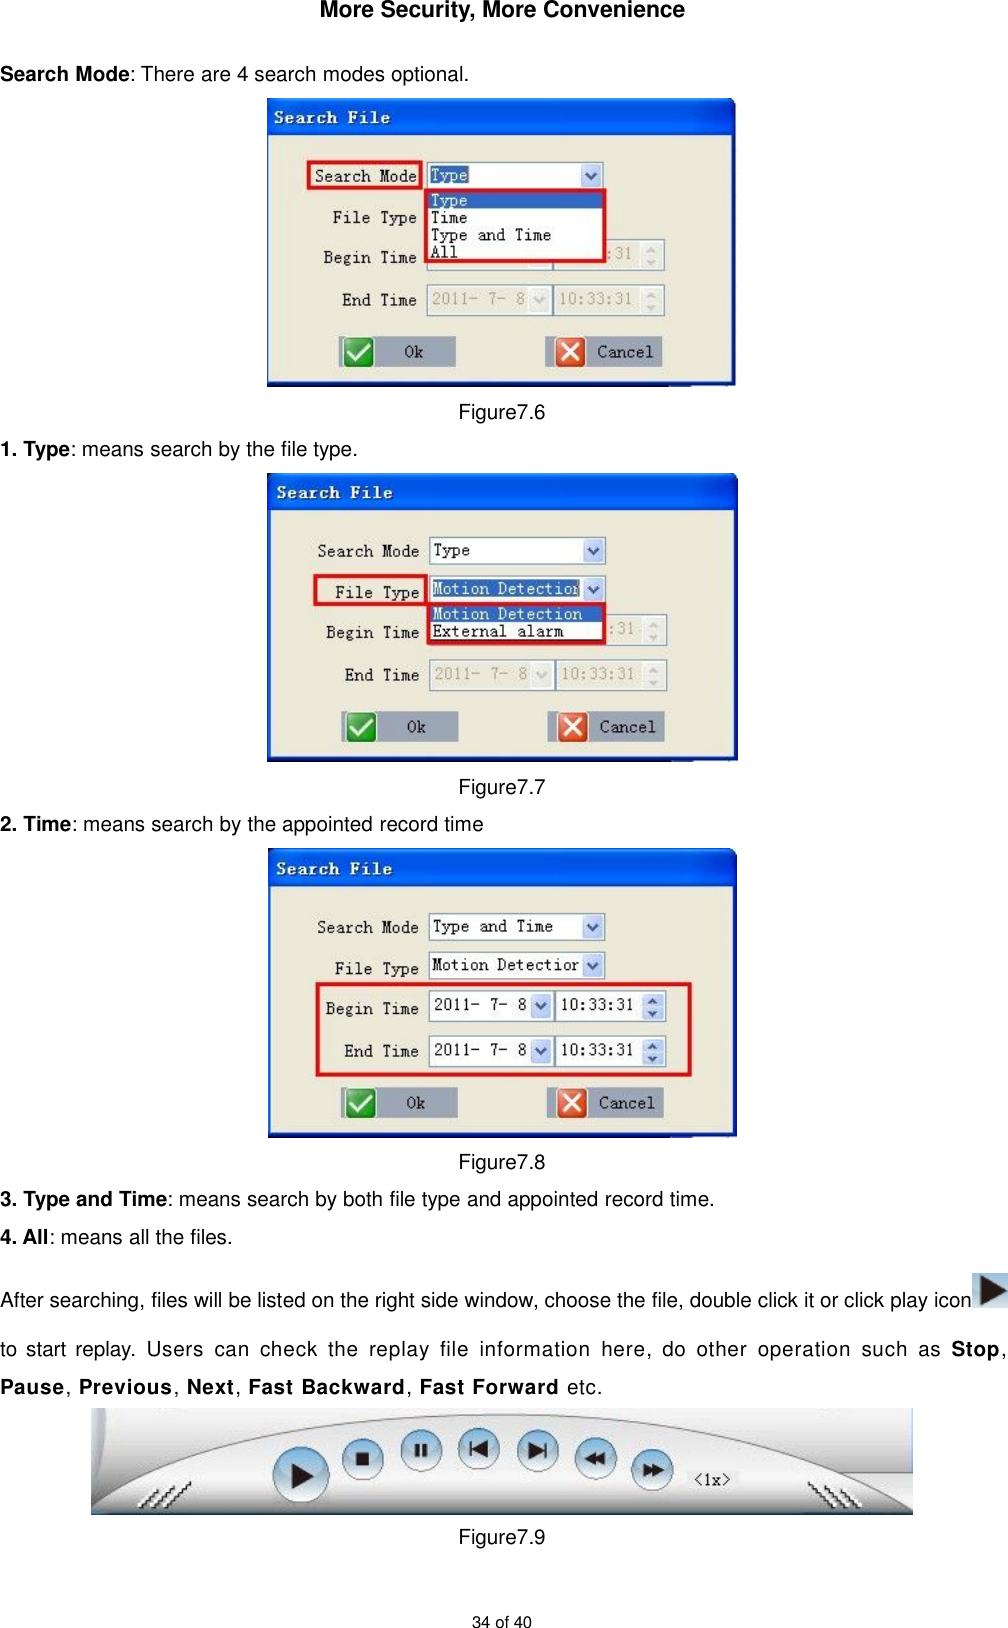
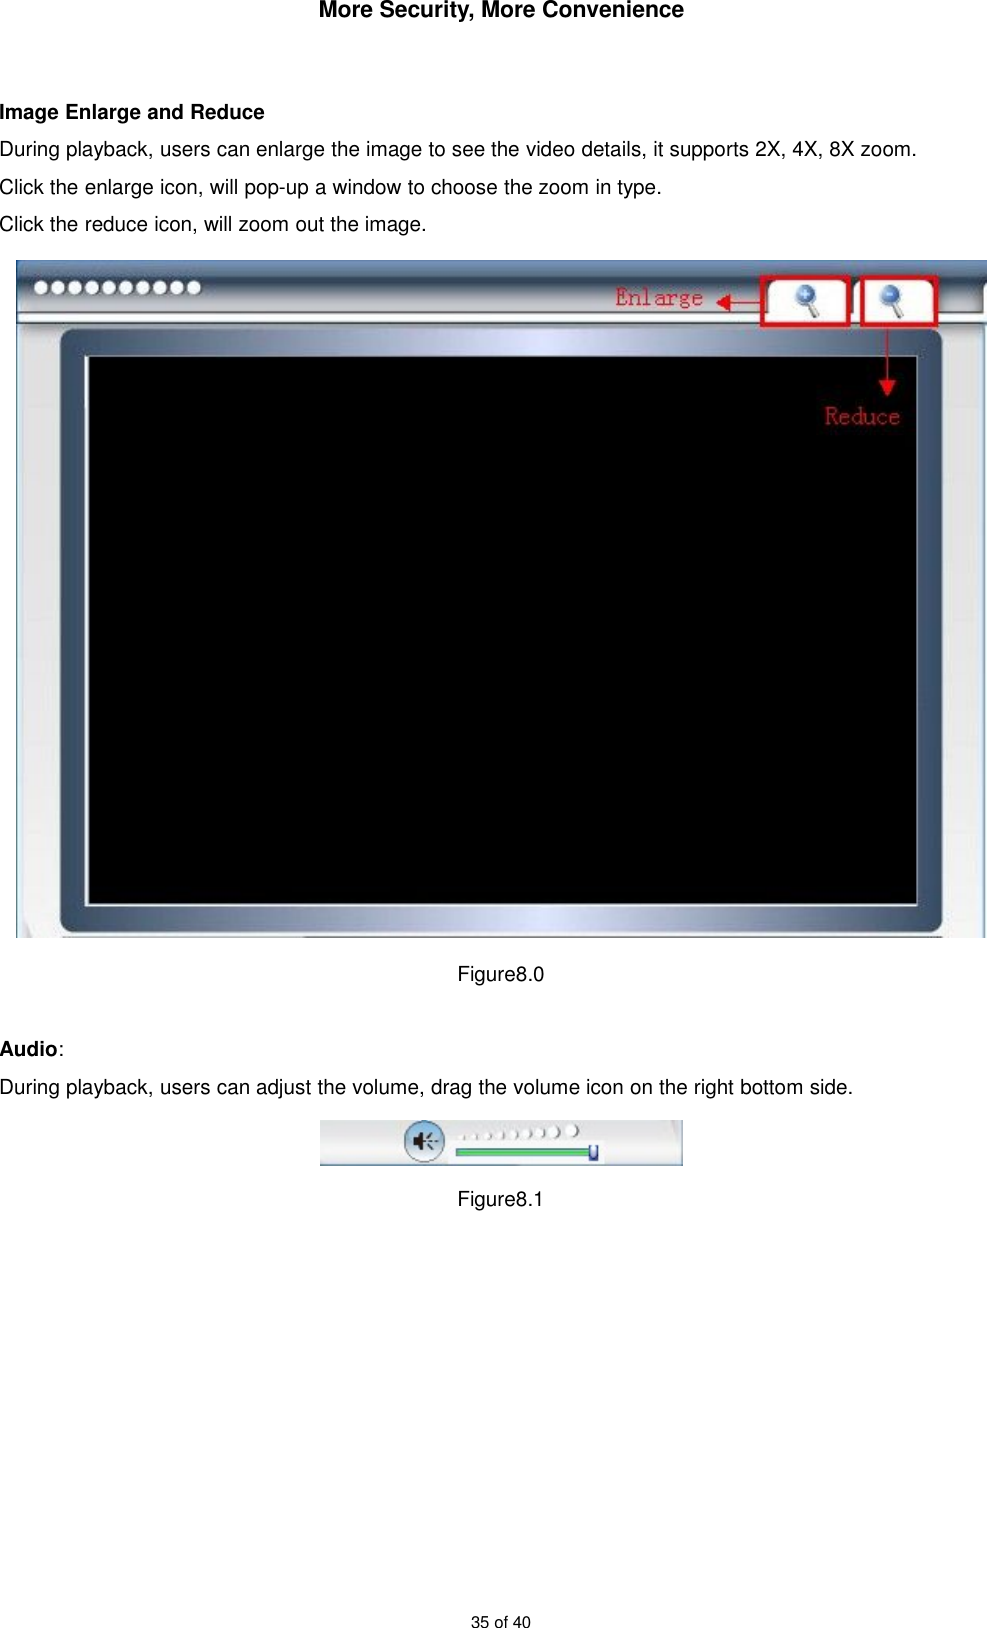
APEXIS ELECTRONIC AH4033BW IP Camera User Manual
SHENZHEN APEXIS ELECTRONIC CO., LTD. IP Camera Users Manual
UserManual.wiki
>
APEXIS ELECTRONIC
>
AH4033BW User Manual
Users Manual
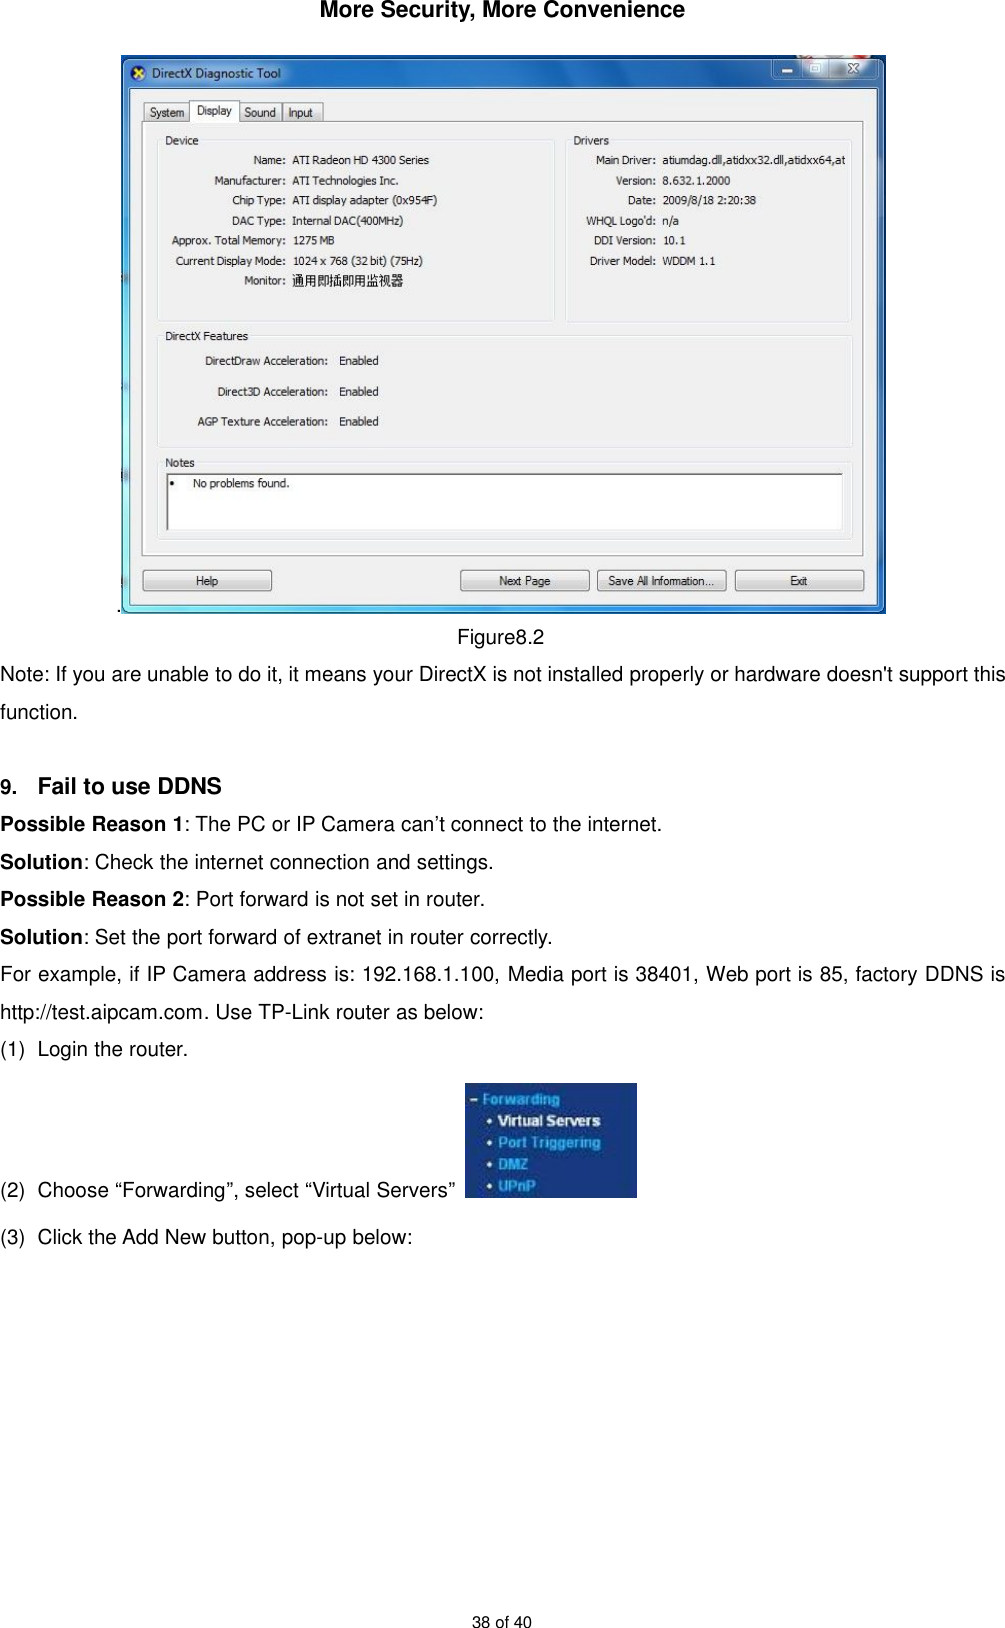
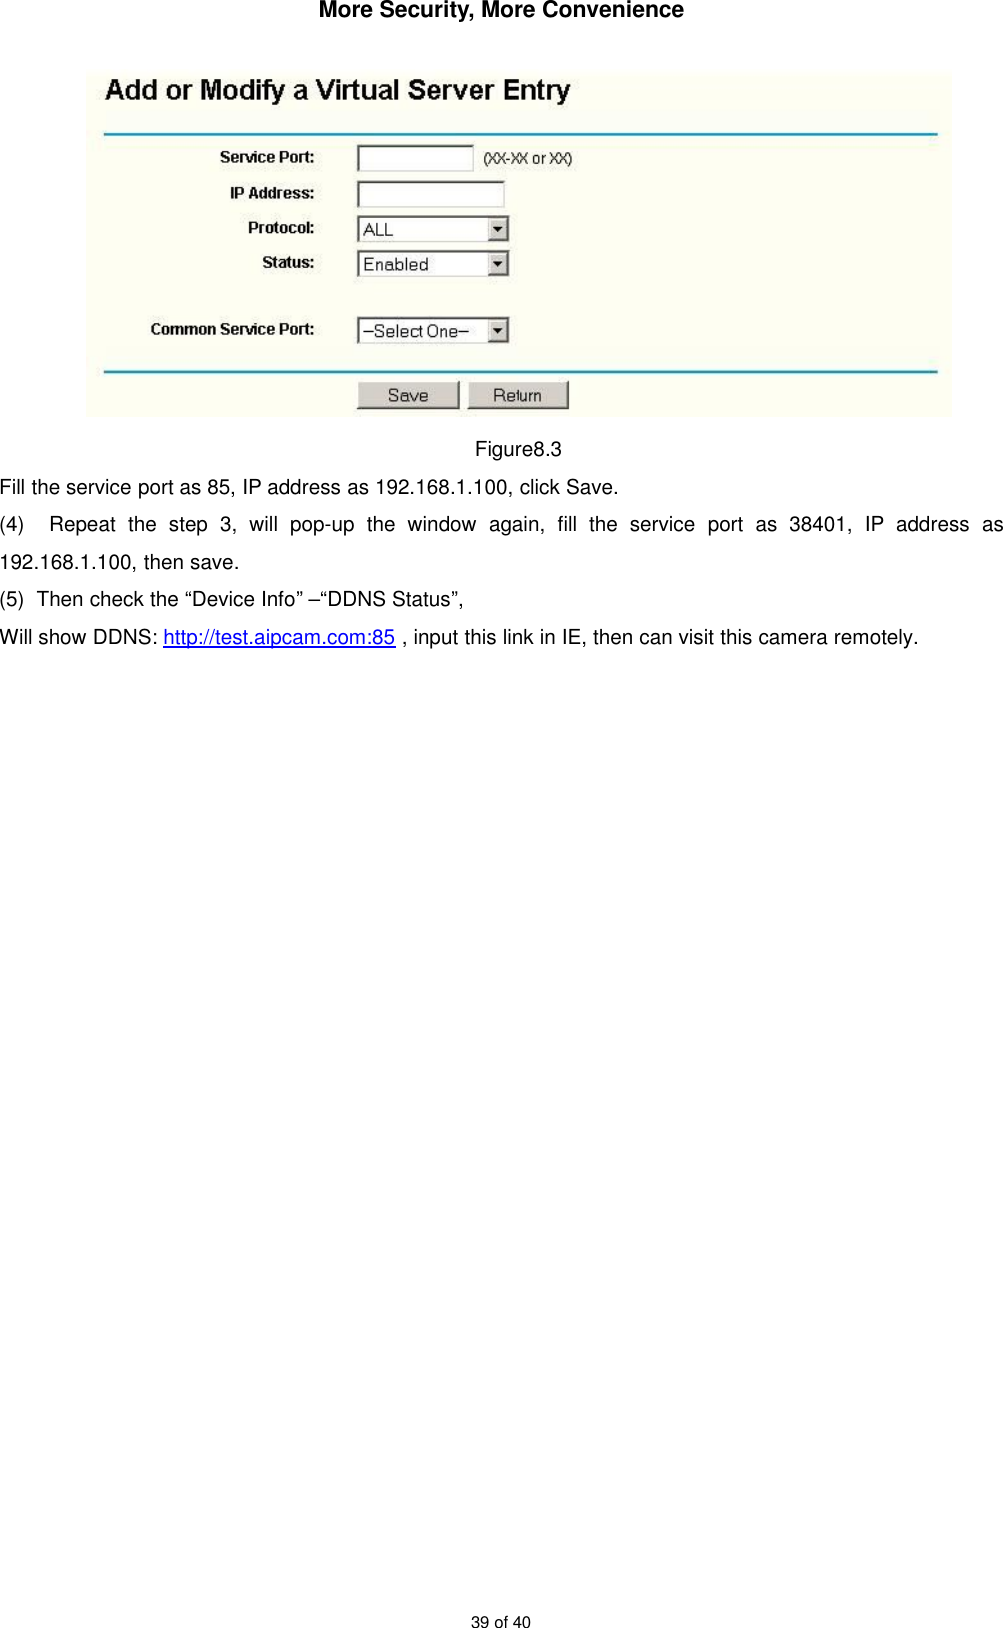
Navigation menu
Upload a User Manual
Namespaces
Wiki Guide
HTML
PDF
Info
Views
User Manual
Discussion / Help
Navigation


![More Security, More Convenience36 of 406. FREQUENTLY ASKED QUESTIONS1. I have forgotten the administrator username and/or passwordThere is a [RST] button on the rear panel, keep the power on, hold the reset button for 10 seconds, it willrestore back to factory default settings as below:Username: adminPassword: adminNOTE: Please don’t press RST button if without professional guide.2. There is no picture displayed in IE browserIt maybe the ActiveX problem,If use the IE browser for the first time, should install the ActiveX, details as below:Before login, click the ActiveX icon at the right side of interface to download, save the file, runit to install the ActiveX.3. Fail to visit IP camera via IE after upgradingSolution: Clear the browser buffer.Steps: Open IE>click “Tools”> “Internet Options”>“General”>“Delete”> “Internet temporary files”, deletethe cookies and temporary files, then click “OK” and re-login.4. The video is not smoothPossible reason 1: The frame rate value is too small.Solution: Increase the frame rate value.Possible reason 2: Too many users are connecting to the device.Solution: Close some connection or reduce the video frame rate.Possible reason 3: Network bandwidth is too low, lots of lost packets.Solution: Reduce the video frame rate or video compression bit rate.5. Fail to visit IP camera via IE browserPossible Reason 1: Network is disconnected.Solution: Connect your PC to network, check whether the network works well or not. Check whether thecable problem, or network problem caused by PC virus.Possible reason 2: IP Address has been occupied by other devices.Solution: Stop the connection between IP camera and network; connect the IP camera to PCdirectly, reset IP address according to the proper operations recommended.Possible reason 3: IP addresses are in different subnets.Solution: Check IP address, Subnet masking and Gateway.Possible reason 4: Physical address of network conflict with IP camera.](https://usermanual.wiki/APEXIS-ELECTRONIC/AH4033BW/User-Guide-2529558-Page-36.png)