AQUATIC AV SM78 WATERPROOF MEDIA PLAYER User Manual
AQUATIC AV WATERPROOF MEDIA PLAYER Users Manual
UserManual.wiki
>
AQUATIC AV
>
SM78 User Manual
Users Manual
Navigation menu
Upload a User Manual
Namespaces
Wiki Guide
HTML
PDF
Info
Views
User Manual
Discussion / Help
Navigation
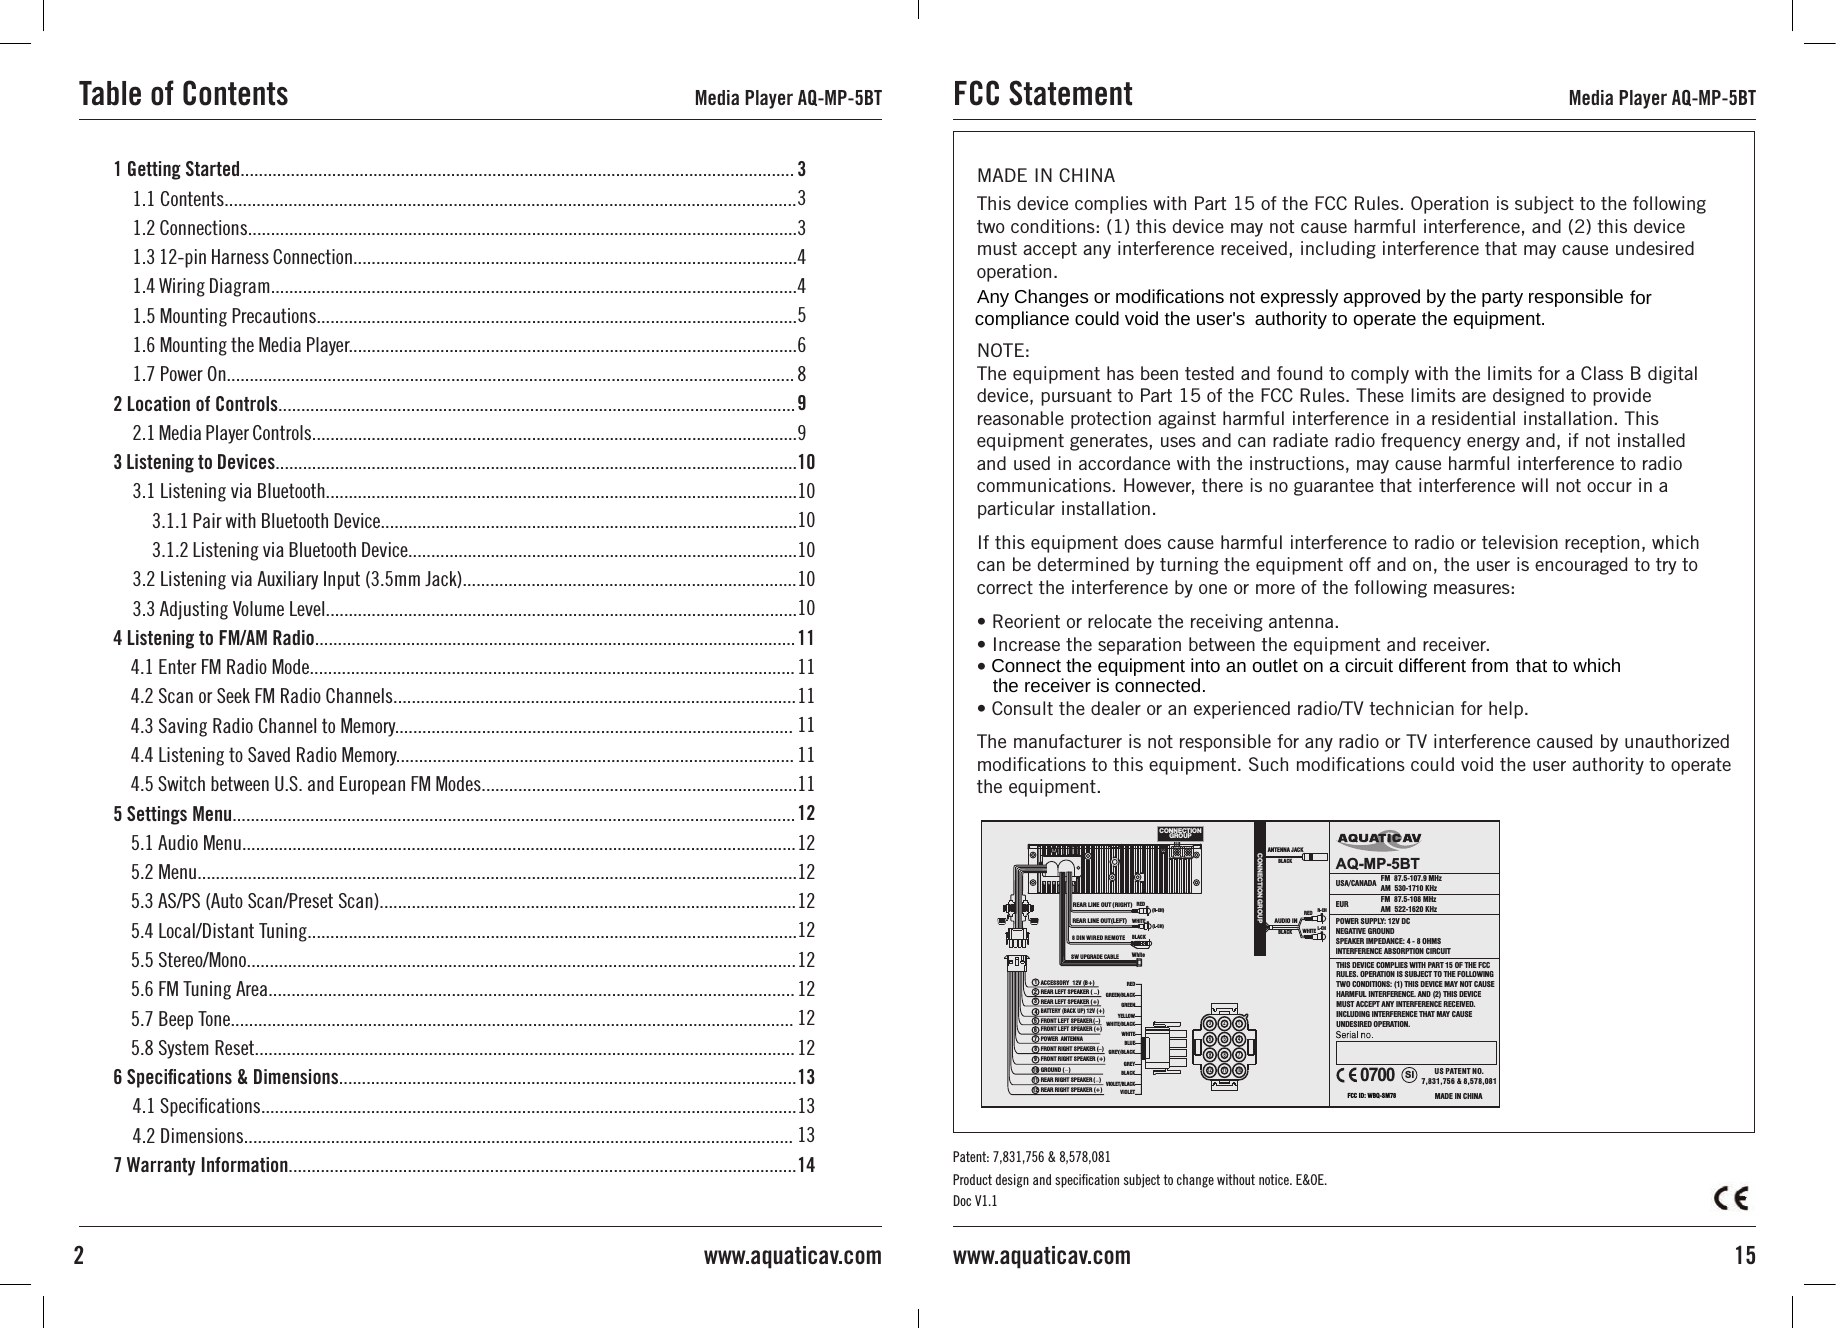
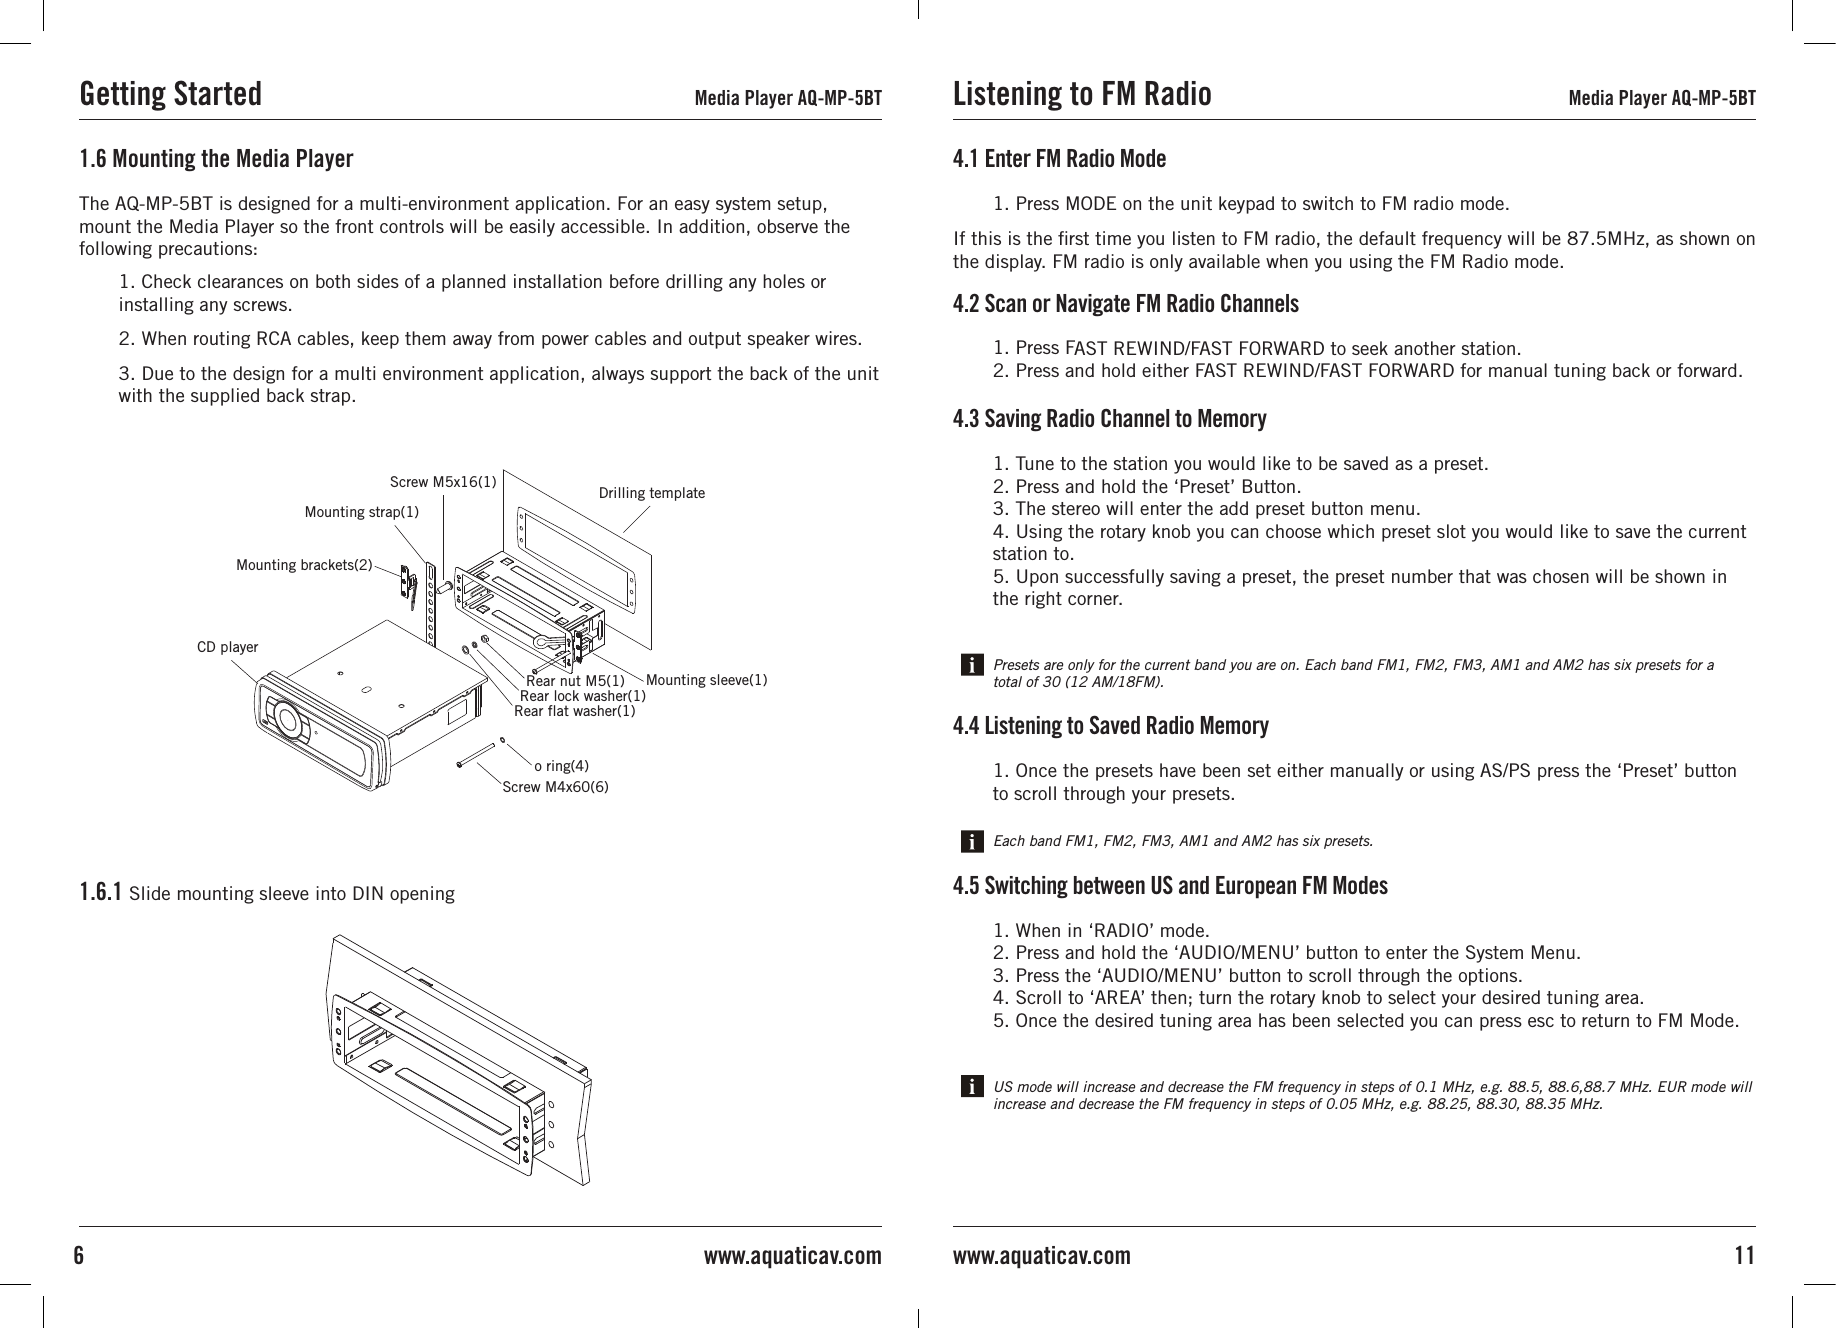
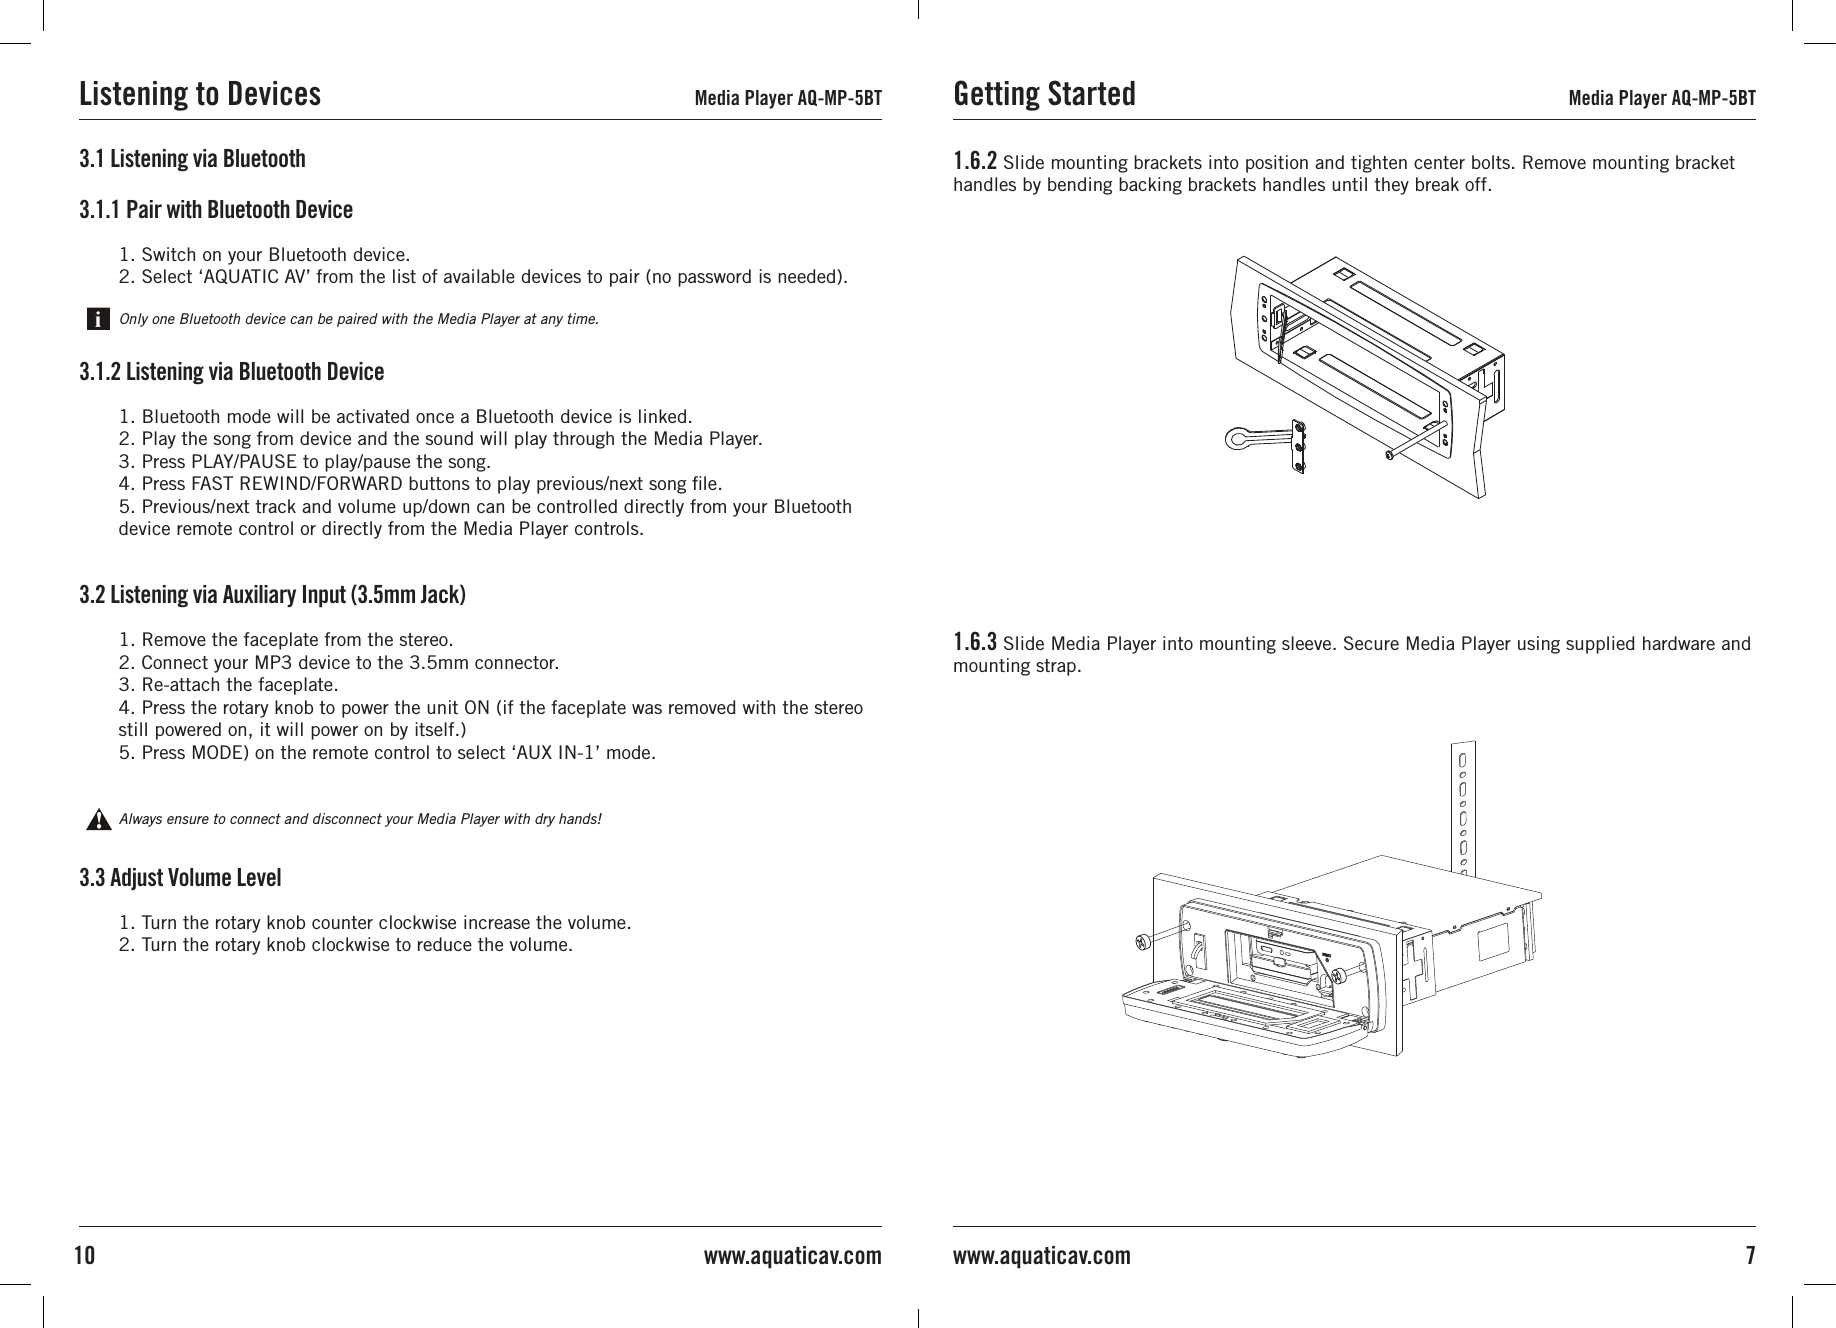
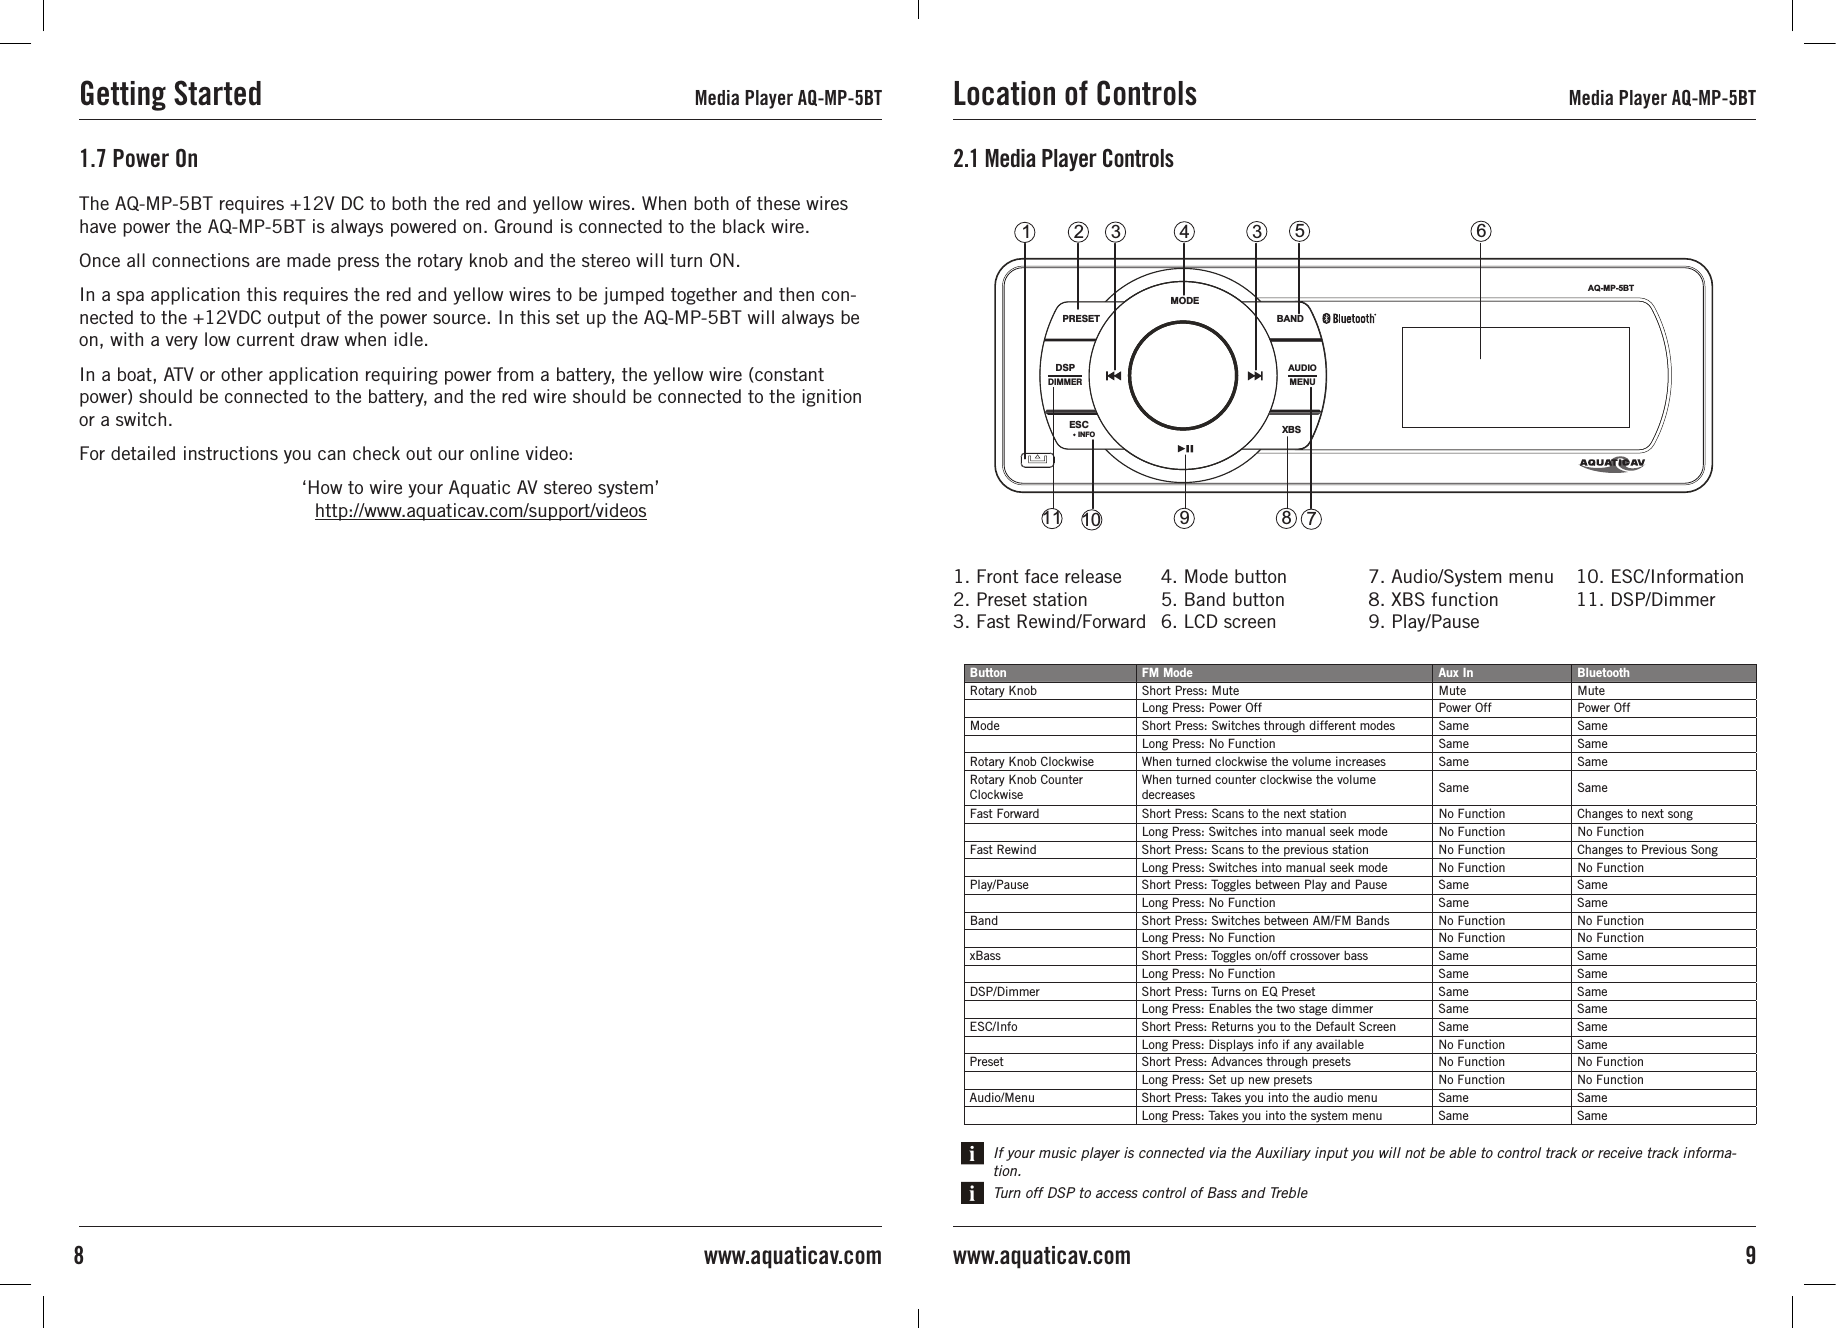
![• AQ-MP-5BT Digital Media Player• Wiring Harness (AQ-UNH-2)• Four (4) Stainless Steel Mounting Screws• Spare Fuse• Mounting Template• Mounting Bracket• DIN Cage• Owner’s Manual1.1 Contents1. 12-pin Watertight HarnessThe 12-pin harness supplies power and ground connections to the Media Player and four (4) speaker channel output connections from the Media Player (see also 1.3 below).Do not cut or modify the 12-pin harness on the Locker side or warranty will be void.2. FM Radio Antenna JackConnect antenna (AQ-ANT-1 sold separately) to female antenna receptacle. For best FM performance make sure the antenna is extended to the highest achievable position.3. Auxiliary OutputsAllows external amplifiers to be connected to power additional speakers.4. Auxiliary Inputs Allows an additional RCA input, from a standalone unit or another stereo source.5. 8-pin DIN Cable Allows connection of the wired Remote Control (AQ-WR-5F sold separately).6. Bluetooth AntennaAllows a Bluetooth device to wirelessly connect to the unit.1.2 Connections (see Wiring Diagram 1.4)The AQ-MP-5BT includes the universal harness AQ-UNH-2 in order to connect the stereo to power and speakers.All open wire connections should be soldered and protected against water and dust for best long-term performance.1.3 12-pin Harness Connection (see Wiring Diagram 1.4)Getting Started Media Player AQ-MP-5BT3www.aquaticav.comAquatic AV offers a limited warranty of our products on the following terms:Length of warranty 2 years on audio systems, electronics, speakers, and accessories (receipt required).Coverage This warranty covers only the original purchaser of an Aquatic AV product purchased from an authorized Aquatic AV dealer. In order to receive service, the purchaser must provide Aquatic AV with a copy of the receipt stating the customer name, dealer name, product purchased and date of purchase.Defective products Products found to be defective during the warranty period will be repaired or replaced (with a product deemed to be equivalent) at Aquatic AV’s discretion.What is not covered Damage caused by accident, abuse, improper operations or theft. Any cost or expense related to the removal or reinstallation of product. Service performed by anyone other than an authorized Aquatic AV service center. Any product with the serial number or tamper labels defaced, altered, or removed. Subsequent damage to other components. Any product not purchased from an authorized Aquatic AV dealer.Limit on implied warranties Any implied warranties including warranties of fitness for use and merchantability are limited in duration to the period of the express warranty set forth above. Some states do not allow limitations on the length of an implied warranty, so this limitation may not apply. No person is authorized to assume for Aquatic AV any other liability in connection with the sale of the product.How to obtain service You must obtain a return material authorization number (RMA) to return any product to Aquatic AV. You are responsible for shipping charges of returned products to Aquatic AV.Please record the model and serial number[s] of your equipment in the space provided below as your permanent record and will assist us with your factory warranty coverage. These numbers can be found on the rear of the Digital Media Player.Model number[s]: Serial number[s]:Warranty Information Media Player AQ-MP-5BT14 www.aquaticav.com](https://usermanual.wiki/AQUATIC-AV/SM78/User-Guide-2607915-Page-3.png)