ARESON Technology BL0001 WIRELESS MOUSE User Manual USERS MANUAL
ARESON Technology Corp. WIRELESS MOUSE USERS MANUAL
USERS MANUAL

1. Un-install or removing the current mouse driver
Before installing the driver of the mouse, we suggest that you check if any other mouse
driver installed in your system. If yes, in order not to make conflict, please un-install or
remove that driver before installing the mouse.
2. Install the mouse driver (optional)
Select setup.exe to install the driver.
Trouble Shooting
a. Make sure you have connected the receiver correctly to the computer's USB port.
b. For the best performance, we suggest you to locate the receiver with a distance from
other electrical devices, such as the computer, the computer monitor or external storage
drives.
c. Make sure you have set the communication between the receiver and the mouse. Refer
to the channel setting instruction (refer to No.3) in your manual.
d. Some system devices might conflict with the mouse. Confirm the IRQ/address settings
of these devices for conflicts, and change the settings as required.
e. Make sure that you are not working the mouse on glossy or reflective surfaces.
f. Try unplugging then reconnecting the receiver cable to your computer.
Battery use reminders
1. Please make sure the batteries used for recharging are "Rechargeable Batteries"
2. Remove worn-out batteries from equipment immediately and dispose of promptly.
3. Keep all batteries (used or new) out of the reach of children.
4. To have the batteries with a regular check and replace new batteries if not used for a
long time.
5. Never dispose of batteries in fire, as they could explode.
6. Always replace all the batteries at the same time. Mixing old and new batteries or
mining types (such as alkaline with zinc carbon) will reduce overall performance and could
cause leakage or rupture.
7. If the lower power indicator is blinking, please charge the battery through the USB
charging cable immediately. Otherwise, you may need to reset the batteries and ID, and
then recharge the batteries more than 4 hours.
8. Do not mix different types of batteries (e.g. Ni MH, NiCd, alkaline, and etc) in the mouse.
9. Remove batteries from the electrical device if the device is not going to be sued for a
long time.
10. If the performance of the batteries decreases substantially, it istime to replace the
batteries.
This device complies with Part 15 of the FCC Rules. Operation is subject to the following
two conditions: (1) this device may not cause harmful interference, and (2) this device must
accept any interference received, including interference that may cause undesired operation.
FCC NOTE:
The manufacturer is not responsible for any radio or TV interference caused by
unauthorized modifications to this equipment. Such modifications could void the user's
authority to operate the equipment.
Wireless
Laser
Mouse
Optical
Mouse
User's Guide
All other brands and trademarks are the properties of their respective owners.
The product specifications are subject to change without notice.

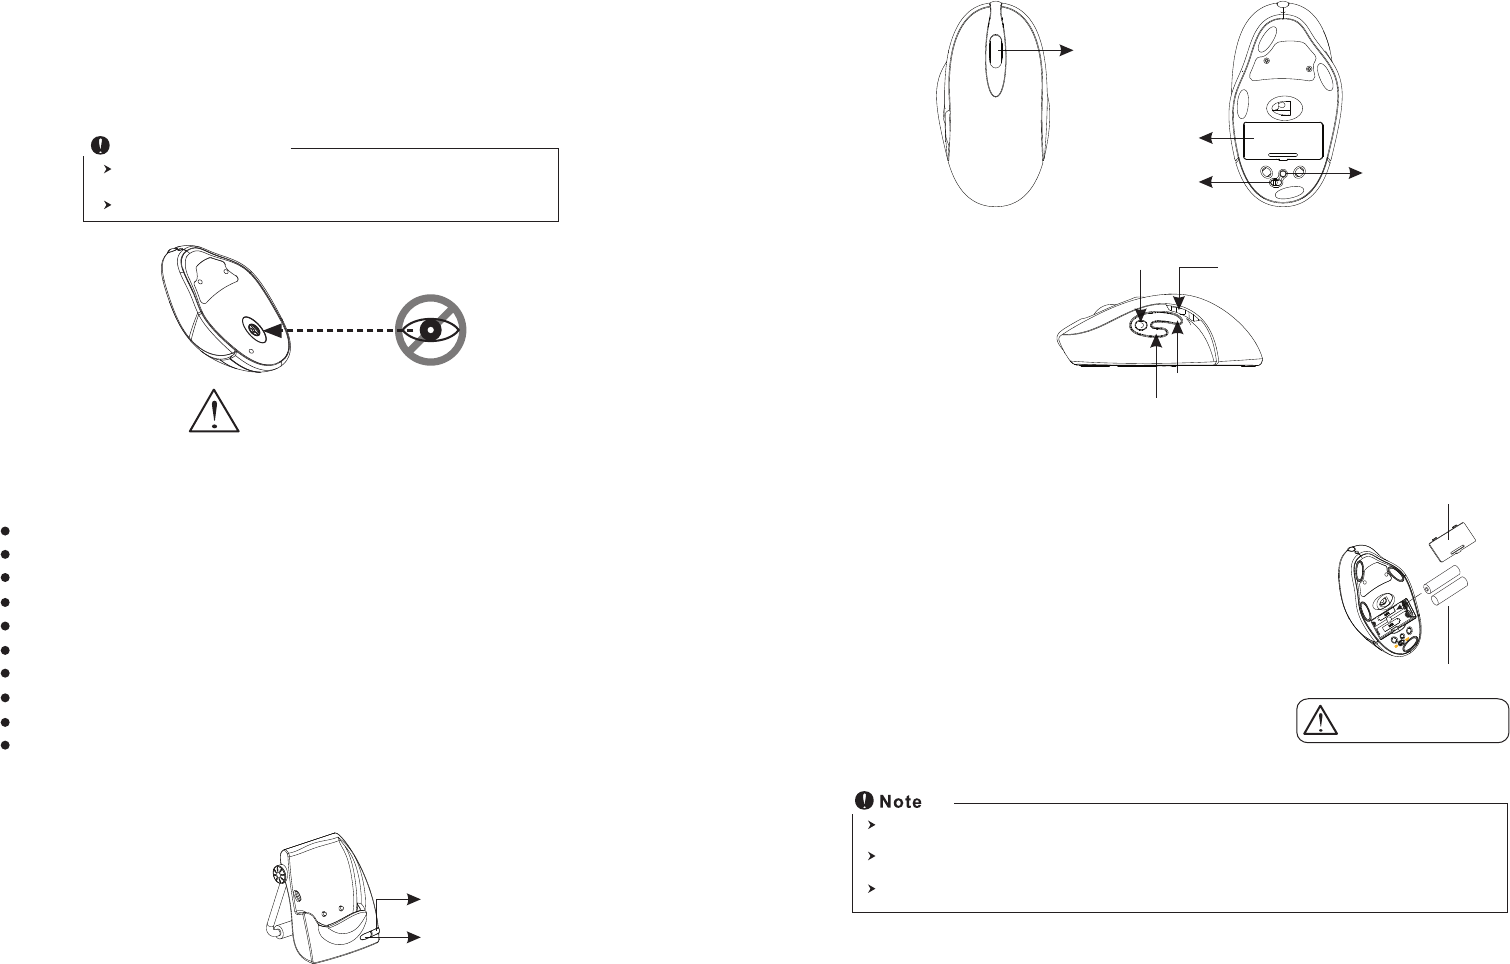
Charging Cradle / Recevier
ID reset button
Led
Wheel button
Battery cover
ID reset button
Forward button
Backward button
Mouse
Battery status indicator
Resolution
switchable button
Introduction
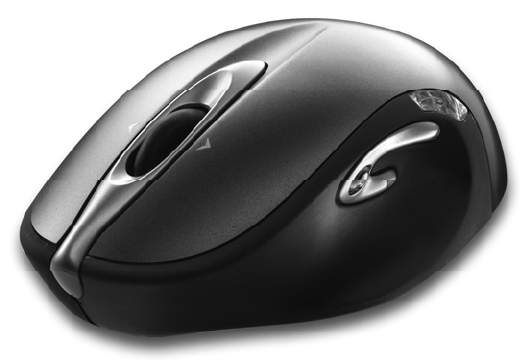
Congratulations on your purchase of the most innovative wireless mouse. With an incredible
sensitivity to surface details and high tracking speed than other mice, the mouse can track
reliably even on tricky polished or wood-grain surfaces. It offers even more advance that will
make you more productive and more comfortable.
27 MHz RF (distance 1.0m)
Using state-of-art technology. High tracking speed and sensitivity.
4D tilt wheel scroll. (optional)
One Channel/256 ID
Recharging by charging cradle
Plug and Play! No need to set the channel ID.
Power on/off switch
Data report rate : 125 Report/Sec.
2*AAA NiMH batteries
800 dpi or higher
Power on/off switch
This product complies with IEC 60825-1, Class I laser product. (for Laser mouse
models only.)
Your product complies with FCC and CE rules.
Safety Notice
Please DO NOT direct the
laser beam at anyone's eye.
(※ Only for laser model)
Features
1. Insert the batteries
a. Remove the battery compartment cover on the bottom case
of the mouse.
b. Fit in the batteries accordingly to the diagram indicated in
the battery cabinet.
c. Close the battery compartments cover properly.
A. Hardware Installation
A wrong battery placement
may cause batteries overheat.
Battery compartment cover
2*AA charging batteries
It is a MUST to fully charge the rechargeable batteries contained in this package at the first-time use.
The unit offers a strong power saving management. Once the mouse accesses the sleeping mode, " to click any
button of the mouse" is compulsory to wake it up.
Power on/off:
There is a Power on/off switch designed to save the batteries power while non-usage of a longer period.

Press ID reset button
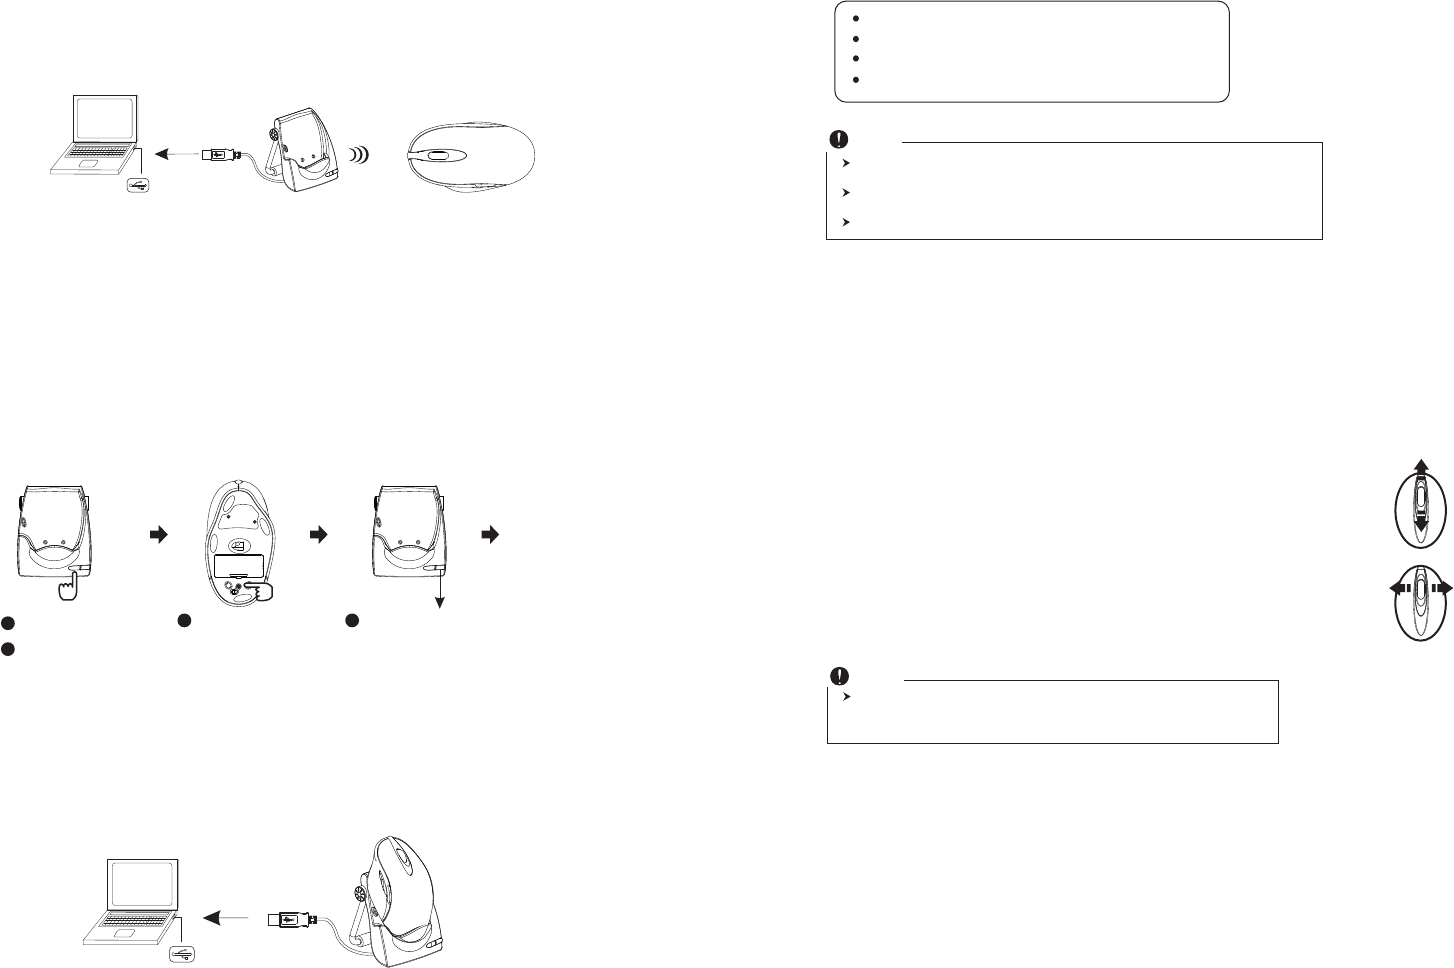
2. Connect the receiver
a. Turn off your PC.
b. Connect the receiver cable to USB port on PC
c. Turn on your PC
PC
Red Led indicator
blinks slowly
USB port
Press ID reset button Red Led indicator
blinks faster
PC USB port
4. Recharge the batteries
When the mouse Low Power indicator signals, please recharge the batteries by putting the
mouse in the cradle and connect the USB cable to the USB port of your PC. (Make sure
that you are using rechargeable batteries inside). It takes about 5-6 hours to completely
recharge the batteries.
1
2
3 4
ID links OK!
3. Establish communication between the mouse and receiver
A. Auto-link mode:
The mouse has auto-link function itself.
B. Manual mode:
a. Please reset the ID when first time use if necessary.(step 1)
b. Press the ID reset button on the receiver cradle, and note the red LED will blink slowly.
(step 2)
c. Press the ID reset button on the bottom of the mouse to set a new ID. (step 3) The red
LED indicator will blink at a faster rate when an identical ID is located.(step 4)
d. Press any button of the mouse to confirm the ID matching. The red LED indicator on the
receiver will blink any time the mouse sends it a signal.
The red LED on the top case of the mouse is a low batteries power indicator. It
indicates that batteries inside the mouse need to be recharged.
If the batteries are used up, you may need to take out the batteries, reinstall again,
and reset the ID to recharge it.
The mouse surface may be warm during charging process. It is a normal phenomenon.
Note
[Mouse] Green LED Light ON - Charge completed
[Mouse] Red LED flashing - Low Battery
[Cradle] Orange LED Light ON - Charging
[Cradle] Green LED Light ON - Charge completed
★ LED Display Status
After Recharging
1. Removing the mouse from the charging cradle when charging is completed.
2. Make sure the communication between the mouse and the receiver is still available after
completing recharging batteries. If not, please refer to the channel setting instruction (refer
to No. 3) in the manual to reset the communication.
5. Operation
4D Scrolling (optional):
a. Vertical Scrolling
Roll wheel up to scroll up; roll wheel down to scroll down.
b. Horizontal (tilt) scrolling (optional)
Push wheel left and hold the scroll left; press wheel rightand hold to scroll
right. Release wheel to stop scrolling function.
a.
b.
(optional)
The tilt scrolling function is only effective under successful installation of the
original mouse driver. The driver is an optional item included in the package
or it can be downloaded from the website of the local brand vendor.
Note
B. Driver Installation
The mouse features plug & play. It is not necessary to install the driver to operate the mouse.
The driver is an optional item included. However if the model purchased is with 4D tilt
function, you may require the mouse software driver to make the tilt scrolling function
effective.