ARRIS 2WMPLRMT RF TV remote User Manual 5100 000233 000 RevA v2
Pace Americas RF TV remote 5100 000233 000 RevA v2
ARRIS >
manual
8.5”
25.5”
8.5”
REMOTE CONTROL PROGRAMMING Using Your TV1 Remote Control on TV1:
8. Press OK to continue.
Because RF signals travel long distances and go through
walls, a neighbor’s remote may control your receiver by
mistake. If this is happening, perform the procedure above
to re-pair your TV2 Remote Control. Each time, one of 256
codes is randomly selected, so the likelihood of interference
with your neighbor is low.
CONFIGURING THE REMOTE CONTROL TO CONTROL
A TELEVISION DEVICE, AUDIO DEVICE, OR BOTH
Each remote control is capable of controlling not only the
receiver, but also your television and optionally another audio
device (i.e., stereo receiver or other media device).
Configuration 1 (television only)
If you use your television to output both video and audio, you
should congure your remote control to control your television
only. In this conguration, pressing VOL +, VOL -, MUTE, and
TV POWER on the remote control will control your television’s
volume up, volume down, mute, and power functions
respectively.
To program your remote control for this conguration:
1. Simultaneously press the SHIFT and NUMBER PAD 1.
Configuration 2 (television and audio device)
If you use your television to output video only and another
audio device (i.e., stereo receiver or other media device) to
output audio, you should congure your remote control to
control both your television and audio device. In this
conguration, pressing TV POWER on the remote control will
control your television’s power function and pressing VOL +,
VOL -, and MUTE will control your audio device’s volume up,
volume down, and mute functions respectively. Additionally,
simultaneously pressing the KEYBOARD SHIFT and TV
POWER will toggle the power of your audio device.
To program your remote control for this conguration:
1. Simultaneously press the SHIFT and NUMBER PAD 2.
PROGRAMMING EACH REMOTE CONTROL TO CONTROL
A TELEVISION
To program your remote control to your television:
1. Turn on the television device using the device’s front
panel or its remote control.
2. Simultaneously press NUMBER PAD 1 and NUMBER
PAD 3 to enter television-programming mode.
3. After 3 seconds, the LED indicator on top of the remote
control will blink twice and stay lit.
4. Find the 3-digit Code Number from Table 1 that
corresponds to your television’s manufacturer.
Many manufacturers have several Code Numbers
associated with them. Start with the rst Code Number.
5. Enter the 3-digit Code Number using the lower keypad
on the remote control. After each digit key press, the
LED indicator will blink.
6. If a valid 3-digit Code Number is entered, the LED
indicator will blink twice and switch off. The remote
control is now programmed with the new Code Number
of the television device.
7. If an invalid 3-digit Code Number is entered, the LED
indicator will give one long blink and switch off.
The previously programmed code is retained.
8. Try turning off the television device by pressing
TV POWER on the remote control. If the television
device does not turn off, go to step 10.
9. Turn the device back on and try VOL +, VOL -, and
MUTE to make sure they work. If the Code Number
works, stop here.
10. If the Code Number does not work, repeat steps 1-9
with the next Code Number in the table.
11. If you cannot nd a code that works, try 000-156 until
the remote control works.
PROGRAMMING EACH REMOTE CONTROL TO CONTROL
AN AUDIO DEVICE (CONFIGURATION 2 ONLY)
To program your remote control to your audio device:
1. Turn on the audio device using the device’s front panel
or its remote control.
2. Simultaneously press NUMBER PAD 1 and NUMBER
PAD 6 to enter audio-programming mode.
3. After 3 seconds, the LED indicator on top of the remote
control will blink twice and stay lit.
4. Find the 3-digit Code Number from Table 2 that
corresponds to your audio device’s manufacturer.
Many manufacturers have several Code Numbers
associated with them. Start with the rst Code Number.
5. Enter the 3-digit Code Number using the lower keypad
on the remote control. After each digit key press, the
LED indicator will blink.
6. If a valid 3-digit Code Number is entered, the LED
indicator will blink twice and switch off. The remote
control is now programmed with the new Code Number
of the audio device.
7. If an invalid 3-digit Code Number is entered, the LED
indicator will give one long blink and switch off. The
previously programmed code is retained.
8. Try turning off the audio device by pressing TV POWER on
the remote control. If the audio device does not turn off,
go to step 10.
9. Turn the device back on and try VOL +, VOL -, and MUTE
to make sure they work. If the Code Number works,
stop here.
10. If the Code Number does not work, repeat steps 1-9
with the next Code Number in the table.
11. If you cannot nd a code that works, try every code
from 000-156 until the remote control works.
A Mark 134
Action 108
Admiral 071 093 099 118
127 130 131
Advent 147
Aiko 079
Aiwa 047
Akai 104 105 123
Amtron 082
Anam 106
Anam National 072 082 110
AOC 073 074 075 104
112 117 134 140
Apex 000 001 015 016
Audiovox 082 108 140 144
Bell & Howell 071 084 118 131
Benq 051
Broksonic 037 038 104 106
118 138 146
Carver 153
CCE 118
Centurion 077
Citek 143
Citizen 073 075 079 082
089 092 138
Classic 104 123
Colortyme 073 075 105 116
118 125 127 139
Contec Cony 106 108
Contec/Cony 078 082
Craig 082 106 108 114
119 125 138
Crosley 118 153
Crown 082 087 119 134
CTX 056
Curtis 104
Curtis Mathes 070 073 075 084
089 092 102 105
112 117 118 125
127 134 135 148
153 155
Daewoo 073 074 075 079
092 104 110 112
117 134 135 140
144
Dalian 006 014 016 136
Daytron 073 075 092 114
117 134 140
Denon 145
Dimensia 070 155
Dumont 073 091
Electrohome 072 073 075 080
104 105 117 134
Emerson 073 075 078 081
082 083 084 092
096 103 104 105
106 108 114 117
119 125 129 130
131 134 139 144
146
Envision 073 075 105 112
Fisher 052 084 115 123
124 133
Fujitsu 083
Funai 082 083 106 108
GE 009 066 067 070
072 073 075 085
086 104 106 110
113 116 117 125
126 127 128 134
144 149 154 155
Goldstar 073 074 075 078
080 092 104 105
109 112 117 134
135 137
Gradiente 105 122 123
Granada 134
Grundig 126 134
Hallmark 073 075 104
Harman Kardon 104
Hisense 151
Hitachi 041 042 058 059
068 073 075 078
101 117 126 127
131 134 140 145
Innity 087 153
Inovision 009 076 144
Janeil 094
JBL 087 153
JC Penney 070 073 074 075
085 086 089 092
104 112 113 125
126 127 134 149
155
Jensen 073 075 105 129
JVC 007 010 012 031
036 078 086 103
122 125 126
Kawasho 073 075 112 123
Kenwood 073 075 080 104
105 112 116 139
Kloss 082 094 110
Novabeam
KTV 082 092 106 108
112 117 134
LG 074
Lloyds 137 139
Loewe 087
Logik 071 142
Luxman 073 075
LXI 070 075 084 087
104 118 127 149
153 155
Magnasonic 104 105 131 140
Magnavox 017 073 075 080
087 104 105 112
114 117 118 119
126 131 153
Majestic 071
Marantz 073 075 087 105
112 116 117 118
153
Megatron 075
Memorex 071 074 075 084
104
MGA 073 074 075 080
105
Mitsubishi 049 073 074 075
080 104 105 112
117 134
Montgomery 071
Ward
Motorola 072 093
MTC 073 074 075 089
104 112 118 125
140
Multitech 082
Multivision 088
NAD 075 101
NEC 072 073 074 075
105 112 116 117
139
Nikko 075 079 140
Noblex 137
Onwa 082 106
Optimus 101
Optonica 093
Orion 096 130 146
Panasonic 003 011 023 032
033 034 072 086
087 108 110 113
126 127 128 140
Philco 072 073 074 075
078 080 087 104
105 112 114 117
118 119 131 140
145 153
Philips 004 005 029 030
072 073 078 080
087 118 153
Pioneer 045 073 075 101
110 111 116 117
Portland 073 074 075 079
092 104 112 117
134 135
Price Club 089
Prima 135 142 152
Prism 086
Proscan 070 127 149 154
155
Proton 073 075 078 104
105 117 119 127
134 138
Quasar 053 063 064 072
086 110 114 126
128
Radio Shack 084 106 108 110
118 120 124 127
132 134 155
Radio Shack/ 070 073 075 078
Realistic 082 084 092
RCA 008 060 065 070
072 073 074 075
080 102 106 110
111 113 116 117
125 127 128 134
148 149 154 155
Realistic 084 155
Replay 156
Runco 091
Sampo 039 073 075 092
110 112 117
Samsung 043 048 054 057
062 073 074 075
078 080 089 092
097 104 112 117
118 125 131 134
139
Sansui 022 096 120
Sanyo 073 084 115 124
Sasho 020 036
Scott 073 075 078 082
083 106 108 117
130 134
Sears 070 073 075 080
083 084 095 104
106 115 118 124
127 133 134 149
153 155
Sharp 013 028 035 073
075 078 092 093
120 131 132 134
139 141
Signature 071
Signature 2000 115 132
Sony 002 018 026 098
100 121 123 134
Soundesign 073 075 082 083
104 106 117 119
129
Starlite 082
Supre-Macy 094
Sylvania 044 046 069 073
075 080 087 104
105 112 114 117
118 119 140 153
Symphonic 081 082 095 108
Tandy 093 118
Tatung 072 110 138
Technics 086 126 128
Techwood 073 075 086 105
118
Teknika 071 073 074 075
078 079 082 083
089 092 106 108
112 116 117 119
134 137 140 143
153
Telecaption 090
Telefunken 139
Toshiba 006 019 021 024
025 027 084 089
090 115 125 133
150
ToteVision 092 127
Ultra 140
Uniden 121
Universal 085
Video Concepts 106
Vidikron 118 153
Vistek 040 048
Wards 070 071 073 074
075 080 081 083
085 087 104 112
113 117 118 119
120 125 127 131
153 155
Walmart 055 051 107
White 104 112 134 135
Westinghouse 140 144
Yamaha 073 074 075 080
112 119 139 140
Zenith 050 055 061 071
073 091 109 121
140
TABLE 1 Television Device Code Numbers
Amplier
Kenwood 048
Pioneer 041
RCA 069
Yamaha 001 053
Audio Cassette
Aiwa 039
Curtis Mathes 041
Denon 052
Fisher 042 049
GE 070
Kenwood 048 056
NAD 040
Nakamichi 054
Onkyo 055
Optimus 041 047
Panasonic 015 050
Philips 013
Pioneer 018 041 045
Proscan 070
Quasar 050
Radio Shack 047
RCA 070
Sansui 057
Sanyo 044
Sherwood 047
Sony 043
Technics 050
Yamaha 053
Audio System
Aiwa 039
Carver 051
Curtis Mathes 041
Denon 052
Harman Kardon 046
Jerrold 066 068
Kenwood 048 056
Nakamichi 054
Panasonic 015 016
Philips 013 014
Pioneer 018 041
RCA & 031 032 033
Dimensia 034 035
Sansui 057
Sanyo 044
Scientic Atlanta 067
Sony 043
Starcom 066
Technics 050
Yamaha 053
Digital Audio Tape
Sony 043
HTIB
BOSE 010
Philips 022
Toshiba 025
Phono
Kenwood 048
Pioneer 041
Sony 043
Yamaha 053
Receiver/Amplier
Yamaha 001
Receiver/Tuner
Aiwa 017 036 039
BOSE 010
Cambridge 011 028
Carver 051
Curtis Mathes 041
Denon 006 026 027
052
Fisher 042 044 049
Gradiente 062
Harman Kardon 008 038 046
Hitachi 059
Ibiza 006 037
JBL 038
Jensen 061
JVC 007 030
Kenwood 005 028 048
056
Luxman 064
Marantz 019
McIntosh 058
NAD 040
Nakamichi 054
NEC 040
Nikko 063
Onkyo 003 021 055
Optimus 041 047
Panasonic 009 012 016
029 050
Philips 014
Pioneer 004 023 041
045
Quasar 050
Radio Shack 047
RCA 071 072
Sansui 057
Sanyo 042 044
Sharp 060
Sherwood 047
Sony 000 024 043
Technics 002 020 050
Toshiba 025
Yamaha 048 053
Zenith 065
Philips 022
TV/VCR/Tuner Combo
Panasonic 012
TABLE 2 Audio Device Code Numbers
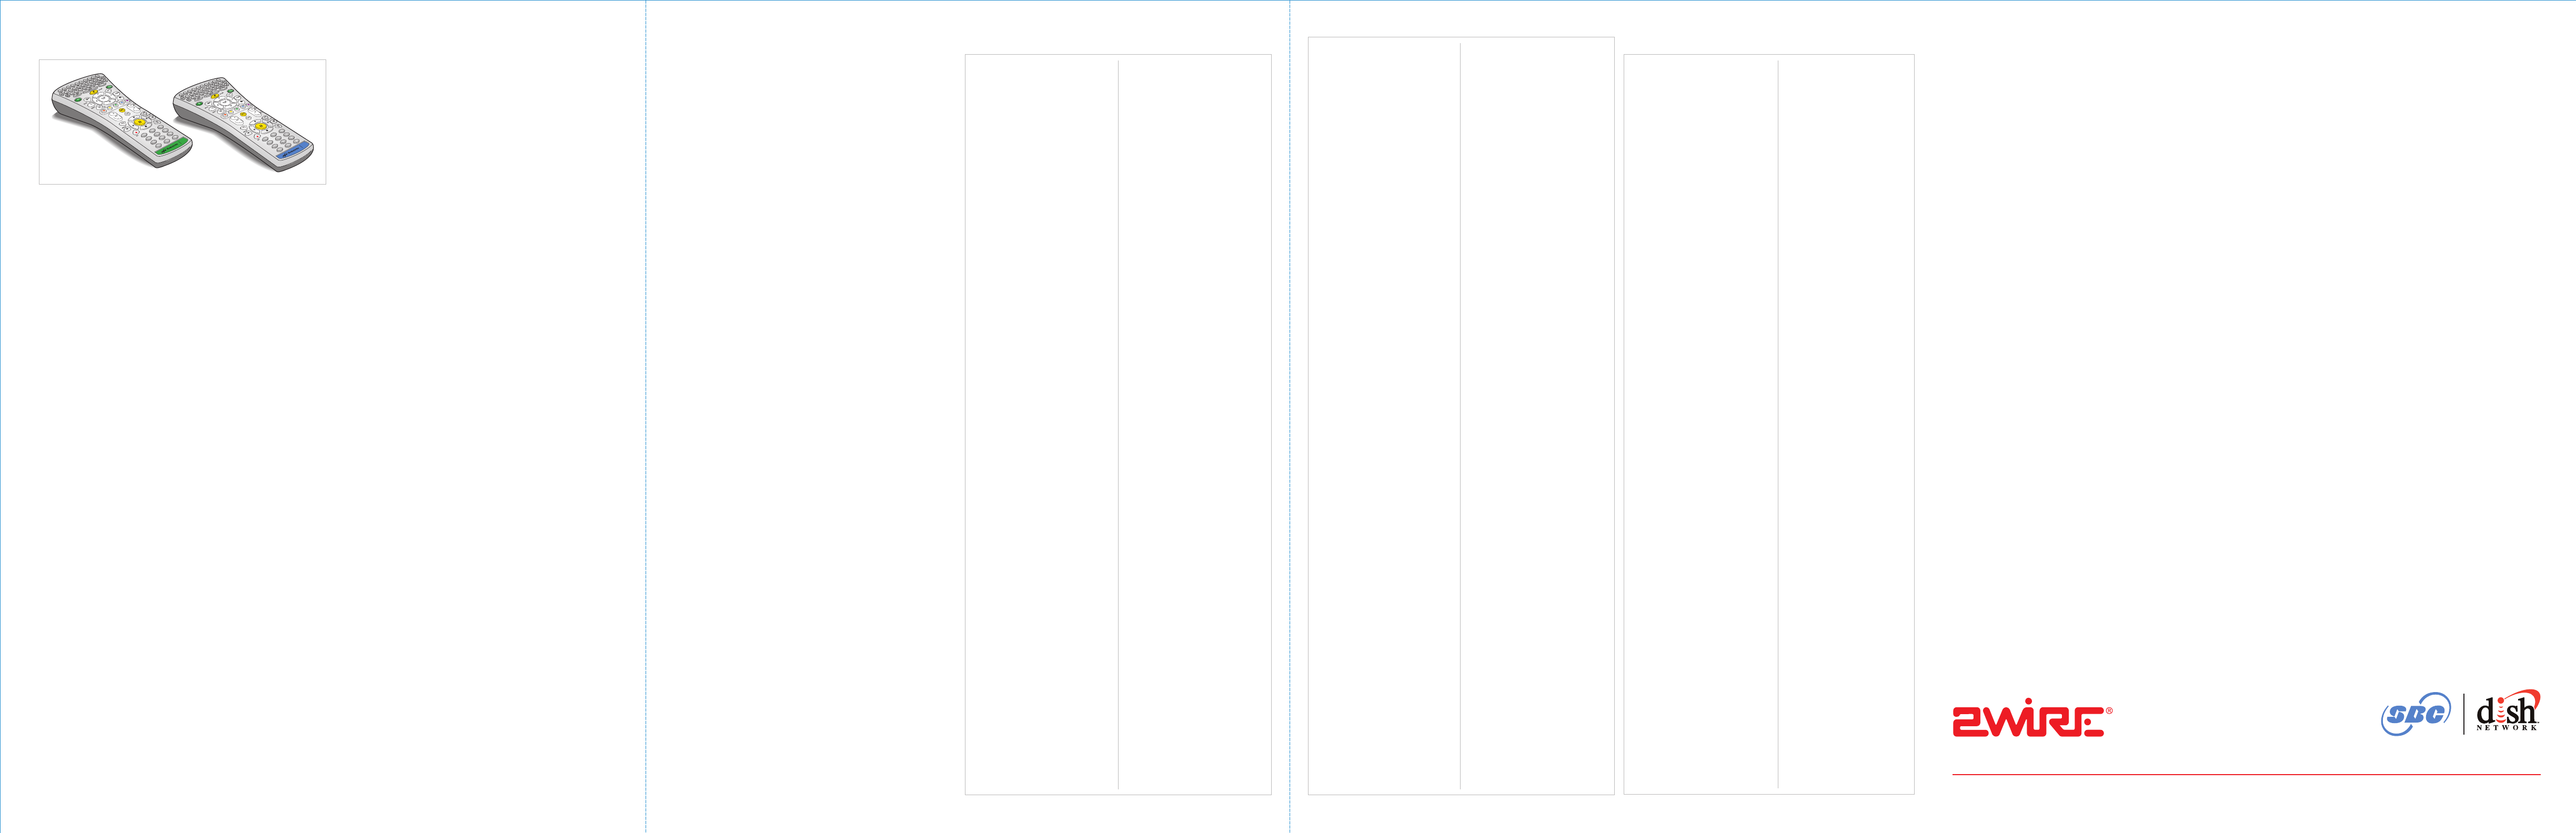
DISTINGUISHING REMOTE CONTROL 1
AND REMOTE CONTROL 2
The receiver is capable of supporting two simultaneous users
and is therefore supplied with two distinct remote controls.
TV1 Remote Control (Green)
The TV1 Remote Control has a green label with a number “1”
and will control the nearby television (TV1), which is typically
located where the RECEIVER resides. This remote control
uses infra-red (IR) signals to control the receiver and your TV1
on-screen experience, and requires unobstructed, line-of-sight
use with the receiver.
TV2 Remote Control (Blue)
The TV2 Remote Control has a blue label with a number “2”
and will control a second television (TV2), which is connected
via coaxial cable to the receiver. This remote uses RF signals,
which can travel long distances and go through walls. The TV2
Remote Control is able to control the receiver and your TV2
on-screen experience from anywhere in your home up to 200
feet away.
PAIRING THE TV2 REMOTE CONTROL TO THE RECEIVER
It is necessary to synchronize your TV2 Remote Control with
your receiver before use. You're shown how to do this during
the on-screen setup process, but the instructions are
repeated below.
Using Your TV1 Remote Control:
1. Press HOME on the remote control to display the
home menu.
2. Select System Settings to go to the System Settings
Main Menu.
3. Select Television to go to the TV Settings menu.
4. Select 2nd TV Setup to go to the TV2 menu.
5. Select Pair TV2 Remote. The Congure TV2 Remote
Control window displays.
Using Your TV2 Remote Control on TV1:
6. Simultaneously press and hold NUMBER PAD 3 and
NUMBER PAD 7 until the LED blinks twice and stays on.
Release both keys.
7. When complete, the TV2 Remote Control Congured
window displays.
1
2
REGULATORY INFORMATION
Trade Name: MRC3020RF
Responsible Party: 2Wire, Inc.
Address: 1704 Automation Pkwy.
San Jose, CA 95131 408-856-1600
This device complies with Part 15 of the FCC rules. Operation is subject to the following
two conditions: (1) This device may not cause harmful interference, and (2) this device
must acceptn ay interference received, includingin terference that may cause undesired
operation.
You are cautioned that any changes or modications not expressly approved in this
manual could void your authority to operate
this equipment.
1.877.294.7394 www.2Wire.com/homezone
5100-000371-000 Rev A 09/05