ARRIS C61W ARRIS C61W-700 Wireless RVU Client User Manual Manual
ARRIS ARRIS C61W-700 Wireless RVU Client Manual
UserManual.wiki
>
ARRIS
>
C61W User Manual
>
Manual
Contents
1.
Manual
2.
Manual Pt 2
Manual
Navigation menu
Upload a User Manual
Namespaces
Wiki Guide
HTML
PDF
Info
Views
User Manual
Discussion / Help
Navigation


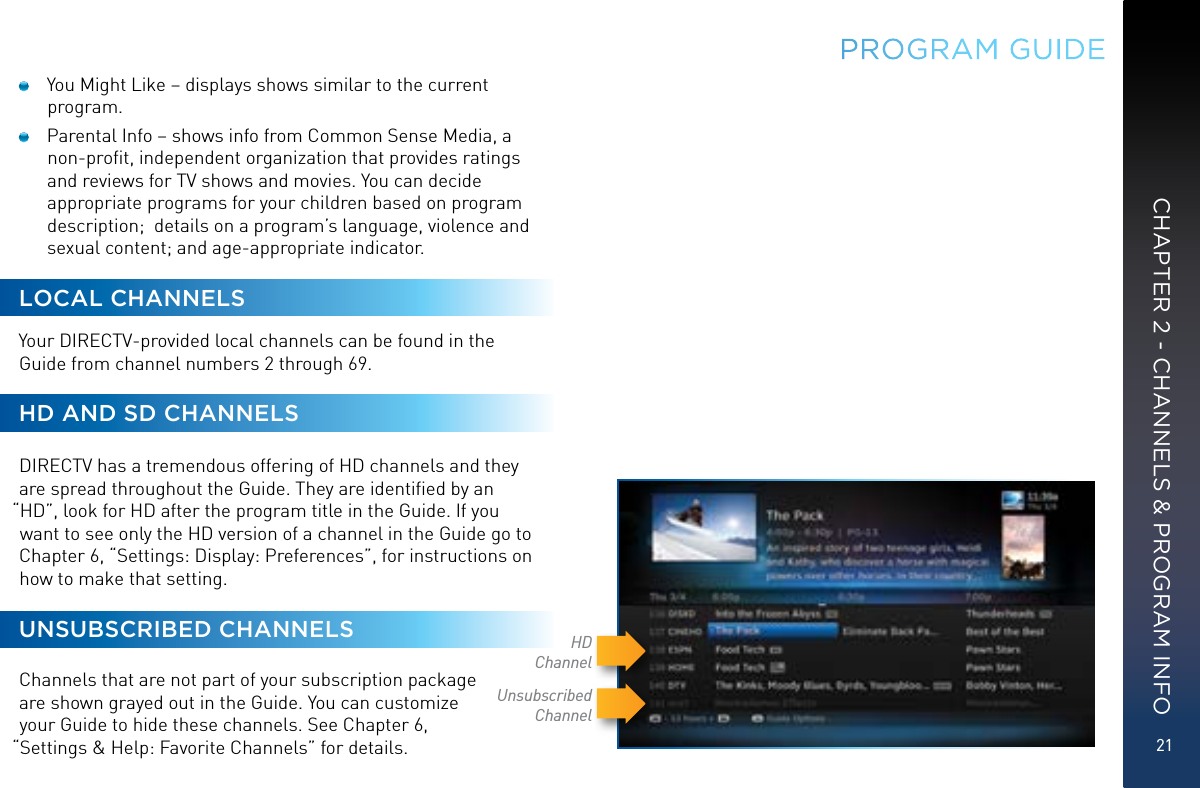
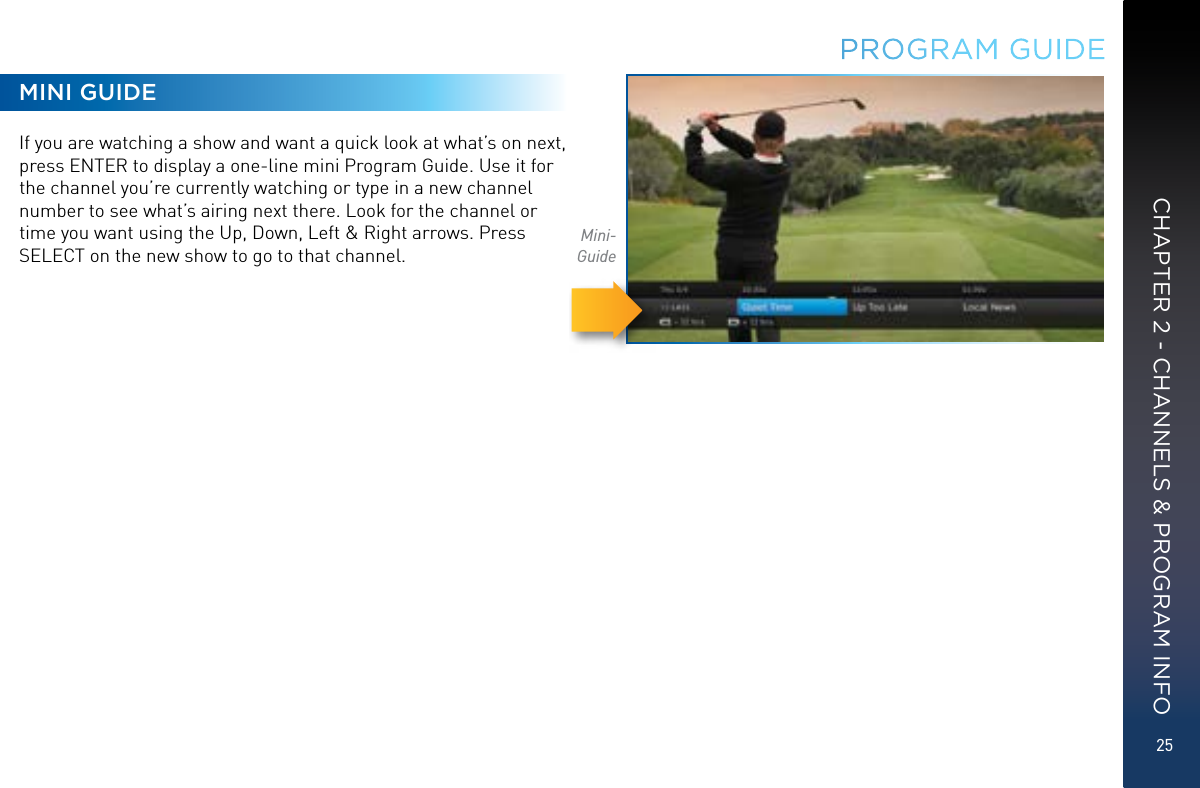
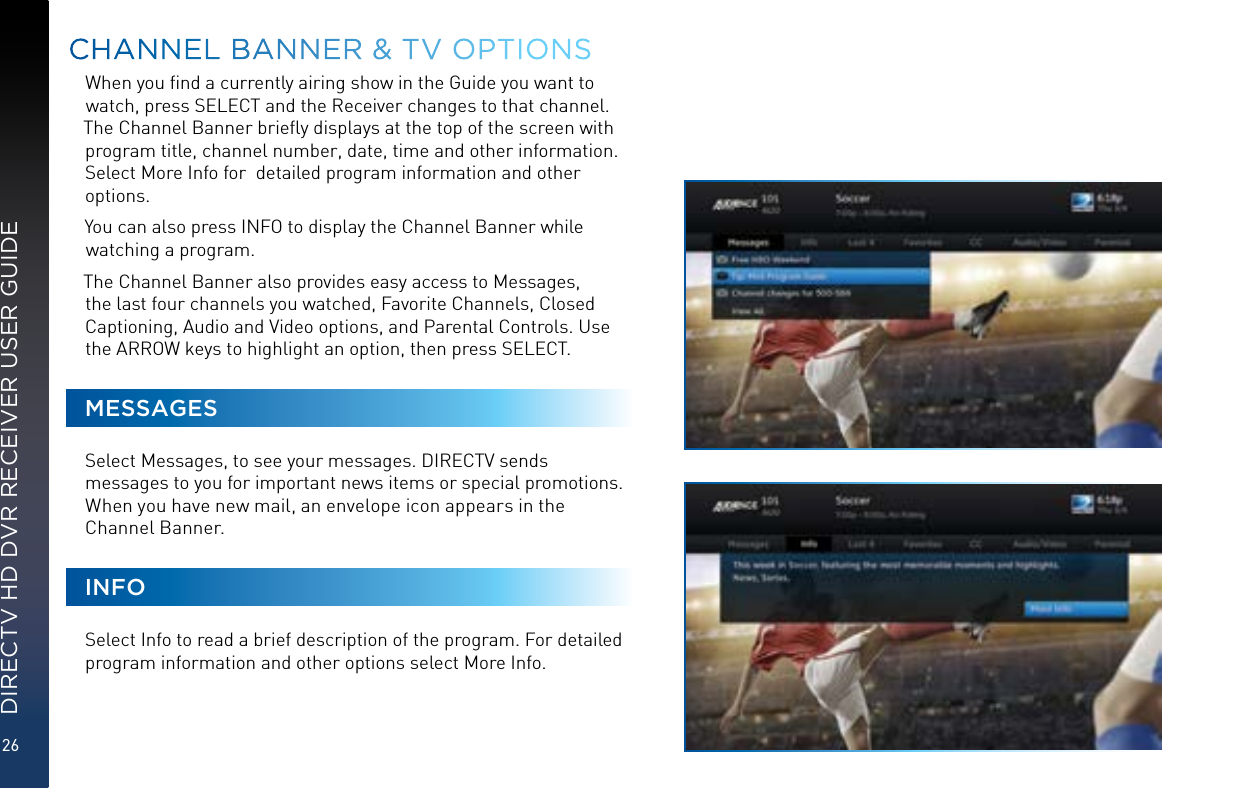
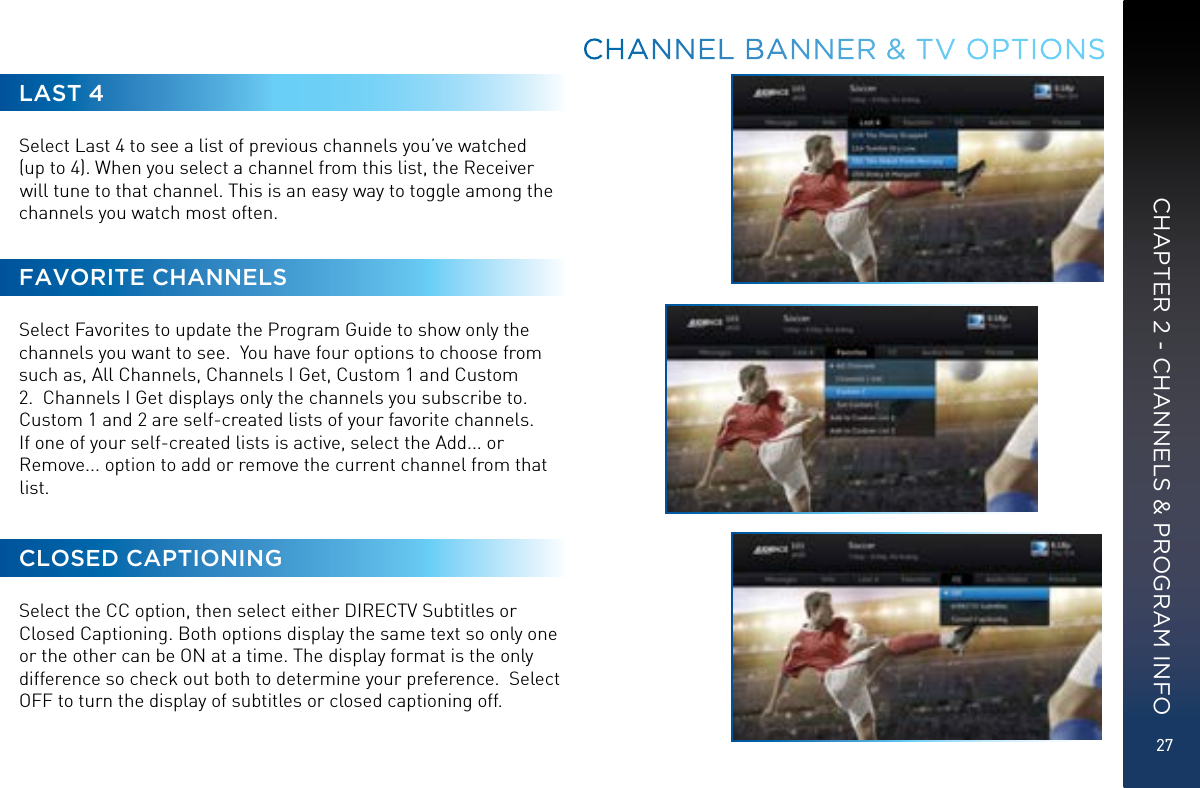
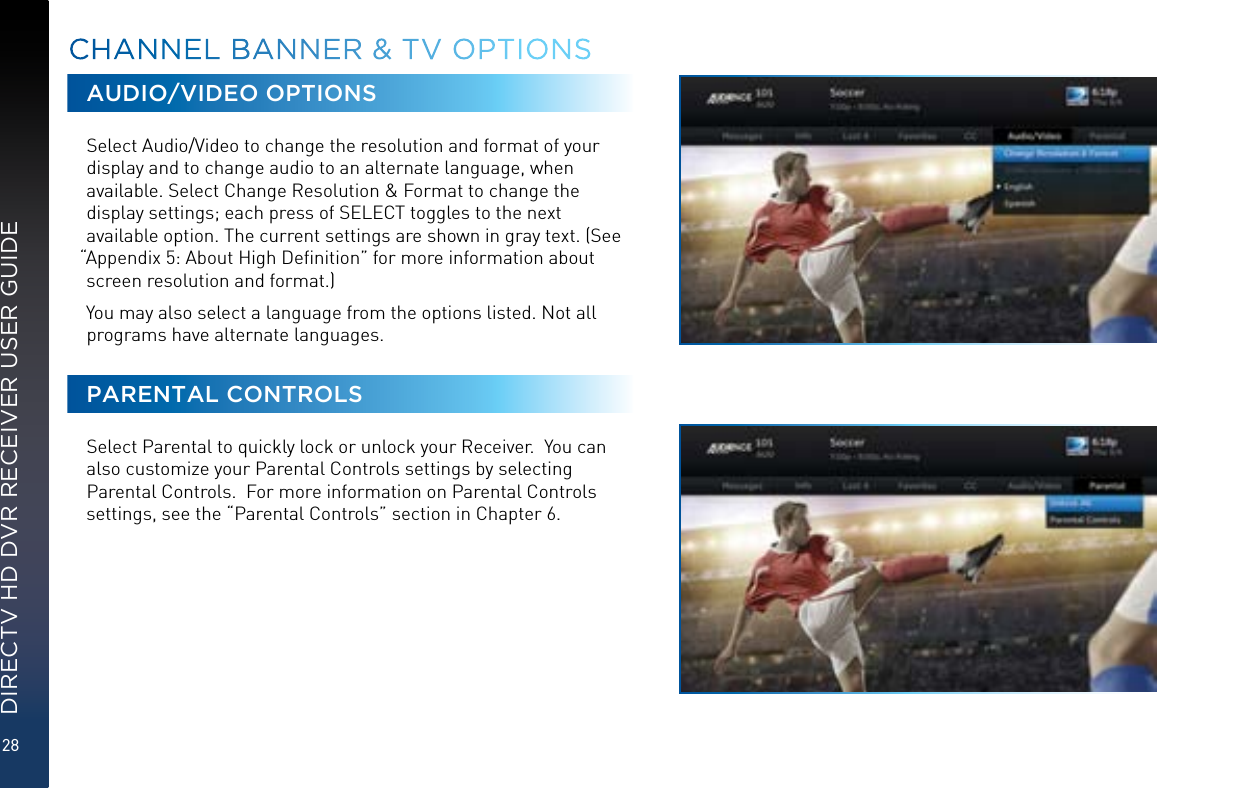
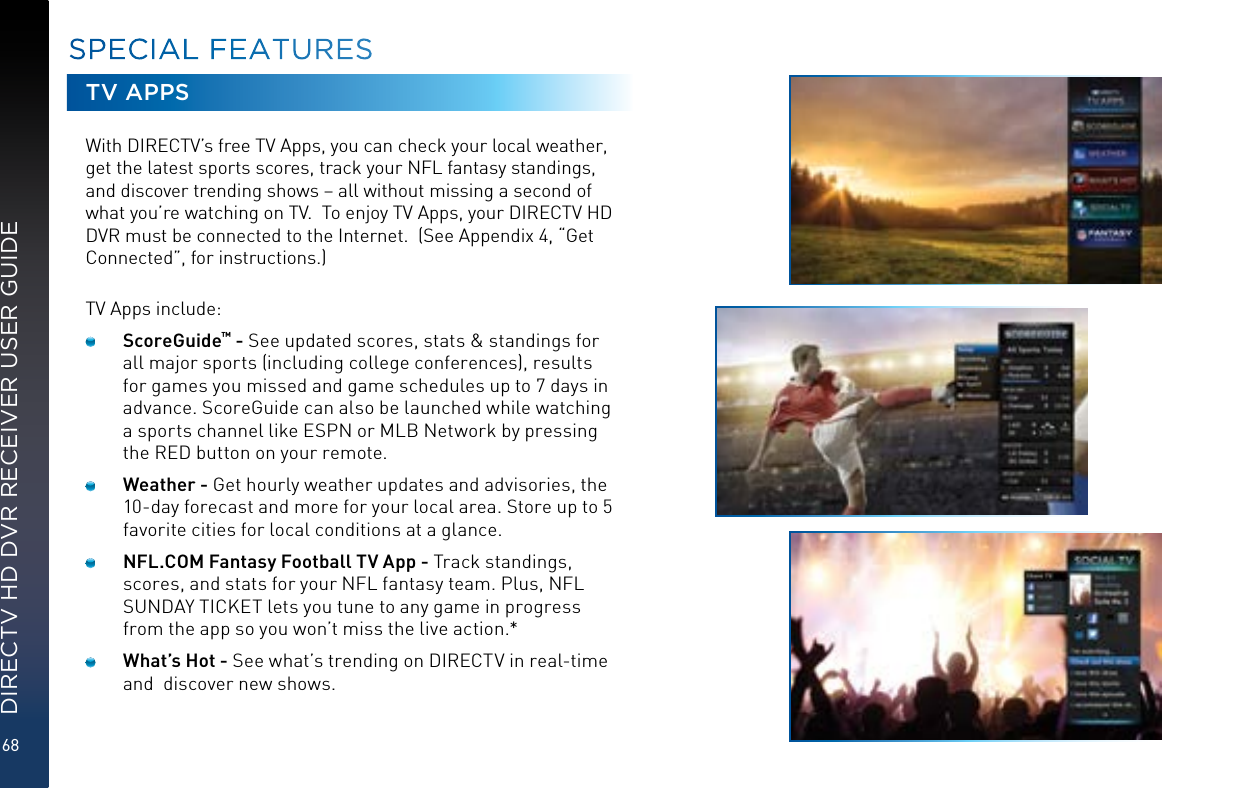
![24DIRECTV HD DVR RECEIVER USER GUIDEPROGRAM GUIDEGUIDE OPTIONSFrom the Program Guide, press the DASH key [—] to display the Guide Options menu.Sort programs by category: Select Sort programs by category, then select a category to see a list of shows in chronological order that match your sort criteria. Jump to a date & time: Select Jump to a date & time to quickly go to a future date and time in the Guide.Change favorites list: By default, your Program Guide displays all channels offered by DIRECTV, some of which may not be in your programming package. Change favorites list allows you to toggle the channels displayed in your Guide among the following: All Channels, Channels I Get (channels you subscribe to) or a custom list of channels you have defined. The Edit Settings option allows you to modify the channels in your custom list. See Chapter 6, “Settings & Help: Favorite Channels” for details.Pay Per View: Select Pay Per View then select a program type. The Receiver will search for featured movies, sports or events that are available for “rent” from DIRECTV ’s vast Pay Per View offerings. More programs are available through the Movies, On Demand TV Shows and Adults Only destinations (See Chapter 3.)](https://usermanual.wiki/ARRIS/C61W.Manual/User-Guide-3386574-Page-24.png)