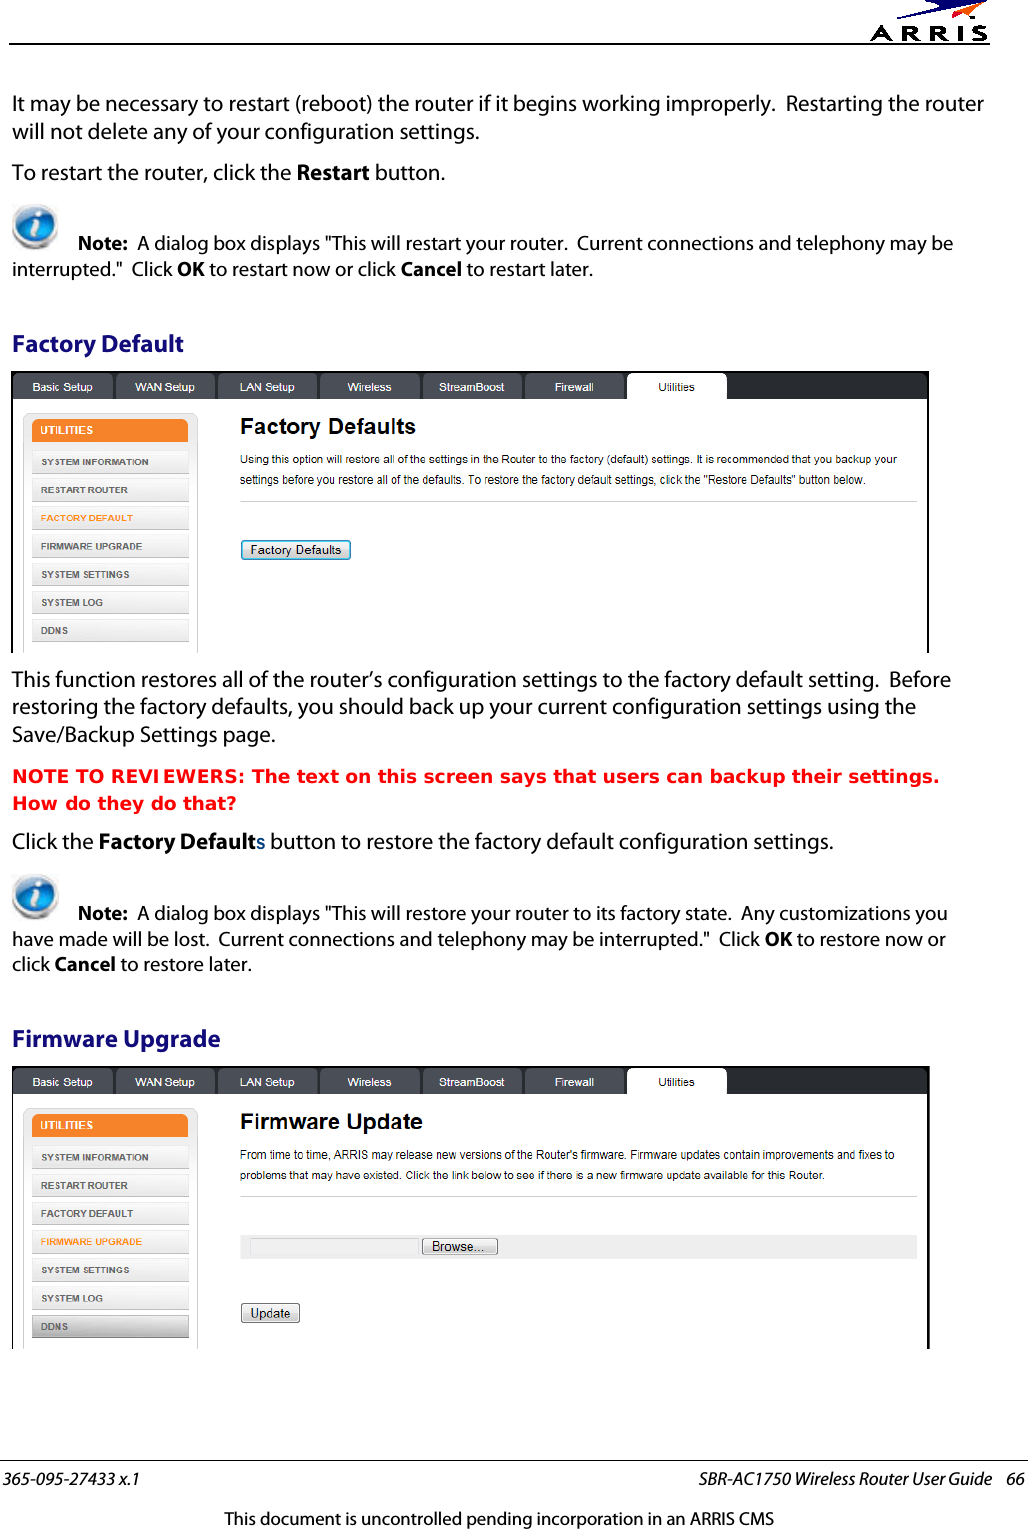
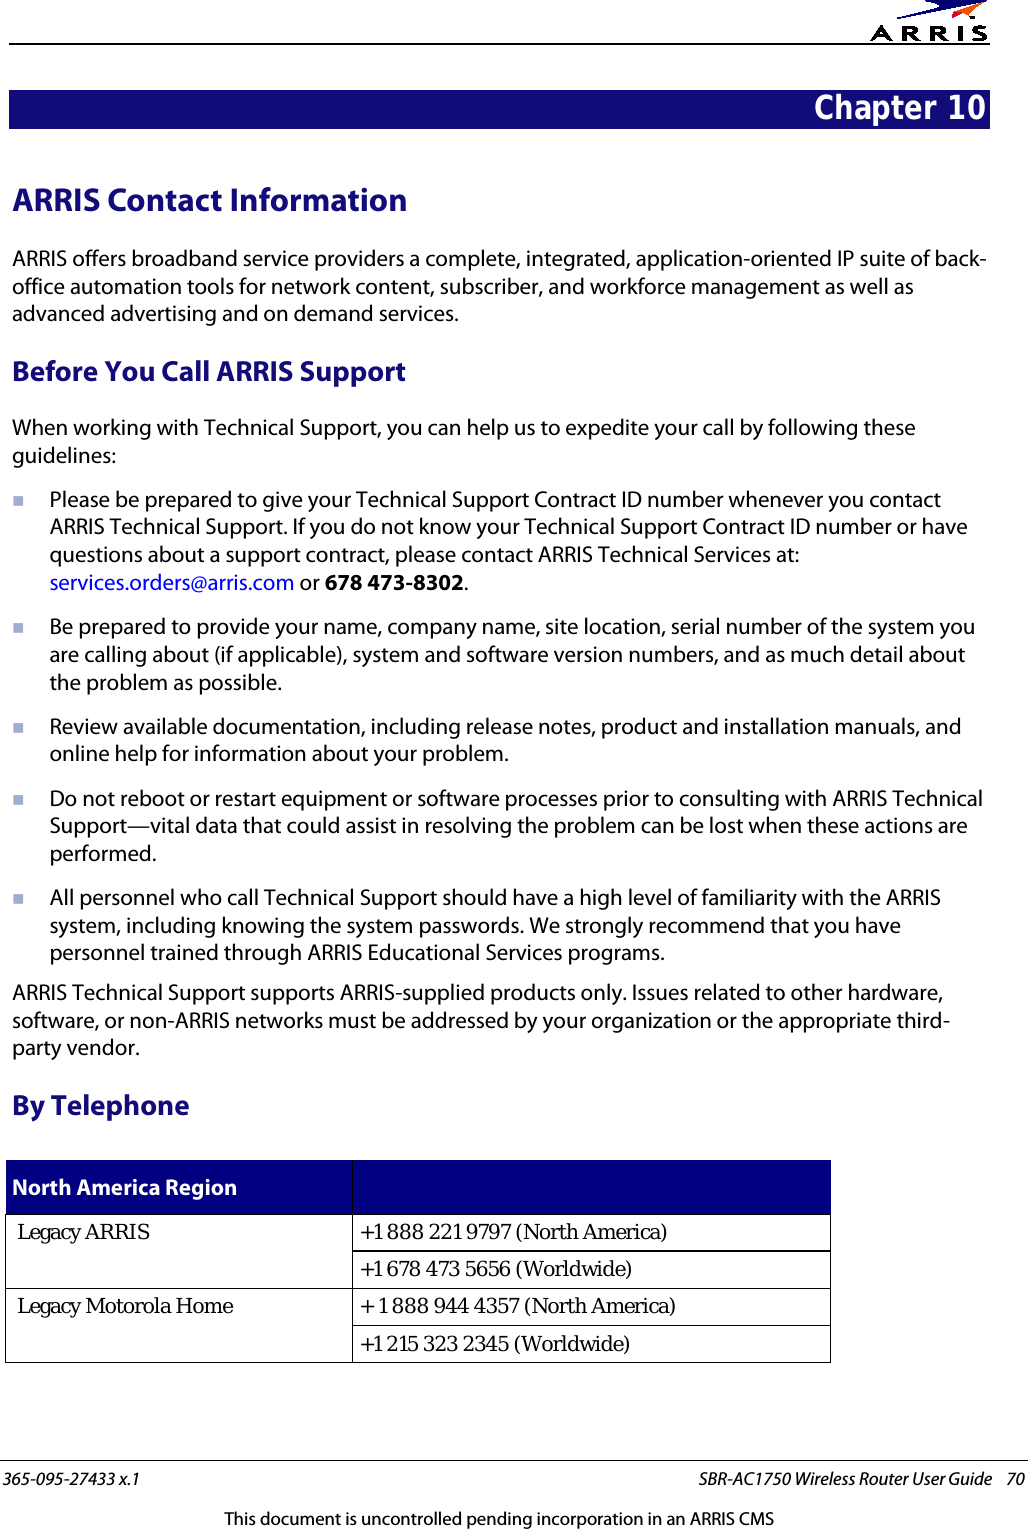
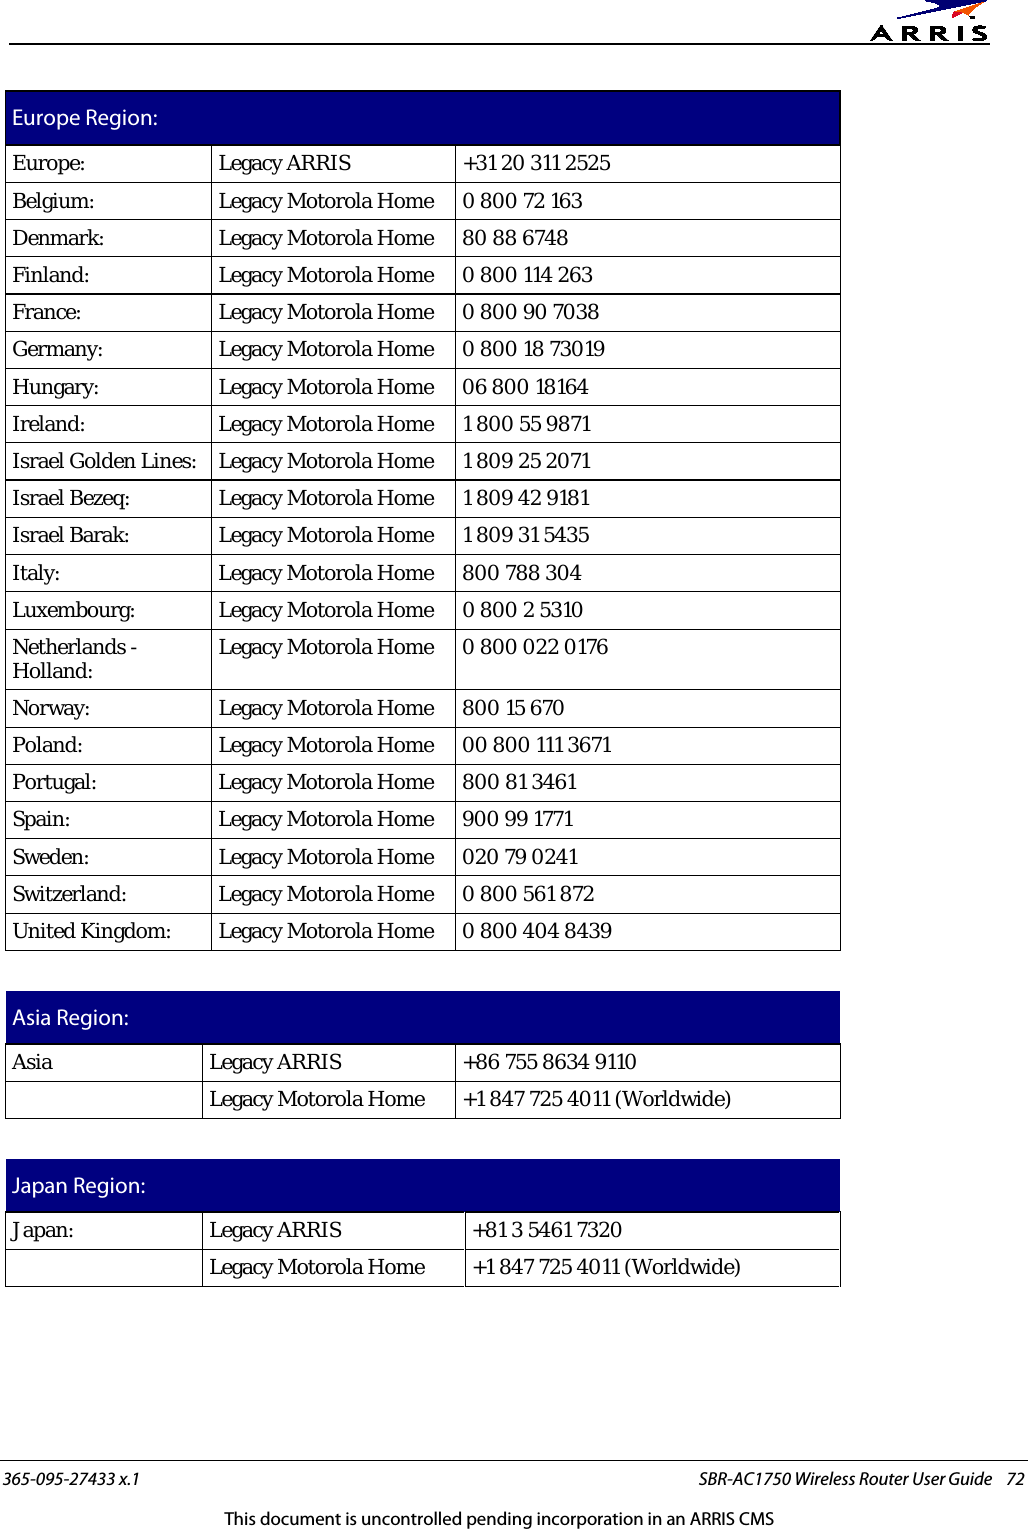
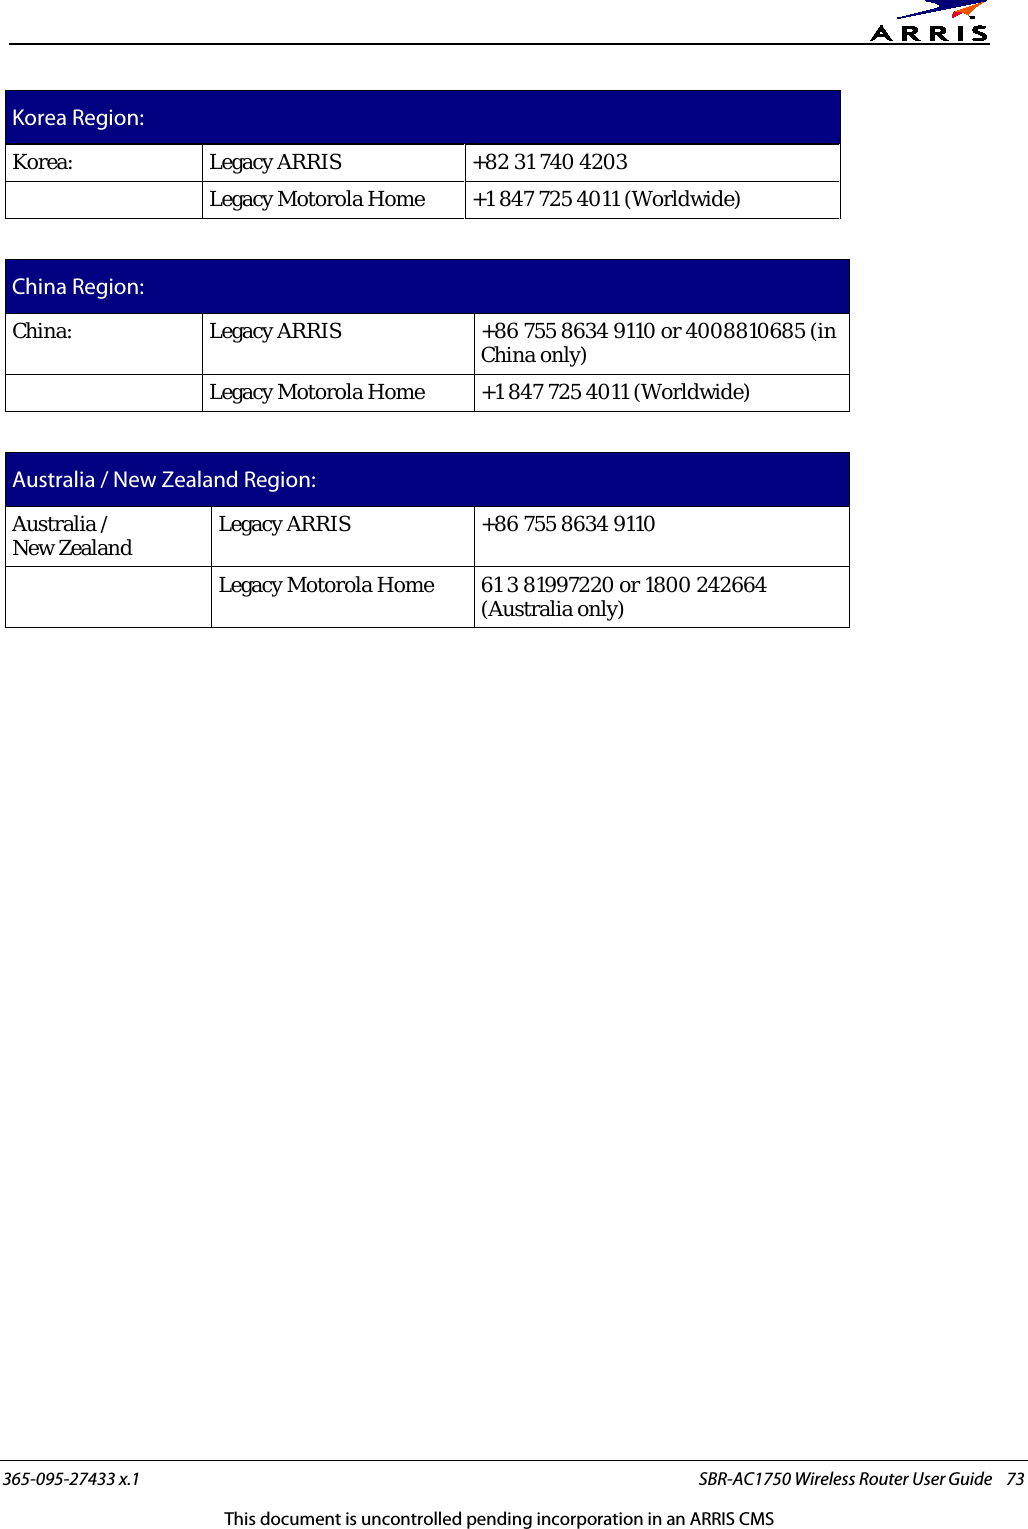
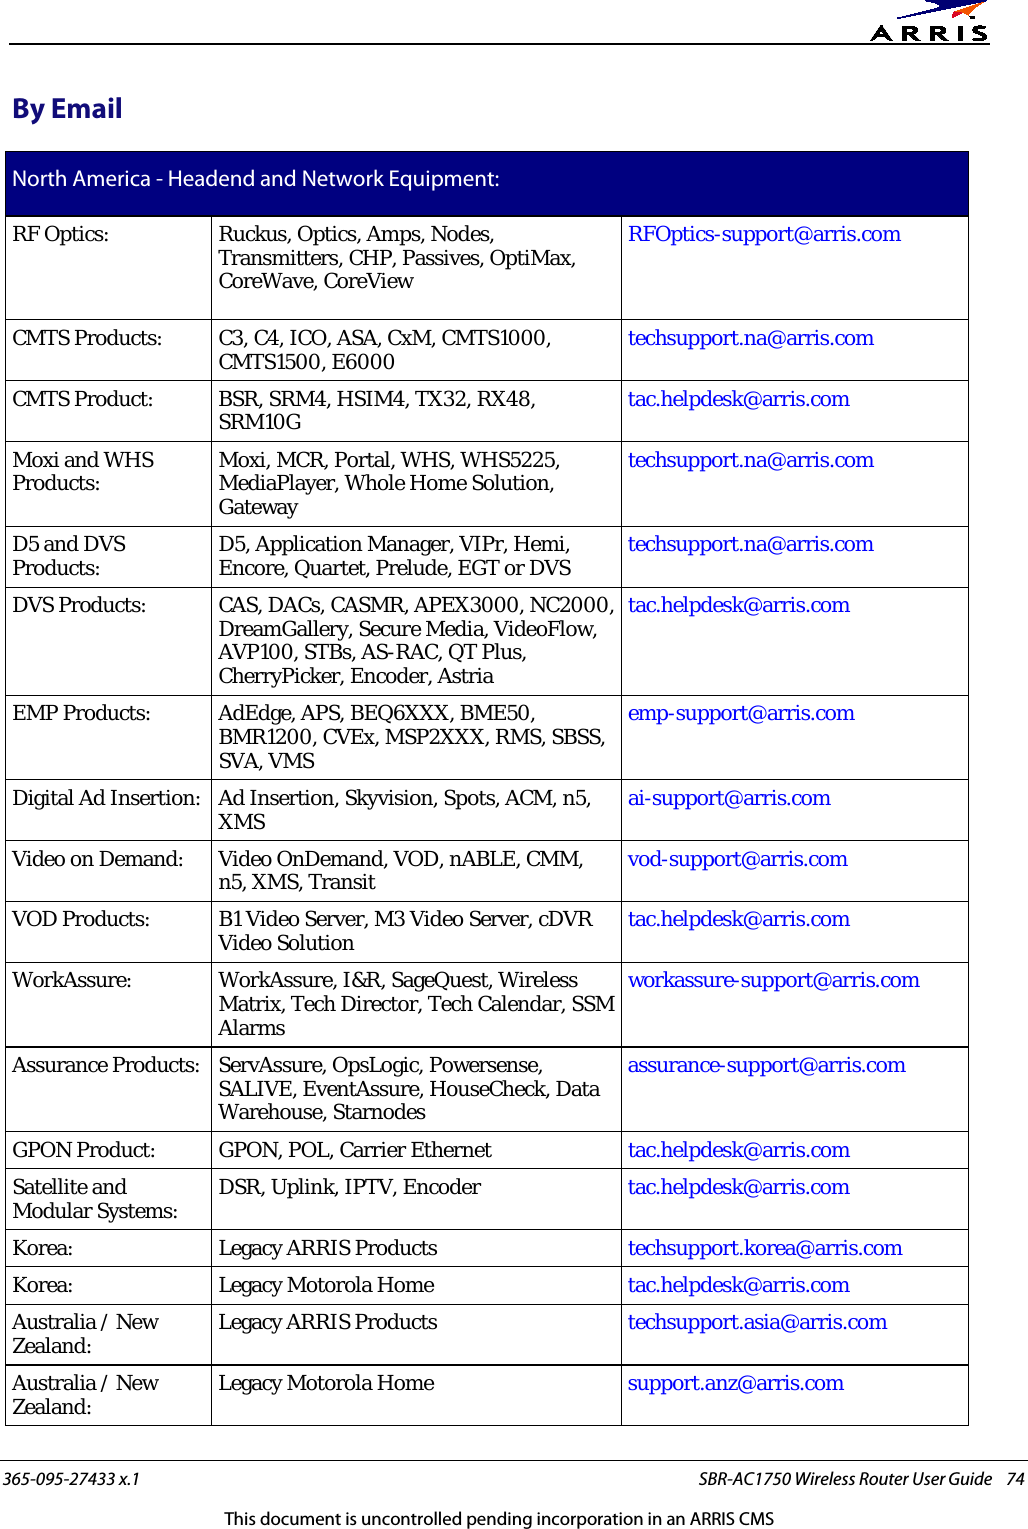
ARRIS SBR1750 802.11ac Wireless Router User Manual User Guide
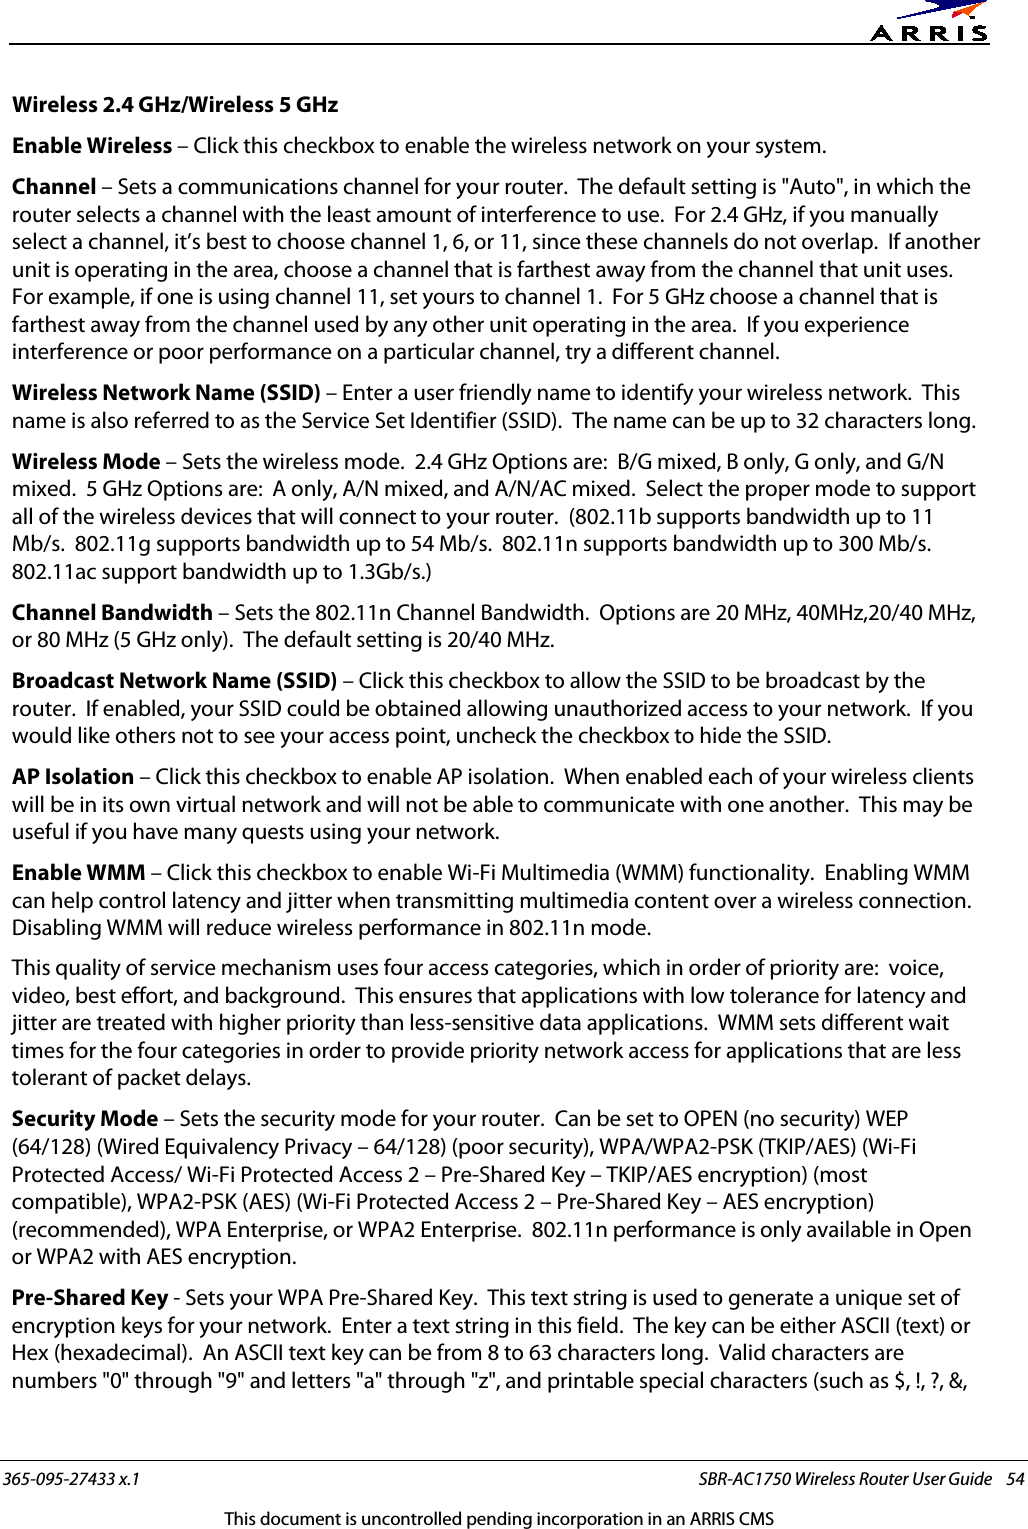
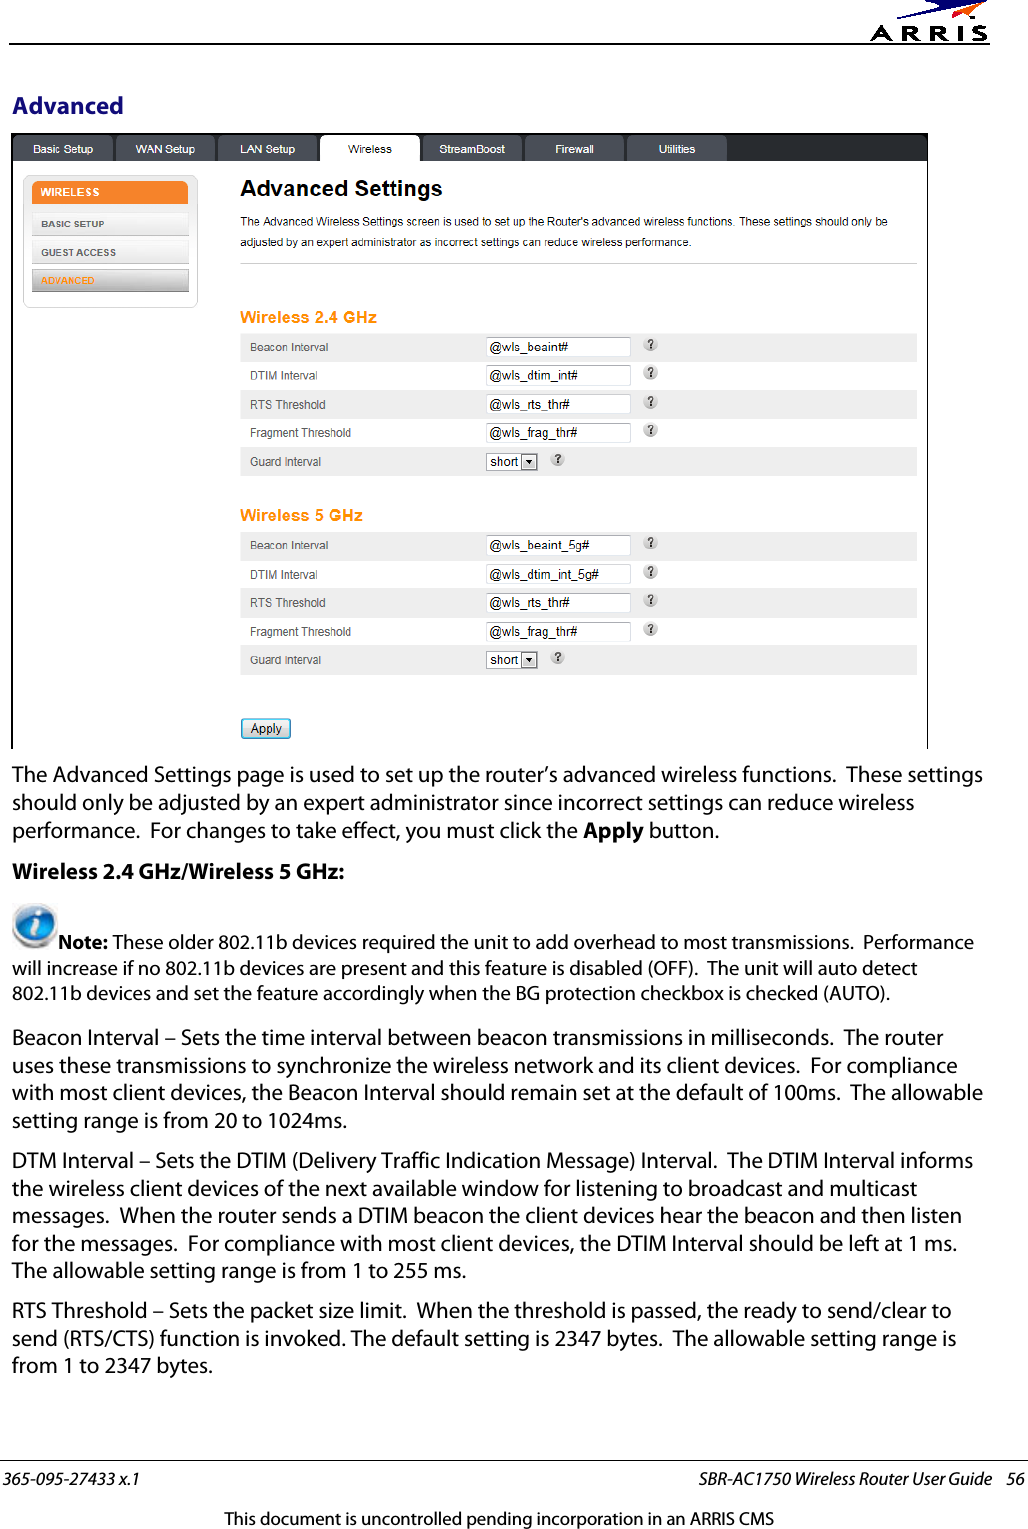
ARRIS Group, Inc. 802.11ac Wireless Router User Guide
ARRIS >
Contents
- 1. Users Manual-1
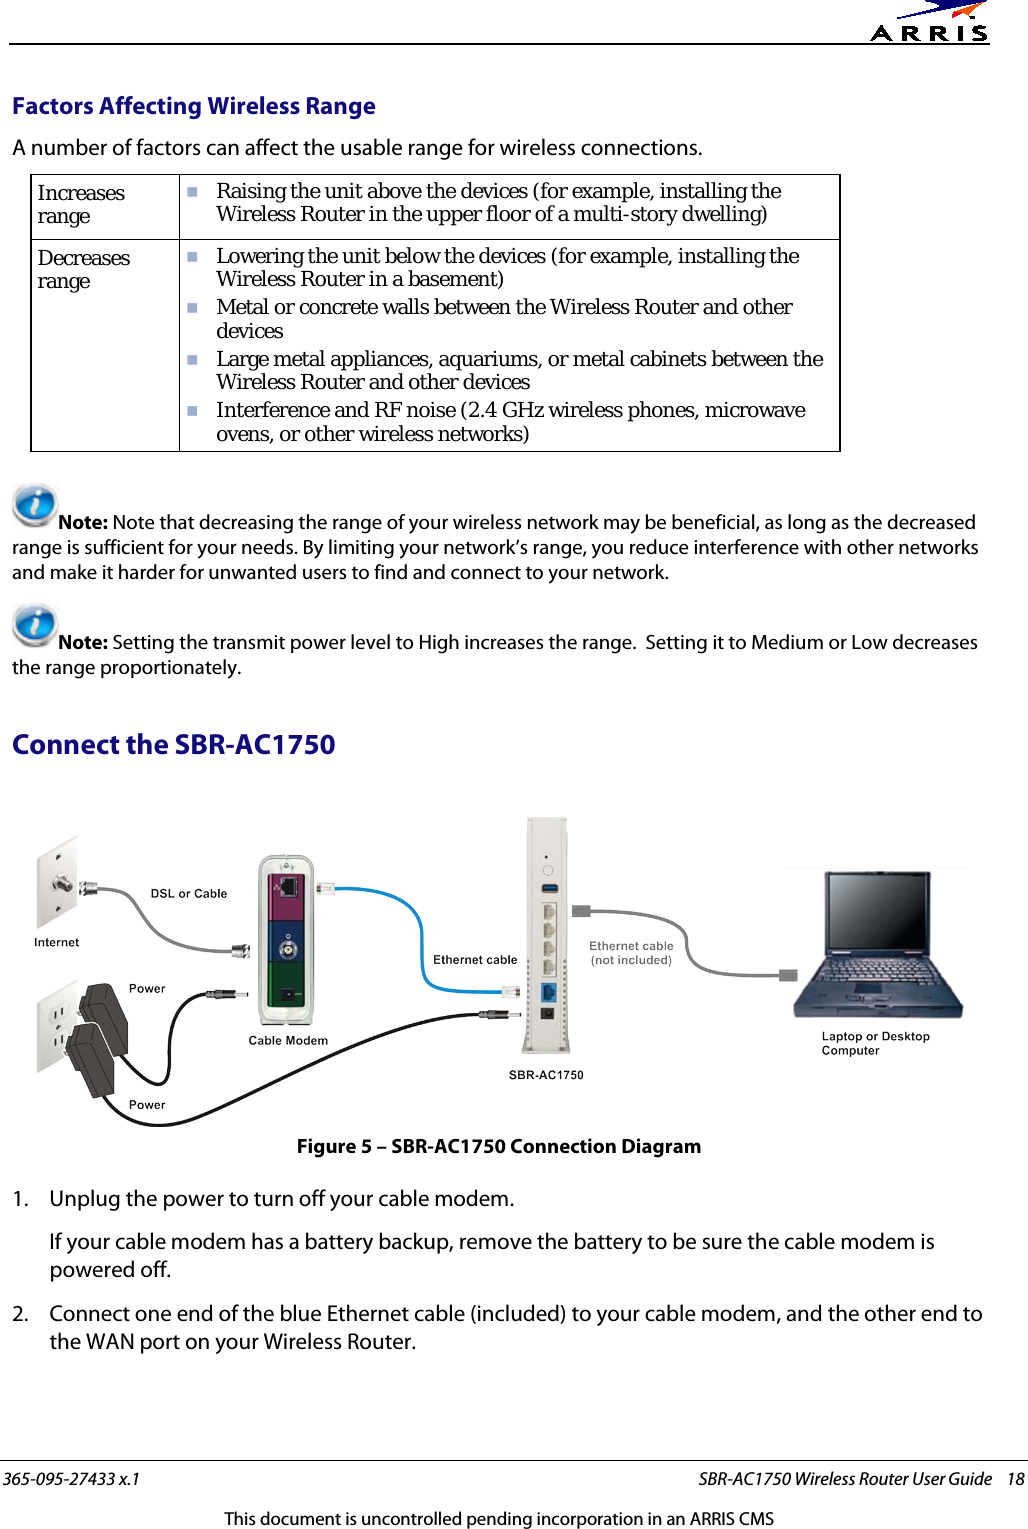
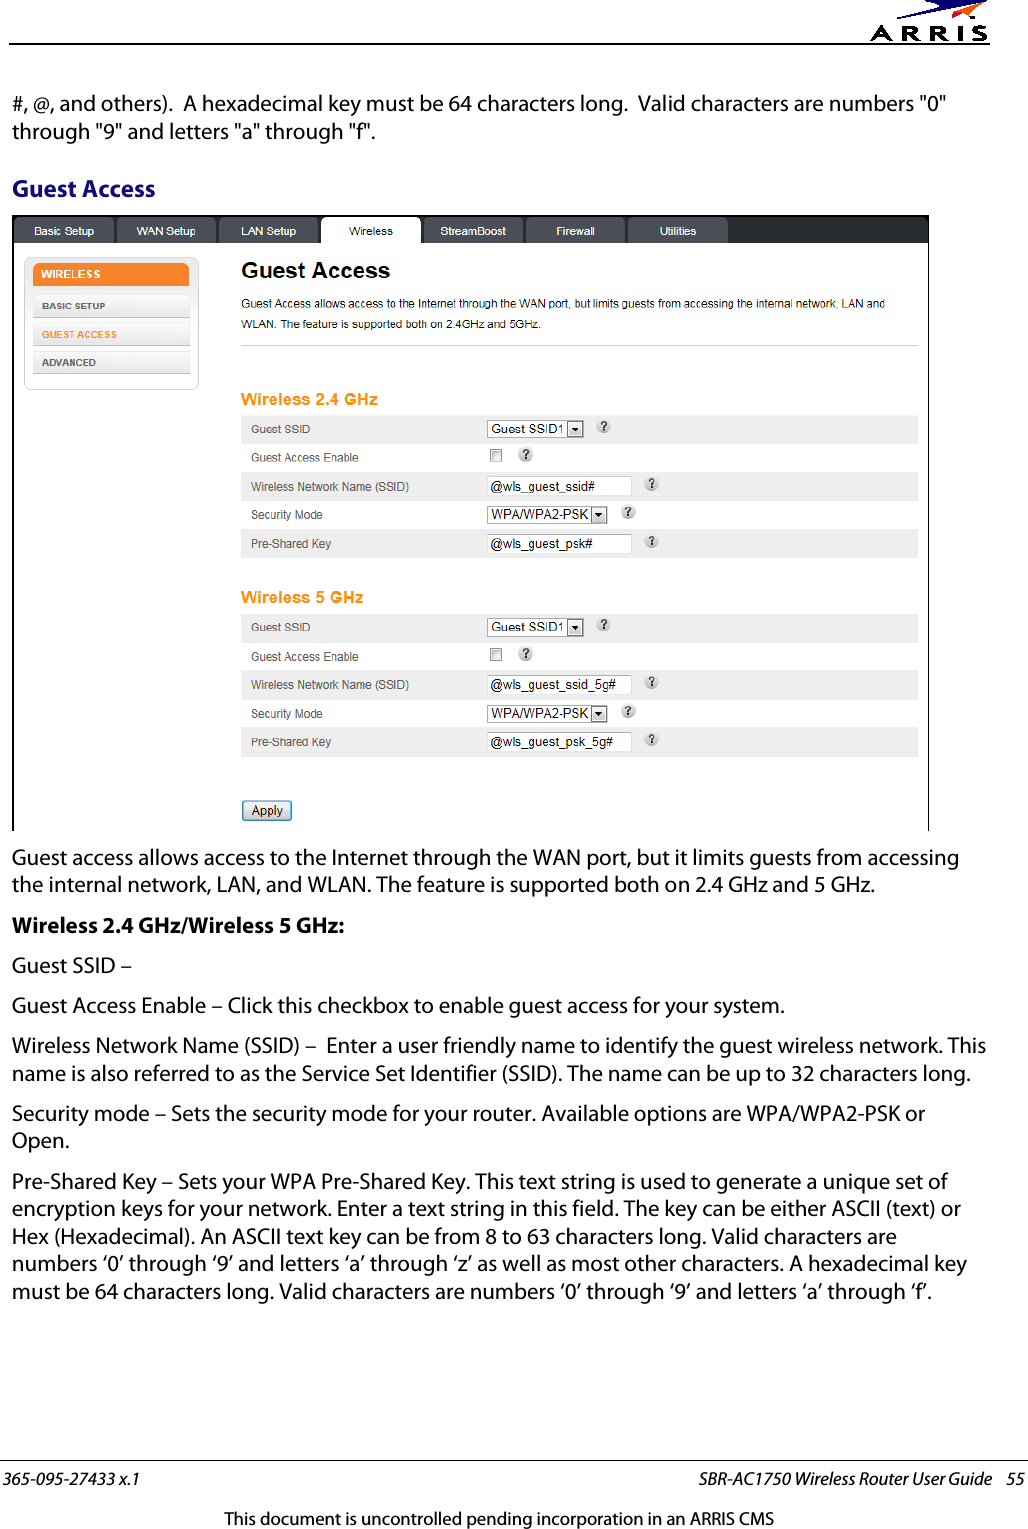
- 2. Users Manual-2
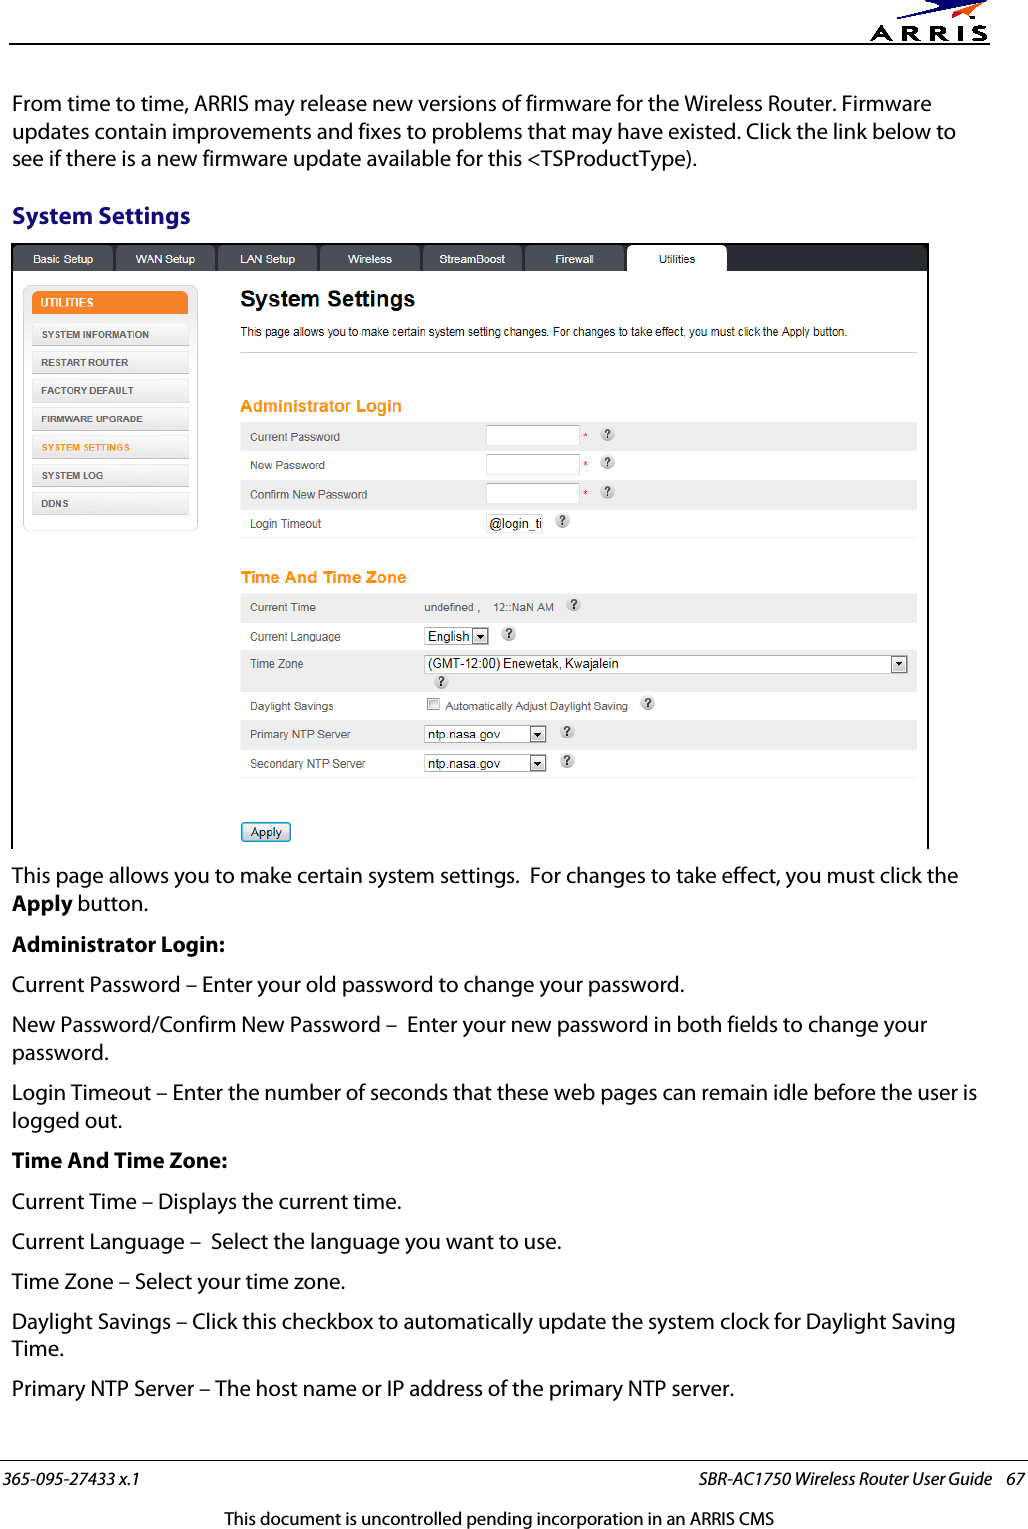
- 3. User Manual-1
- 4. User Manual-3
- 5. User Manual-2
Users Manual-1