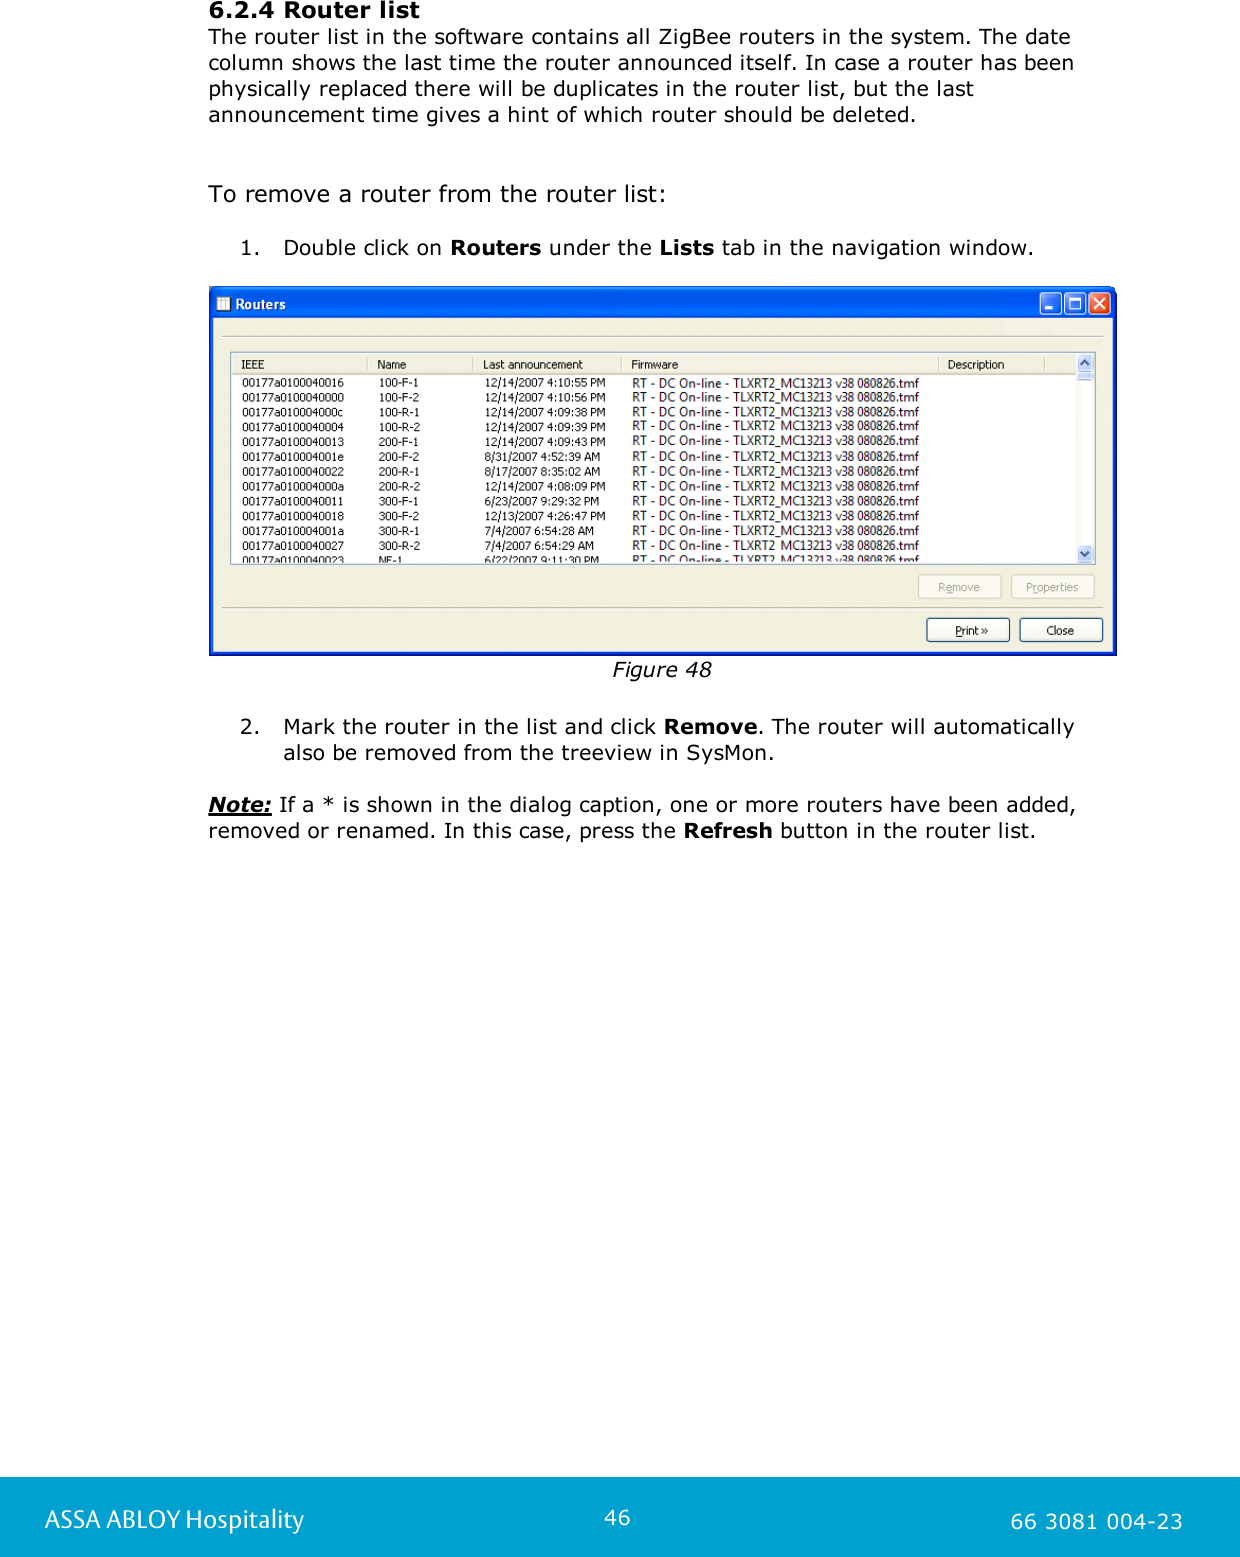
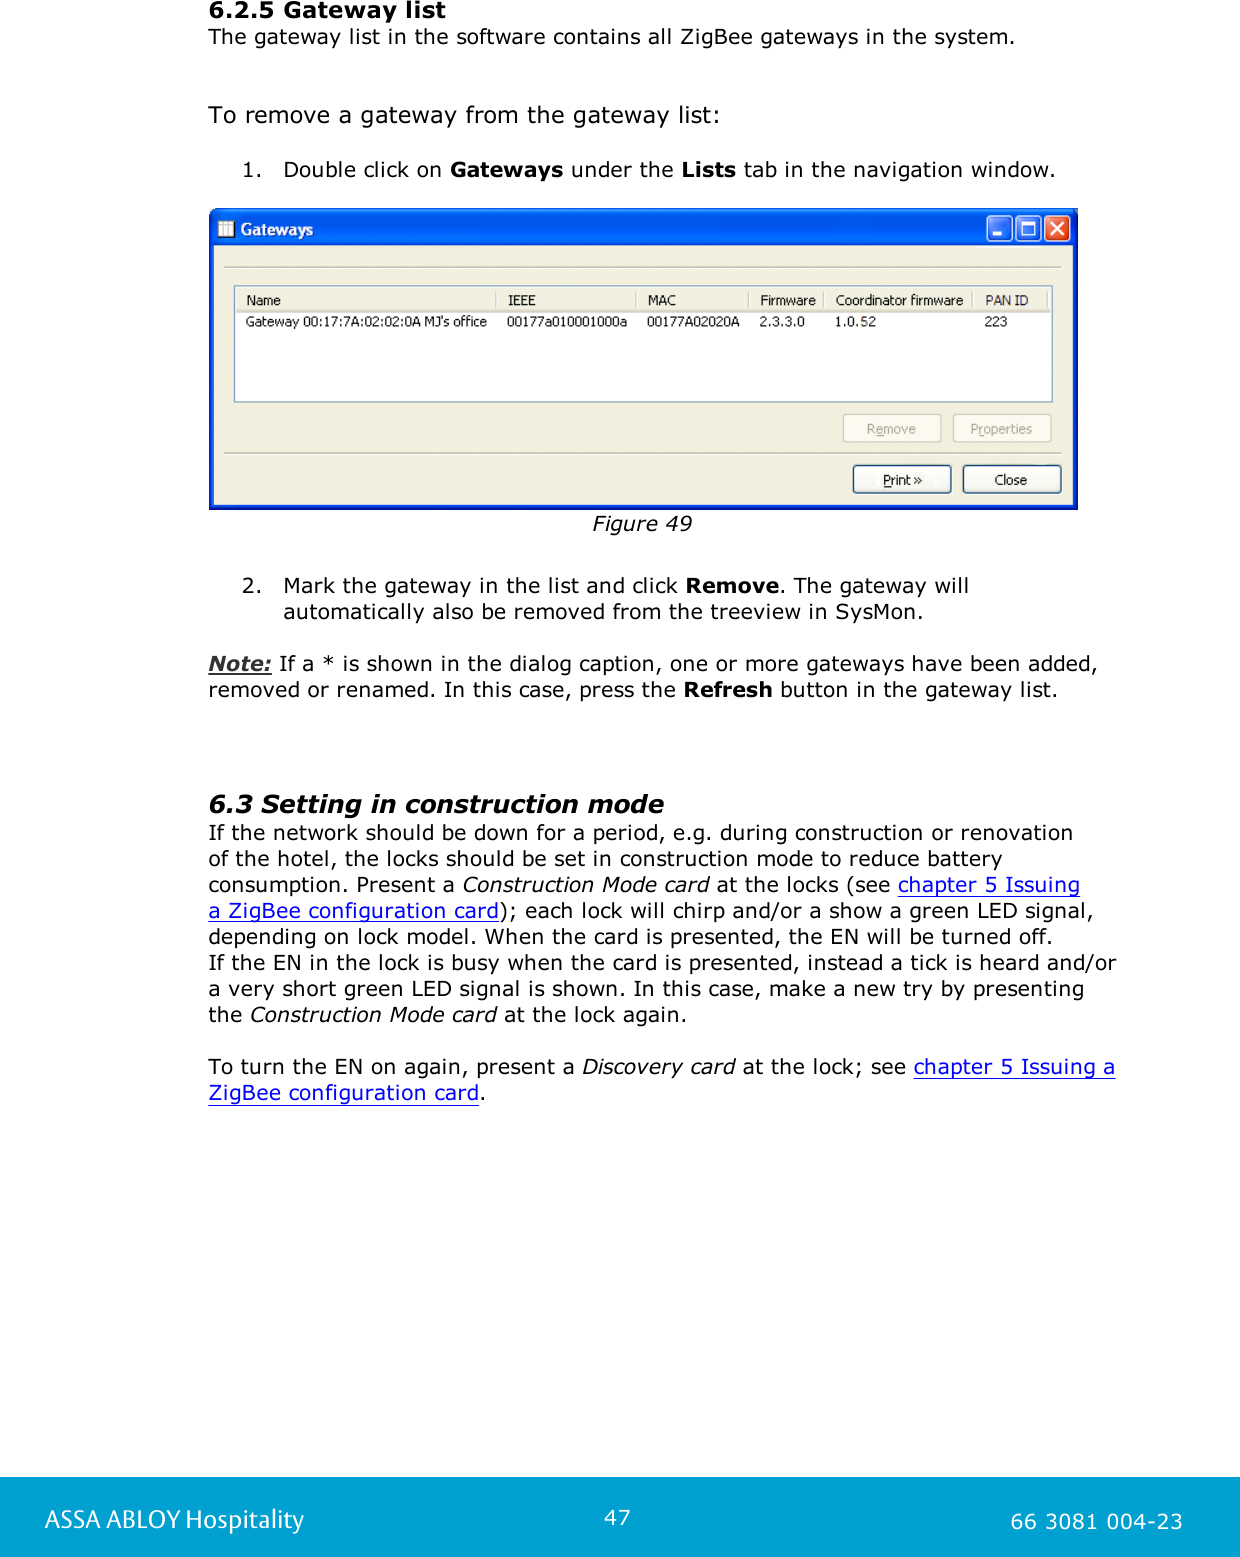
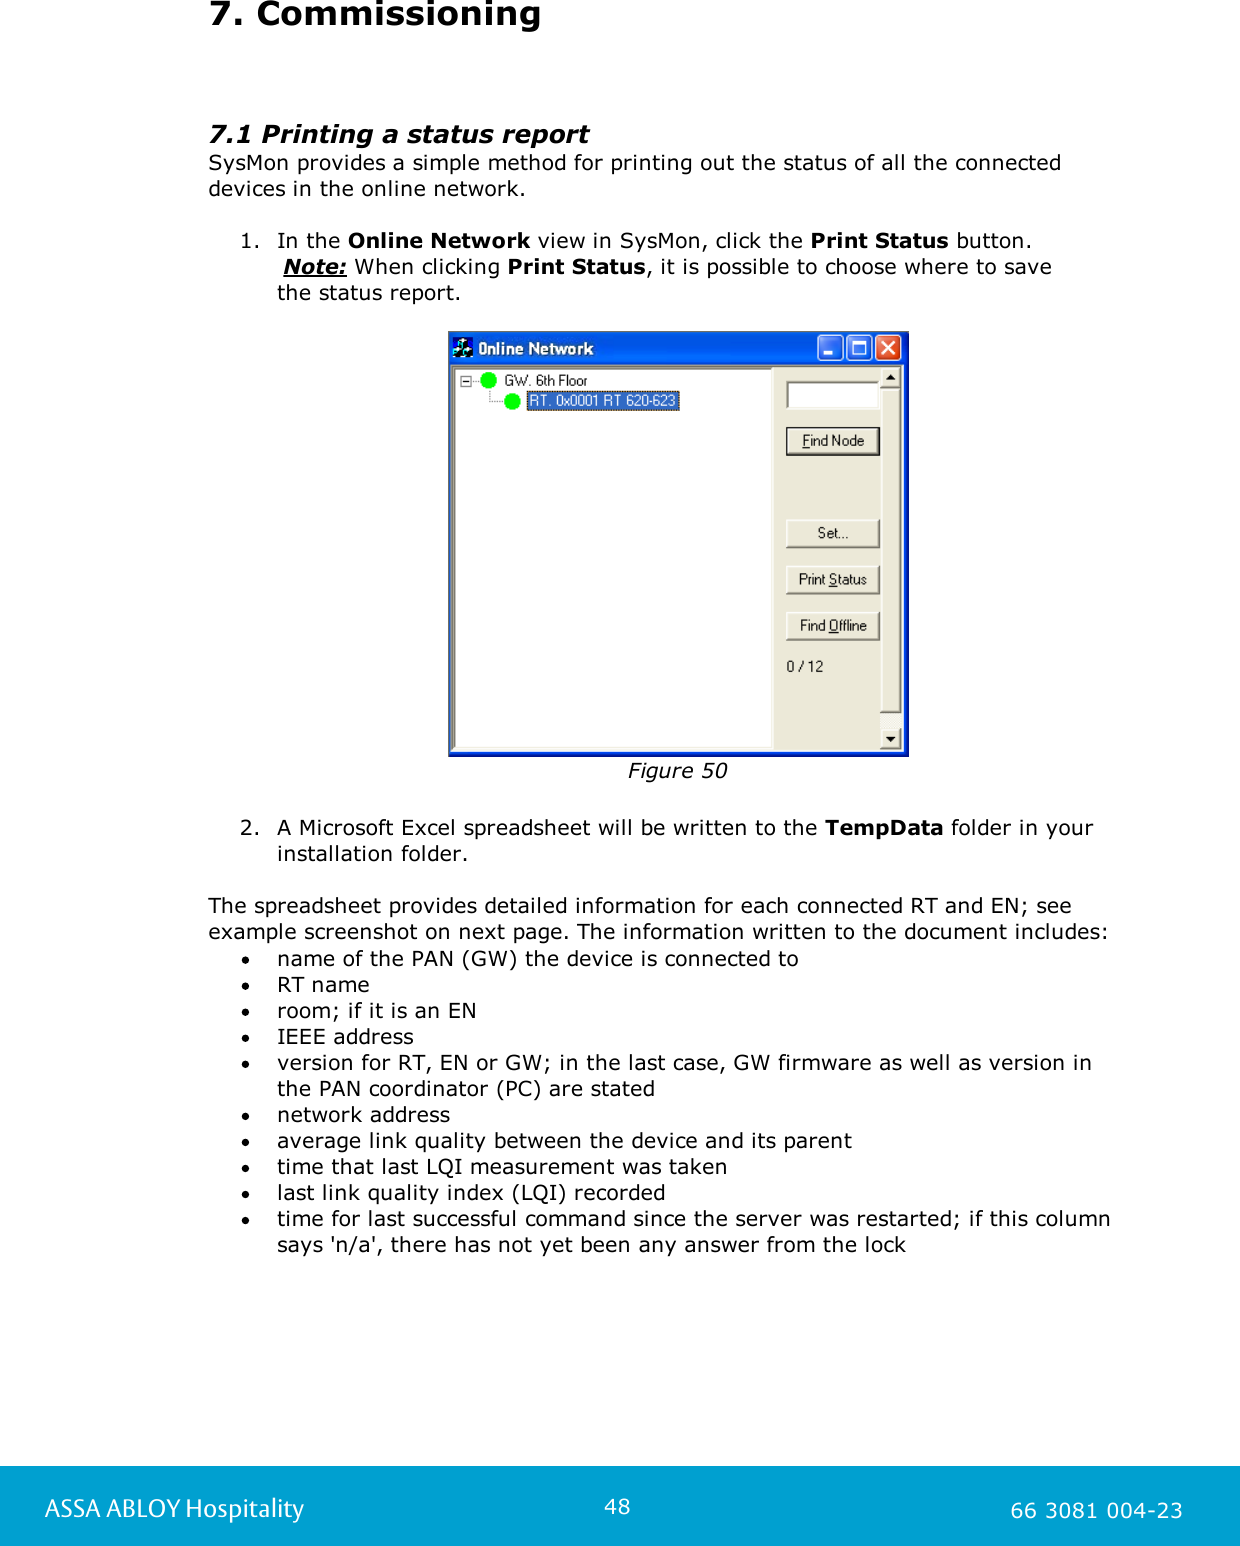
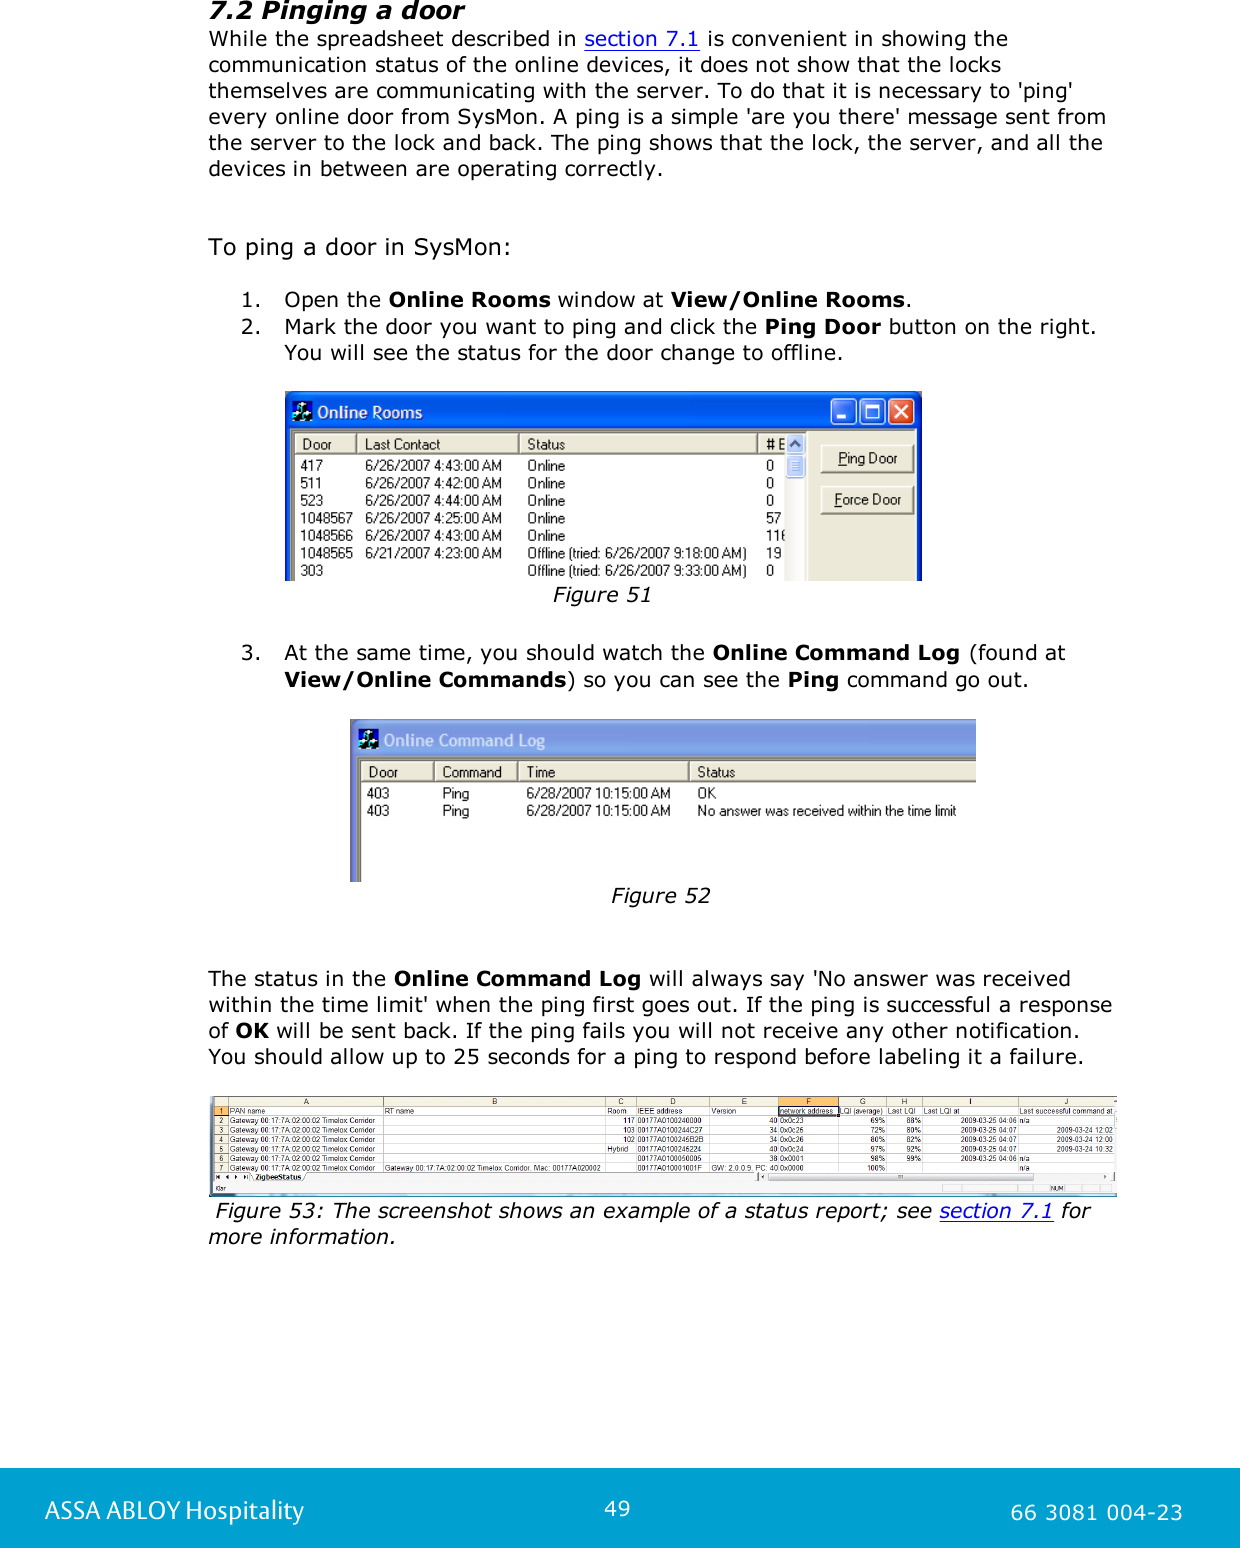
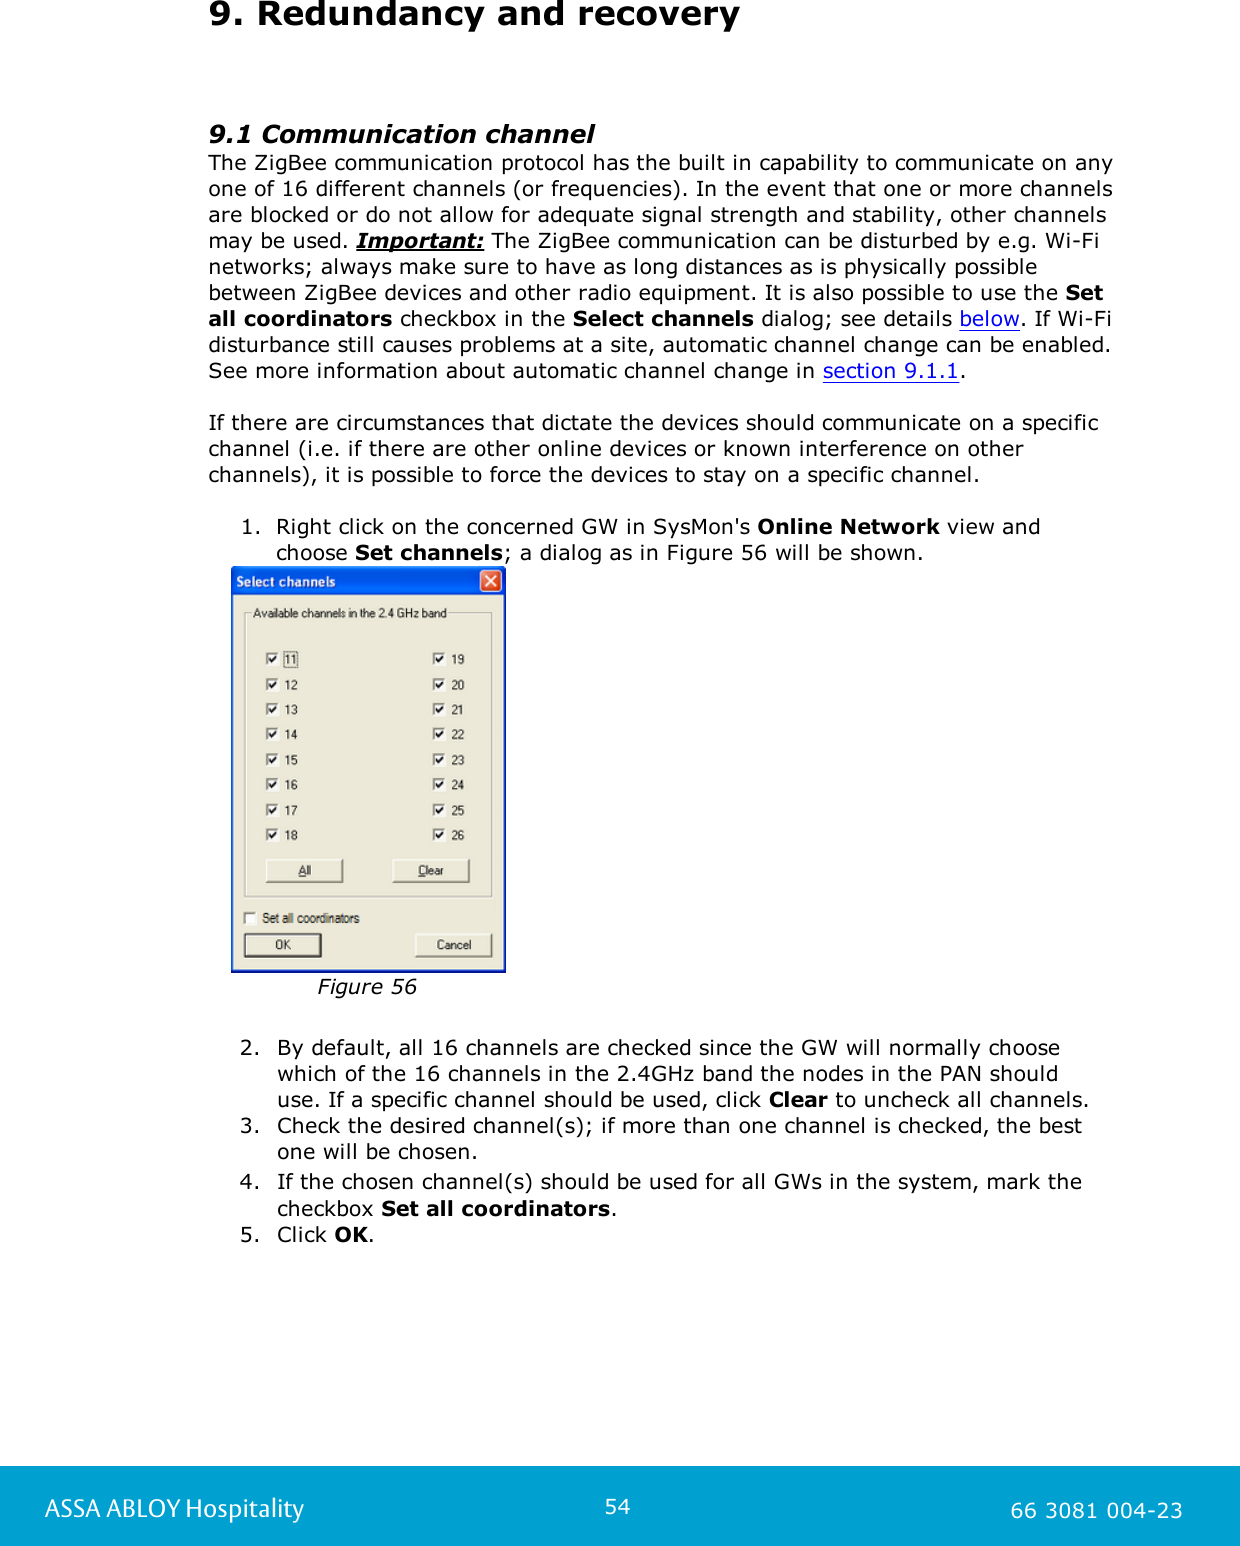
ASSALOY Global Solutions Norway AS 683081150C1 Zigbee EN 4 User Manual Enter the help project title here
ASSA ABLOY Hospitality AS Zigbee EN 4 Enter the help project title here
UserManual.wiki
>
ASSALOY Global Solutions Norway AS
>
683081150C1 User Manual
Users Manual
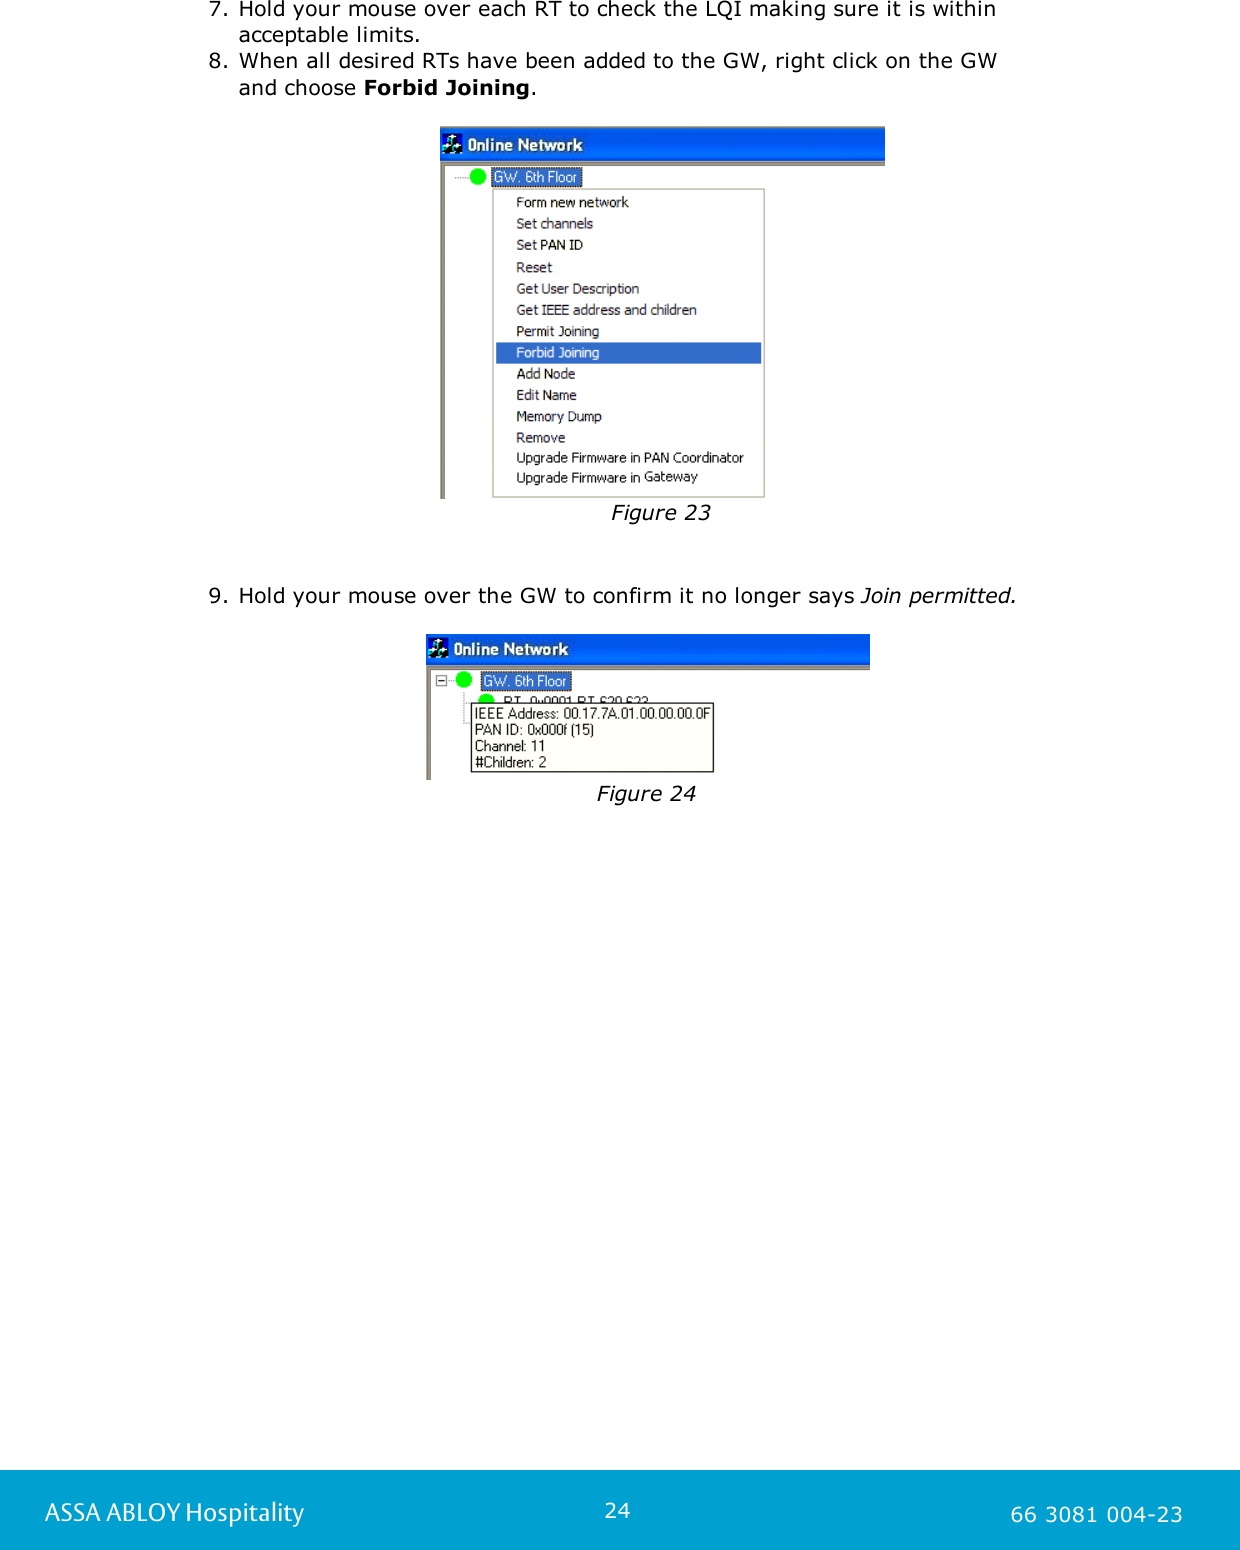
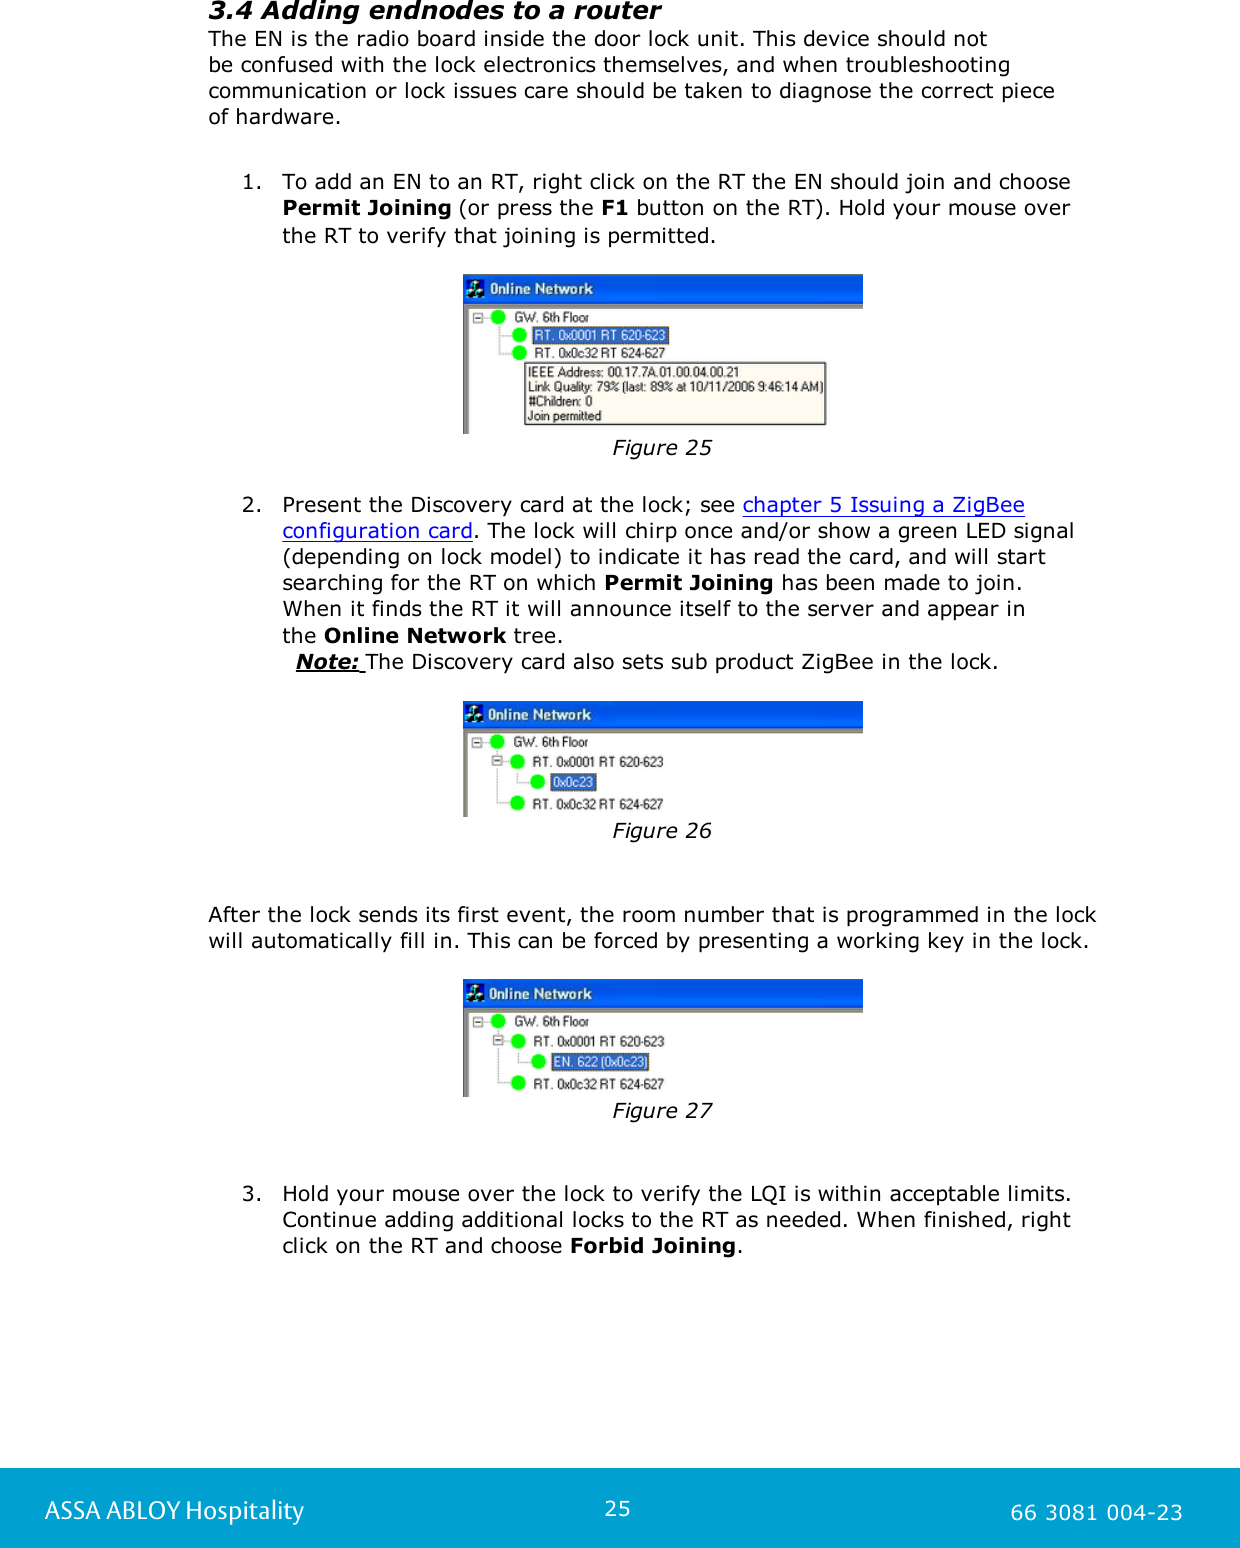
Navigation menu
Upload a User Manual
Namespaces
Wiki Guide
HTML
PDF
Info
Views
User Manual
Discussion / Help
Navigation