ASSALOY YRIZW1US Push Button and Touch Screen Deadbolt Locks User Manual 14 0099 Exhibit Cover
ASSA ABLOY Inc. Push Button and Touch Screen Deadbolt Locks 14 0099 Exhibit Cover
ASSALOY >
Contents
- 1. Manual - Model YRD110-ZW-US
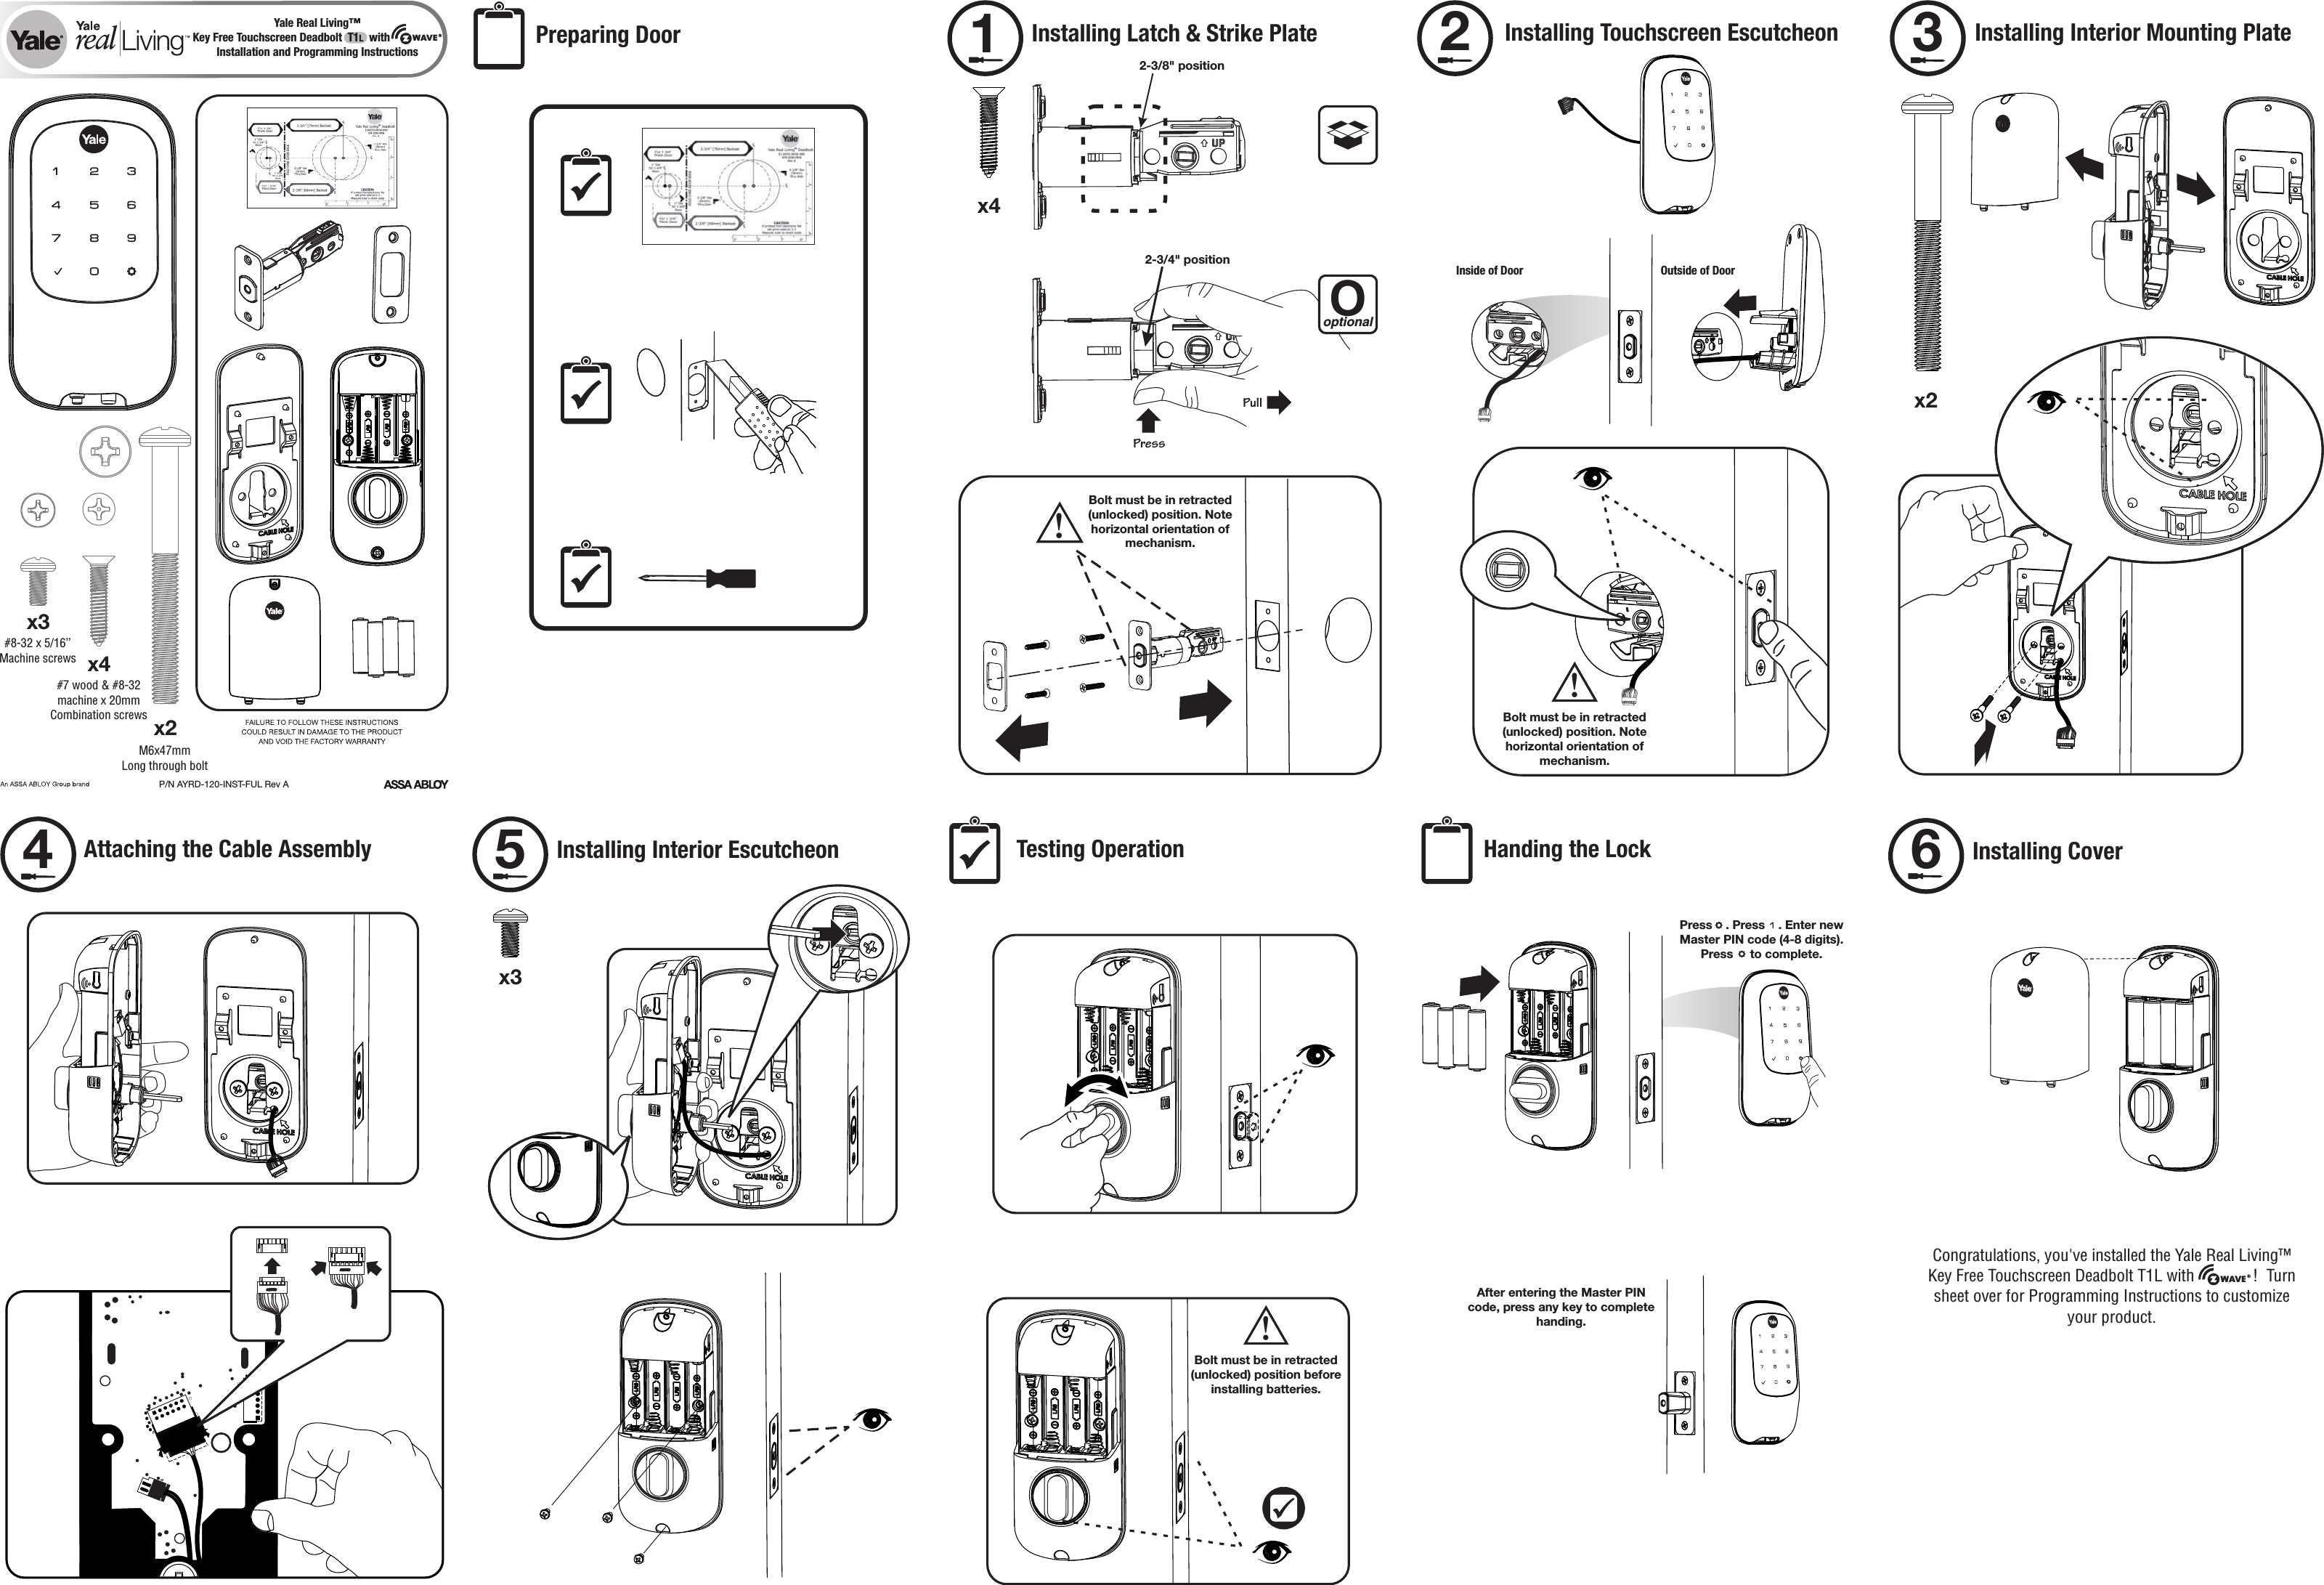
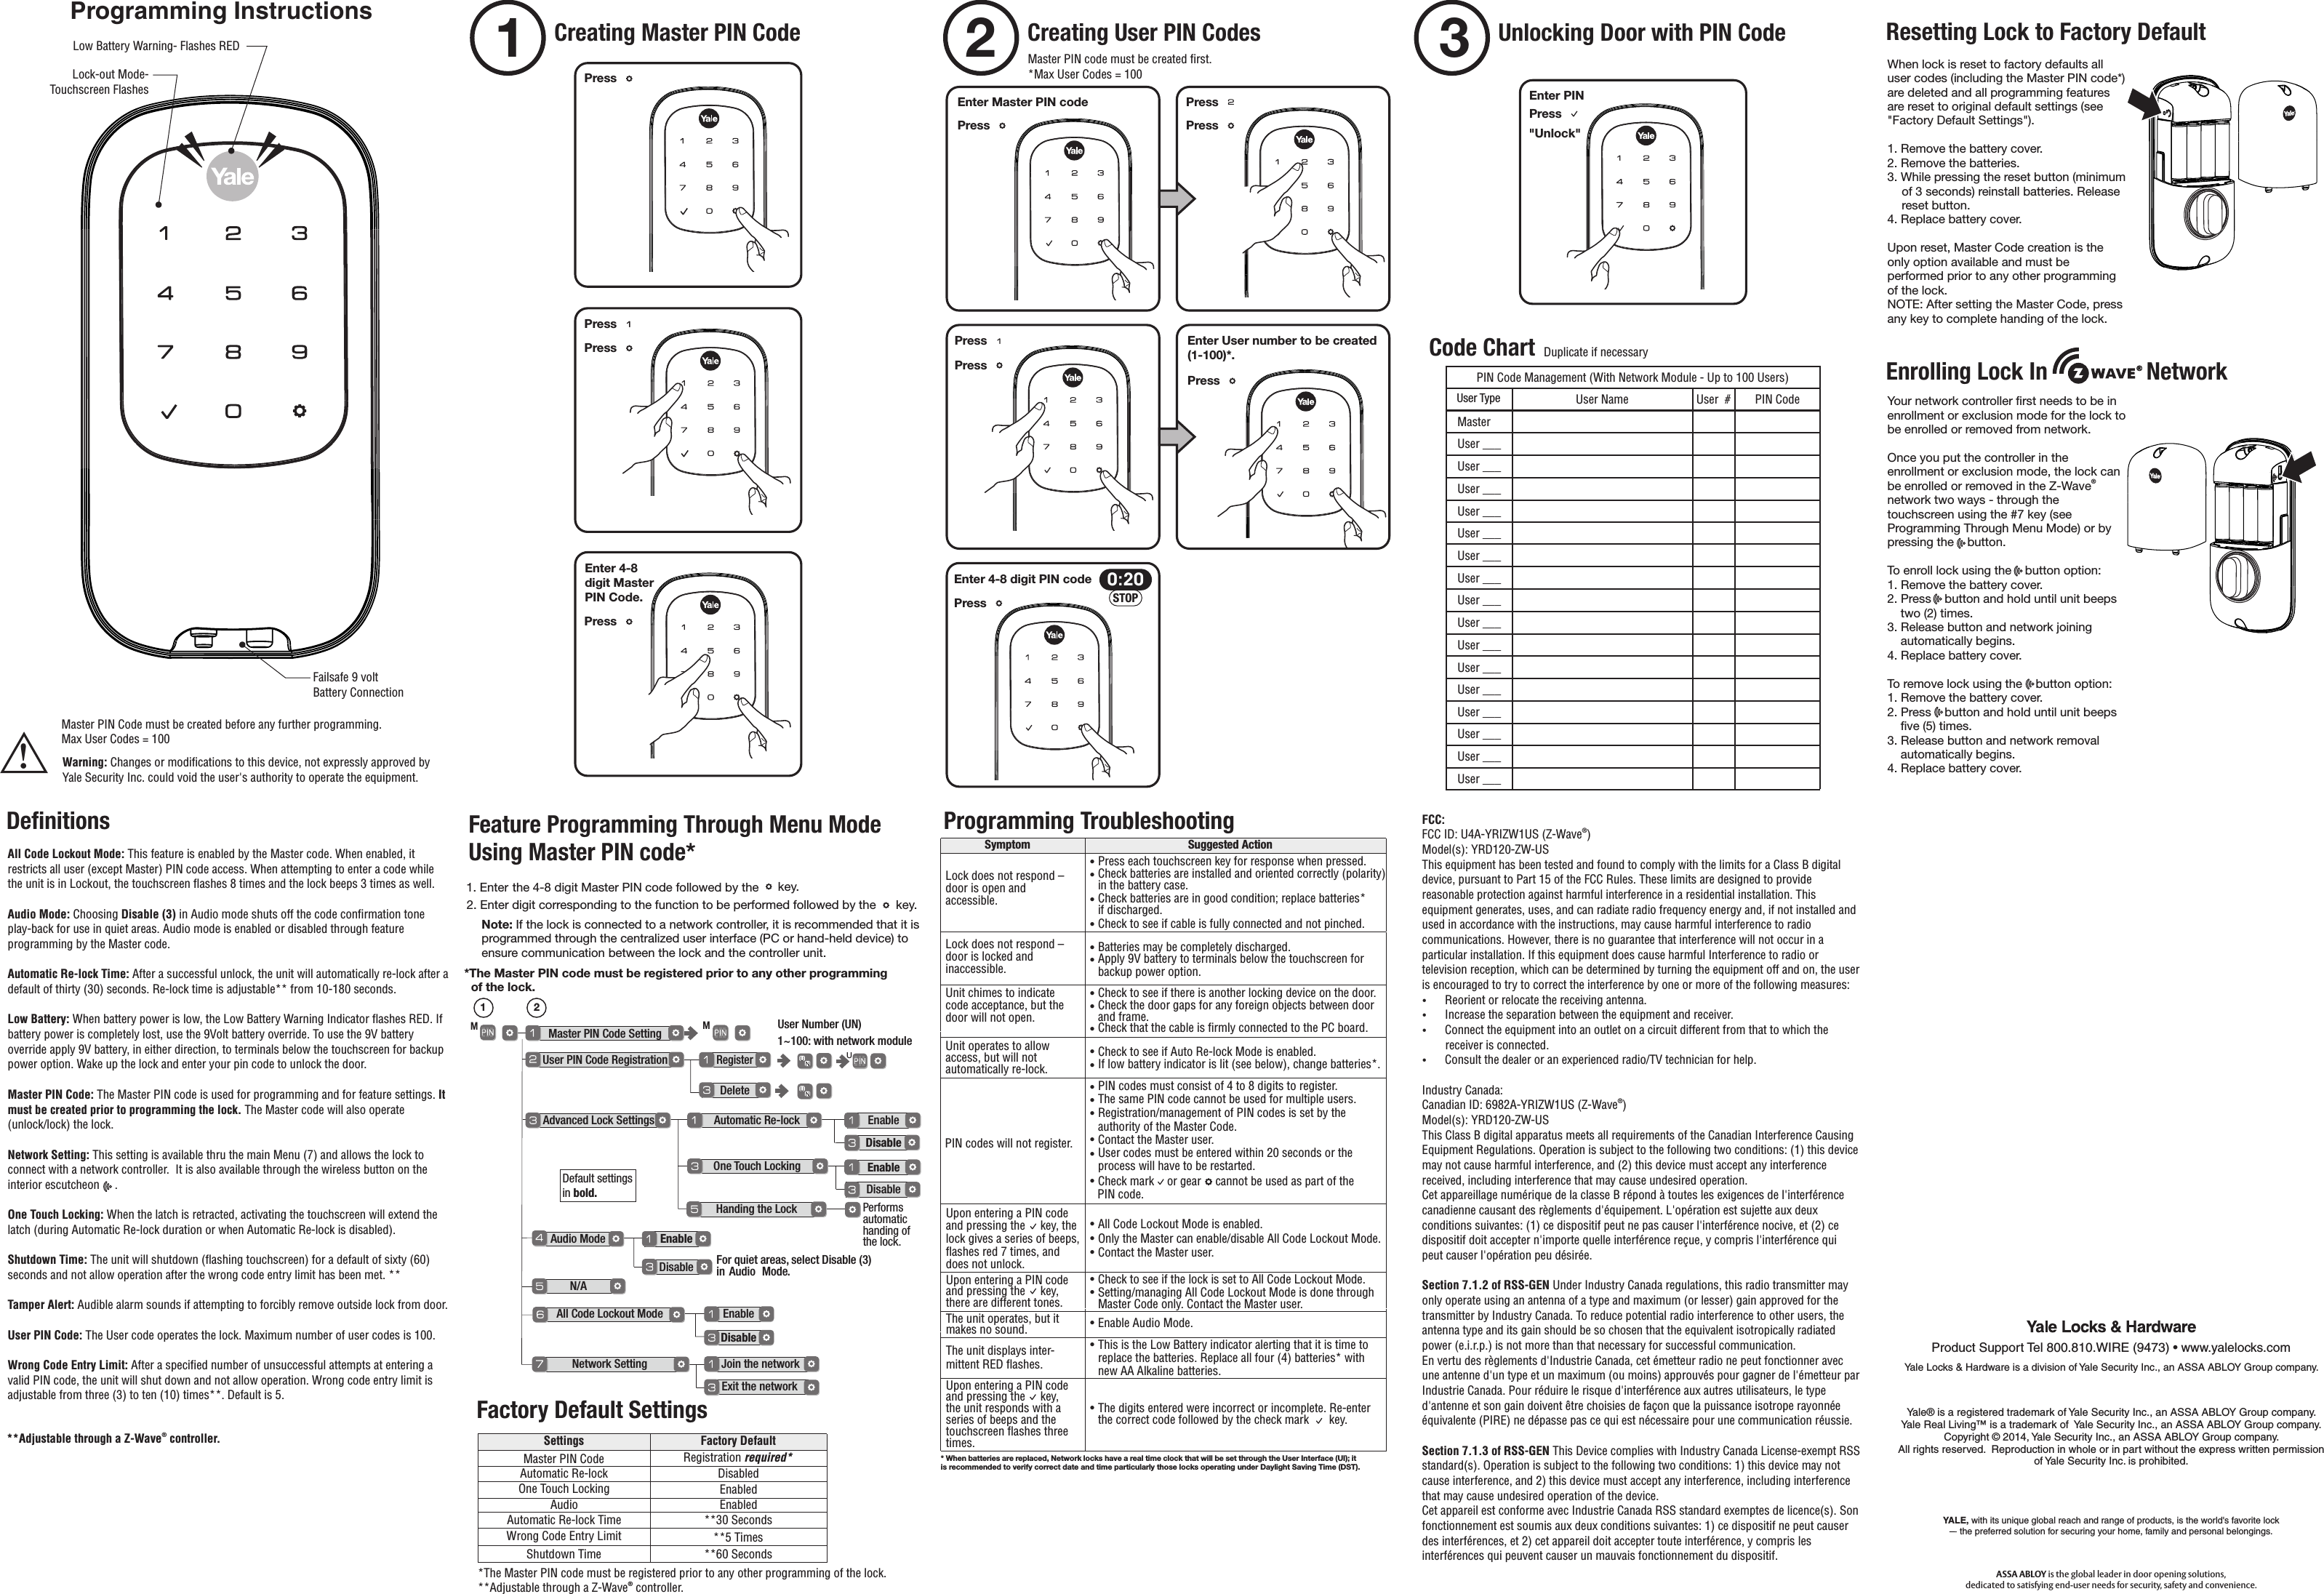
- 2. Manual - Model YRD120-ZW-US
Manual - Model YRD120-ZW-US