ASUSTeK Computer 1025CNB037H Eee PC User Manual Eee PC 1025CE UserMan 20110916
ASUSTeK Computer Inc Eee PC Eee PC 1025CE UserMan 20110916
UserManual.wiki
>
ASUSTeK Computer
>
1025CNB037H User Manual
(Eee PC 1025CE) UserMan_20110916
Navigation menu
Upload a User Manual
Namespaces
Wiki Guide
HTML
PDF
Info
Views
User Manual
Discussion / Help
Navigation
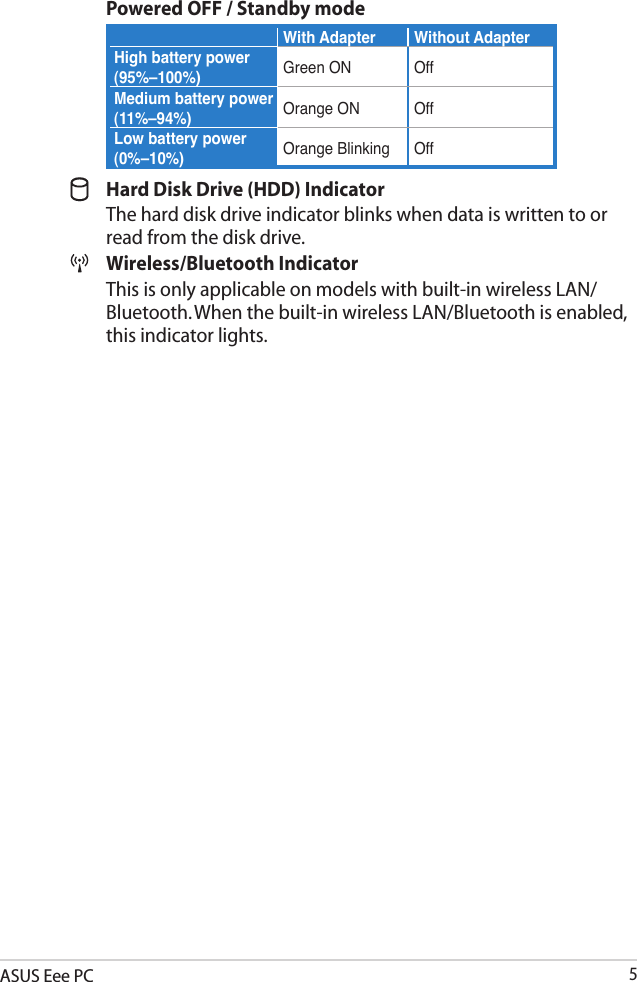
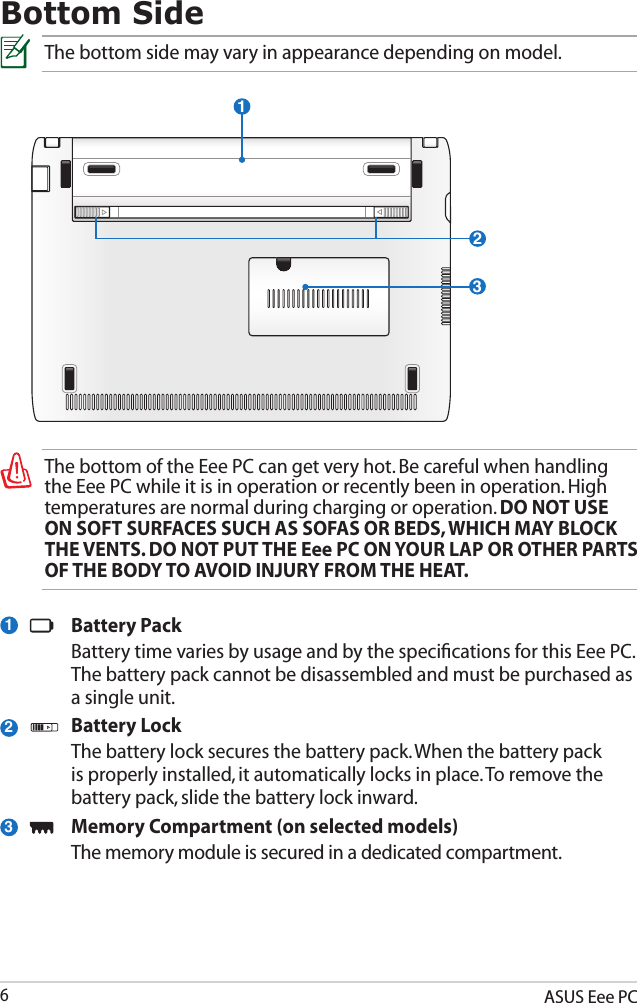
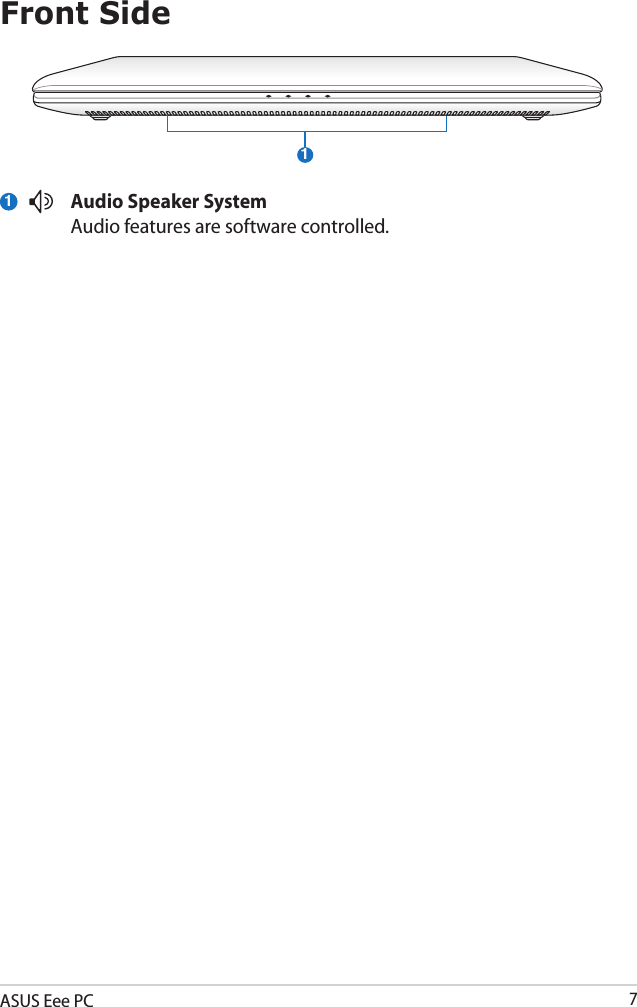
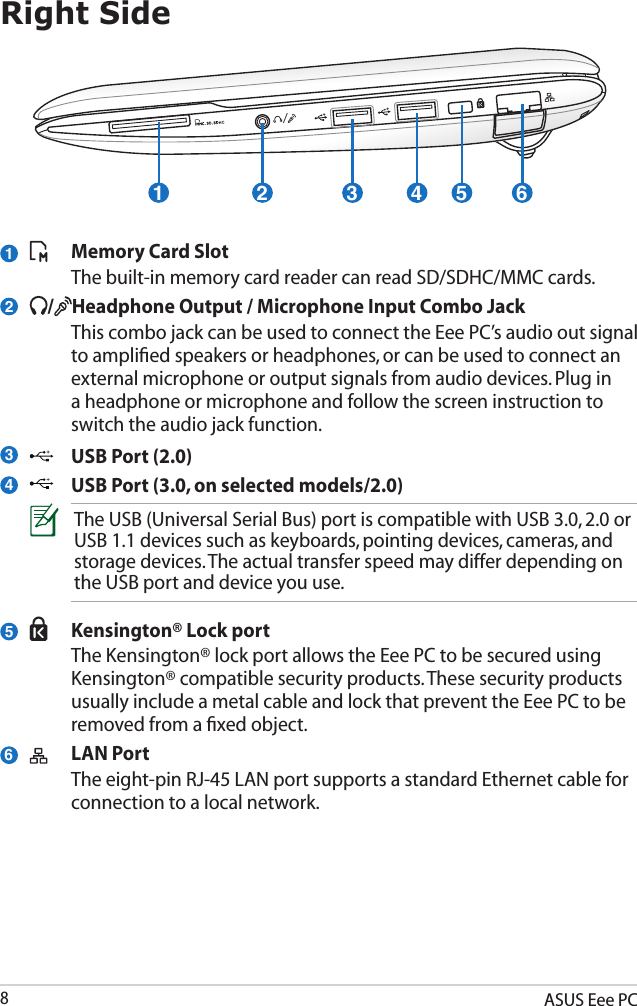

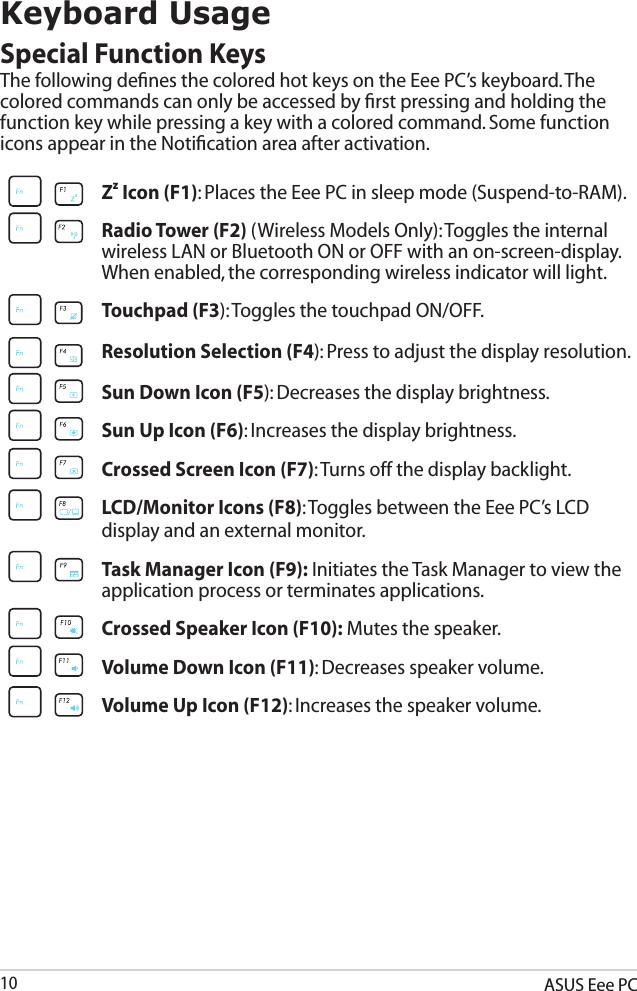
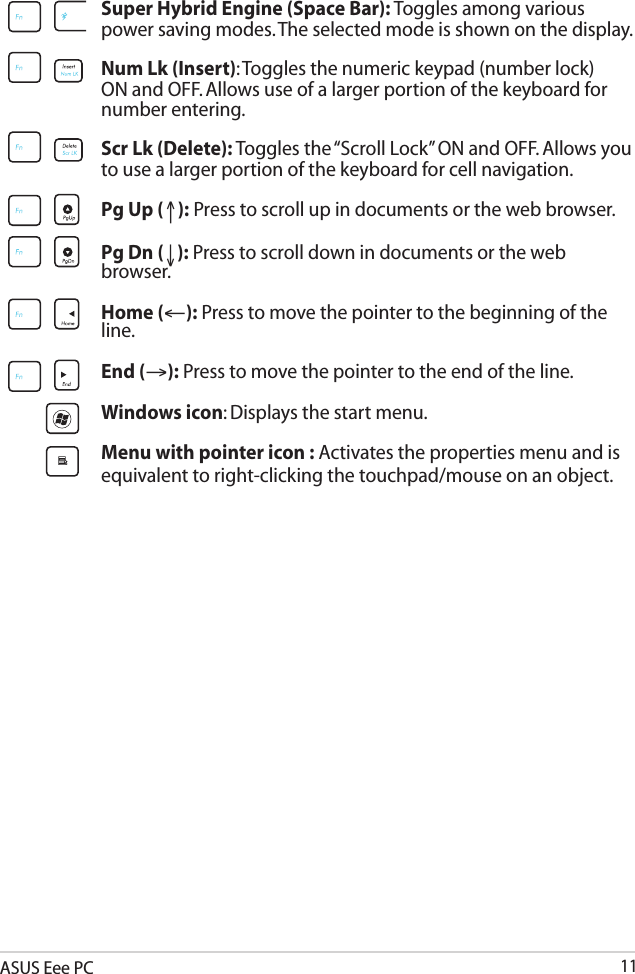
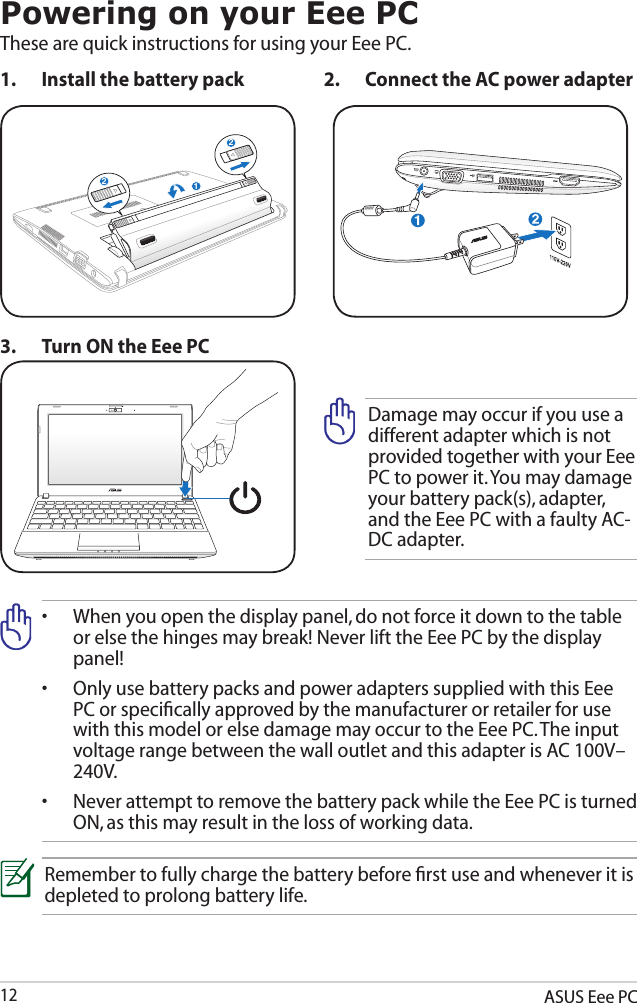
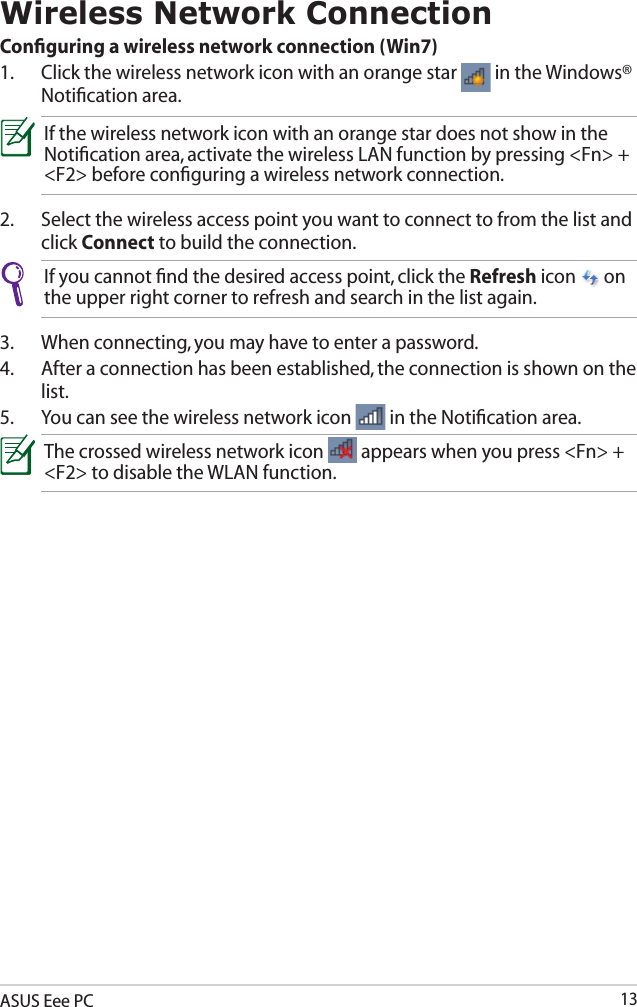
![ASUS Eee PC17Boot Booster (On Selected Model)The Boot Booster item in BIOS setup helps shorten your Eee PC bootup time. However, you MUST disable this BIOS item before you change any Eee PC components or perform system recovery (from USB flash disk, external optical drive or hidden partition). Follow the instructions below to disable Boot Booster:1. Start the system and press <F2> on bootup to show the POST screen. Press <F2> again to enter the BIOS setup.2. Set Boot Booster to [Disabled]. If you fail to see the POST screen or enter the BIOS setup by doing the instruction above, restart the system and try pressing <F2> repeatedly on bootup.3. Press <F10> to save the configuration and restart Eee PC.Remember to enable Boot Booster after you complete hardware change or system recovery.OS Switch (on selected models)The ASUS OS Switch utility allows you to switch the booting operating system between Microsoft Windows and the fast booting OS (OS version varies with models). Double-click the Boot Up Settings icon on your Windows desktop to launch the utility and select an OS to boot your Eee PC. Instant On (on selected models) Zero-wait system restarting gets you immediately back to work and play with saved system status. After activating it, the SHUT DOWN button in the Start Menu will be changed to SLEEP so you could enjoy fast resume to your last working state.During WINDOWS UPDATE, the “Instant On” feature will be automatically disabled so the SHUT DOWN button in the Start Menu will not be changed to the SLEEP function before all updates are completed.](https://usermanual.wiki/ASUSTeK-Computer/1025CNB037H/User-Guide-1552297-Page-17.png)