ASUSTeK Computer AIR Asus Internet Radio User Manual Manual
ASUSTeK Computer Inc Asus Internet Radio Manual
UserManual.wiki
>
ASUSTeK Computer
>
AIR User Manual
Manual
Navigation menu
Upload a User Manual
Namespaces
Wiki Guide
HTML
PDF
Info
Views
User Manual
Discussion / Help
Navigation

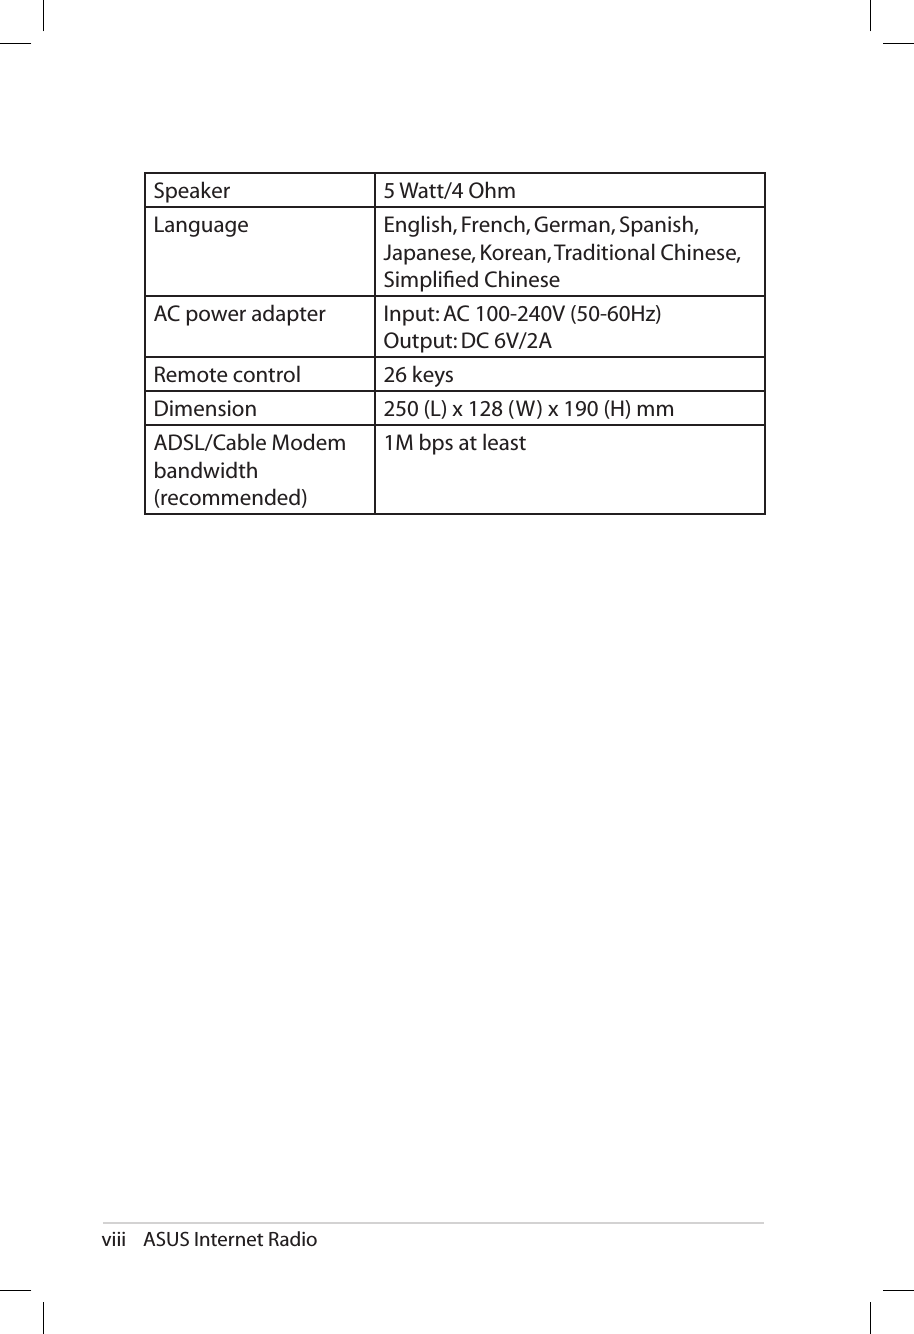
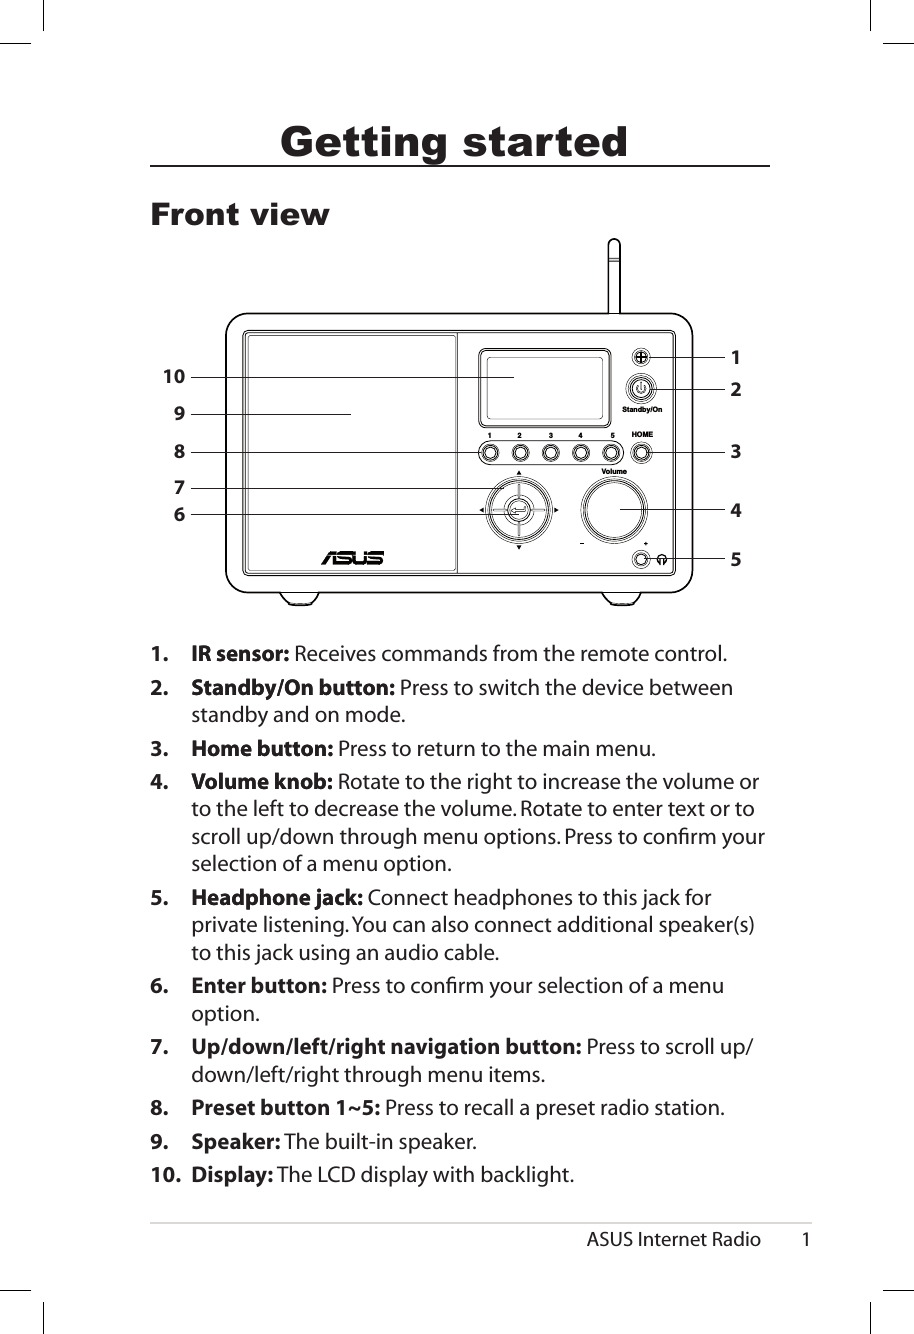
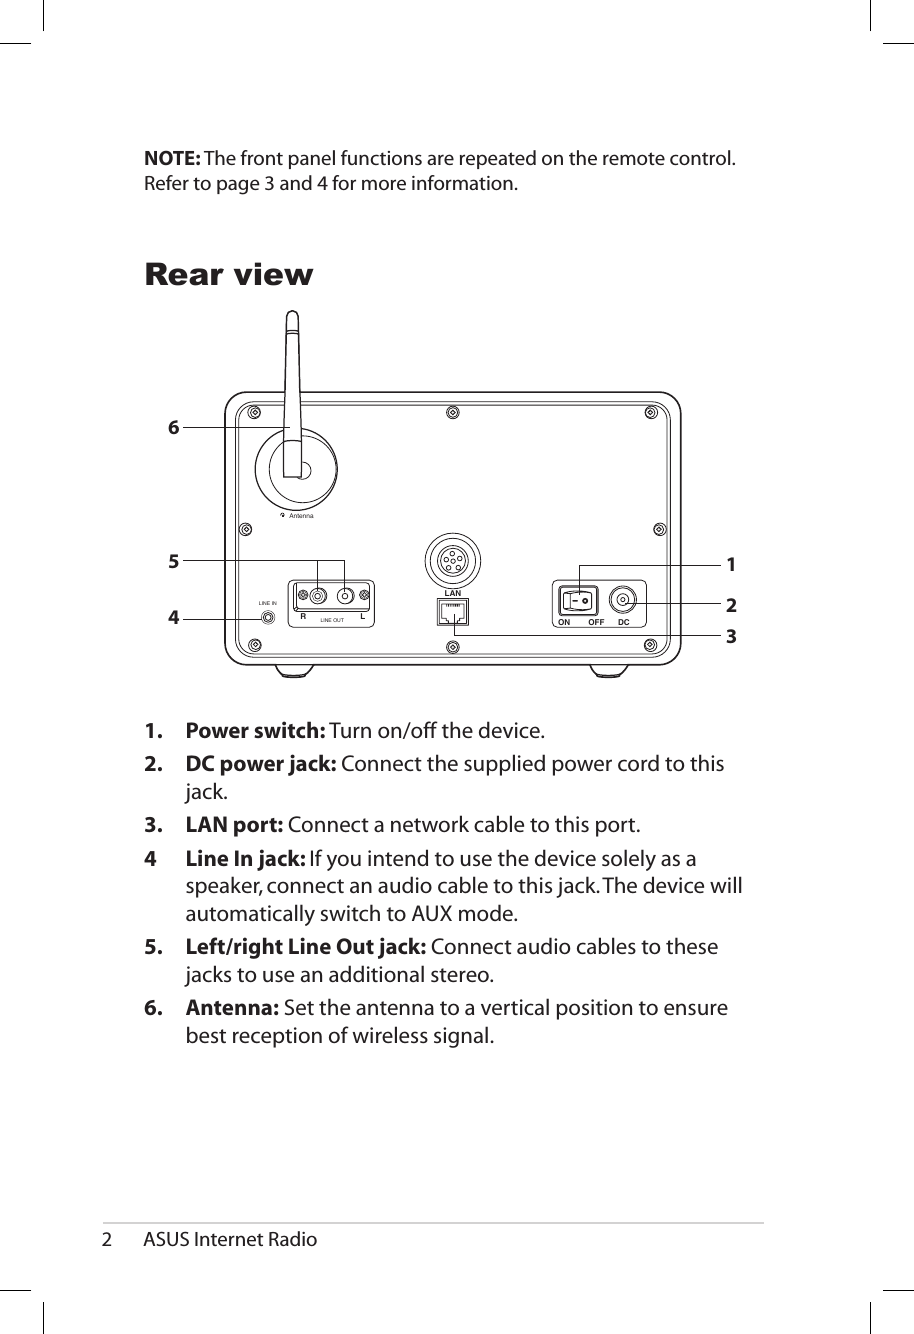
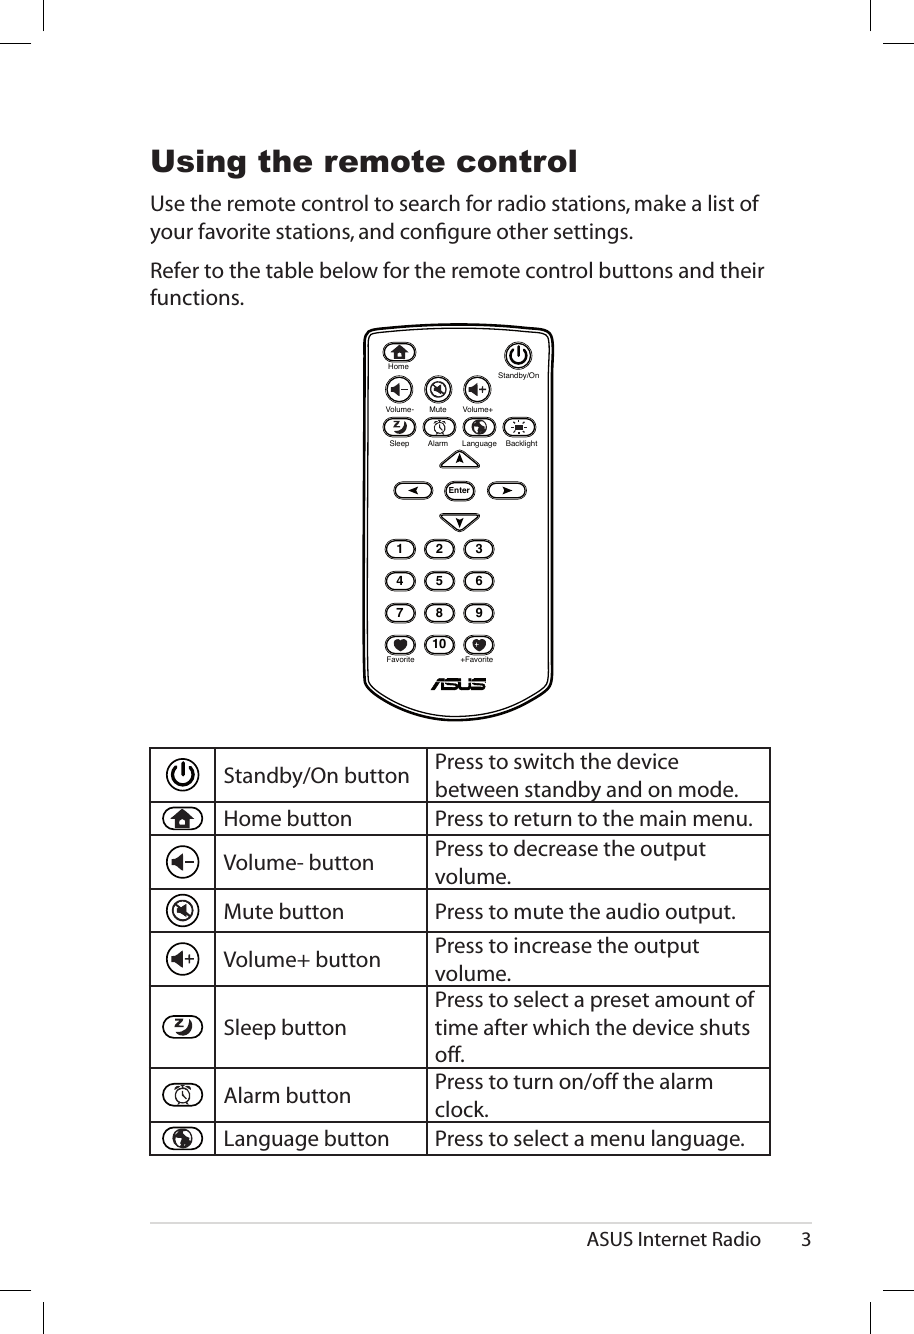
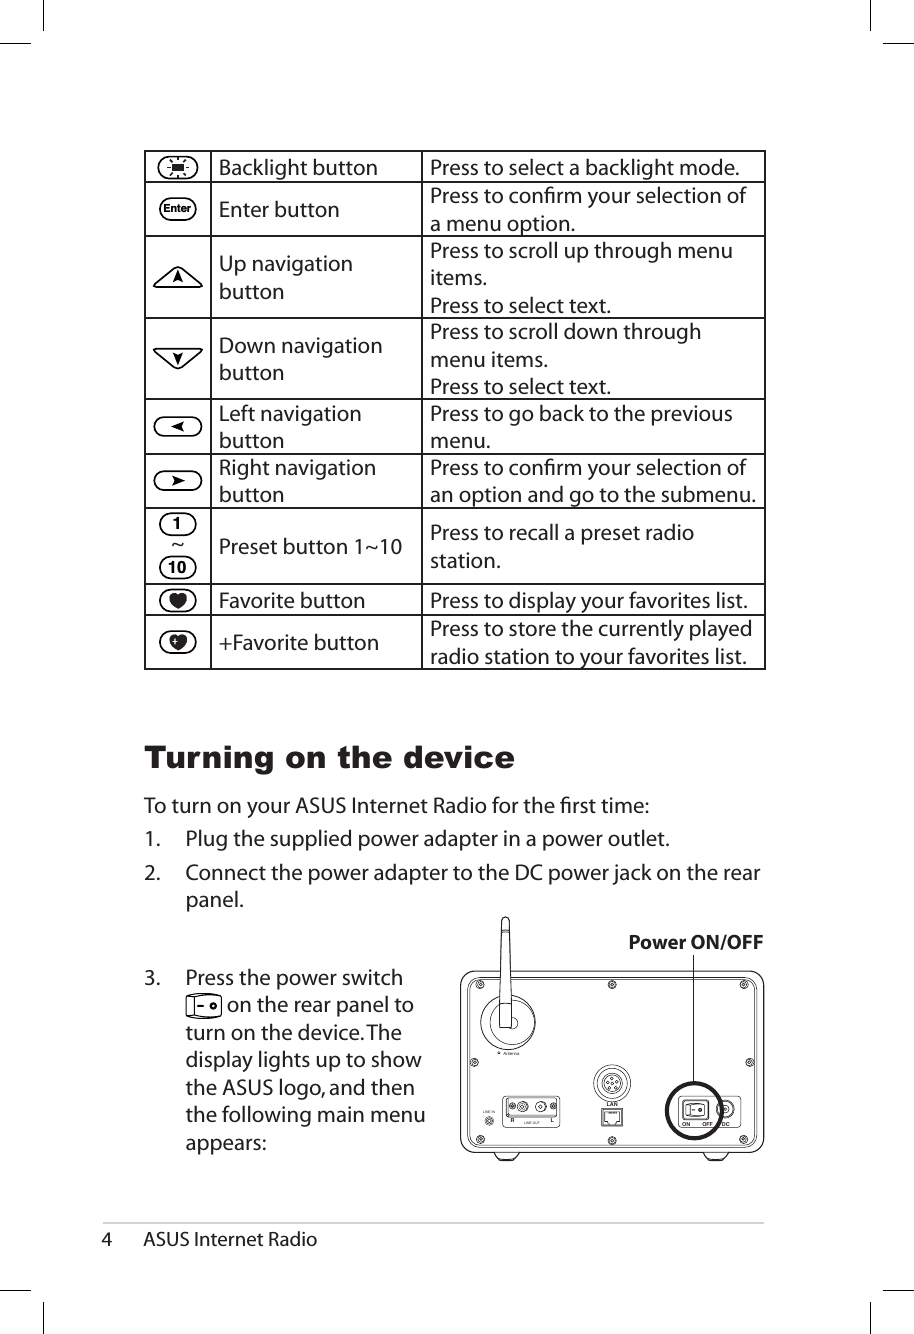
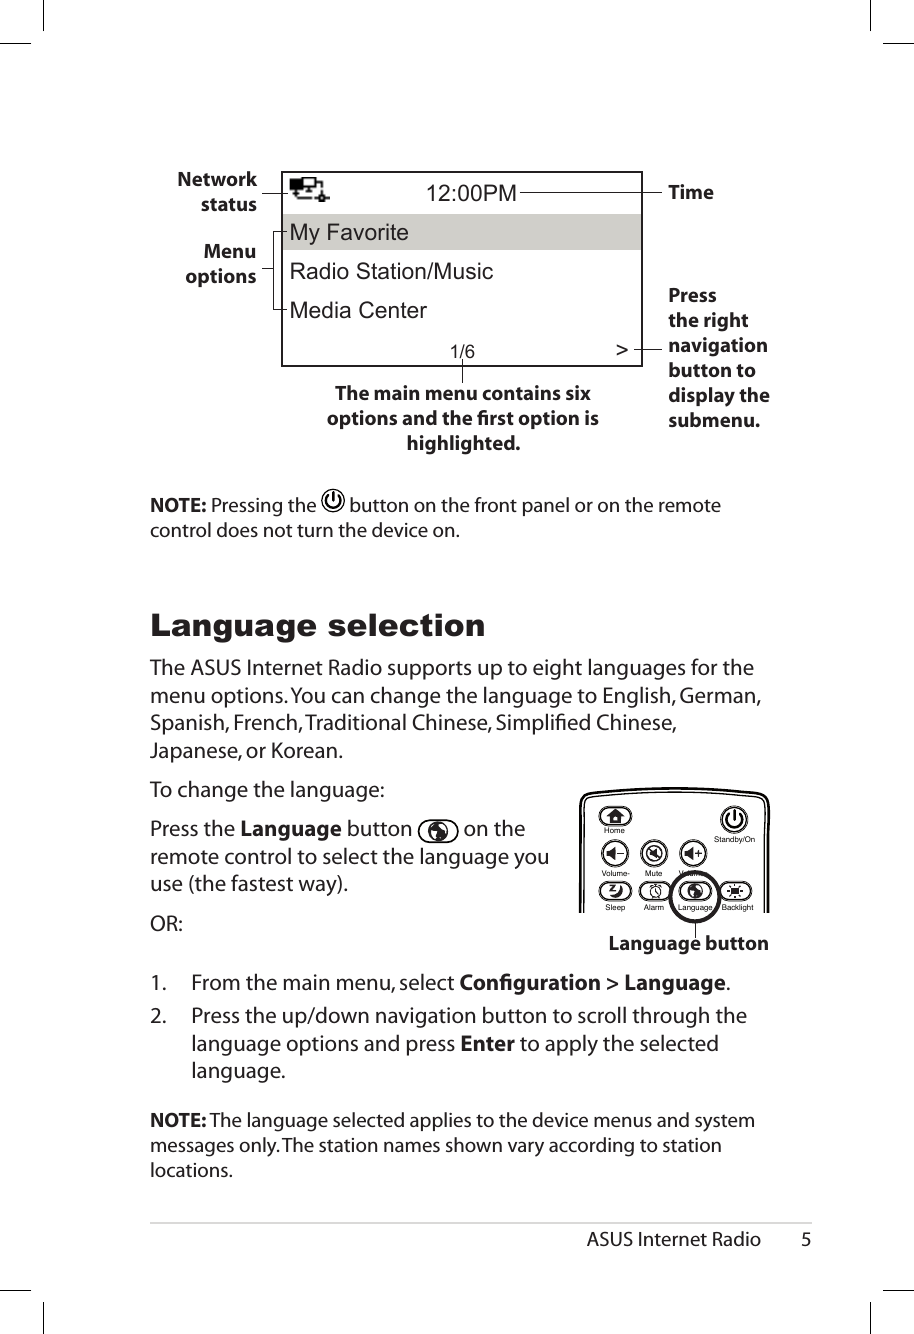
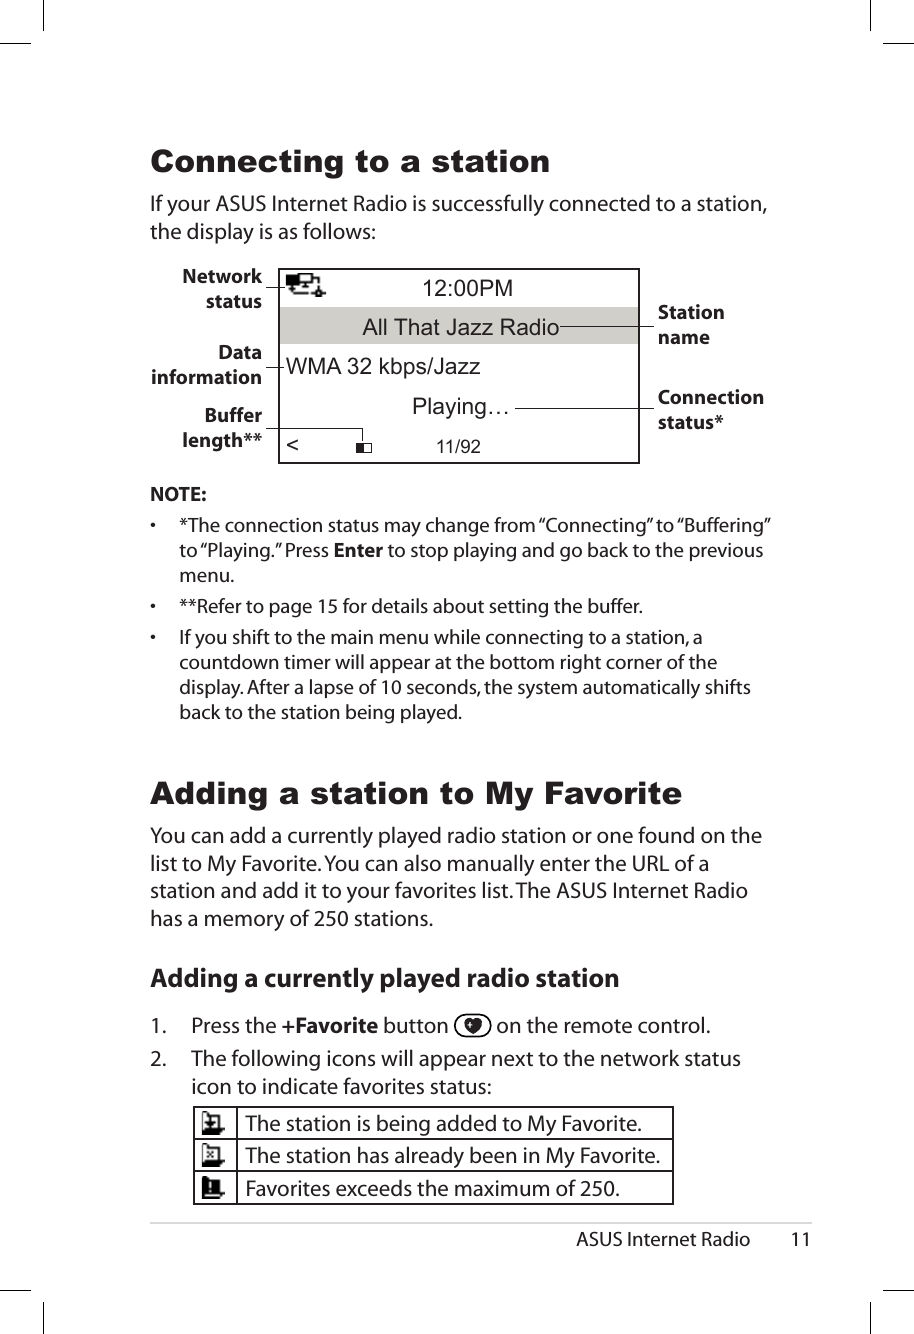
![6 ASUS Internet RadioText entryWhen you add the URL of an online radio station or use a WEP/WPA key for wireless network security, you need to enter text.To enter upper/lower case letters, symbols, or numbers:1. Press the up/down navigation button or rotate the volume knob clockwise/counterclockwise to select a character from the following: A a B b…Z z $ % & # _ ^ ~ ` “ ‘, . : ; ? ! * - + @ < = > { ¦ } [ \ ] ( / ) 0 1…9 delete ( ) space2. Press the right navigation button to proceed to the next. Press Enter or the volume knob when done.NOTE: To delete text, highlight a character and select . The character will be deleted whether you proceed to the right or the left.To enter your IP address and other IP parameters or set the time, date and alarm, follow the steps described above.Connecting the device to the networkBefore enjoying online radio stations worldwide, you must first connect your ASUS Internet Radio to the network via a wired or wireless connection. Plugging in a network cable automatically disables the WLAN function. Establishing a wired connectionUsing an IP address assigned via DHCP:1. Plug a network cable in the LAN port to connect the device to a router or a wirelss access point (the device does not support PPPoE connection).2. From the main menu, select Configuration > Network > IP Configuration > Auto Setting (DHCP).3. PressPress Enter to make a connection. The following icons will appear at the upper left corner of the display to indicate network status:](https://usermanual.wiki/ASUSTeK-Computer/AIR/User-Guide-843312-Page-14.png)