ASUSTeK Computer AIR3 ASUS Internet Radio User Manual Manual
ASUSTeK Computer Inc ASUS Internet Radio Manual
UserManual.wiki
>
ASUSTeK Computer
>
AIR3 User Manual
Manual
Navigation menu
Upload a User Manual
Namespaces
Wiki Guide
HTML
PDF
Info
Views
User Manual
Discussion / Help
Navigation

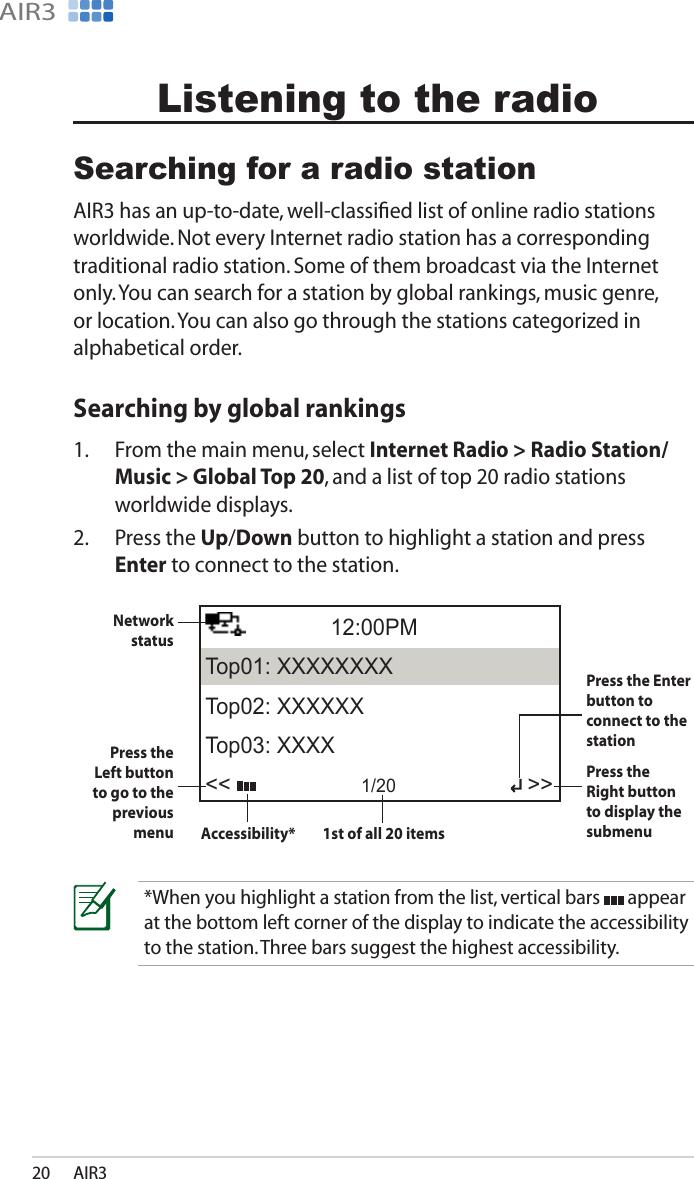
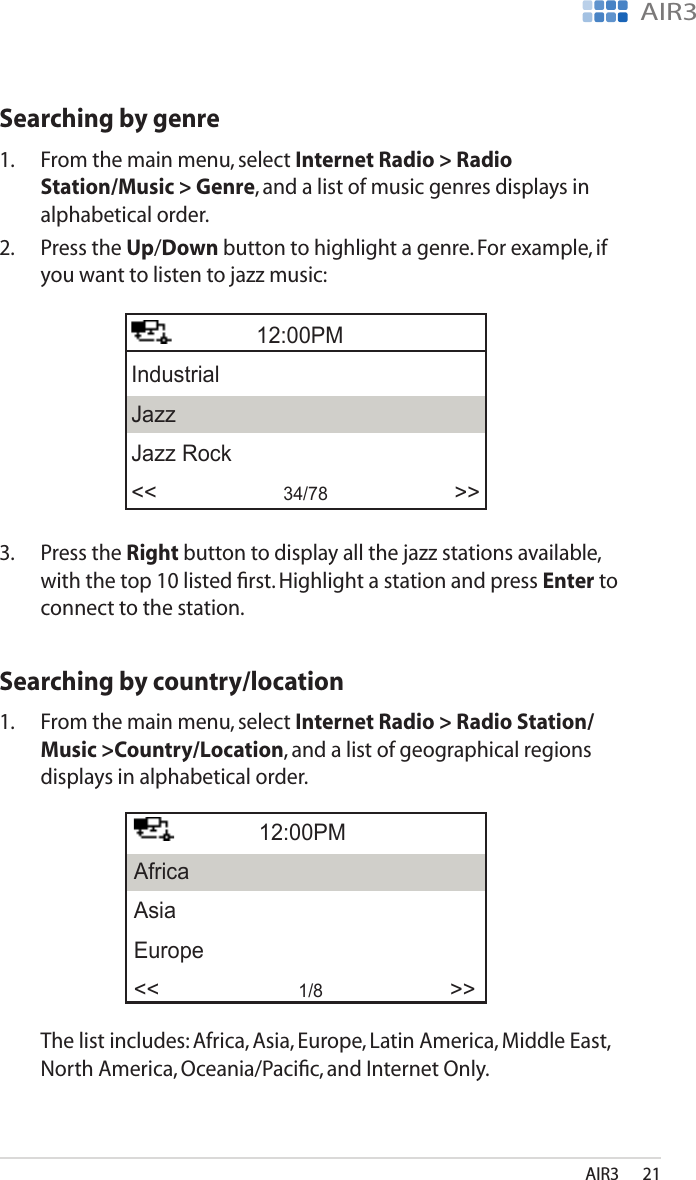
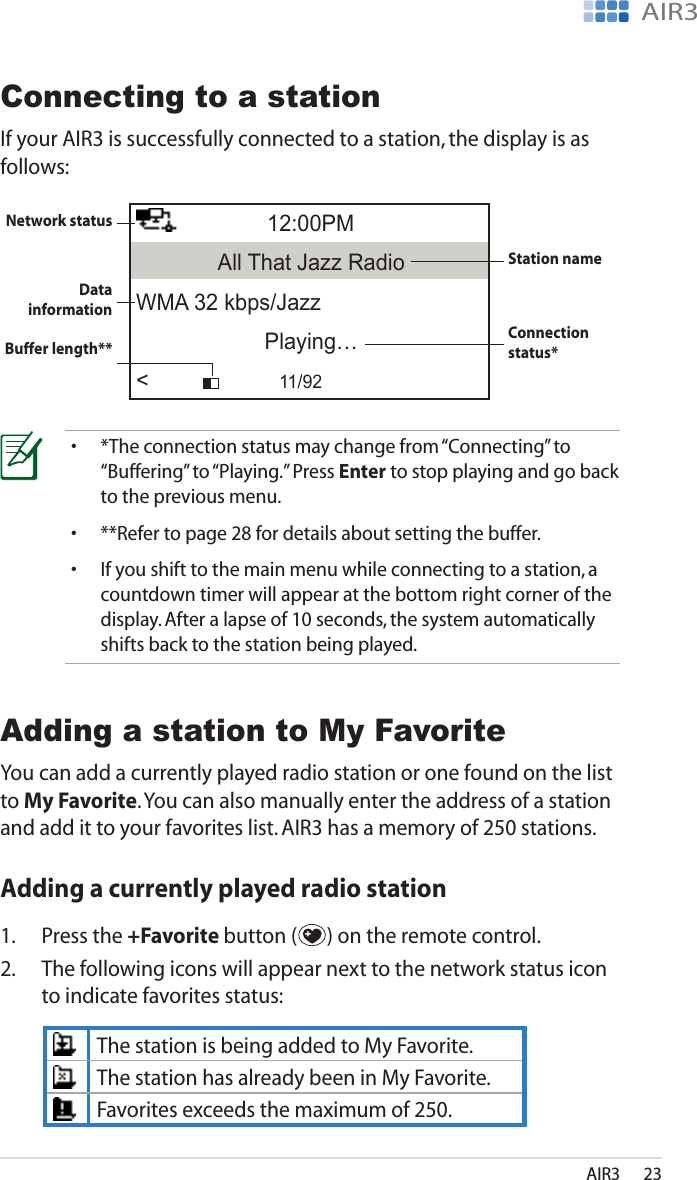
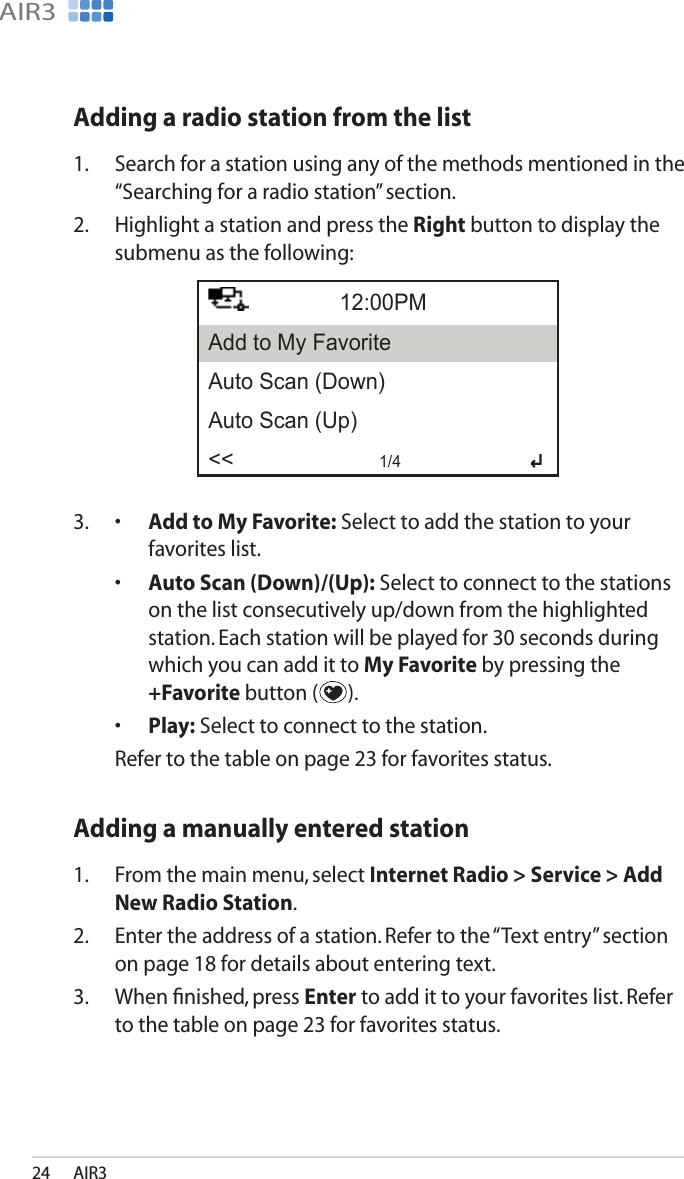
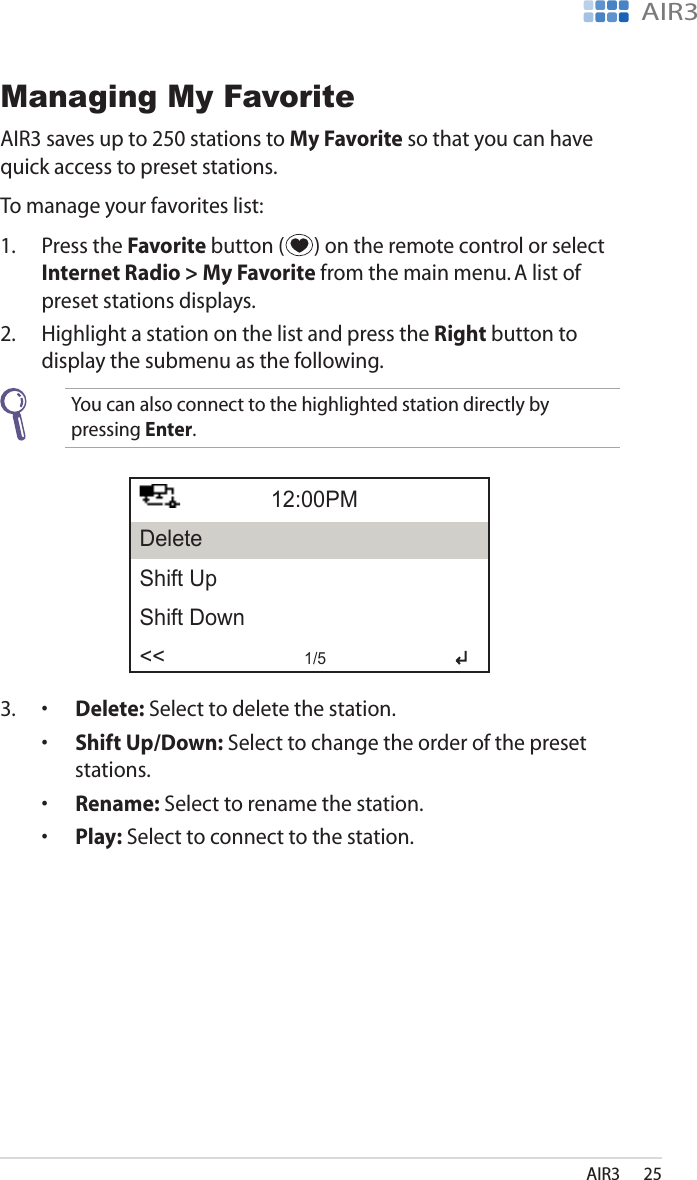
![AIR318AIR3Text entryTo enter your WEP/WPA key or IP address, add a radio station address, and set time and date, do the following:1. Press the Up/Down button or rotate the volume knob to select a character from the following table:The characters appear in a circular order. What is next to “space” is the uppercase A.2. Press the Right button ( or ) to proceed to the next. Press OK ( ) or the volume knob when done.Letters A a B b C c…Z zSymbols $ % & # _ ^ ~ ` “ ‘, . : ; ? ! * - + @ < = > { ¦ } [ \ ] ( / )Numbers 0 1 2 3 4 5 6 7 8 9OtherDelete ( ): Select and press the Left/Right button to delete text on the left. Space: Select to add a space.PREVIOUS PLAY/PAUSE NEXT](https://usermanual.wiki/ASUSTeK-Computer/AIR3/User-Guide-1027830-Page-18.png)