ASUSTeK Computer E05GOBIII Eee PC User Manual 1
ASUSTeK Computer Inc Eee PC 1
UserManual.wiki
>
ASUSTeK Computer
>
E05GOBIII User Manual
>
User Manual 1
Contents
1.
3G User Manual
2.
User Manual 1
3.
User Manual 2
User Manual 1
Navigation menu
Upload a User Manual
Namespaces
Wiki Guide
HTML
PDF
Info
Views
User Manual
Discussion / Help
Navigation


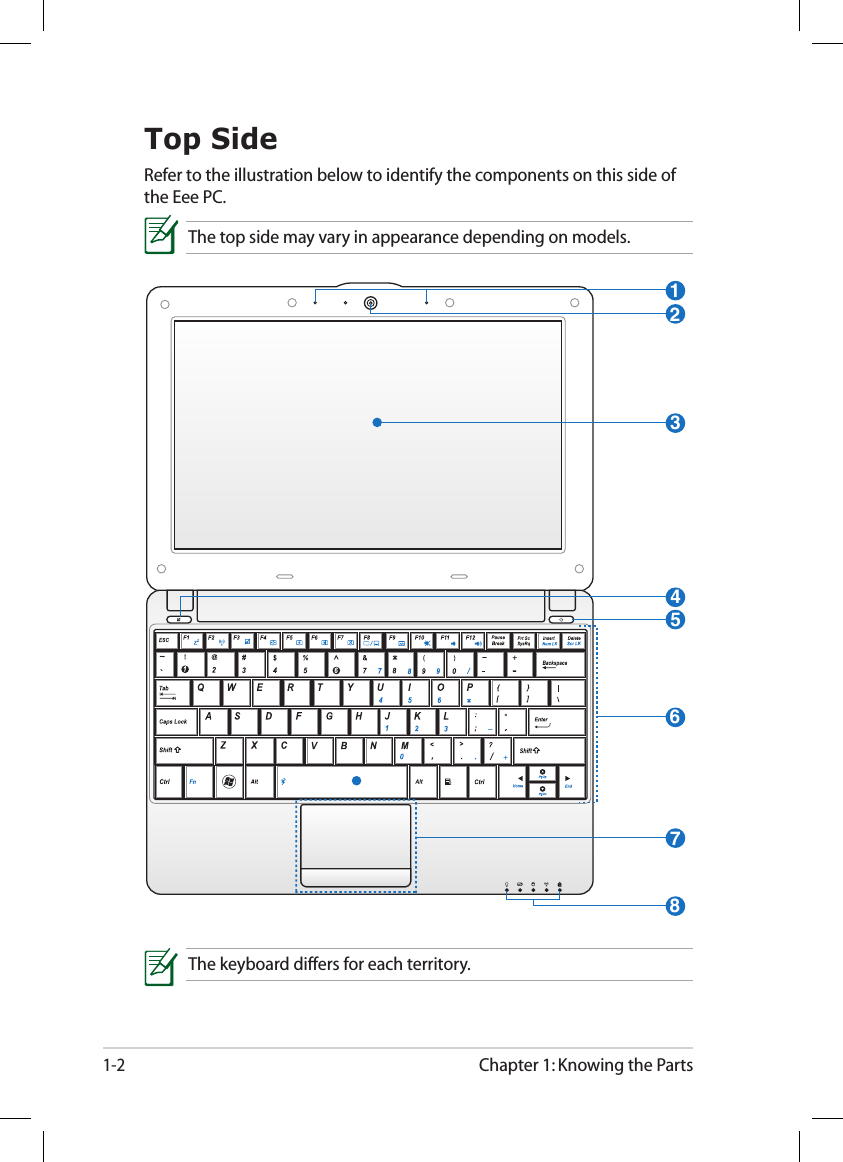
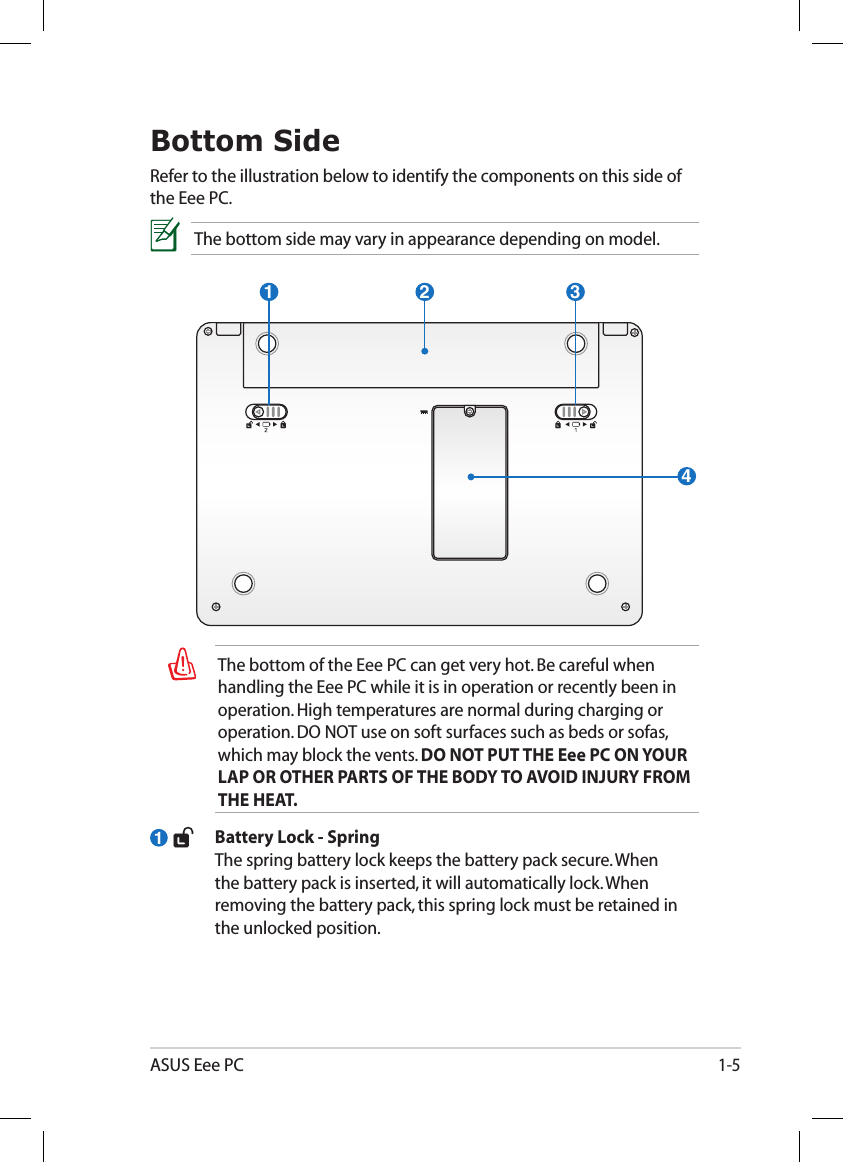
![Chapter 1: Knowing the Parts1-4 Battery Charge Indicator The battery charge indicator (LED) shows the battery charging status as follows: Powered ONWith Adapter Without AdapterHigh battery power (95%–100%) Green ON OffMedium battery power (11%–94%) Orange ON OffLow battery power (0%–10%) Orange Blinking Orange Blinking Powered OFF / Standby modeWith Adapter Without AdapterHigh battery power (95%–100%) Green ON OffMedium battery power (11%–94%) Orange ON OffLow battery power (0%–10%) Orange Blinking Off Hard Disk Drive (HDD) Indicator The hard disk drive indicator blinks when data is written to or read from the disk drive. Wireless/Bluetooth Indicator This is only applicable on models with built-in wireless LAN/Bluetooth (on selected models). When the built-in wireless LAN/Bluetooth is enabled, this indicator lights. Capital Lock Indicator Indicates that capital lock [Caps Lock] is activated when lighted.](https://usermanual.wiki/ASUSTeK-Computer/E05GOBIII.User-Manual-1/User-Guide-1148826-Page-12.png)