ASUSTeK Computer E10HEN771 Eee PC User Manual Eee PC 1000HE
ASUSTeK Computer Inc Eee PC Eee PC 1000HE
UserManual.wiki
>
ASUSTeK Computer
>
E10HEN771 User Manual
>
User Manual
Contents
1.
Manual Appendix for SAR Value
2.
User Manual
User Manual
Navigation menu
Upload a User Manual
Namespaces
Wiki Guide
HTML
PDF
Info
Views
User Manual
Discussion / Help
Navigation
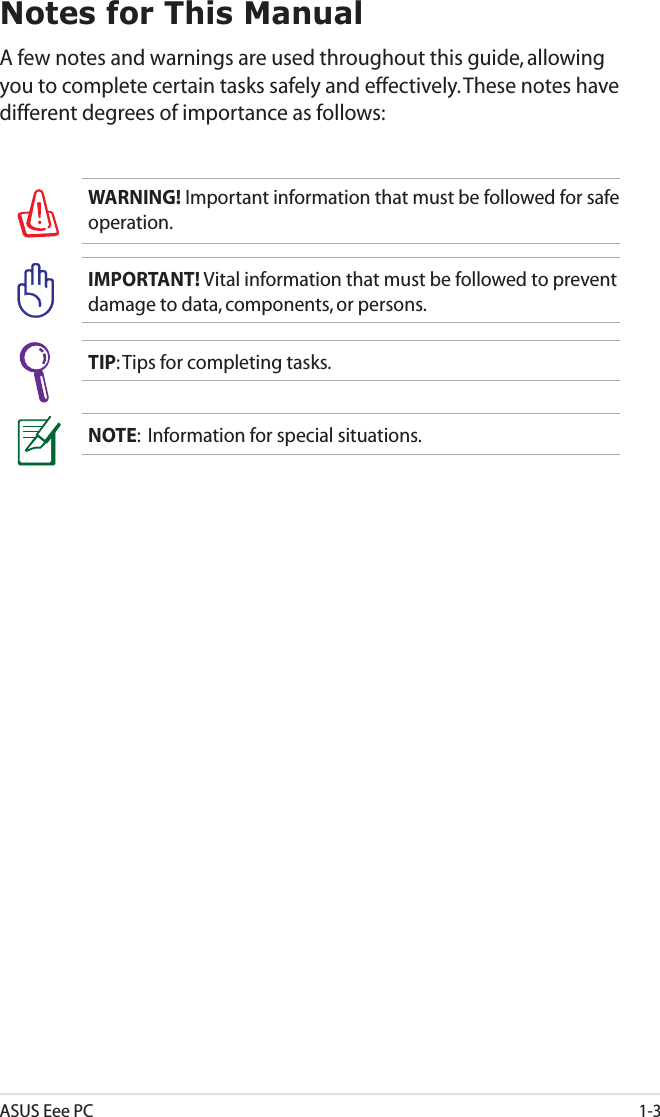


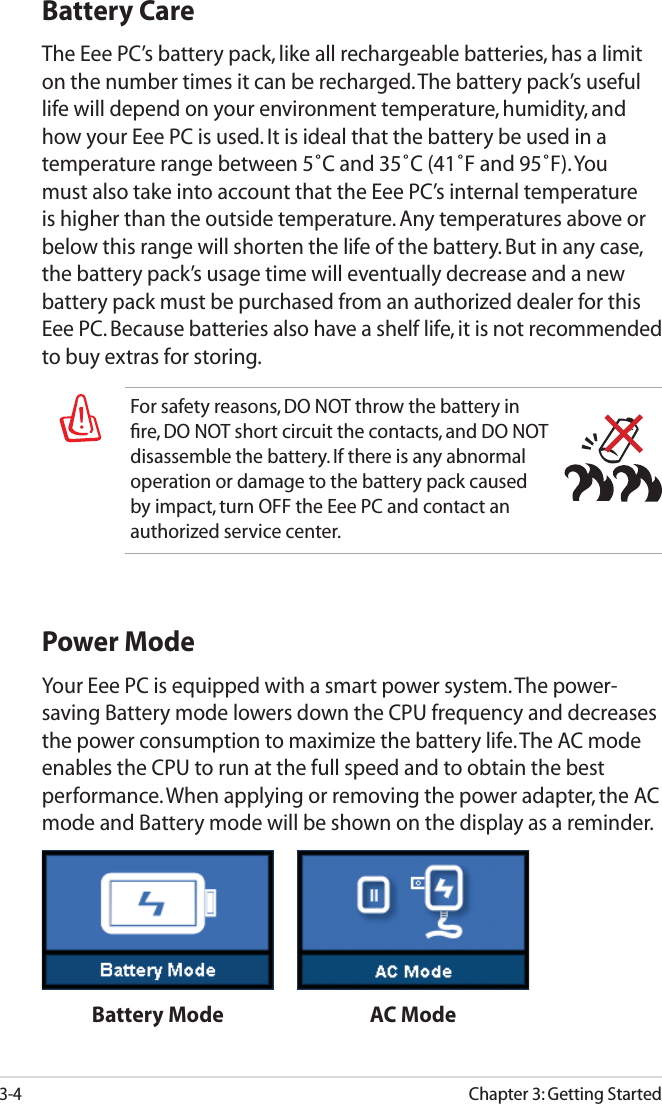

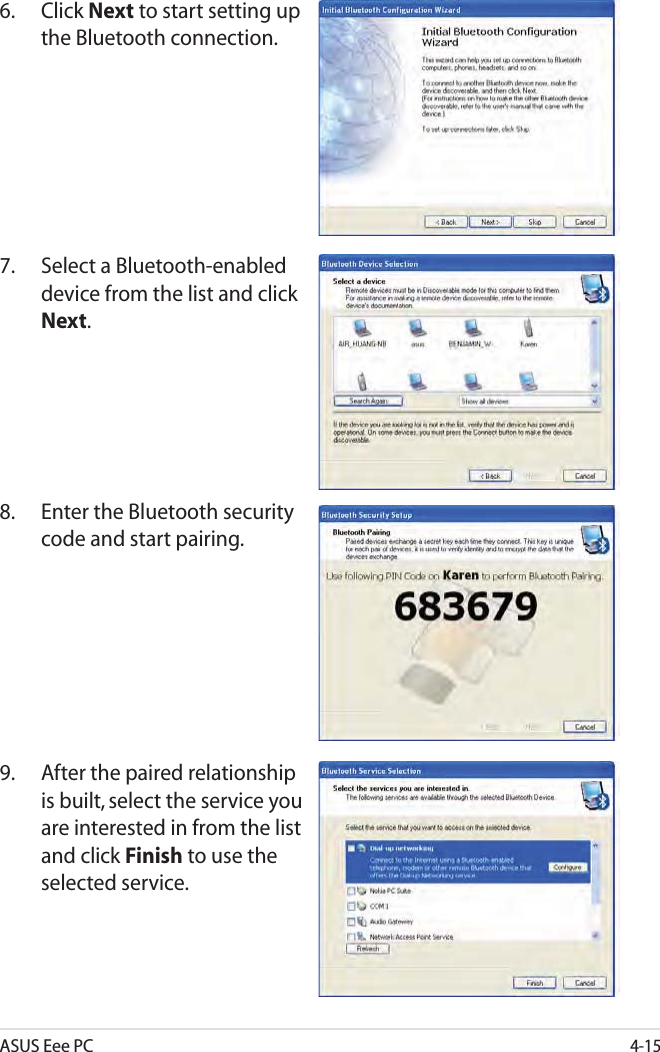
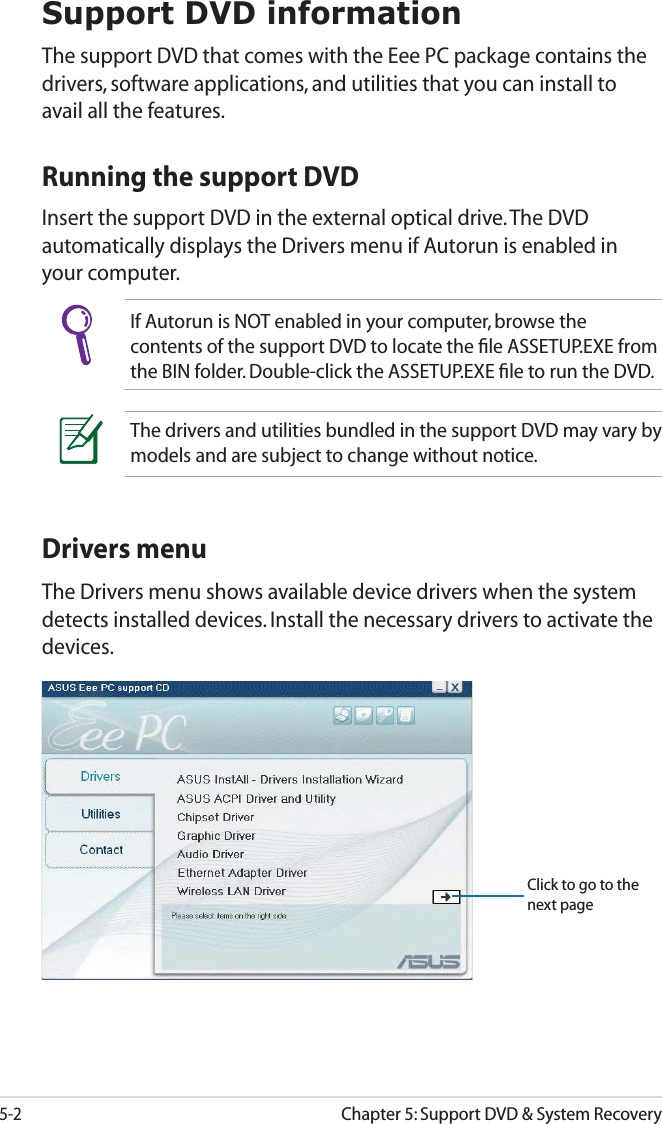
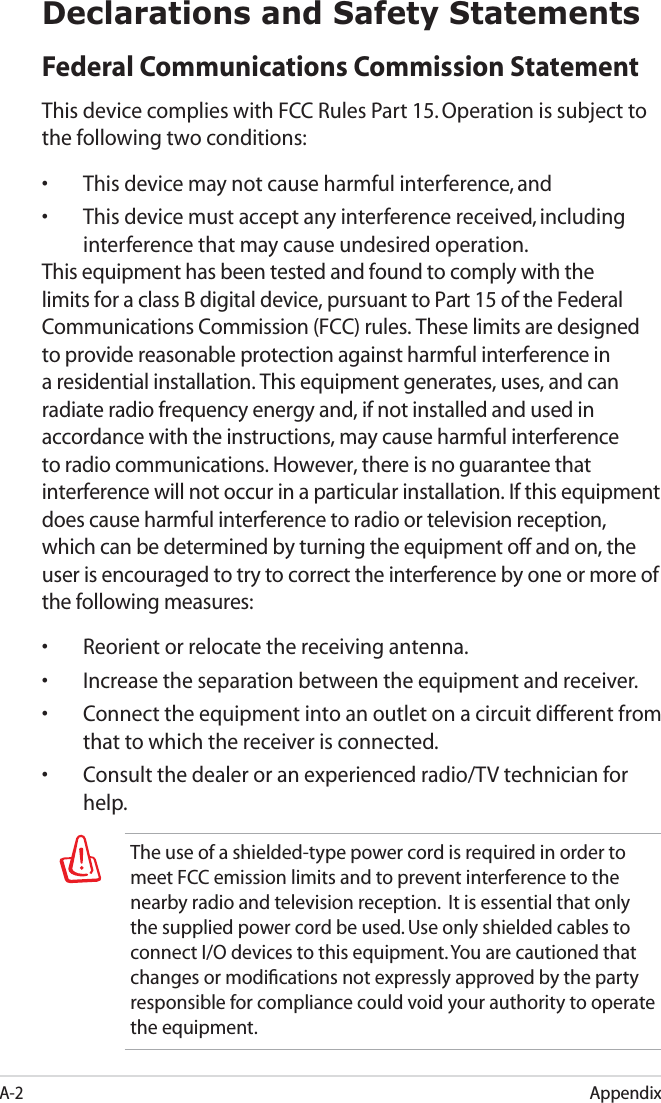
![5-8Chapter 5: Support DVD & System RecoveryBoot BoosterThe Boot Booster item in BIOS setup helps shorten your Eee PC bootup time. However, you MUST disable this BIOS item before you change any Eee PC components or perform system recovery from the external optical drive. Follow the instructions below to disable Boot Booster:1. Start the system and press <F2> on bootup to show the POST screen. Press <F2> again to enter the BIOS setup.v02.58 (C)Copyright 1985-2005, American Megatrends, Inc.BIOS SETUP UTILITYMain Advanced Security Boot ExitBoot Device Priority Boot Settings ConfigurationOnBoard LAN Boot ROM [Enabled]Boot Booster [Disabled]←→ Select Screen↑↓ Select ItemEnter Go to Sub ScreenF1 General HelpF10 Save and ExitESC ExitSpecifies the Boot Device Priority sequence.A virtual floppy disk drive (Floppy Drive B: ) may appear when you set the CD-ROM driveas the first boot device.3. Press <F10> to save the configuration and restart Eee PC.If you fail to see the POST screen or enter the BIOS setup by doing the instruction above, restart the system and try pressing <F2> repeatedly on bootup.2. Set Boot Booster to [Disabled] Remember to enable Boot Booster after you complete hardware change or system recovery.](https://usermanual.wiki/ASUSTeK-Computer/E10HEN771.User-Manual/User-Guide-1081393-Page-72.png)
![A-4AppendixDeclaration of Conformity (R&TTE directive 1999/5/EC)The following items were completed and are considered relevant and sufficient:• Essential requirements as in [Article 3]• Protection requirements for health and safety as in [Article 3.1a]• Testing for electric safety according to [EN 60950]• Protection requirements for electromagnetic compatibility in [Article 3.1b]• Testing for electromagnetic compatibility in [EN 301 489-1] & [EN 301]• Testing according to [489-17]• Effective use of the radio spectrum as in [Article 3.2]• Radio test suites according to [EN 300 328-2]CE Mark WarningThis is a Class B product, in a domestic environment, this product may cause radio interference, in which case the user may be required to take adequate measures.IC Radiation Exposure Statement for CanadaThis equipment complies with IC radiation exposure limits set forth for an uncontrolled environment. To maintain compliance with IC RF exposure compliance requirements, please avoid direct contact to the transmitting antenna during transmitting. End users must follow the specific operating instructions for satisfying RF exposure compliance.Operation is subject to the following two conditions: • This device may not cause interference and • This device must accept any interference, including interference that may cause undesired operation of the device.](https://usermanual.wiki/ASUSTeK-Computer/E10HEN771.User-Manual/User-Guide-1081393-Page-76.png)