ASUSTeK Computer HC-A04 ASUS VivoWatch BP User Manual HC A04 UserMan
ASUSTeK Computer Inc ASUS VivoWatch BP HC A04 UserMan
HC-A04- UserMan
HC-A04
User Manual
Android App E-manual iOS App
E14075
July 2018
First Edition
2
Table of Contents
Introduction .......................................................................................................................... 4
About this manual ..............................................................................................................5
Conventions used in this manual..................................................................................6
Typography ...........................................................................................................................6
Safety precautions ..............................................................................................................7
Battery precautions ............................................................................................................ 9
Chapter 1: Getting started
Getting to know your ASUS VivoWatch BP ................................................................12
ECG (Electrocardiography) electrode................................................................14
PPG (Photoplethysmogram) sensor ..................................................................14
Touch screen display panel ..................................................................................14
Home button .............................................................................................................15
Strap (Medical grade silicone) .............................................................................15
Charging connectors (Input: 5Vdc, 0.5A) .........................................................15
Charging your ASUS VivoWatch BP ..............................................................................16
Chapter 2: Using your ASUS VivoWatch BP
Installing the companion app ........................................................................................ 20
Pairing for the rst time .................................................................................................... 21
Pairing with another device or pairing again ...........................................................22
Calibrating your ASUS VivoWatch BP ..........................................................................24
3
Navigating your ASUS VivoWatch BP...........................................................................25
Unlocking your ASUS VivoWatch BP .................................................................25
Scrolling through ASUS VivoWatch BP features ............................................26
Viewing more information for the selected feature ....................................27
ASUS VivoWatch BP features...........................................................................................28
Home screen ..............................................................................................................28
Measuring screen .....................................................................................................29
Heart rate screen ......................................................................................................31
Settings ........................................................................................................................32
Activities screen ........................................................................................................33
Exercise screen ..........................................................................................................34
Notication and reminders .............................................................................................36
Updating your ASUS VivoWatch BP ..............................................................................37
Updating through the ASUS HealthConnect App .......................................37
Updating through the PC Tool ............................................................................38
Appendices

4
Introduction
Thank you for purchasing the ASUS VivoWatch BP! ASUS VivoWatch BP is
the world’s rst wearable blood pressure tracking device that packs ASUS
HealthAI technology and some tness functions with all the benets of
being accurate, smart, and compact. Please ll in the following information
for future reference:
DATE PURCHASED: ______________________________________
SERIAL NUMBER: ______________________________________
Staple your receipt here
Register your product at https://account.asus.com/product_reg.aspx
5
About this manual
This manual provides information about the hardware and software
features of your ASUS VivoWatch BP, organized through the following
chapters:
Chapter 1: Getting started
This chapter details the hardware components of your ASUS
VivoWatch BP and shows you how to use the dierent parts of your
ASUS VivoWatch BP.
Chapter 2: Using your ASUS VivoWatch BP
This chapter provides an overview of using your ASUS VivoWatch BP.
Appendix
This section includes notices and safety statements for your ASUS
VivoWatch BP.
Read all of the information in the instruction manual and any
other literature in the box before operating the device. For the
full manual version of your ASUS VivoWatch BP, visit our multi-
language web site at: https://www.asus.com/VivoWatch/
ASUS-VivoWatch-BP-HC-A04/HelpDesk_Manual/.
6
Conventions used in this manual
To highlight key information in this manual, some text are presented as
follows:
This message contains vital information that must be followed
to complete a task.
This message contains additional information and tips that
can help complete tasks.
This message contains important information that must be
followed to keep you safe while performing tasks and prevent
damage to your ASUS VivoWatch BP’s data and components.
Typography
Bold = This indicates a menu or an item that must be selected.
Italic = This indicates sections that you can refer to in this user guide.
7
Safety precautions
• YourASUSVivoWatchBPiswater-resistant,notwaterproof.Keepit
dry and refrain from using it near liquids, rain, moisture, and other
sources of water or liquid. If your ASUS VivoWatch BP got wet, wipe
immediately using a soft dry cloth.
• EnsurethatyourASUSVivoWatchBPisdrybeforeusingitwithapp
features and follow the warning information for your personal safety.
• TheASUSVivoWatchBPandthechargingdockmustberecycledor
disposed of properly.
• Keepanysmallcomponentsawayfromchildren.
• YourASUSVivoWatchBPshouldonlybeusedinenvironments
with ambient temperatures between 5°C and 40°C, and stored in
environments with ambient temperatures between -20°C and 45°C.
• DONOTleaveyourASUSVivoWatchBPinahotcar.Temperaturesin
a parked car on sunny days can exceed the recommended ambient
temperatures.
• Somepeoplemayexperienceirritationstocertainmaterialsused
in jewelry, watches, and other wearable items that are in prolonged
contact with their skin. This can be due to allergies, environmental
factors, extended exposure to irritants like soap, sweat, or other
causes.
• Youmaybemorelikelytoexperienceirritationfromanywearable
device if you have allergies or other sensitivities.
8
• Ifyouhaveknownskinsensitivities,pleasetakespecialcarewhen
wearing your ASUS VivoWatch BP.
• YoumaybemorelikelytoexperienceirritationfromyourASUS
VivoWatch BP if you wear it too tightly.
• RemoveyourASUSVivoWatchBPperiodicallytoallowyourskinto
breathe.
• KeepingyourASUSVivoWatchBPandthestrapcleananddrywill
reduce the possibility of skin irritation.
• Ifyouexperienceredness,swelling,itchiness,oranyotherirritationor
discomfort on your skin around, or beneath, your ASUS VivoWatch BP,
please remove your ASUS VivoWatch BP and consult your physician
before resuming wear.
• Continueduse,evenaftersymptomssubside,mayresultinrenewed
or increased irritation.
• TheASUSVivoWatchBPisnotamedicaldeviceandmakes
no medical claims. It is not intended to diagnose health
conditions. The measurement results are only for your
reference.
• DONOTadjustmedicationbasedonthemeasurement
results from the ASUS VivoWatch BP. Take medication as
prescribedbyyourphysician.Onlyaphysicianisqualiedto
diagnose and treat High Blood Pressure.
9
Battery precautions
• Donotdisposeofinre.
• Neverattempttoshort-circuitthebattery.
• Neverattempttodisassembleandreassemblethebattery.
• Discontinueusageifleakageisfound.

10
11
1
Getting started
12
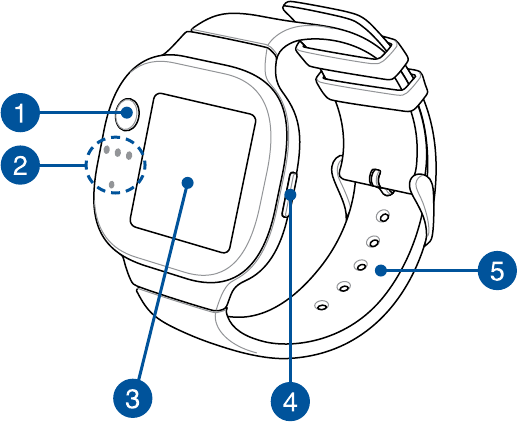
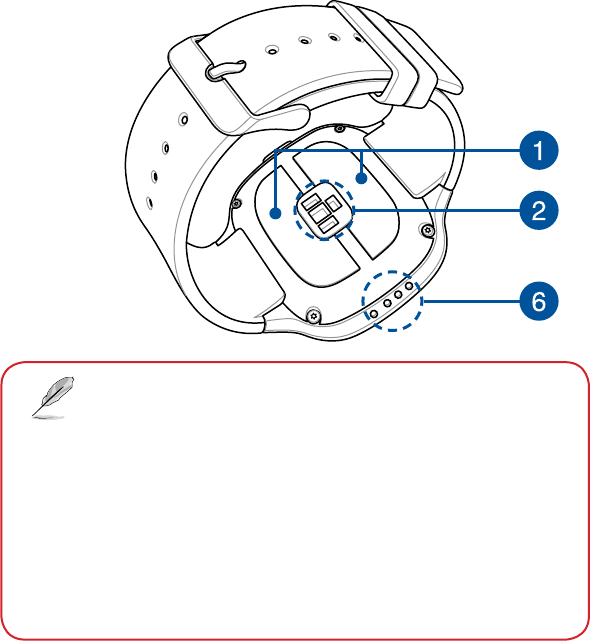
Getting to know your ASUS VivoWatch BP
13
• YourASUSVivoWatchBPcanbeusedasastandalonedevice
formeasurementsandtimeadjustments.
• Downloadandinstallthecompanionappforacomplete
overview of your health data. For more details, refer to the
Installing the companion app section in this manual.
• ASUSVivoWatchBPcomplieswithIP67fordustandwater-
resistant.
• DONOTuseyourASUSVivoWatchBPinliquidswith
chemicals or salt water (such as sea water, swimming pools,
or hot springs) as it may damage the charging connectors.
14
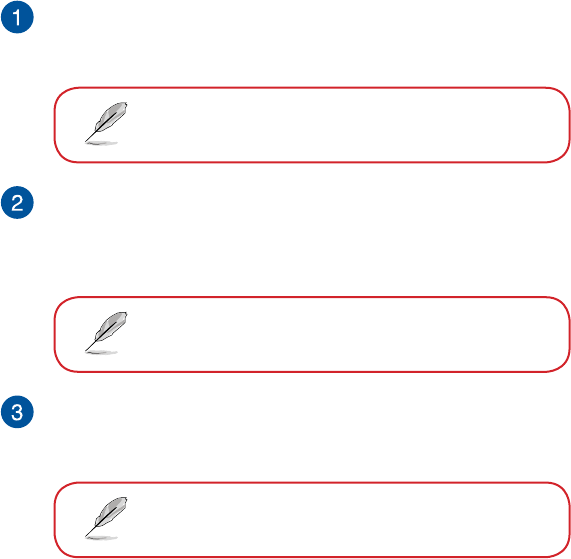
ECG (Electrocardiography) electrode
This electrode works in conjunction with the PPG sensor to allow
you to measure your blood pressure level.
For more details, refer to the Using your ASUS
VivoWatch BP section in this manual.
PPG (Photoplethysmogram) sensor
This sensor works in conjunction with the ECG electrode to allow
you to measure your blood pressure level. This sensor also allows
you to measure your heart rates.
For more details, refer to the Using your ASUS
VivoWatch BP section in this manual.
Touch screen display panel
Use the touch screen display panel to operate your ASUS
VivoWatch BP using gestures.
For more details, refer to the Using your ASUS
VivoWatch BP section in this manual.
15
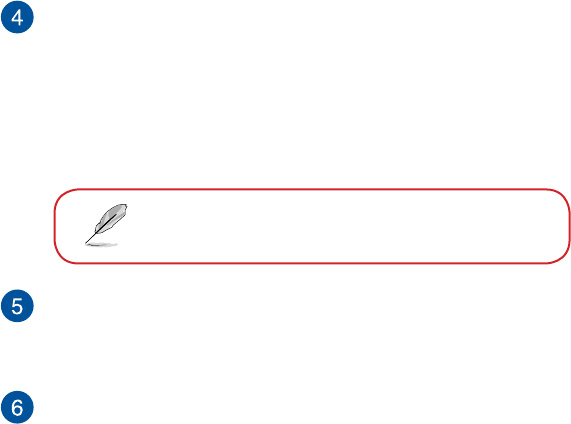
Home button
Press this button on your ASUS VivoWatch BP to return to the
homescreen.YoucanalsopressthisbuttontounlockyourASUS
VivoWatch BP or enable other functions.
Press and hold this button for two (2) seconds to power on your
ASUS VivoWatch BP, or press and hold this button for fteen (15)
seconds to power o your ASUS VivoWatch BP.
To prevent data lost, ensure to upload your data
before powering off your ASUS VivoWatch BP.
Strap (Medical grade silicone)
The strap allows you to wear your ASUS VivoWatch BP on your
wrist.
Charging connectors (Input: 5Vdc, 0.5A)
Align and connect these charging connectors to the charging
connectors on your charging dock to charge the battery of your
ASUS VivoWatch BP.
16
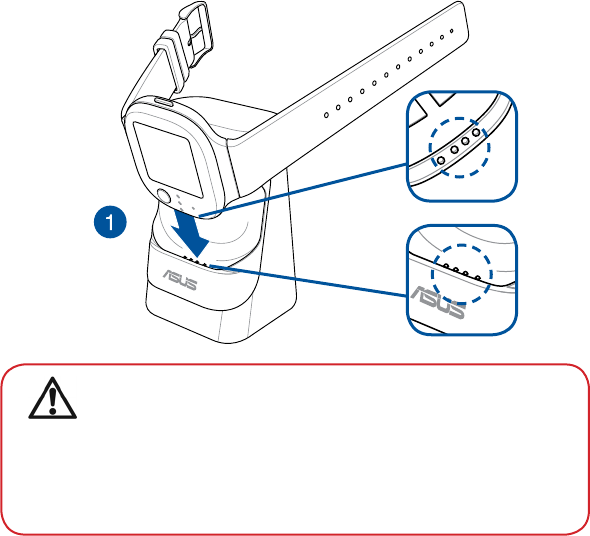
Charging your ASUS VivoWatch BP
1. Align and place the charging connectors on your ASUS VivoWatch BP
onto the charging connectors in the charging dock.
• Ensurethatthechargingconnectorsarecleananddry
before charging.
• AfterwearingyourASUSVivoWatchBPinwatersports,
ensure to thoroughly rinse the charging pins and connectors
with fresh water and dry with a clean cloth to prevent
corrosion.
17
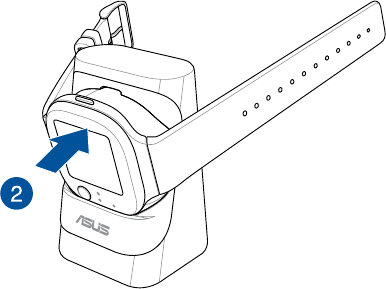
2. Gently push your ASUS VivoWatch BP so that it is rmly seated inside
the charging dock.
18
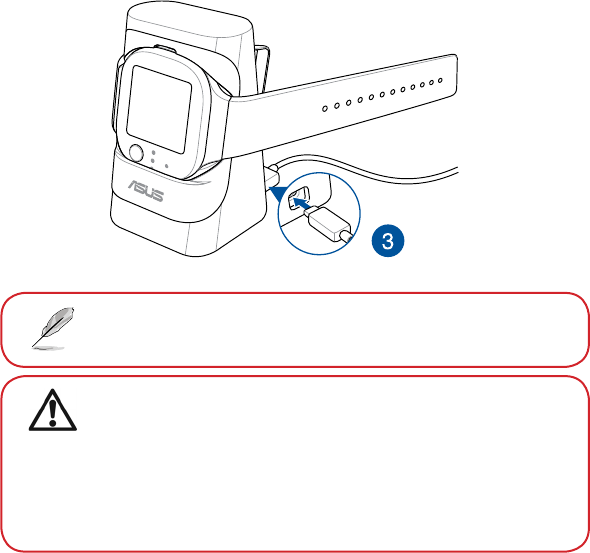
3. Connect the USB cable to the charging dock, then connect the USB
cable to a power source to start charging.
YourASUSVivoWatchBPautomaticallypowersonwhenfully
charged.
• ConnectingtheUSBcableimproperlymaycauseserious
damage to the ASUS VivoWatch BP. Any damage caused by
misuse is not covered by the warranty.
• Donotshortcircuitthechargingconnectorsonthedock.
• Somepowerbankscannotdetectlowcurrentdevices,and
will therefore not be able to charge the ASUS VivoWatch BP.
19
2
Using your ASUS VivoWatch BP
20
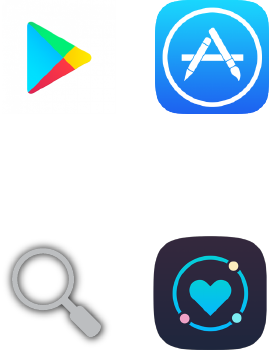
Installing the companion app
Pair your ASUS VivoWatch BP with the companion app to take advantage
of all its features, such as activity data, pill reminders, path tracking,
message and call notications, and sleep and health recommendations.
1. On your phone, log in or sign up for a Google account
or Apple ID.
2. Launch Play Store or App Store.
3. Search for ASUS HealthConnect App, then install the companion
app.
21
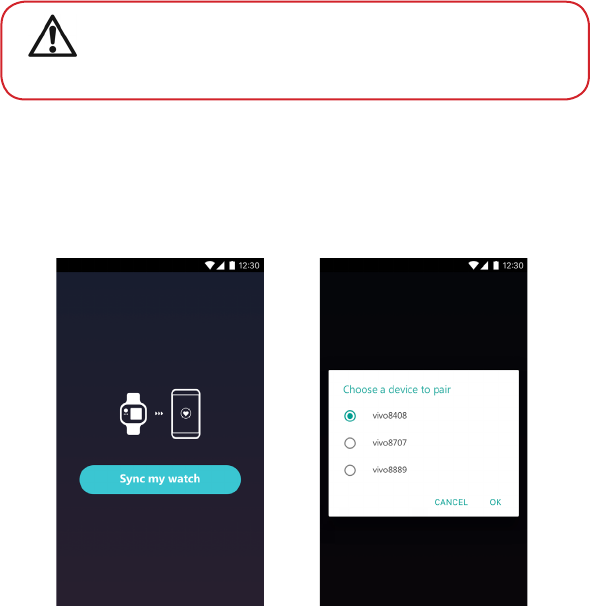
Pairing for the rst time
• TurnontheBluetoothofyourphonebeforepairing.
• EnsurethattheASUSVivoWatchBPiswithinthreemeters
from your phone.
1. Press and hold the home button for two (2) seconds to power on your
ASUS VivoWatch BP.
2. Launch the ASUS HealthConnect App.
3. Follow the onscreen instructions on your phone and ASUS VivoWatch
BP to complete the pairing process.
22
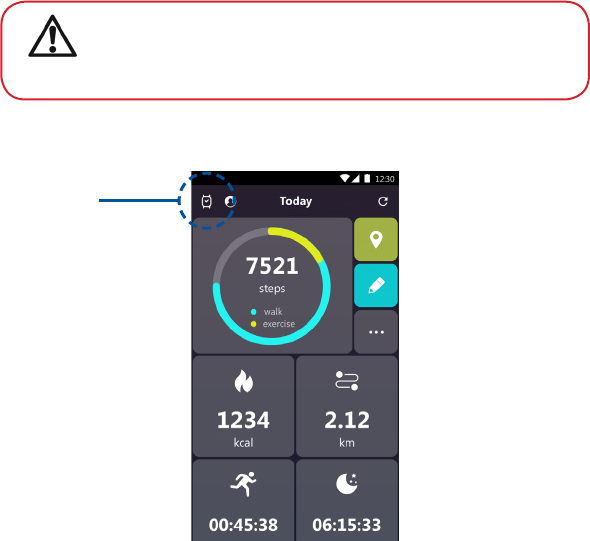
Pairing with another device or pairing again
• TurnontheBluetoothofyourphonebeforepairing.
• EnsurethattheASUSVivoWatchBPiswithinthreemeters
from your phone.
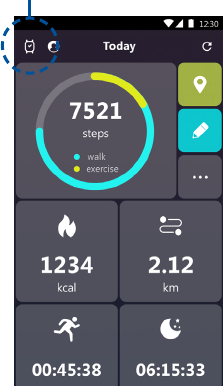
1. From the Today screen, tap the watch icon on the top left corner.
Watch icon
23
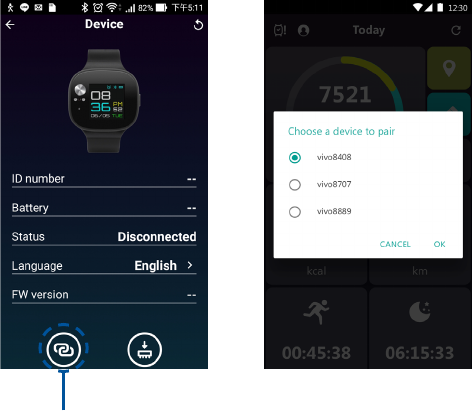
2. From the Device screen, tap Pairing on the bottom left.
3. Select your ASUS VivoWatch BP (or other wearable devices in the ASUS
Vivo series, such as the ASUS VivoWatch and ASUS Vivobaby) from the
available list, then tap OK to start the pairing.
Pairing
24
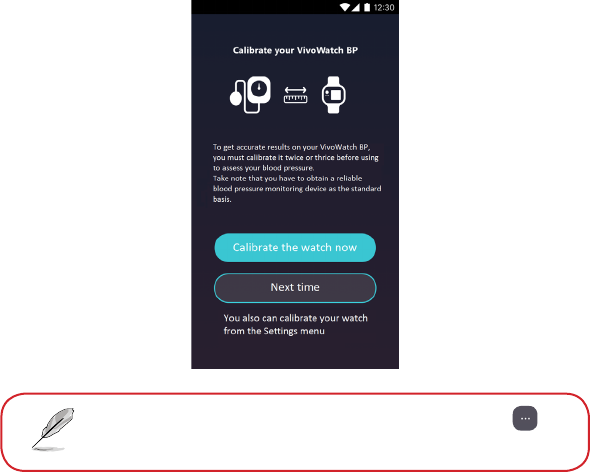
Youcanalsoaccessthecalibratescreenbytapping
on the home screen, then go to settings menu.
Calibrating your ASUS VivoWatch BP
YoumustcalibrateyourASUSVivoWatchBPwithareliablebloodpressure
measuring device before using it for blood pressure measurements.
Calibrate your ASUS VivoWatch BP two to three times for the most accurate
results.
25
Navigating your ASUS VivoWatch BP
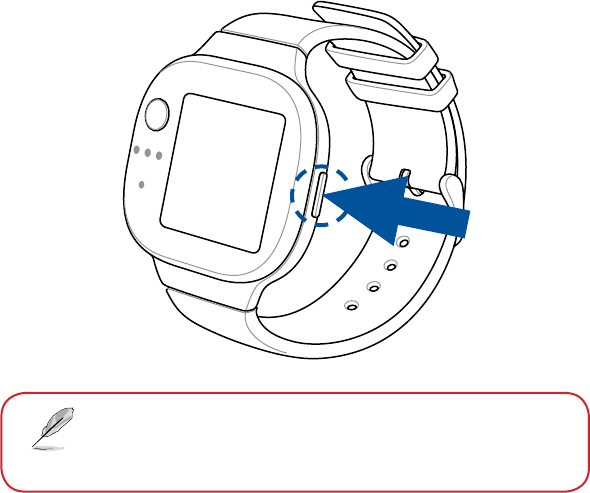
Unlocking your ASUS VivoWatch BP
Press the Home buttontounlockyourASUSVivoWatchBP.Youcanscroll
through the ASUS VivoWatch BP features after it is unlocked.
After a period of inactivity, the ASUS VivoWatch BP
returns to the home screen and is locked to prevent
unwanted operations.
26
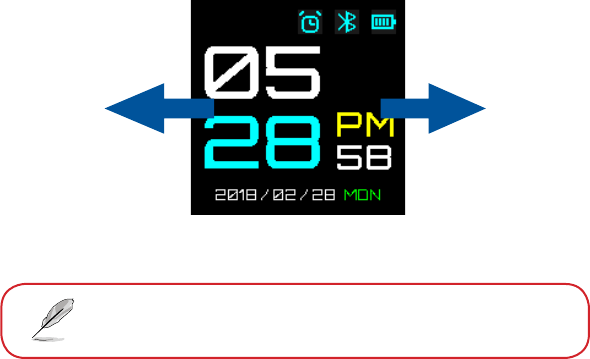
Scrolling through ASUS VivoWatch BP features
Swipe left or right to scroll through the ASUS VivoWatch BP features.
YoucanpresstheHome button toreturntotheHOMEscreen.
27
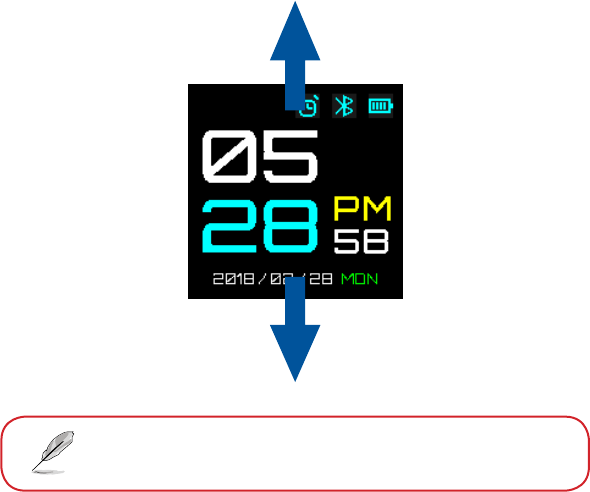
Viewing more information for the selected feature
Swipe up or down to view more information for the selected ASUS
VivoWatch BP feature or change the watch face.
Notallfeaturescontainadditionalinformation.

28
ASUS VivoWatch BP features
YourASUSVivoWatchBPshowsinformationaboutyourdailyactivity
status, exercise time, and sleep quality to assist you towards a healthier life.
The screens shown in this manual are for reference only.
Home screen
The ASUS VivoWatch BP home screen displays the time, date, and status of
your ASUS VivoWatch BP.
Icon Description
Locked
Battery level
Connected
Alarm
Swipe up or down to change the watch face.
29
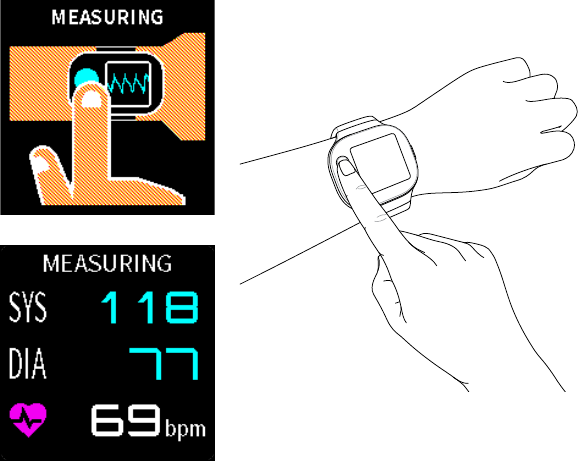
To measure your blood pressure level, scroll to this screen, then place your
nger onto the ECG electrode and the PPG (green light) sensor.
Measuring screen
This screen allows you to measure your blood pressure level. Swipe right
from the Home screen to enter the Measuring screen.

30
YourASUSVivoWatchBPusesthePPGsensorinconjunctionwiththe
ECG electrode to allow you to pick up your blood pressure level, and the
way you wear your ASUS VivoWatch BP can aect the accuracy of the
measurements.
To get more accurate results:
• WeartheASUSVivoWatchBPinanormalwaywiththewatchface
facing up, the bottom of the ASUS VivoWatch BP touching your skin,
and the ASUS VivoWatch BP away from your wrist bone.
• WearyourASUSVivoWatchBPinawaywithoutbeinguncomfortable.
Do not strap the ASUS VivoWatch BP too tight to your wrist.
• Placeyourngergently on the ECG electrode and cover the green
light while measuring your blood pressure.
• Remainstillwhilemeasuringtogetthemostaccurateresults.
• TheaccuracyofthePPGsensormayvarydependingon
measurementconditionsandsurroundings.IfthePPG
sensor is dirty, clean the sensor and try again.
• DonotlookdirectlyintothePPGsensor,thesensorlightmay
impair your vision.
• Pleasemakesurechildrendonotlookdirectlyintothesensor
light.
• TheASUSVivoWatchBPisnotamedicaldeviceandmakes
no medical claims. It is not intended to diagnose health
conditions. The measurement results are only for your
reference.
31
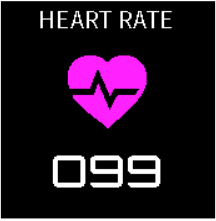
Heart rate screen
This screen shows your current heart rate. The PPG sensor on your ASUS
VivoWatch BP automatically determines your current heart rate.
To get more accurate results:
1. Wear the ASUS VivoWatch BP in a normal way with the watch face
facing up, the bottom of the ASUS VivoWatch BP touching your skin,
and the ASUS VivoWatch BP away from your wrist bone.
2. Wear your ASUS VivoWatch BP in a way without being uncomfortable.
Do not strap the ASUS VivoWatch BP too tight to your wrist.
3. Youcangetthemostaccurateresultsfromtheheartratemonitor
when you are warmed up.
32
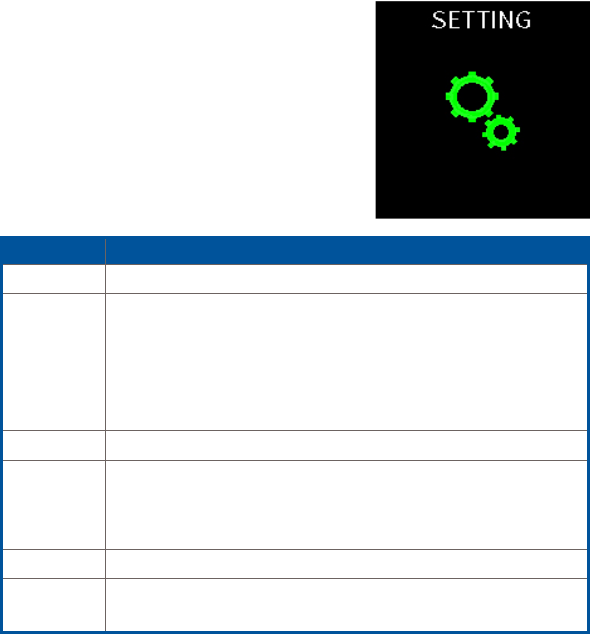
Settings
This screen allows you to change
settings directly on your ASUS
VivoWatch BP. Swipe right from the
Home screen three times to enter
the Settings screen.
Swipe up or down on the Settings
screen to view the congurable
settings listed below.
Setting Description
Alarm Turn alarms on or o.
Location Turn location feature on or o.
Turn on the location feature to enable activity distance,
speed, and path tracking. Align your ASUS VivoWatch BP
at towards the sky for 30 to 60 seconds in an outdoor
open area for a GPS signal.
Time Adjust the time.
Prole Adjust your prole.
Enter your personal information correctly for more accurate
blood pressure measurements.
Language Change device language.
About View more information about your device, such as rmware
version, serial number, e-labels, and etc.
33
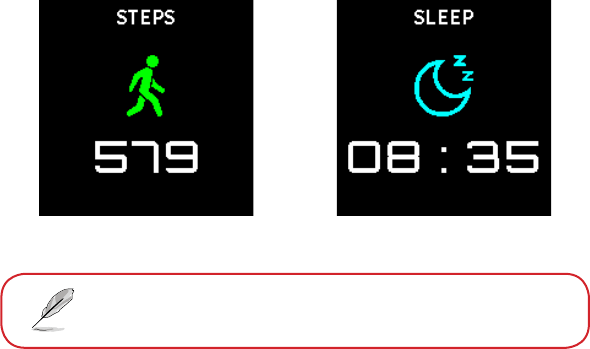
Activities screen
YourASUSVivoWatchBPwillautomaticallyrecordyourdailyactivitiesand
display them on this screen. Swipe left from the Home screen to enter the
Activities screen.
Swipe up or down to view other activities.
Youcanviewyourdailyactivitiessuchasstepsyouhavetaken,calories
you have burned, your sleep time, and your comfort sleep time as they are
recorded.
34
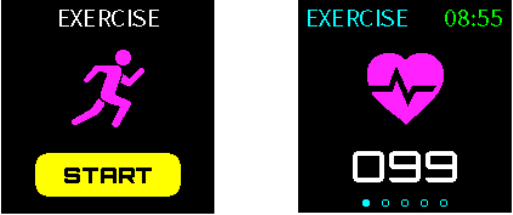
From the exercise screen, swipe left or right to view information such as
the real time heart rate, exercise time, calories, steps, and distance for the
current exercise session.
Exercise screen
This screen allows you to keep track of your exercise sessions. When you
start exercise mode, your ASUS VivoWatch BP will record information
about the current exercise session and show the information as they are
recorded.
Entering exercise mode
To enter exercise mode, swipe left or right to the EXERCISE screen, then
tap START to enter exercise mode.
35
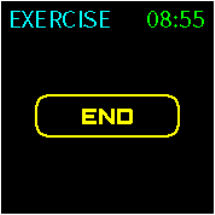
Exiting exercise mode
To exit exercise mode, swipe up on
the EXERCISE screen, then tap END
to exit exercise mode.
36
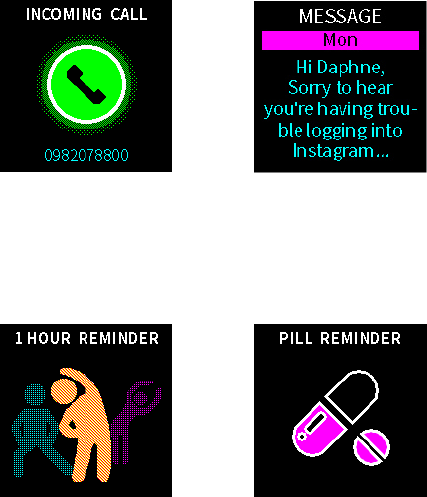
Notications
When you receive a call or message on your paired phone, your ASUS
VivoWatch BP will vibrate and show you the phone number of the caller or
a preview of the message.
Reminders
YourASUSVivoWatchBPwillalsoshowyouwalkandpillreminderstoaid
you towards a healthier lifestyle.
37
Updating your ASUS VivoWatch BP
Updating through the ASUS HealthConnect App
1. Launch the ASUS HealthConnect App.
2. From the Today screen, tap the watch icon on the top left corner.
Watch icon
38
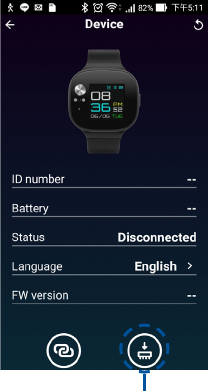
Update
Updating through the PC Tool
1. Place your ASUS VivoWatch BP into the charging dock, then use a USB
cable to connect the charging dock to a computer.
2. Download the latest rmware from the ASUS VivoWatch BP support
site.
3. Open the “.exe” le and follow the instructions to update the rmware.
3. From the Device screen, tap Update on the bottom right. A pop-up
message will appear when the rmware update is complete.
39
Appendix
40
Federal Communications Commission Interference Statement
This equipment has been tested and found to comply with the limits
for a Class B digital device, pursuant to part 15 of the FCC Rules. These
limits are designed to provide reasonable protection against harmful
interference in a residential installation. This equipment generates, uses
and can radiate radio frequency energy and, if not installed and used in
accordance with the instructions, may cause harmful interference to radio
communications. However, there is no guarantee that interference will
not occur in a particular installation. If this equipment does cause harmful
interference to radio or television reception, which can be determined by
turning the equipment o and on, the user is encouraged to try to correct
the interference by one or more of the following measures:
• Reorientorrelocatethereceivingantenna.
• Increasetheseparationbetweentheequipmentandreceiver.
• Connecttheequipmentintoanoutletonacircuitdierentfromthat
to which the receiver is connected.
• Consultthedealeroranexperiencedradio/TVtechnicianforhelp.
CAUTION:
Any changes or modications not expressly approved by the grantee of
this device could void the user's authority to operate the equipment.
This device complies with Part 15 of the FCC Rules. Operation is subject
to the following two conditions: (1) this device may not cause harmful
interference, and (2) this device must accept any interference received,
including interference that may cause undesired operation.
41
RF exposure warning
The equipment complies with FCC RF exposure limits set forth for an
uncontrolled environment.
The equipment must not be co-located or operating in conjunction with
any other antenna or transmitter.
Compliance Statement of Innovation, Science and Economic
Development Canada (ISED)
This device complies with Innovation, Science and Economic Development
Canada licence exempt RSS standard(s). Operation is subject to the
following two conditions: (1) this device may not cause interference, and (2)
this device must accept any interference, including interference that may
cause undesired operation of the device.
CAN ICES-3(B)/NMB-3(B)
Déclaration de conformité de Innovation, Sciences et
Développement économique Canada (ISED)
Le présent appareil est conforme aux CNR d’Innovation, Sciences et
Développement économique Canada applicables aux appareils radio
exempts de licence. L’exploitation est autorisée aux deux conditions
suivantes : (1) l’appareil ne doit pas produire de brouillage, et (2) l’utilisateur
de l’appareil doit accepter tout brouillage radioélectrique subi, même si le
brouillage est susceptible d’en compromettre le fonctionnement.
CAN ICES-3(B)/NMB-3(B)
42
Radio Frequency (RF) Exposure Information
The radiated output power of the Wireless Device is below the Industry
Canada (IC) radio frequency exposure limits. The Wireless Device should be
used in such a manner such that the potential for human contact during
normal operation is minimized.
This device has also been evaluated and shown compliant with the IC RF
Exposure limits under portable exposure conditions (antennas are less
than 20 cm of a person’s body).
Informations concernant l’exposition aux fréquences radio (RF)
La puissance de sortie émise par cet appareil sans l est inférieure à la
limite d’exposition aux fréquences radio d’Industrie Canada (IC). Utilisez
l’appareil sans l de façon à minimiser les contacts humains lors d’un
fonctionnement normal.
Cet appareil est conforme aux limites d’exposition aux rayonnements
IC établies pour un environnement exposé à des appareils mobiles
(les antennes se situant à une distance inférieure à 20 cm du corps de
l’utilisateur).
43
Simplied EU Declaration of Conformity
ASUSTek Computer Inc. hereby declares that this device is in compliance
with the essential requirements and other relevant provisions of Directive
2014/53/EU. Full text of EU declaration of conformity is available at
https://www.asus.com/support/.
RED RF Output table
Function Frequency Maximum Output Power (EIRP)
Bluetooth 2402 - 2480 MHz 4 dBm
TheSimpliedEUDeclarationofConformityofthisdevicehas
beenupdated.ThisdevicenowcomplieswithRadioEquipment
Directive2014/53/EU,andnolongercomplieswithR&TTE
Directive1999/5/EC.

44
NCC警語:
經型式認證合格之低功率射頻電機,非經許可,公司、商號或使用者均
不得擅自變更頻率、加大功率或變更原設計之特性及功能。
低功率射頻電機之使用不得影響飛航安全及干擾合法通信;經發現有干
擾現象時,應立即停用,並改善至無干擾時方得繼續使用。
前項合法通信,指依電信法規定作業之無線電通信。低功率射頻電機須
忍受合法通信或工業、科學及醫療用電波輻射性電機設備之干擾。
注意!使用過度恐傷害視力:
1. 使用 30 分鐘請休息 10分鐘。
2. 未滿 2 歲幼兒不看螢幕,2 歲以上每天看螢幕不要超過 1 小時。
「產品之限用物質含有情況」之相關資訊,請參考下表。
單元
限用物質及其化學符號
鉛
(Pb)
汞
(Hg)
鎘
(Cd)
六價鉻
(Cr+6)
多溴聯苯
(PBB)
多溴二苯醚
(PBDE)
印刷電路板及
電子組件 - ○ ○ ○ ○ ○
外殼 ○ ○ ○ ○ ○ ○
液晶螢幕 - ○ ○ ○ ○ ○
錶帶 ○ ○ ○ ○ ○ ○
其他及其配件 - ○ ○ ○ ○ ○
○:係指該項限用物質之百分比含量未超出百分比含量基準值。
-:係指該項限用物質為排除項目。

45
Global Environmental Regulation Compliance and Declaration
ASUS follows the green design concept to design and manufacture our
products, and makes sure that each stage of the product life cycle of ASUS
product is in line with global environmental regulations. In addition, ASUS
disclose the relevant information based on regulation requirements.
Please refer to http://csr.asus.com/english/Compliance.htm for information
disclosure based on regulation requirements ASUS is complied with:
Japan JIS-C-0950 Material Declarations
EU REACH SVHC
ASUS Recycling/Takeback Services
ASUS recycling and takeback programs come from our commitment
to the highest standards for protecting our environment. We believe in
providing solutions for you to be able to responsibly recycle our products,
batteries, other components as well as the packaging materials. Please
go to http://csr.asus.com/english/Takeback.htm for detailed recycling
information in dierent regions.

46
Proper disposal
Do not throw your ASUS VivoWatch BP in municipal
waste. This product has been designed to enable proper
reuse of parts and recycling. The symbol of the crossed
out wheeled bin indicates that the product (electrical,
electronic equipment and mercury-containing button cell
battery) should not be placed in municipal waste. Check
local regulations for disposal of electronic products.
Do not throw the battery in municipal waste. The symbol
of the crossed out wheeled bin indicates that the battery
should not be placed in municipal waste.
For US and Canada customers, you can call 1-800-822-8837
(toll-free) for recycling information of your ASUS products’
rechargeable batteries.
Rechargeable Battery Recycling Service in North America
47
Notices for removable batteries
• Riskofexplosionifbatteryisreplacedbyanincorrecttype.
• Thebatteryanditscomponentmustberecycledordisposedof
properly.
Avis concernant les batteries remplaçables
• Labatteriedel’ordinateurportablepeutprésenterunrisqued’incendie
ou de brûlure si celle-ci est retirée ou désassemblée.
• Labatterieetsescomposantsdoiventêtrerecyclésdefaçon
appropriée.
Regional notice for California
WARNING
Cancer and Reproductive Harm -
www.P65Warnings.ca.gov
48
Nordic Lithium Cautions (for lithium-ion batteries)
CAUTION! Danger of explosion if battery is incorrectly replaced. Replace
only with the same or equivalent type recommended by the manufacturer.
Dispose of used batteries according to the manufacturer’s instructions.
(English)
ATTENZIONE! Rischio di esplosione della batteria se sostituita in modo
errato. Sostituire la batteria con un una di tipo uguale o equivalente
consigliata dalla fabbrica. Non disperdere le batterie nell’ambiente. (Italian)
VORSICHT! Explosionsgefahr bei unsachgemäßen Austausch der Batterie.
Ersatz nur durch denselben oder einem vom Hersteller empfohlenem
ähnlichen Typ. Entsorgung gebrauchter Batterien nach Angaben des
Herstellers. (German)
ADVARSELI! Lithiumbatteri - Eksplosionsfare ved fejlagtig håndtering.
Udskiftning må kun ske med batteri af samme fabrikat og type. Levér det
brugte batteri tilbage til leverandøren. (Danish)
VARNING! Explosionsfara vid felaktigt batteribyte. Använd
samma batterityp eller en ekvivalent typ som rekommenderas av
apparattillverkaren.Kasseraanväntbatterienligtfabrikantensinstruktion.
(Swedish)
VAROITUS! Paristo voi räjähtää, jos se on virheellisesti asennettu. Vaihda
paristo ainoastaan laitevalmistajan sousittelemaan tyyppiin. Hävitä
käytetty paristo valmistagan ohjeiden mukaisesti. (Finnish)
49
ATTENTION! Il y a danger d’explosion s’il y a remplacement incorrect de
la batterie. Remplacer uniquement avec une batterie du mêre type ou
d’un type équivalent recommandé par le constructeur. Mettre au rebut les
batteries usagées conformément aux instructions du fabricant. (French)
ADVARSEL! Eksplosjonsfare ved feilaktig skifte av batteri. Benytt samme
batteritype eller en tilsvarende type anbefalt av apparatfabrikanten. Brukte
batterier kasseres i henhold til fabrikantens instruksjoner. (Norwegian)
(Japanese)
ВНИМАНИЕ! При замене аккумулятора на аккумулятор иного типа
возможно его возгорание. Утилизируйте аккумулятор в соответствии с
инструкциями производителя. (Russian)
Manufacturer ASUSTek COMPUTER INC.
Address 4F, No. 150, LI-TE RD., PEITOU,
TAIPEI 112, TAIWAN
Authorized
Representative
in Europe
ASUS COMPUTER GmbH
Address HARKORTSTR.21-23,40880
RATINGEN,GERMANY
50
COPYRIGHT AND WARRANTY INFORMATION
No part of this user guide, including the products and software described in it, may be
reproduced, transmitted, transcribed, stored in a retrieval system, or translated into any
language in any form or by any means, except documentation kept by the purchaser for
backuppurposes,withouttheexpresswrittenpermissionofASUSTeKComputerINC.
(“ASUS”).
Product warranty or service will not be extended if: (1) the product is repaired, modied
or altered, unless such repair, modication of alteration is authorized in writing by ASUS;
or (2) the serial number of the is defaced or missing.
ASUSPROVIDESTHISUserguide“ASIS”WITHOUTWARRANTYOFANYKIND,EITHER
EXPRESS OR IMPLIED, INCLUDING BUT NOT LIMITED TO THE IMPLIED WARRANTIES OR
CONDITIONSOFMERCHANTABILITYORFITNESSFORAPARTICULARPURPOSE.INNO
EVENTSHALLASUS,ITSDIRECTORS,OFFICERS,EMPLOYEESORAGENTSBELIABLEFOR
ANYINDIRECT,SPECIAL,INCIDENTAL,ORCONSEQUENTIALDAMAGES(INCLUDING
DAMAGES FOR LOSS OF PROFITS, LOSS OF BUSINESS, LOSS OF USE OR DATA,
INTERRUPTIONOFBUSINESSANDTHELIKE),EVENIFASUSHASBEENADVISEDOFTHE
POSSIBILITYOFSUCHDAMAGESARISINGFROMANYDEFECTORERRORINTHISUser
guide OR PRODUCT.
Products and corporate names appearing in this user guide may or may not be
registered trademarks or copyrights of their respective companies, and are used only for
identication or explanation and to the owners’ benet, without intent to infringe.
SPECIFICATIONS AND INFORMATION CONTAINED IN THIS User guide ARE FURNISHED
FORINFORMATIONALUSEONLY,ANDARESUBJECTTOCHANGEATANYTIMEWITHOUT
NOTICE,ANDSHOULDNOTBECONSTRUEDASACOMMITMENTBYASUS.ASUS
ASSUMESNORESPONSIBILITYORLIABILITYFORANYERRORSORINACCURACIES
THATMAYAPPEARINTHISUserguide,INCLUDINGTHEPRODUCTSANDSOFTWARE
DESCRIBED IN IT.
Copyright©2018ASUSTeKComputerINC.AllRightsReserved.

51
LIMITATION OF LIABILITY
Circumstances may arise where because of a default on ASUS’ part or other liability,
you are entitled to recover damages from ASUS. In each such instance, regardless of
the basis on which you are entitled to claim damages from ASUS, ASUS is liable for no
more than damages for bodily injury (including death) and damage to real property
and tangible personal property; or any other actual and direct damages resulted from
omission or failure of performing legal duties under this Warranty Statement, up to the
listed contract price of each product.
ASUS will only be responsible for or indemnify you for loss, damages or claims based in
contract, tort or infringement under this Warranty Statement.
This limit also applies to ASUS’ suppliers and its reseller. It is the maximum for which
ASUS, its suppliers, and your reseller are collectively responsible.
UNDERNOCIRCUMSTANCESISASUSLIABLEFORANYOFTHEFOLLOWING:(1)THIRD-
PARTYCLAIMSAGAINSTYOUFORDAMAGES;(2)LOSSOF,ORDAMAGETO,YOUR
RECORDSORDATA;OR(3)SPECIAL,INCIDENTAL,ORINDIRECTDAMAGESORFORANY
ECONOMICCONSEQUENTIALDAMAGES(INCLUDINGLOSTPROFITSORSAVINGS),EVEN
IFASUS,ITSSUPPLIERSORYOURRESELLERISINFORMEDOFTHEIRPOSSIBILITY.
SERVICE AND SUPPORT
Visit our multi-language web site at https://www.asus.com/support/