ASUSTeK Computer HD05UGPZ5 BLUETOOTH MODULE User Manual 4 OF 4
ASUSTeK Computer Inc BLUETOOTH MODULE 4 OF 4
Contents
- 1. USER MANUAL 1 OF 4
- 2. USER MANUAL 2 OF 4
- 3. USER MANUAL 3 OF 4
- 4. USER MANUAL 4 OF 4
USER MANUAL 4 OF 4
Quick Start Guide - Introduction 第 7 頁,共 160 頁
file://C:\Documents and Settings\anitachou\Local Settings\Temp\~hh3F24.htm 2004/11/30
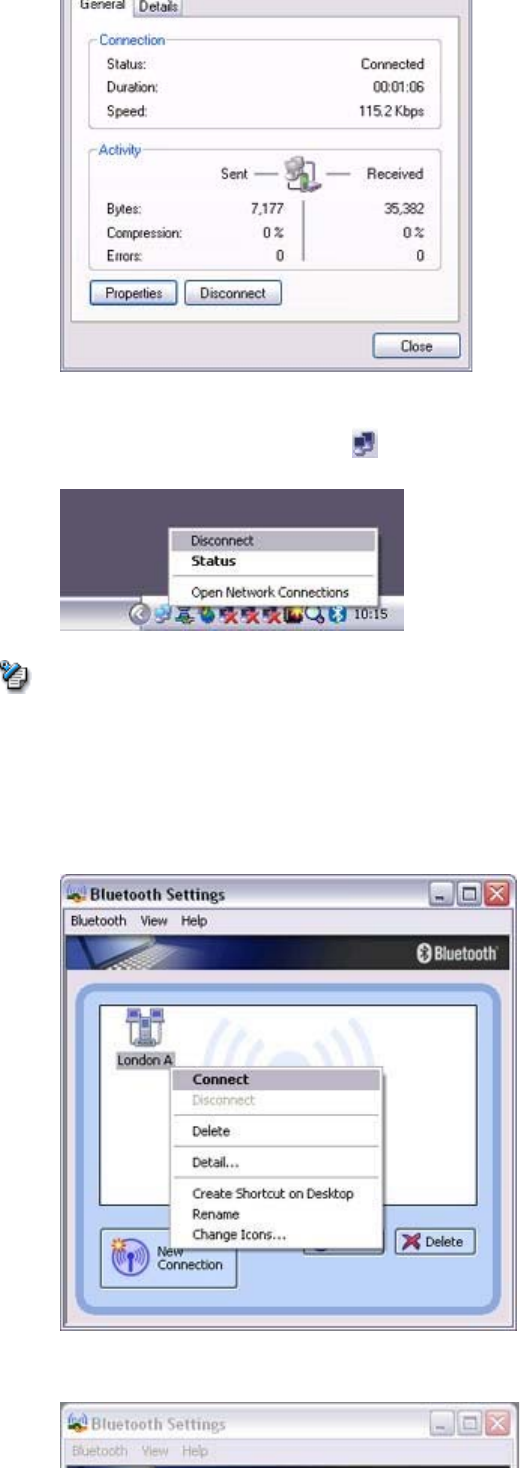
Please click on the [Disconnect] button when you want to disconnect from the Internet.
Alternatively, please right-click on the icon, and then click on [Disconnect].
zYou can start an application to make an automatic connection to the Internet, but you can
also make a manual connection using the connection destination icon.
The procedure is described below.
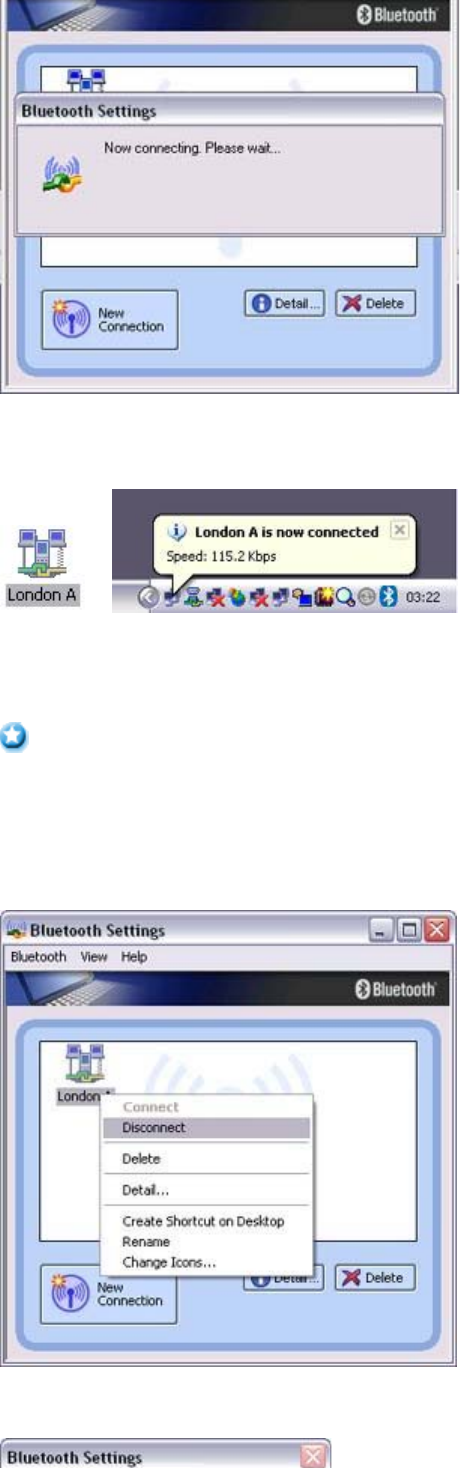
1. From the [Bluetooth Settings] window, right -click on the connection destination icon,
and then click on [Connect] from the menu that appears
A window indicating that the connection is being established will appear.
Note
Quick Start Guide - Introduction 第 8 頁,共 160 頁
file://C:\Documents and Settings\anitachou\Local Settings\Temp\~hh3F24.htm 2004/11/30
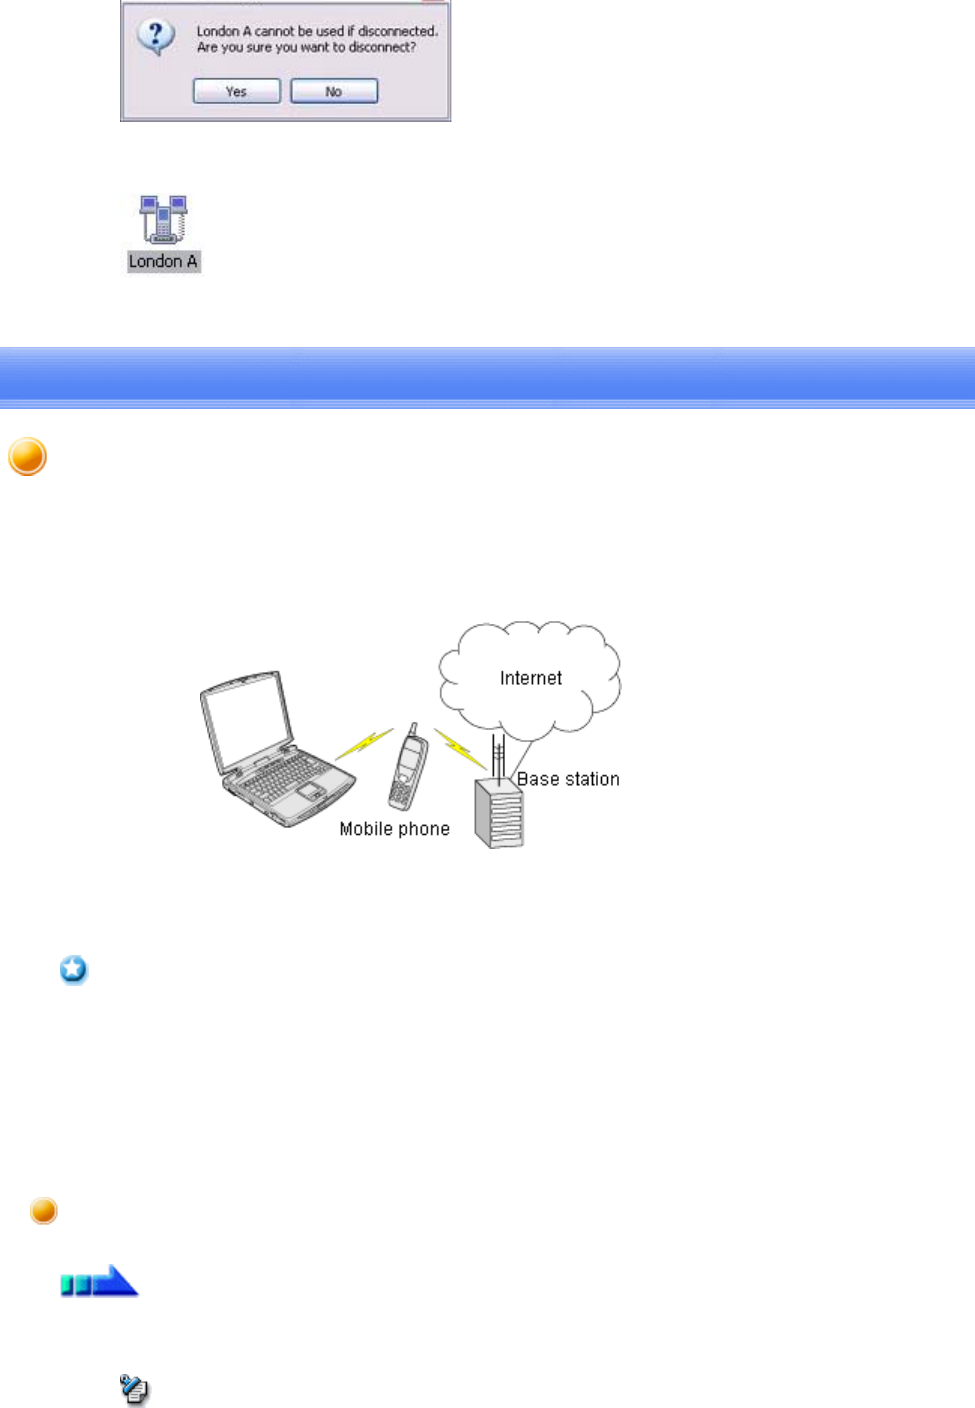
If the connection has been established successfully, the connection icon and task tray
will appear as shown below.
You will be able to browse Web pages using your browser and send and receive e-
mail.
{Please enter the e-mail settings separately if you are going to use e-mail (the set-
up method will vary with the application).
2. End the connection
Right-click on the icon, and then click [Disconnect] to end the connection.
The following message will appear. Click on the [Yes] button.
Important
Quick Start Guide - Introduction 第 9 頁,共 160 頁
file://C:\Documents and Settings\anitachou\Local Settings\Temp\~hh3F24.htm 2004/11/30
When the icon appears as shown below, the connection will have ended.
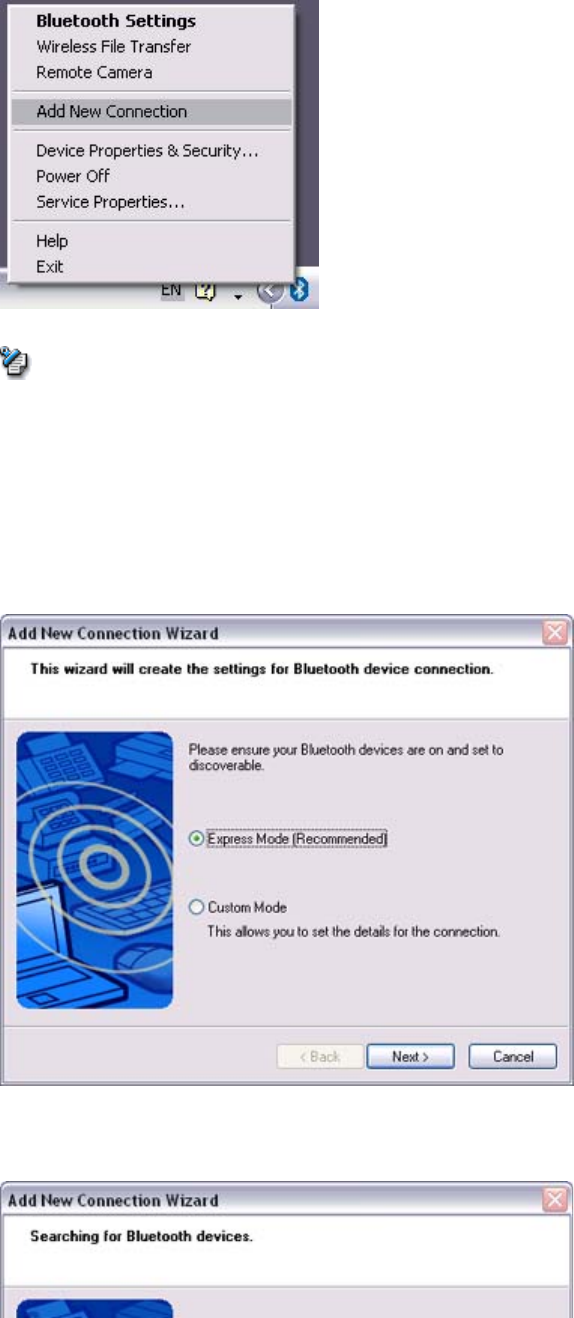
This section describes how to connect to the Internet via a telephone line, using a mobile
telephone.
→Configuring a mobile telephone for use as a modem
→Connecting to the Internet
zIn order to connect to the Internet, you must have already signed up with a provider and
obtained a connection ID and password. Please ensure you have confirmed the ID,
password and telephone number of your provider's access point before you begin the set-
up process.
zA Bluetooth passkey (PIN code) is required for you to connect to the mobile telephone.
Please make a note of your Bluetooth passkey before you start the set-up process.
1. Turn on the mobile telephone, and set it to be connectable via Bluetooth
{Please refer to the mobile telephone instruction manual for information on how to
operate the device.
Important
Configuring a mobile telephone for use as a modem
Procedure
Note
Connecting to the Internet using a mobile telephone [DUN]
Quick Start Guide - Introduction 第 10 頁,共 160 頁
file://C:\Documents and Settings\anitachou\Local Settings\Temp\~hh3F24.htm 2004/11/30
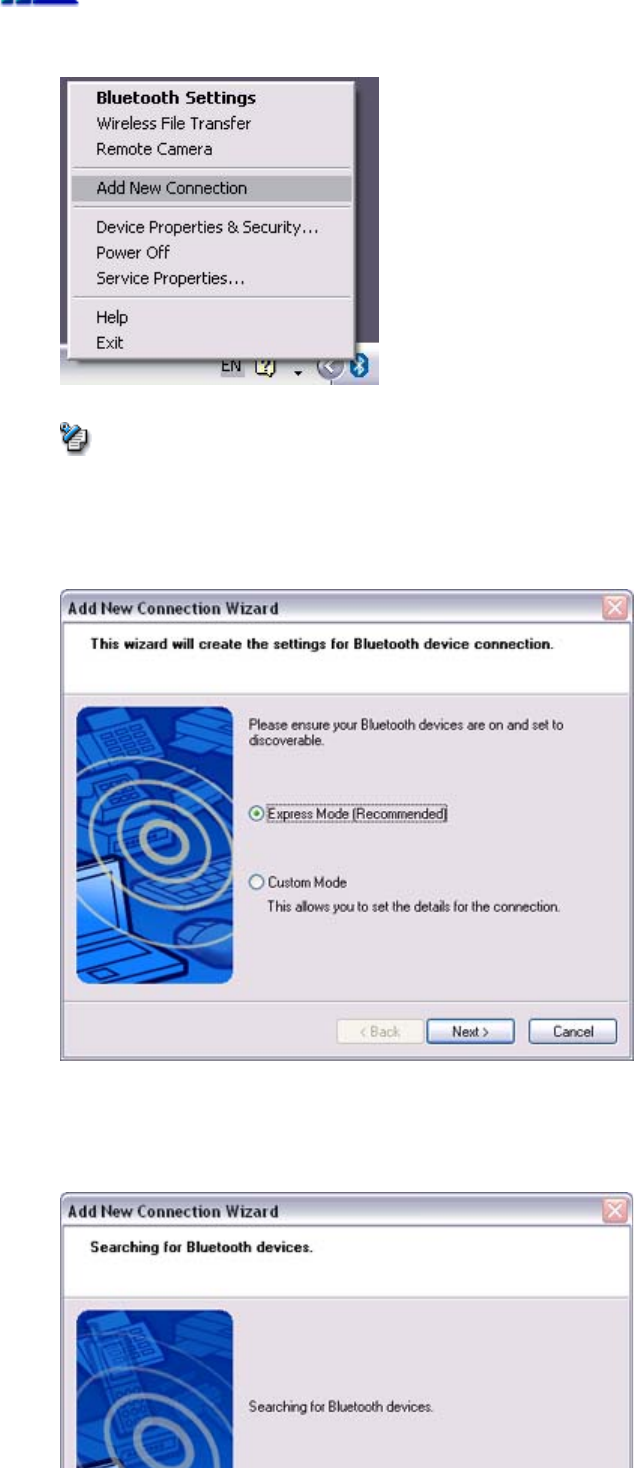
2. Right-click on the Bluetooth icon in the task tray, and then click on [Add New
Connection]
{Alternatively, click [Start]→[All Programs]→[Bluetooth]→[Bluetooth Settings],
and then click on
[
New Connection
]
from the active
[
Bluetooth Settin
g
s
]
window.
The [Add New Connection Wizard (Welcome to the Add New Connection Wizard)]
window will appear.
3. Confirm that [Express Mode] has been selected, and then click on the [Next] button
The [Add New Connection Wizard (Searching for Bluetooth devices)] window will
appear.
Note

Quick Start Guide - Introduction 第 11 頁,共 160 頁
file://C:\Documents and Settings\anitachou\Local Settings\Temp\~hh3F24.htm 2004/11/30
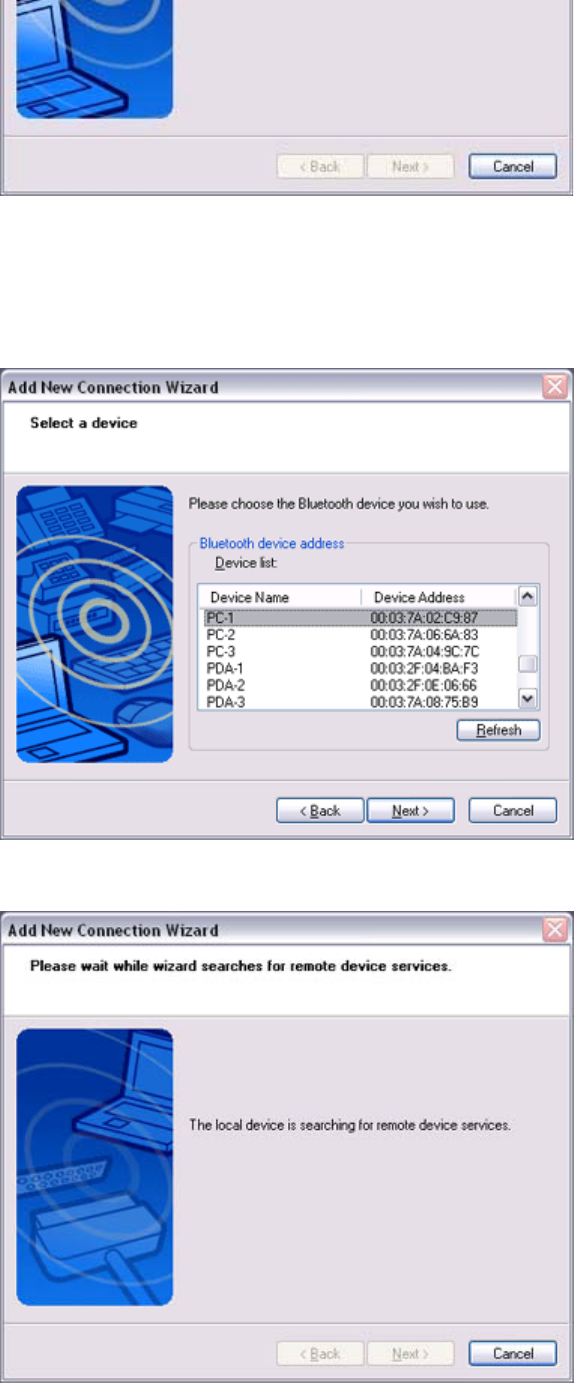
4. Select the device name of the mobile telephone from [Device List], and then click on
the [Next] button
The [Add New Connection Wizard (Searching for Services)] window will appear.

Quick Start Guide - Introduction 第 12 頁,共 160 頁
file://C:\Documents and Settings\anitachou\Local Settings\Temp\~hh3F24.htm 2004/11/30
Once a service has been detected successfully, connection to the device and COM port
creation will be
p
erformed automaticall
y,
after which the
[
Add New Connection Wizard
(Modem Settings)] window will appear.
5. If you are connecting to a mobile telephone for the first time, enter the passkey for the
wireless modem station under [Bluetooth Passkey (PIN code)], and then click on the
[OK] button
Once the program has finished searching for the devices, the [Add New Connection
Wizard (Device Selection)] window will appear.
6. Click on the [Next] button
Certain modems require you to configure initialization commands separately.
Please click on the [Additional Initialization Command Settings] button, enter the
initialization commands in the following window, and then click on the [OK] button.
Quick Start Guide - Introduction 第 13 頁,共 160 頁
file://C:\Documents and Settings\anitachou\Local Settings\Temp\~hh3F24.htm 2004/11/30
{Please refer to the modem or mobile phone instruction manual for further details
on the initialization commands.
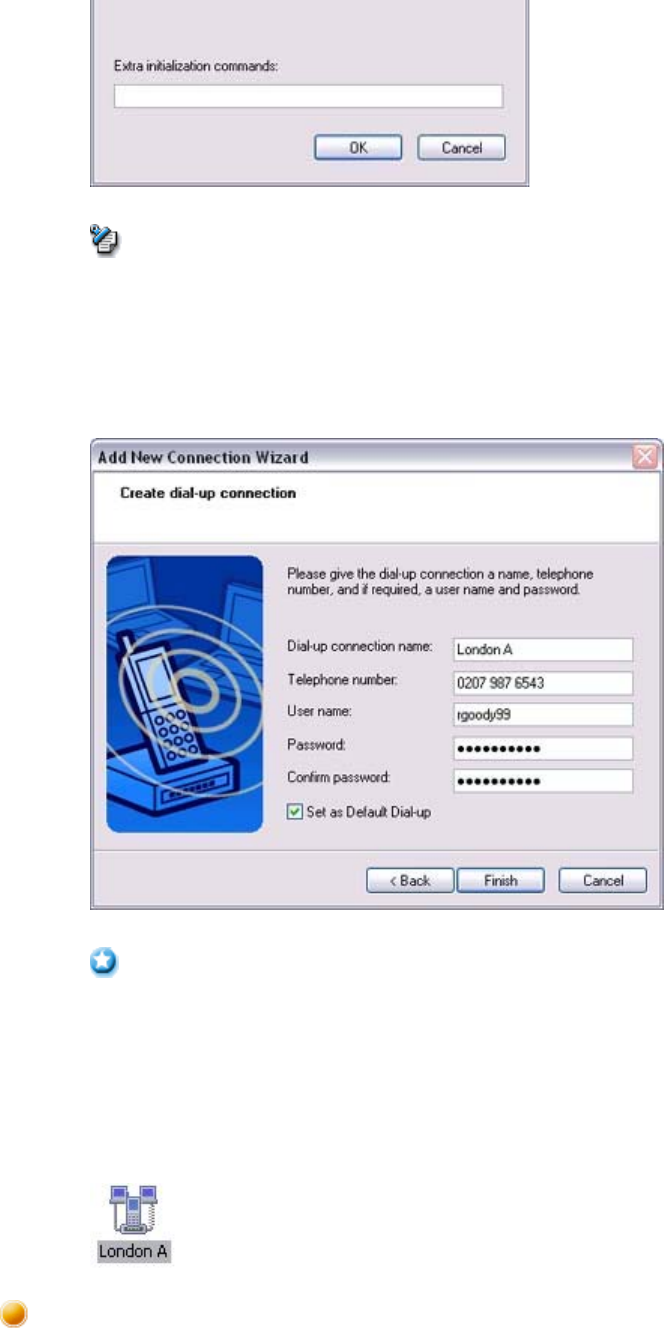
7. Enter the connection name (optional), telephone number (of your provider's access
point), user name and password (as issued by your provider), and then click on the
[Finish] button.
{The sample entries shown in the window are provided solely for purpose of
explanation. Please use your own telephone number, ID and password according
to the arrangement with your provider.
The settings will be registered, and an icon will appear in the [Bluetooth Settings]
window.
You can connect to the Internet by following the procedure below if the connection destination
registered when you configured the mobile telephone has been set as the default connection
destination.
1
Start your browser e
mail application or other application
Note
Important
Connecting to the Internet
Quick Start Guide - Introduction 第 14 頁,共 160 頁
file://C:\Documents and Settings\anitachou\Local Settings\Temp\~hh3F24.htm 2004/11/30
1
.
Start
your
browser,
e
-
mail
application
or
other
application
{Please enter the e-mail settings separately if you are going to use e-mail (the set-
up method will vary with the application).
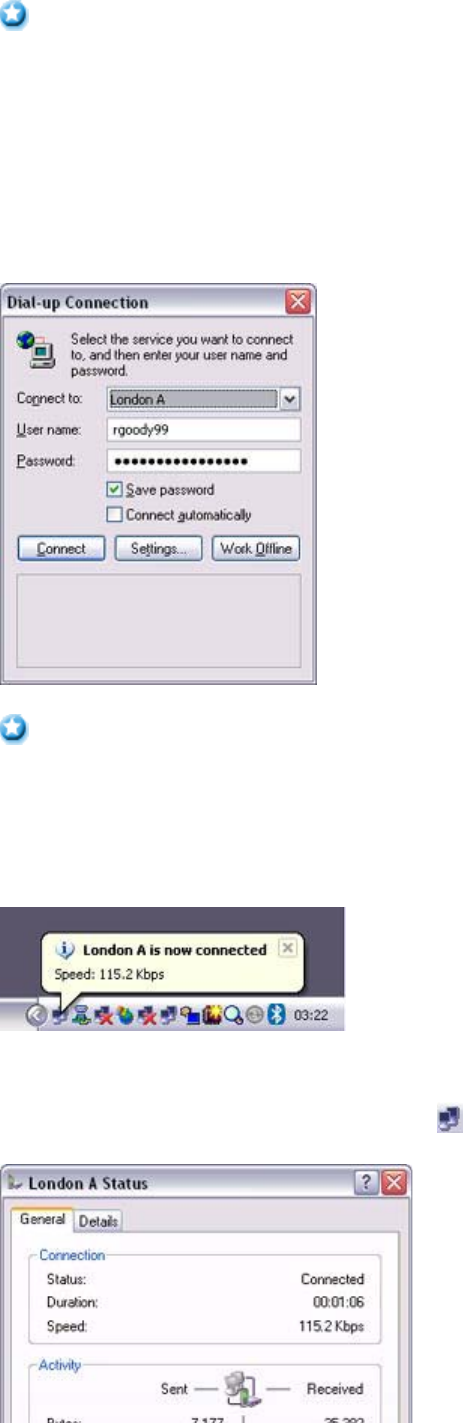
2. Enter the URL of the Web page you wish to display and then press the [Enter] key, or
use the e-mail tool to send/receive items or perform other activities.
The [Dial-up Connection] window will appear.
3. Click on the [Connect] button
{A connection will be automatically established with the mobile telephone if COM
Auto Connect is available. If COM Auto Connect is not available, please
manually connect to the mobile telephone.
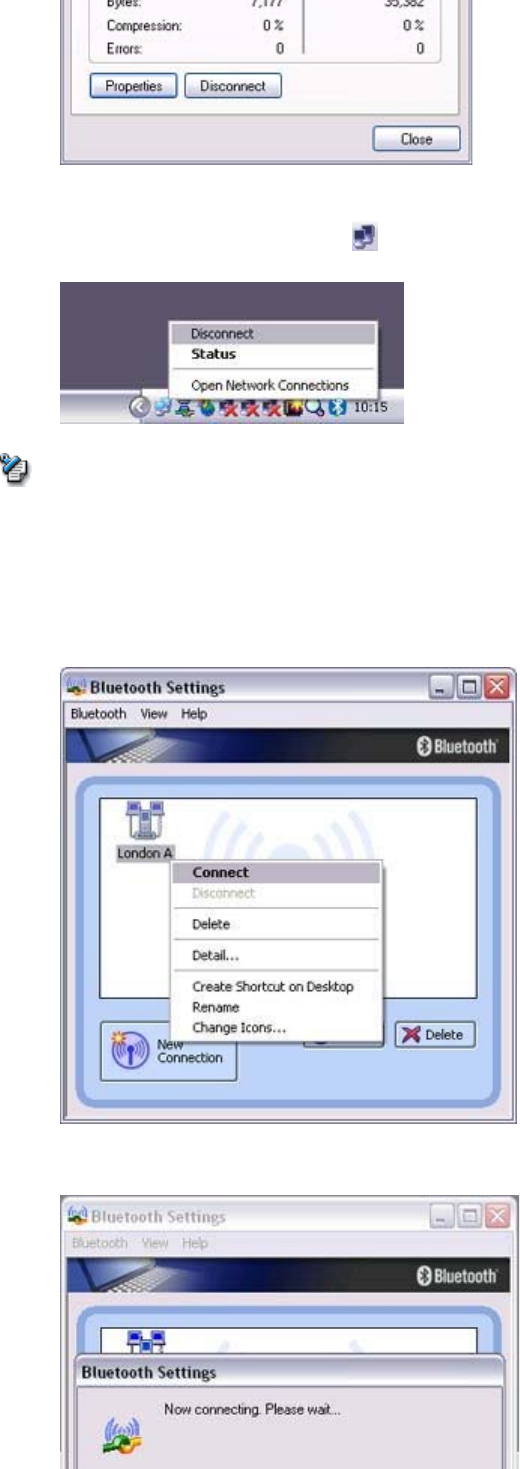
The following message will appear once you have connected to the Internet.
4. End the connection
The window below will appear if you double-click on the icon in the task bar.
Important
Important
Quick Start Guide - Introduction 第 15 頁,共 160 頁
file://C:\Documents and Settings\anitachou\Local Settings\Temp\~hh3F24.htm 2004/11/30
Please click on the [Disconnect] button when you want to disconnect from the Internet.
Alternatively, please right-click on the icon, and then click on [Disconnect].
zYou can start an application to make an automatic connection to the Internet, but you can
also make a manual connection using the connection destination icon.
The procedure is described below.
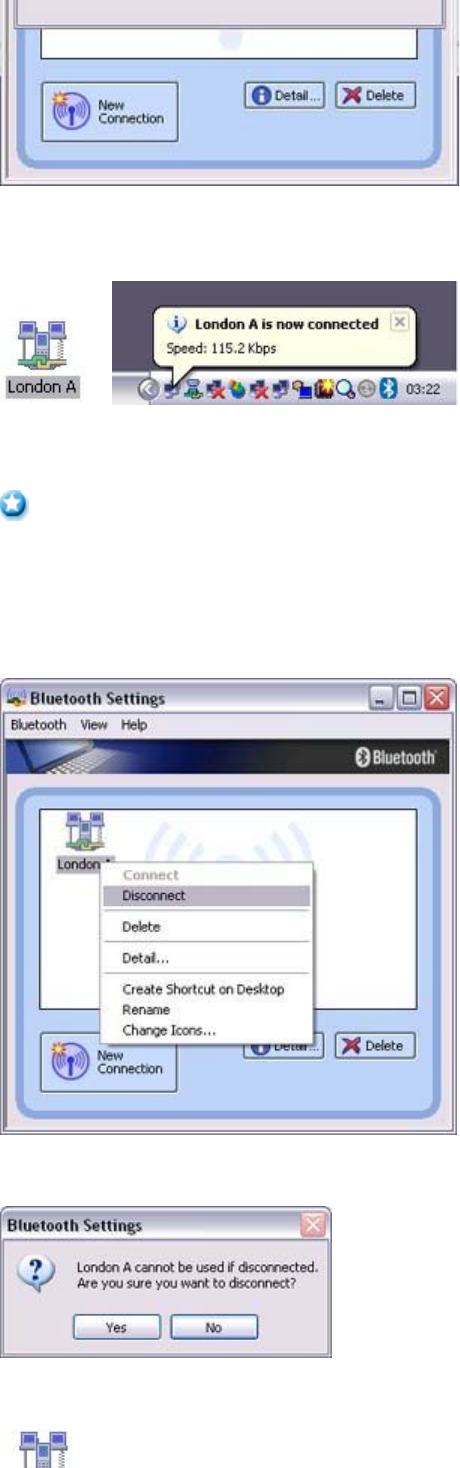
1. From the [Bluetooth Settings] window, right -click on the connection destination icon,
and then click on [Connect] from the menu that appears
A window indicating that the connection is being established will appear.
Note
Quick Start Guide - Introduction 第 16 頁,共 160 頁
file://C:\Documents and Settings\anitachou\Local Settings\Temp\~hh3F24.htm 2004/11/30
If the connection has been established successfully, the connection icon and task tray
will appear as shown below.
You will be able to browse Web pages using your browser and send and receive e-mail.
{Please enter the e-mail settings separately if you are going to use e-mail (the set-
up method will vary with the application).
2. End the connection
Right-click on the icon, and then click [Disconnect] to end a connection.
The following message will appear. Click on the [Yes] button.
When the icon appears as shown below, the connection will have been ended.
Important
Quick Start Guide - Introduction 第 17 頁,共 160 頁
file://C:\Documents and Settings\anitachou\Local Settings\Temp\~hh3F24.htm 2004/11/30
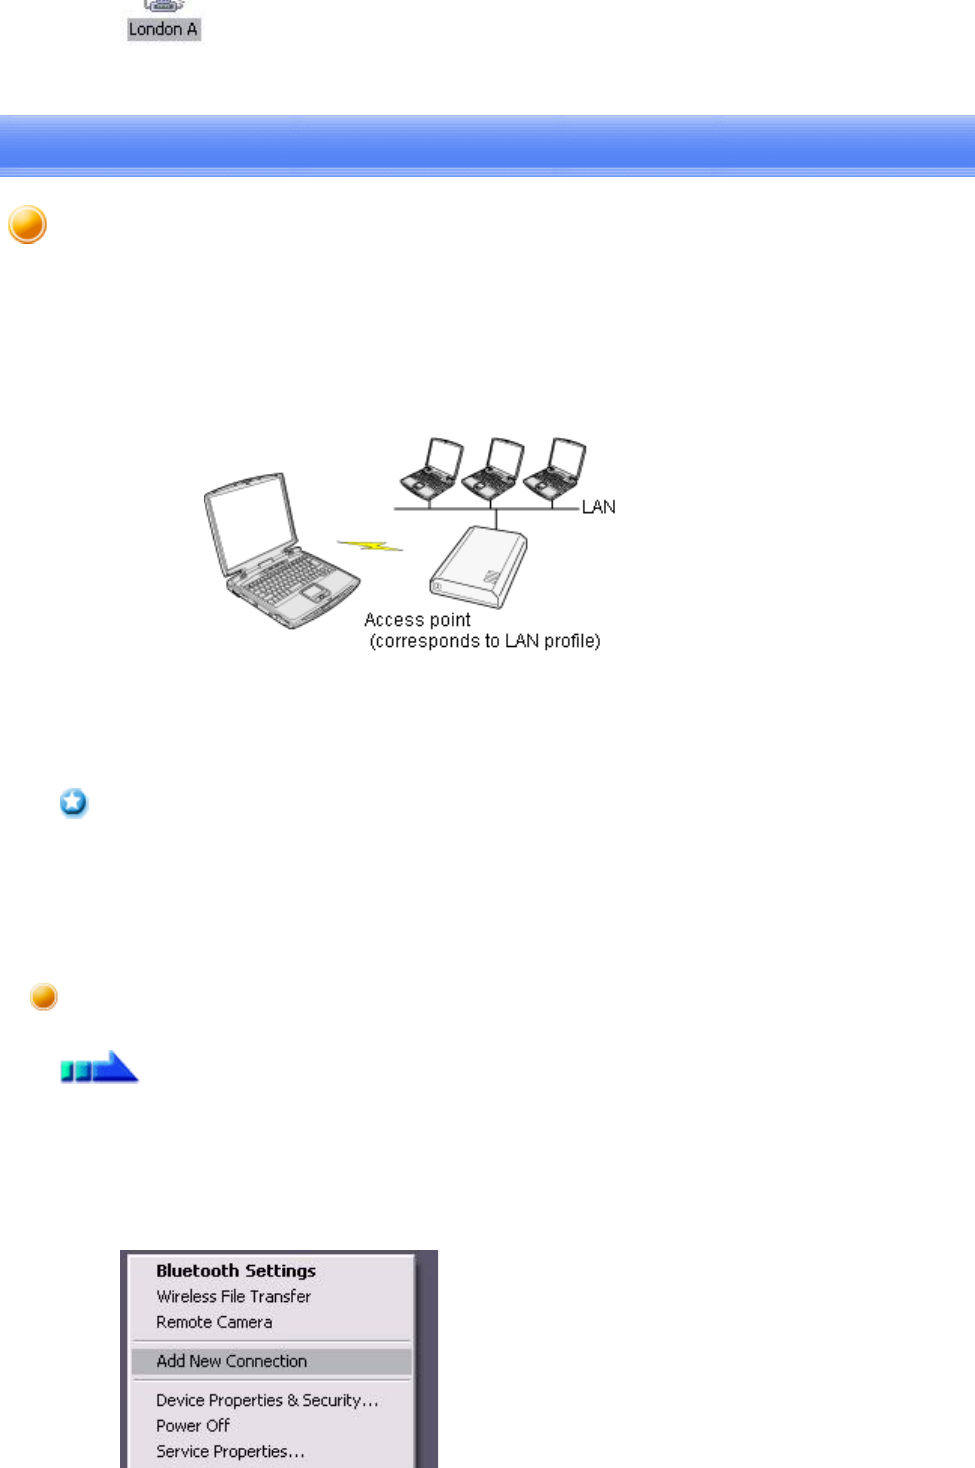
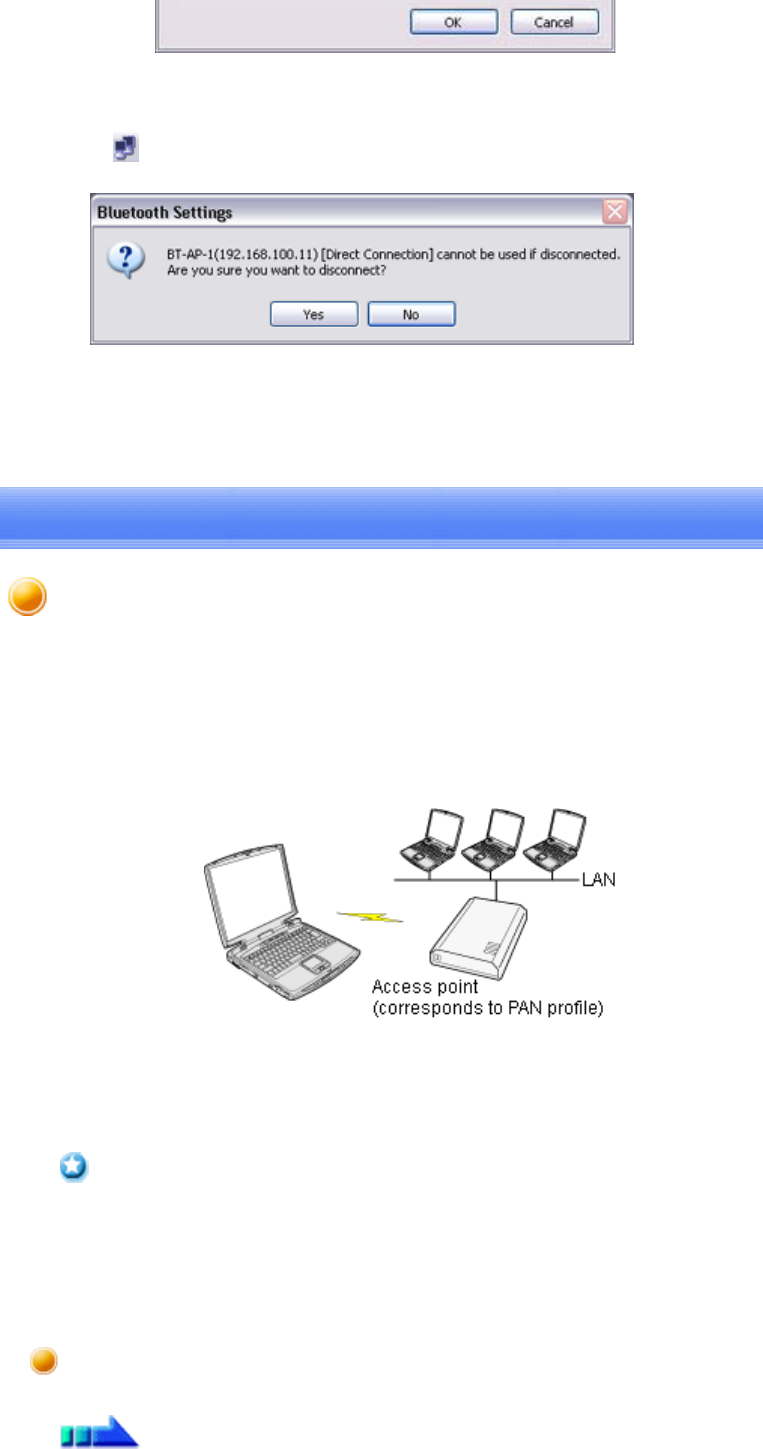
This section describes how to connect to a network (for example, a company LAN or a personal
home network) using a LAP profile-compatible access point.
Please refer to "Using an access point (PAN) to connect to a LAN if you are using a PAN profile-
compatible access point.
→Setting up the access point
→Connecting to a LAN (LAP)
zThe access point must have been started and a normal connection already established to
the network before the access point is set up. Please refer to the access point instruction
manual for information on how to set up the access point.
zA Bluetooth passkey (PIN code) is required for you to connect to the access point. Please
make a note of your Bluetooth passkey before you start the set-up process.
1. Turn on the access point, and confirm that a connection has been established with the
network
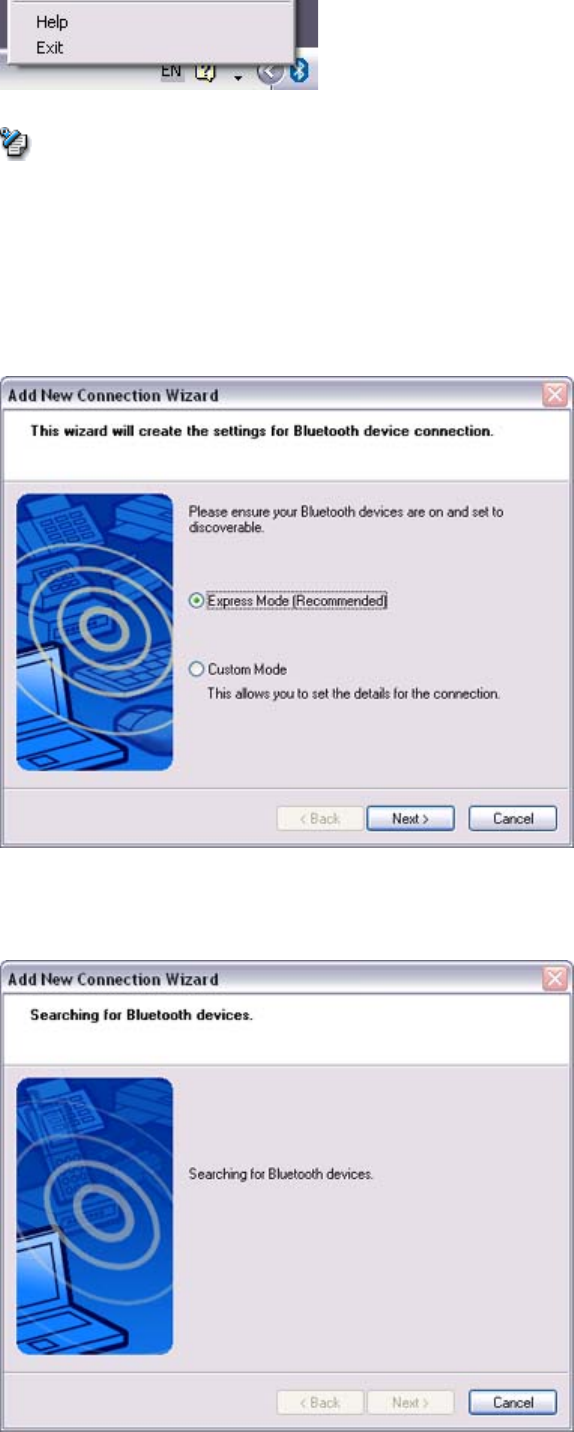
2. Right-click the Bluetooth icon in the task tray, and then click on [Add New
Connection]
Important
Setting up the access point
Procedure
Connecting to a LAN using an access point (LAP) [LAP]
Quick Start Guide - Introduction 第 18 頁,共 160 頁
file://C:\Documents and Settings\anitachou\Local Settings\Temp\~hh3F24.htm 2004/11/30
{Alternatively, click [Start]→[All Programs]→[Bluetooth]→[Bluetooth Settings],
and then click on [New Connection] from the active [Bluetooth Settings] window.
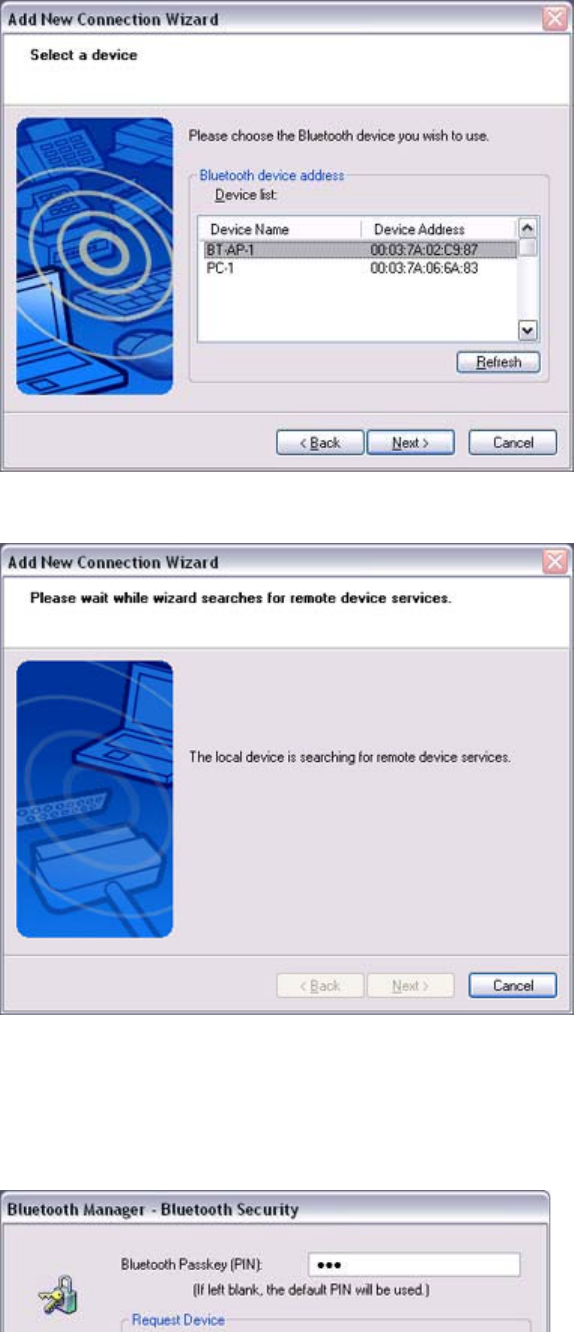
The [Add New Connection Wizard (Welcome to the Add New Connection
Wizard)] window will appear.
3. Confirm that [Express Mode] has been selected, and then click on the [Next] button
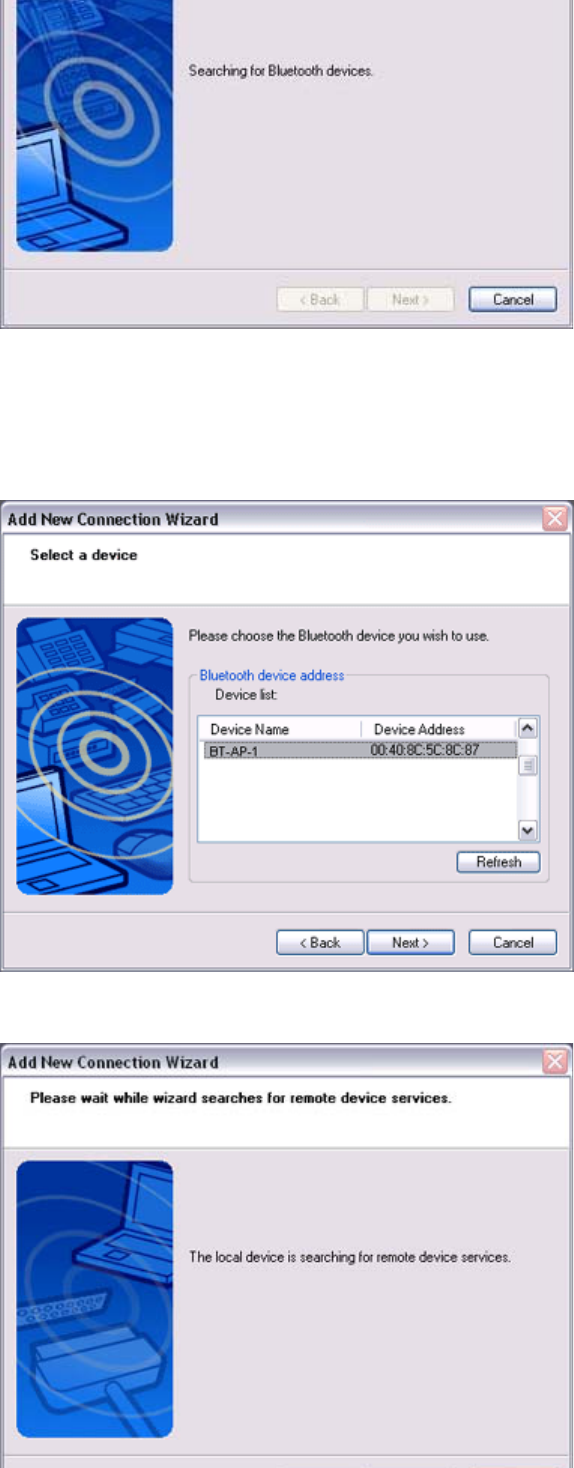
The [Add New Connection Wizard (Searching for Bluetooth devices)] window
will appear.
Once the program has finished searching for the devices the [Add New
Note
Quick Start Guide - Introduction 第 19 頁,共 160 頁
file://C:\Documents and Settings\anitachou\Local Settings\Temp\~hh3F24.htm 2004/11/30
Once
the
program
has
finished
searching
for
the
devices,
the
[Add
New
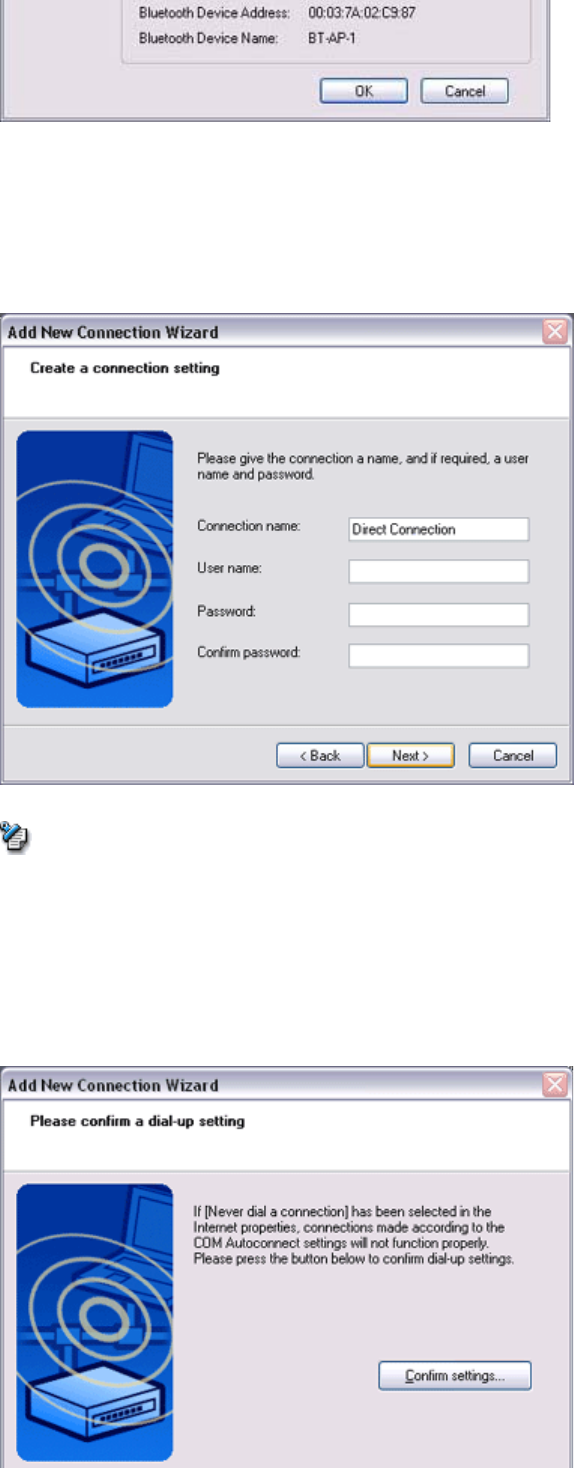
Connection Wizard (Device Selection)] window will appear.
4. Select the device name of the access point from [Device List], and then click on the
[Next] button
The [Add New Connection Wizard (Searching for Services)] window will appear.
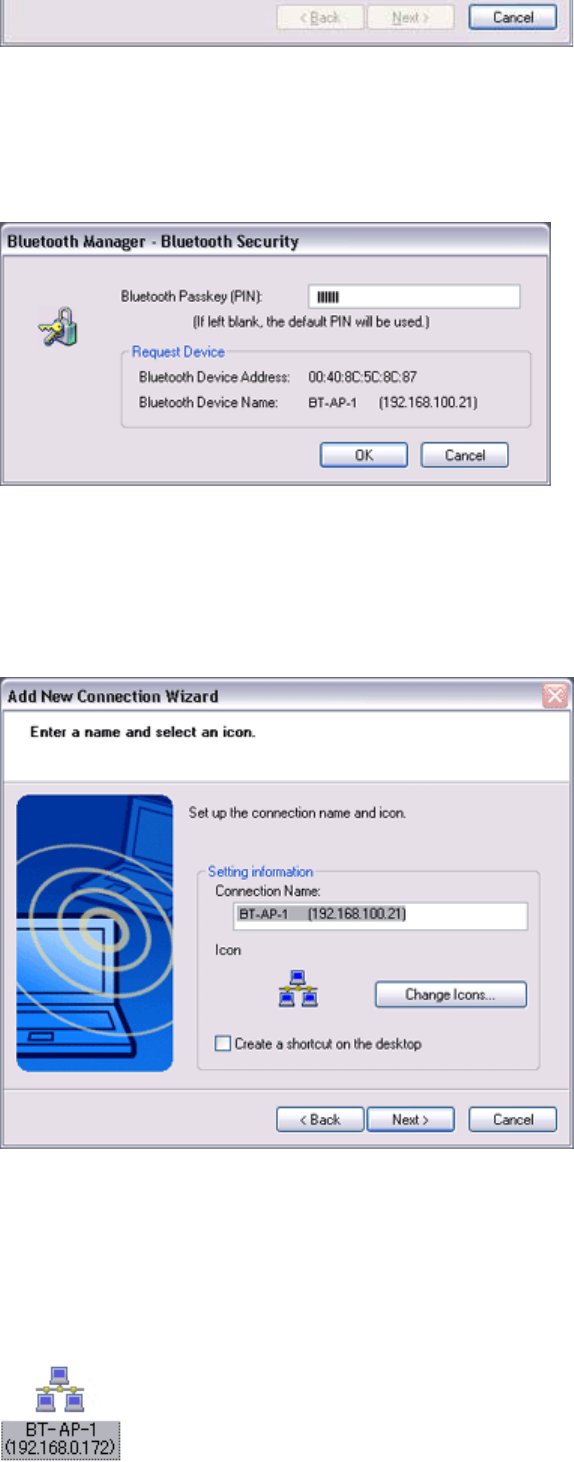
You will be asked for the Bluetooth passkey in the window that appears.
5. Enter the passkey under [Bluetooth Passkey (PIN code)], and then click on the [OK]
button
Quick Start Guide - Introduction 第 20 頁,共 160 頁
file://C:\Documents and Settings\anitachou\Local Settings\Temp\~hh3F24.htm 2004/11/30
Service detection and COM port creation will be performed automatically.
The [Add New Connection Wizard (Create Connection Destination)] window will
appear.
6. Enter the connection name, user name and password, then click on the [Next] button
{The user name and password are entered here to allow you to connect to the
access point.
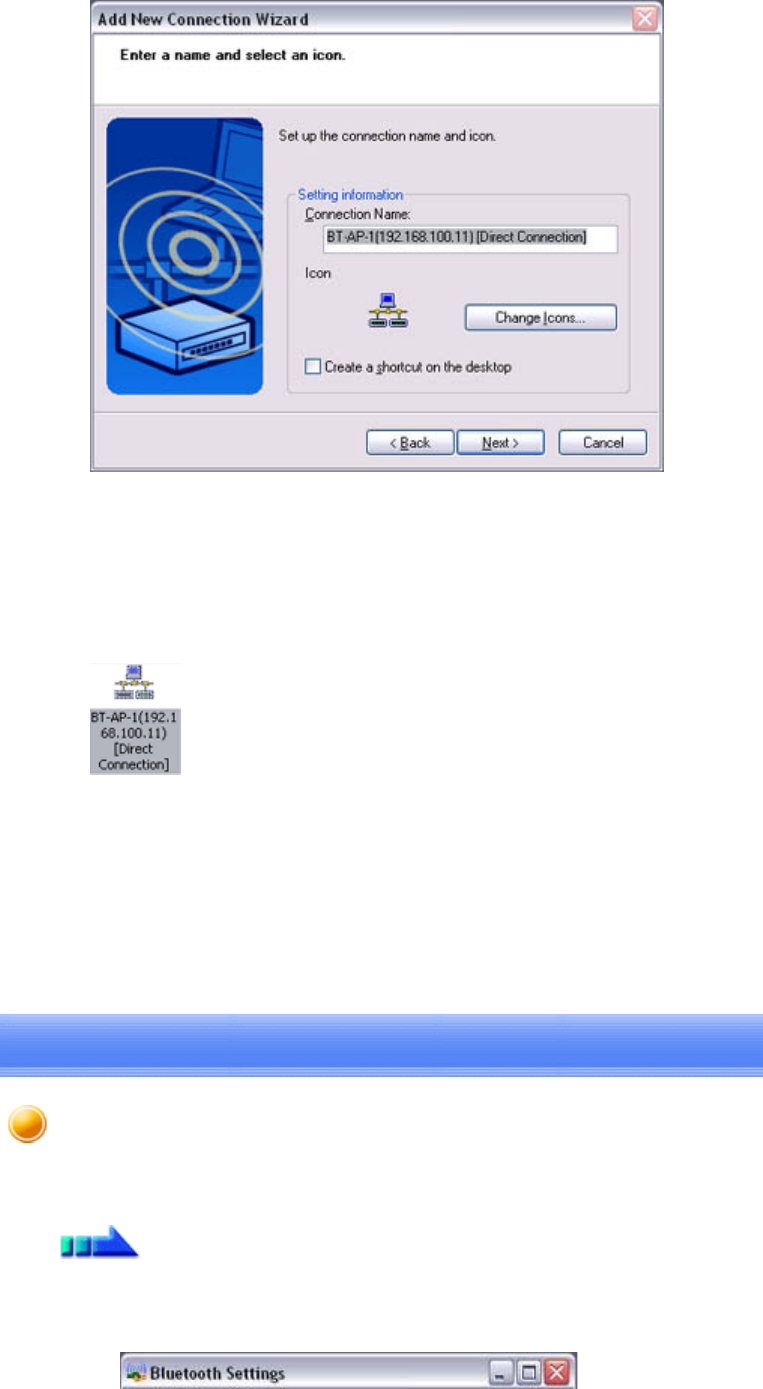
The [Add New Connection Wizard (Confirm Dial-up Settings)] window will appear.
7. Click on the [Confirm Settings] button
Note
Quick Start Guide - Introduction 第 21 頁,共 160 頁
file://C:\Documents and Settings\anitachou\Local Settings\Temp\~hh3F24.htm 2004/11/30
The [Internet Options] window will appear.
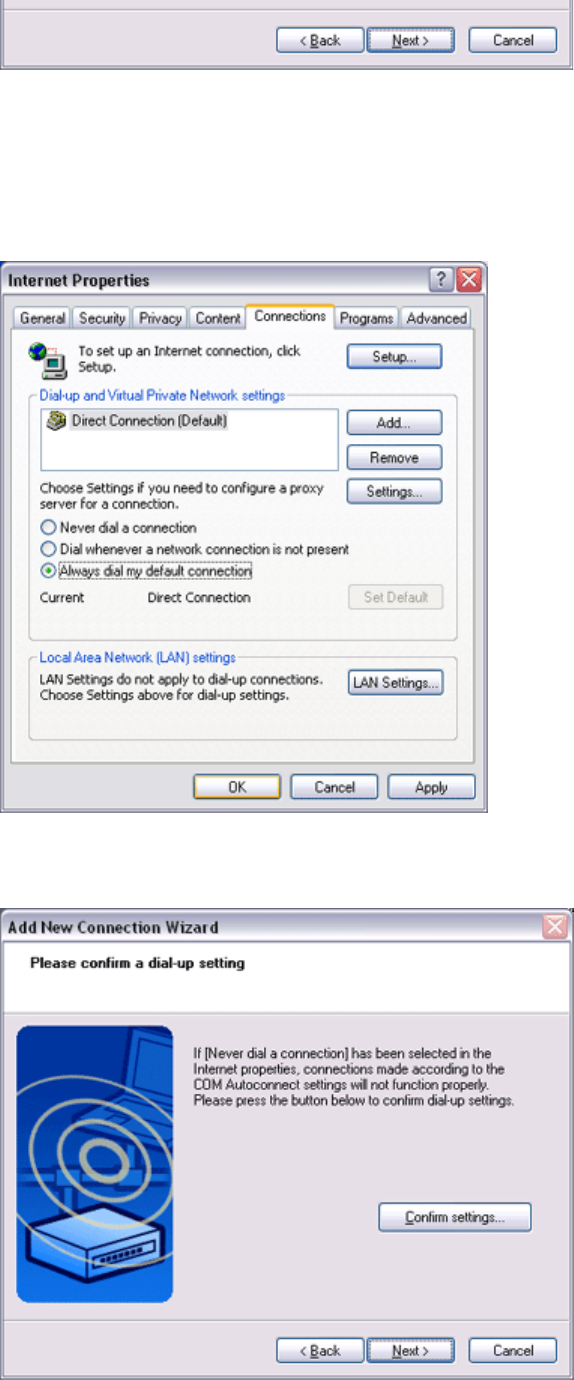
8. Configure the connection method, and then click on the [OK] button
Set the connection destination used for the LAN connection set up in (6) above as the
default connection destination, and then select "Always dial my default connection."
9. Click on the [Next] button
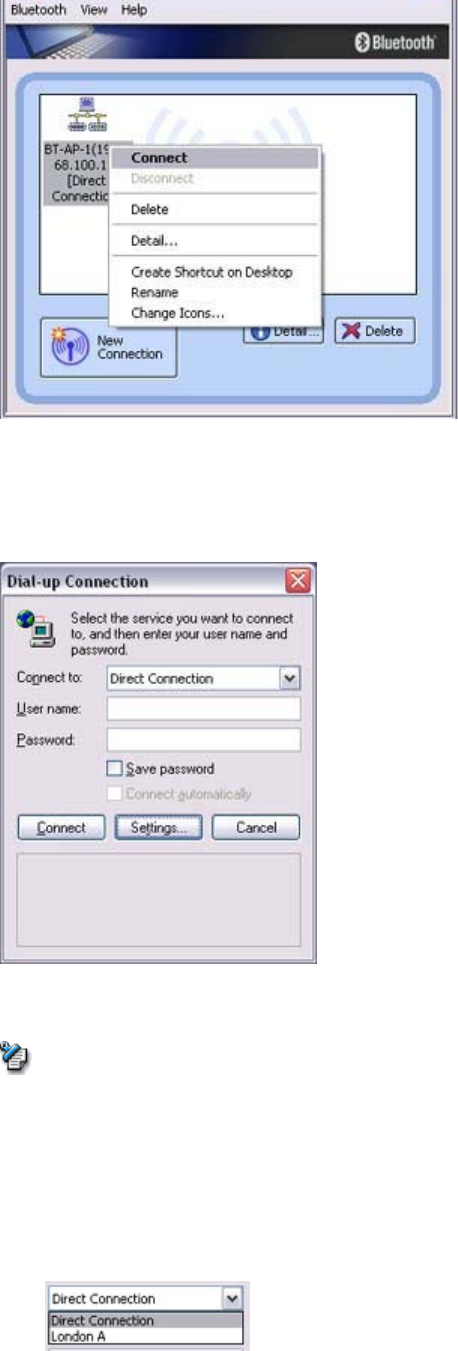
The [Add New Connection Wizard (Connection Name Settings)] window will appear.
10.
Enter
the
type
and
name
of
the
icon
displayed
after
registration,
and
then
click
on
the
Quick Start Guide - Introduction 第 22 頁,共 160 頁
file://C:\Documents and Settings\anitachou\Local Settings\Temp\~hh3F24.htm 2004/11/30
10.
Enter the type and name of the icon displayed after registration, and then click on the
[Next] button
Please click on the [Next] button if you are satisfied with the settings.
The [Add New Connection Wizard (Completing the Add New Connection Wizard)]
window will appear.
11. Click on the [Finish] button
The access point icon will be registered in the [Bluetooth Settings] window.
This will complete the access point set-up process.
→"Connecting to a LAN (LAP)"
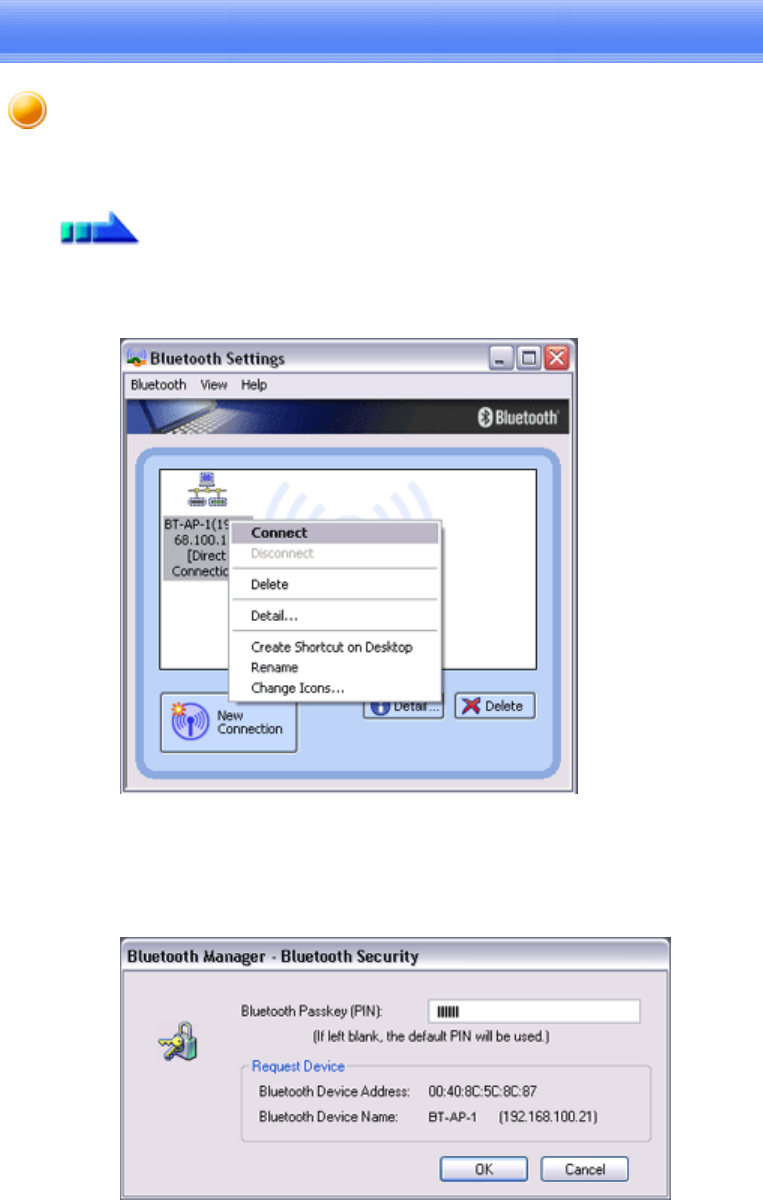
1. Right-click on the connection icon in the [Bluetooth Settings] window, and then click
on [Connect]
Procedure
Connecting to a LAN (LAP)
Quick Start Guide - Introduction 第 23 頁,共 160 頁
file://C:\Documents and Settings\anitachou\Local Settings\Temp\~hh3F24.htm 2004/11/30
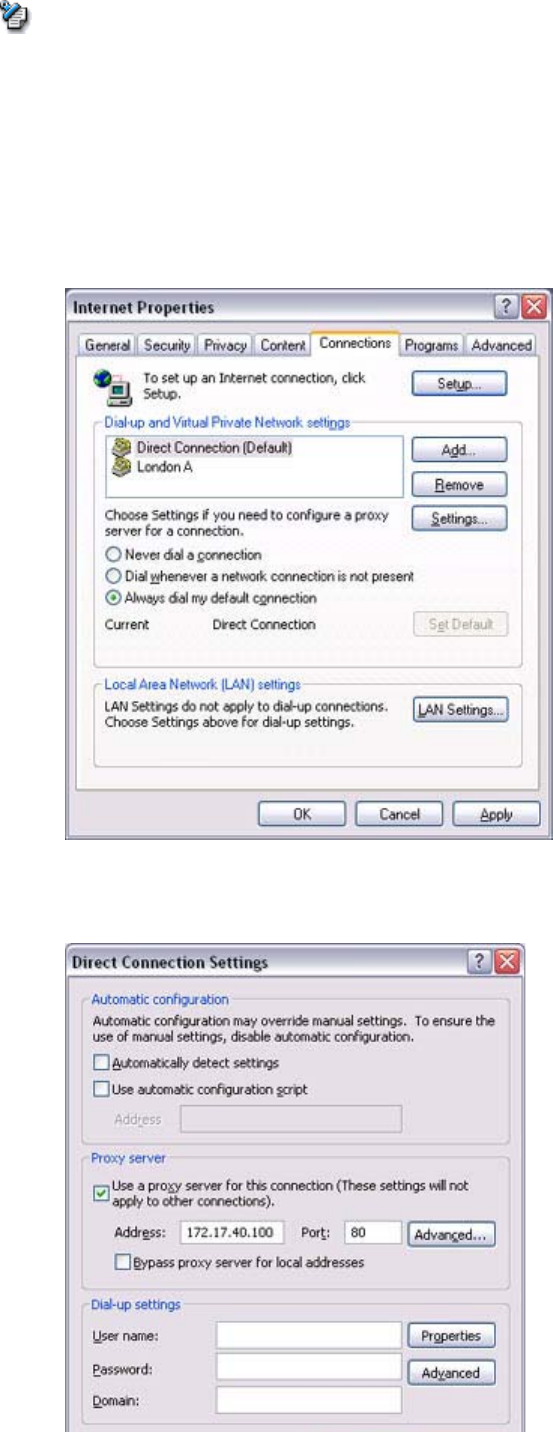
The [Dial-up Connection] window will appear.
2. Confirm that "Direct connection" has been selected under [Connection Destination],
and then click on the [Connect] button
A connection will be initiated.
{This is an example of what happens when you use "Direct connection" as a
connection name under "Connect to access point." If a name different from the
connection name is used, that name will appear under [Connection Destination].
{Please simply click on [Settings] if no user name or password have been entered
(i.e., if those fields have been left blank)
{Please change the connection destination if a different connection name (for a
dial-up connection) appears in [Connection Destination].
Related topic→"Changing the default connection destination"
Once you connect to the network, Internet Explorer will start automatically, and you
w
ill
be
ab
l
e
to
e
x
c
h
a
n
ge
data
w
i
t
h
ot
h
e
r
co
m
pute
r
s
o
n
t
h
e
n
etwo
rk
.
Note
Quick Start Guide - Introduction 第 24 頁,共 160 頁
file://C:\Documents and Settings\anitachou\Local Settings\Temp\~hh3F24.htm 2004/11/30
w beabetoecagedata w t ot e co pute s o t e etwo .
{Please follow the procedure below if you need to set up a proxy server to connect
to the Internet (the following procedure is not necessary if the PC you are going to
use has already been set up as a proxy server).
1 Select [Internet Options...] from the [Tools] menu in Internet Explorer
The [Internet Options] window will appear.
2 Click on the [Connections] tab, and then click on the [Settings...] button
3 Enter the IP address and port number of the proxy server under [Proxy Server],
and then click on the [OK] button
Note
Quick Start Guide - Introduction 第 25 頁,共 160 頁
file://C:\Documents and Settings\anitachou\Local Settings\Temp\~hh3F24.htm 2004/11/30
3. End the connection
Right-click either on the connection icon under the [Bluetooth Settings] window or on
the icon in the task tray, and then click on [Disconnect].
Click on the "Yes" button in the disconnection confirmation dialog box that appears.
This section describes how to connect to a network (for example, a company LAN or a personal
home network) using a PAN profile-compatible access point.
Please refer to "Using an access point (LAP) to connect to a LAN" if you are using a LAP profile-
compatible access point.
→Setting up the access point
→Connecting to a LAN (PAN)
zThe access point must be started and a normal connection already established to the
network before the access point is set up. Please refer to the access point instruction
manual for information on how to set up the access point.
zA Bluetooth passkey (PIN code) is required for you to connect to the access point. Please
make a note of your Bluetooth passkey before you start the set-up process.
Important
Setting up the access point
Procedure
Connecting to a LAN using an access point (PAN) [PAN]

Quick Start Guide - Introduction 第 26 頁,共 160 頁
file://C:\Documents and Settings\anitachou\Local Settings\Temp\~hh3F24.htm 2004/11/30
1. Turn on the access point, and confirm that a connection has been established with the
network
2. Right-click the Bluetooth icon in the task tray, and then click on [Add New
Connection]
{Alternatively, click [Start]→[All Programs]→[Bluetooth]→[Bluetooth Settings],
and then click on [New Connection] from the active [Bluetooth Settings] window.
The [Add New Connection Wizard (Welcome to the Add New Connection
Wizard)] window will appear.
3. Confirm that [Express Mode] has been selected, and then click on the [Next] button
The [Add New Connection Wizard (Searching for Bluetooth devices)] window
will appear.
Note
Quick Start Guide - Introduction 第 27 頁,共 160 頁
file://C:\Documents and Settings\anitachou\Local Settings\Temp\~hh3F24.htm 2004/11/30
Once the program has finished searching for the devices, the [Add New
Connection Wizard (Device Selection)] window will appear.
4. Select the device name of the access point from [Device List], and then click on the
[Next] button
The [Add New Connection Wizard (Searching for Services)] window will appear.
Quick Start Guide - Introduction 第 28 頁,共 160 頁
file://C:\Documents and Settings\anitachou\Local Settings\Temp\~hh3F24.htm 2004/11/30
You will be asked for the Bluetooth passkey in the window that appears.
5. Enter the passkey under [Bluetooth Passkey (PIN code)], and then click on the [OK]
button
Service detection and COM port creation will be performed automatically.
The [Add New Connection Wizard (Connection Name Settings)] window will appear.
6. Enter the type and name of the icon displayed after registration, and then click on the
[Next] button
Please click on the [Next] button if you are satisfied with the settings.
The [Add New Connection Wizard (Completing the Add New Connection Wizard)]
window will appear.
7. Click on the [Finish] button
The access point icon will be registered in the [Bluetooth Settings] window.
Quick Start Guide - Introduction 第 29 頁,共 160 頁
file://C:\Documents and Settings\anitachou\Local Settings\Temp\~hh3F24.htm 2004/11/30
This will complete the access point set-up process.
→"Connecting to a LAN (PAN)"
1. Right-click on the connection icon in the [Bluetooth Settings] window, and then click
on [Connect]
You will be asked for the Bluetooth passkey in the window that appears.
2. Enter the passkey under [Bluetooth Passkey (PIN code)], and then click on the [OK]
button
A connection will be initiated
Procedure
Connecting to a LAN (PAN)
Quick Start Guide - Introduction 第 30 頁,共 160 頁
file://C:\Documents and Settings\anitachou\Local Settings\Temp\~hh3F24.htm 2004/11/30
A
connection
will
be
initiated
.
Once you have connected to the network, Internet Explorer will start automatically, and
you will be able to exchange data with other computers on the network.
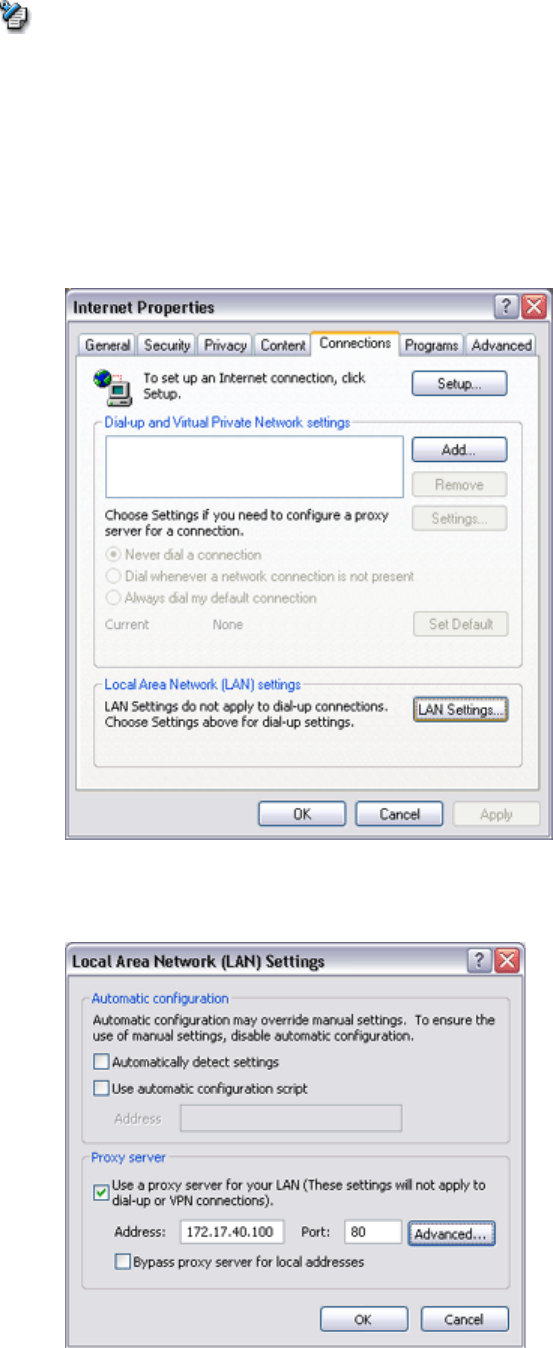
{Please follow the procedure below if you need to set up a proxy server to connect
to the Internet (the following procedure is not necessary if the PC you are going to
use has already been set up as a proxy server).
1 Select [Internet Options...] from the [Tools] menu in Internet Explorer
The [Internet Options] window will appear.
2 Click on the [Connections] tab, and then click on the [LAN Settings...] button
3 Enter the IP address and port number of the proxy server under [Proxy Server],
and then click on the [OK] button
Note
Quick Start Guide - Introduction 第 31 頁,共 160 頁
file://C:\Documents and Settings\anitachou\Local Settings\Temp\~hh3F24.htm 2004/11/30
3. End the connection
Right-click either on the connection icon under the [Bluetooth Settings] window or on
the icon in the task tray, and then click on [Disconnect].
Click on the "Yes" button in the disconnection confirmation dialog box that appears.
You can use the PAN profile to build a network of Bluetooth -enabled devices.
→Operating as a server
→Operating as a client
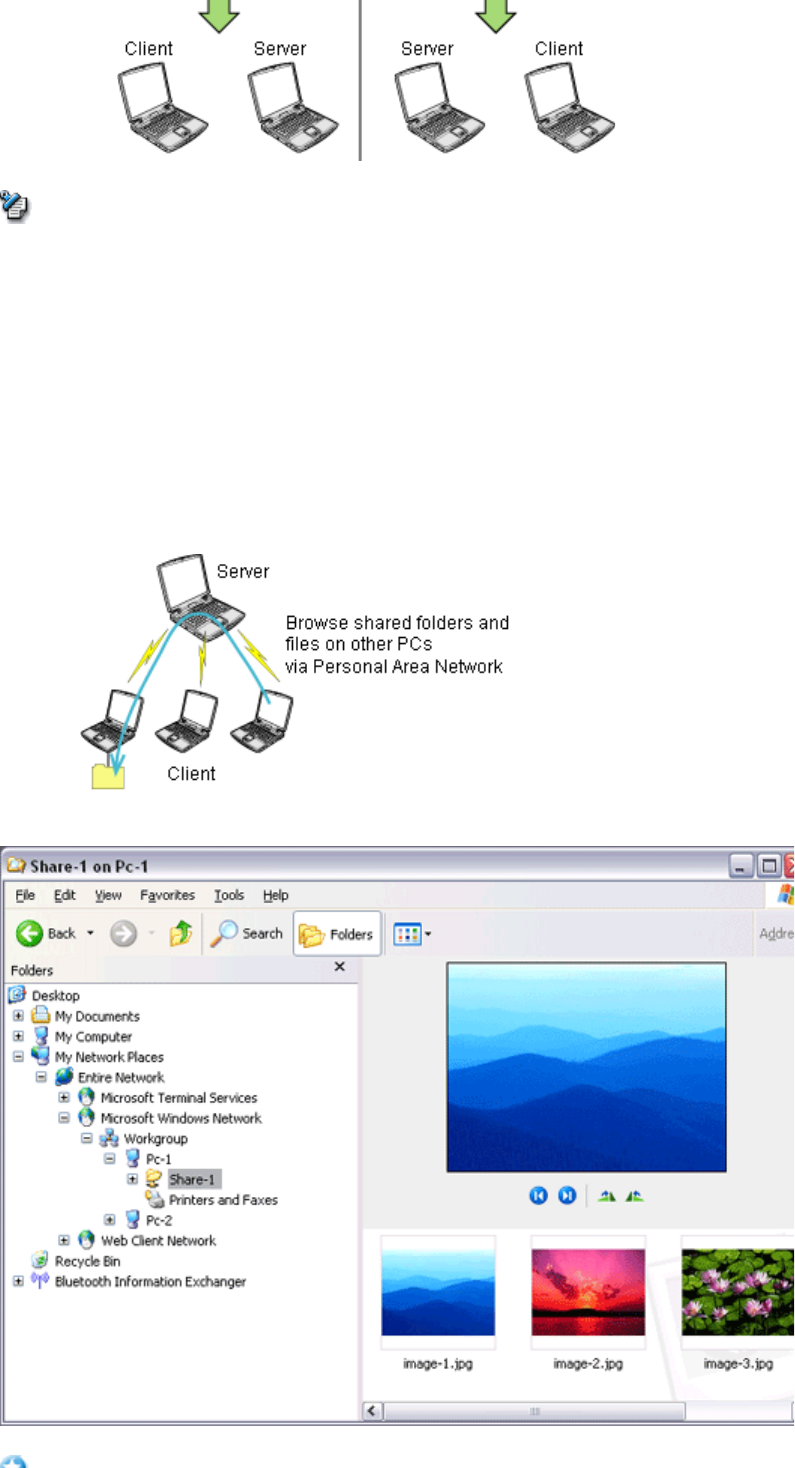
A personal area network comprises a client -server architecture. The device to which other
devices connect is called the "server", and a device that connects to the server is called a
"client."
The client-server relationship is not necessarily a fixed one. The first of two devices to
establish a connection can be the server when one other device is present, and can be the
client in other instances.
Building a personal area network [PAN]
Quick Start Guide - Introduction 第 32 頁,共 160 頁
file://C:\Documents and Settings\anitachou\Local Settings\Temp\~hh3F24.htm 2004/11/30
zThe maximum total number of devices that can be used to constitute a single personal
area network is seven: one server and six clients.
A network comprising as many as seven devices could theoretically be built, but an
operating environment that involves the use of other Bluetooth devices, leaving aside
other complications, might require the network to comprise fewer components..
By using the PAN profile, you will be able to build a network that uses the same TCP/IP
protocol used in regular LANs. Accordingly, the machine designated as the server can be used
for configuration tasks that utilize DHCP, such as assigning IP addresses to clients.
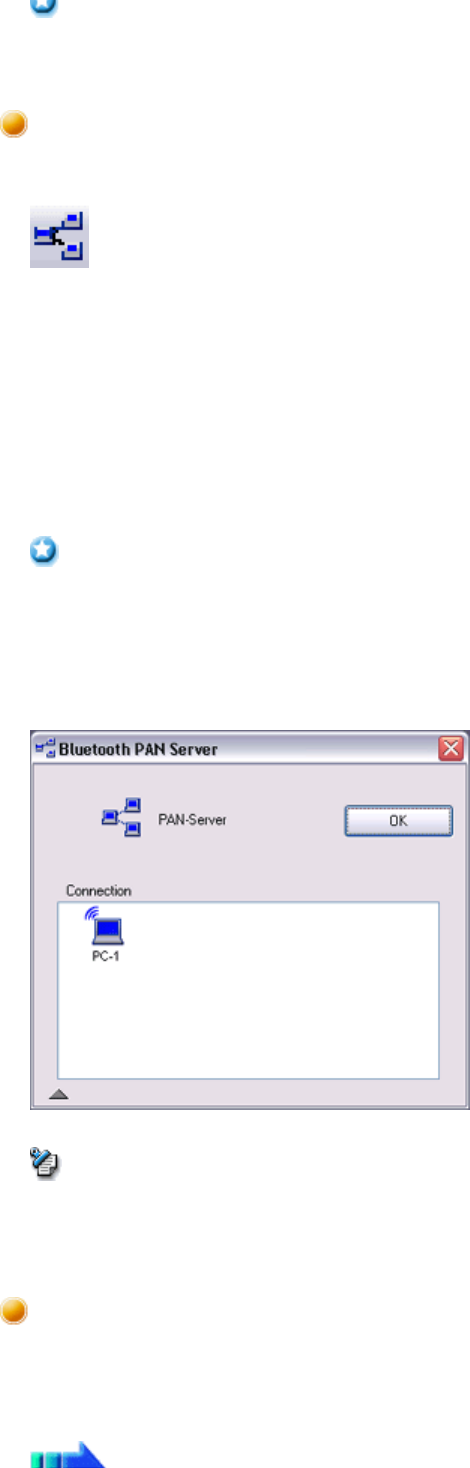
In addition, you will be able to configure folder and file sharing, which will allow data to be
browsed by other servers or clients on the network.
Note
Important
Quick Start Guide - Introduction 第 33 頁,共 160 頁
file://C:\Documents and Settings\anitachou\Local Settings\Temp\~hh3F24.htm 2004/11/30
zPlease refer to Windows Help for further information on TCP/IP, DHCP and
configurations for sharing.
The following icon will appear in the tasktray when the PAN server function has been
activated.
Should the icon not appear, please follow the procedure below to activate the PAN server
function.
1. Right-click the Bluetooth icon in the task tray and make sure the Option [Use PAN
Group Ad-hoc Network] is enabled.
A message will appear asking you to confirm whether you wish to activate the PAN
group ad-hoc network.
2. Click the [Yes] button
The PAN server will be activated, and an icon will accordingly appear in the tasktray.
Other devices that use the PAN profile will now be able to connect over the network.
zWhen using the device as the server, make sure that all user accounts have a password
set for the security reasons.
By clicking on the icon, the [Bluetooth PAN Server] window will appear.
In the graphic below, one client has established a connection.
zWhen you try to connect to another server as a client, the task tray icon will disappear,
and your machine will not be able to function as a server in response to connection
requests originating from other devices.
Connecting to a server as a client is performed from the [Bluetooth Settings] window, as
described below.
Important
Operating as a server
Important
Note
Operating as a client
Procedure
Quick Start Guide - Introduction 第 34 頁,共 160 頁
file://C:\Documents and Settings\anitachou\Local Settings\Temp\~hh3F24.htm 2004/11/30
1. Right-click on the Bluetooth icon in the task tray, and click on [Add New Connection]
{Alternatively, click on [Start]→[All Programs]→[Bluetooth]→[Bluetooth
Settings], and then on [New Connection] from the [Bluetooth Settings] window.
2. Confirm that [Express Mode] has been selected, and then click on the [Next] button
3. Click on the [Next] button in the advisory dialog box
The [Add New Connection Wizard (Searching for Bluetooth devices)] window will
appear.
Note
Quick Start Guide - Introduction 第 35 頁,共 160 頁
file://C:\Documents and Settings\anitachou\Local Settings\Temp\~hh3F24.htm 2004/11/30
Once the program has finished searching for the devices, the [Add New
Connection Wizard (Device Selection)] window will appear.
4. Select the name of the device designated as the server from [Device List], and then
click on the [Next] button
The [Add New Connection Wizard (Searching for Services)] window will appear.
The [Add New Connection Wizard (Confirm Connection Name)] window will appear.
Quick Start Guide - Introduction 第 36 頁,共 160 頁
file://C:\Documents and Settings\anitachou\Local Settings\Temp\~hh3F24.htm 2004/11/30
5. Click on the [Next] button
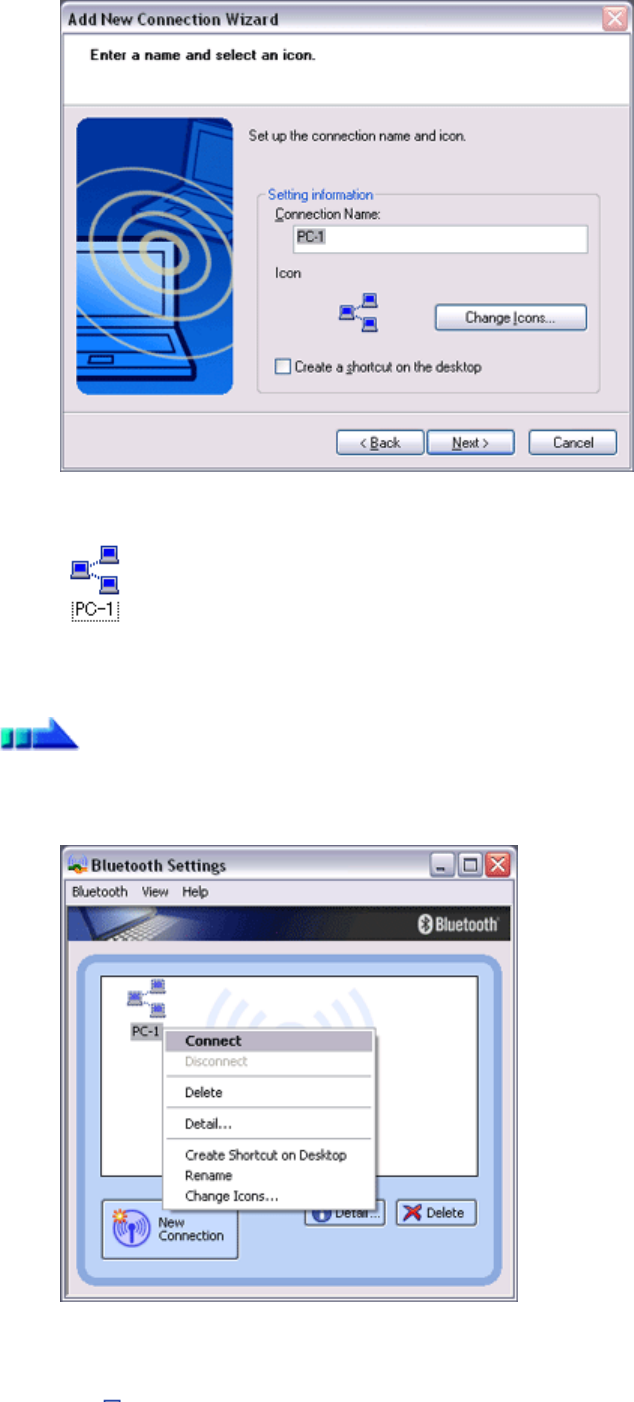
The registered icon will appear in the [Bluetooth Settings] window.
■Connecting to a server
1. Right-click on the icon in the [Bluetooth Settings] window, and then click on
[Connect]
Once you have connected, the icon will change to indicate that the device is
connected.
Procedure
Quick Start Guide - Introduction 第 37 頁,共 160 頁
file://C:\Documents and Settings\anitachou\Local Settings\Temp\~hh3F24.htm 2004/11/30
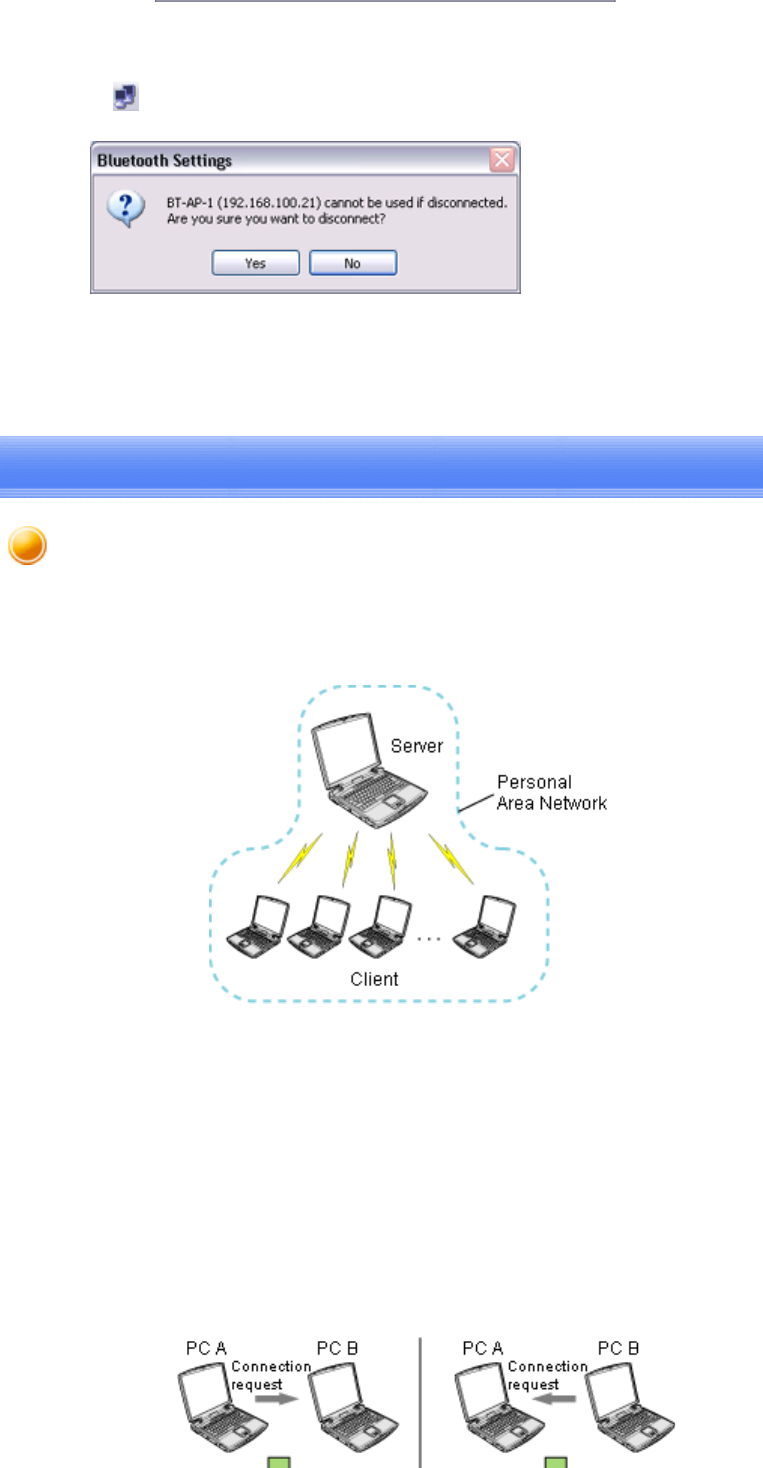
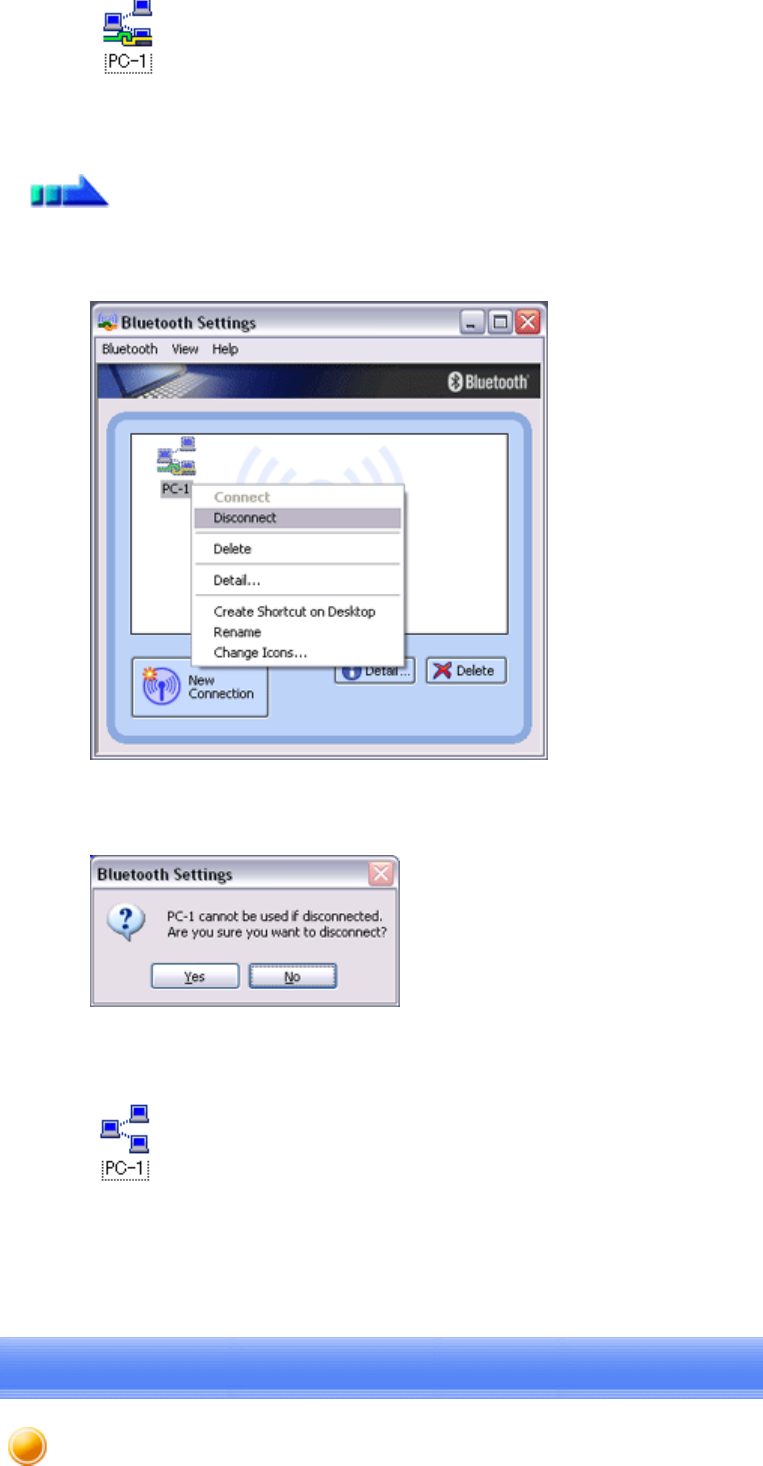
■Ending a connection to a server
1. Right-click on the icon in the [Bluetooth Settings] window, and then click on
[Disconnect]
A message confirming whether you wish to disconnect will appear. Click on the [Yes]
button.
Once you have disconnected, the icon will change to indicate that the device is not
connected.
Procedure
Using a modem station for fax transmissions [FAX]
Quick Start Guide - Introduction 第 38 頁,共 160 頁
file://C:\Documents and Settings\anitachou\Local Settings\Temp\~hh3F24.htm 2004/11/30
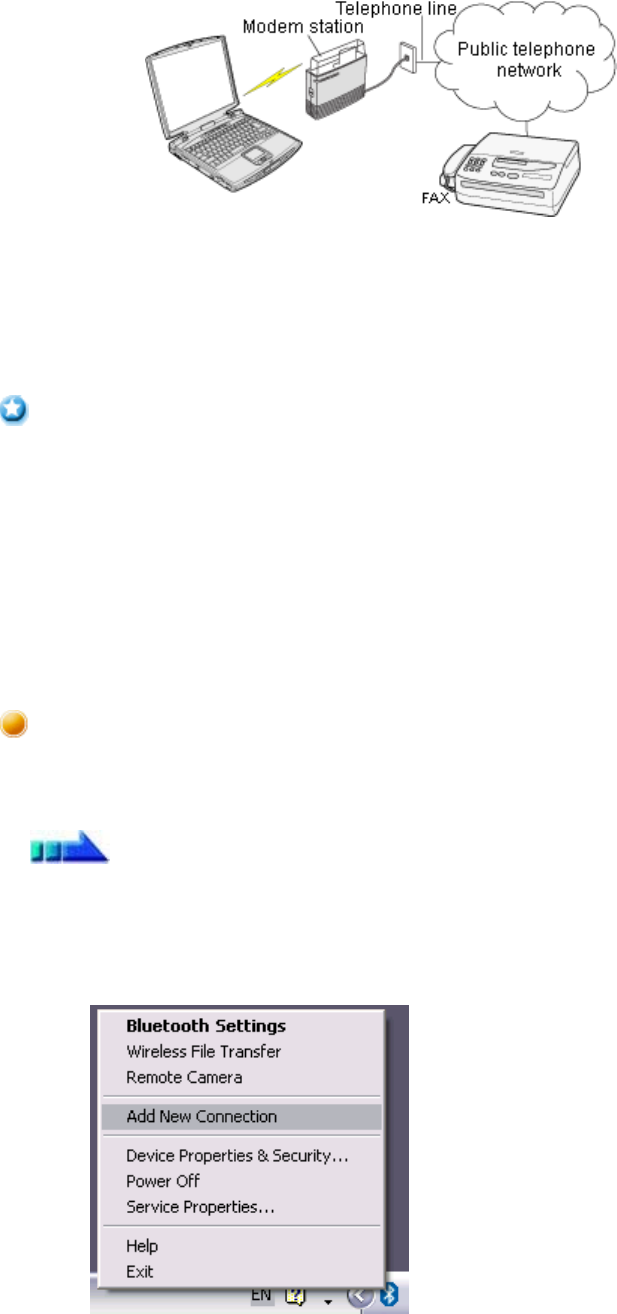
This section describes how to send a fax using a Bluetooth wireless modem station.
→Setting up the modem station
→Installing a modem
→Setting fax information
→Sending a fax
→Receiving a fax
zPlease refer to the modem station instruction manual for information on how to connect the
station to a telephone line.
zPlease ensure that any drivers used to connect the PC to the modem have been installed.
zA Bluetooth passkey (PIN code) is required for you to connect to the modem station. Please
make a note of your Bluetooth passkey before you start the set -up process.
zA fax application is required for you to be able to send and receive faxes. The description
below is based on a example using Microsoft Fax, which is installed with Windows XP as
standard.
If you are going to use a commercially available fax application , then please refer to the
manual that came with the application for information on how to send and receive faxes.
Set up and register the modem station as a fax service.
1. Turn on the wireless modem station
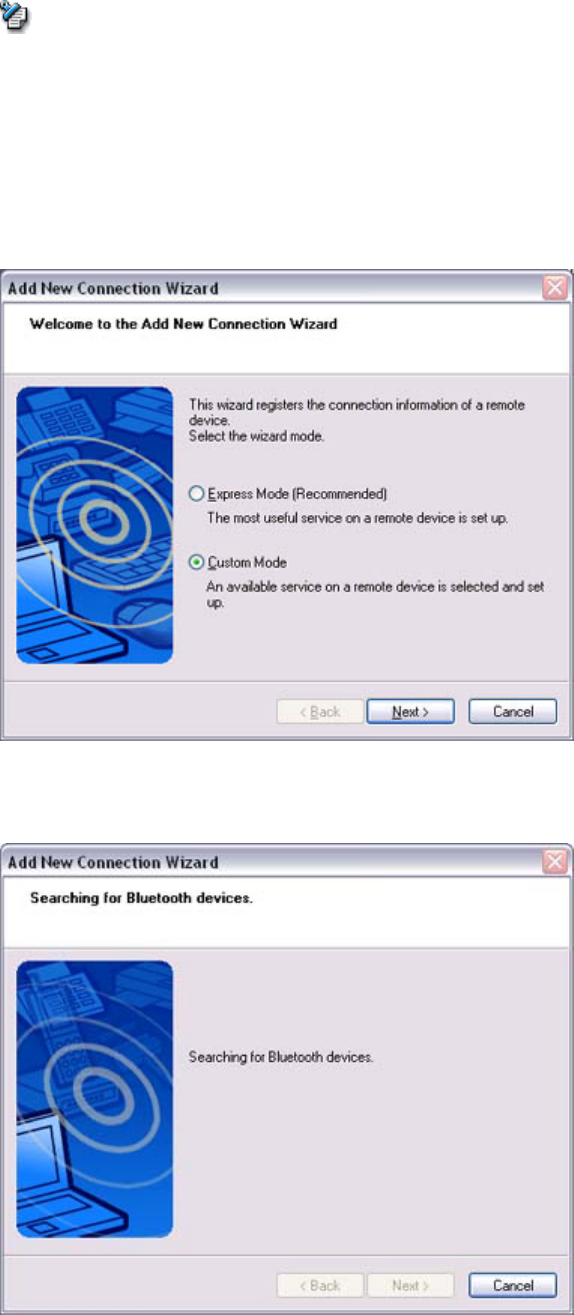
2. Right-click on the Bluetooth icon in the task tray, and then click on [Add New
Connection]
Important
Setting up the modem station
Procedure
Quick Start Guide - Introduction 第 39 頁,共 160 頁
file://C:\Documents and Settings\anitachou\Local Settings\Temp\~hh3F24.htm 2004/11/30
{Alternatively, click [Start]→[All Programs]→[Bluetooth]→[Bluetooth Settings],
and then click on [New Connection] from the active [Bluetooth Settings]
window.
The [Add New Connection Wizard (Welcome to the Add New Connection Wizard)]
window will appear.
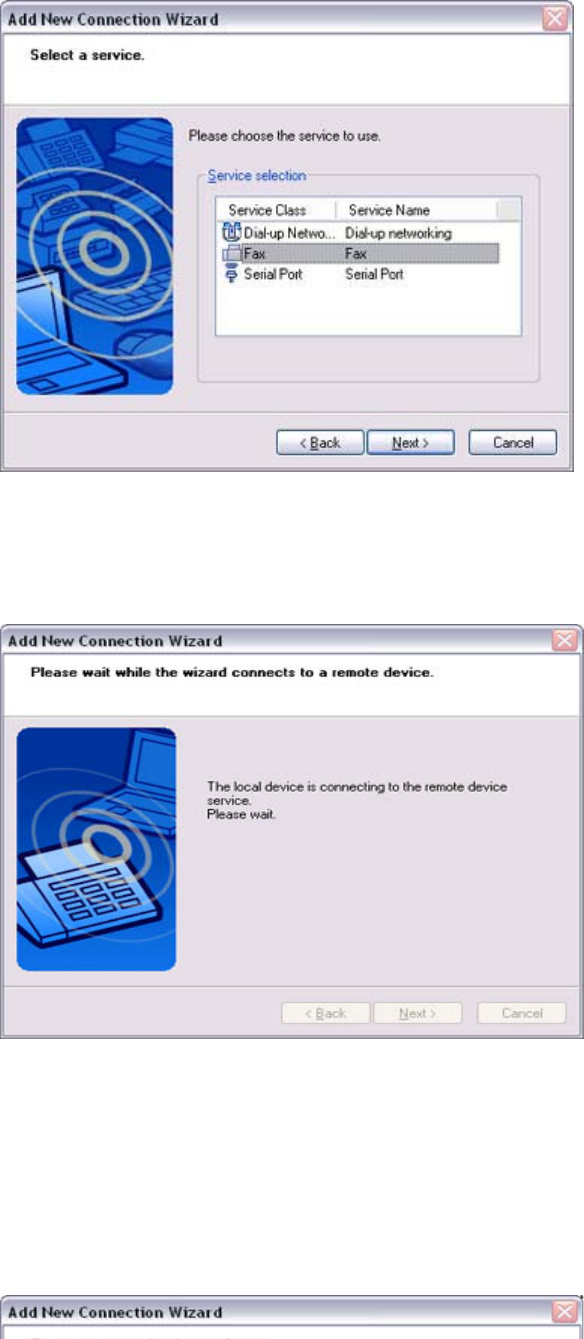
3. Select [Custom Mode], and then click on the [Next] button
The [Add New Connection Wizard (Searching for Bluetooth devices)] window will
appear.
Once the program has finished searching for the devices, the [Add New Connection
Wizard (Select Device)] window will appear.
4. Select the device name of the wireless modem station from [Device List], and then
click on the [Next] button
Note

Quick Start Guide - Introduction 第 40 頁,共 160 頁
file://C:\Documents and Settings\anitachou\Local Settings\Temp\~hh3F24.htm 2004/11/30
The [Add New Connection Wizard (Searching for Services)] window will appear.
5. If you are connecting to the wireless modem station for the first time, enter the
passkey for the device from the [Bluetooth Passkey (PIN Code)] window, and then
click on the [OK] button
Once the program has finished searching for the services the [Add New Connection
Quick Start Guide - Introduction 第 41 頁,共 160 頁
file://C:\Documents and Settings\anitachou\Local Settings\Temp\~hh3F24.htm 2004/11/30
Once
the
program
has
finished
searching
for
the
services,
the
[Add
New
Connection
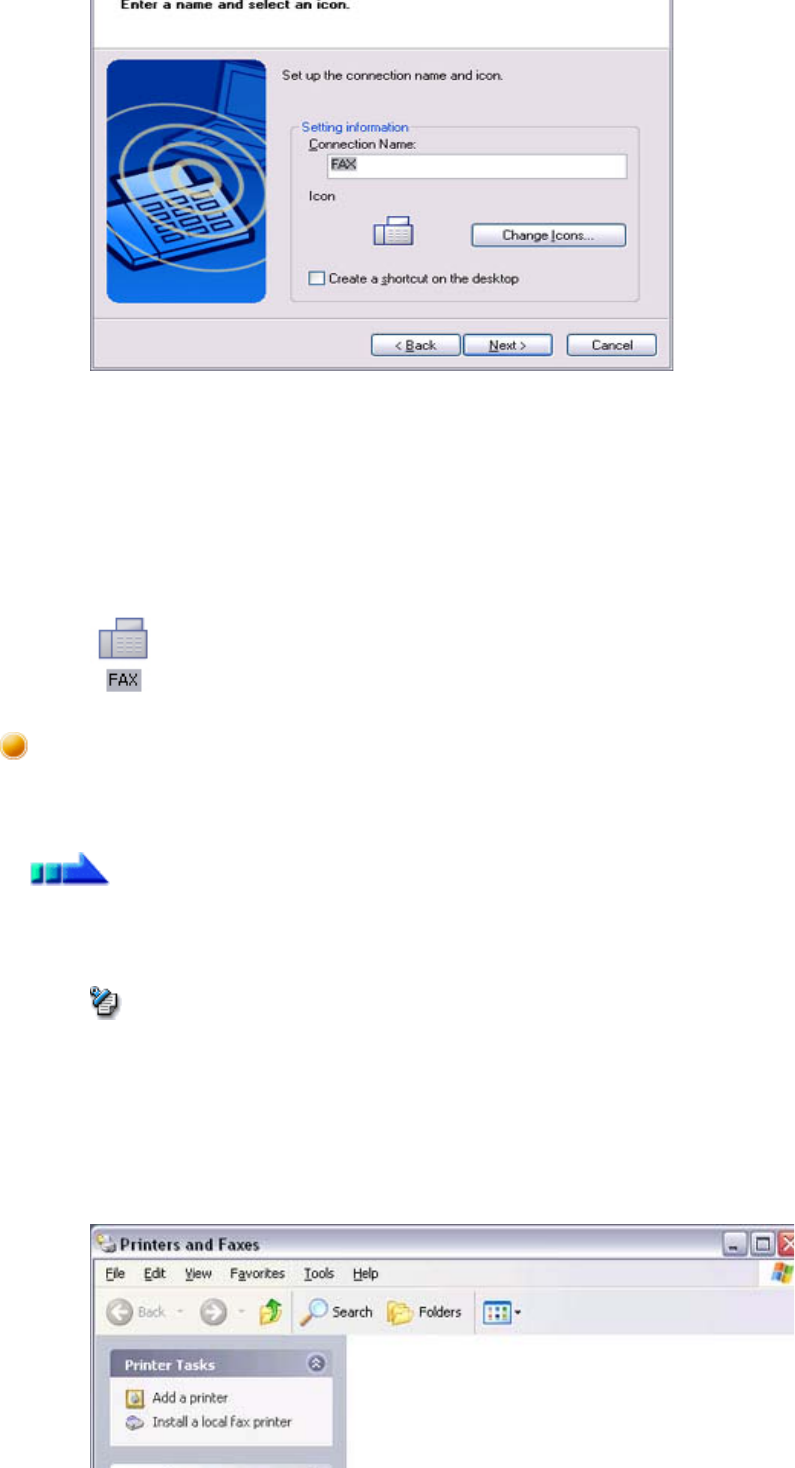
Wizard (Select Service)] window will appear.
6. Select "Fax" under [Select Service], and then click on the [Next] button
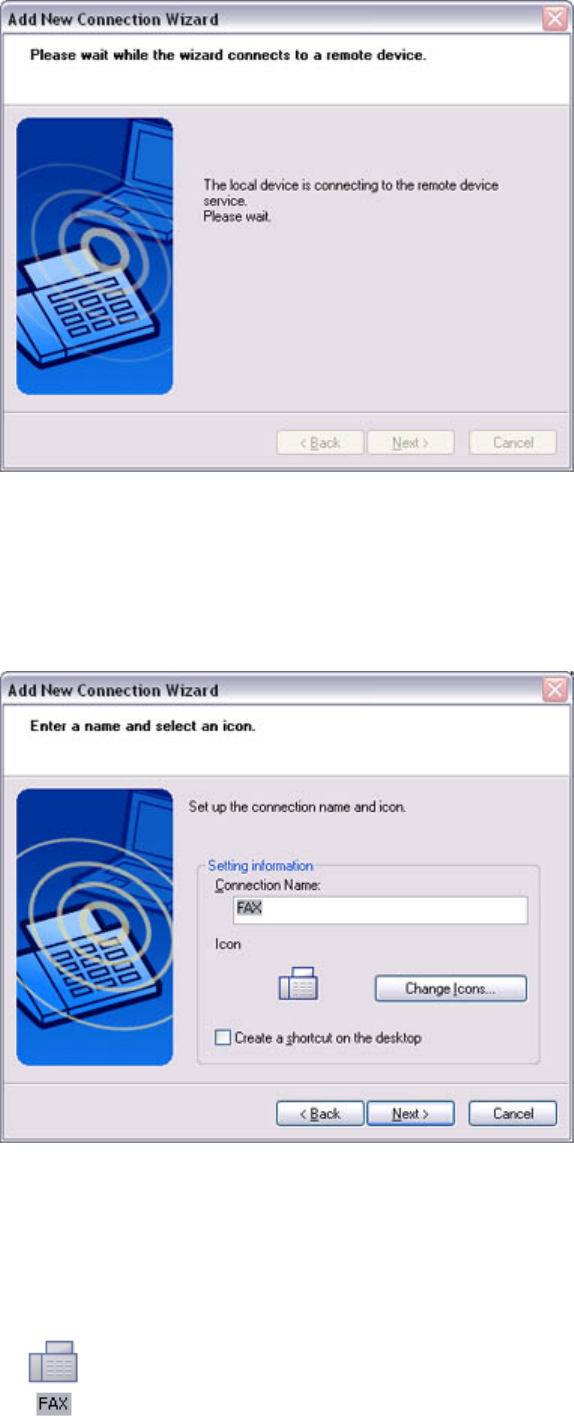
The [Add New Connection Wizard (Connecting to Remote Device)] screen will
appear.
The COM port and modem registration process will then be automatically performed.
Once the COM port and modem (standard 33600 bps type) registration is complete,
the [Add New Connection Wizard (Setting Connection Name)] screen will appear.
7. Configure the type and name of the icon to appear after registration,
and click on the [Next] button.
Please click only on the [Next] button once you are satisfied with the configuration.
Quick Start Guide - Introduction 第 42 頁,共 160 頁
file://C:\Documents and Settings\anitachou\Local Settings\Temp\~hh3F24.htm 2004/11/30
The [Add New Connection Wizard (Completing the Add New Connection Wizard)]
screen will appear.
8. Click on the [Finish] button
The settings will be registered, and the icon will appear on the [Bluetooth Settings]
screen.
Configure send/receive settings and register fax information.
1. Select [Start]→[Control Panel], and then double-click on the [Printers and Other
Hardware] icon
{If the control panel is displayed in "Classic view", and you use Windows 2000,
please start from Step (2).
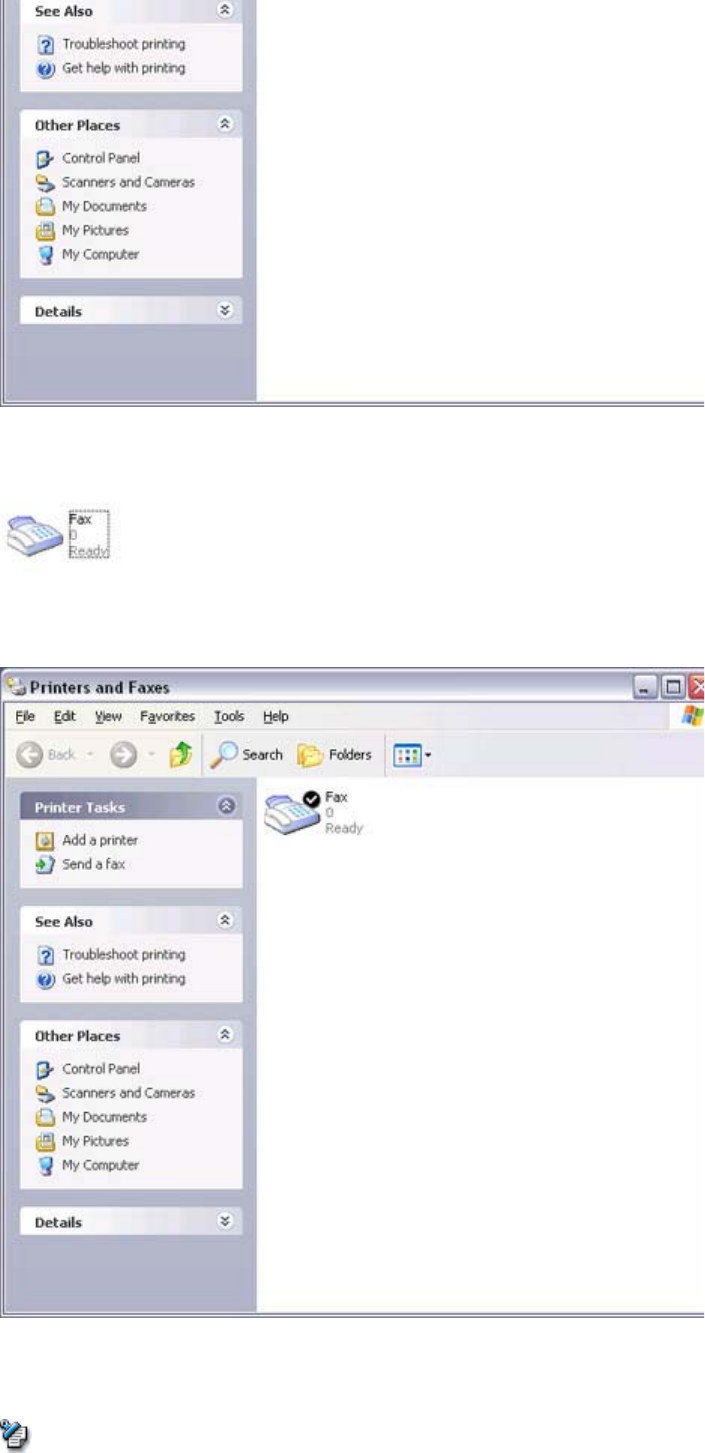
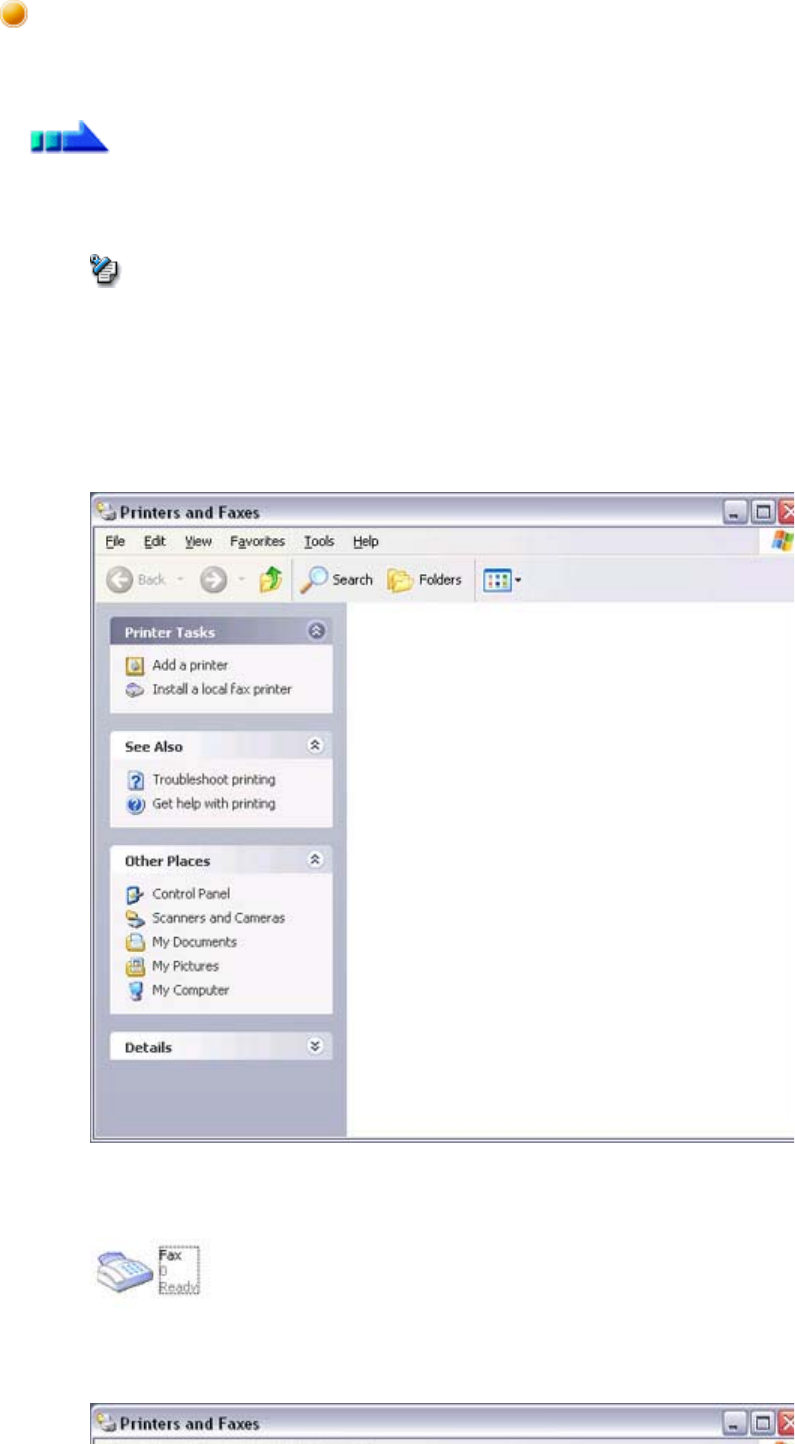
2. Double-click on the [Printers and Faxes] icon
The [Printers & Faxes] window will appear.
3. Click on "Install a local fax printer" in the [Printers and Faxes] window
Setting FAX information
Procedure
Note
Quick Start Guide - Introduction 第 43 頁,共 160 頁
file://C:\Documents and Settings\anitachou\Local Settings\Temp\~hh3F24.htm 2004/11/30
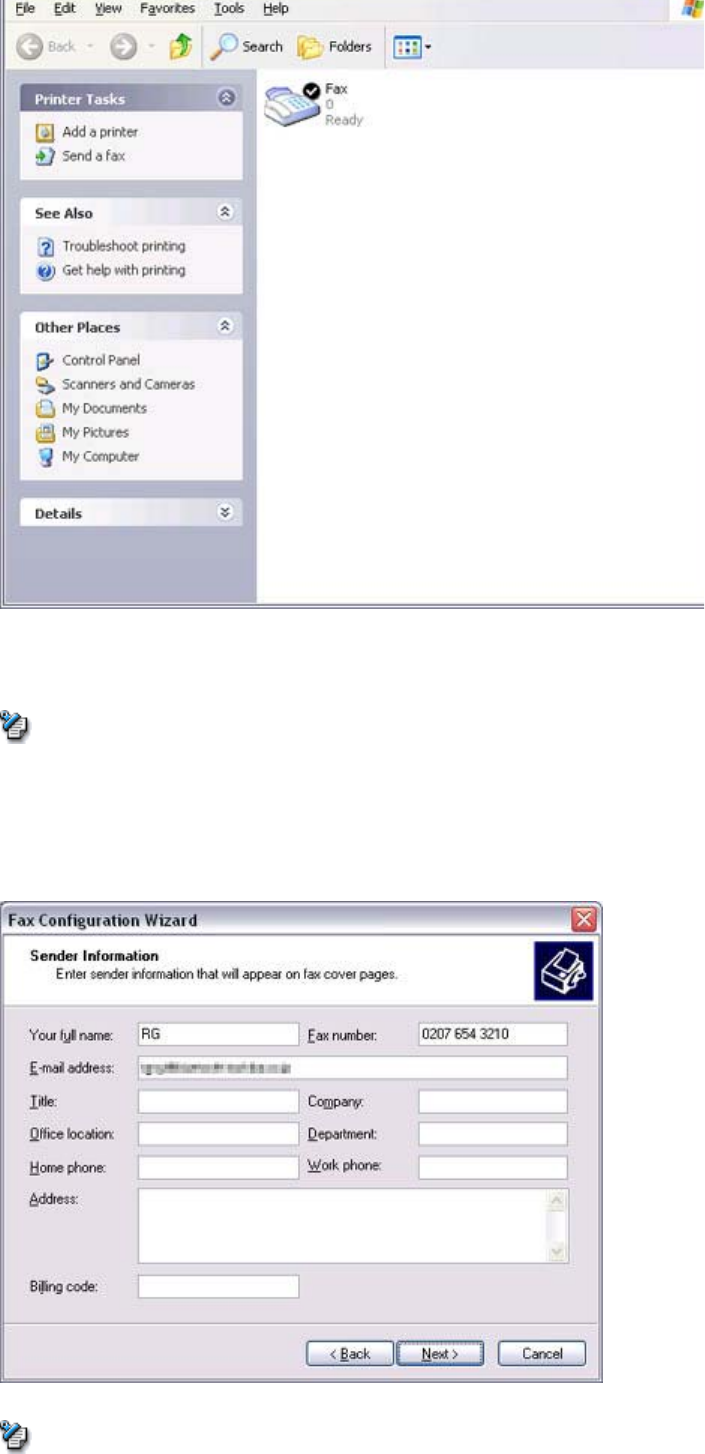
A window showing installed programs will appear, and a Fax icon will have been
created in the [Printers and Faxes] screen.
4. Click on "Send a fax" under "Printer Tasks" on the left side of the window
If you have not yet configured a fax device, the [Fax Configuration Wizard] window
will appear. In the window you can enter settings pertaining to the sender (yourself).
Note
Quick Start Guide - Introduction 第 44 頁,共 160 頁
file://C:\Documents and Settings\anitachou\Local Settings\Temp\~hh3F24.htm 2004/11/30
{If the fax confi
g
uration information has alread
y
been re
g
istered
,
the
[
Send Fax
Wizard] window, which can be viewed under " Sending a fax" below, will appear
instead of the [Fax Configuration Wizard] window.
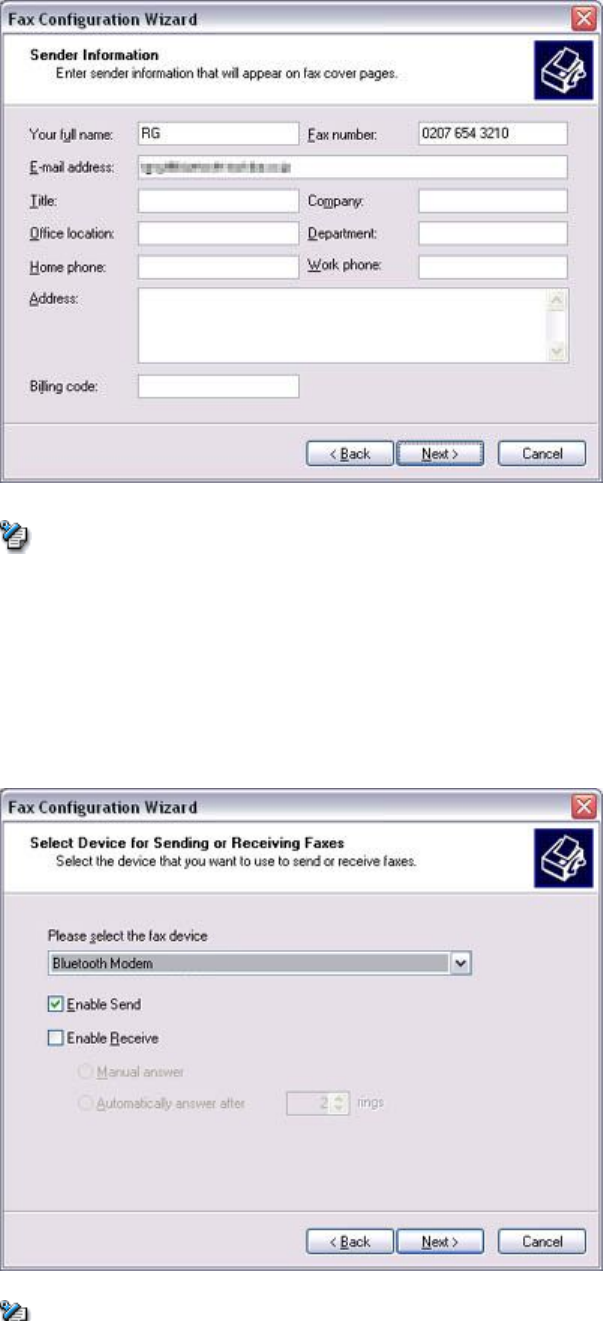
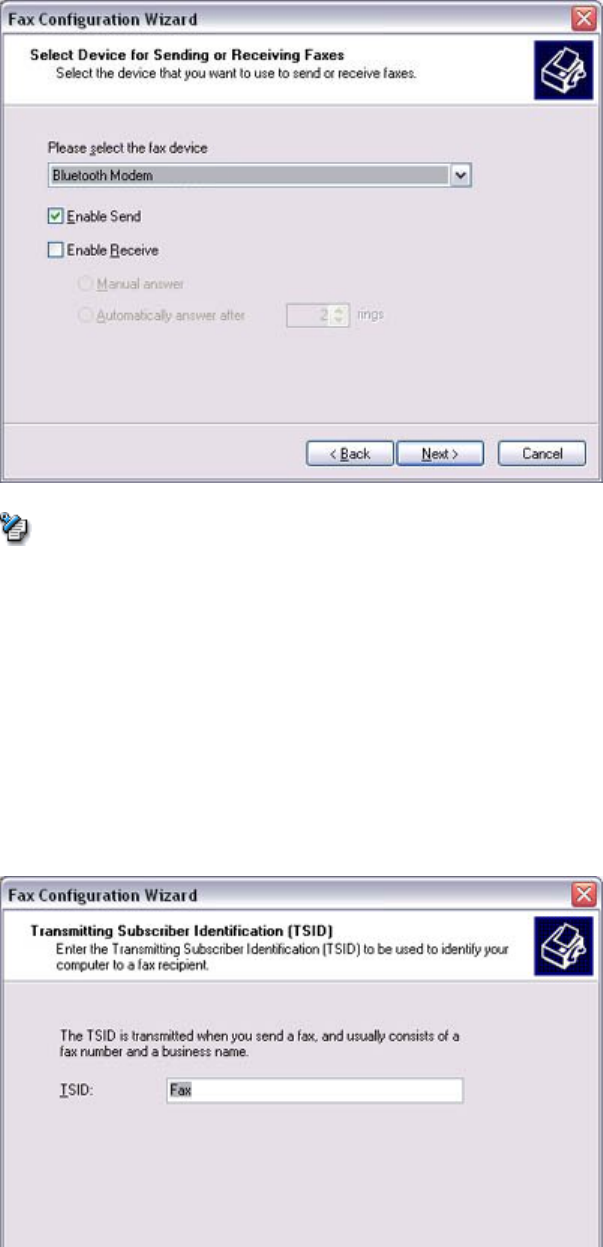
5. Enter the sender information, and click on the [Next] button
{The sender information that you configure here will be automatically appended
as header information when you send a fax.
The [Fax Configuration Wizard (Select Device for Sending or Receiving Faxes)]
window will appear.
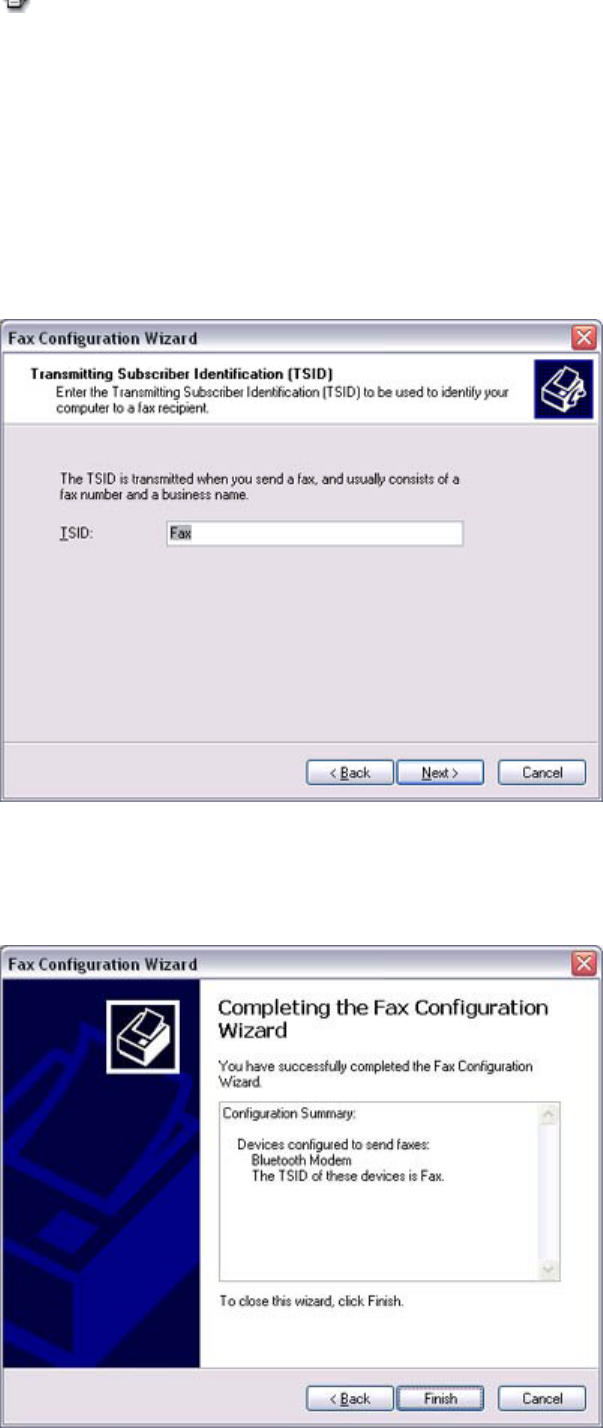
6. Select a device to be used for fax transmissions, enable the device for sending or
receiving, and then click on the [Next] button
Note
Note
Quick Start Guide - Introduction 第 45 頁,共 160 頁
file://C:\Documents and Settings\anitachou\Local Settings\Temp\~hh3F24.htm 2004/11/30
{If [Enable Receive] is selected, the device will be on standby for receiving faxes
even if it is not sending or receiving anything, and therefore will be in
continuous connection to the wireless modem (when COM Auto Connect is on).
Please decide whether to select this option based on the desired objective and/or
frequency of transmission.
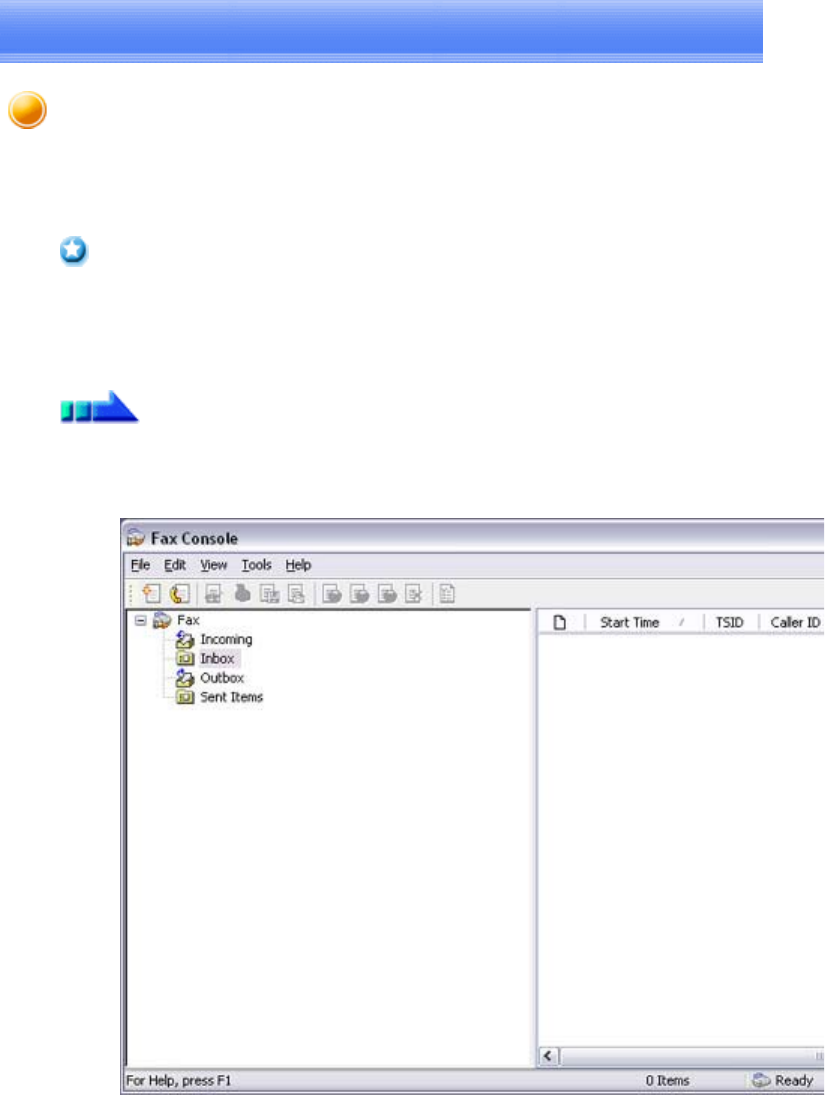
The [Fax Configuration Wizard (Transmitting Subscriber Identification (TSID))]
window will appear.
7. Click on the [Next] button
It is important that you do not change the transmitter subscriber identification.
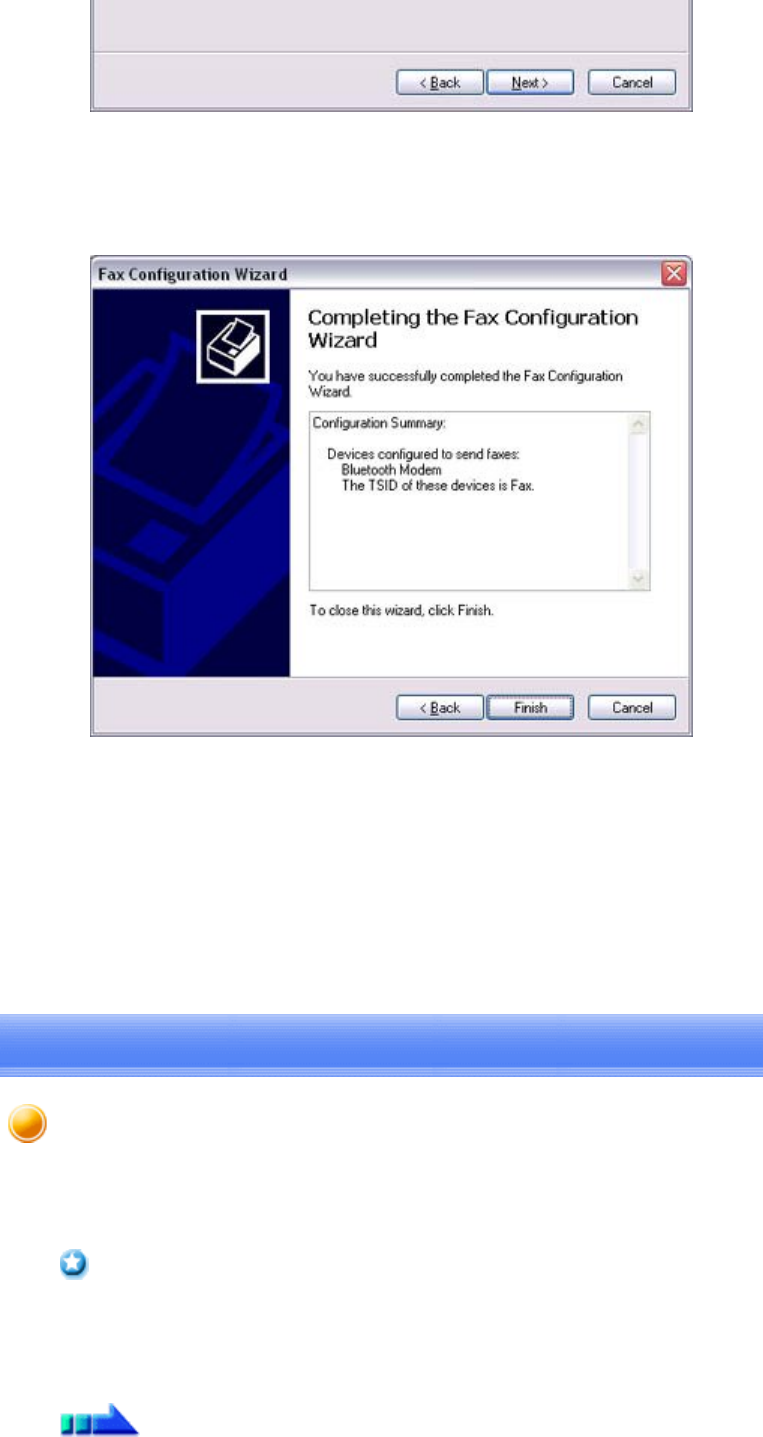
The [Fax Configuration Wizard (Completing the Fax Configuration Wizard)] window
will appear.
8. Click on the [Finish] button
The
fax
information
will
be
have
been
registered,
and
the
[Fax
Console]
window
will
Note
Quick Start Guide - Introduction 第 46 頁,共 160 頁
file://C:\Documents and Settings\anitachou\Local Settings\Temp\~hh3F24.htm 2004/11/30
The fax information will be have been registered, and the [Fax Console] window will
appear.
This will complete the fax set-up process.
Related topics: "Sending a fax" and "Receiving a fax"
This section describes how to send a fax from the Fax Console.
zThe Fax service must be enabled for sending in order for you to send a fax.
Please refer to "Using a wireless modem station" under "Troubleshooting" for how to
change the send and receive settings once the service has been configured.
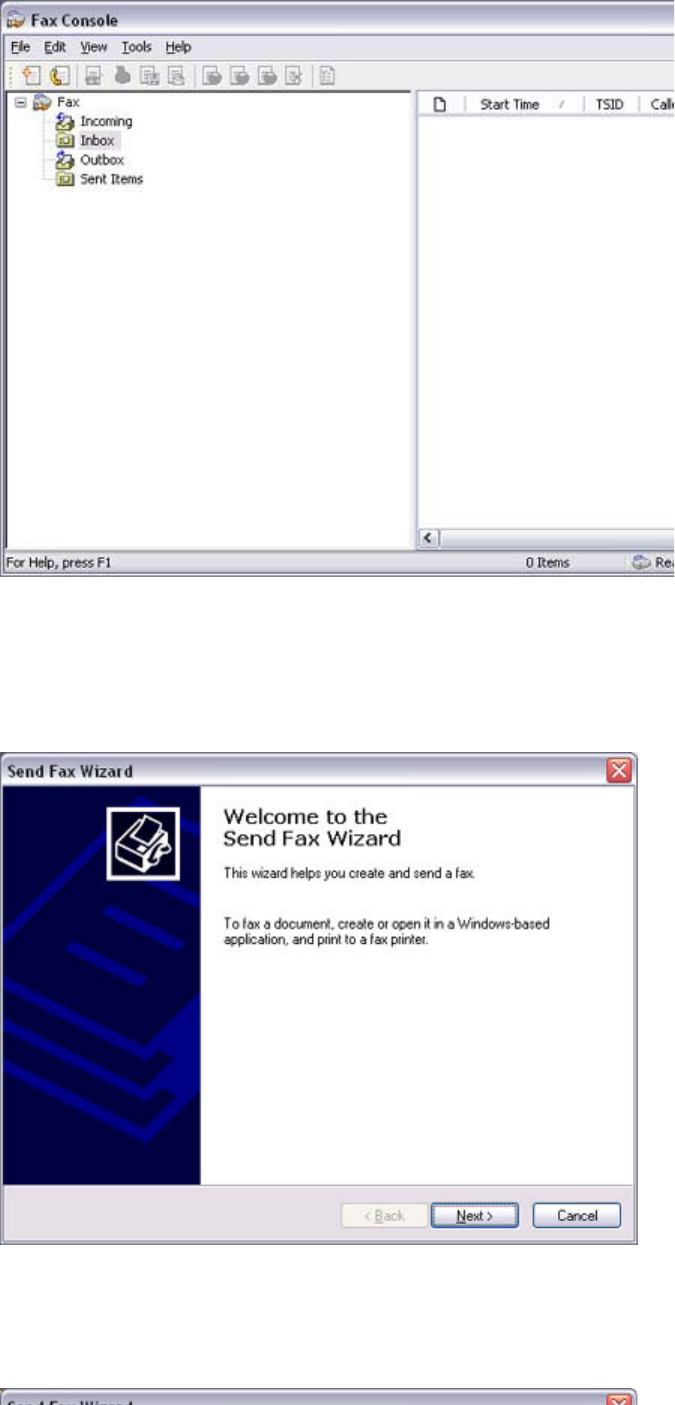
1. Double-click on the [Fax] icon in the Control Panel
The [Fax Console] window will appear.
2. In the [Fax Console] window, click [File] →[Send fax]
The [Send Fax Wizard (Starting the Send Fax Wizard)] window will appear.
3. Click on the [Next] button
Important
Procedure
Sending a fax
Quick Start Guide - Introduction 第 47 頁,共 160 頁
file://C:\Documents and Settings\anitachou\Local Settings\Temp\~hh3F24.htm 2004/11/30
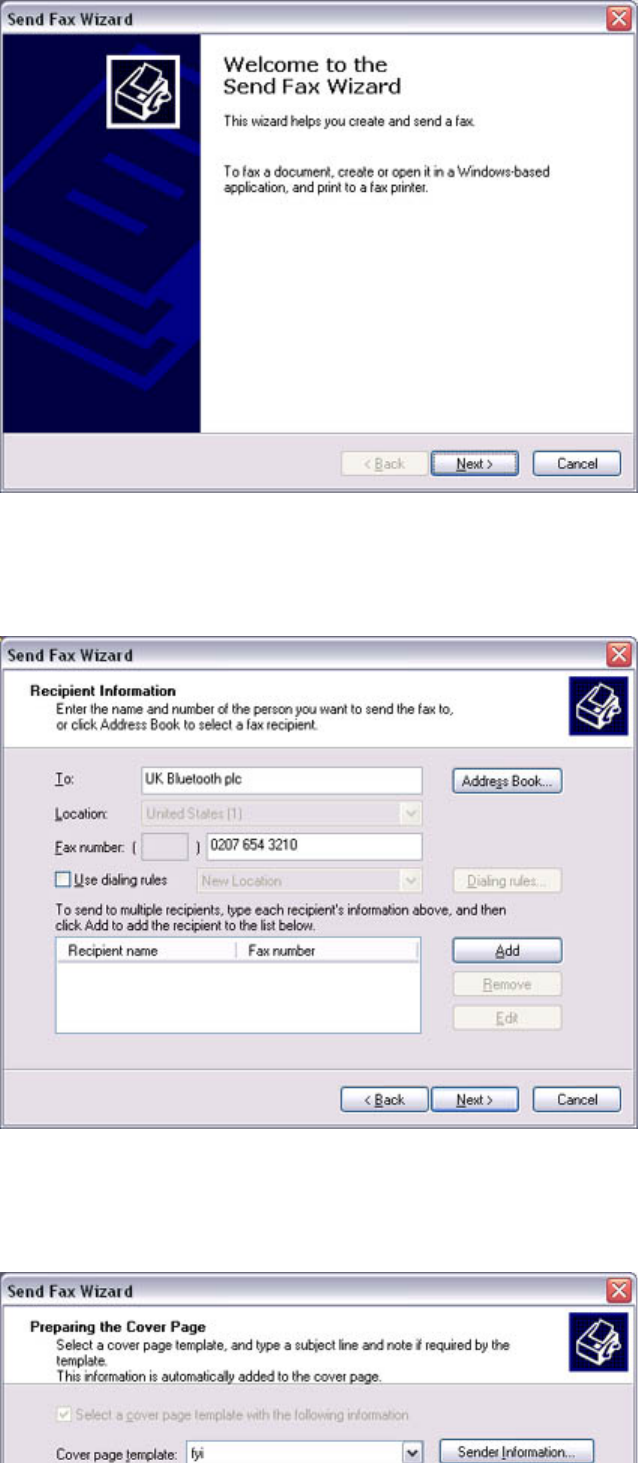
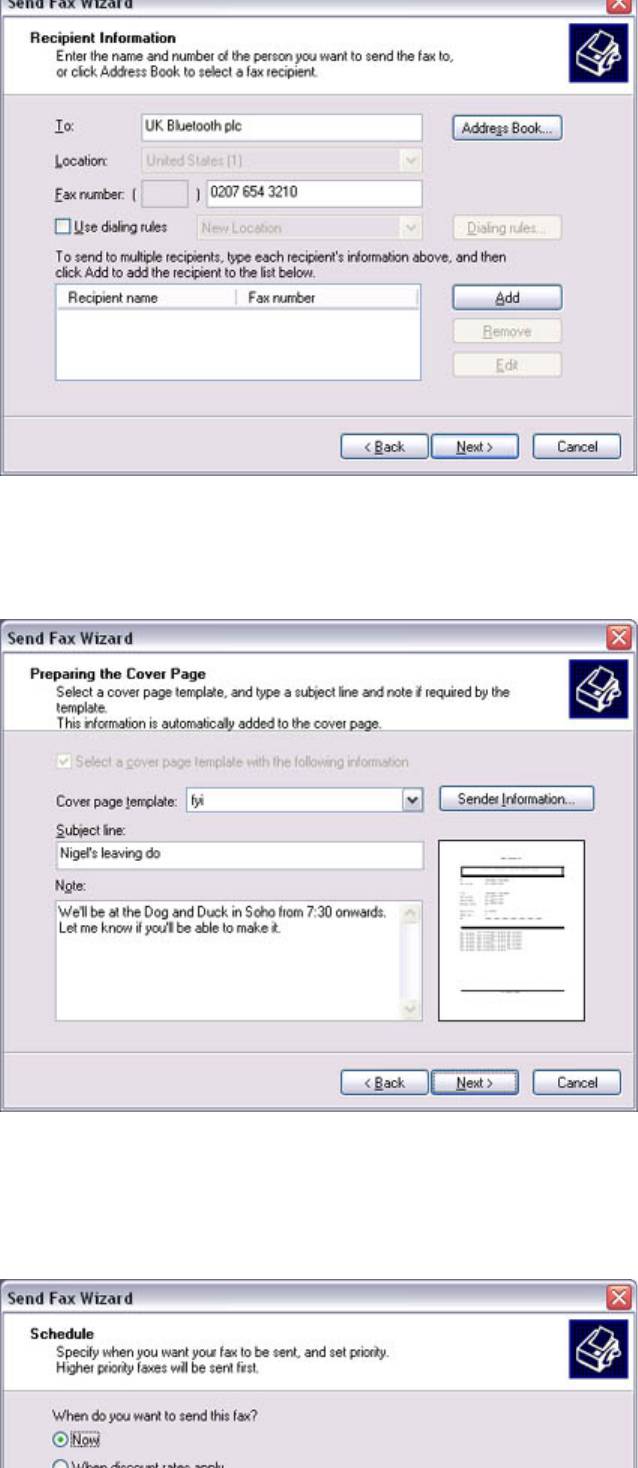
The [Send Fax Wizard (Recipient Information)] window will appear.
4. Enter the name and fax number of the destination party, and then click on the [Next]
button
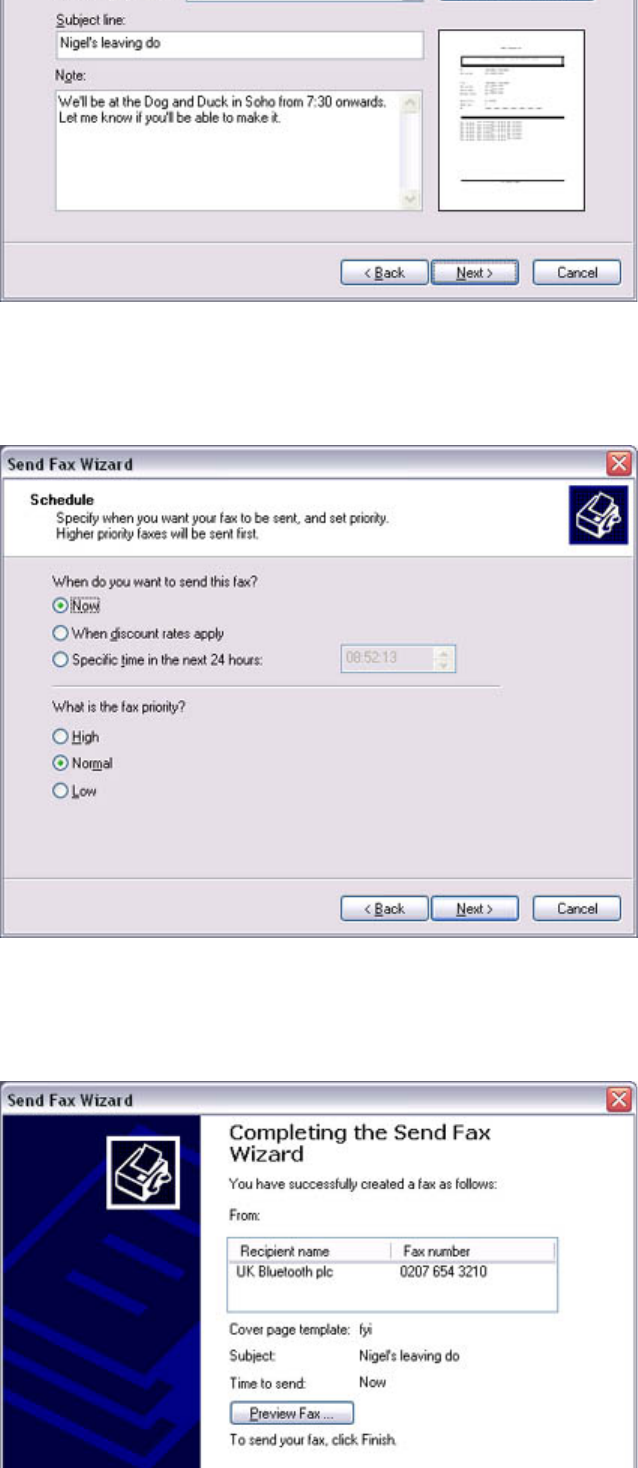
The [Send Fax Wizard (Preparing the Cover Page)] window will appear.
5. Specify the cover page template, subject line, and note (body text), and then click on
the [Next] button
Quick Start Guide - Introduction 第 48 頁,共 160 頁
file://C:\Documents and Settings\anitachou\Local Settings\Temp\~hh3F24.htm 2004/11/30
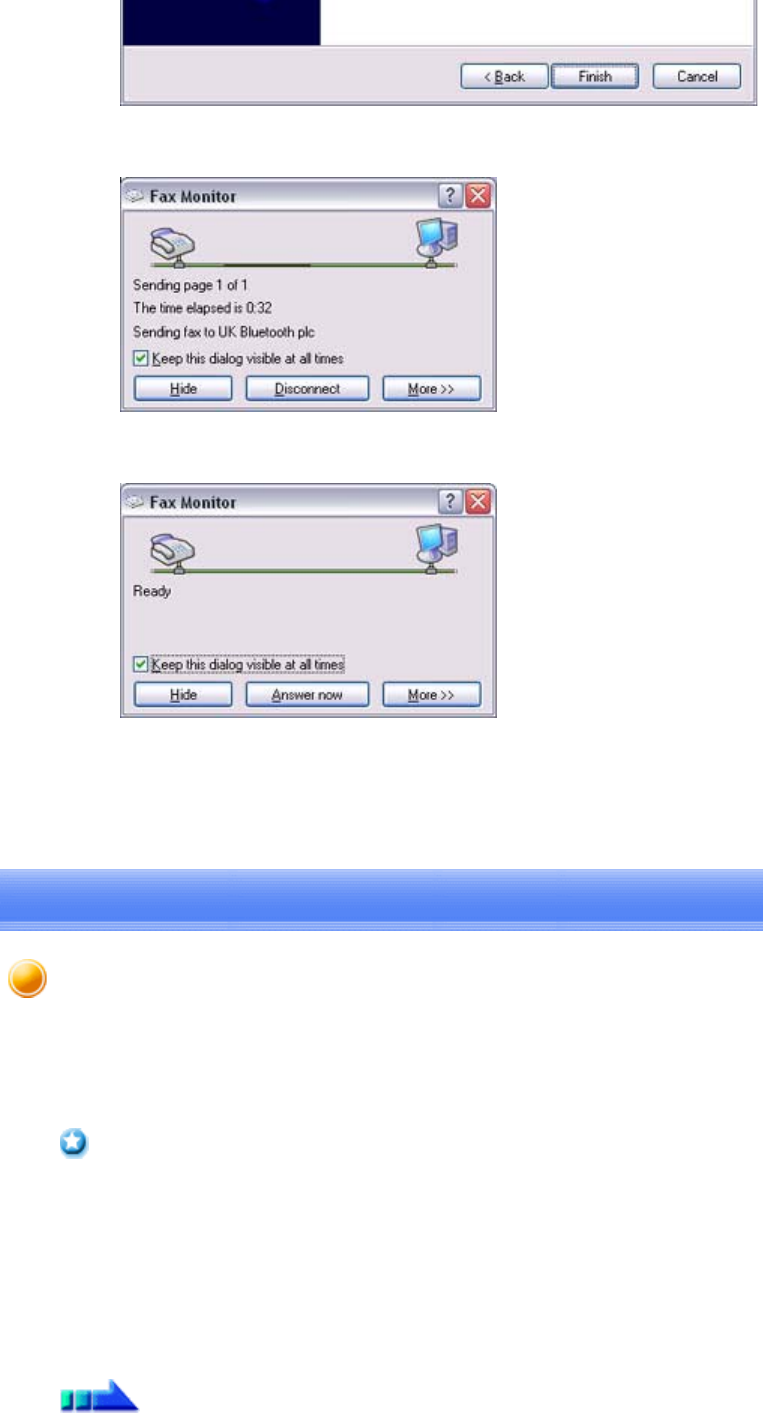
The [Send Fax Wizard (Schedule)] window will appear.
6. If you wish to send the fax immediately, select "Now", and then click on the [Next]
button
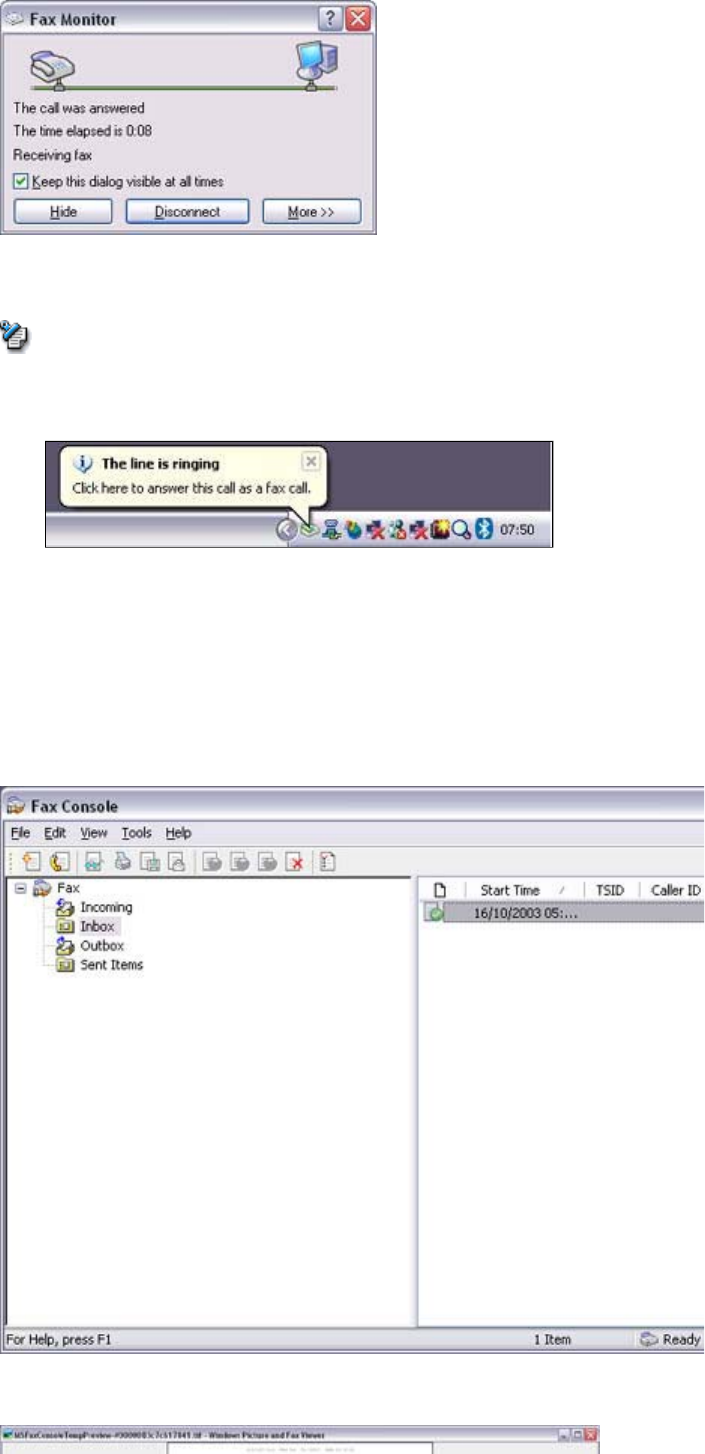
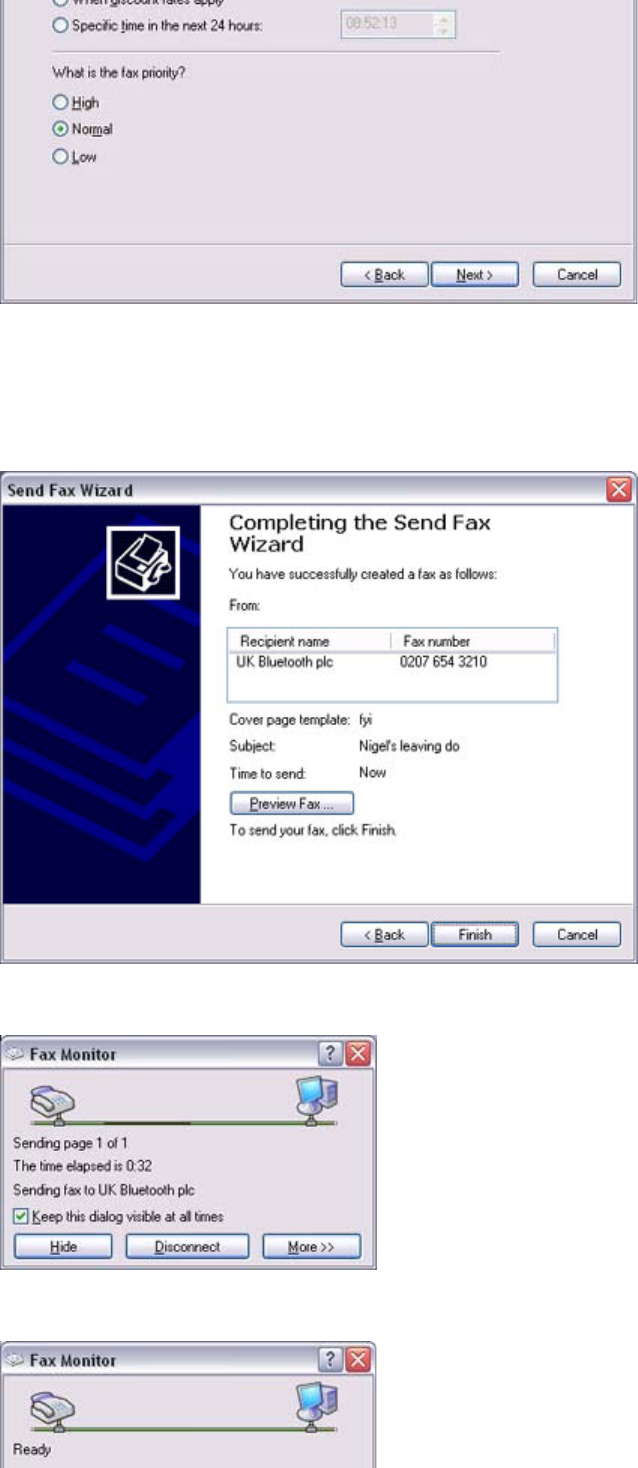
The [Send Fax Wizard (Completing the Send Fax Wizard)] window will appear.
7. Confirm the destination information and transmission details, and then click on the
[Finish] button
Quick Start Guide - Introduction 第 49 頁,共 160 頁
file://C:\Documents and Settings\anitachou\Local Settings\Temp\~hh3F24.htm 2004/11/30
The software will automatically dial the number and send the fax.
Once the fax has been sent, Fax Monitor will revert to standby mode.
Related topic: "Receiving a fax"
This section describes what to do when a fax arrives after you have established a connection
to a modem station.
zThe Fax service must be enabled for receiving in order for you to receive a fax.
Please refer to "Using a wireless modem station" under "Troubleshooting" for
information on how to change the send and receive settings once the fax service has
been configured.
zPlease ensure you have connected to a modem station before you receive a fax (the
device will be connected to the modem if "Enable Receive" has been selected or COM
Auto Connect has been activated).
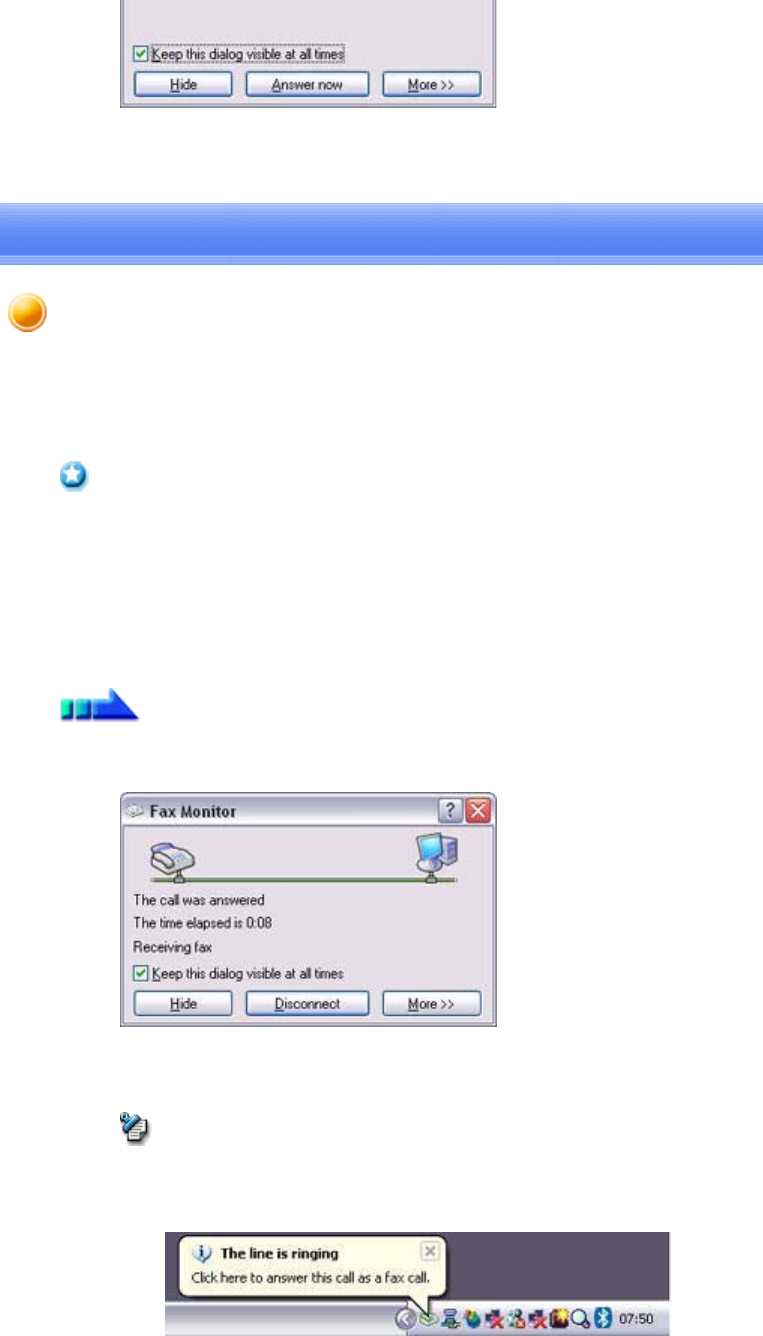
1. When a fax arrives, the Fax Monitor will start automatically as the fax is received
Important
Procedure
Receiving a fax
Quick Start Guide - Introduction 第 50 頁,共 160 頁
file://C:\Documents and Settings\anitachou\Local Settings\Temp\~hh3F24.htm 2004/11/30
Once the fax has been received, the Fax Monitor will revert to standby mode.
{If you have enabled manual fax reception, the message below will appear when a
fax arrives.
Click on the message with your mouse to receive the fax.
2. Double-click on the [Fax] icon in the Control Panel
The [Fax Console] window will appear.
3. In the [Fax Console] window, double-click on the fax that has arrived
An image of the received fax will be displayed.
Note
Quick Start Guide - Introduction 第 51 頁,共 160 頁
file://C:\Documents and Settings\anitachou\Local Settings\Temp\~hh3F24.htm 2004/11/30
Related topic: "Sending a fax"
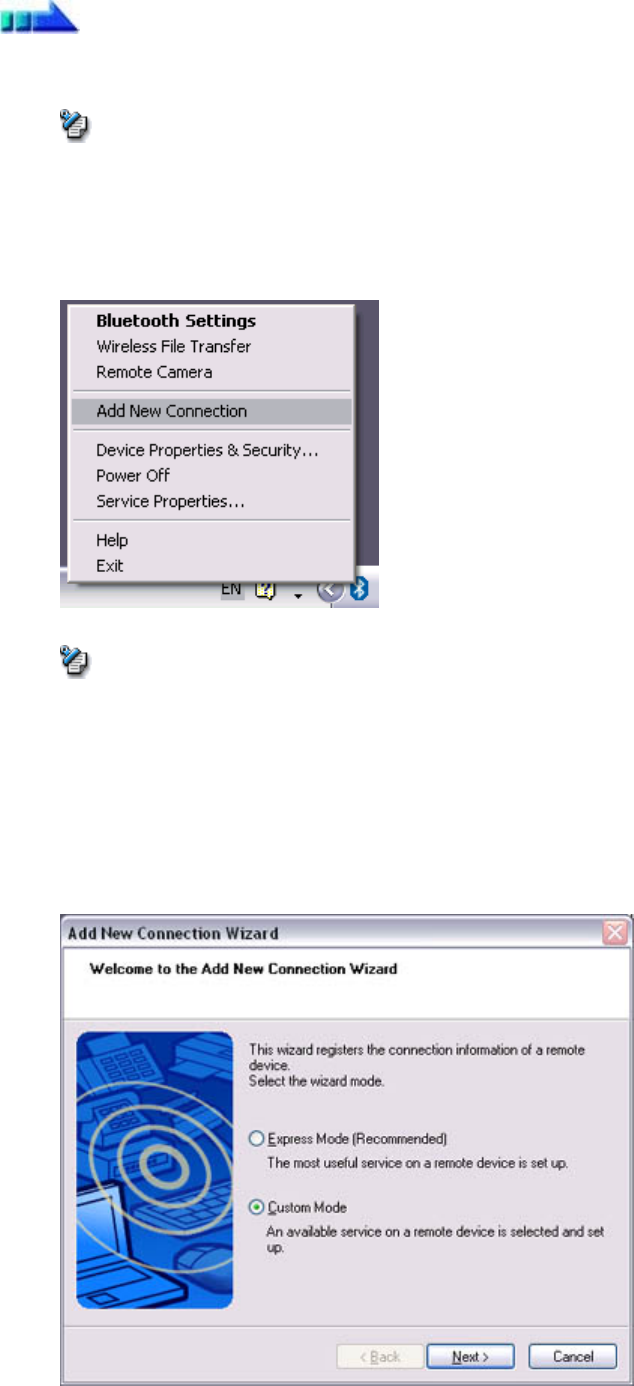
This section describes how to send a fax using a mobile telephone as a modem.
→Setting up the mobile telephone
→Installing a modem
→Setting fax information
→Sending a fax
→Receiving a fax
zPlease ensure that any drivers used to connect the PC to the mobile telephone have been
installed.
zA Bluetooth passkey (PIN code) is required for you to connect to the mobile telephone.
Please make a note of your Bluetooth passkey before you start the set -up process.
zA fax application is required for you to be able to send and receive faxes. The description
below is based on a example using Microsoft Fax, which is installed with Windows XP as
standard.
If you are going to use a commercially available fax application , then please refer to the
manual that came with the application for information on how to send and receive faxes.
Important
Setting up the mobile telephone
Using a mobile telephone for fax transmissions [FAX]
Quick Start Guide - Introduction 第 52 頁,共 160 頁
file://C:\Documents and Settings\anitachou\Local Settings\Temp\~hh3F24.htm 2004/11/30
Set up and register the mobile telephone as a fax service.
1. Turn on the mobile telephone, and set it to be connectable via Bluetooth
{Please refer to the instruction manual for information on how to operate the
telephone.
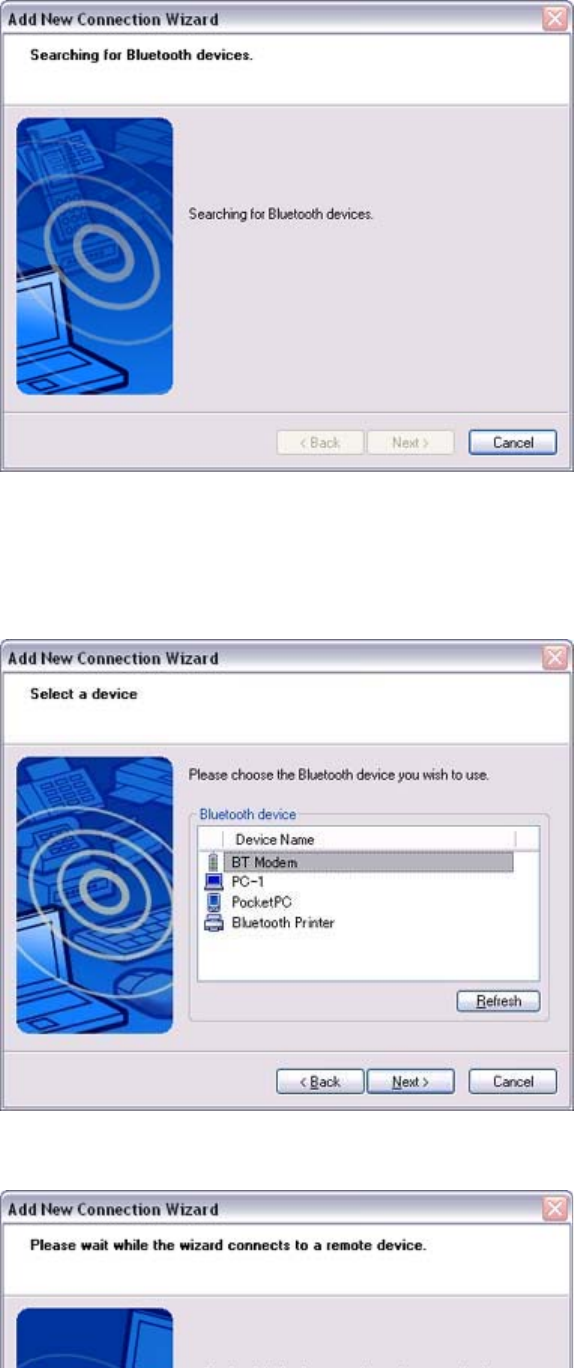
2. Right-click on the Bluetooth icon in the task tray, and then click on [Add New
Connection]
{Alternatively, click [Start]→[All Programs]→[Bluetooth]→[Bluetooth Settings],
and then click on [New Connection] from the active [Bluetooth Settings]
window.
The [Add New Connection Wizard (Welcome to the Add New Connection Wizard)]
window will appear.
3. Select [Custom Mode], and then click on the [Next] button
Procedure
Note
Note
Quick Start Guide - Introduction 第 53 頁,共 160 頁
file://C:\Documents and Settings\anitachou\Local Settings\Temp\~hh3F24.htm 2004/11/30
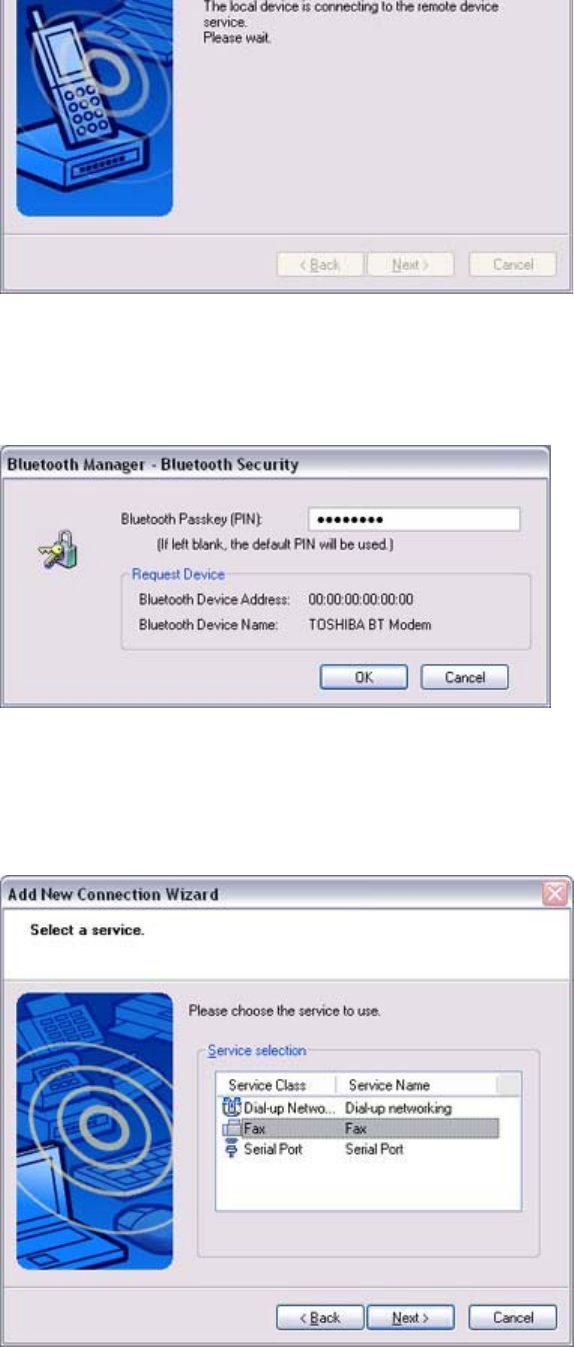
The [Add New Connection Wizard (Searching for Bluetooth devices)] window will
appear.
Once the program has finished searching for the devices, the [Add New Connection
Wizard (Select Device)] window will appear.
4. Select the device name of the mobile telephone from [Device List], and then click on
the [Next] button
The [Add New Connection Wizard (Searching for Services)] window will appear.
Quick Start Guide - Introduction 第 54 頁,共 160 頁
file://C:\Documents and Settings\anitachou\Local Settings\Temp\~hh3F24.htm 2004/11/30
5. If you are connecting to the mobile telephone for the first time, enter the passkey for
the device from the [Bluetooth Passkey (PIN Code)] window, and then click on the
[OK] button.
Once the program has finished searching for the services, the [Add New Connection
Wizard (Select Service)] window will appear.
6. Select "Fax" under [Select Service], and then click on the [Next] button
The [Add New Connection Wizard (Connecting to Remote Device)] screen will
appear.
The
COM
port
and
modem
registration
process
will
then
be
automatically
performed.
Quick Start Guide - Introduction 第 55 頁,共 160 頁
file://C:\Documents and Settings\anitachou\Local Settings\Temp\~hh3F24.htm 2004/11/30
The
COM
port
and
modem
registration
process
will
then
be
automatically
performed.
Once the
COM port and modem (standard 33600 bps type) registration is complete,
the [Add New Connection Wizard (Setting Connection Name)] screen will appear.
7. Configure the type and name of the icon to appear after registration, and click on the
[Next] button.
Please click only on the [Next] button once you are satisfied with the configuration.
The [Add New Connection Wizard (Completing the Add New Connection Wizard)]
screen will appear.
8. Click on the [Finish] button
The settings will be registered, and the icon will appear on the [Bluetooth Settings]
screen.
Quick Start Guide - Introduction 第 56 頁,共 160 頁
file://C:\Documents and Settings\anitachou\Local Settings\Temp\~hh3F24.htm 2004/11/30
Configure send/receive settings and register fax information.
1. Select [Start]→[Control Panel], and then double-click on the [Printers and Other
Hardware] icon
{If the control panel is displayed in "Classic view", and you use Windows 2000,
please start from Step (2).
2. Double-click on the [Printers and Faxes] icon
The [Printers & Faxes] window will appear.
3. Click on "Set up faxing" in the [Printers and Faxes] window
A window showing installed programs will appear, and a Fax icon will have been
created in the [Printers and Faxes] screen.
4. Click on "Send a fax" under "Printer Tasks" on the left side of the window
Setting fax information
Procedure
Note
Quick Start Guide - Introduction 第 57 頁,共 160 頁
file://C:\Documents and Settings\anitachou\Local Settings\Temp\~hh3F24.htm 2004/11/30
If you have not yet configured a fax device, the [Fax Configuration Wizard] window
will appear. In the window you can enter settings pertaining to the sender (yourself).
{If the fax configuration information has already been registered, the [Send Fax
Wizard] window, which can be viewed under " Sending a fax" below, will appear
instead of the [Fax Configuration Wizard] window.
5. Enter the sender information, and click on the [Next] button
Note
Note
Quick Start Guide - Introduction 第 58 頁,共 160 頁
file://C:\Documents and Settings\anitachou\Local Settings\Temp\~hh3F24.htm 2004/11/30
{The sender information that you configure here will be automatically appended
as header information when you send a fax.
The [Fax Configuration Wizard (Select Device for Sending or Receiving Faxes)]
window will appear.
6. Select a device to be used for fax transmissions, enable the device for sending or
receiving, and then click on the [Next] button
{If [Enable Receive] is selected, the device will be on standby for receiving faxes
even if it is not sending or receiving anything, and therefore will be in
continuous connection to the wireless modem (when COM Auto Connect is
on).
Please decide whether to select this option based on to the desired objective
and/or frequency of transmission.
The [Fax Configuration Wizard (Transmitting Subscriber Identification (TSID))]
window will appear.
7. Click on the [Next] button
It is important that you do not change the transmitter subscriber identification.
Note
Quick Start Guide - Introduction 第 59 頁,共 160 頁
file://C:\Documents and Settings\anitachou\Local Settings\Temp\~hh3F24.htm 2004/11/30
The [Fax Configuration Wizard (Completing the Fax Configuration Wizard)] window
will appear.
8. Click on the [Finish] button
The fax information will be have been registered, and the [Fax Console] window will
appear.
This will complete the fax set-up process.
Related topics: "Sending a fax" and "Receiving a fax"
This section describes how to send a fax from the Fax Console.
zThe Fax service must be enabled for sending in order for you to send a fax.
Please refer to "Using a mobile telephone" under "Troubleshooting" for how to change
the send and receive settings once the service has been configured.""
1
Double
click on the [Fax] icon in the Control Panel
Important
Procedure
Sending a fax
Quick Start Guide - Introduction 第 60 頁,共 160 頁
file://C:\Documents and Settings\anitachou\Local Settings\Temp\~hh3F24.htm 2004/11/30
1
.
Double
-
click
on
the
[Fax]
icon
in
the
Control
Panel
The [Fax Console] window will appear.
2. In the [Fax Console] window, click [File] →[Send fax]
The [Send Fax Wizard (Starting the Send Fax Wizard)] window will appear.
3. Click on the [Next] button
The [Send Fax Wizard (Recipient Information)] window will appear.
4. Enter the name and fax number of the destination party, and then click on the [Next]
button
Quick Start Guide - Introduction 第 61 頁,共 160 頁
file://C:\Documents and Settings\anitachou\Local Settings\Temp\~hh3F24.htm 2004/11/30
The [Send Fax Wizard (Preparing the Cover Page)] window will appear.
5. Specify the cover page template, subject line, and note (body text), and then click on
the [Next] button
The [Send Fax Wizard (Schedule)] window will appear.
6. If you wish to send the fax immediately, select "Now", and then click on the [Next]
button
Quick Start Guide - Introduction 第 62 頁,共 160 頁
file://C:\Documents and Settings\anitachou\Local Settings\Temp\~hh3F24.htm 2004/11/30
The [Send Fax Wizard (Completing the Send Fax Wizard)] window will appear.
7. Confirm the destination information and transmission details, and then click on the
[Finish] button
The software will automatically dial the number and send the fax.
Once the fax has been sent, Fax Monitor will revert to standby mode.
Quick Start Guide - Introduction 第 63 頁,共 160 頁
file://C:\Documents and Settings\anitachou\Local Settings\Temp\~hh3F24.htm 2004/11/30
Related topic: "Receiving a fax"
This section describes what to do when a fax arrives after you have established a connection
to a modem station.
zThe Fax service must be enabled for receiving in order for you to receive a fax.
Please refer to "Using a mobile telephone" under "Troubleshooting" for information on
how to change the send and receive settings once the fax service has been configured.
zPlease ensure you have connected to a modem station before you receive a fax (the
device will be connected to the modem if "Enable Receive" has been selected or COM
Auto Connect has been activated).
1. When a fax arrives, the Fax Monitor will start automatically as the fax is received
Once the fax has been received, the Fax Monitor will revert to standby mode.
{If
y
ou have enabled manual fax rece
p
tion
,
the messa
g
e below will a
pp
ear when a
fax arrives.
Click on the message with your mouse to receive the fax.
2. Double-click on the [Fax] icon in the Control Panel
The [Fax Console] window will appear
Important
Procedure
Note
Receiving a fax

Quick Start Guide - Introduction 第 64 頁,共 160 頁
file://C:\Documents and Settings\anitachou\Local Settings\Temp\~hh3F24.htm 2004/11/30
The
[Fax
Console]
window
will
appear
.
3. In the [Fax Console] window, double-click on the fax that has arrived
An image of the received fax will be displayed.
Related topic: "Sending a fax"
Printing
Quick Start Guide - Introduction 第 65 頁,共 160 頁
file://C:\Documents and Settings\anitachou\Local Settings\Temp\~hh3F24.htm 2004/11/30
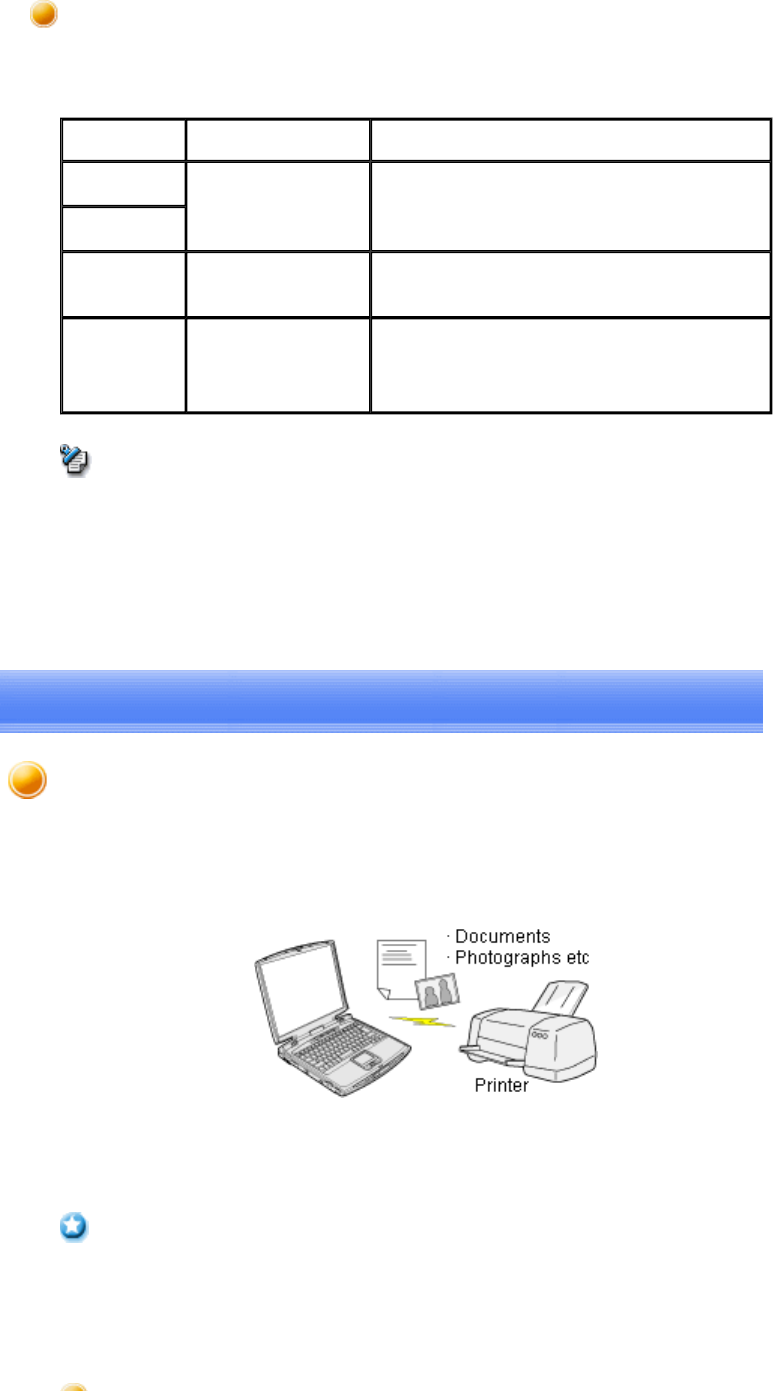
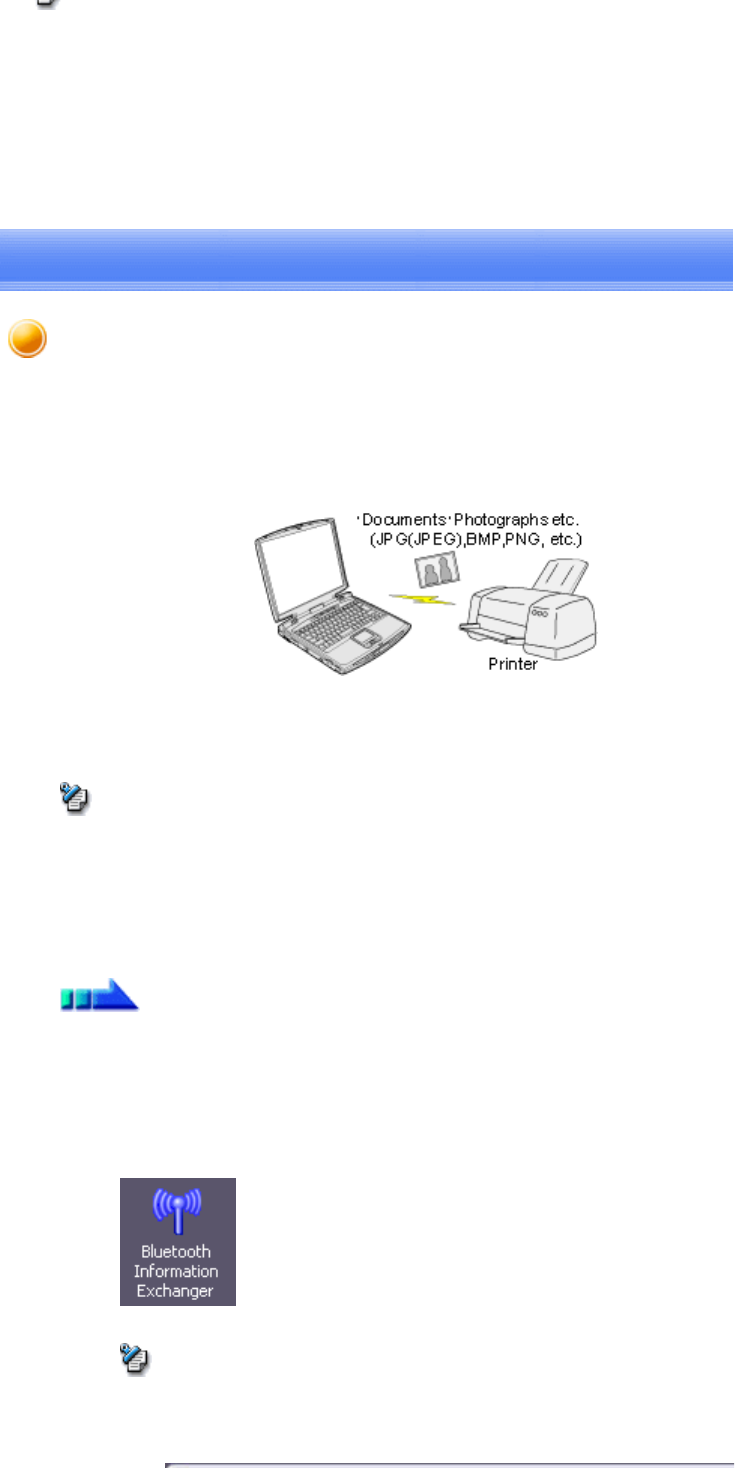
This section describes how to use a Bluetooth -compatible printer for printing.
When printing using Bluetooth, the methods for configuring and using the printer will vary
with the corresponding profile.
z(*1) The majority of Bluetooth-compatible printers support HCRP.
If you have selected Express Mode, HCRP will be chosen as the default profile. If the
printer does not support HCRP, then SPP will be the next choice.
z(*2) The printing of business cards using OPP complies exclusively with the business
card (vCARD) standard.
Types of printer functions
Profile Bluetooth Settings Operation
HCRP (*1) You must register the
printer in Bluetooth
Settings
Allows you to print from various applications, as
with ordinary cable-connected printers.
→"Printing document and images"
SPP
OPP (*2) Not required Allows you to print business card data directly.
→"Printing business card data"
BIP Not required Allows you to print image data directly.
→"Printing images directly from a digital camera
or other device"
Note
This section describes how to print using a Bluetooth -compatible printer.
→Setting up the printer
→Printing
zPlease ensure that any printer-specific drivers have been installed on the PC before you
have established a Bluetooth connection.
zA Bluetooth passkey (PIN code) is required for you to connect to the printer. Please
make a note of your Bluetooth passkey before you start the set -up process.
Important
S tti th i t
Printing documents and images [HCRP] [SPP]
Quick Start Guide - Introduction 第 66 頁,共 160 頁
file://C:\Documents and Settings\anitachou\Local Settings\Temp\~hh3F24.htm 2004/11/30
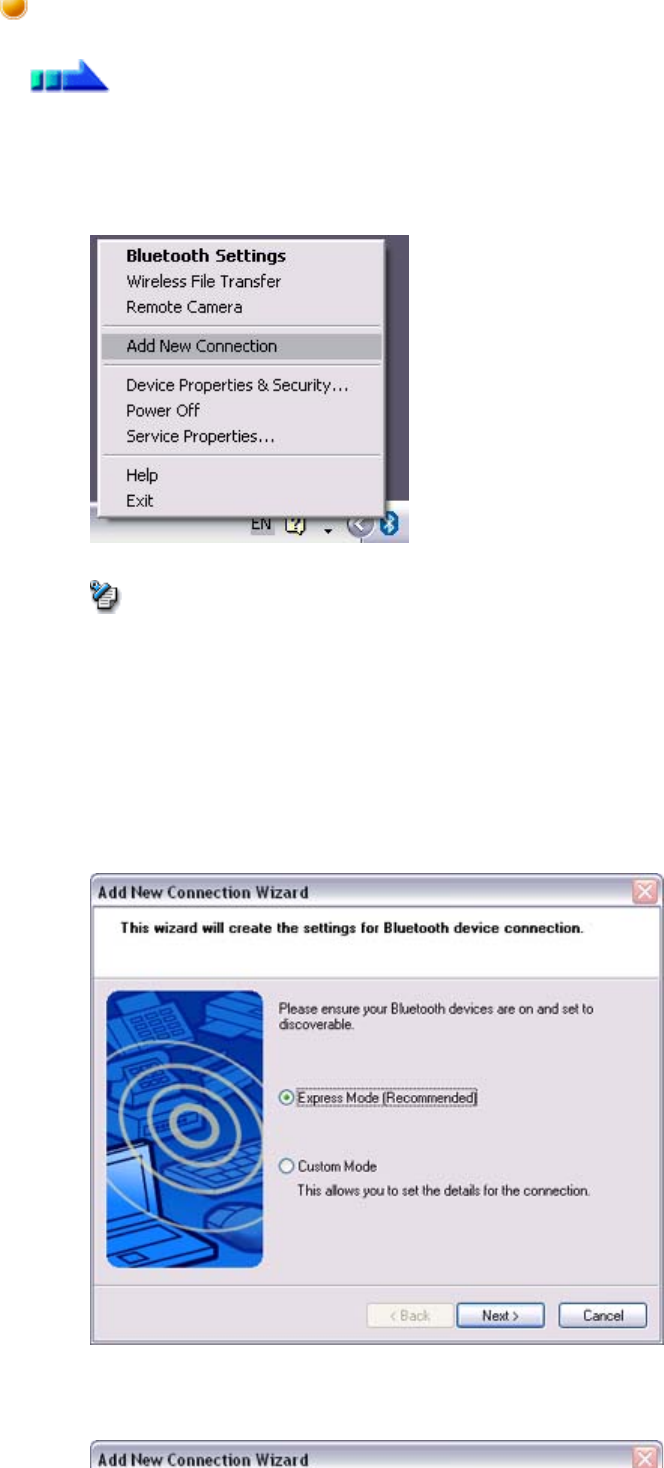
1. Turn on the printer
2. Right-click on the Bluetooth icon in the task tray, and then click on [Add New
Connection]
{Alternatively, click [Start]→[All Programs]→[Bluetooth]→[Bluetooth
Settings], and then click on [New Connection] from the active [Bluetooth
Settings] window.
The [Add New Connection Wizard (Welcome to the Add New Connection
Wizard)] window will appear.
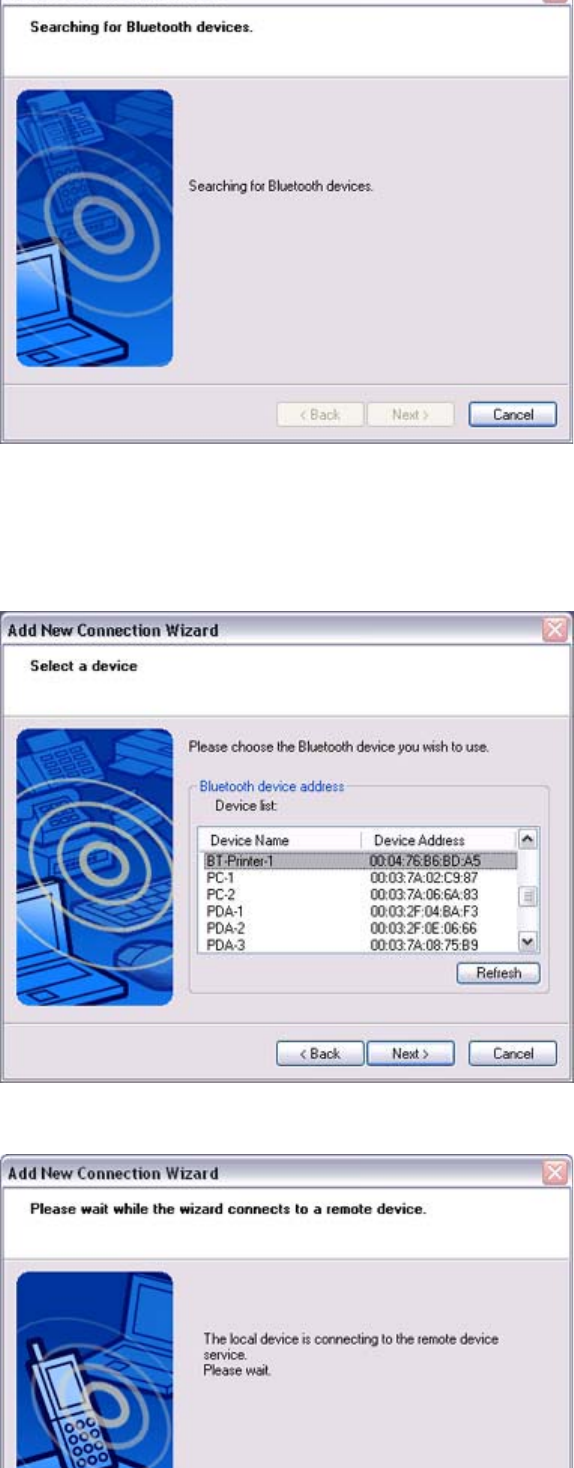
3. Confirm that [Express Mode] has been selected, and then click on the [Next]
button
The [Add New Connection Wizard (Searching for Bluetooth devices)] window
will appear.
S
e
tti
ng up
th
e pr
i
n
t
er
Procedure
Note
Quick Start Guide - Introduction 第 67 頁,共 160 頁
file://C:\Documents and Settings\anitachou\Local Settings\Temp\~hh3F24.htm 2004/11/30
Once the program has finished searching for the devices, the [Add New
Connection Wizard (Device Selection)] window will appear.
4. Select the device name of the printer from [Device List], and then click on the
[Next] button
The [Add New Connection Wizard (Searching for Services)] window will appear.
Quick Start Guide - Introduction 第 68 頁,共 160 頁
file://C:\Documents and Settings\anitachou\Local Settings\Temp\~hh3F24.htm 2004/11/30
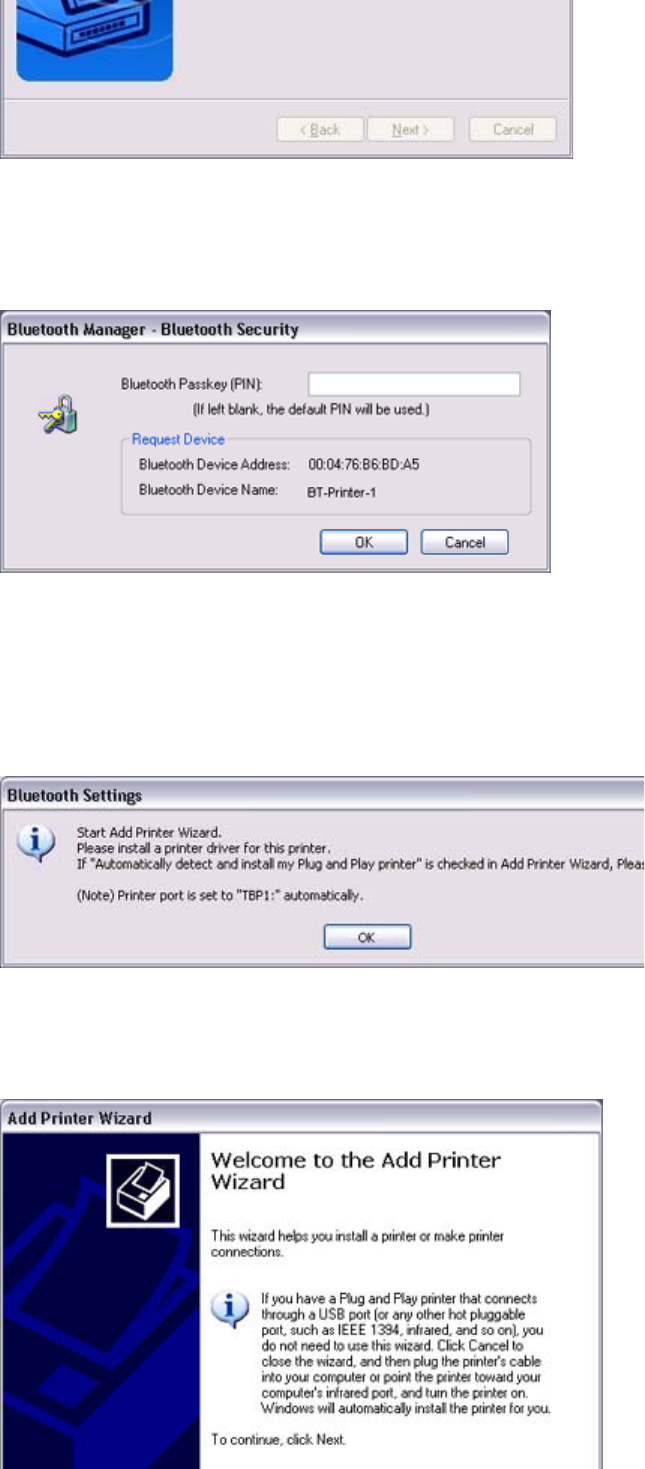
5. If you are connecting to the printer for the first time, enter the passkey for the
device from the [Bluetooth Passkey (PIN Code)] window, and then click on the
[OK] button.
Once the services have been detected successfully, connection to the device and
creation of the HCRP port will be performed automatically.
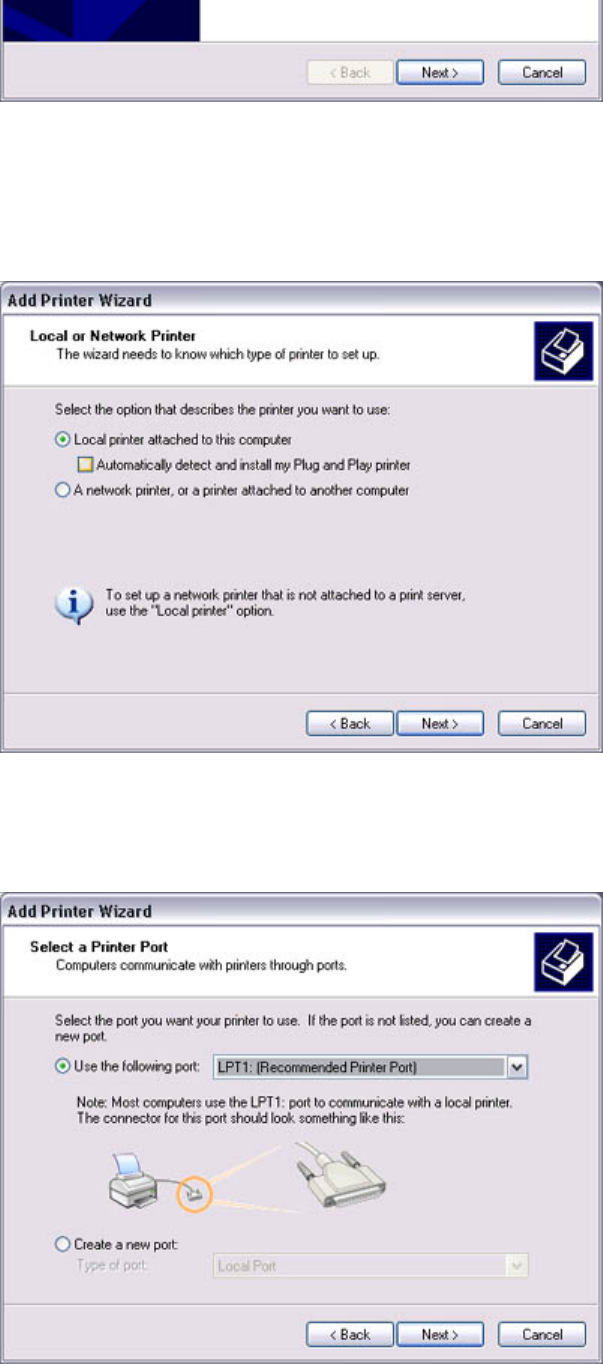
If you have not yet installed a printer, a message prompting you to install a printer
will appear.
6. Click on the [OK] button
The [Add Printer Wizard (Starting the Add Printer Wizard)] window will appear.
7. Click on the [Next] button
Quick Start Guide - Introduction 第 69 頁,共 160 頁
file://C:\Documents and Settings\anitachou\Local Settings\Temp\~hh3F24.htm 2004/11/30
The [Add Printer Wizard (Local Printer or Network Printer)] window will appear.
8. Select "Local printer attached to this computer", remove the check next to
"Automatically detect and install my Plug and Play printer", and then click on the
[Next] button
The [Add Printer Wizard (Select Printer Port)] window will appear.
9. Select the desired port, and then click on the [Next] button
The [Add Printer Wizard (Install Printer Software)] window will appear.
Quick Start Guide - Introduction 第 70 頁,共 160 頁
file://C:\Documents and Settings\anitachou\Local Settings\Temp\~hh3F24.htm 2004/11/30
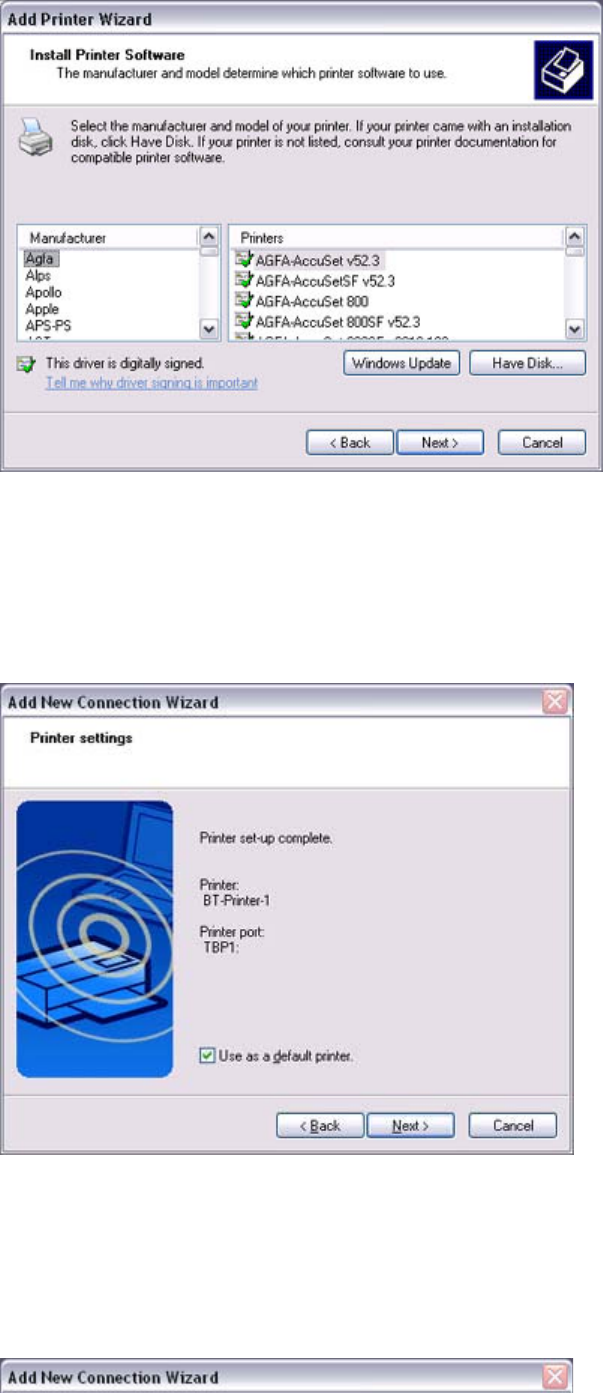
10. Select the [Manufacturer] and [Printer] as pertains to the printer to be installed, or
click on the [Use Device] button, and then click on the [Next] button
Please install the printer according to the instructions in the windows that follow.
Once installation is complete, a message of confirmation will appear in the [Add
New Connection Wizard (Printer Settings)] window.
11. Click on [Next]
The [Add New Connection Wizard (Connection Name Settings)] window will
appear.
12. Enter the type and name of the icon displayed after registration, and then click on
the [Next] button
Please click on the [Next] button if you are satisfied with the settings.
Quick Start Guide - Introduction 第 71 頁,共 160 頁
file://C:\Documents and Settings\anitachou\Local Settings\Temp\~hh3F24.htm 2004/11/30
{You can change the connection icon and icon name.
→"Changing the connection icon name"
→"Changing the connection icon"
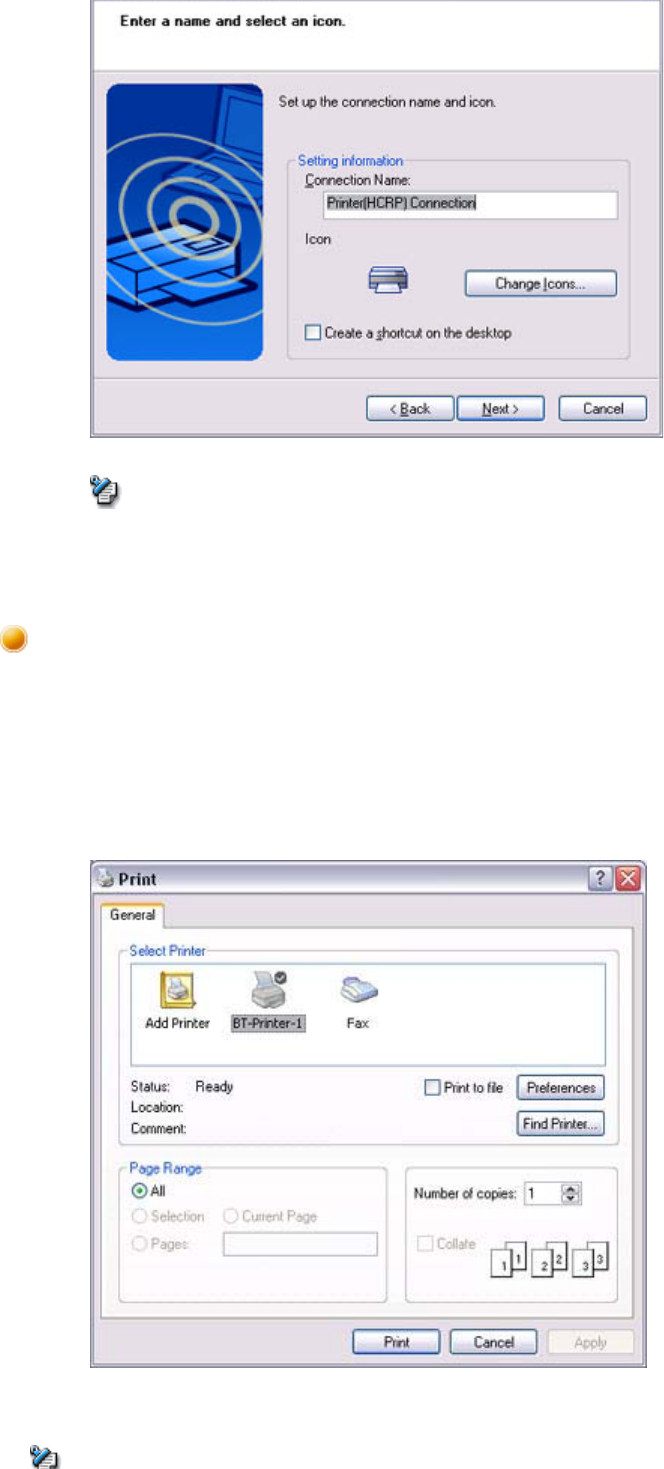
Try to print from the message pad.
1. Click [File]→[Print]
The [Print] screen will appear.
2. Select wireless printer from under [Select Printer], and then click on the [Print]
button
Printing will commence.
Note
Printing
Note
Quick Start Guide - Introduction 第 72 頁,共 160 頁
file://C:\Documents and Settings\anitachou\Local Settings\Temp\~hh3F24.htm 2004/11/30
zIf you have connected to a printer using HCRP or SPP profiles, all future Bluetooth
connections to that printer will be established automatically once you have printed a
document from your PC.
If
y
ou have a
p
rinter that su
pp
orts BIP
(
Basic Ima
g
in
g
Profile
),
y
ou can send ima
g
es dir
e
to a printer to be printed out, without having to perform any special set -up procedure.
→Printing image files on a printer (using icons)
→Printing image files on a printer (by right -clicking the mouse)
zBelow is a list of file t
yp
es
(
extensions
)
of ima
g
es that can be
p
rinted out directl
y
.
{Bitmap (*.bmp)
{JPEG (*.jpg; *.jpeg)
{PNG (*.png)
■Printing image files on a printer (using icons)
1. Turn on the printer
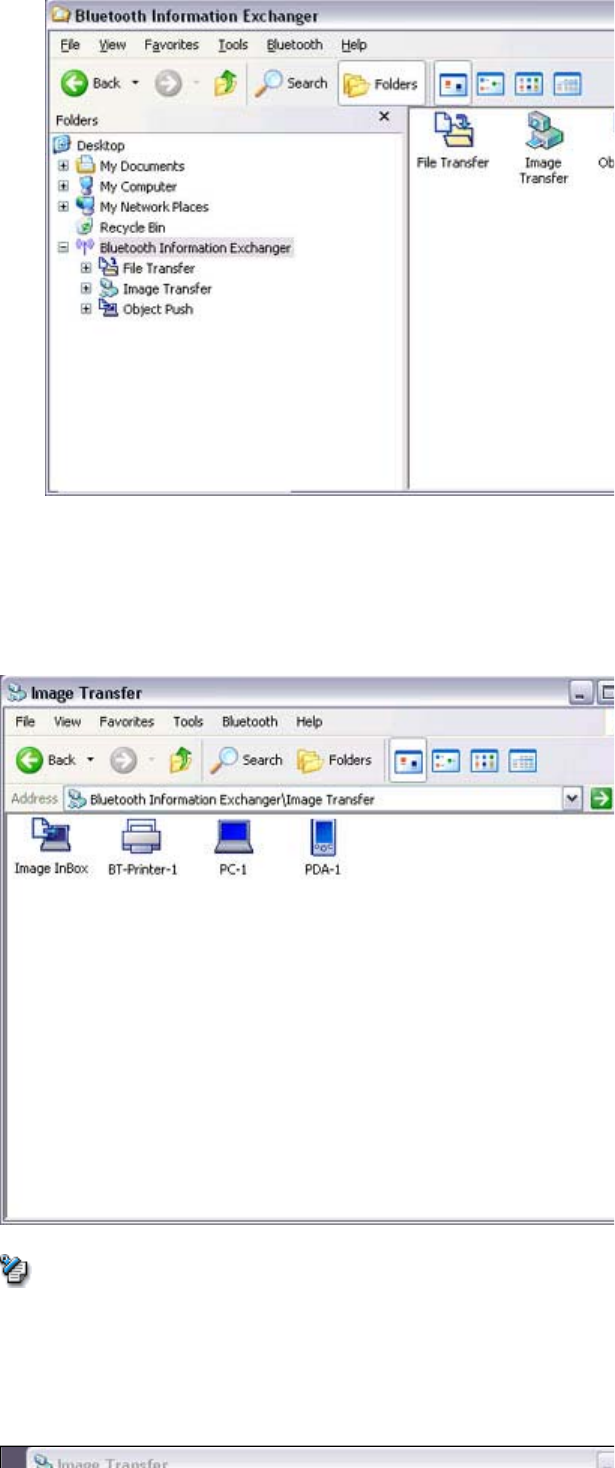
2. Click on the Bluetooth Information Exchanger icon on the Desktop
{Alternativel
y,
o
p
en Ex
p
lorer and click on the Bluetooth Information Exch
a
folder for the same result.
Note
Procedure
Note
Printing images directly from a digital camera or other device
[BIP]
Quick Start Guide - Introduction 第 73 頁,共 160 頁
file://C:\Documents and Settings\anitachou\Local Settings\Temp\~hh3F24.htm 2004/11/30
The [Bluetooth Information Exchanger] window will appear.
3. Double-click on the [Image Transfer] icon
A list of devices will appear in the [Image Transfer] window.
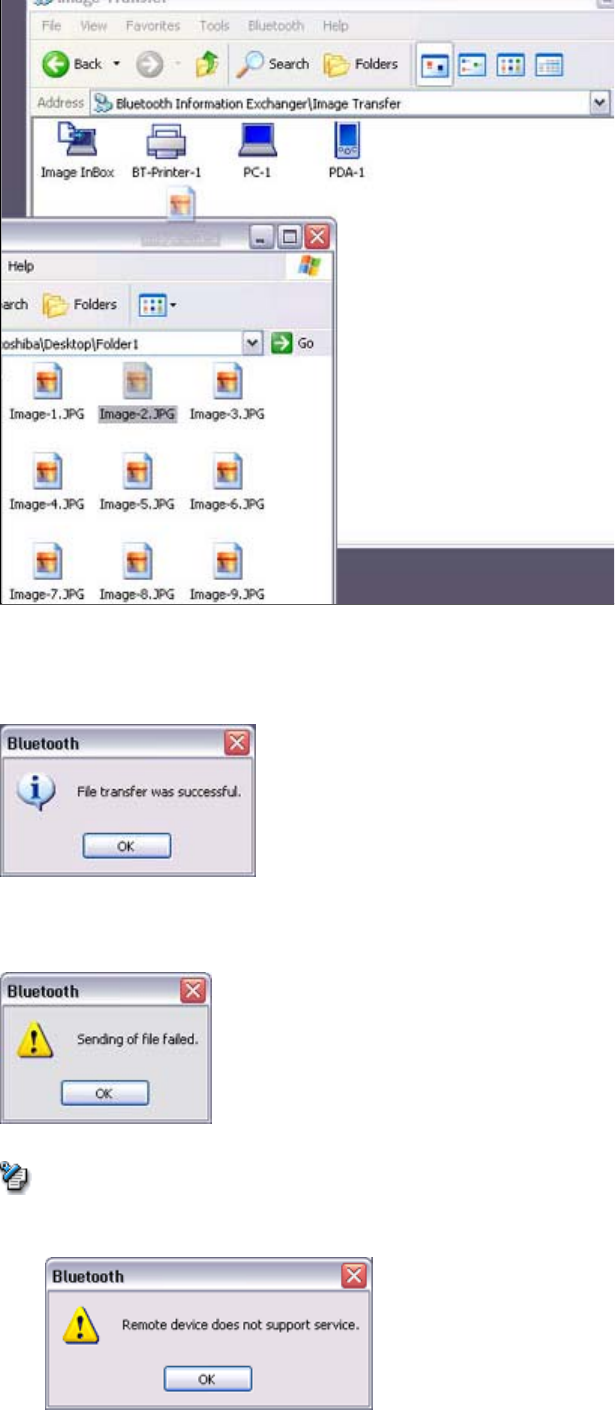
{If
y
our desired
p
rinter does not a
pp
ear in the list
,
p
lease confirm that the
pr
has been turned on, and then click on [Bluetooth] →[Search Devices]
A device search will be performed.
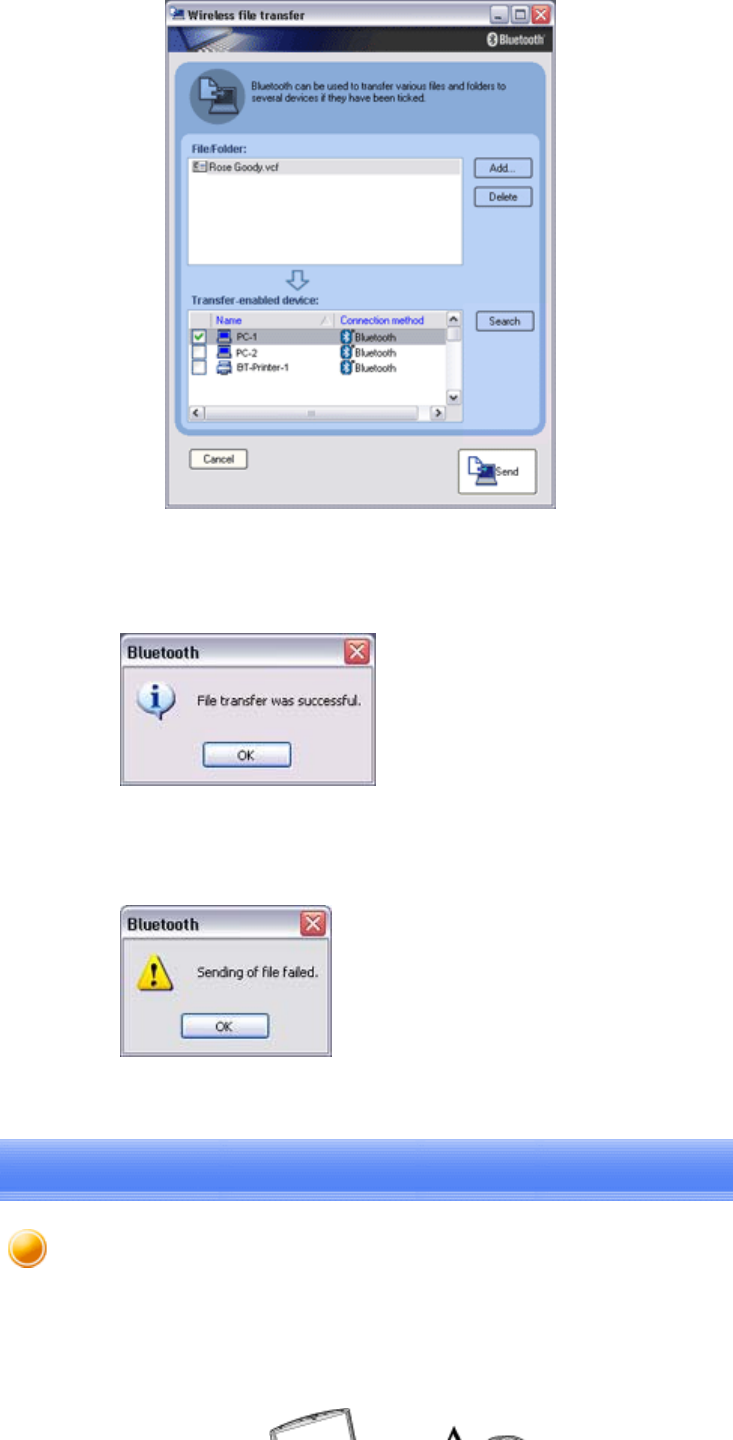
4. Drag and drop the file to be sent on top of the icon of the destination printer
Note
Quick Start Guide - Introduction 第 74 頁,共 160 頁
file://C:\Documents and Settings\anitachou\Local Settings\Temp\~hh3F24.htm 2004/11/30
The file will be sent to the printer.
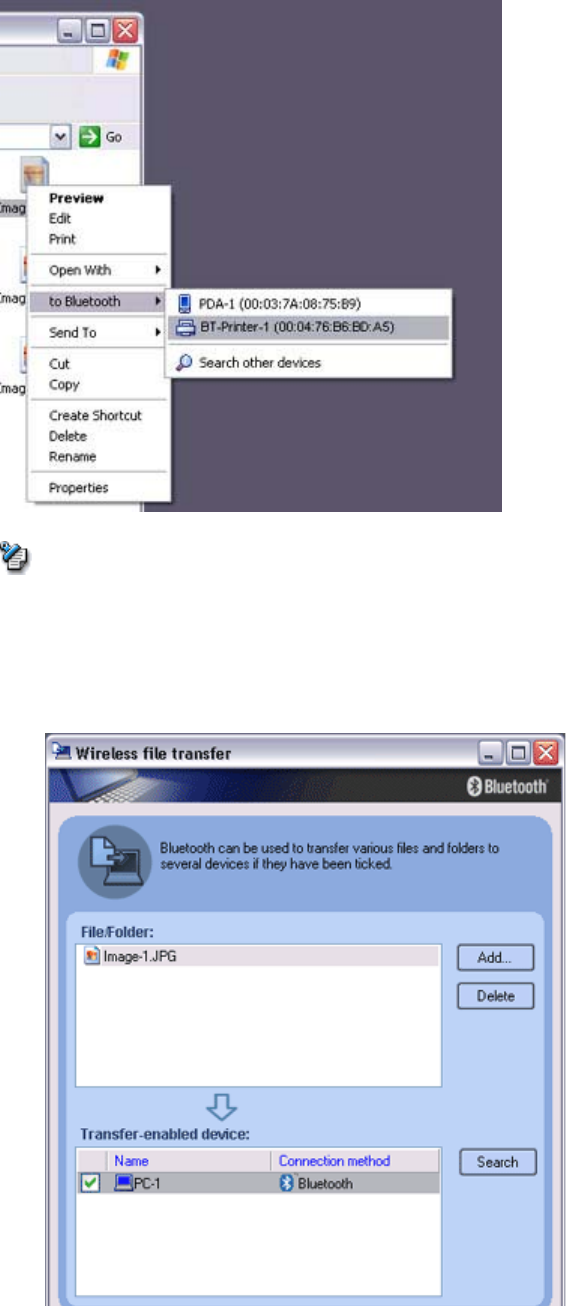
If the file has been sent to the
p
rinter successfull
y,
the messa
g
e below will a
pp
e
a
the image will be printed out. Please click on the [OK] button.
The messa
g
e below will a
pp
ear if the file transmission was unsuccessful. Please
on the [OK] button to close the message, and repeat the printing procedure.
{If the
p
rinter does not su
pp
ort the BIP
p
rofile
,
the messa
g
e below will a
ppe
■Printing image files to a printer (by right -clicking the mouse)
Note
Quick Start Guide - Introduction 第 75 頁,共 160 頁
file://C:\Documents and Settings\anitachou\Local Settings\Temp\~hh3F24.htm 2004/11/30
1. Turn on the printer
2. Right-click on the file to be sent
,
and then click on the destination
p
rinter under
[
Bluetooth]
{If
y
our desired device does not a
pp
ear in the list
,
p
lease confirm that the d
e
has been turned on, and then click on [to Bluetooth] →[Search Other Dev
i
Once the device has been detected
,
the messa
g
e below will a
pp
ear. Please
s
the destination device, and click on the [Send] button.
Note
Quick Start Guide - Introduction 第 76 頁,共 160 頁
file://C:\Documents and Settings\anitachou\Local Settings\Temp\~hh3F24.htm 2004/11/30
A window indicating that the file is being sent to the printer will appear.
If the file has been sent to the
p
rinter successfull
y,
the messa
g
e below will a
pp
e
a
the image will be printed out. Please click on the [OK] button.
The messa
g
e below will a
pp
ear if the file transmission was unsuccessful. Please
on the [OK] button to close the message, and repeat the printing procedure.
{If the
p
rinter does not su
pp
ort the BIP
p
rofile
,
the messa
g
e below will a
ppe
Note
If
y
ou have a
p
rinter that su
pp
orts OPP
(
Ob
j
ect Push Profile
),
y
ou can directl
y
send busi
n
card data that conforms to the "vCard" standard to a printer and print it out.
Printing business card data [OPP]
Quick Start Guide - Introduction 第 77 頁,共 160 頁
file://C:\Documents and Settings\anitachou\Local Settings\Temp\~hh3F24.htm 2004/11/30
→Printing business card data (using icons)
→Printing business card data (by right-clicking the mouse)
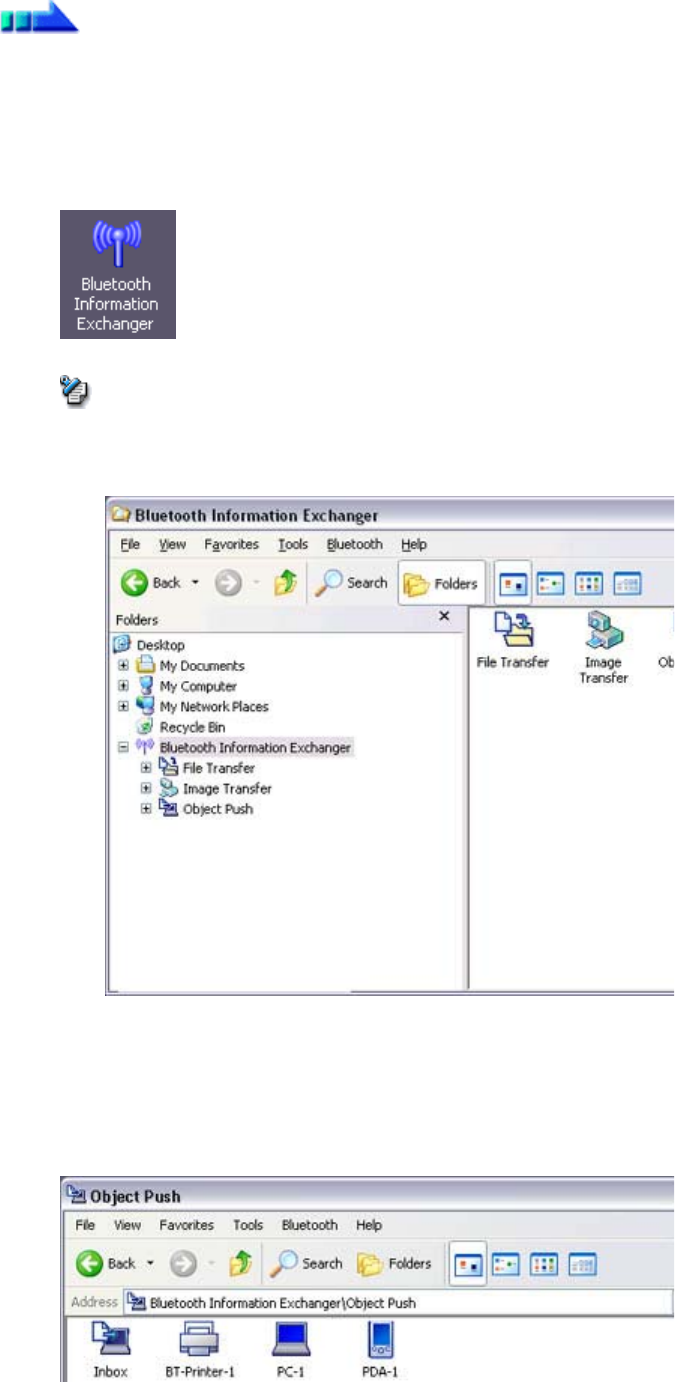
■Printing business card data (using icons)
1. Turn on the printer
2. Click on the Bluetooth Information Exchanger icon on the Desktop
{Alternatively, open Explorer and click on the Bluetooth Information Exch
folder for the same result.
The [Bluetooth Information Exchanger] window will appear.
3. Double-click on the [Object Push] icon
A list of devices will appear in the [Object Push] window.
Procedure
Note
Quick Start Guide - Introduction 第 78 頁,共 160 頁
file://C:\Documents and Settings\anitachou\Local Settings\Temp\~hh3F24.htm 2004/11/30
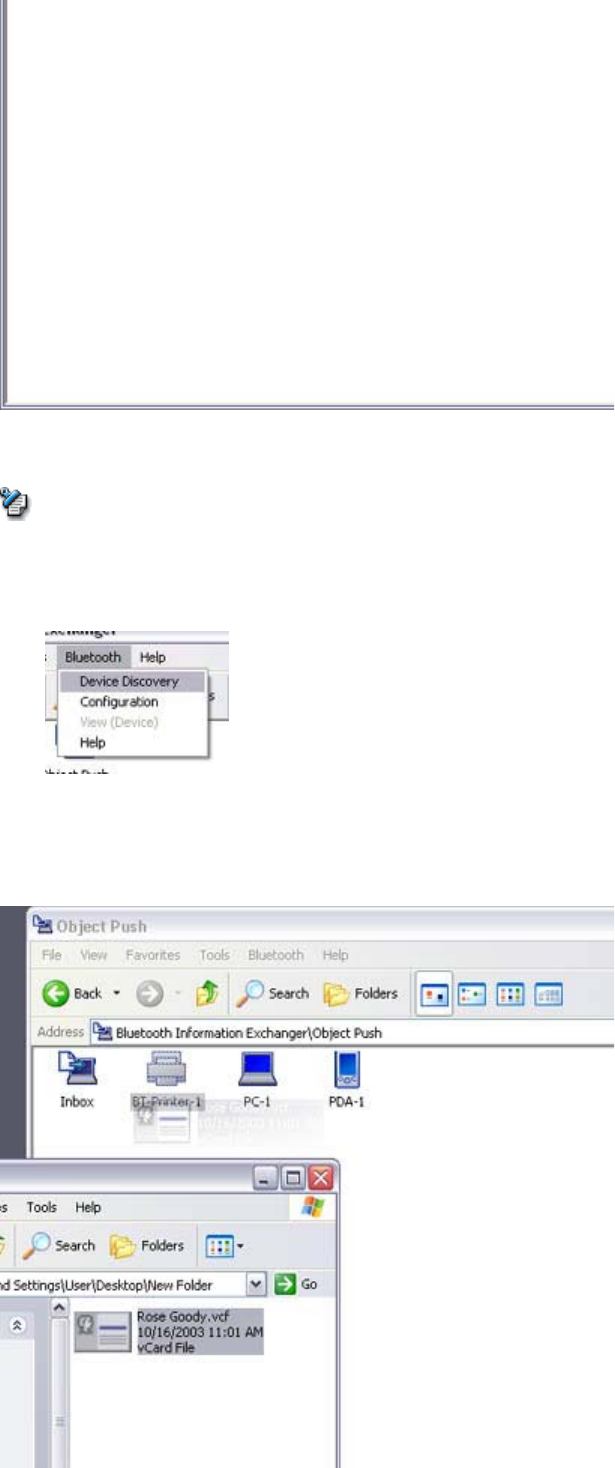
Here, the image will be sent to the target printer.
{If
y
our desired
p
rinter does not a
pp
ear in the list
,
p
lease confirm that the
pr
has been turned on, and then click on [Bluetooth] →[Search Devices]
A device search will be performed.
4. Dra
g
and dro
p
the business card data to be sent on to
p
of the icon of the destinat
i
printer
Note
Quick Start Guide - Introduction 第 79 頁,共 160 頁
file://C:\Documents and Settings\anitachou\Local Settings\Temp\~hh3F24.htm 2004/11/30
The business card will be sent to the printer.
If the business card has been sent to the
p
rinter successfull
y,
the messa
g
e below
w
appear, and the image will be printed out. Please click on the [OK] button.
The messa
g
e below will a
pp
ear if the business card transmission was unsuccessf
u
Please click on the [OK] button to close the message, and repeat the printing
procedure.
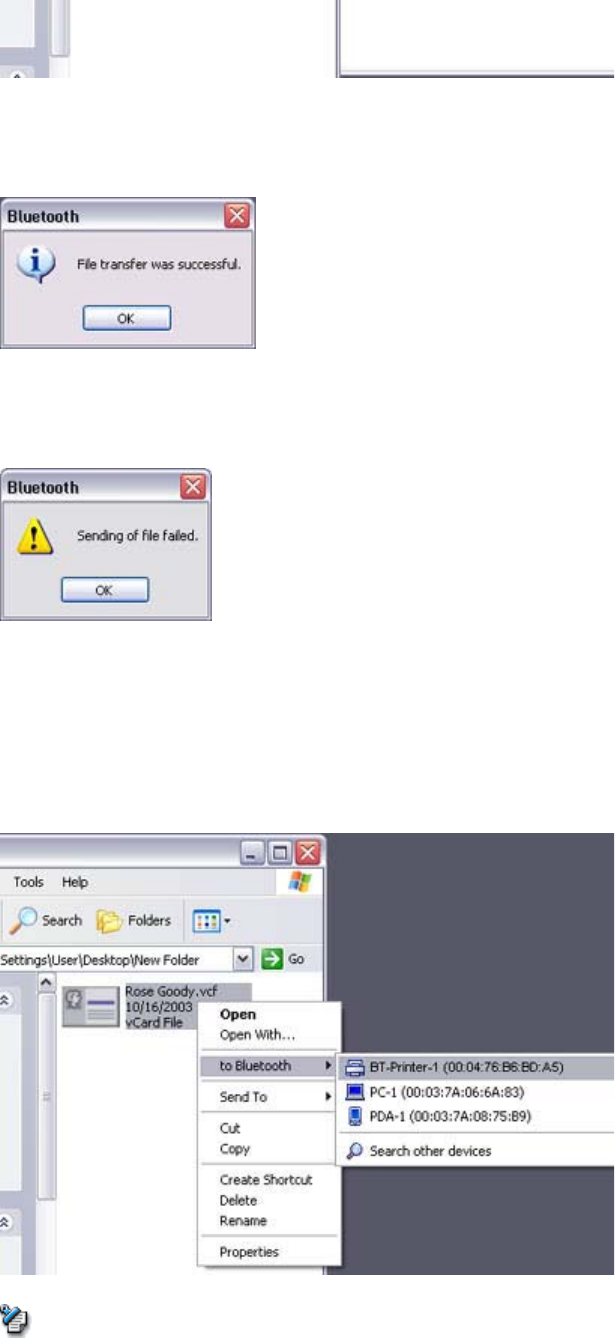
■Printing business card data (by right-clicking the mouse)
1. Turn on the printer
2. Right-click on the business card data to be sent
,
and then click on the destinatio
n
printer under [to Bluetooth]
{If
y
our desired device does not a
pp
ear in the list
,
p
lease confirm that the d
e
has been turned on, and then click on [to Bluetooth] →[Search Other Dev
i
Once the device has been detected
,
the messa
g
e below will a
pp
ear. Please
s
the destination device
,
and click on the
[
Send
]
button.
Note
Quick Start Guide - Introduction 第 80 頁,共 160 頁
file://C:\Documents and Settings\anitachou\Local Settings\Temp\~hh3F24.htm 2004/11/30
,[]
The business card will be sent to the printer.
If the business card has been sent to the
p
rinter successfull
y,
the messa
g
e below
w
appear, and the image will be printed out. Please click on the [OK] button.
The messa
g
e below will a
pp
ear if the business card transmission was unsuccessf
u
Please click on the [OK] button to close the message, and repeat the printing
procedure.
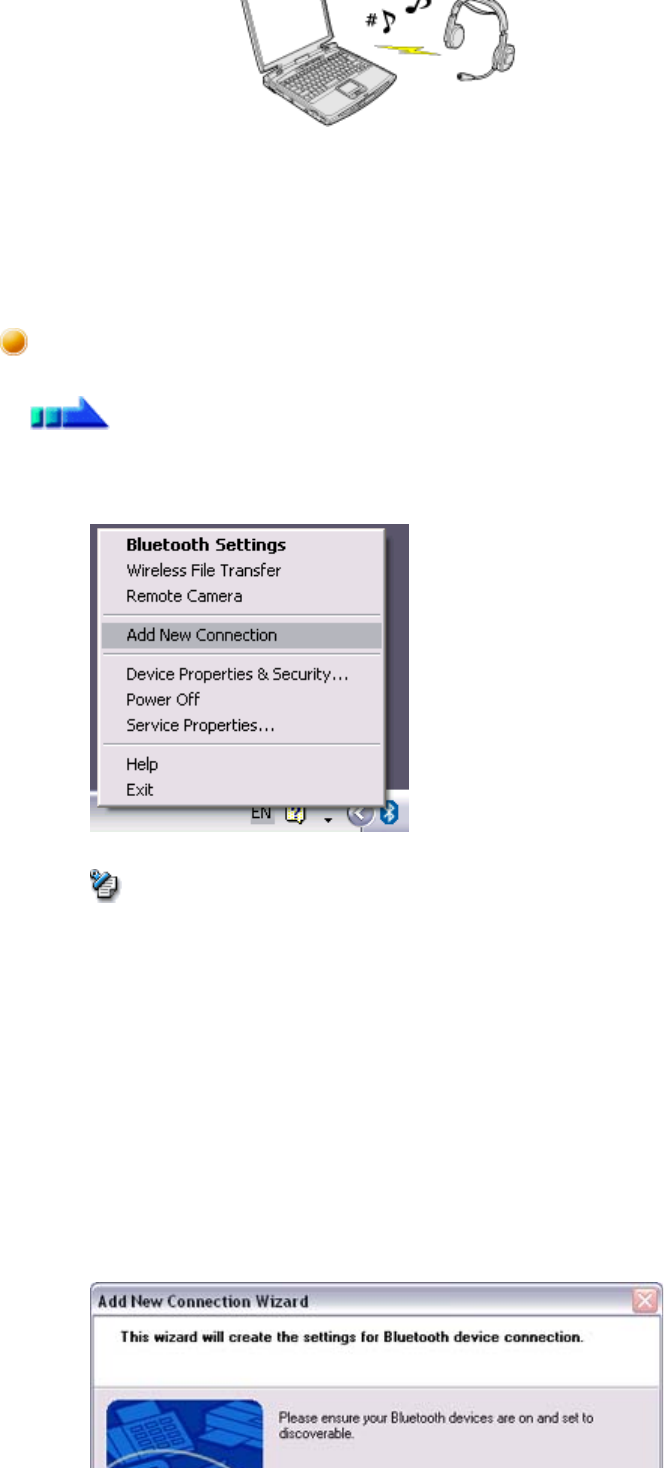
This section describes how to use the stereo head
p
hones to listen to
y
our favourite music or
o
audio files stored on your PC.
Listening to music using the stereo headphones 【GAVDP】
【A2DP】 【AVRCP】
Quick Start Guide - Introduction 第 81 頁,共 160 頁
file://C:\Documents and Settings\anitachou\Local Settings\Temp\~hh3F24.htm 2004/11/30
→Configuring the stereo headphones
→Connecting to the stereo headphones
→Listening to music or other audio files
→Playing music using remote control
→Copyright protection function
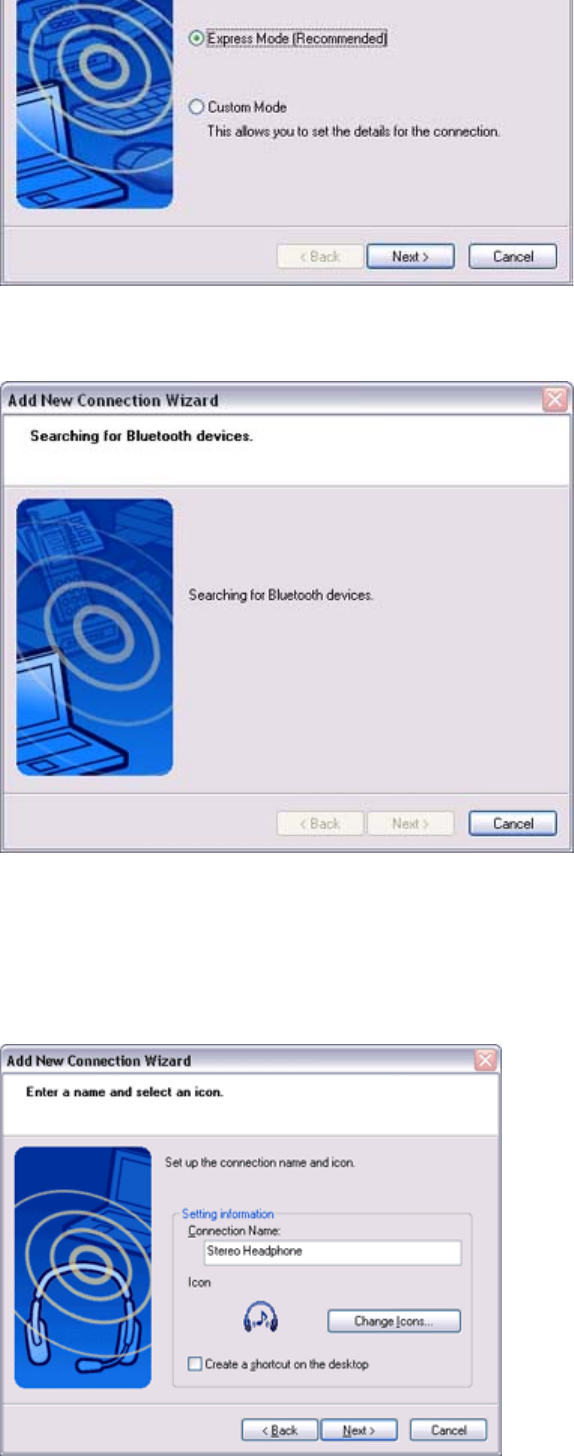
1. Right-click on the Bluetooth icon in the task tray, and click on [Add New
Connection].
{Alternatively, click [Start]→[All Programs]→[Bluetooth]→[Bluetooth
Settin
g
s
],
and then click on
[
New Connection
]
from the
[
Bluetooth Settin
gs
screen that has opened.
The
[
Add New Connection Wizard
(
Welcome to the Add New Connection Wiza
r
will appear.
2. Switch ON the stereo headphones and activate "Discoverable" mode
Please refer to the user
g
uide for the stereo head
p
hones for further information o
n
how to operate them.
3. Confirm that
[
Ex
p
ress Mode
]
has been selected
,
and then click on the
[
Next
]
but
t
Configuring the stereo headphones
Procedure
Note
Quick Start Guide - Introduction 第 82 頁,共 160 頁
file://C:\Documents and Settings\anitachou\Local Settings\Temp\~hh3F24.htm 2004/11/30
The
[
Add New Connection Wizard
(
Searchin
g
for Bluetooth Devices
)]
screen w
i
appear.
Once the search for the devices has ended
,
the
[
Add New Connection Wizard
(
S
e
Device)] screen will appear.
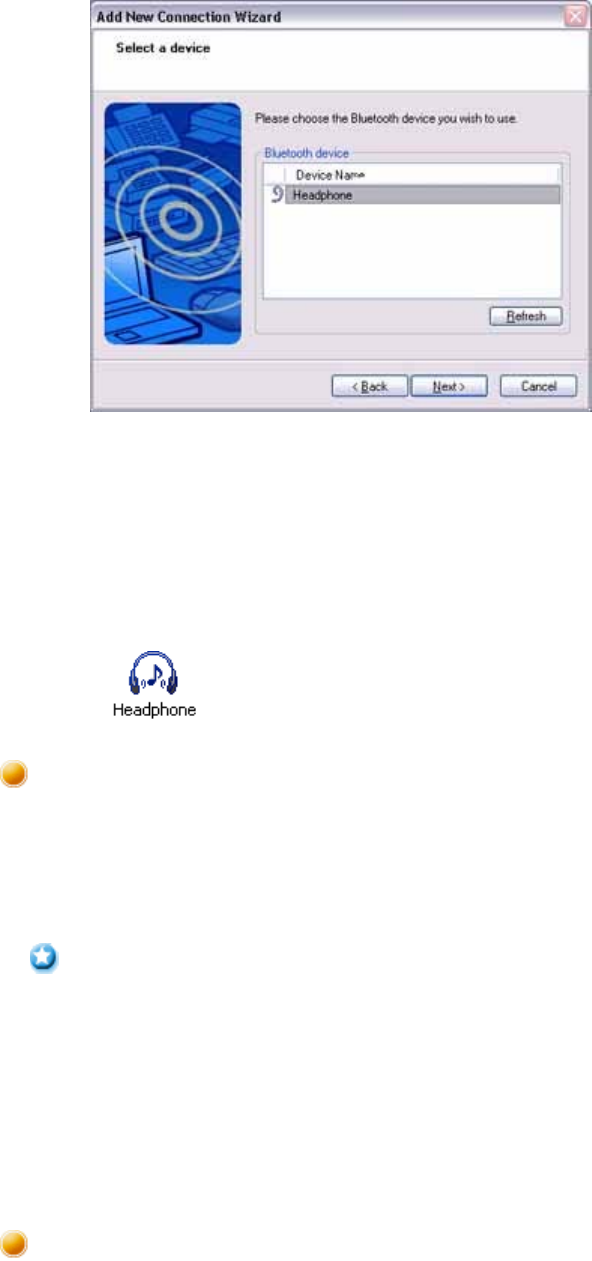
4. Select the device name of the stereo head
p
hones from the list
,
and click on the
[N
button
Quick Start Guide - Introduction 第 83 頁,共 160 頁
file://C:\Documents and Settings\anitachou\Local Settings\Temp\~hh3F24.htm 2004/11/30
The
[
Add New Connection Wizard
(
Searchin
g
for Services
)]
screen will a
pp
ear.
5. Confi
g
ure the t
yp
e and name of the icon to a
pp
ear once re
g
istration is com
p
lete
,
click on the [Next] button
Please click the [Next] button once you are satisfied with the configuration.
The [Add New Connection Wizard (Configure Connection Name)] screen will
appear.
6. Click on the [Finish] button
The settin
g
s will be re
g
istered
,
and the icon will a
pp
ear on the
[
Bluetooth Settin
g
screen.
You can connect to the stereo head
p
hones from the icon re
g
istered in
[
Bluetooth Settin
gs
Please refer to the user
g
uide for information on how to make a connection from the ster
e
headphones.
zPlease close the followin
g
audio a
pp
lications before an
y
connection is made betwe
your stereo headphones and PC.
{Music/video playback applications
{e-Conferencing applications
{Voice-recognition applications
Please finish connecting the stereo headphones before launching any of these
applications.
1
Pl i i th di fil PC
Connecting to the stereo headphones
Important
Listening to music or other audio files