ASUSTeK Computer K00X ASUS Tablet User Manual AT T ME375CL 2pages QSG
ASUSTeK Computer Inc ASUS Tablet AT T ME375CL 2pages QSG
Contents
- 1. Users Manual (statement)
- 2. Users manual
- 3. Users Manual
Users manual
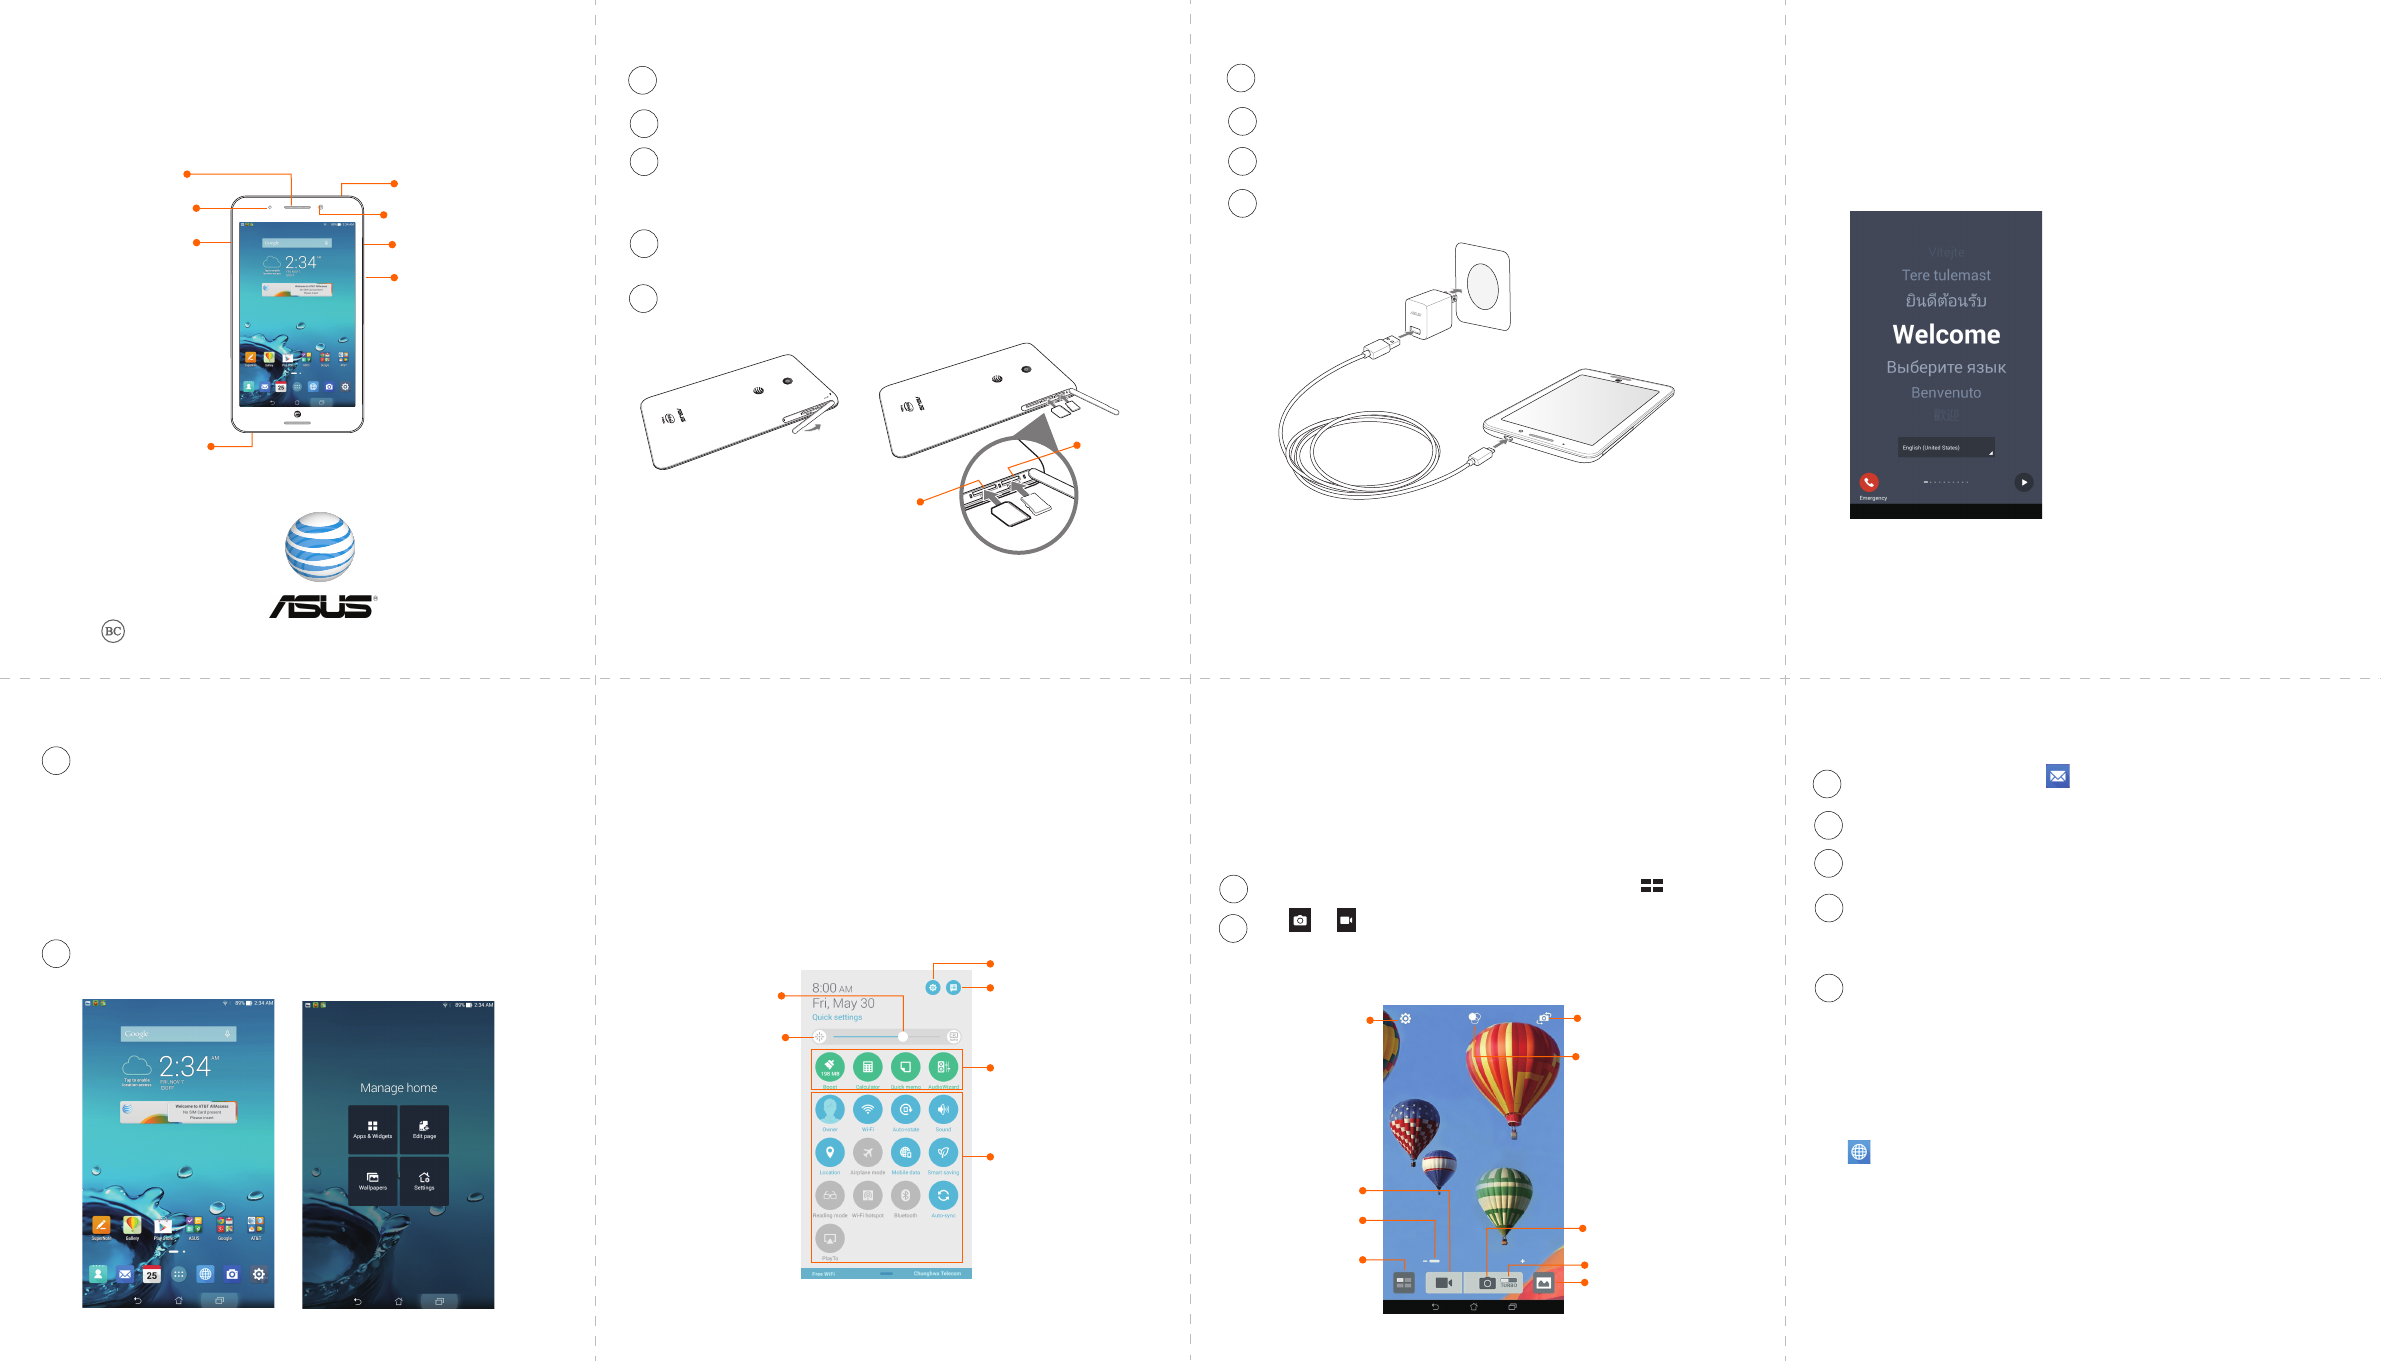
Quick Start Guide
Power/lock button
Volume keys
Charging /
micro USB port
Front camera
Micro SIM / micro SD
card compartment
(at the side)
Headphone jack
(at the bottom)
Proximity sensor
Audio speaker
Charging your device
2
3
4
1
NOTES:
• Charge your tablet for eight (8) hours before using it in battery mode
for the first time.
• Ensure that the power adapter is plugged into the correct power outlet with
the correct power rating. The output voltage of this adapter is DC 5V, 2A.
Connect the micro USB cable to the AC power adapter.
Plug the AC power adapter to a grounded power outlet.
Connect the micro USB cable to your phone.
When fully-charged, disconnect the USB cable from your device
before unplugging the AC power adapter from the power outlet.
First time use
When you turn your tablet on for the first time, Setup Wizard will guide you
through the setup process. Follow the onscreen instructions to select your
language, select input methods, setup your mobile network and Wi-Fi,
sync accounts, and configure your location services.
Use your Google or ASUS account to set up your tablet. If you do not have a
Google or ASUS account yet, go ahead and create one.
Home Screen
1
2
Tap and hold an empty area on the home screen and select
a category :
• Apps: Add shortcuts for quick access to your favorite apps.
• Widgets: Add widgets for a quick view of your calendar, maps,
and more.
• Wallpaper: Change your device’s wallpaper.
• Edit page: Add or remove pages onD your home screen.
To remove an item, tap and hold it until X Remove appears, then drag
the item to the top of the screen.
Quick Settings
The Quick Settings Notification Panel provides a one-tap access to some
of the apps, wireless features and settings of your tablet. Each of these
features are represented by a button.
To launch ASUS Quick Settings, swipe from the top of the screen and tap
the Settings icon. From the Quick Settings Notification Panel, tap a
green button to launch an app or tap a blue button to enable or disable a
feature.
Open Settings
Toggle between System
notifications and Quick
Settings panels
Move the slider
to adjust the
brightness level
Tap an item to launch it
Tap an item to enable or
disable it
Tap to launch the
Display app
PixelMaster Camera and Video
Tap the Camera icon from the Home screen to launch the PixelMaster
Camera app.
Advanced camera features
Capture images or videos ofyour special moments using the advanced
camera features of your tablet.
2
1From the PixelMaster Camera app’s home screen, tap .
Tap or then select a feature you want to use.
NOTE: Refer to the E-Manual for the detailed instructions on how to use the
advanced camera features.
Tap to adjust
camera settings
Tap to switch between
front and rear cameras
Tap to apply image effects
Tap to use the
advanced camera
settings Tap to open Gallery
Move the slider
to zoom in or out
Tap to use Turbo Burst
Tap to take photos
Tap to record videos
Email and Web Browsing
Email
2
3
4
1From the home screen, tap to launch the Email app.
Tap the mail provider you want to set up.
Key in your email address and password and tap Next.
Configure the Account settings such as inbox checking frequency,
sync days, or notification for incoming emails. When done, tap
Next.
Key in an account name that you want to be displayed in the
outgoing messages, then tap Next to log into your inbox.
5
Web Browsing
Your browser’s clean and intuitive interface makes it easier to surf web
contents at a fast page loading speed via its Chrome-based browser
engine. It also lets you share or email web contents, as well as send it as a
read later task.
Tap to launch the web browser and surf the web. Go to page that you
want to share, then tap the Settings icon.
• Tap share a page, tap Share page, then select the account or app where
you want to share the page to.
• To send a page for later reading, tap Read later. The page is added a
to-do task in your Do It Later app.
Installing a micro SIM / microSD card
Turn off your tablet.
Open the micro SIM / micro SD card compartment.
Align and insert the micro SIM card into the micro-SIM card slot with
the gold-plated contacts facing upward. Align and insert the memory
card into the memory card slot.
Push the micro SD card all the way into the slot until it is seated firmly
in place.
Close the micro SIM / memory card compartment.
2
3
4
1
5
NOTE: Insert a 3G / 4G micro SIM card in your tablet for Internet connection only.
Micro SD
card slot
Micro SIM
card slot

1
2
Device Security
Secure your device with a PIN, password, or pattern.
1
2
Settings
Power Management
See how much power running apps are consuming and manage your
power settings.
Swipe your finger down from the top of the screen and tap .
Tap Power management.
Swipe your finger down from the top of the screen and tap .
Tap Lock screen.
Wi-Fi and Bluetooth
Connect to a Wi-Fi network
Using Bluetooth
1
2
3
1
2
3
4
Swipe your finger down from the top of the screen and tap .
Slide Wi-Fi to ON. Your device scans for available Wi-Fi networks.
Tap Wi-Fi, then select a Wi-Fi network to connect to from the list.
When prompted, enter the password or security key.
Swipe your finger down from the top of the screen and tap .
Slide Bluetooth to ON. Your device scans for Bluetooth devices
nearby.
From the list of Bluetooth devices, select the Bluetooth device you
want to pair with. Follow the succeeding instructions to complete
the pairing. If necessary, refer to the documentation that came with
the Bluetooth device.
NOTES:
• You can also tap Wi-Fi or Bluetooth from the Quick Settings to quickly enable or
disable an existing Wi-Fi or Bluetooth connection.
• Turn off Wi-Fi or Bluetooth when you’re not using it to help save battery power.
AT&T Ready2Go
Set up your device quickly and easily by using Ready2Go to help you:
• Set up email and social accounts
• Sync your contacts and calendar
• Connect to Wi-Fi
• Sign up for AT&T Locker
You can use Ready2Go when you first activate your phone, or open it later
from the App tray. The wizard will guide you through the setup process.
Battery Status
This special widget shows the battery status of your tablet percentage
and color. The more battery power, the brighter the color.
1. Go to the All apps screen and tap the Widgets tab.
2. Tap and hold the Battery widget to display the Battery widget on the
Home Screen.
Network Indicators
Your 4G LTE wireless device will indicate which of the AT&T wireless
networks you are connected to. A network indicator does not necessarily
mean that you will experience any particular upload or download data
speeds.
4G LTE: Connected to the AT&T 4G LTE network.
4G: Connected to the AT&T HSPA+ network. The AT&T HSPA+
network is capable of delivering 4G speeds when
combined with enhanced backhaul. 4G availability is increasing
with ongoing backhaul deployment.
E: Connected to the AT&T EDGE/2G network.
Actual data upload and download speeds depend on various factors, including the
device, network utilization, file characteristics, terrain, etc. Learn more at:
wireless.att.com/learn/articles-resources/wireless-terms.jsp, your Wireless
Customer Agreement, Section 3.2 “Where and How Does AT&T Service Work?” The
AT&T HSPA+ network can deliver 4G speeds when combined with enhanced backhaul.
Your wireless device can’t distinguish between HSP+cell sites with enhanced
backhaul and those without. Enhanced backhaul not available anywhere. Learn more
at att.com/network.
15060-xxxxxxxx
Find More Information
On the web
• Tutorials and videos: att.com/DeviceHowTo
• Manage your wireless account, including suspending service if your
phone is stolen: att.com/MyATT
Give us a call
• 611 from any AT&T wireless phone
• (800)901-9878
Accessories
• att.com/WirelessAccessories
• Visit your AT&T store
ASUS and ASUS logo are registered trademarks of ASUSTeK Computer Inc (”ASUS”). ©
2014 AT&T Intellectual Property. All rights reserved. AT&T, the AT&T logo and all other AT&T
marks contained herein are trademarks of AT&T Intellectual Property. All other marks
contained herein are the properties of their respective owners.
Printed in Taiwan