ASUSTeK Computer R600 PORTABLE NAVIGATION DEVICE User Manual users manual
ASUSTeK Computer Inc PORTABLE NAVIGATION DEVICE users manual
UserManual.wiki
>
ASUSTeK Computer
>
R600 User Manual
users manual
Navigation menu
Upload a User Manual
Namespaces
Wiki Guide
HTML
PDF
Info
Views
User Manual
Discussion / Help
Navigation

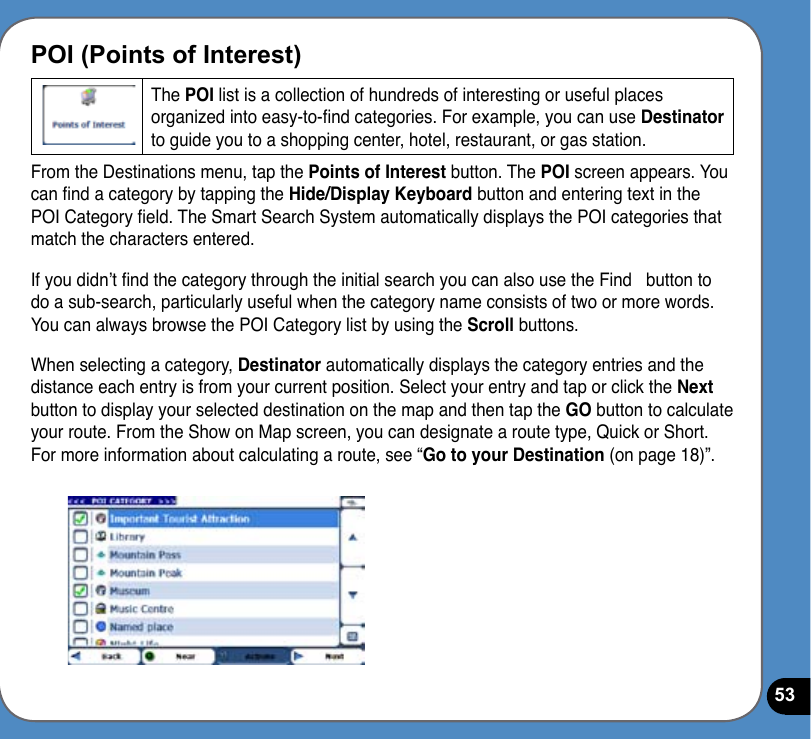
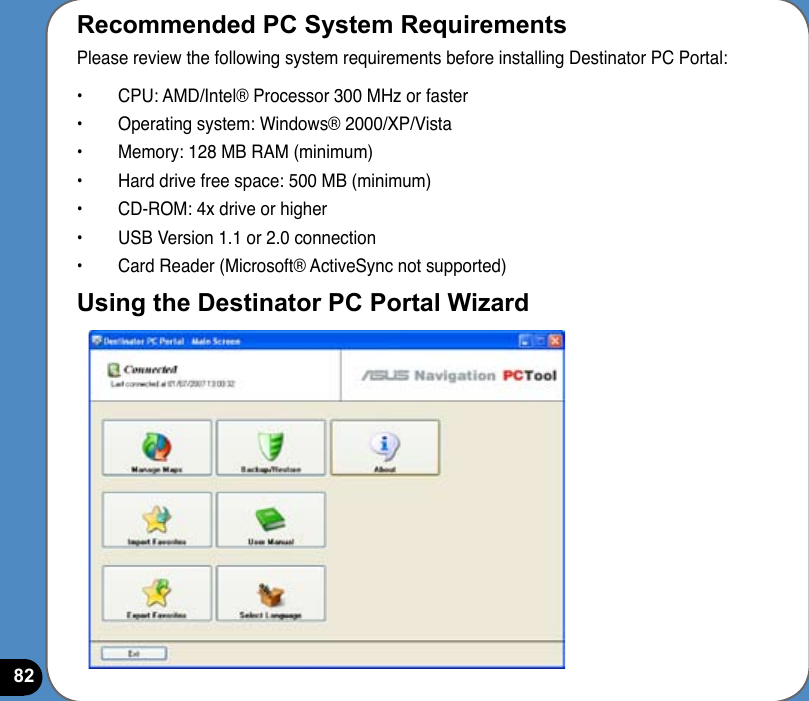
![9Recent Locations ............................................................................ 47My Favorites .................................................................................... 49POI (Points of Interest) .................................................................... 53Trafc Information (Optional) .......................................................... 57Route Manager ............................................................................... 63Map Manager .................................................................................. 70Extras ......................................................................................... 732.4 Settings................................................................................78Prompts ......................................................................................... 78Language Settings .......................................................................... 79GPS Settings ................................................................................... 79Factory Restore ............................................................................... 802.5 Getting Started with Destinator PC portal ........................81Installing the Destinator PC Portal .................................................. 81Recommended PC System Requirements ..................................... 82Using the Destinator PC Portal Wizard] .......................................... 82Installing Maps ................................................................................ 85](https://usermanual.wiki/ASUSTeK-Computer/R600/User-Guide-834377-Page-9.png)


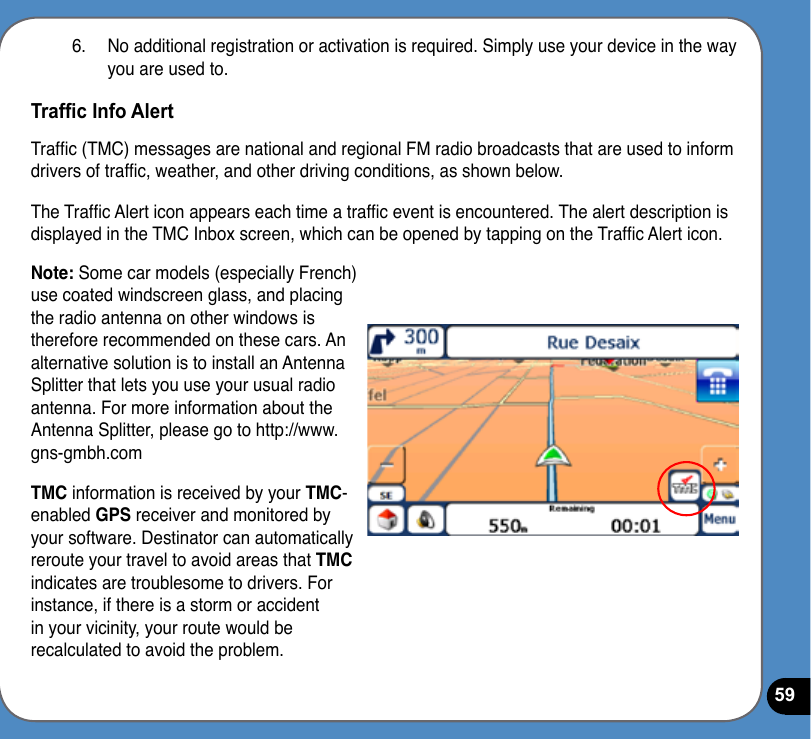
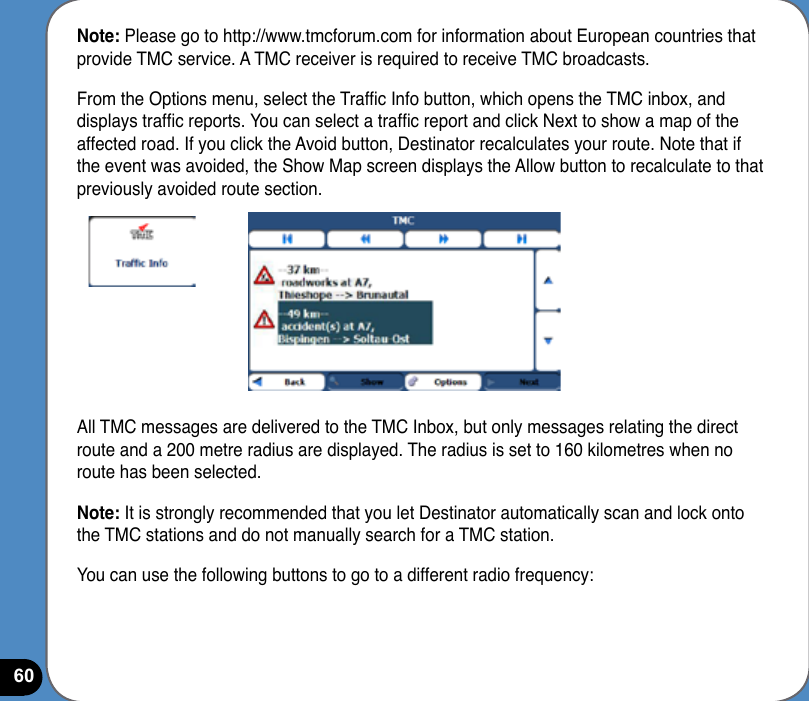
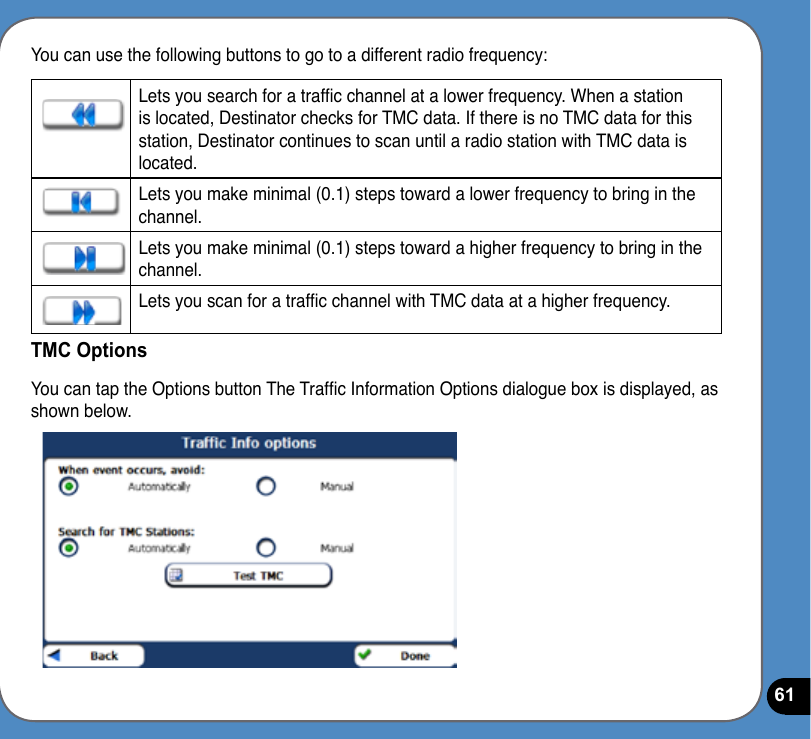
![62You must congure the Trafc Message Channel (TMC) be dening the following settings:When an event occurs:You can select either: Automatically - Destinator automatically recalculates the route to avoid a road with adverse trafc conditions – trafc jam or accident only. Manual - You can manually select the TMC event from the inbox and tap the Avoid button from the Show Map screen.Search for TMC Stations:Automatically - Destinator automatically scans the FM radio frequencies until a TMC station is found. Should you lose the station frequency, Destinator will automatically scan for a new TMC station.Manual - You can use the frequency keys to scan for a TMC station [Not advised]. Test TMC When you tap this button, Destinator expands the search radius for to the “Whole Map” for one minute, switches automatically to the TMC Inbox screen and displays a test message called “Testing TMC Service”. After one minute, Destinator reverts to the route and the 200 metre radius.” If you do not receive a message after tapping this button, please check in the following sequence: The TMC receiver is locked on to a TMC station. If not, reconnect your TMC receiver. If you see the tuner scanning but not locking on to a TMC station, try to change your position and check that your antenna is vertical. Depending on your location, you might not have TMC coverage. Check that you are using the map of the country that you are currently travelling in.TMC Pro For Destinator use in Germany only - It is highly recommended to keep the TMC Pro checkbox selected. TMC Pro provides highly accurate TMC data over a broad area.](https://usermanual.wiki/ASUSTeK-Computer/R600/User-Guide-834377-Page-62.png)
![91Previous maps If maps from a previous Destinator version are located on your computer, the following message is displayed:“Existing map data found. Do you want to keep it? “Clicking Yes lets you install maps from previous Destinator Console or PC Portal versions.Remove maps The following message appears when you have selected an installed map and clicked the Actions button:“Selected maps will be removed from your device. Are you sure you wish to continue?”Data Transfer If you close the Destinator PC Portal while install Destinator software or a map, importing or exporting a Favourite location, or backing up Destinator data, the following message appears: “If you close the Destinator PC Portal now, the [Process] will not be completed. Are you sure you wish to close?”Backup Data If stored Destinator data is located on your computer, the following message appears:“Destinator Backup data found. Do you want to keep it?”It is recommended that backup data be kept.”](https://usermanual.wiki/ASUSTeK-Computer/R600/User-Guide-834377-Page-91.png)