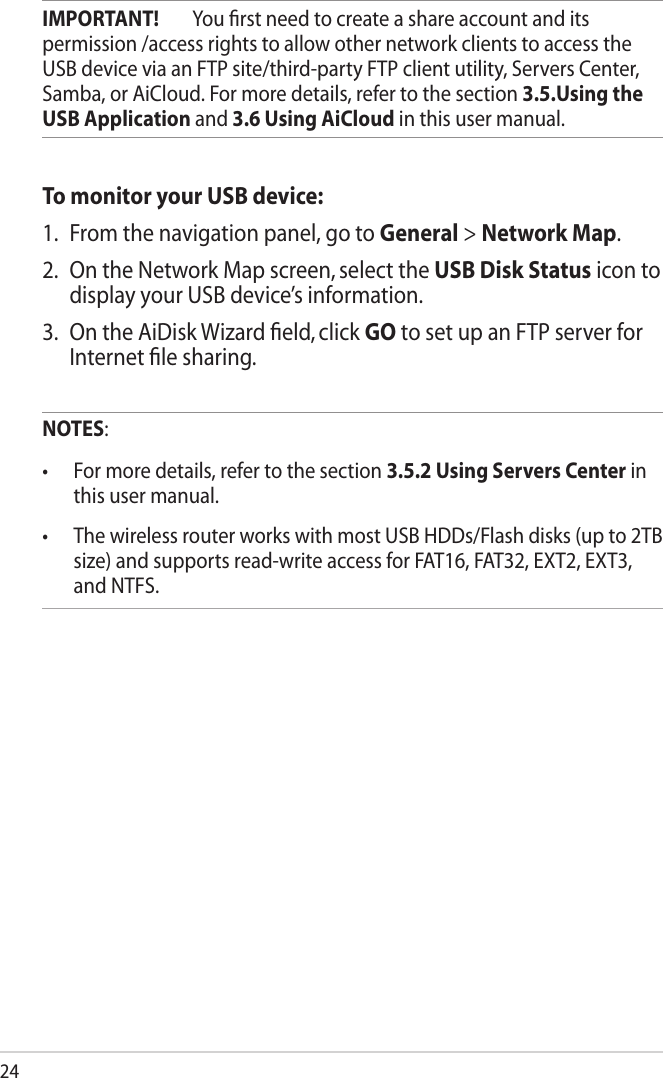
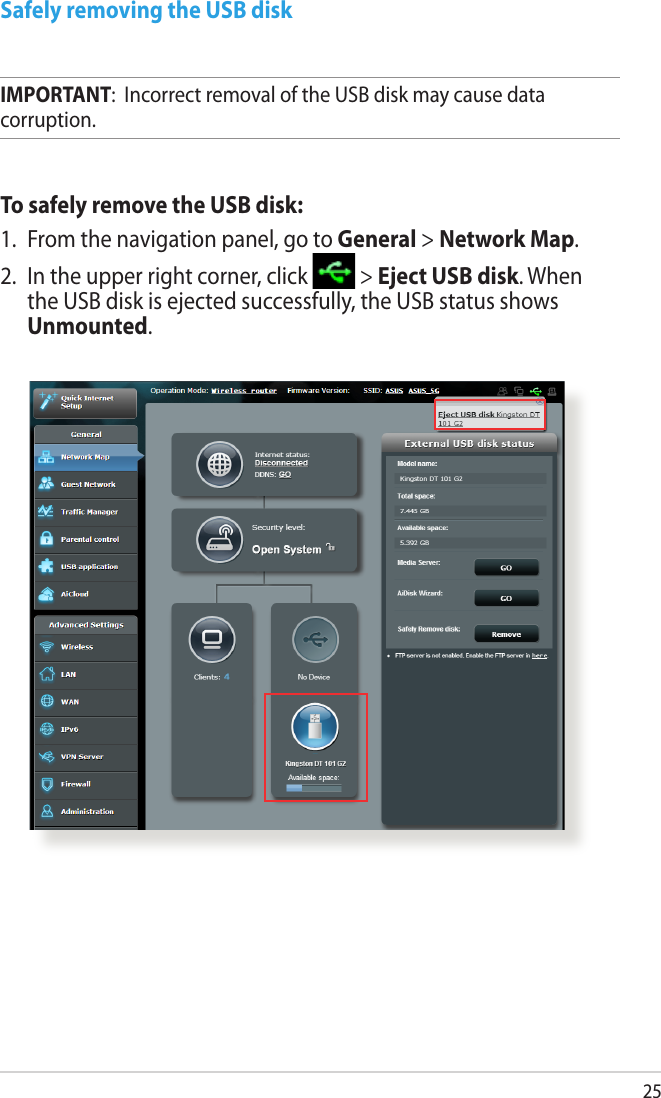
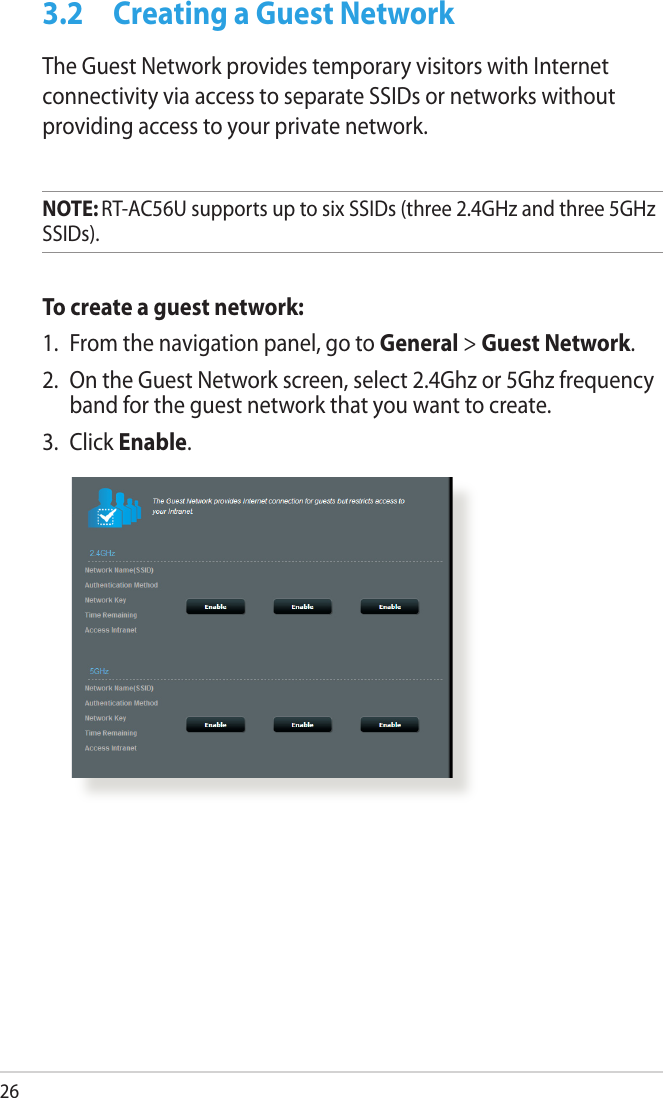
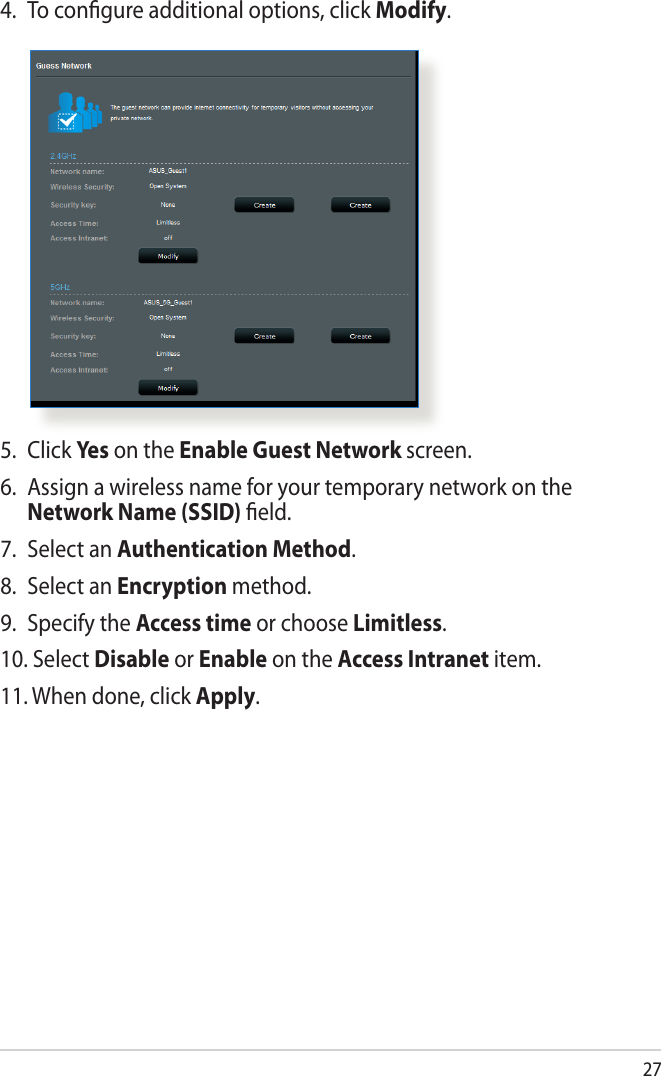
ASUSTeK Computer RTAC56UA Dual-band Wireless-AC1200 Gigabit Router User Manual 1
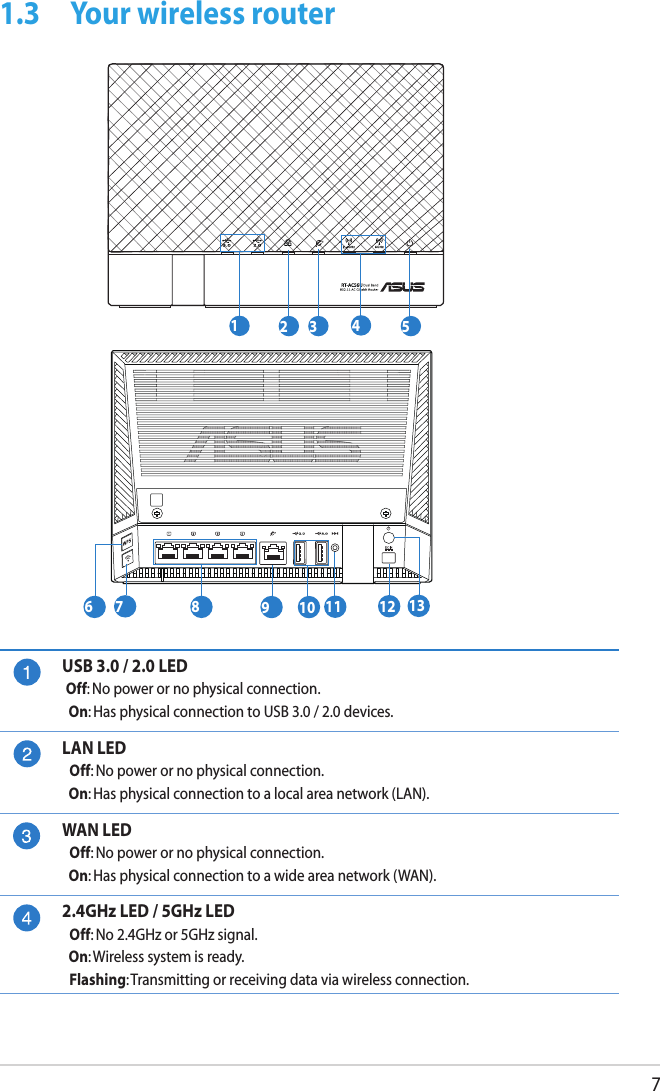
ASUSTeK Computer Inc Dual-band Wireless-AC1200 Gigabit Router Users Manual 1
Contents
- 1. Users Manual-1
- 2. Users Manual-2
- 3. Users Manual-3
- 4. User manual
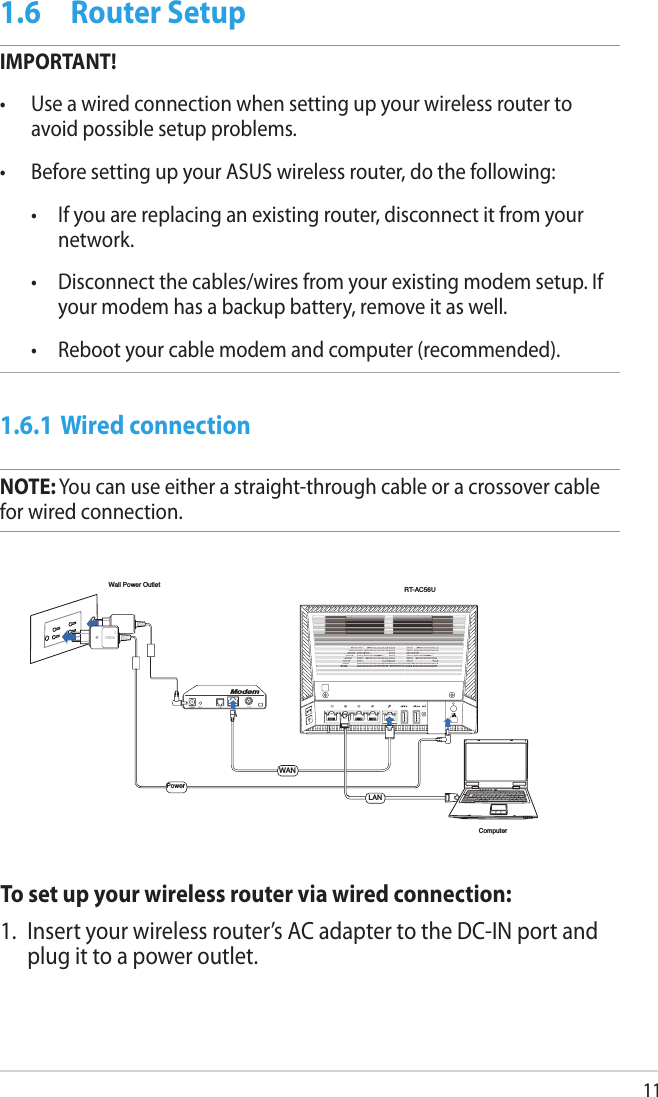
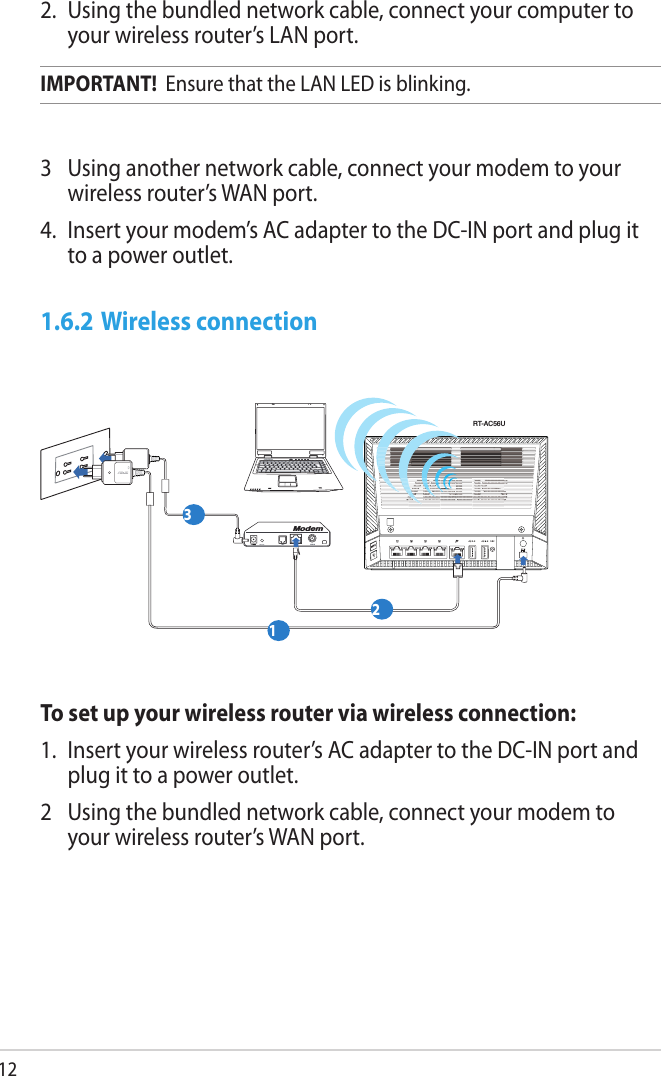
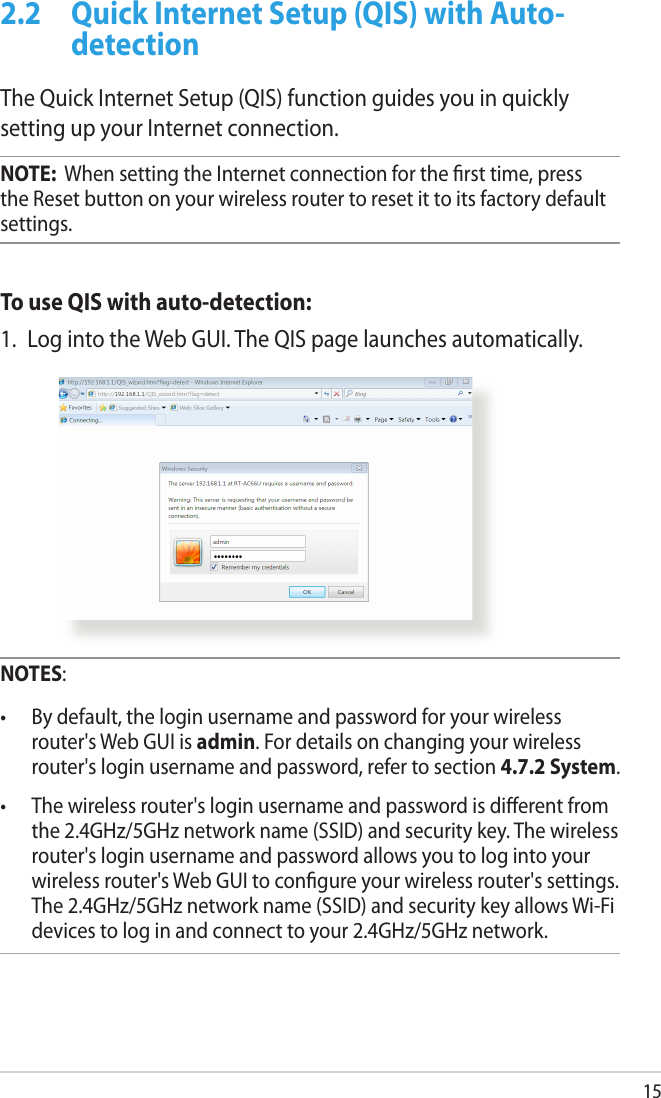
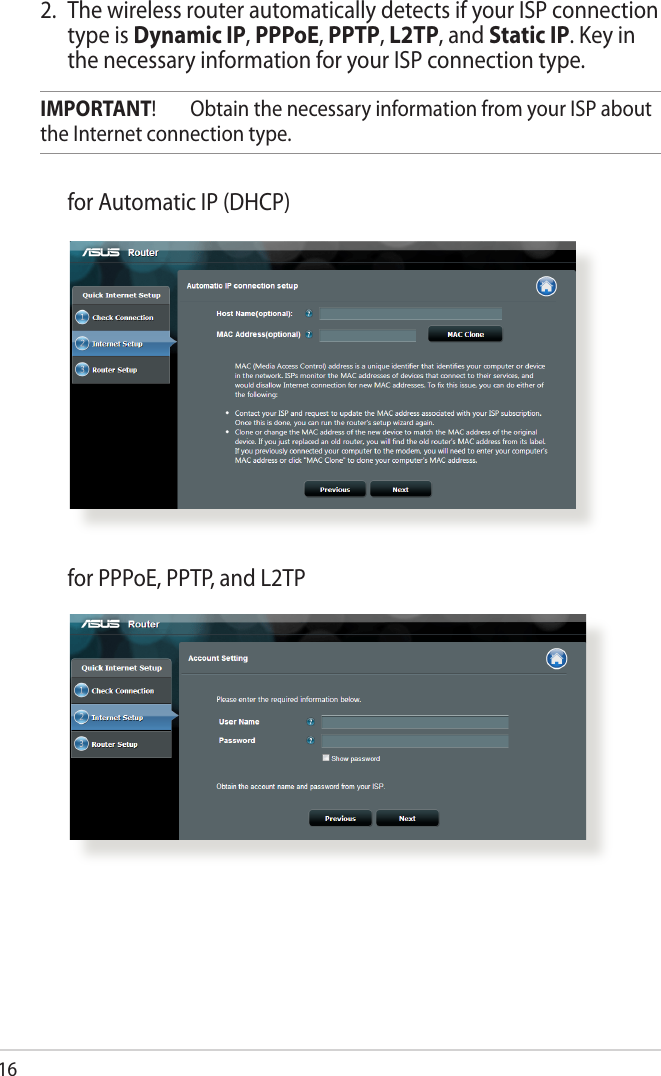
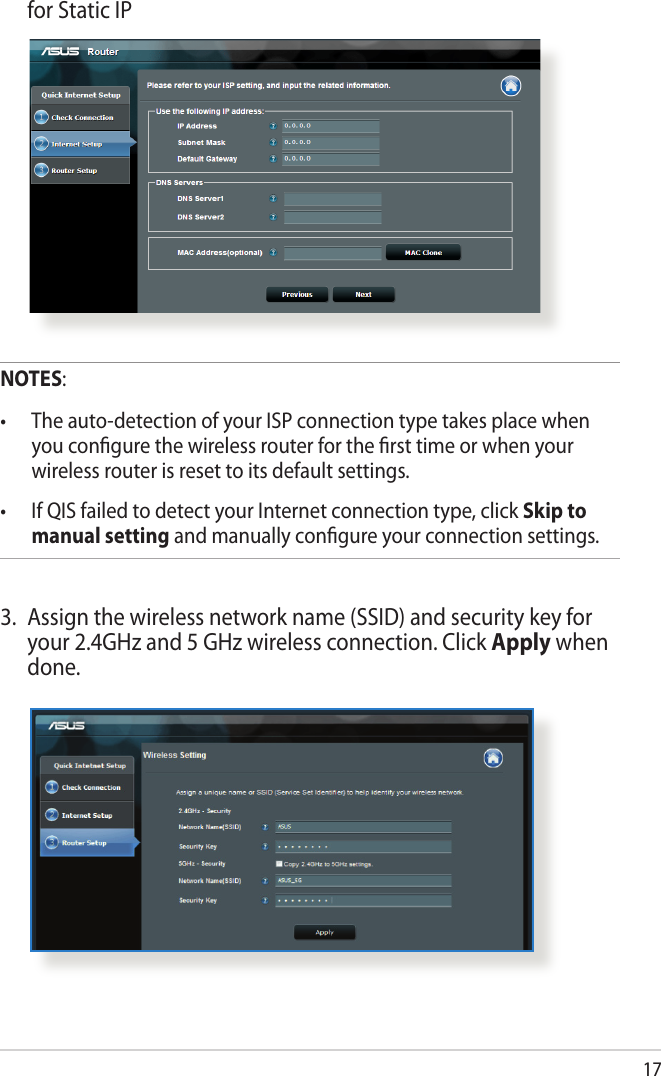
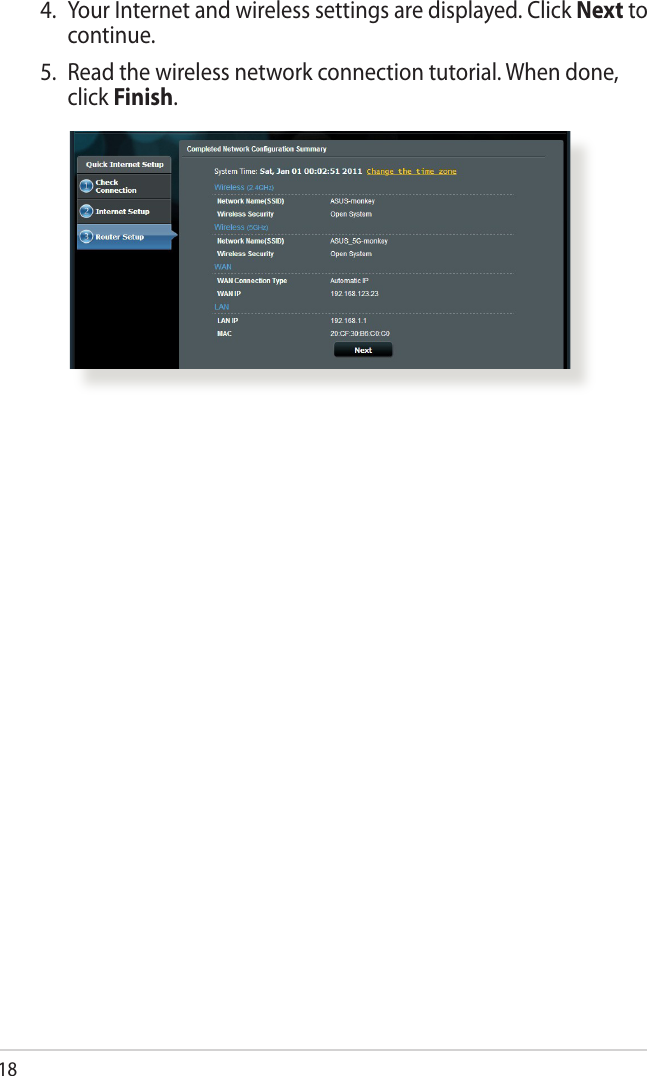
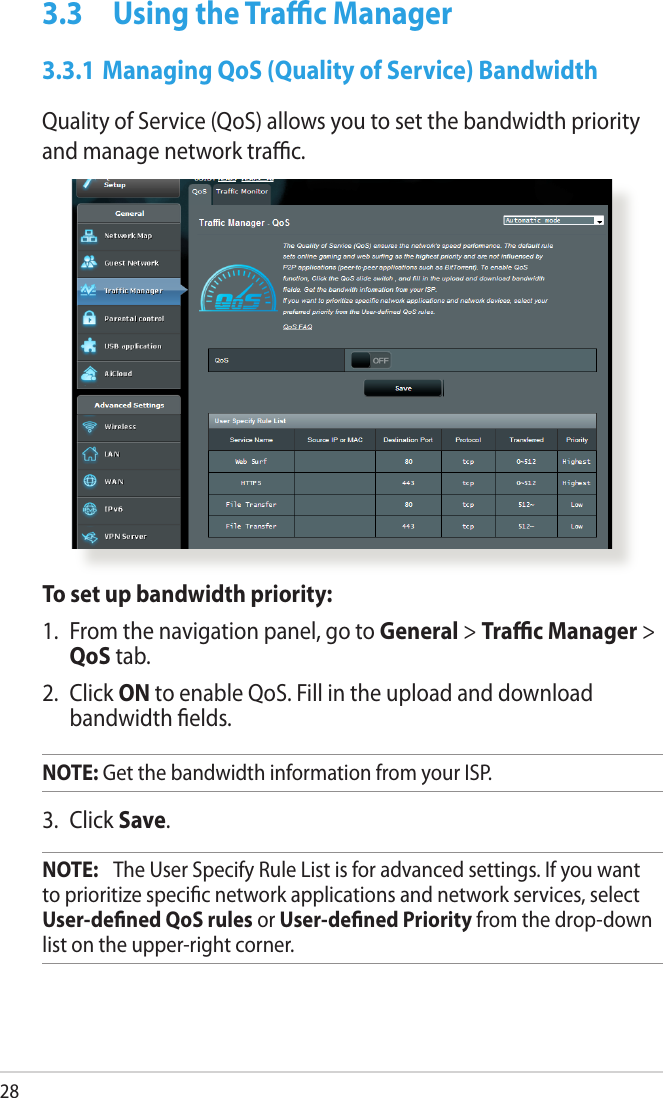
Users Manual-1