ASUSTeK Computer RTN53 ASUS Dual band Wireless N Router User Manual User Man MSQ RTN53
ASUSTeK Computer Inc ASUS Dual band Wireless N Router User Man MSQ RTN53
UserManual.wiki
>
ASUSTeK Computer
>
RTN53 User Manual
User Man_MSQ-RTN53
Navigation menu
Upload a User Manual
Namespaces
Wiki Guide
HTML
PDF
Info
Views
User Manual
Discussion / Help
Navigation


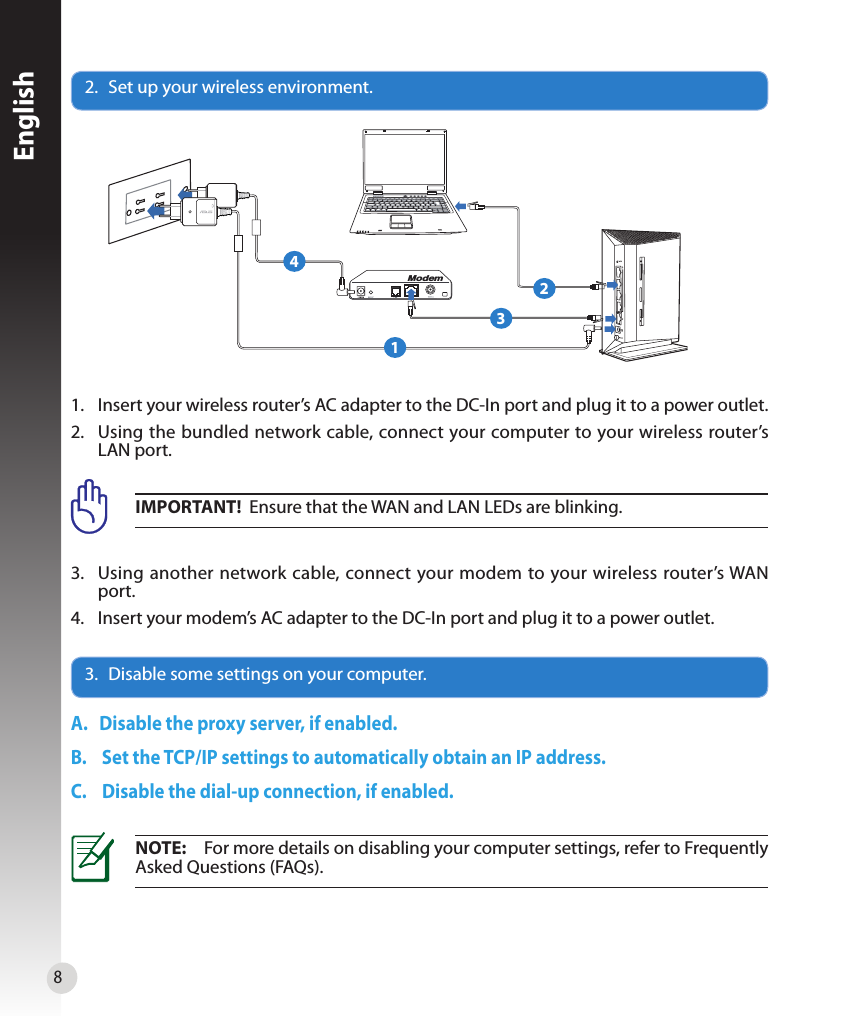
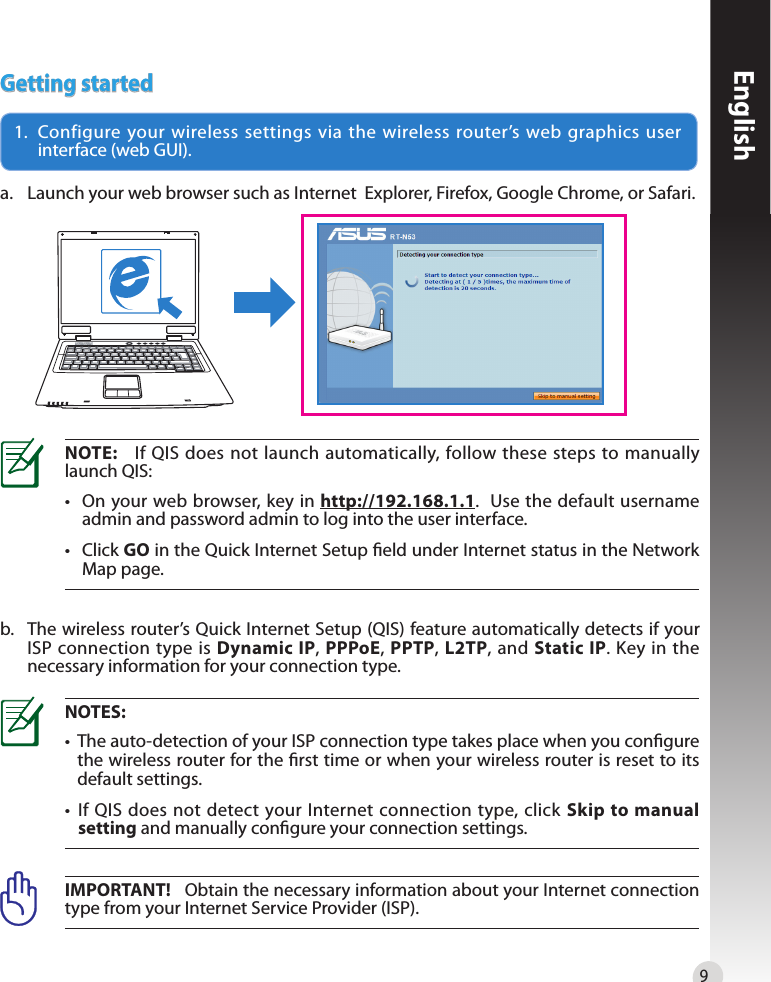
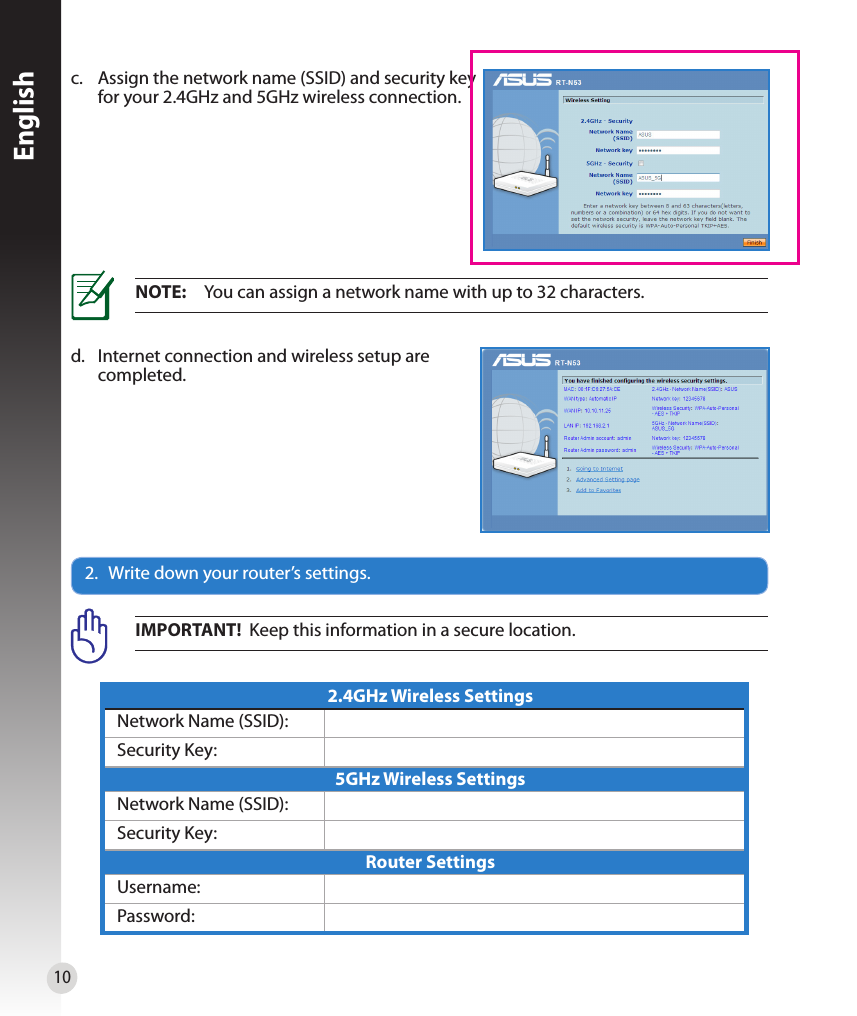
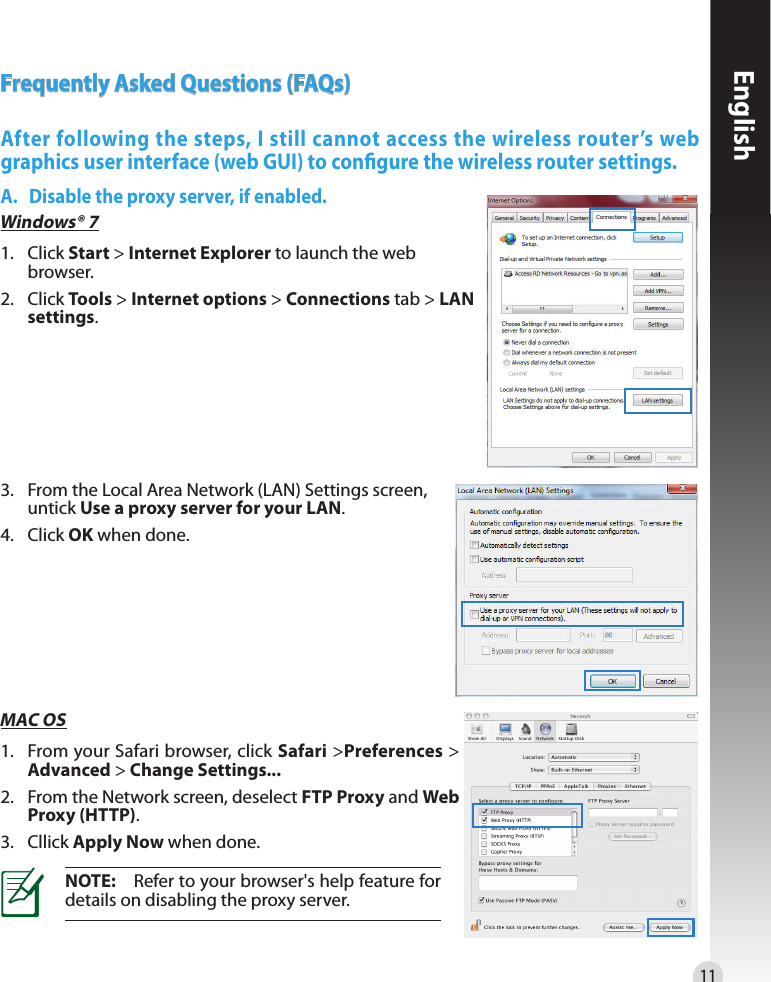
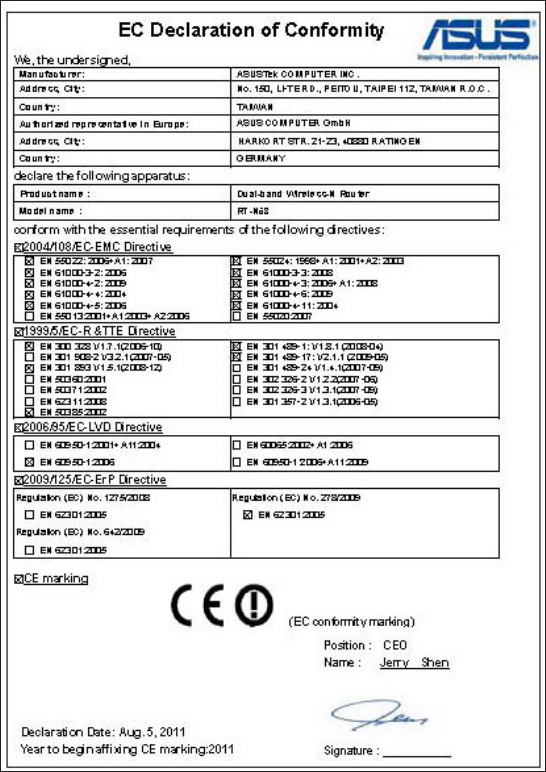
![WARNING! The use of a shielded-type power cord is required in order to meet FCC emission limits and to prevent interference to the nearby radio and television reception. It is essential that only the supplied power cord be used. Use only shielded cables to connect I/O devices to this equipment. You are cautioned that changes or modifications not expressly approved by the party responsible for compliance could void your authority to operate the equipment.(Reprinted from the Code of Federal Regulations #47, part 15.193, 1993. Washington DC: Office of the Federal Register, National Archives and Records Administration, U.S. Government Printing Oce.)Declaration of Conformity (R&TTE directive 1999/5/EC)The following items were completed and are considered relevant and sucient:• Essential requirements as in [Article 3]• Protection requirements for health and safety as in [Article 3.1a]• Testing for electric safety according to [EN 60950]• Protection requirements for electromagnetic compatibility in [Article 3.1b]• Testing for electromagnetic compatibility in [EN 301 489-1] & [EN 301] & [EN 301 489-33]• Eective use of the radio spectrum as in [Article 3.2]• Radio test suites according to [EN 302 065] For operation within 5.15 ~ 5.25GHz frequency range, it is restricted to indoor environment. IEEE 802.11b or 802.11g operation of this product in the U.S.A. is firmware-limited to channels 1 through 11. IMPORTANT NOTE:FCC Radiation Exposure Statement:This equipment complies with FCC radiation exposure limits set forth for an uncontrolled environment. This equipment should be installed and operated with minimum distance 20cm between the radiator & your body. This transmitter must not be co-located or operating in conjunction with any other antenna or transmitter.](https://usermanual.wiki/ASUSTeK-Computer/RTN53/User-Guide-1544867-Page-18.png)