ASUSTeK Computer S2NWM3B2200BG Notebook P.C. with WLAN User Manual 01 08 S200 E1082 E 1
ASUSTeK Computer Inc Notebook P.C. with WLAN 01 08 S200 E1082 E 1
UserManual.wiki
>
ASUSTeK Computer
>
S2NWM3B2200BG User Manual
>
User manual revised
Contents
1.
OEM Manual revised
2.
User manual revised
User manual revised
Navigation menu
Upload a User Manual
Namespaces
Wiki Guide
HTML
PDF
Info
Views
User Manual
Discussion / Help
Navigation
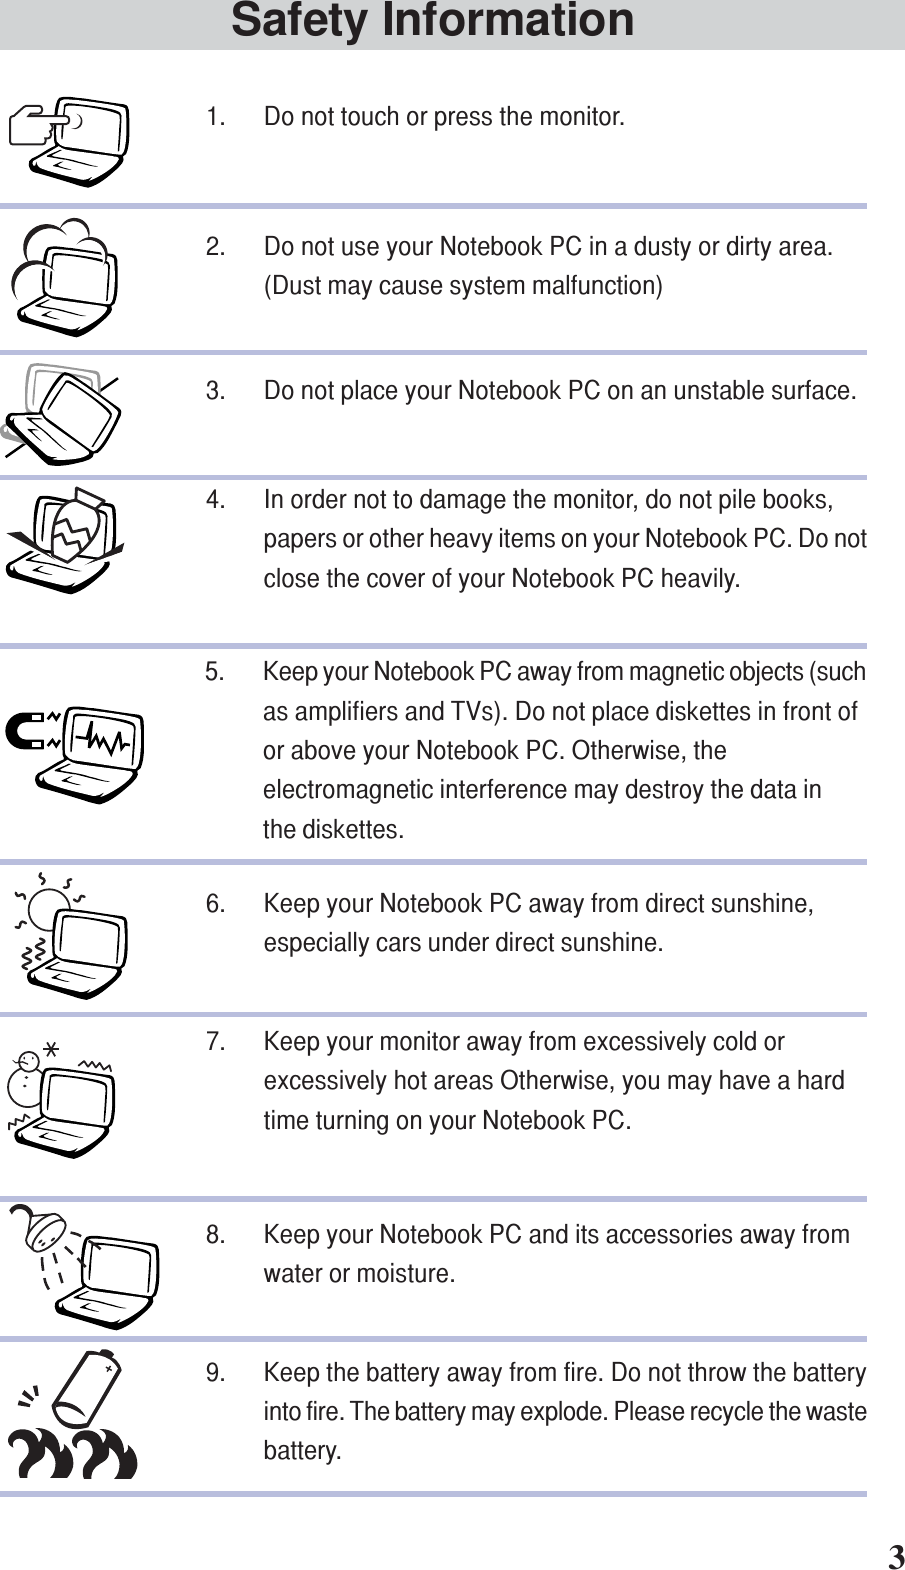

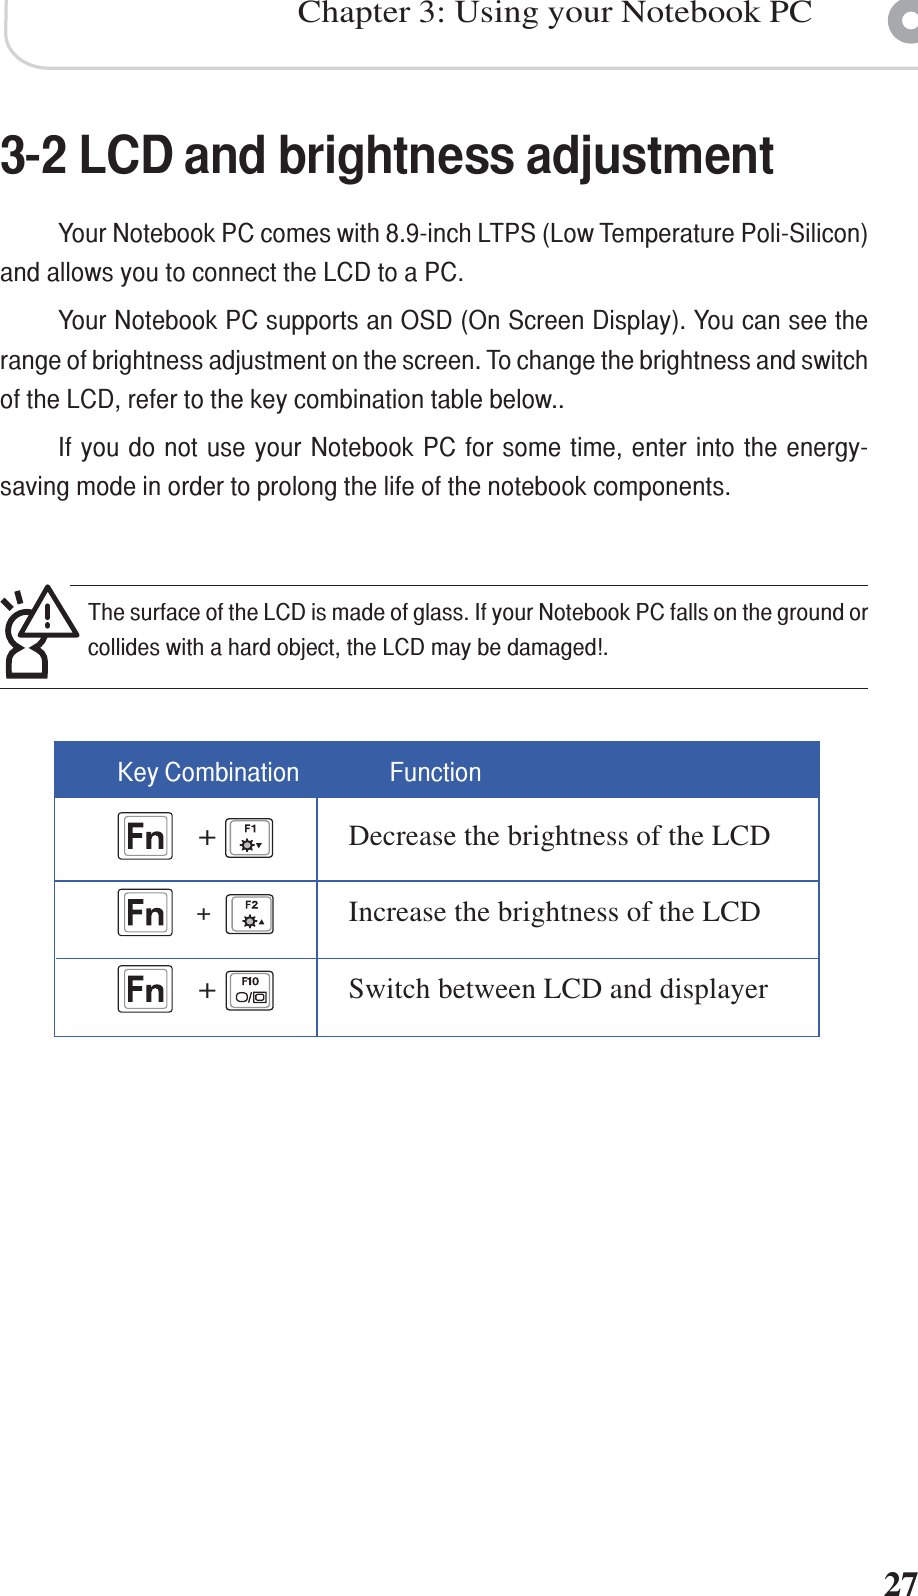
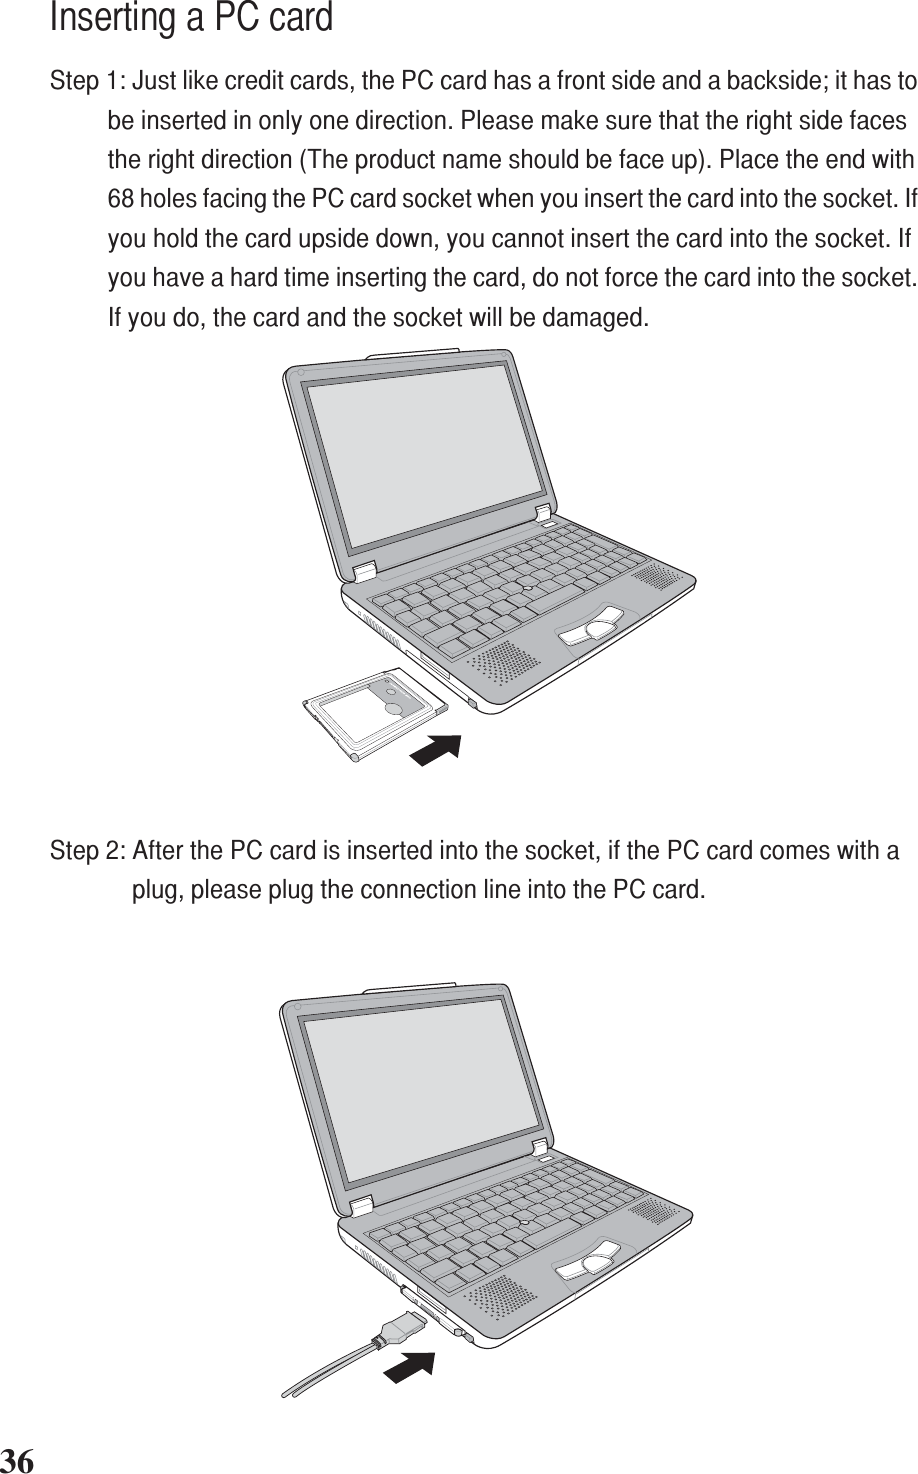
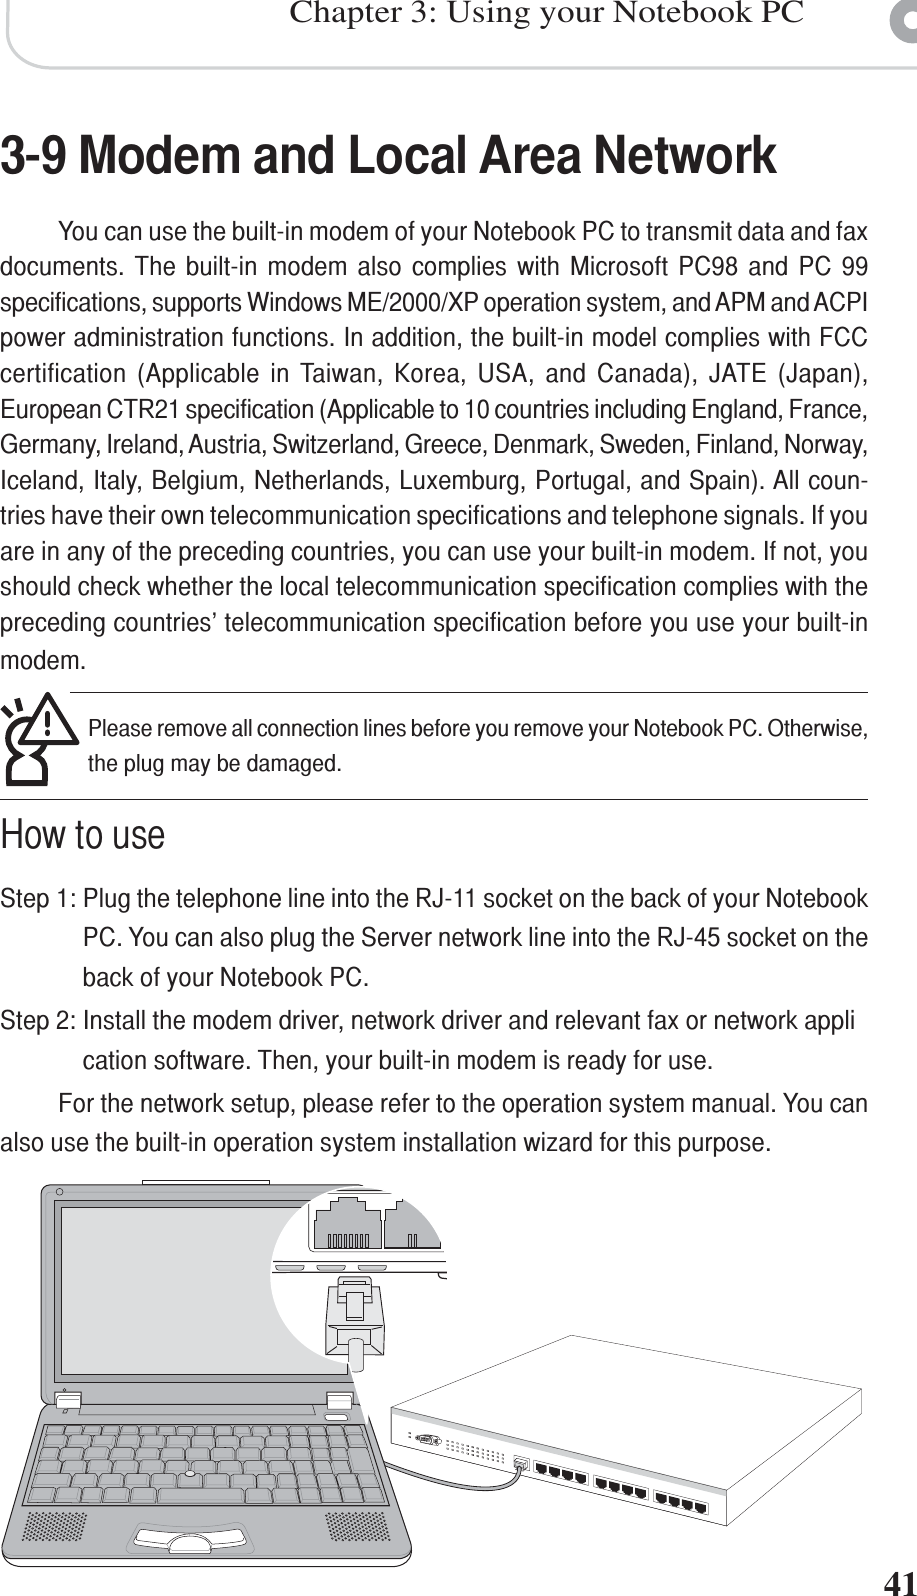
![+-+-182-1 Connect the batteryThere are two types of power supplies for your Notebook PC – transformerand battery. You can use the later whenever you are away from home and have noaccess to AC power. Always use a transformer when you are at home or at work.Your Notebook PC comes with a built-in battery and is equipped with a charge-able battery. When you open the box, you will find that the battery in the accessorybox is not installed in your Notebook PC. Follow these steps to installthe battery:Step 1: Place your Notebook PC on a desk with the bottom side facing up (Do notplace your Notebook PC on a rough desktop to avoid scratching the top)Step 2: Move the fixing-switch of the battery to [Open ].Step 3: Follow the arrow sign and move to the back of the Notebook PC.Step 4: As soon as you hear a click sound, press the battery switch to [Close ].The battery should be tightly held in place.213Fixing-switch of battery Spring-switch of batteryIf you use a chargeable battery, please pay attention to following instructions: 1) Donot dismantle the battery; 2) Do not contact metal or electric conductors to avoidshort-circuits; 3) Avoid rain and do not place battery in water; 4) Keep battery out ofchildren’s reach.Once the Notebook PC is connected to the transformer, the battery inside the NotebookPC will charge until the battery is fully charged.](https://usermanual.wiki/ASUSTeK-Computer/S2NWM3B2200BG.User-manual-revised/User-Guide-490247-Page-19.png)
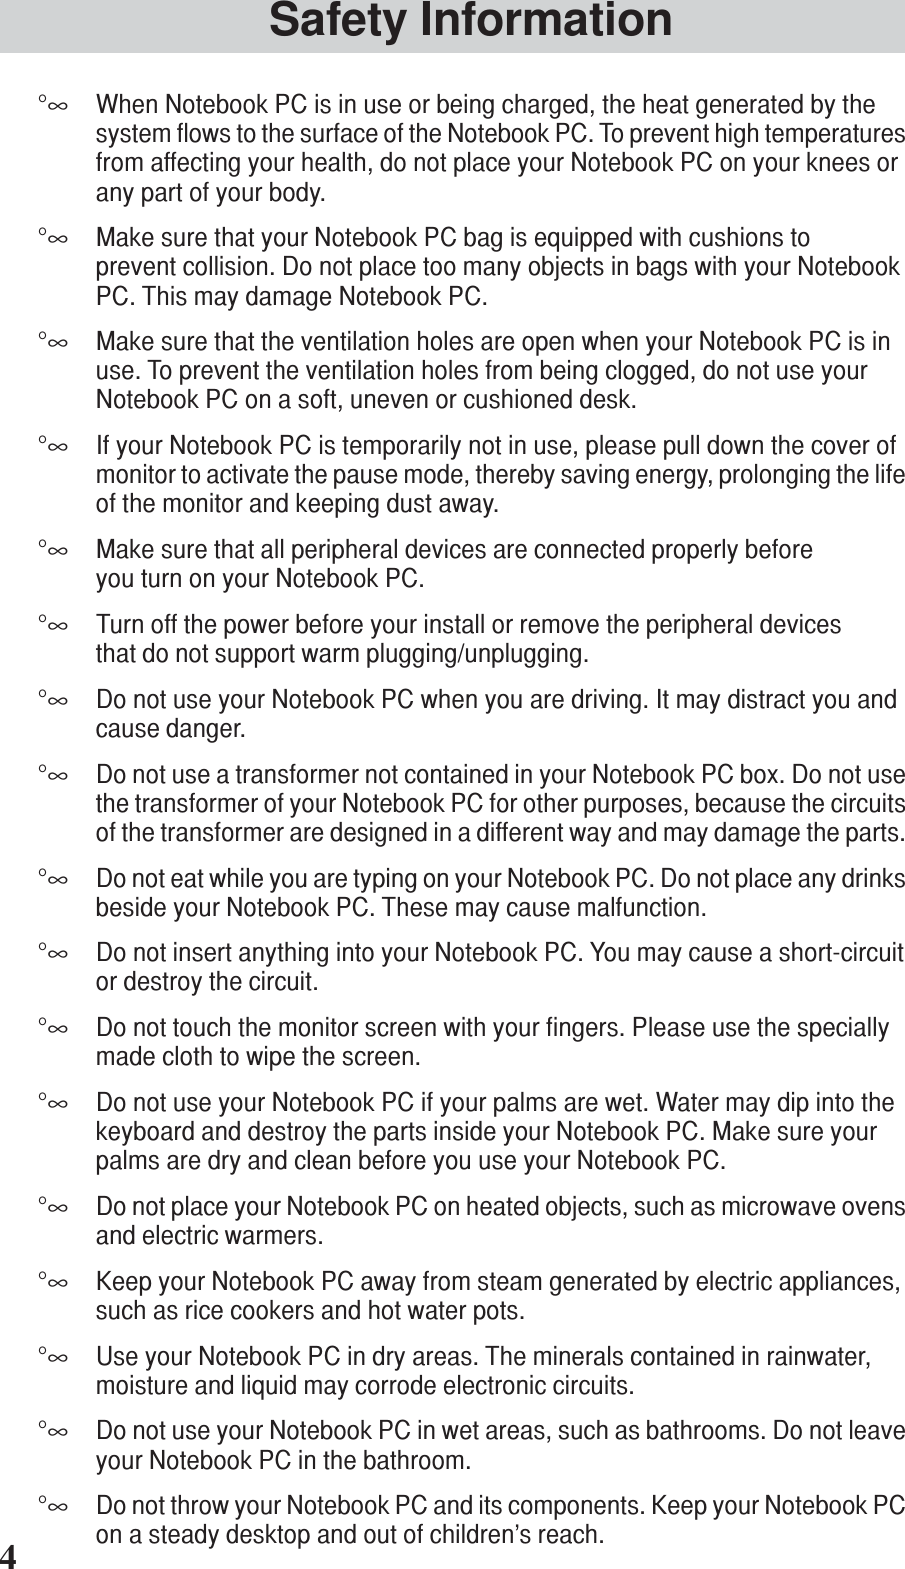
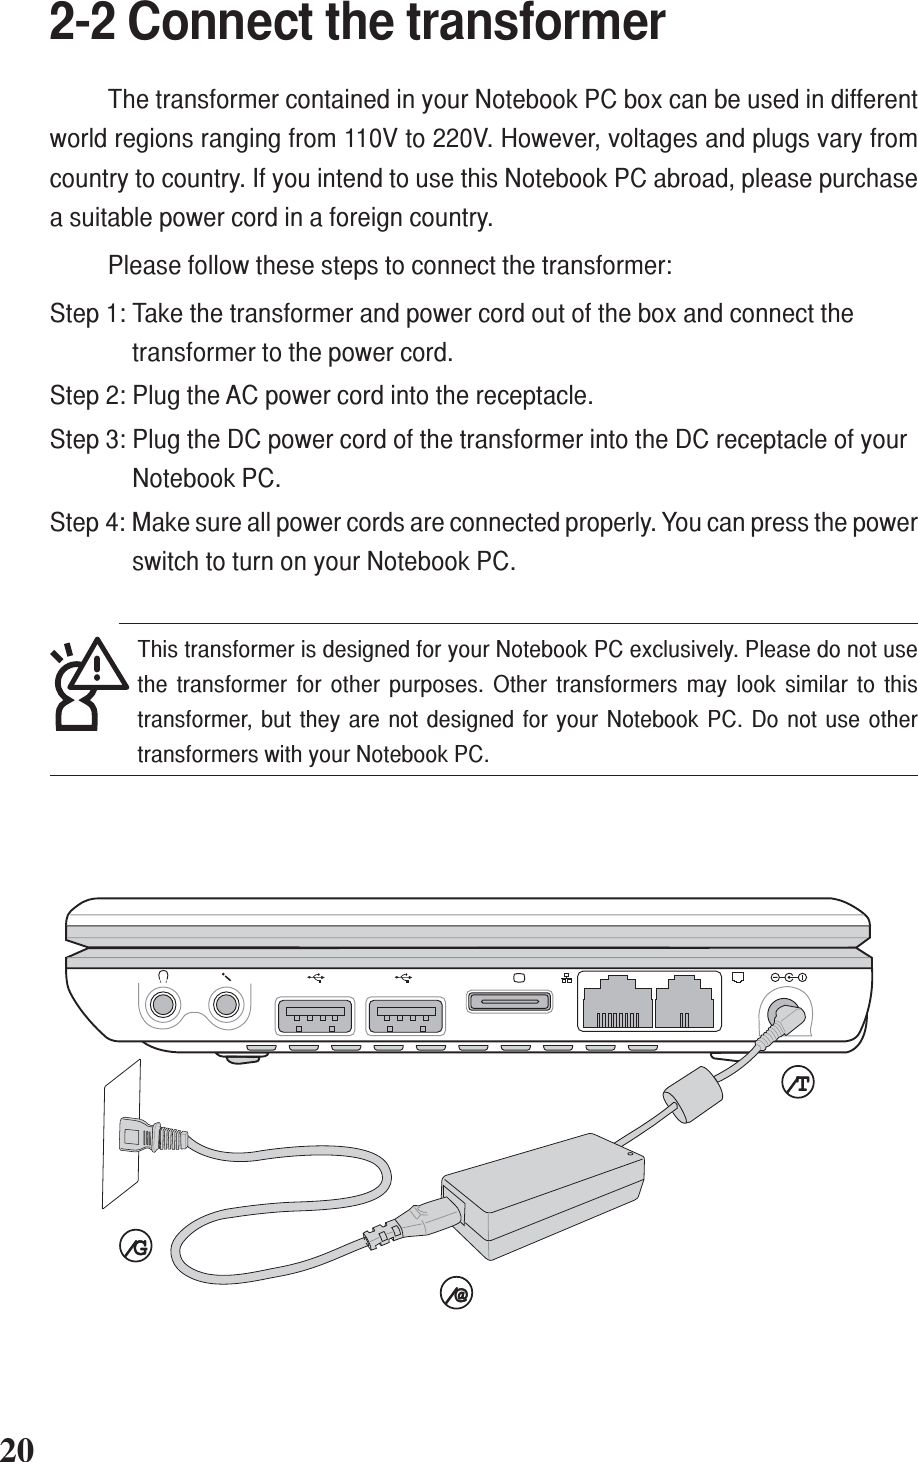
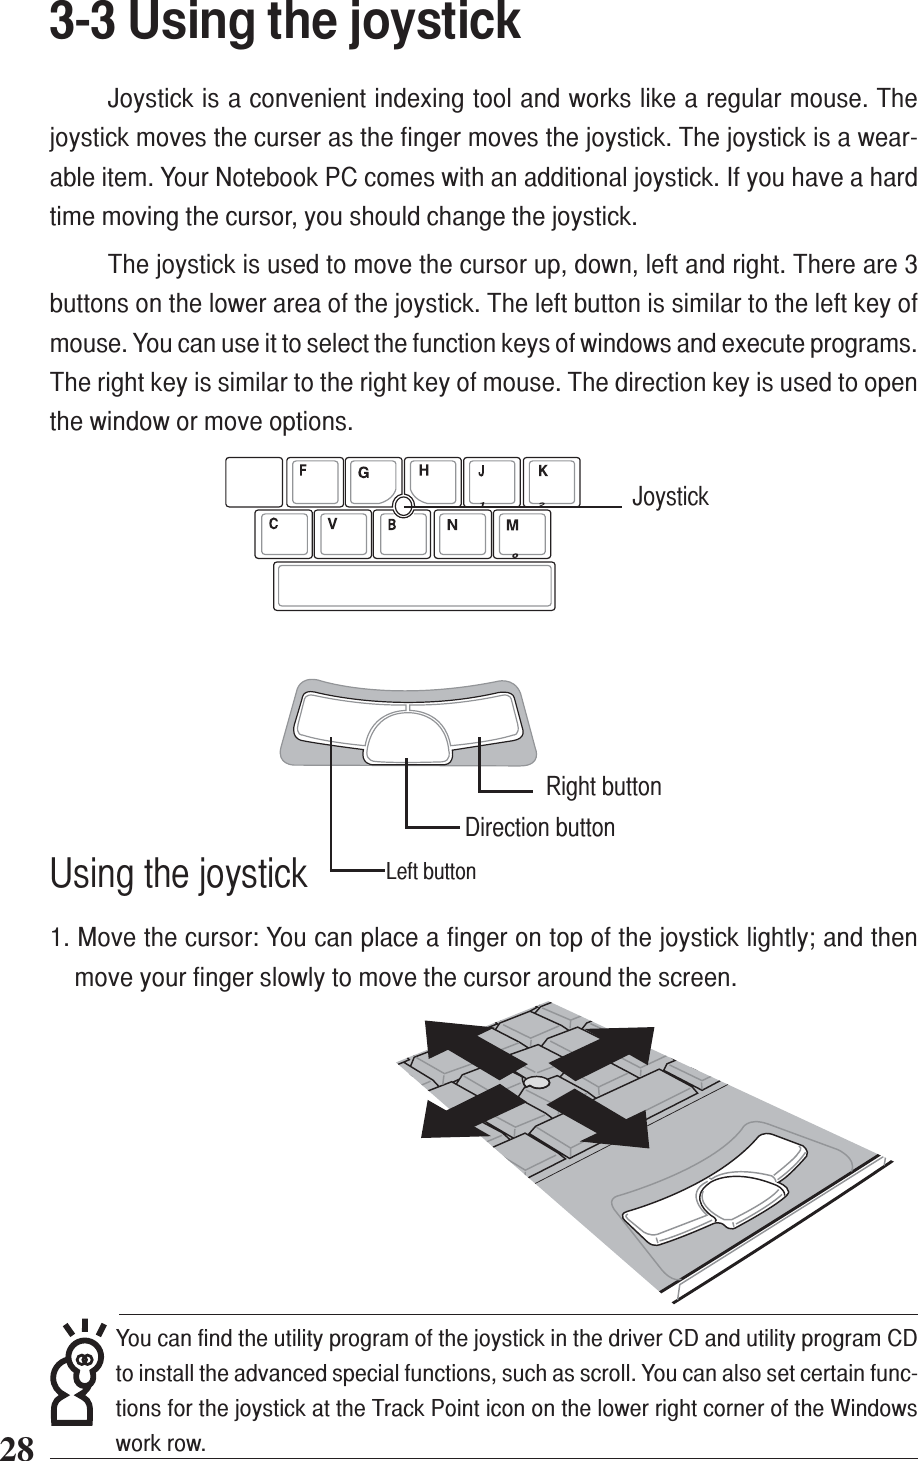
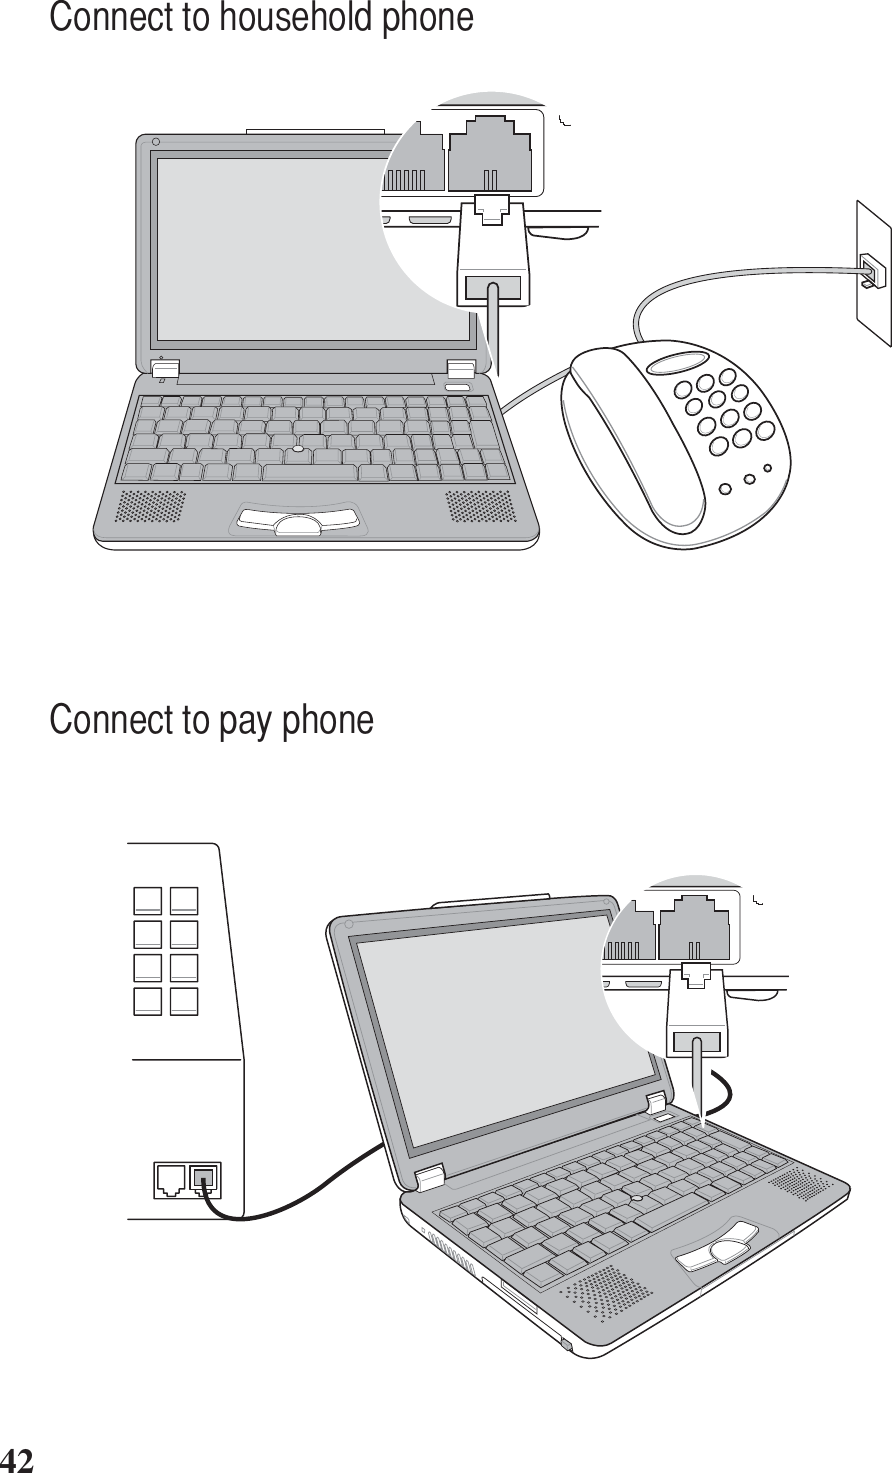
![Chapter 2: Before you use your Notebook PC19132If the Notebook PC is connected to the battery (Not connected to the transformer)and the power is on, the power indicator turns green. If the Notebook PC is off or onstandby, the indicator will be off. Do not remove the battery if the power indicator isgreen. Otherwise, data will be lost.To Remove BatteryFollow these steps to remove battery:Step 1: Turn off the Notebook PC and remove all connection lines.Step 2: Place your Notebook PC on the desk with the bottom side facing up (Do notplace your Notebook PC on a rough desktop to avoid scratching the top).Step 3: Move the switch of the battery to [Open ].Step 4: Follow the arrow sign shown in Fig. 2 and press the spring-switch of thebattery to [Open ] with one hand; and press toward the arrow sign shownin Fig. 3 with the other hand simultaneously to remove the battery.](https://usermanual.wiki/ASUSTeK-Computer/S2NWM3B2200BG.User-manual-revised/User-Guide-490247-Page-20.png)

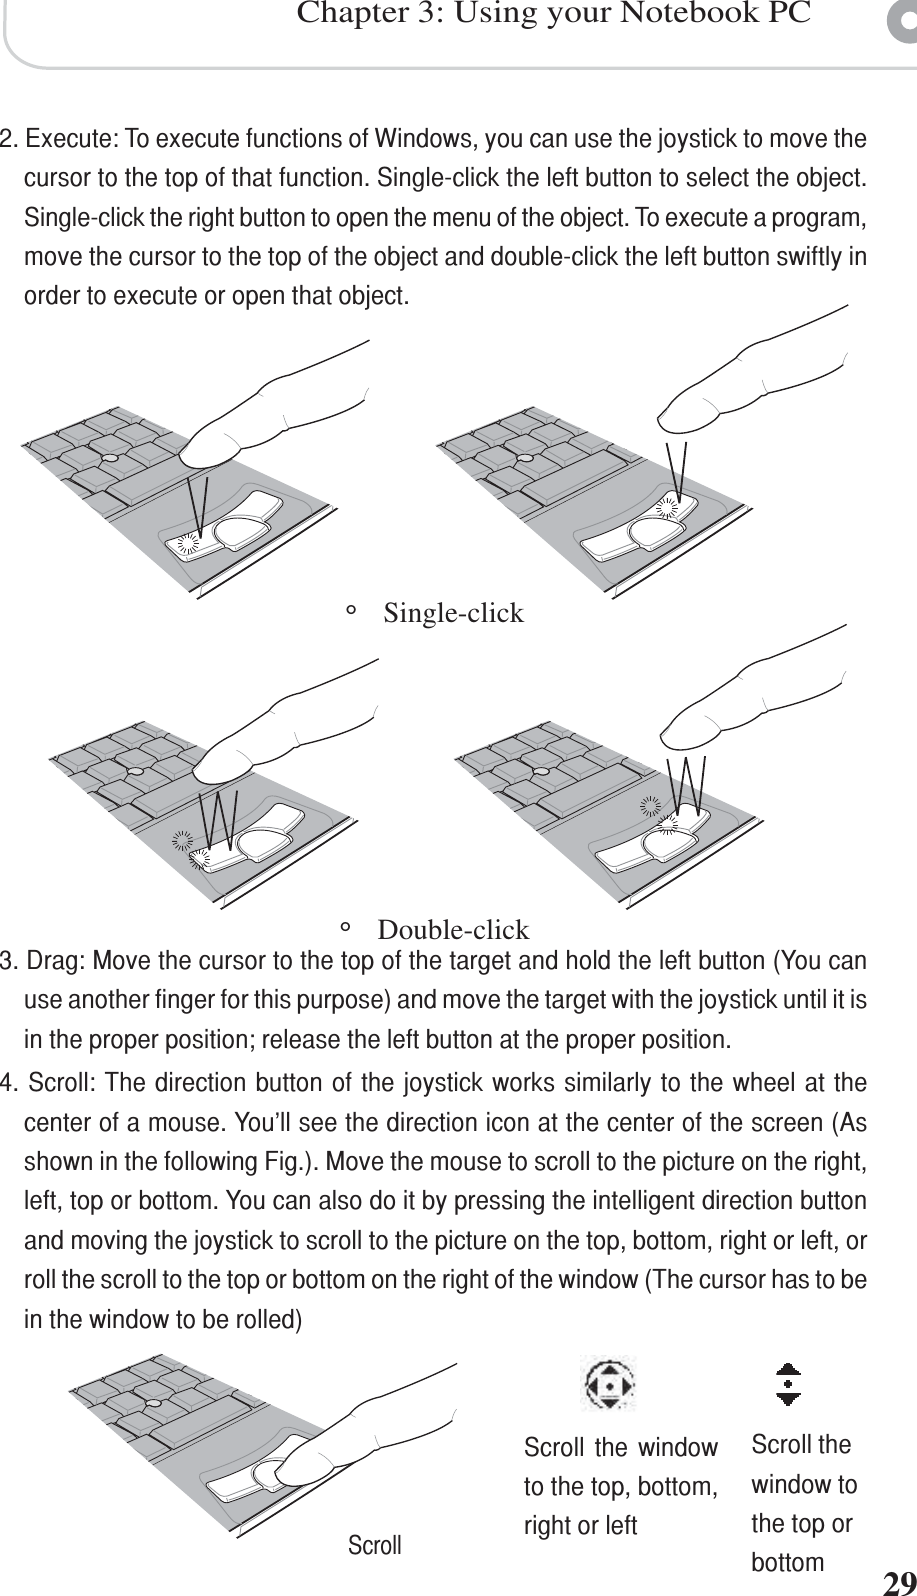
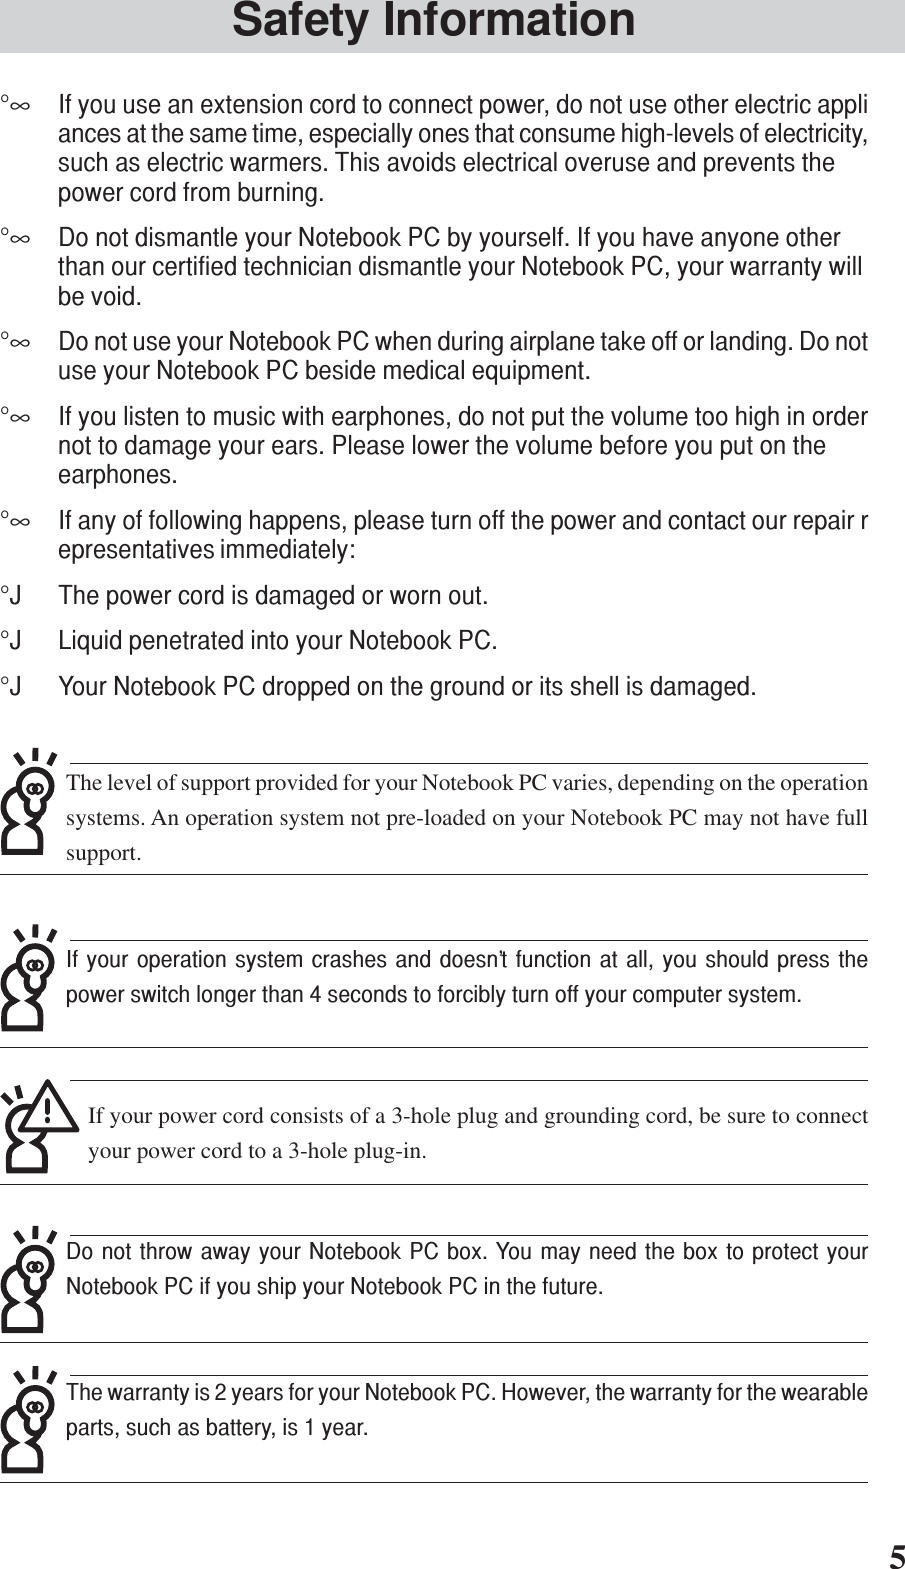
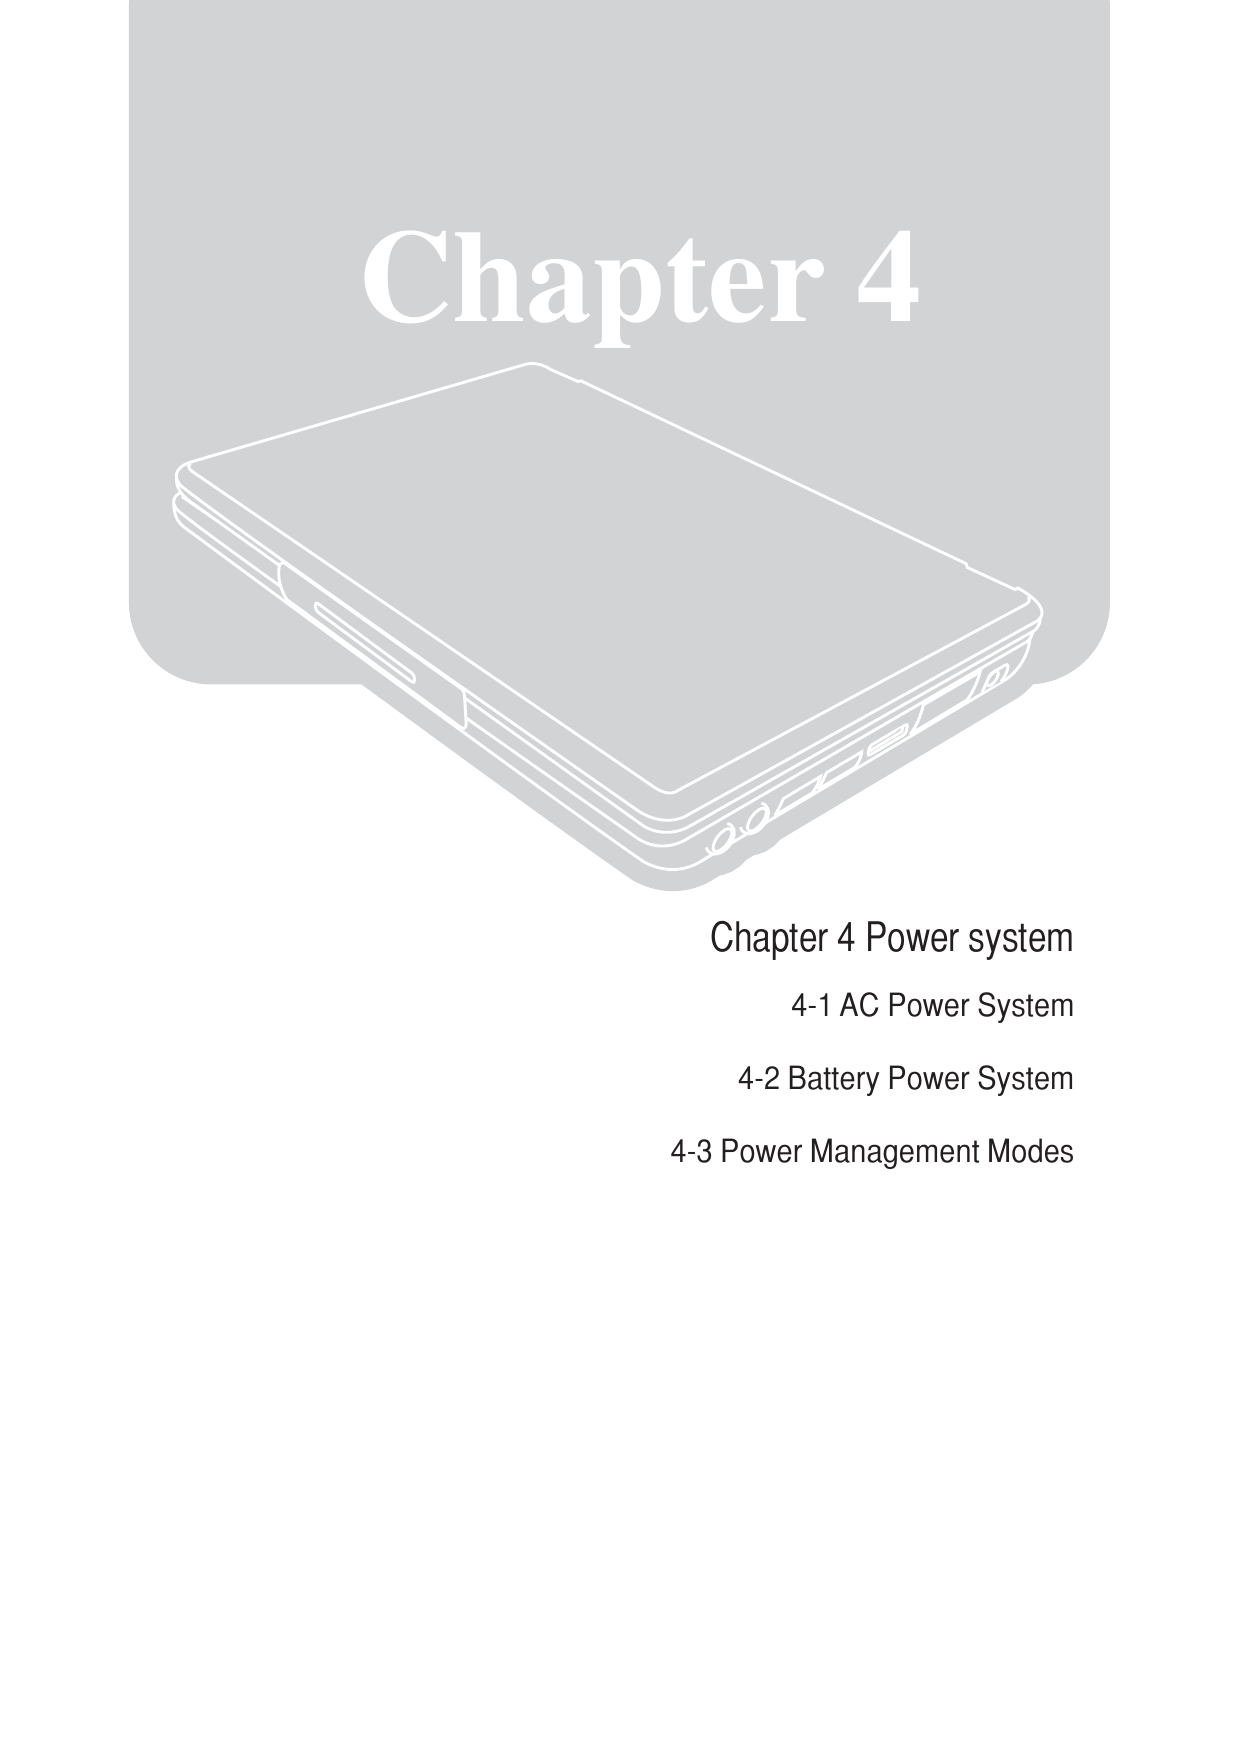
![+-+-30Maintenance of joystick1. Do not use sharp objects to write on the surface of the joystick. It may damagethe joystick.2. Keep dust, grease and liquid away from the joystick.3. Make sure your fingers are clean and dry when you use the joystick.4. Do not place heavy objects on the joystick or on both buttons.5. A light touch is sufficient to activate the joystick. Striking joystick heavily doesn’tmake the joystick work better. Please avoid striking the joystick heavily.3-4 Using the keyboardYour Notebook PC comes with a Windows TM reinforced keyboard. Yourkeyboard can be used as a standard keyboard; and also includes 2 Windows TMspecial function keys to help you use Windows TM in a swift and convenient manner.WindowsTM function keysThere are two keys designed specifically for the WindowsTM operating systemand can be used in WindowsTM only.: Press this key to activate the Start of WindowsTM.Condense the homepage fonts swiftlyWhen you use IE to browse the homepage, you can use the control [Ctrl] key and rollthe wheel of the mouse to condense or enlarge the text of the homepage. Press thewheel of the mouse to scroll to the picture at the top, bottom, right or left.](https://usermanual.wiki/ASUSTeK-Computer/S2NWM3B2200BG.User-manual-revised/User-Guide-490247-Page-31.png)
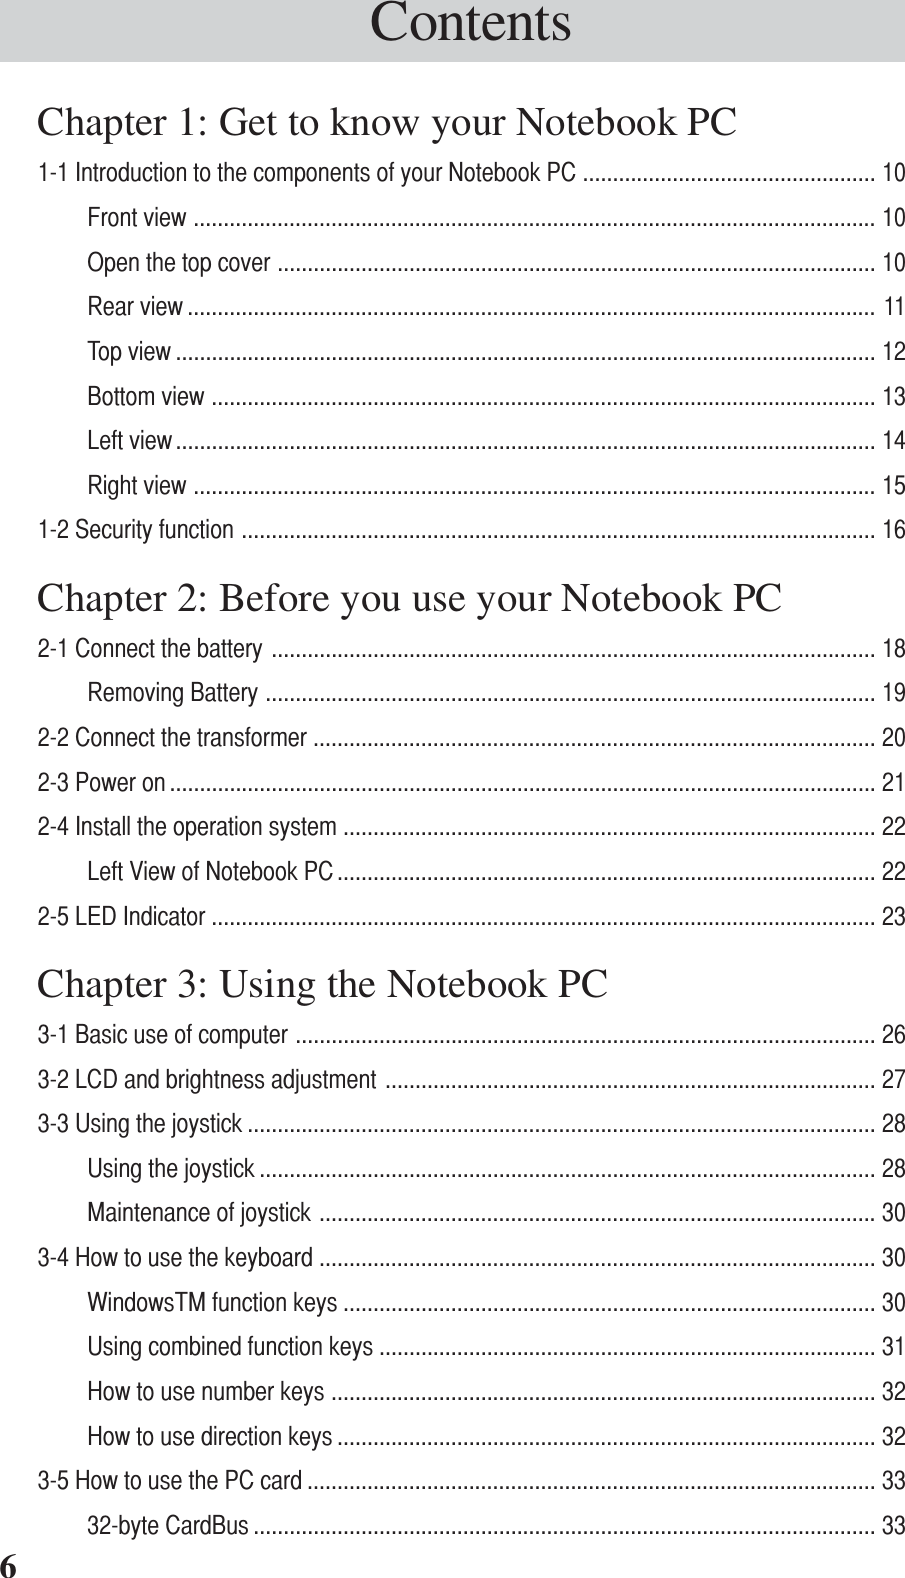
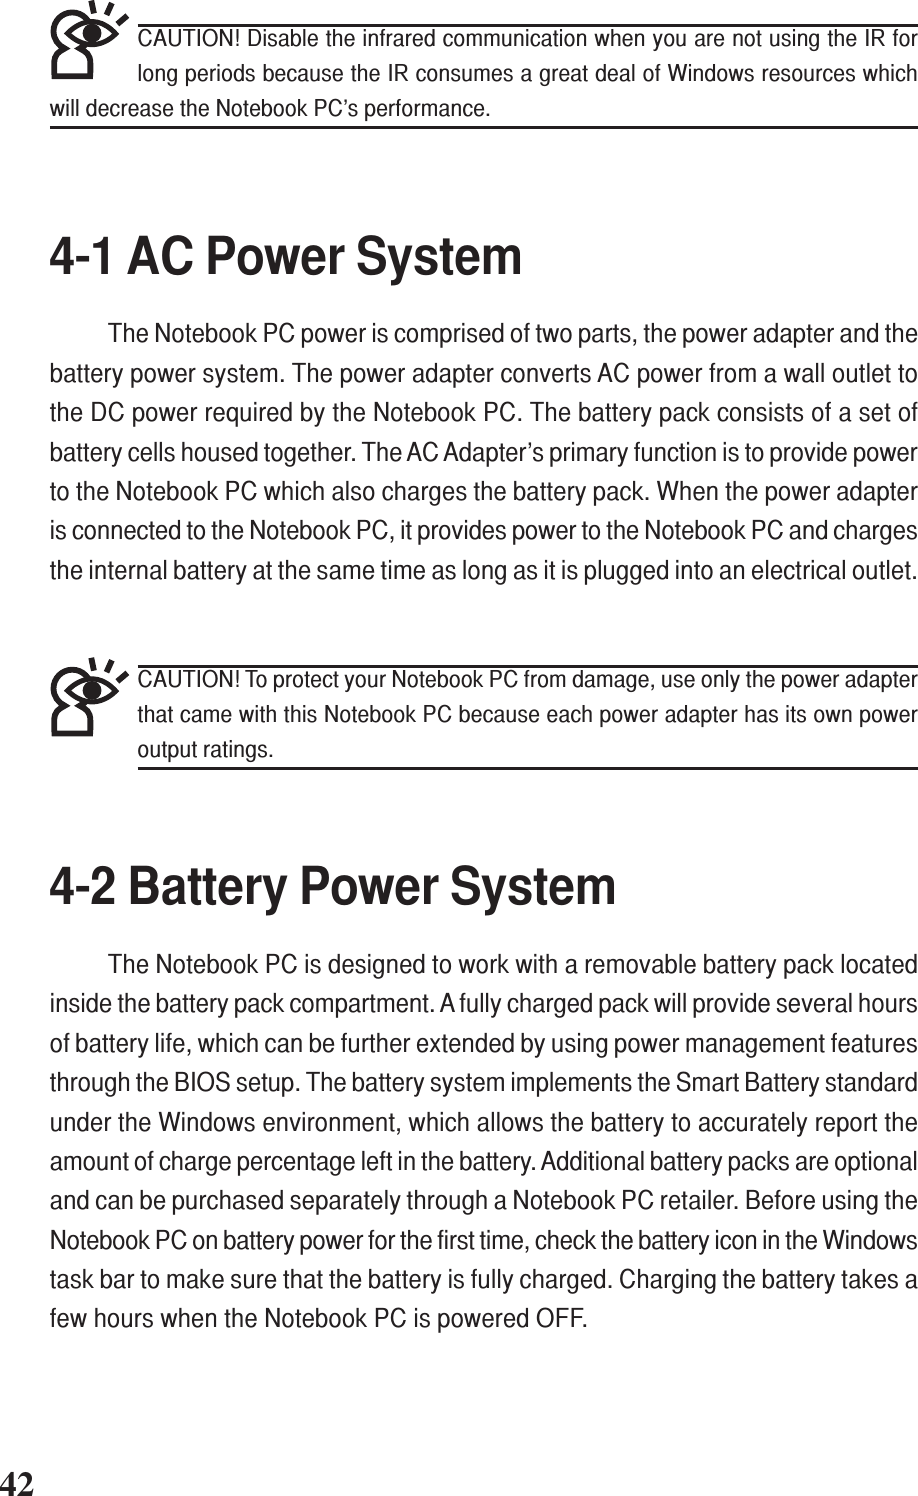
![Chapter 3: Using your Notebook PC31This key works similarly to the right key of a mouse or joystick. All objectsunder the WindowsTM operation system are given certain functions with theright key. Move the cursor to the top of the icon of the object and press thiskey. You’ll see the function menu of that object.Using combined function keysThe colored text or diagrams on the keyboard are the function keys of yourNotebook PC. These keys work only when you hold the function key on thelower left corner.1. +: Decrease the brightness of the LCD.2. +: Increase the brightness of the LCD.3. +: Standby mode (Save to RAM).4. +: Sleep mode (Save to Disk).5. +: Increase volume (Only applicable to Windows system).6. +: Decrease volume (Only applicable to Windows system).7. +: Mute (Only applicable in Windows system).8. +: Switch to LCD or displayer.9. +: Activate built-in number keyboard. The built-in keyboard al-lows you to use the 15 keys on the center and right of the Notebook PC as thenumber keys on the right of the PC. Just like the number keys of the PC, the built-in number keys can be used to enter numbers. You can also use the built-innumber keyboard as the direction key.10. +: Open or close [Lock scroll].](https://usermanual.wiki/ASUSTeK-Computer/S2NWM3B2200BG.User-manual-revised/User-Guide-490247-Page-32.png)
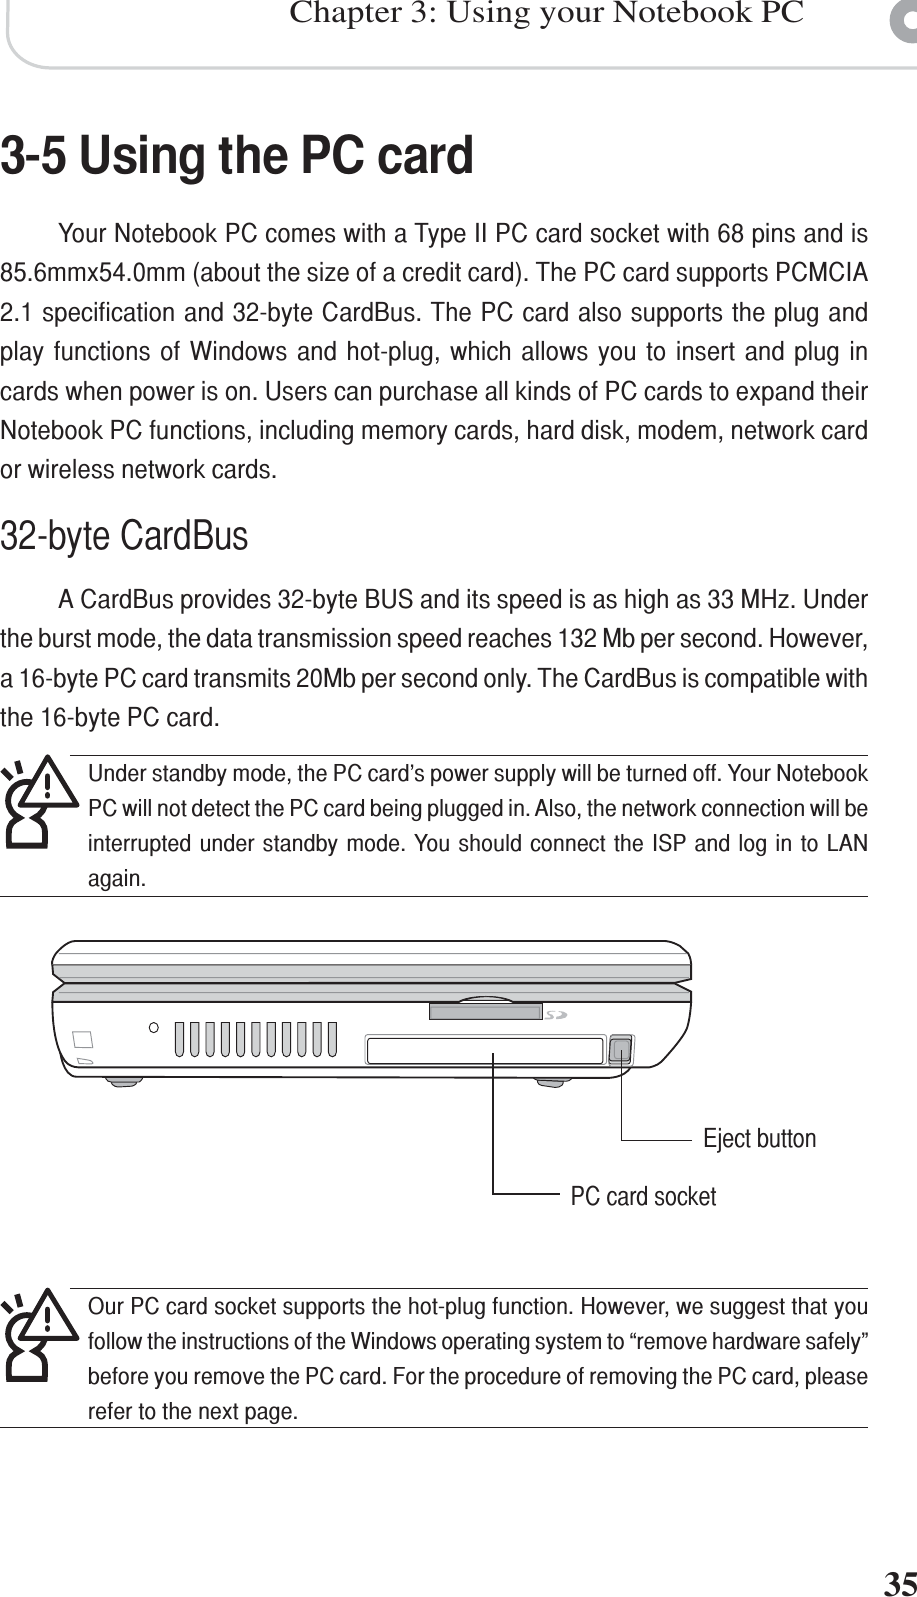
![+-+-32Using the number keys°∞Use as number keys: Press + to activate the number keys. Theindicator will be on. Then you can press the following keys to enter the numbersand symbols shown on the lower end of the keys.Using the direction keys°∞Use as direction keys: Press + to activate direction keys. Press[Shift] + the keys shown preceding Fig. Then the number keys will become directionkeys (The functions of all keys are shown as follows)](https://usermanual.wiki/ASUSTeK-Computer/S2NWM3B2200BG.User-manual-revised/User-Guide-490247-Page-33.png)
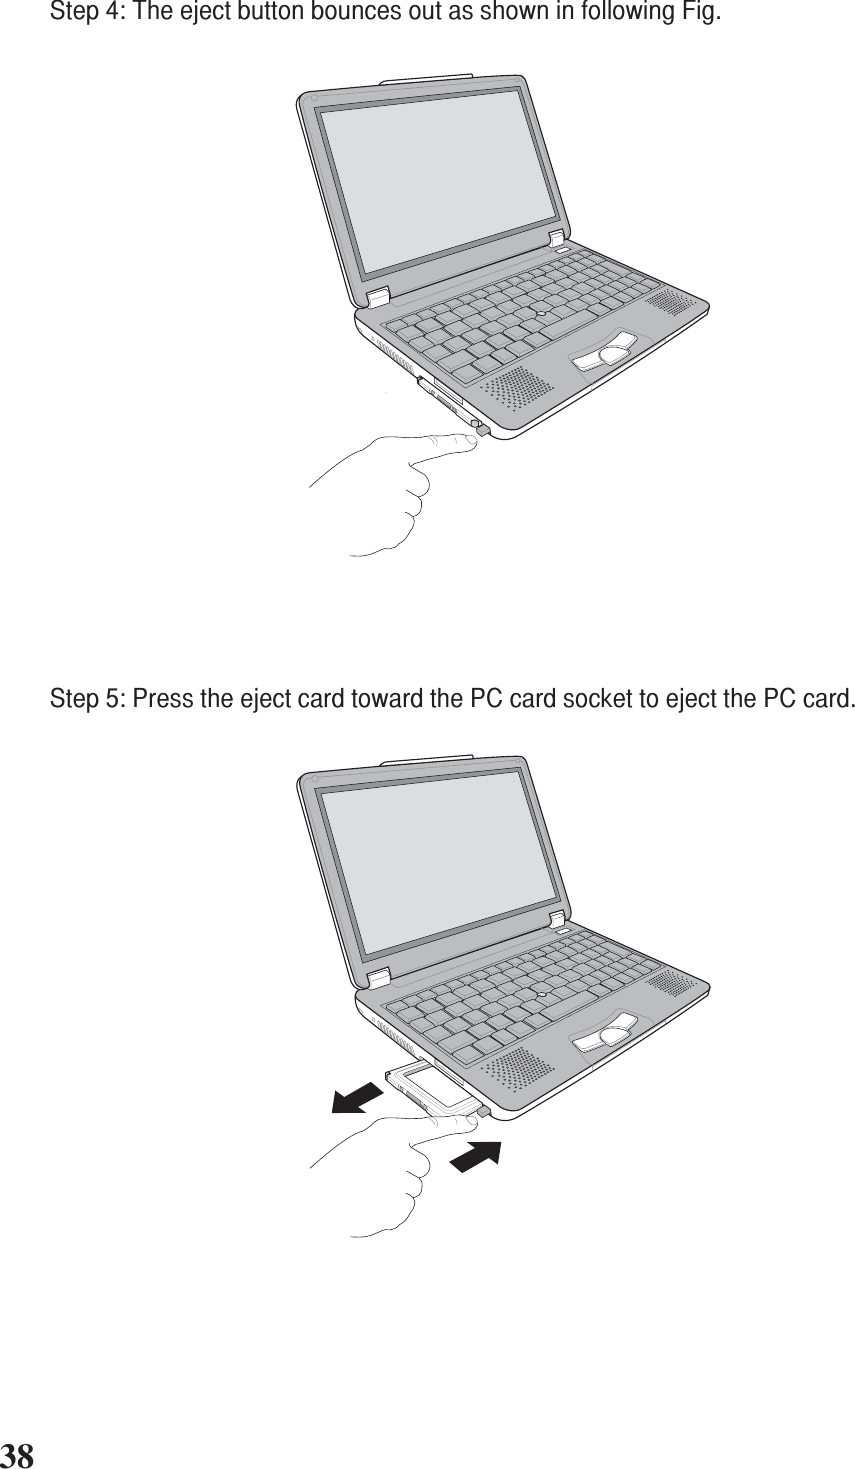
![37Chapter 3: Using your Notebook PCEjecting the PC cardStep 1: Click the icon “Remove hardware safely” located on the lower right workrow or control station of the Windows operating system.Step 2: The window “Remove hardware safely” appears. At [Hardware device] chosePCMCIA device and click [Stop] to stop the PC card from running.Step 3: Press the eject button.](https://usermanual.wiki/ASUSTeK-Computer/S2NWM3B2200BG.User-manual-revised/User-Guide-490247-Page-36.png)
![+-46Suspend ModeIn Standby and Hibernation, the CPU clock is stopped and most of the Note-book PC devices are put in their lowest active state. The suspend mode is thelowest power state of the Notebook PC. The Notebook PC enters Suspend whenthe system remains idle for a specified amount of time or manually using the [Fn][F1]keys. The Power LED blinks when the Notebook PC is in STR mode. In STD mode,the Notebook PC will appear to be powered OFF. Recover from STR by pressingany keyboard button (except Fn). Recover from STD by using the power switch(just like powering ON the Notebook PC).Power SavingsThe Notebook PC enters Standby mode (low priority) when the system remainsidle for a specified amount of time. The timeout can be set through BIOS setup(lower priority) and Windows power management (higher priority). To resume systemoperation, press any key.Power State SummarySTATE ENTRY EVENT EXIT EVENTStand by • Stand by through Windows Start button, • Any device• Timer as set though “Power Management” • Battery low in Windows Control Panel (higher priority)STR (Standy By) • Ring indicator • Any Key(Save-to-RAM) • Sleep button [FN F1]STD (Hibernate) • Power button • Power button(Save-to-Disk) • Battery Extremely Low](https://usermanual.wiki/ASUSTeK-Computer/S2NWM3B2200BG.User-manual-revised/User-Guide-490247-Page-47.png)