ASUSTeK Computer T91NE785H Eee PC User Manual e4518 Eee PC T91 8th draft
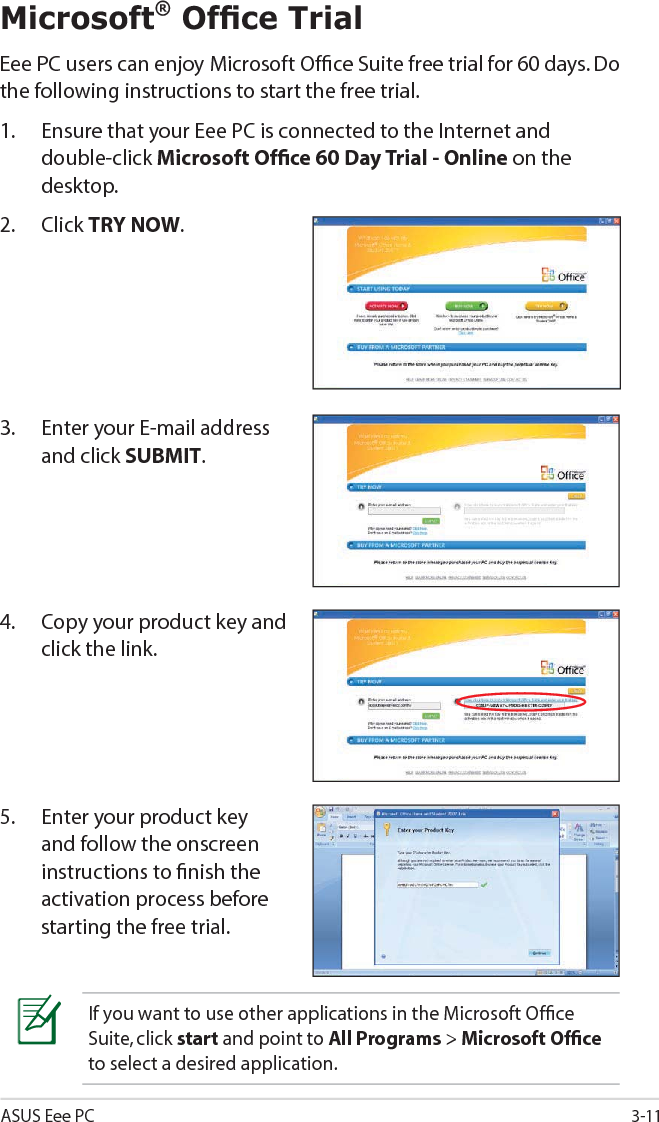
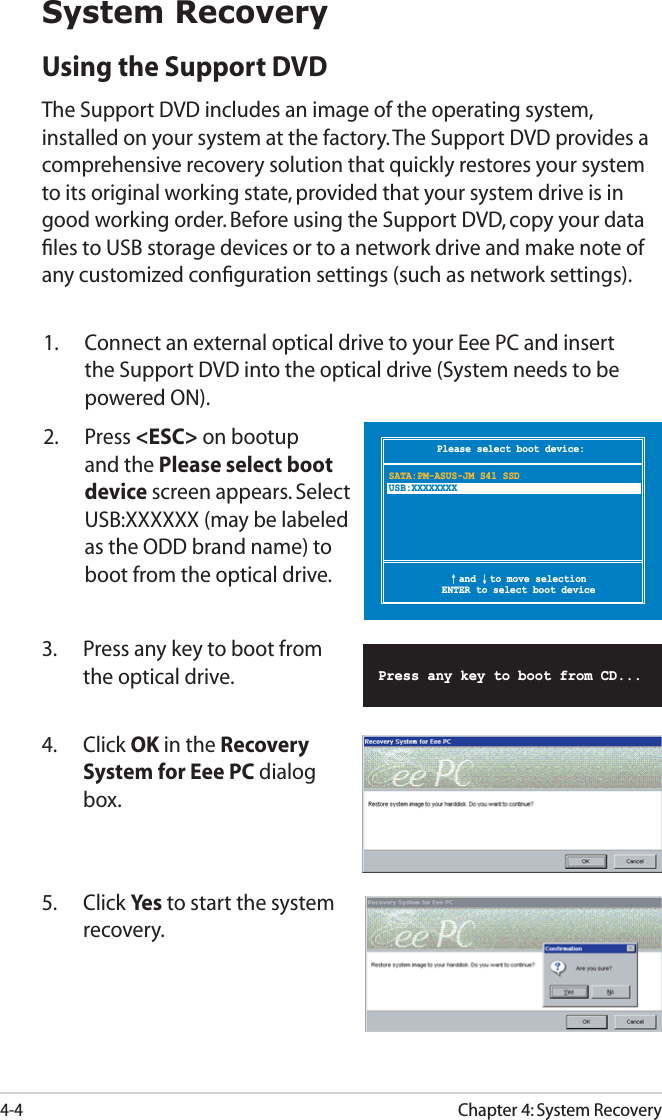
ASUSTeK Computer Inc Eee PC e4518 Eee PC T91 8th draft
UserManual.wiki
>
ASUSTeK Computer
>
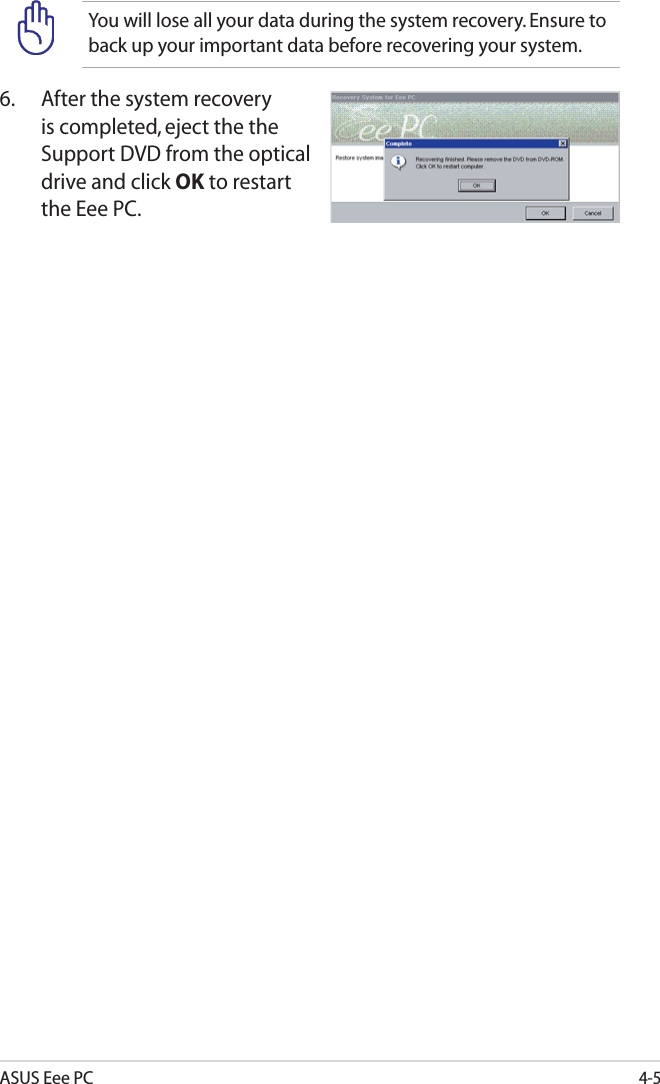
T91NE785H User Manual
Users Manual
Navigation menu
Upload a User Manual
Namespaces
Wiki Guide
HTML
PDF
Info
Views
User Manual
Discussion / Help
Navigation
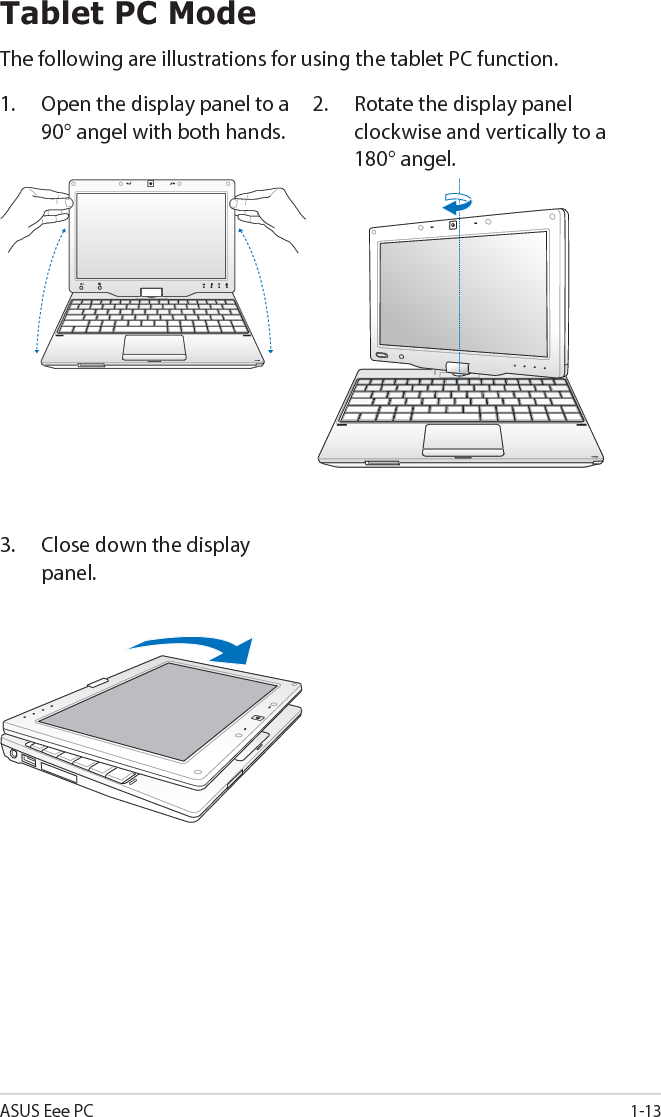
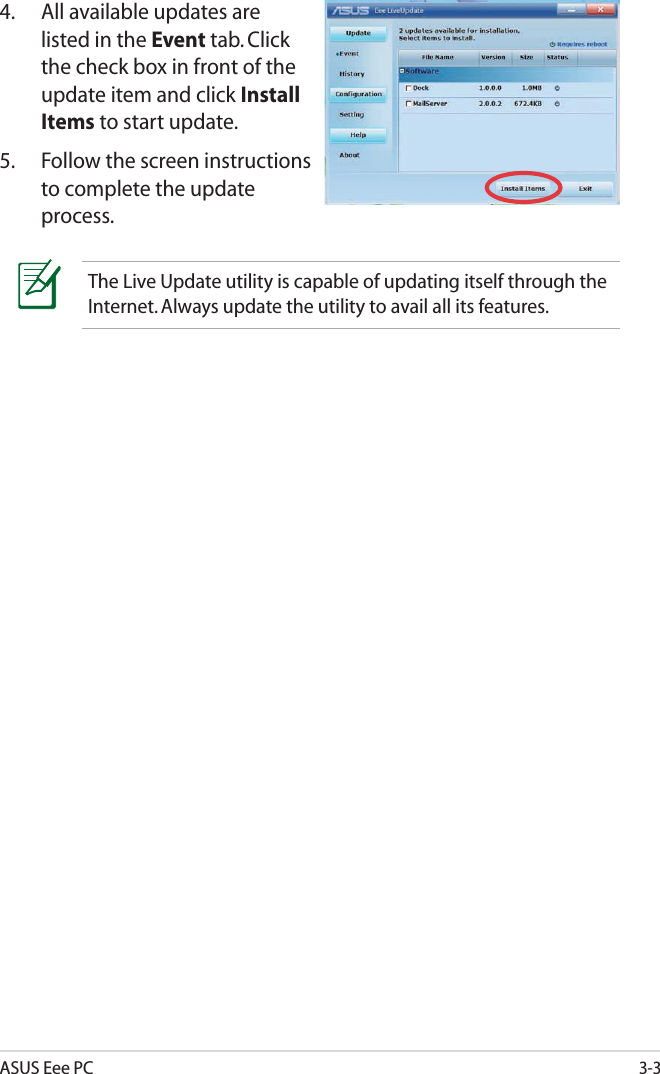
![Eee PC User ManualWindows® XP Edition Eee PC T91E451815G06QXXXXXXESCTabQWERT Y U I OPLKAltAltCtrlCtrl FnJHGFDSABVM<>..,?NCXZCaps Lock{[:;}]F1 F2 F3 F4 F5 F6 F7 F8 F9 F10 F11 F12PauseBreakPrt ScInsertDeleteEnterBackspace=)0(98778945610235%4$32!&ShiftShift1 6Num LKHomePgUpPgDn EndScr LK#@~SysRq](https://usermanual.wiki/ASUSTeK-Computer/T91NE785H/User-Guide-1089905-Page-1.png)
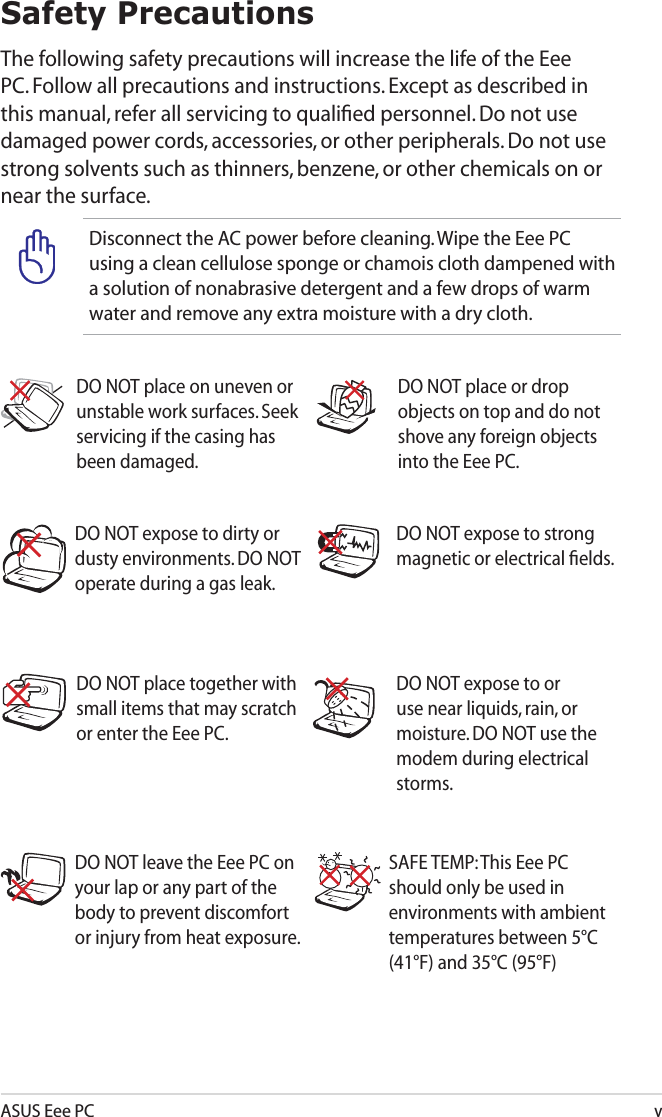

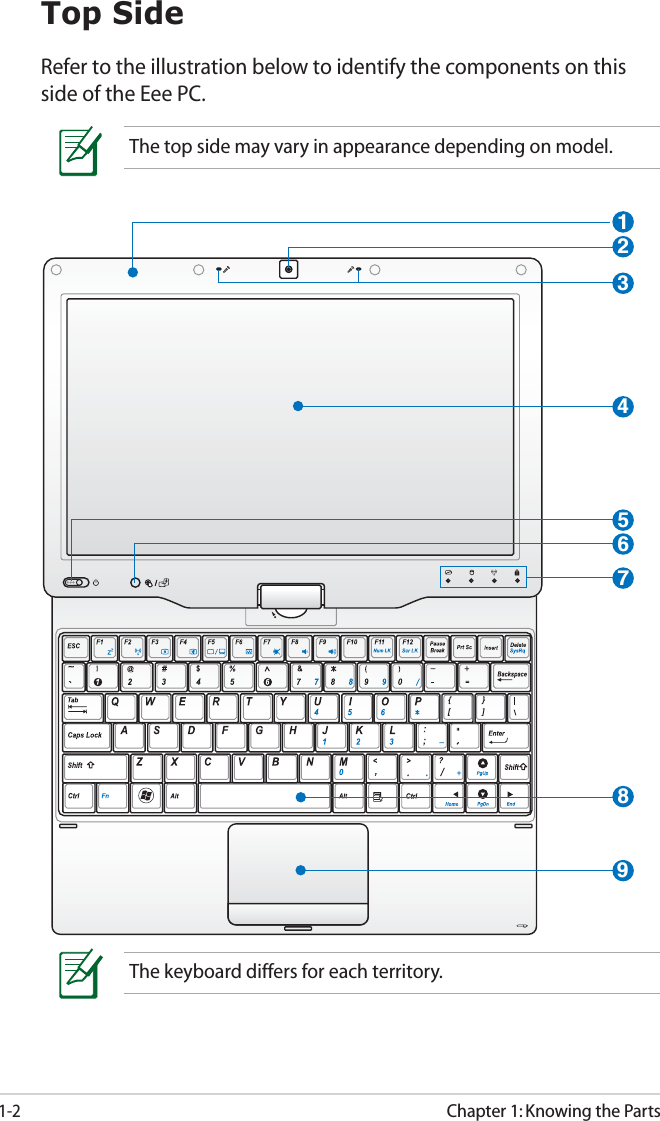
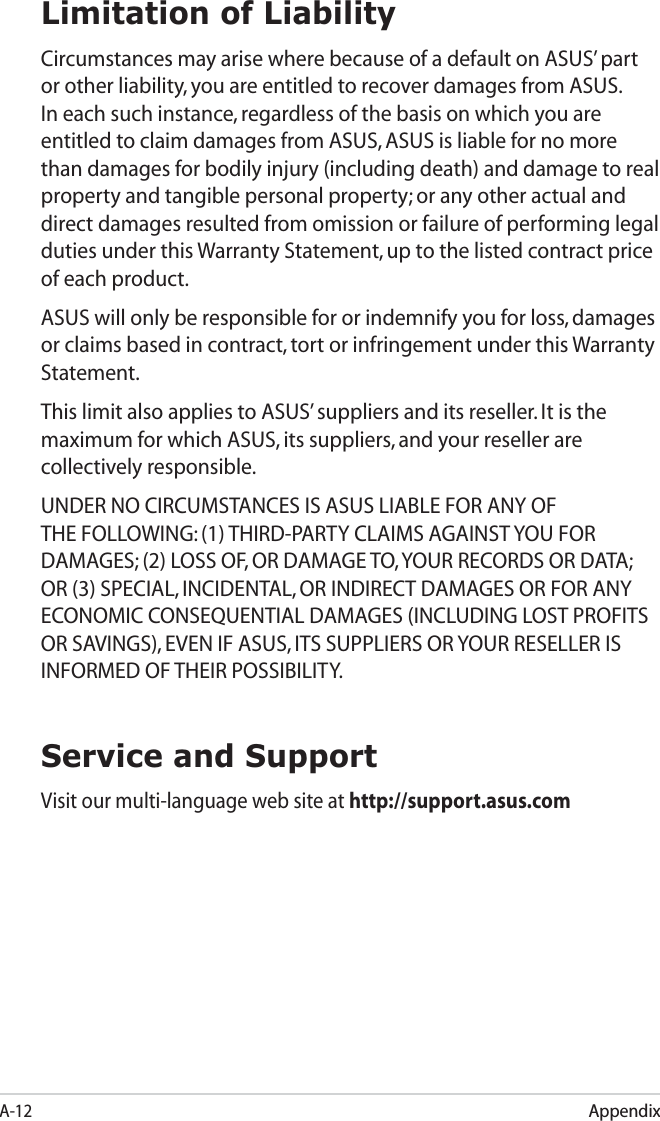
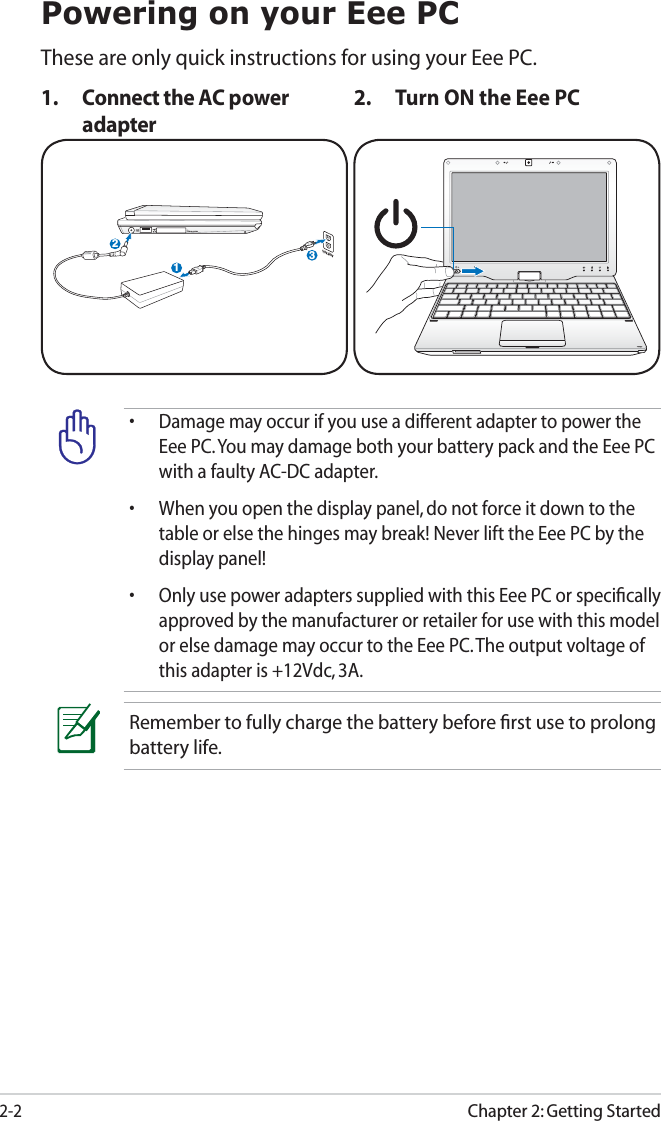
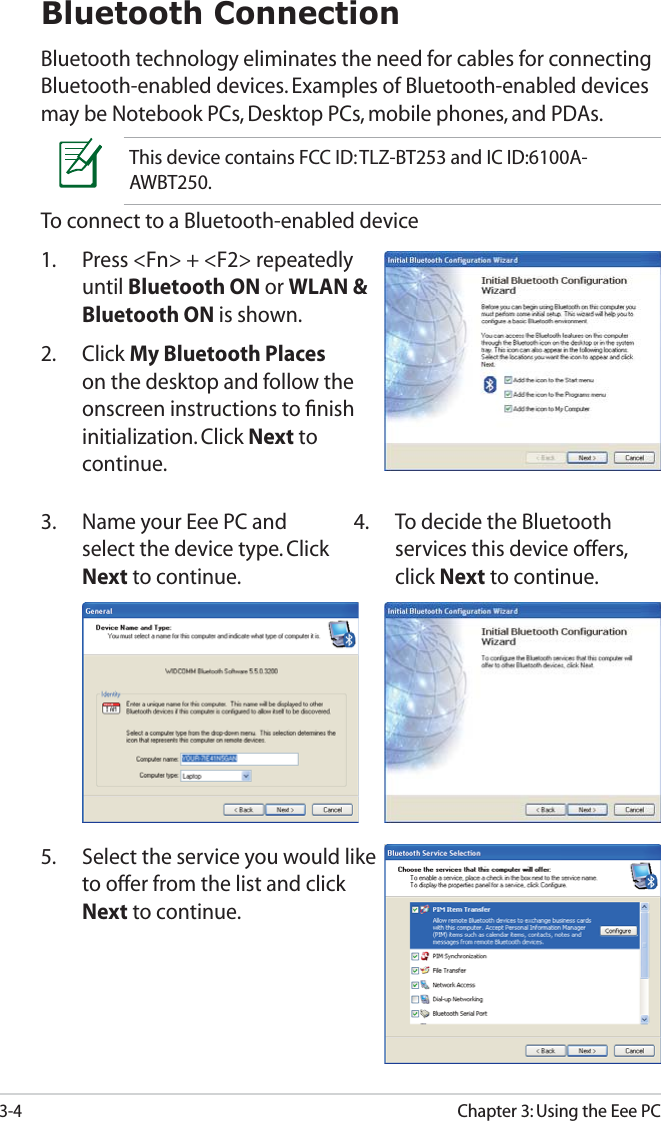
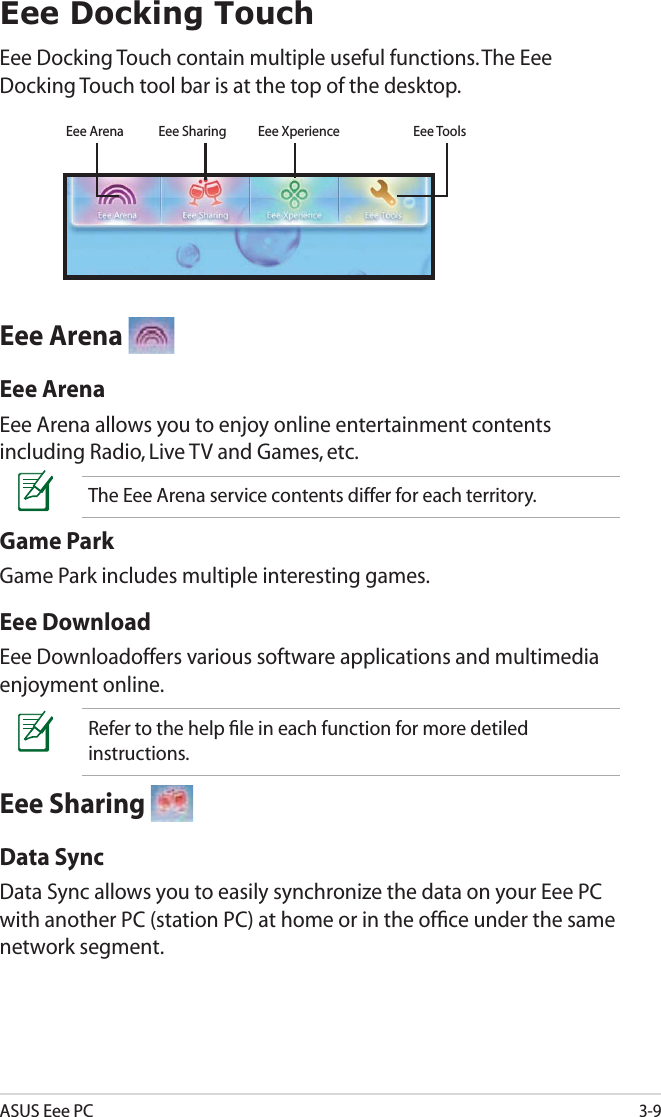
![1-4Chapter 1: Knowing the Parts8 Powered ON / Standby modeWith Adapter Without AdapterHigh battery power (95%–100%) Green ON OffMedium battery power (10%–94%) Orange ON OffLow battery power (0%–10%) Orange BlinkingOrange Blinking (Powered ON) Off (Standby Mode) Powered OFFWith Adapter Without AdapterHigh battery power (95%–100%) Green ON OffMedium battery power (11%–94%) Orange ON OffLow battery power (0%–10%) Orange Blinking Off Storage Device Indicator The storage device indicator blinks when data is written to or read from the storage device. Wireless/Bluetooth Indicator This is only applicable on models with built-in wireless LAN/Bluetooth. When the built-in wireless LAN/Bluetooth is enabled, this indicator lights. Capital Lock Indicator Indicates that capital lock [Caps Lock] is activated when lighted. Keyboard The keyboard provides keys with comfortable travel (depth at which the keys can be depressed) and palm rest for both hands. Touchpad and Buttons The touchpad and its buttons comprises a pointing device that provides the same functions as a desktop mouse.9](https://usermanual.wiki/ASUSTeK-Computer/T91NE785H/User-Guide-1089905-Page-12.png)

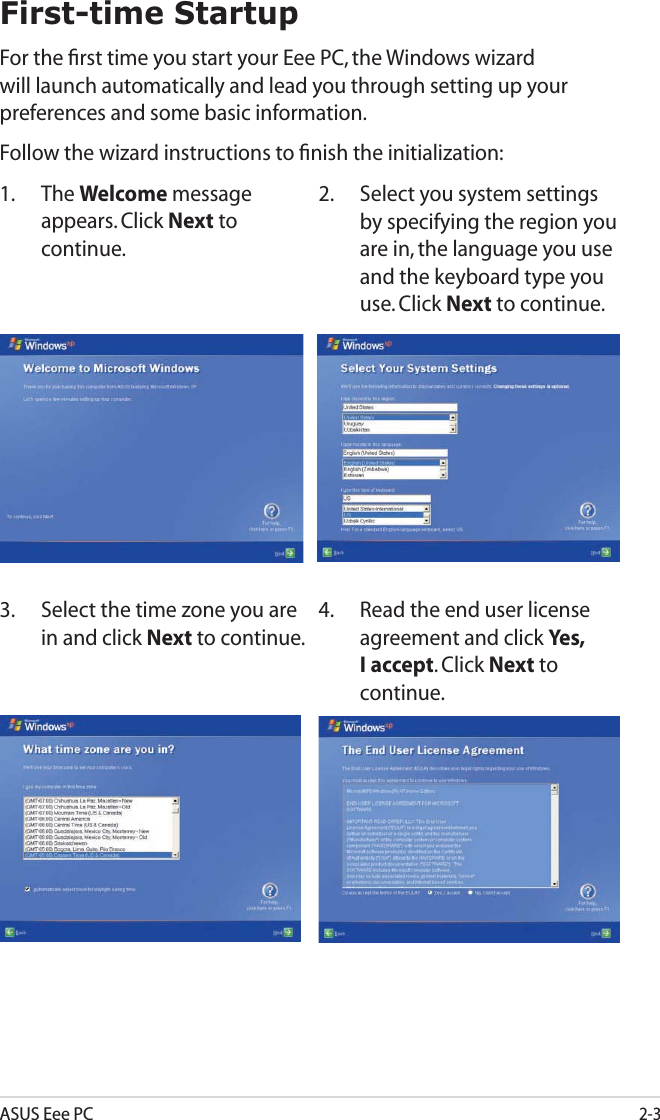


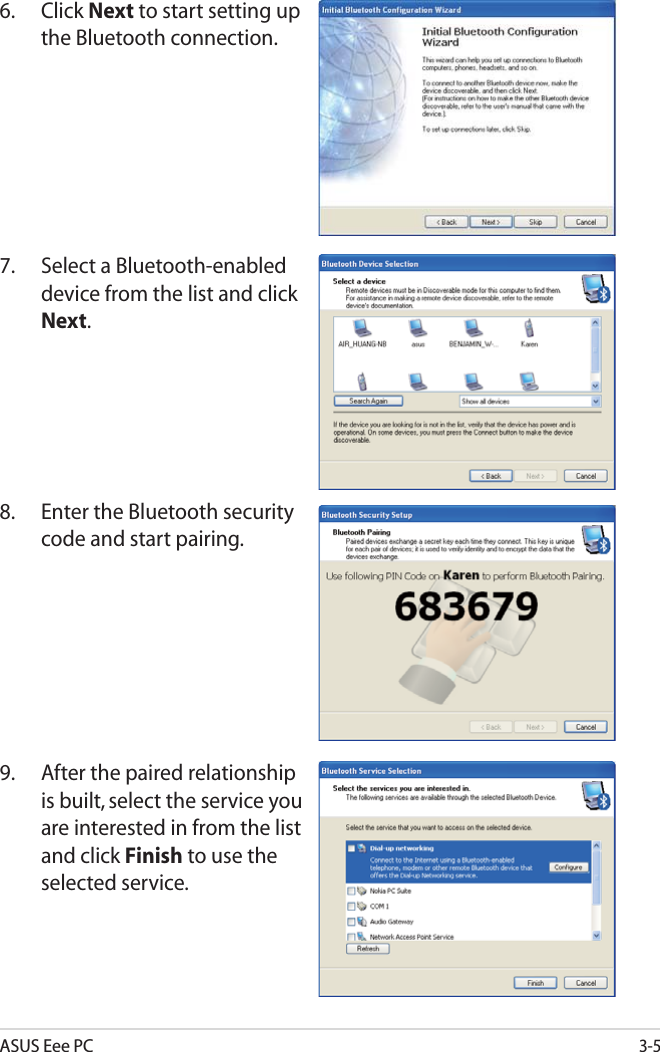

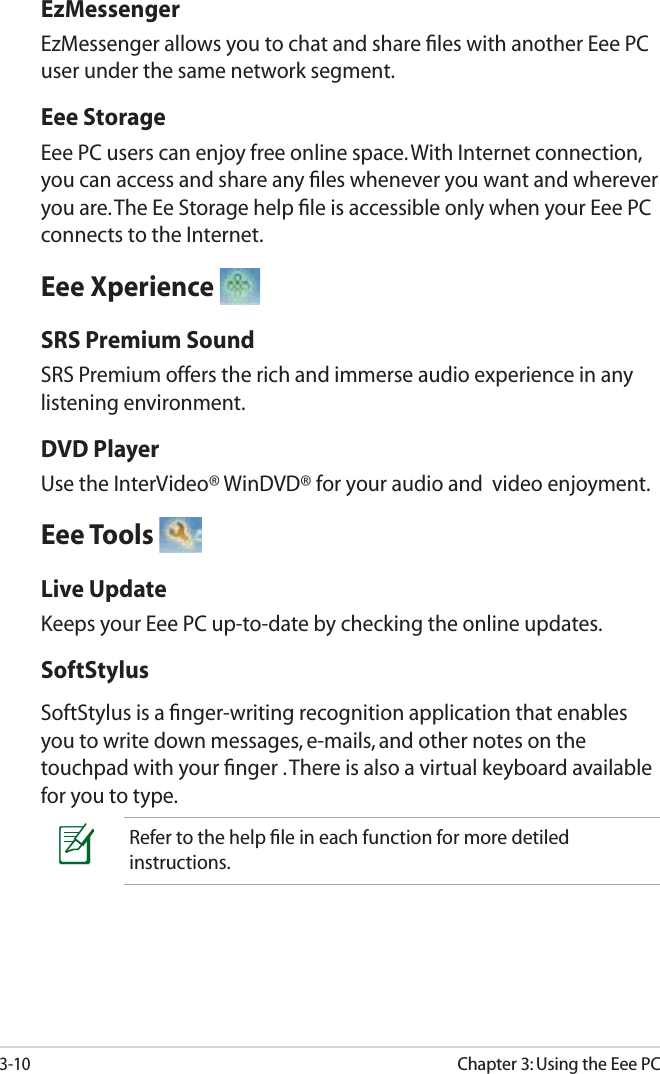
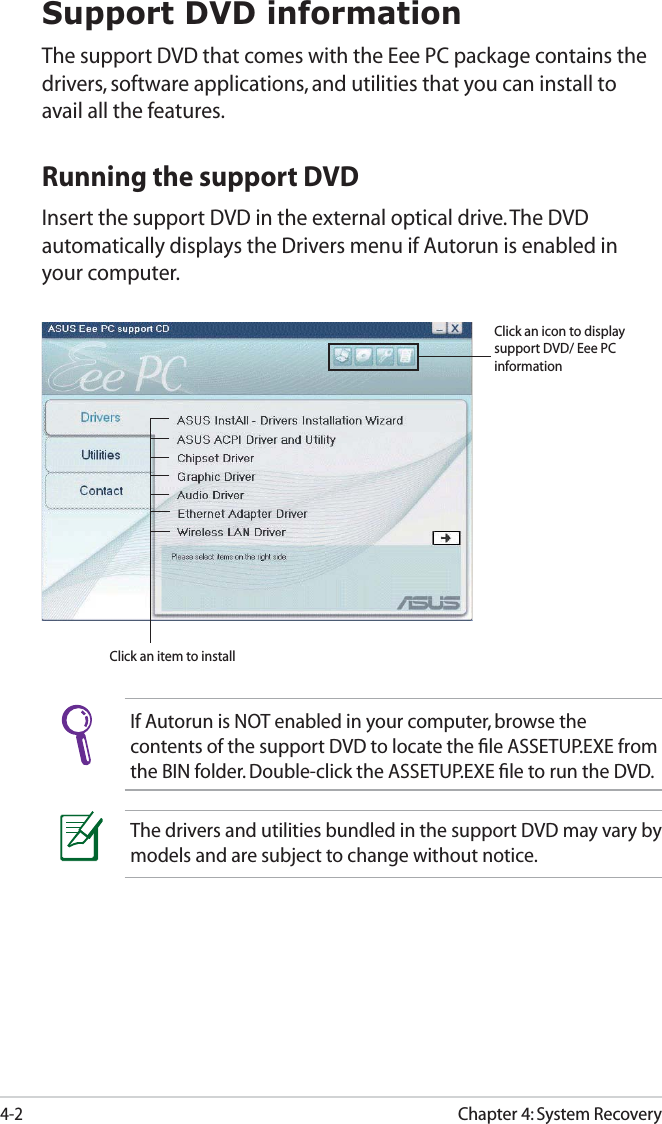
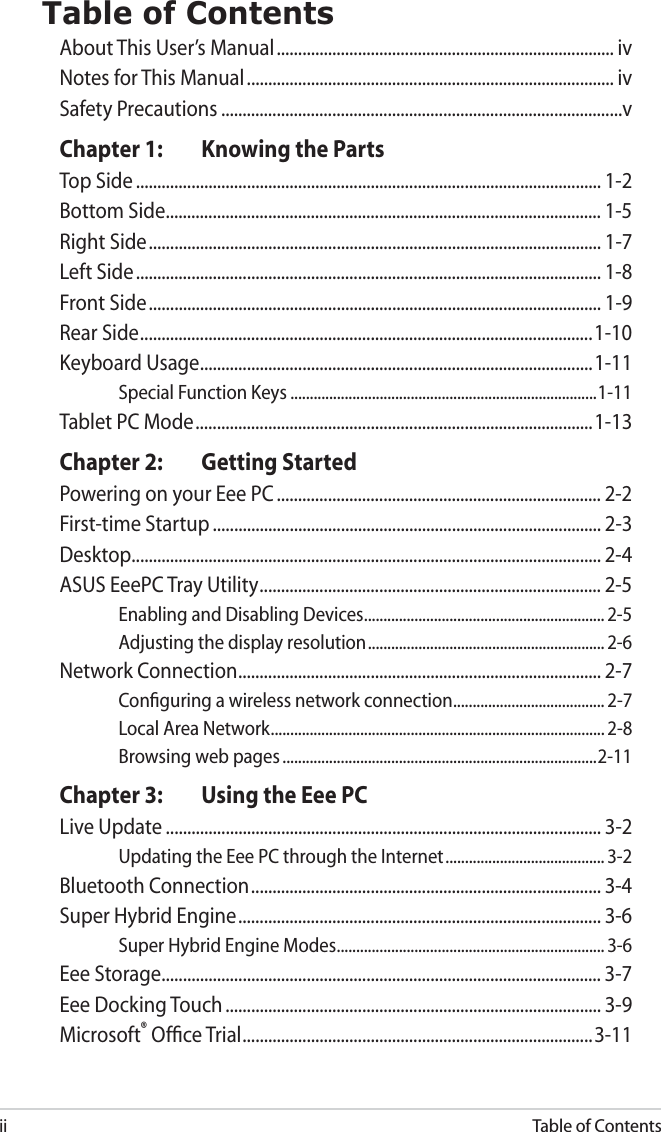
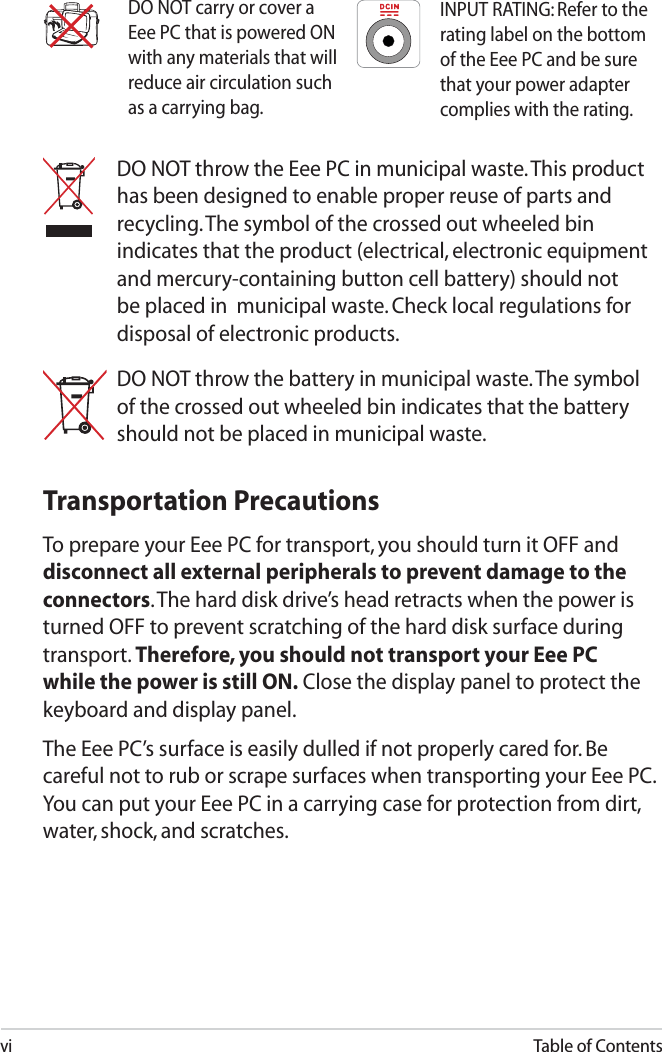
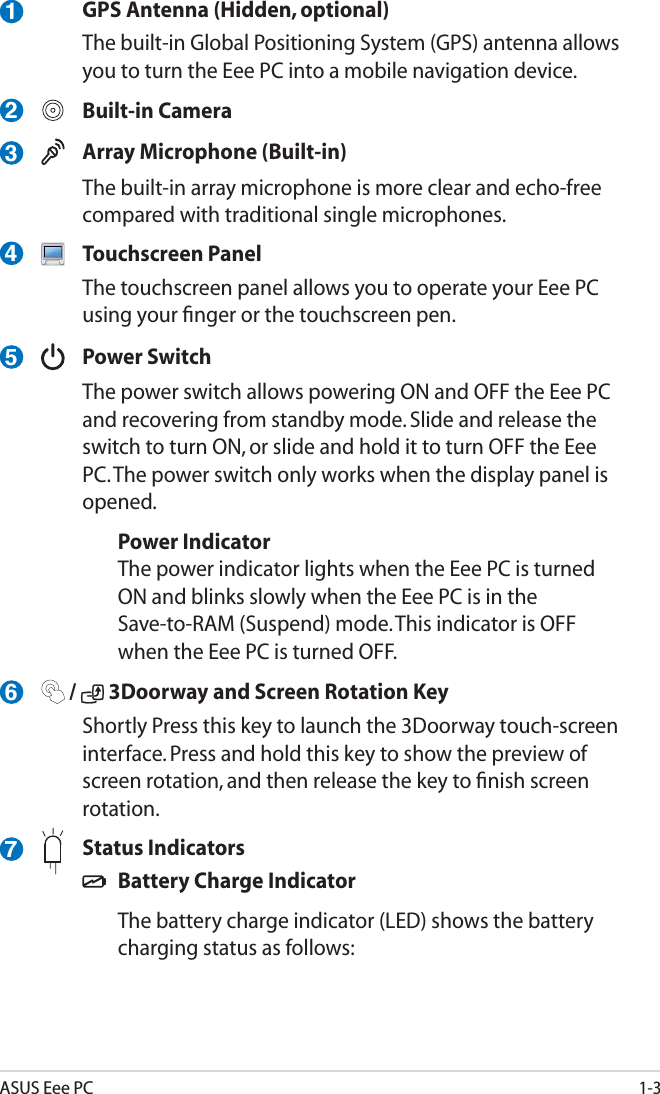
![Chapter 4: System Recovery4-6Boot BoosterThe Boot Booster item in BIOS setup helps shorten your Eee PC bootup time. However, you MUST disable this BIOS item before you change any Eee PC components or perform system recovery (from USB flash disk, external optical drive or hidden partition). Follow the instructions below to disable Boot Booster:1. Start the system and press <F2> on bootup to show the POST screen. Press <F2> again to enter the BIOS setup.v02.58 (C)Copyright 1985-2005, American Megatrends, Inc.BIOS SETUP UTILITYMain Advanced Security Boot Exit Boot Device Priority Boot Settings ConfigurationOnBoard LAN Boot ROM [Enabled]Boot Booster [Disabled]←→ Select Screen ↑↓ Select Item Enter Go to Sub Screen F1 General Help F10 Save and Exit ESC ExitSpecifies the Boot Device Priority sequence.A virtual floppy disk drive (Floppy Drive B: ) may appear when you set the CD-ROM drive as the first boot device.3. Press <F10> to save the configuration and restart Eee PC.If you fail to see the POST screen or enter the BIOS setup by doing the instruction above, restart the system and try pressing <F2> repeatedly on bootup.2. Set Boot Booster to [Disabled] Remember to enable Boot Booster after you complete hardware change or system recovery.](https://usermanual.wiki/ASUSTeK-Computer/T91NE785H/User-Guide-1089905-Page-52.png)
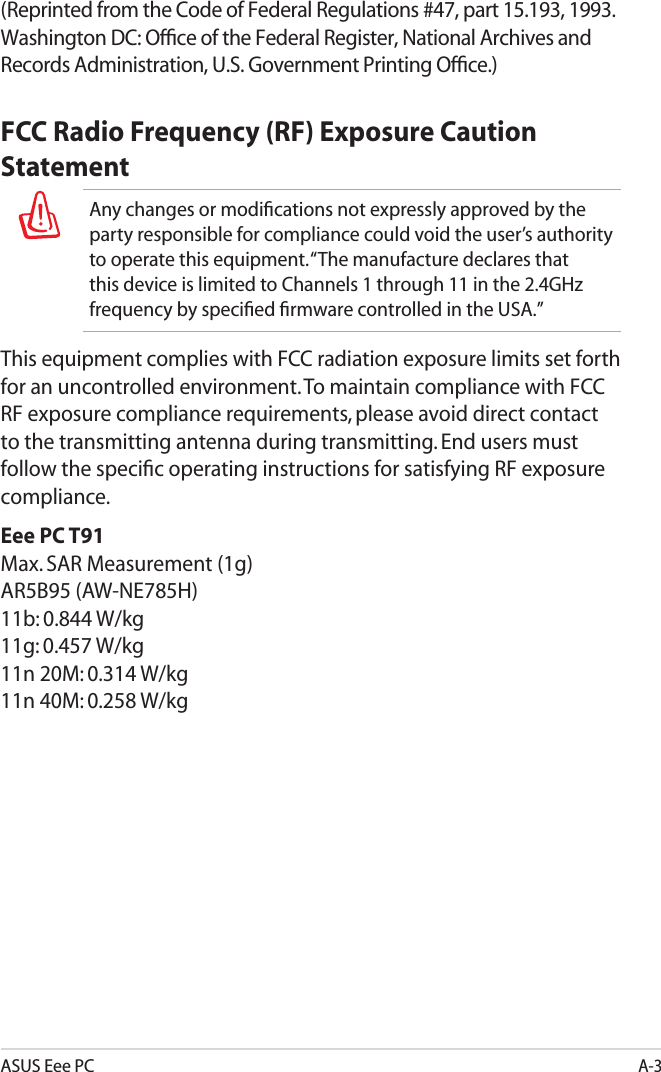
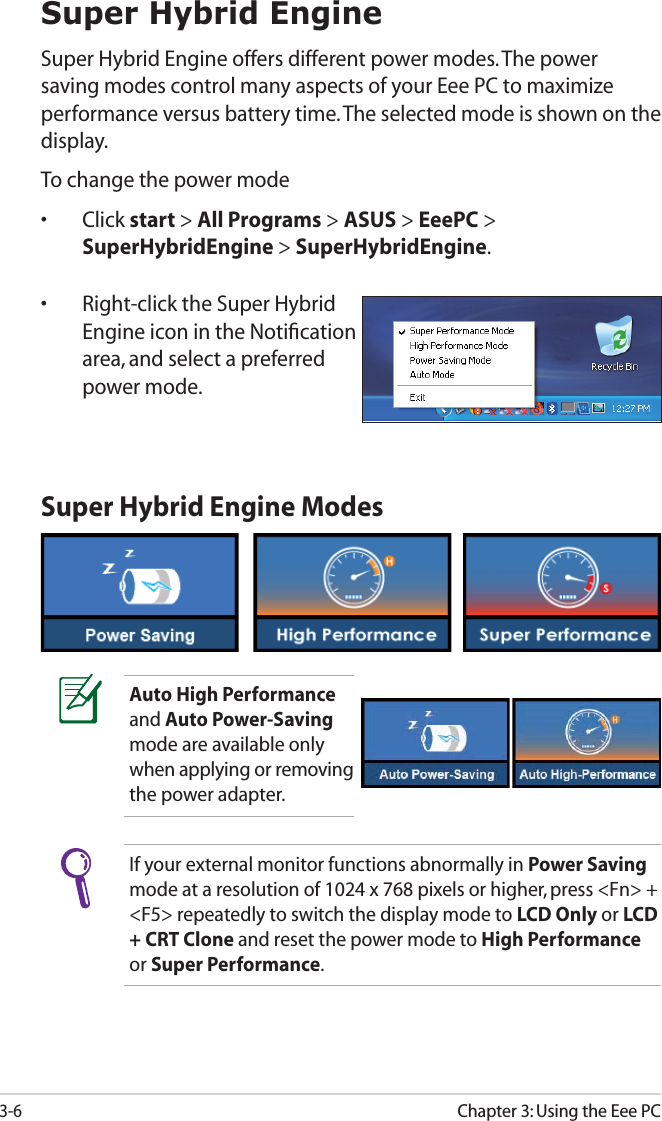
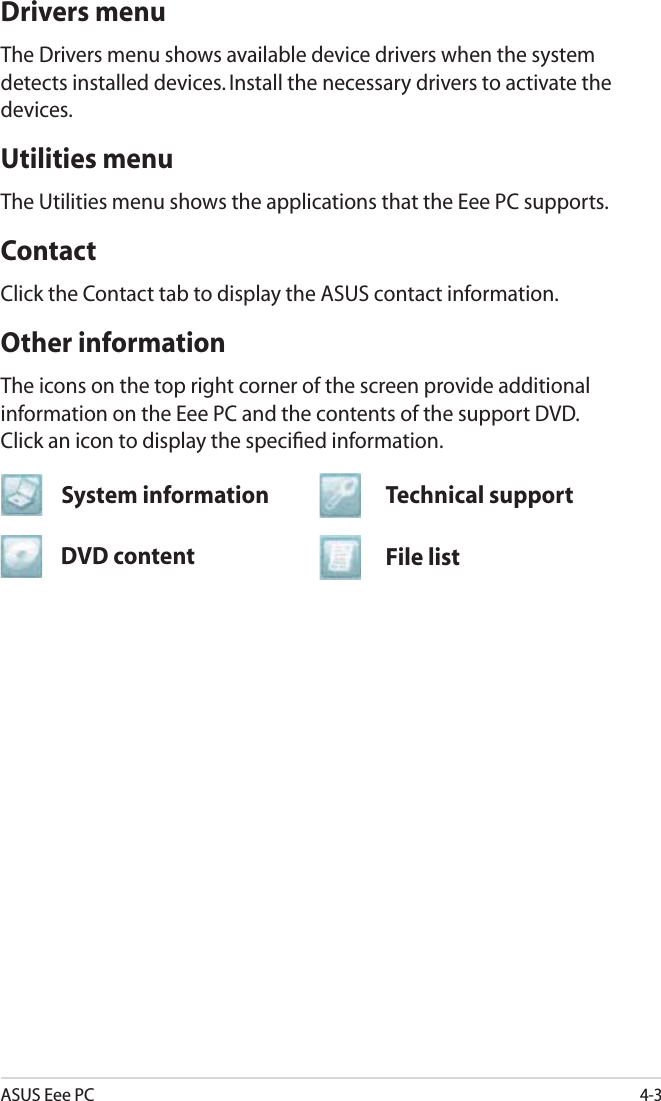
![AppendixA-4Declaration of Conformity (R&TTE directive 1999/5/EC)The following items were completed and are considered relevant and sufficient:• Essential requirements as in [Article 3]• Protection requirements for health and safety as in [Article 3.1a]• Testing for electric safety according to [EN 60950]• Protection requirements for electromagnetic compatibility in [Article 3.1b]• Testing for electromagnetic compatibility in [EN 301 489-1] & [EN 301]• Testing according to [489-17]• Effective use of the radio spectrum as in [Article 3.2]• Radio test suites according to [EN 300 328-2]CE Mark WarningThis is a Class B product, in a domestic environment, this product may cause radio interference, in which case the user may be required to take adequate measures.IC Radiation Exposure Statement for CanadaThis equipment complies with IC radiation exposure limits set forth for an uncontrolled environment. To maintain compliance with IC RF exposure compliance requirements, please avoid direct contact to the transmitting antenna during transmitting. End users must follow the specific operating instructions for satisfying RF exposure compliance.Operation is subject to the following two conditions: • This device may not cause interference and](https://usermanual.wiki/ASUSTeK-Computer/T91NE785H/User-Guide-1089905-Page-56.png)
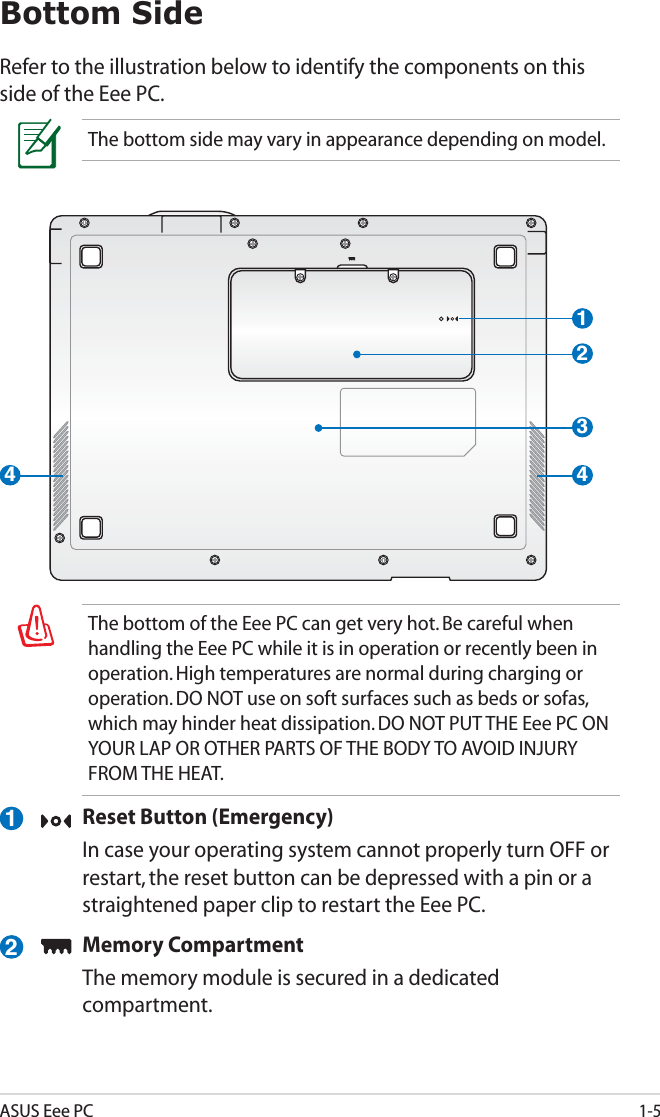
![ASUS Eee PCA-5• This device must accept any interference, including interference that may cause undesired operation of the device.To prevent radio interference to the licensed service (i.e. co-channel Mobile Satellite systems) this device is intended to be operated indoors and away from windows to provide maximum shielding. Equipment (or its transmit antenna) that is installed outdoors is subject to licensing. Eee PC T91 Max. SAR Measurement (1g) AR5B95 (AW-NE785H) 11b: 0.844 W/kg 11g: 0.457 W/kg 11n 20M: 0.314 W/kg 11n 40M: 0.258 W/kgThis device and its antenna(s) must not be co-located or operating in conjunction with any other antenna or transmitter.Country Code selection feature to be disabled for products marketed to the US/CANADA.This Class [B] digital apparatus complies with Canadian ICES-003. Cet appareil numérique de la classe [B] est conforme à la norme NMB-003 du Canada](https://usermanual.wiki/ASUSTeK-Computer/T91NE785H/User-Guide-1089905-Page-57.png)