ASUSTeK Computer USBN11 Wireless LAN USB Adapter User Manual 20080303 XN 791 UsserManual
ASUSTeK Computer Inc Wireless LAN USB Adapter 20080303 XN 791 UsserManual
UserManual.wiki
>
ASUSTeK Computer
>
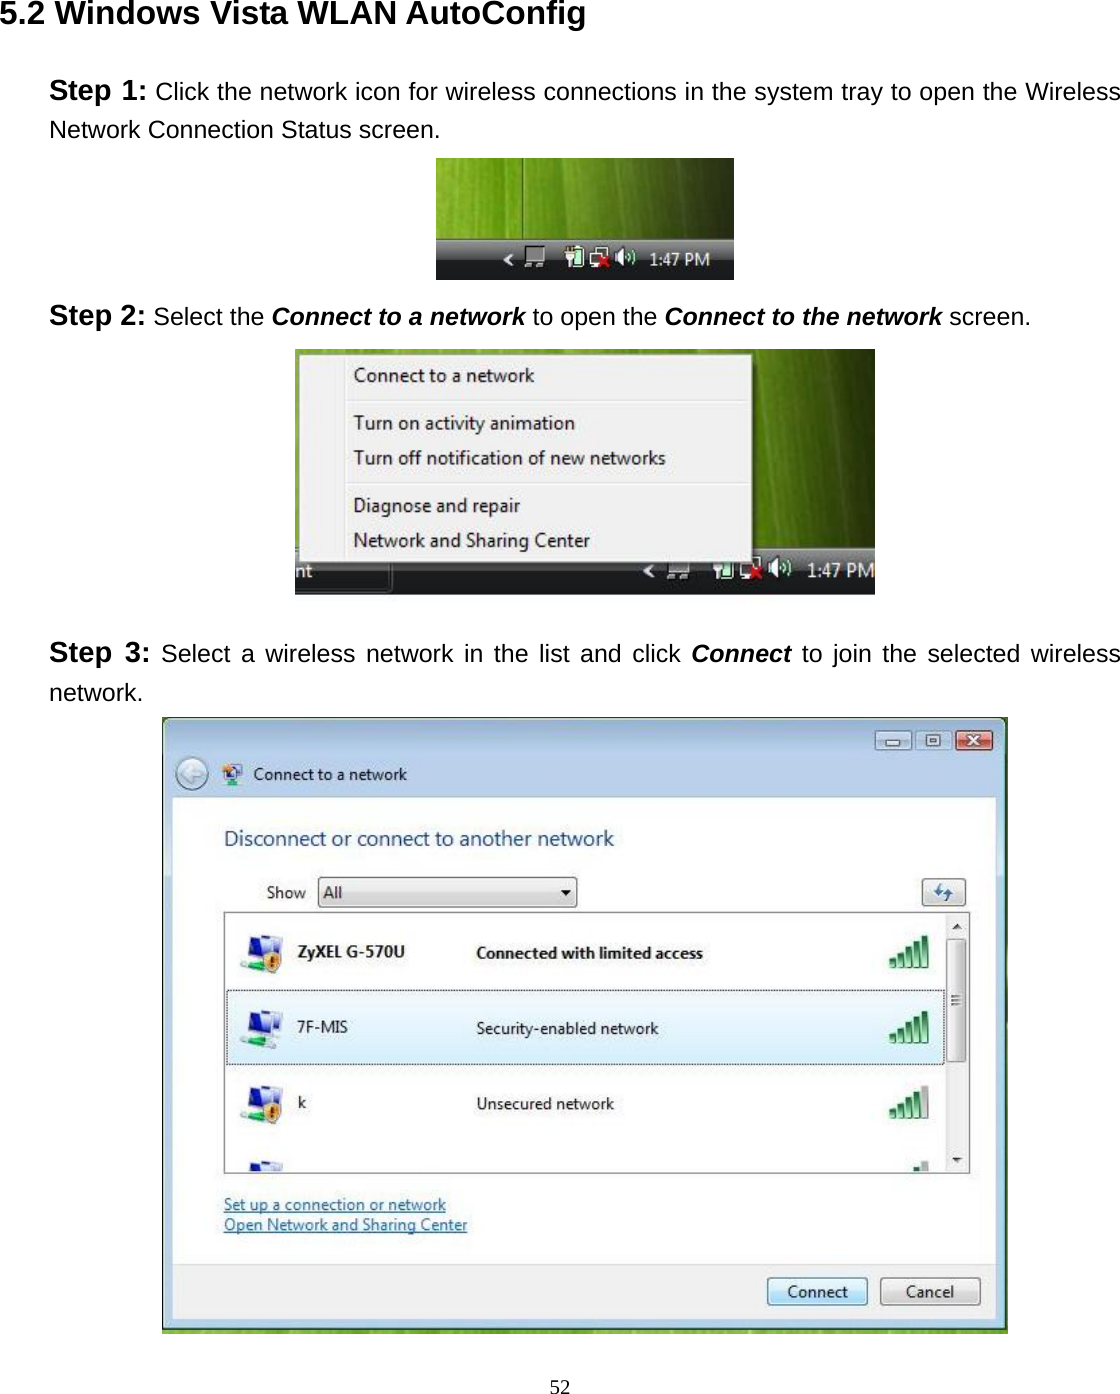
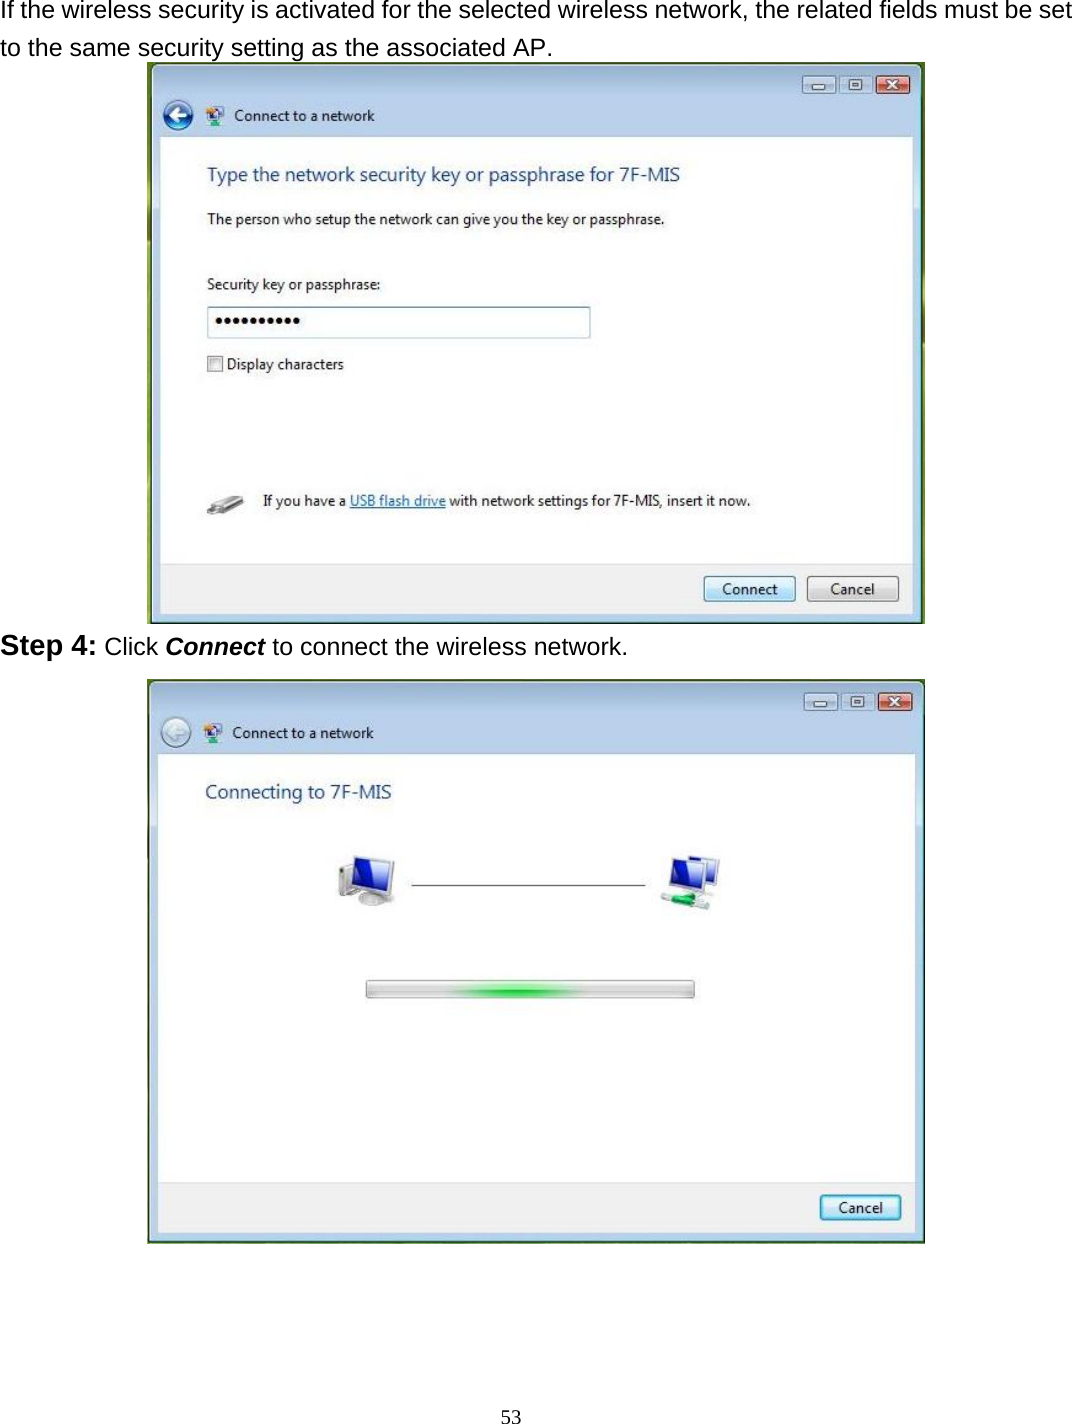
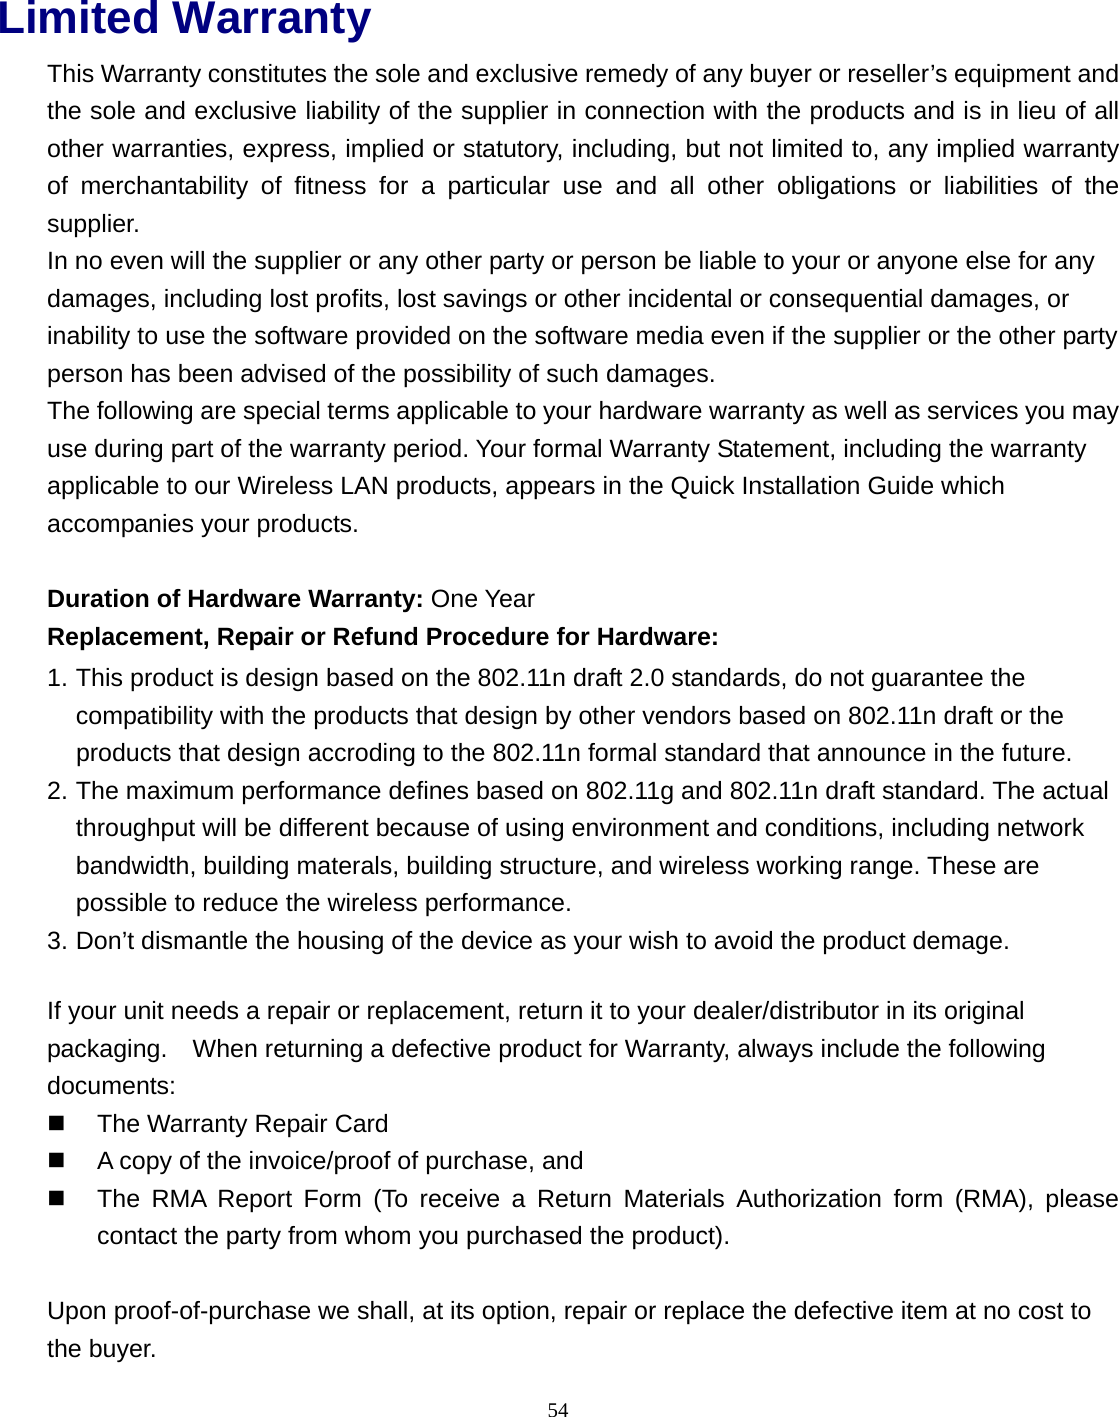
USBN11 User Manual
User Manual
Navigation menu
Upload a User Manual
Namespaces
Wiki Guide
HTML
PDF
Info
Views
User Manual
Discussion / Help
Navigation