ASUSTeK Computer WL140 USB WLAN SpaceLink Client User Manual USB SpaceLink Client p65
ASUSTeK Computer Inc USB WLAN SpaceLink Client USB SpaceLink Client p65
UserManual.wiki
>
ASUSTeK Computer
>
WL140 User Manual
>
Users Manual
Contents
1.
Users Manual
2.
Compliance Sheet
Users Manual
Navigation menu
Upload a User Manual
Namespaces
Wiki Guide
HTML
PDF
Info
Views
User Manual
Discussion / Help
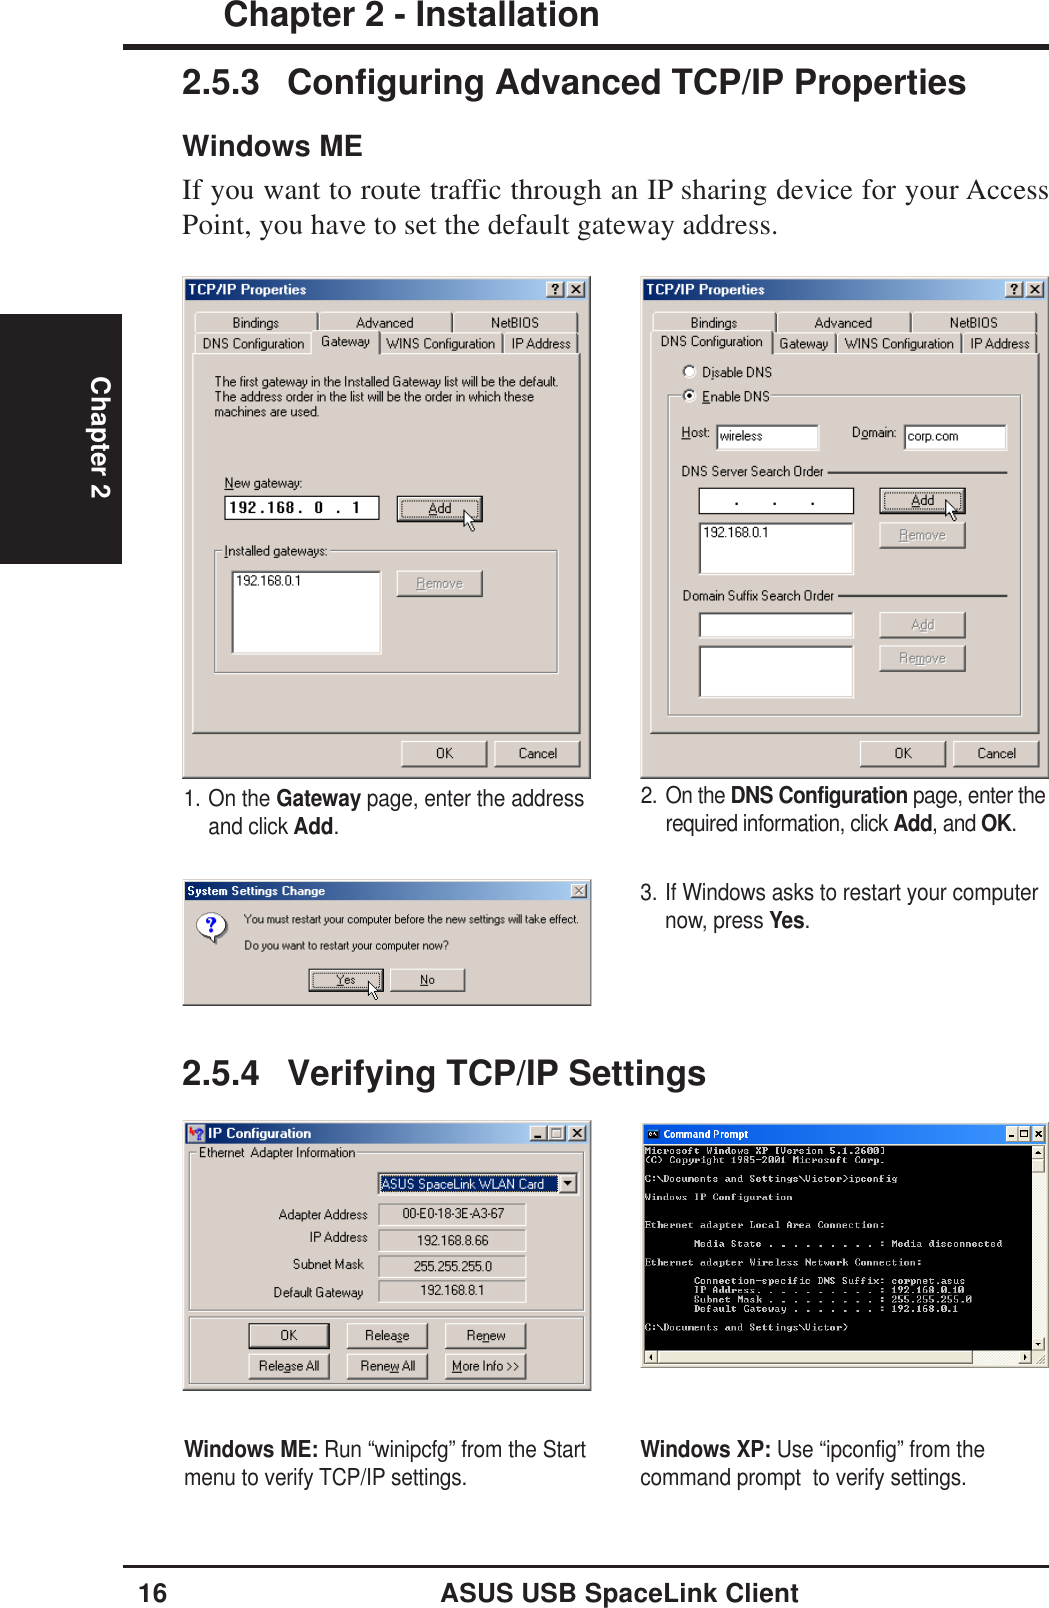
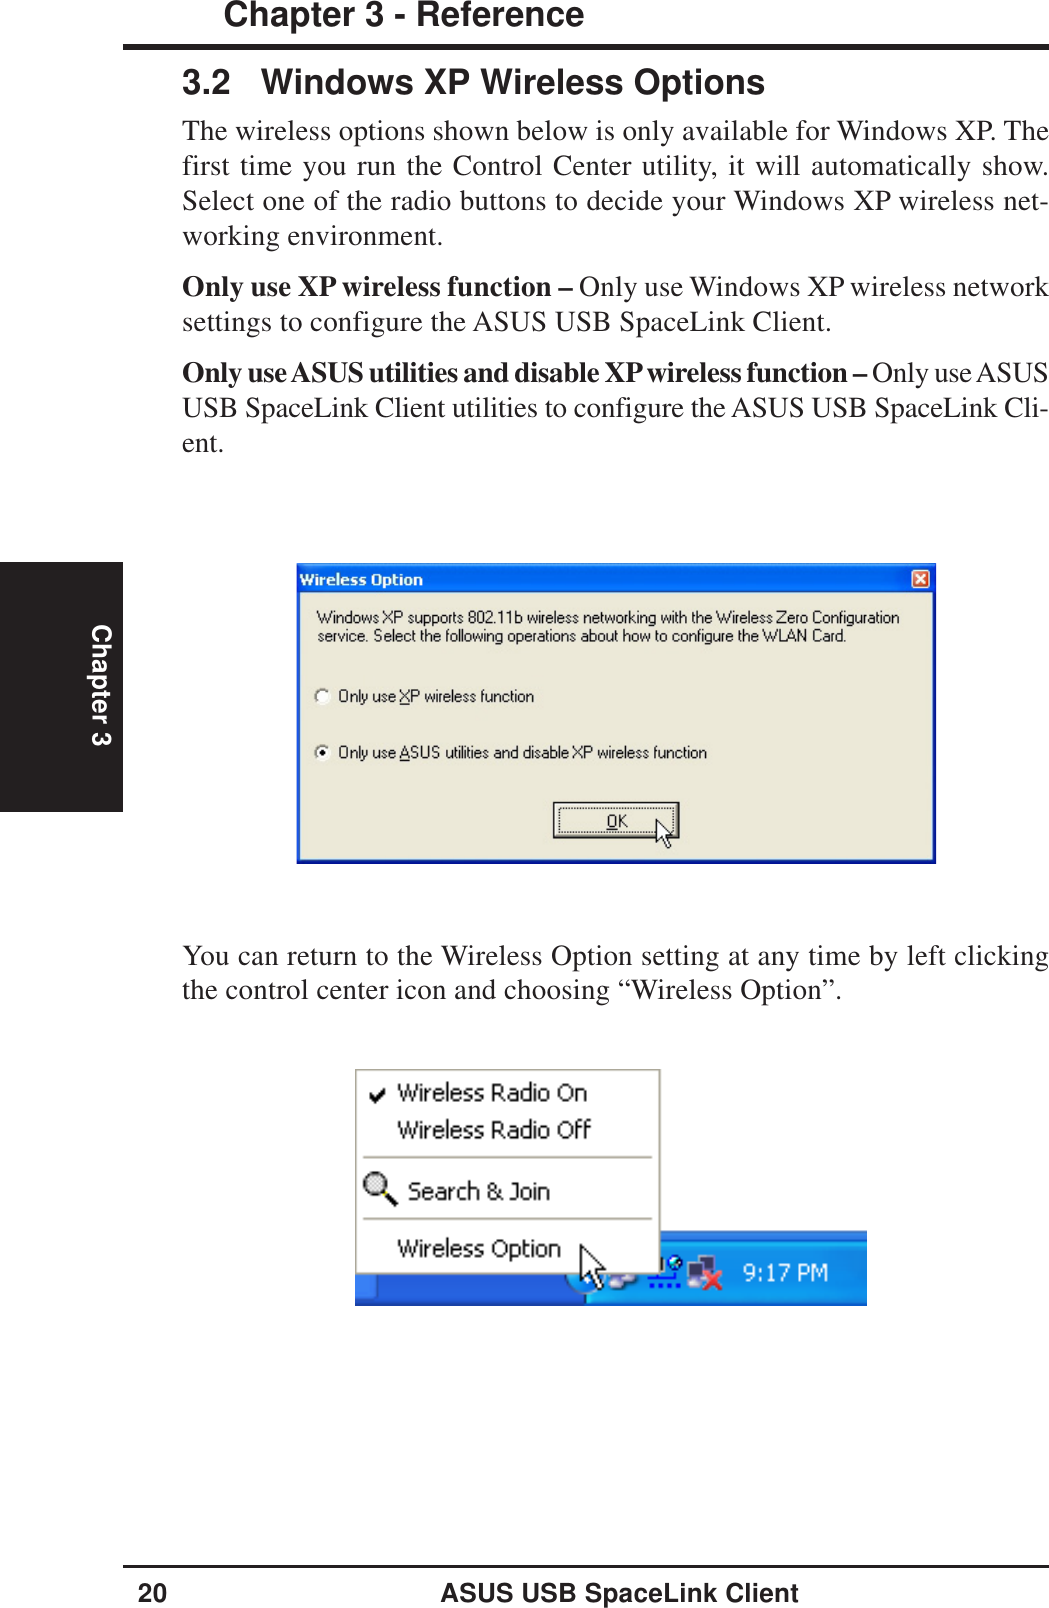
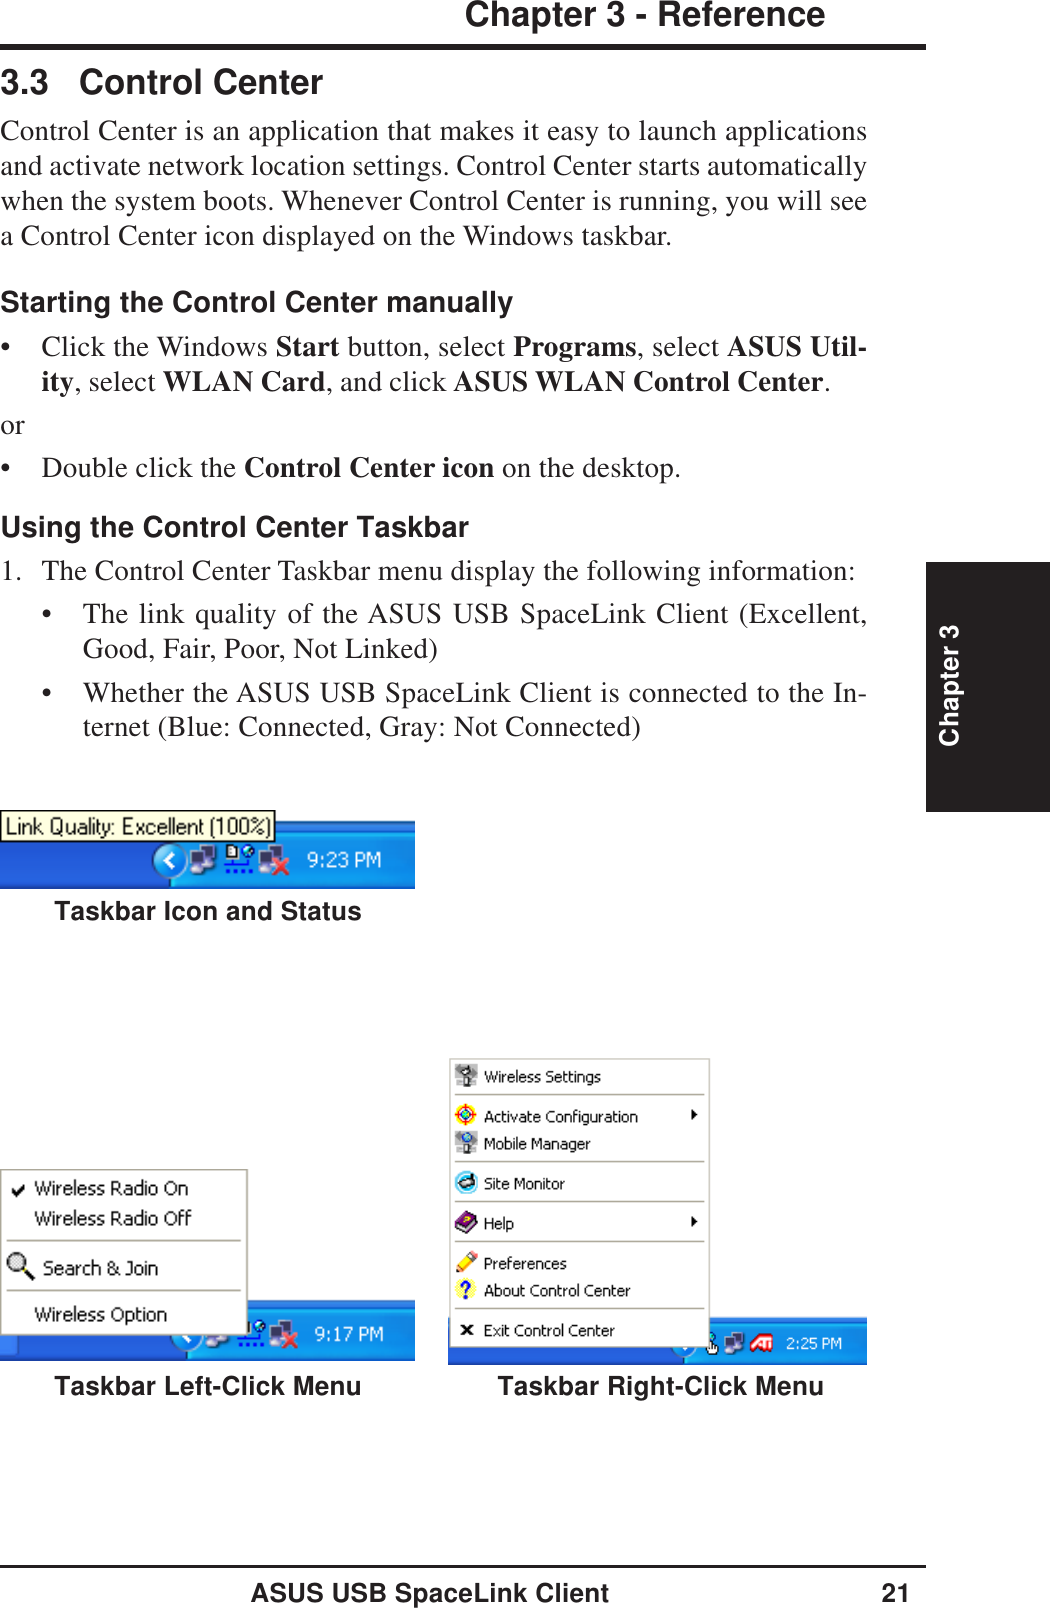
Navigation
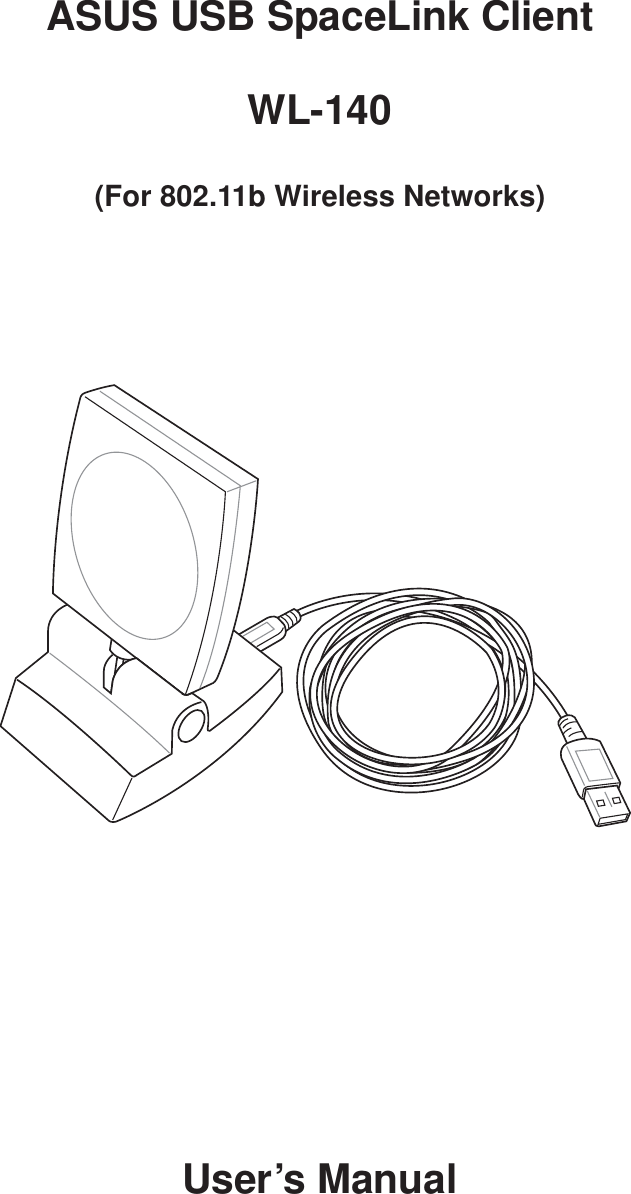
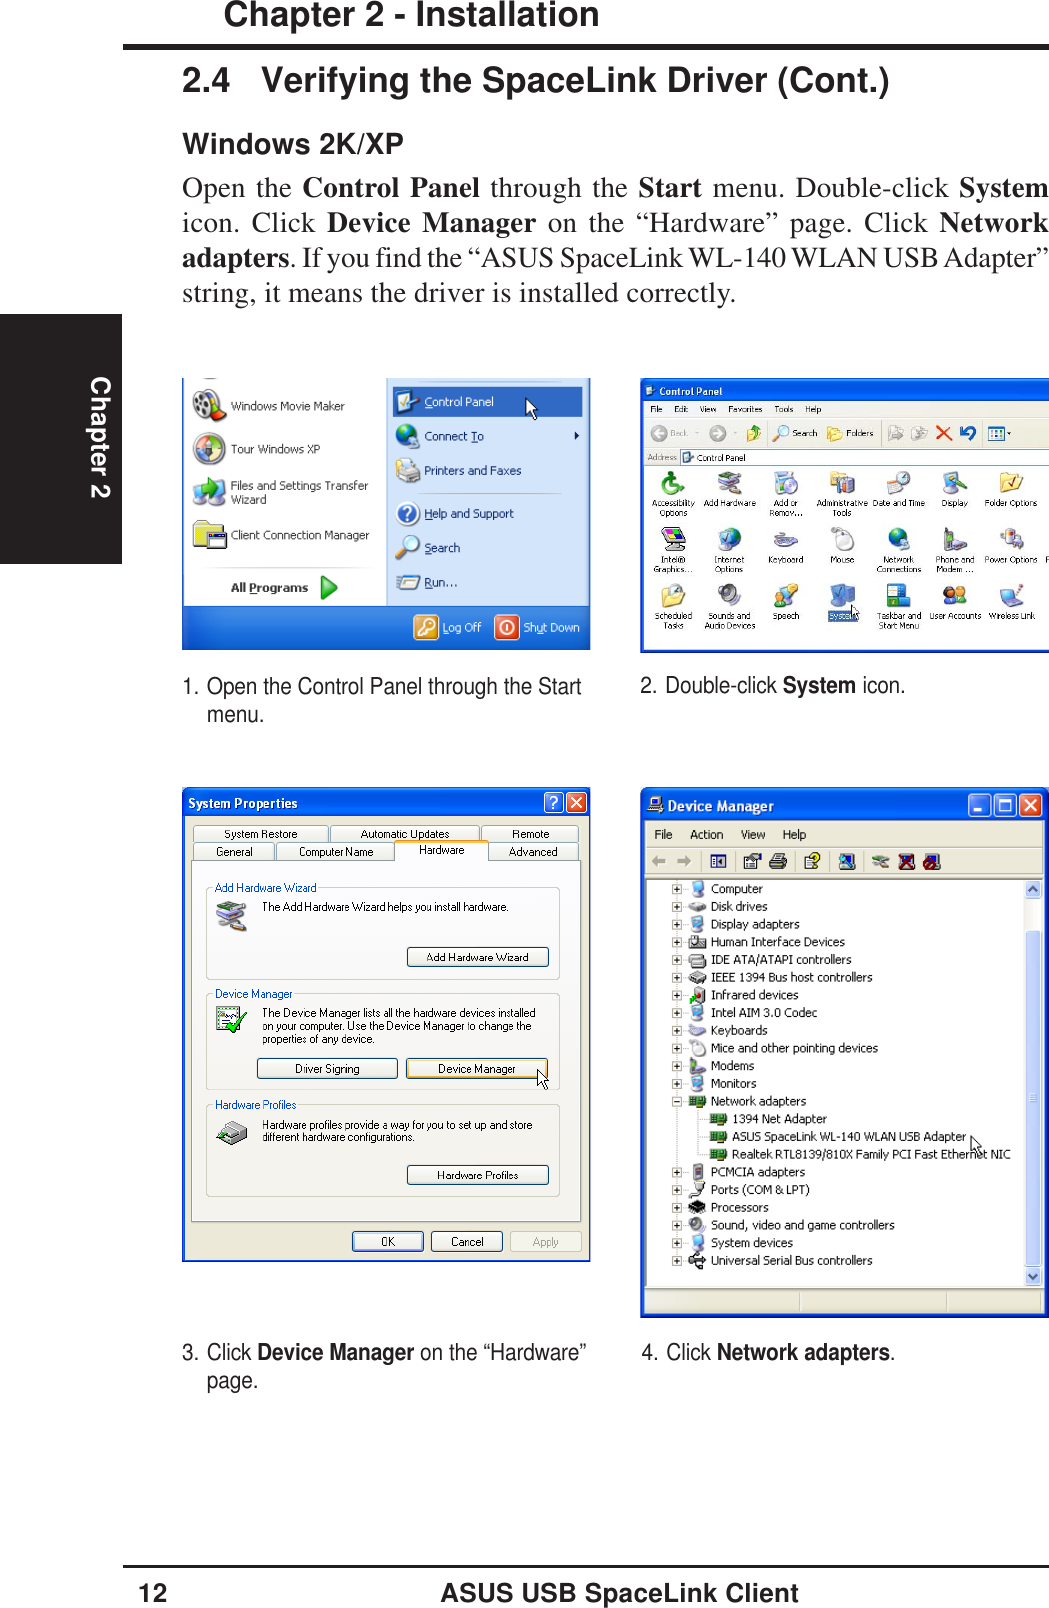
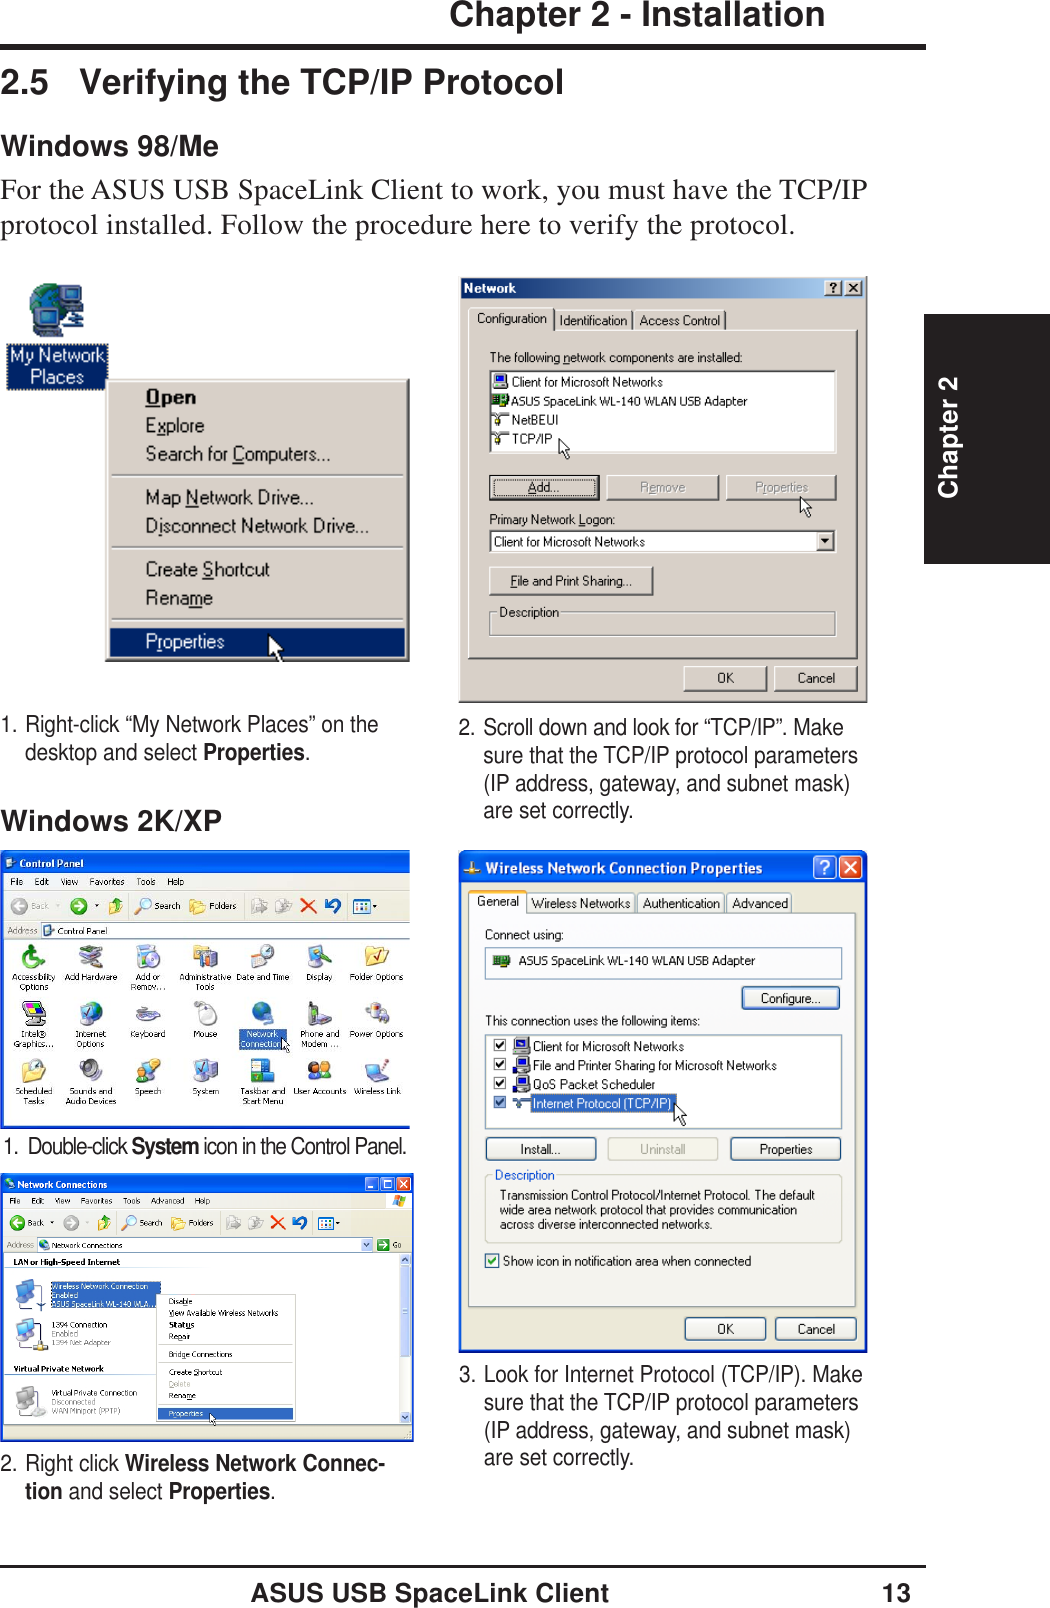
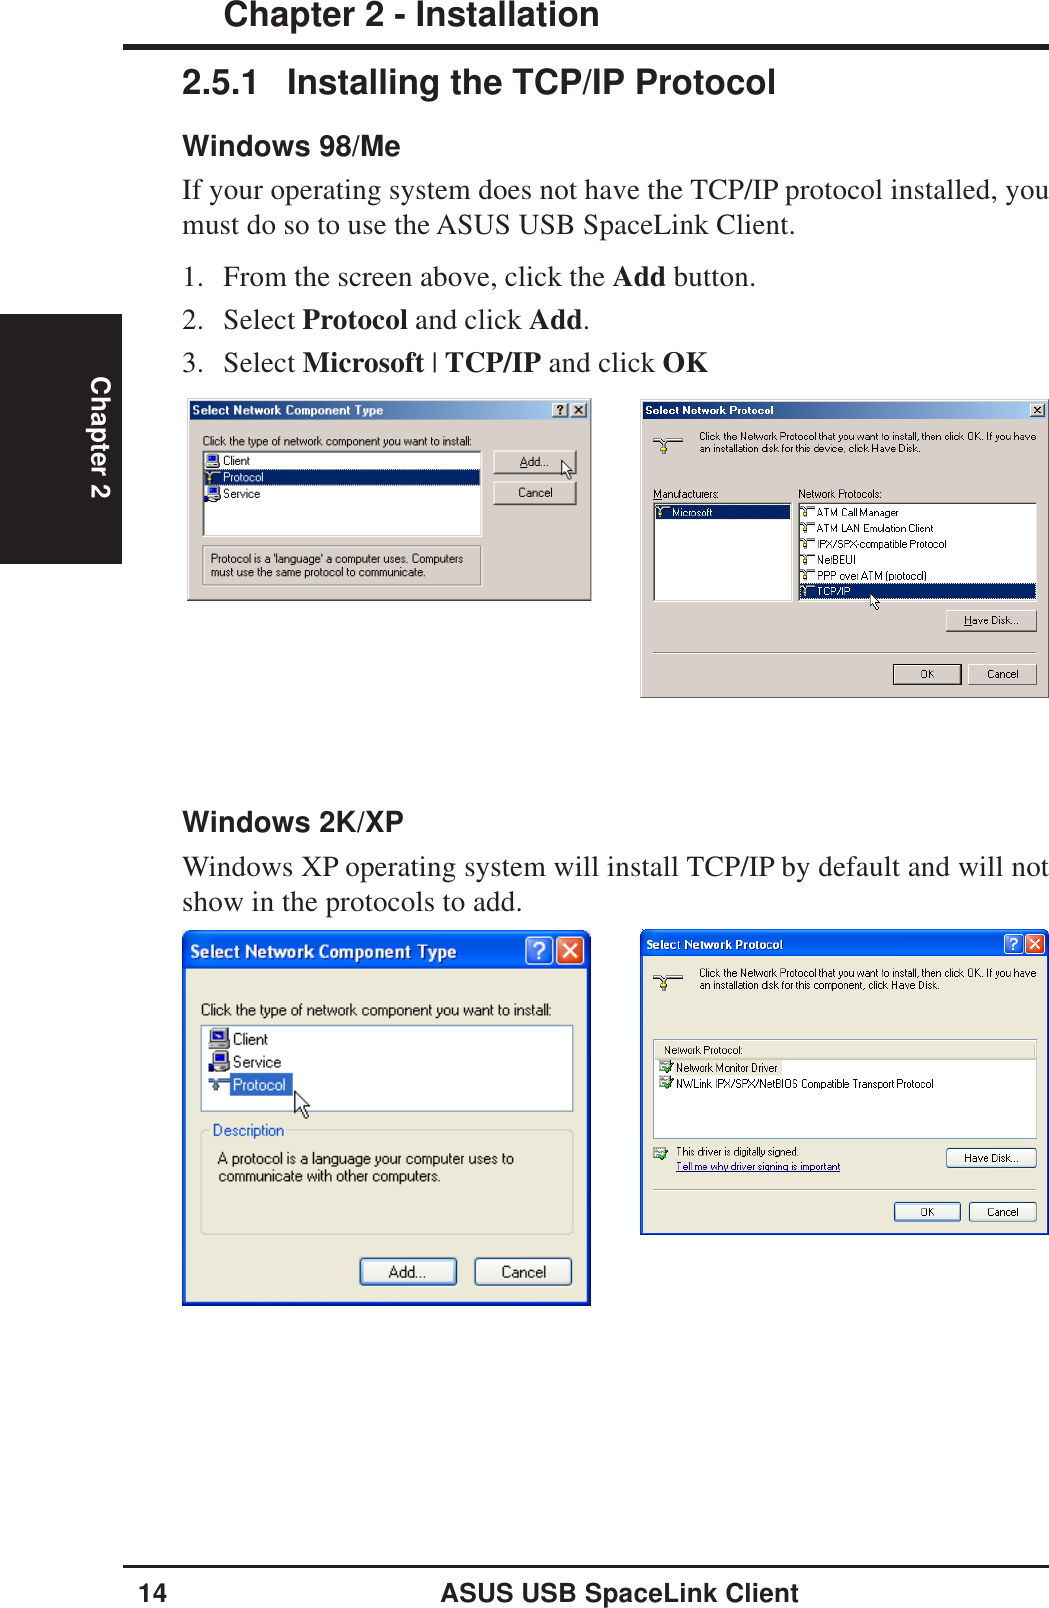
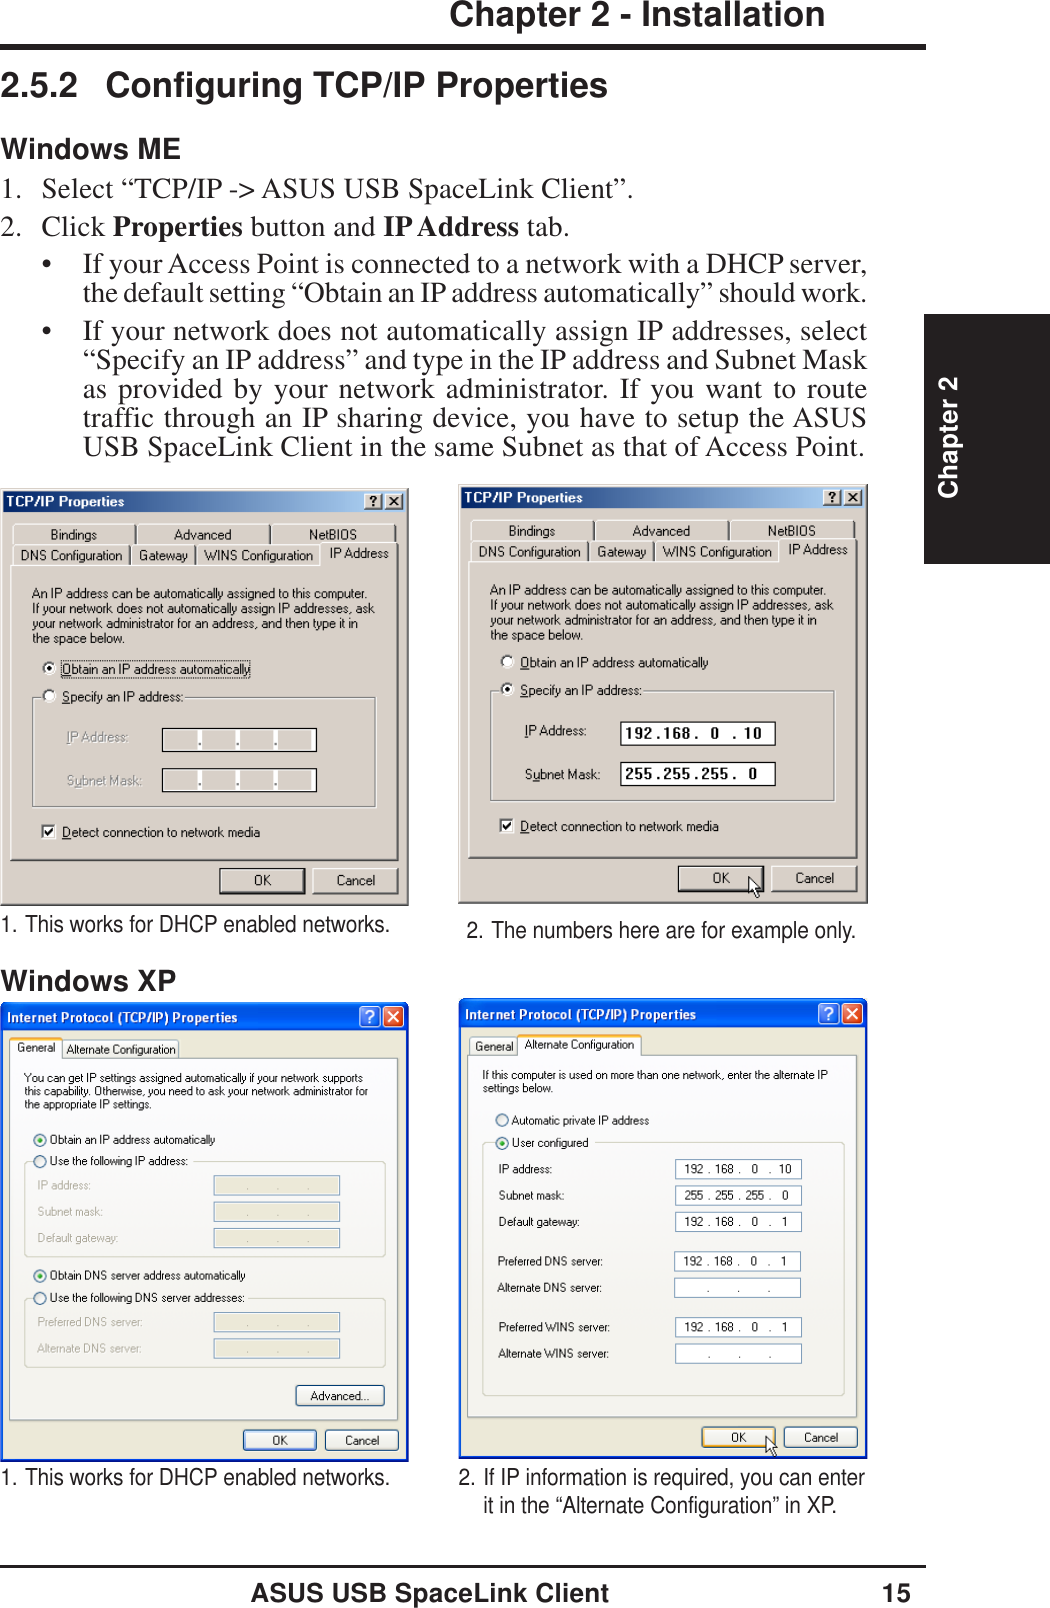
![10 ASUS USB SpaceLink ClientChapter 2 - InstallationChapter 22.3 Installing the SpaceLink Driver1. Turn ON your computer and enter Windows.2. Connect the smaller end of the USB cable into the back of the ASUSUSB SpaceLink Client.3. Insert the larger end of the USB cable into your computer’s USB port.4. Windows will automatically detect the ASUS USB SpaceLink Clientonce it is inserted. When the “Add New Hardware Wizard” dialog ap-pears, click Next to begin driver installation.5. Select “Search for the best driver for your device (Recommended)”.Click Next to continue.6. Specify the location with “[CD]\Card\Driver\USB” and click Next.Where [CD] represents the drive letter of your CD-ROM drive.7. Wait while Windows searches for the device driver for the ASUS USBSpaceLink Client. Windows will display the search result: “ASUSSpaceLink WL-140 WLAN USB Adapter”. Click Next.8. During the installation, Windows may prompt you to insert the “Win-dows Operating System CD” which contains some driver files. Insertyour Windows setup disc and type the path if necessary and click Yes.Windows will start copying the necessary files.9. When the installation procedure is completed, click Finish.10. Restart your Windows to make the driver take effect.Smaller End(Rear View)Larger EndSmaller End(Side View)](https://usermanual.wiki/ASUSTeK-Computer/WL140.Users-Manual/User-Guide-307126-Page-10.png)