ASUSTeK Computer WL167GV2 ASUS USB WLAN ADAPTER User Manual WL167g 1 Front P65
ASUSTeK Computer Inc ASUS USB WLAN ADAPTER WL167g 1 Front P65
UserManual.wiki
>
ASUSTeK Computer
>
WL167GV2 User Manual
users manual
Navigation menu
Upload a User Manual
Namespaces
Wiki Guide
HTML
PDF
Info
Views
User Manual
Discussion / Help
Navigation

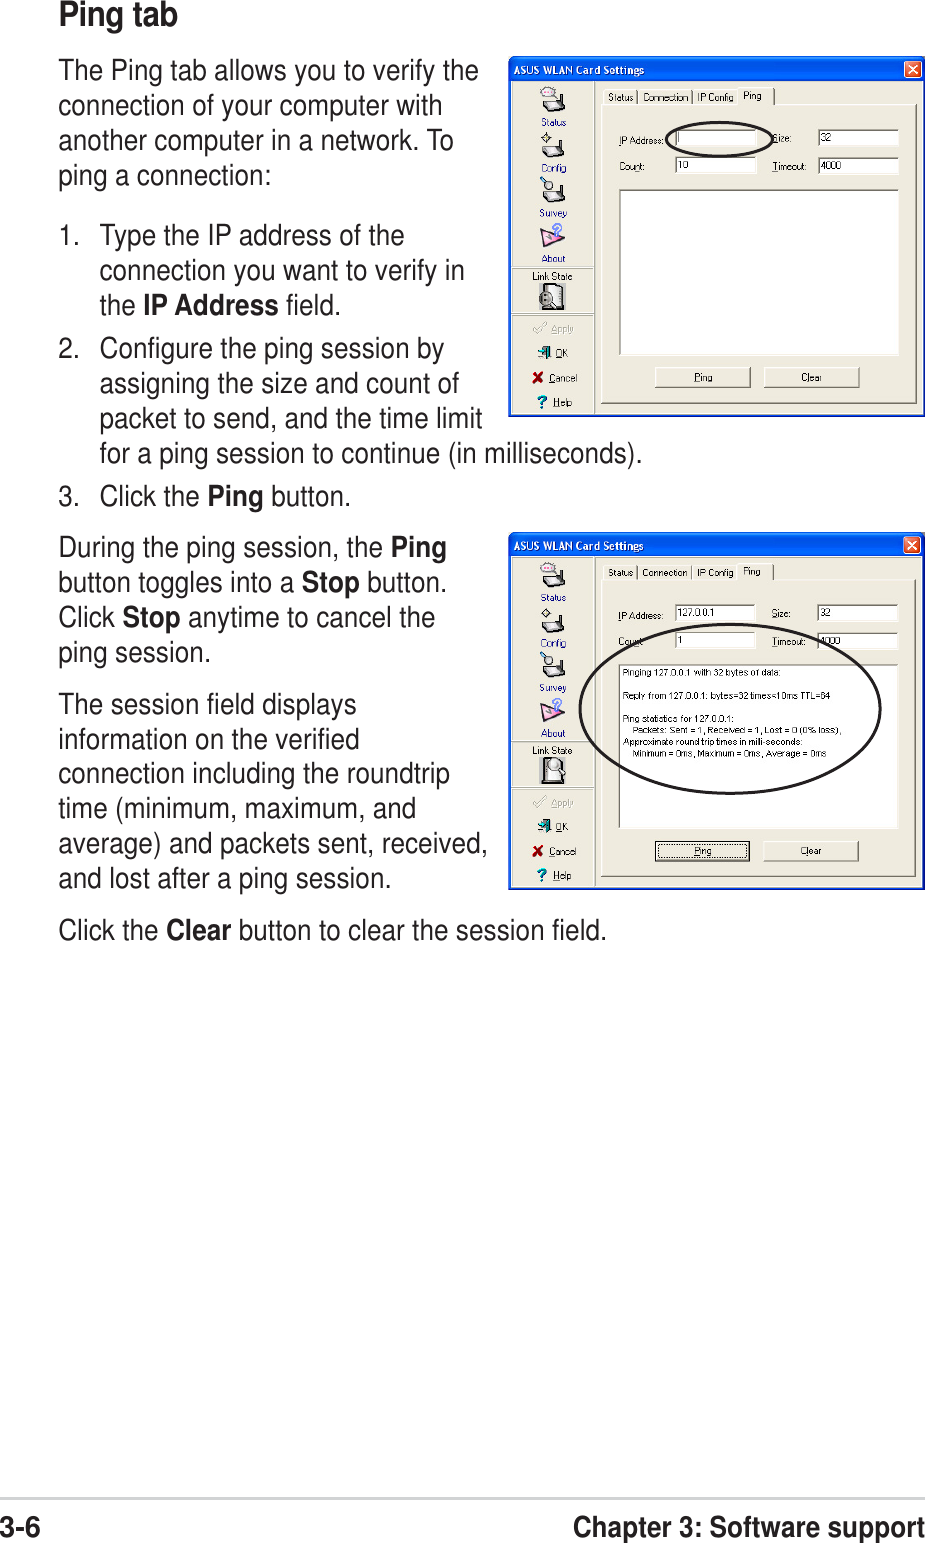
![viSafety statementsRegulatory Information/DisclaimersInstallation and use of this Wireless LAN device must be in strict accordancewith the instructions included in the user documentation provided with theproduct. Any changes or modifications (including the antennas) made to thisdevice that are not expressly approved by the manufacturer may void theuser’s authority to operate the equipment. The manufacturer is notresponsible for any radio or television interference caused by unauthorizedmodification of this device, or the substitution of the connecting cables andequipment other than manufacturer specified. It is the responsibility of theuser to correct any interference caused by such unauthorized modification,substitution or attachment. Manufacturer and its authorized resellers ordistributors will assume no liability for any damage or violation of governmentregulations arising from failing to comply with these guidelines.CAUTION! To maintain compliance with FCC’s RF exposureguidelines, this equipment should be installed and operated withminimum distance [20cm] between the radiator and your body. Use onthe supplied antenna. Unauthorized antenna, modification, orattachments could damage the transmitter and may violate FCCregulations.Safety InformationIn order to maintain compliance with the FCC RF exposure guidelines, thisequipment should be installed and operated with minimum distance [20cm]between the radiator and your body. Use only with supplied antenna.Unauthorized antenna, modification, or attachments could damage thetransmitter and may violate FCC regulations.CAUTION! Any changes or modifications not expressly approved inthis manual could void your authorization to use this device.MPE StatementYour device contains a low power transmitter. When device is transmitted itsends out Radio Frequency (RF) signal.](https://usermanual.wiki/ASUSTeK-Computer/WL167GV2/User-Guide-697116-Page-6.png)
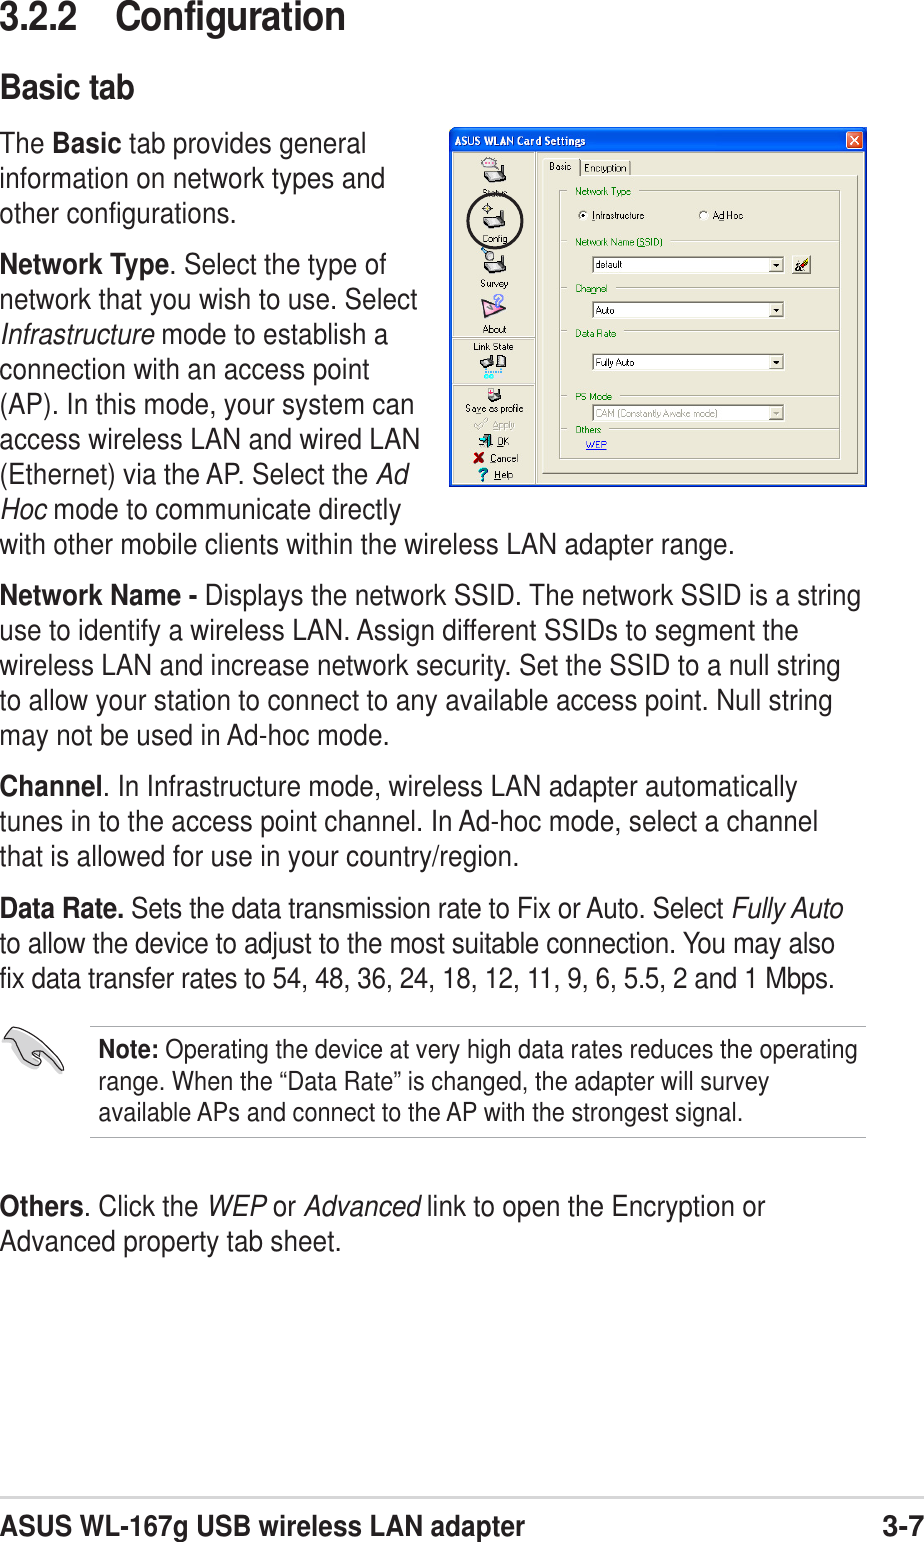
![viiFCC Radio Frequency ExposureThis Wireless LAN radio device has been evaluated under FCC BulletinOET 65C and found compliant to the requirements as set forth in CFR 47Sections 2.1091, 2.1093, and 15.247(b)(4) addressing RF Exposure fromradio frequency devices. The radiation output power of this Wireless LANdevice is far below the FCC radio frequency exposure limits. Nevertheless,this device shall be used in such a manner that the potential for humancontact during normal operation – as a mobile or portable device but use ina body-worn way is strictly prohibit. When using this device, a certainseparation distance between antenna and nearby persons has to be kept toensure RF exposure compliance. In order to comply with the RF exposurelimits established in the ANSI C95.1 standards, the distance between theantennas and the user should not be less than [20cm].RF ExposureThe antenna(s) used for this transmitter must not be co-located or operatingin conjunction with any other antenna or transmitter.Safety statements](https://usermanual.wiki/ASUSTeK-Computer/WL167GV2/User-Guide-697116-Page-7.png)