ATEN Technology IOGEAR GWA504 WIRELESS-G BROADBAND ROUTER User Manual GWA504 manual p65
ATEN Technology, Inc., dba IOGEAR WIRELESS-G BROADBAND ROUTER GWA504 manual p65
Contents
- 1. USER MANUAL 1
- 2. USER MANUAL 2
- 3. USER MNAUAL 3
- 4. USER MNAUAL 4
USER MANUAL 2

9. You will now see the Firewall settings. IOGEAR®
offers you an easy set-up package to configure a
Firewall. Please note high Firewall protection will
make your network securer, but may cause
wireless gateway’s performance to be lower. Click
Next when you are done.
18
Quick Installation
10. This is the summary page showing all
configurations you’ve set. Click Next when you
are done.
Quick Installation
19
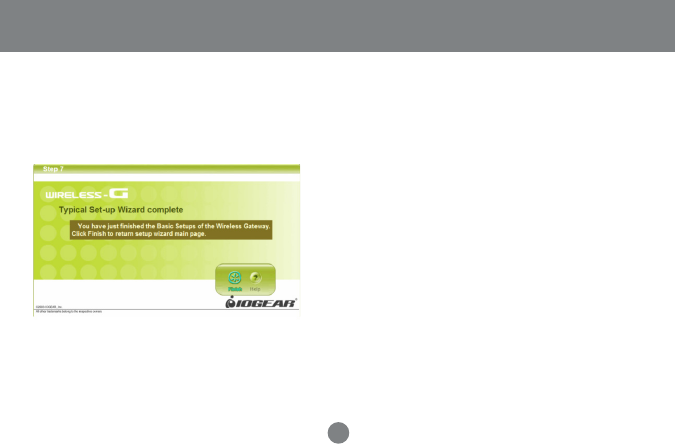
11. Click Finish when you are done. When you have
finished the configuration, you will be brought to
the main window.
Quick Installation
20
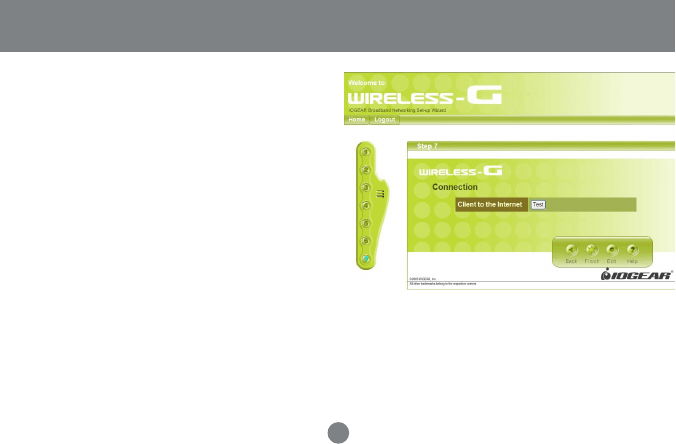
12. At this point your GWA504 router should be
working successfully and the router should be
giving access to the Internet to all the client
computers. To check the status of the router you
can click the Test button to see whether your
Internet connection is functioning.
Please make sure your WAN port has been
connected (to a xDSL, Cable modem, or Ethernet).
Click Finish when you are done. When you have
finished the configuration, you will be brought to
the main window.
Note: The next steps show you Advanced Features
to enhance the configuration of your IOGEAR
GWA504 router
21
Advanced Setup
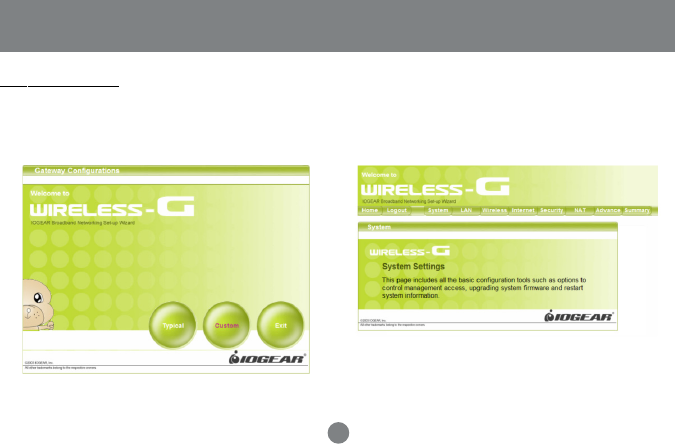
Step 1.
After you logged in as shown in Quick Installation
step 3, click on the Custom button.
Step 2.
The Customized Configuration menu is separated
into eight categories.
Advanced Setup

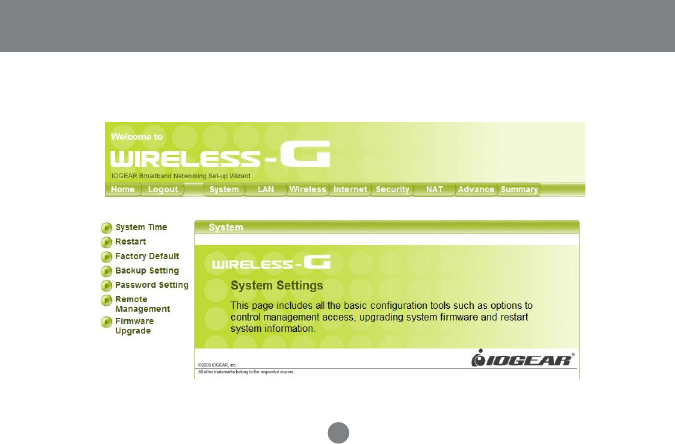
System
It includes all the basic configuration tools, such
as options to control management access,
upgrading system firmware and restart system.
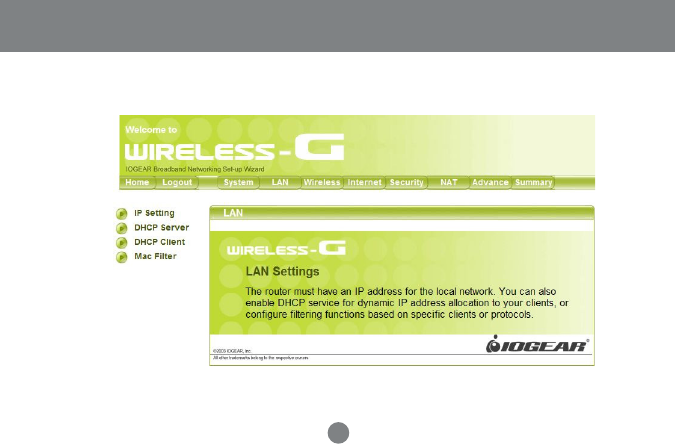
LAN
The router must have an IP address for the local
network. You can also enable DHCP service for
dynamic IP address allocation to your clients, or
configure filtering functions based on specific
clients or protocols.
Wireless
In this section, you can configure all wireless
related settings for your wireless access point.
Internet
In Internet settings, you can configure the way
your router connects to you ISP.
Security
Your Wireless-G Broadband Router features
powerful and flexible Firewall protection to keep your
network secure. You can configure the strength of
Firewall protection to a high or low level. If you are an
advanced user, you can configure Firewall policies to
meet on your needs.
NAT
Network Address Translation allows multiple users at
your local site to access the internet over a single
user account. It can also prevent hacker attacks by
mapping local addresses to public addresses for key
services such as Web or FTP.
Advance
Here you can set your log setting, SNMP, Routing,
Schedule Rule and Miscellaneous tasks.
Summary
In this section, you can check all system status,
network statistics and Event Log.
Advanced Setup
22
System Page
23
Configuration Utility
24
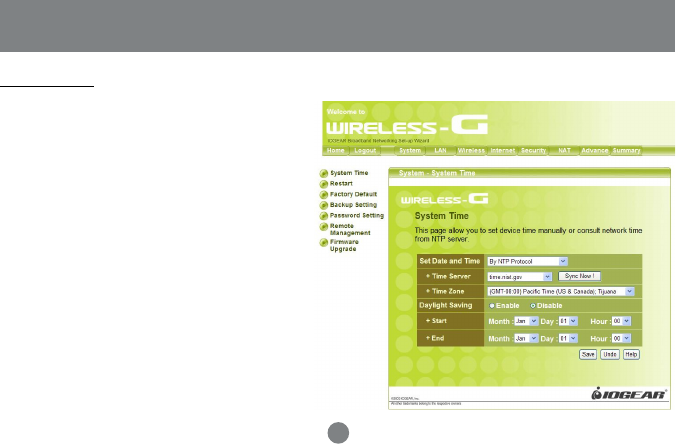
System Time
Configuration Utility
For system management purposes, a correctly
configured time zone setting will let you have
accurate time stamps on the system log. If
you’re in an area that is within the daylight
savings time period, please also check the
option. You can also set device time manually or
consult network time from NTP server.
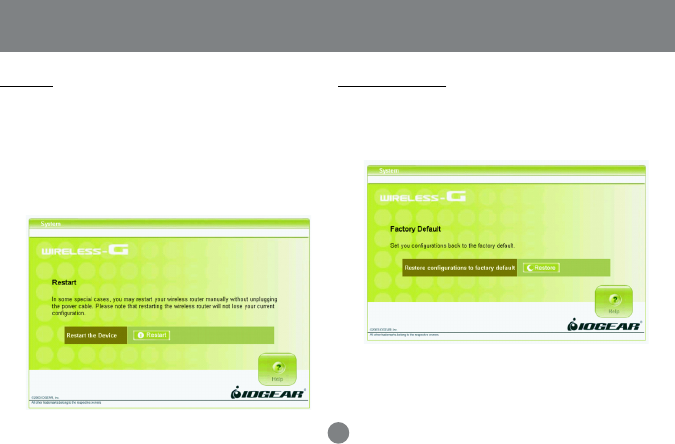
Factory Default
25
Configuration Utility
Click the Reset to default button to set your
configuration back to factory settings.
In some special cases, you may restart your
Wireless-G Broadband Router manually without
unplugging the power cable. Please note that
restarting the Wireless-G Broadband Router you
will not lose your current configuration. Click
Restart button to restart the router.
Restart

This is where you can change your administration
password for the Wireless-G Broadband Router. For
better security, you should give a new password
because password setting is disabled by default.
Don’t forget to Click Apply button to make your
configuration take effect.
Password Setting
Configuration Utility
Backup Setting
Save the settings of your router to a file. Once you
want to restore these setting, click Firmware
upgrade and use the file you saved.
26
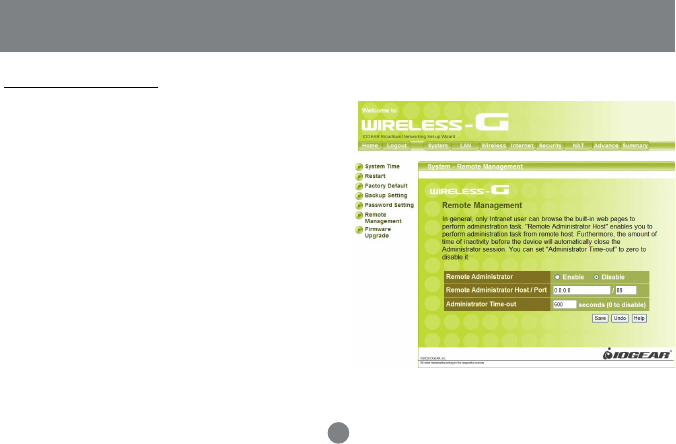
Remote Management
This setting allows you to manage your Wireless-G
Broadband Router through a WAN connection
(Internet). Click the button to enable or disable this
function. If you enable this function you can use the
specified port on your PC to remotely control the
router. The default port is 8080. You can also set
“Administration Time-out.” It is the amount of
inactivity before the device automatically close the
administration section. You can set “Administration
Time-out” to zero to disable it.
27
Configuration Utility
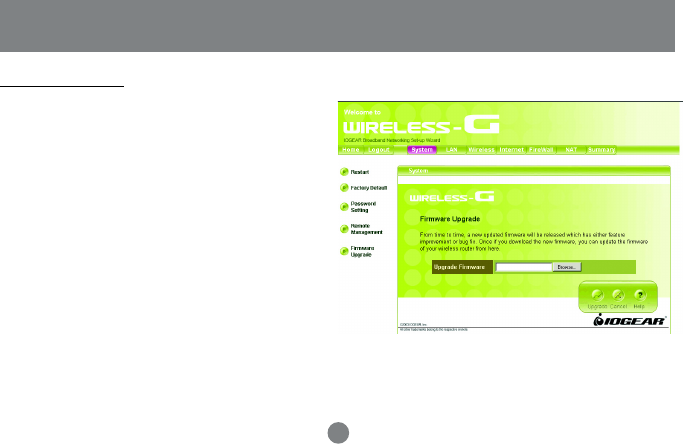
• Upgrade Steps:
To update the firmware by web page, click the
Browse button first to select the file that had been
saved in your laptop or PC. Then click the Upgrade
button to update the firmware. Please do not power
off the router while upgrading and there will be a
sequence of screen descriptions to inform you the
status of the upgrade process. If the upgrade
process is successful, the utility will go back to
homepage.
Firmware Update
From time to time, a new and updated firmware will
be released, which has either feature improvements
or bug fixes. Once you download the new firmware
patch, you can update the firmware of your Wireless-
G Broadband Router from here.
28
Configuration Utility
LAN Page
29
Configuration Utility
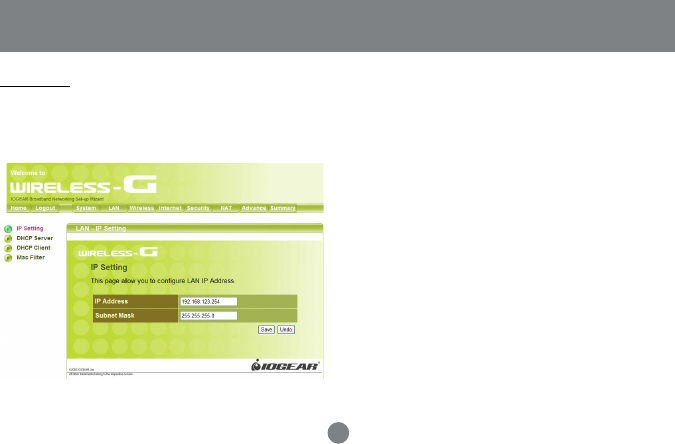
IP Setting
You can setup IP address information for your
wireless router.
Configuration Utility
30
31
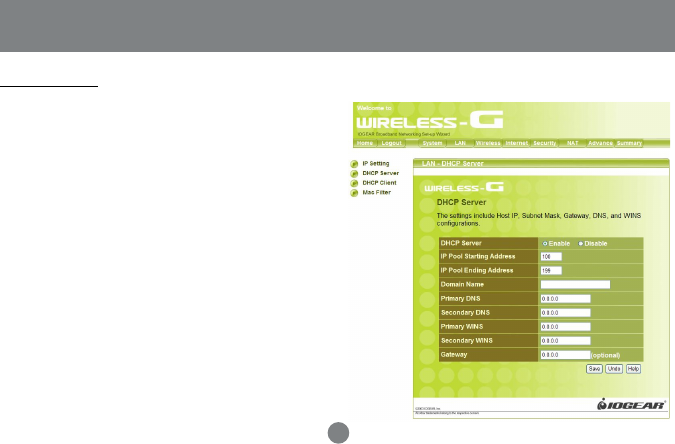
Your wireless router can act as a DHCP server, and
assign IP addresses to your clients automatically. This
function is enabled by default. The assigned IP
addressed will be within the range of IP pool that you
specify. It is a good security practice to set just enough
range of IP pool for the devices you want to connect to
this wireless network. This can block other unintended
devices to enter your network.
• IP Pool Starting Address: Enter a value for the
DHCP server to start with when issuing IP
addresses. The default value is 100.
• IP Pool Ending Address: The maximum number of
PCs that you want the DHCP server to assign IP
addresses to. This number cannot be greater than
253.
DHCP Server
Configuration Utility
32
Configuration Utility
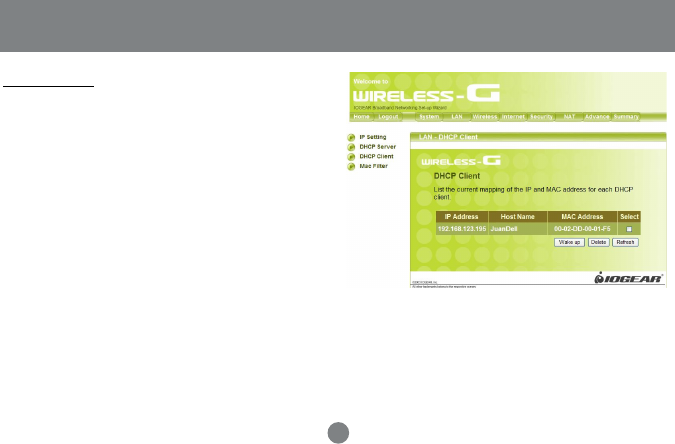
The DHCP client list shows clients assigned by the
DHCP server. Click Refresh button to refresh the list.
Wake-on-LAN is a technology that enables you to
power up a networked device remotely. In order to
enjoy this feature, the target device must be Wake-on-
LAN enabled. Click on the “Wake-up” button will
make the router to send the wake-up feature to the
target device immediately.
DHCP Client

Configuration Utility
33
MAC Filter
MAC Address Control allows you to assign different
access right for different users and to assign a
specific IP address to a certain MAC address.
MAC Address Control Check “Enable” to enable
the “MAC Address Control”. All of the settings in this
page will take effect only when “Enable” is checked.
Connection control Check “Connection control” to
enable the controlling of which wired andwireless
clients can connect to this device. If a client is
denied to connect to this device, it means the client
can’t access to the Internet either. Choose “allow” or
“deny” to allow or deny the clients, whose MAC
addresses are not in the “Control table” (please see
below), to connect to this device.
Association control Check “Association control” to
enable the controlling of which wireless client
canassociate to the wireless LAN. If a client is
denied to associate to the wireless LAN, it means
the client can’t send or receive any data via this
device. Choose “allow” or “deny” to allow or deny the
clients, whose MAC addresses are not in the
“Control table”, to associate to the wireless LAN.
“Control table” is the table at the bottom of the “MAC
Address Control” page. Each row of this table
indicates the MAC address and the expected IP
address mapping of a client. There are four columns
in this table:
MAC Address MAC address indicates a specific
client.
IP Address Expected IP address of the
corresponding client. Keep it empty if you don’t care
its IP address.
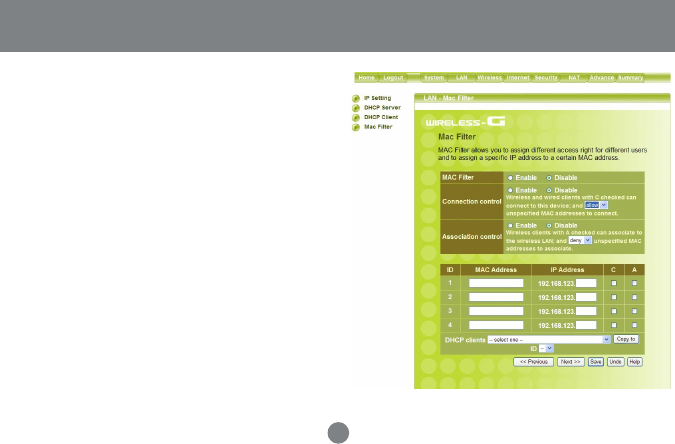
Configuration Utility
C When “Connection control” is checked, check
“C” will allow the corresponding client to connect
to this device.
A When “Association control” is checked, check
“A” will allow the corresponding client to
associate to the wireless LAN. In this page, we
provide the following Combobox and button to
help you to input the MAC address.
You can select a specific client in the “DHCP
clients” Combobox, and then click on the “Copy
to” button to copy the MAC address of the client
you select to the ID selected in the “ID”
Combobox.
Previous page and Next Page To make this
setup page simple and clear, we have divided the
“Control table” into several pages. You can use
these buttons to navigate to different pages.
34
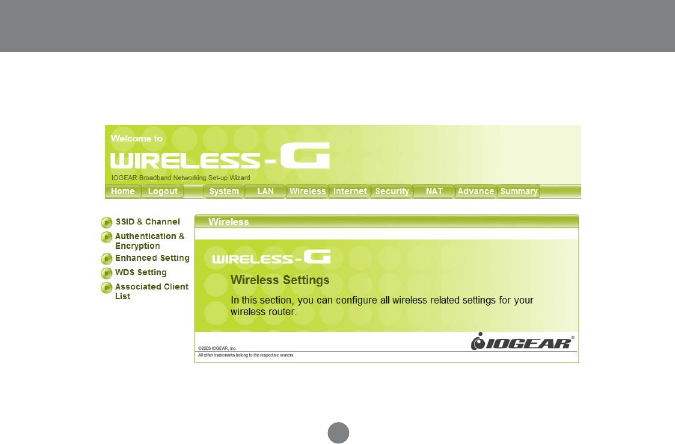
Wireless Page
Configuration Utility
35

Configuration Utility
36
SSID & Channel
Here is where you may modify the SSID and
Channel of your Wireless-G Broadband Router.
• SSID (Service Set ID, or Network Name):
Enter the name you wish to give your Wireless-G
Broadband Router (ex. “JOHN” or “IOGEAR”).
Every Wireless Clients (PC card, USB and PCI
adaptors) in your network must be configured to
accept with the same SSID.
• Channel
It can be left as Default, unless you plan on using
multiple access points. When multiple Wireless
Networks presenting, please ensure they are not
using the same channel, preferably at least 5
channels apart to each other.
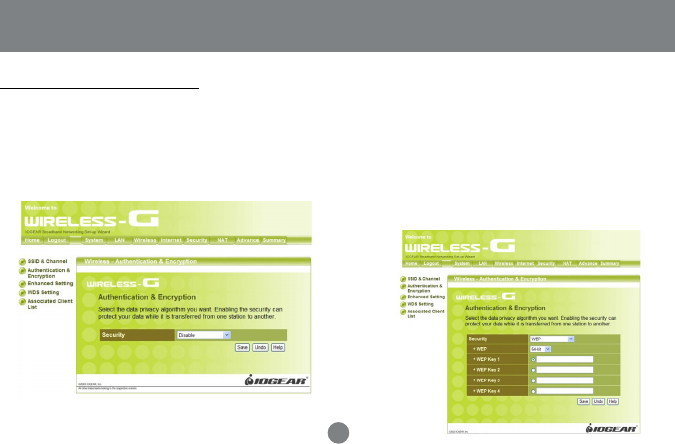
Disable : Disable the encryption feature.
WEP : Accept WEP clients only. WEP key must be
entered manually. You must input 10 Hexadecimal
digits for WEP 64 bit, or 26 Hexadecimal digits for
WEP 128 bit
Select the data privacy algorithm you want. Enabling
the security can protect your data while it is
transferred from one station to another. • WEP Key 1, 2, 3 & 4
When you enable the 128 or 64 bit WEP key
security, please select one WEP key to be used
and input 26 or 10 hexadecimal (0, 1, 2...8, 9, A,
B...F) digits.
37
Authentication & Encryption
Configuration Utility