ATID AT570 INDUSTRIAL PDA User Manual AT 570 English Rev1 1
ATID Co., Ltd INDUSTRIAL PDA AT 570 English Rev1 1
UserManual.wiki
>
ATID
>
AT570 User Manual
>
revised users manual
Contents
1.
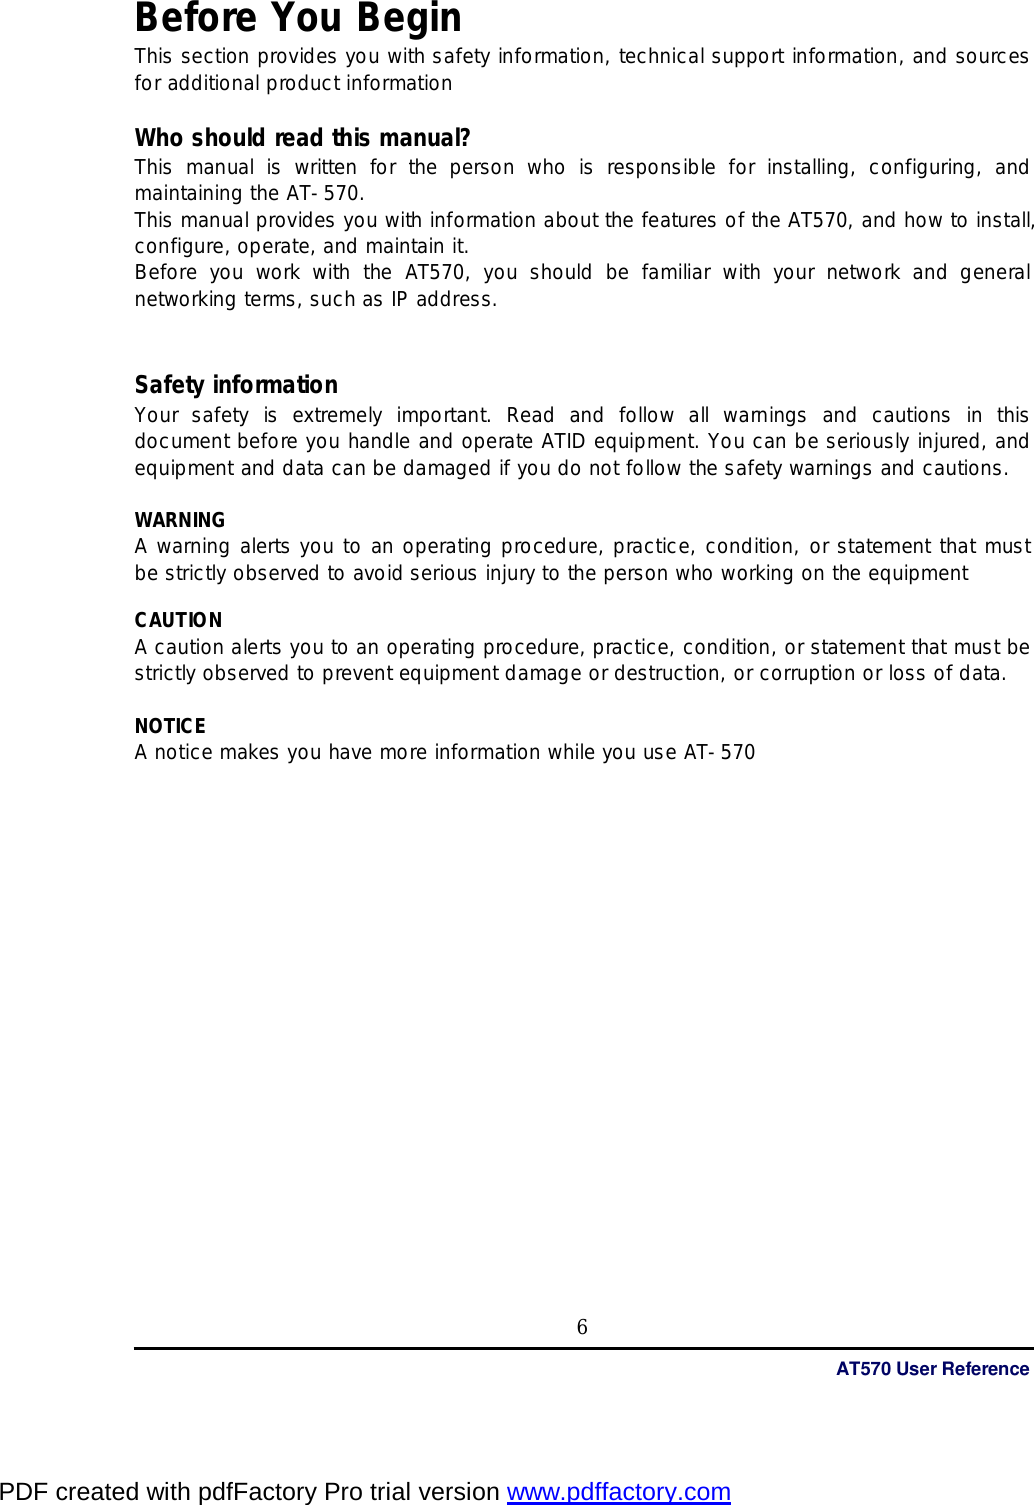
USERS MANUAL
2.
revised users manual
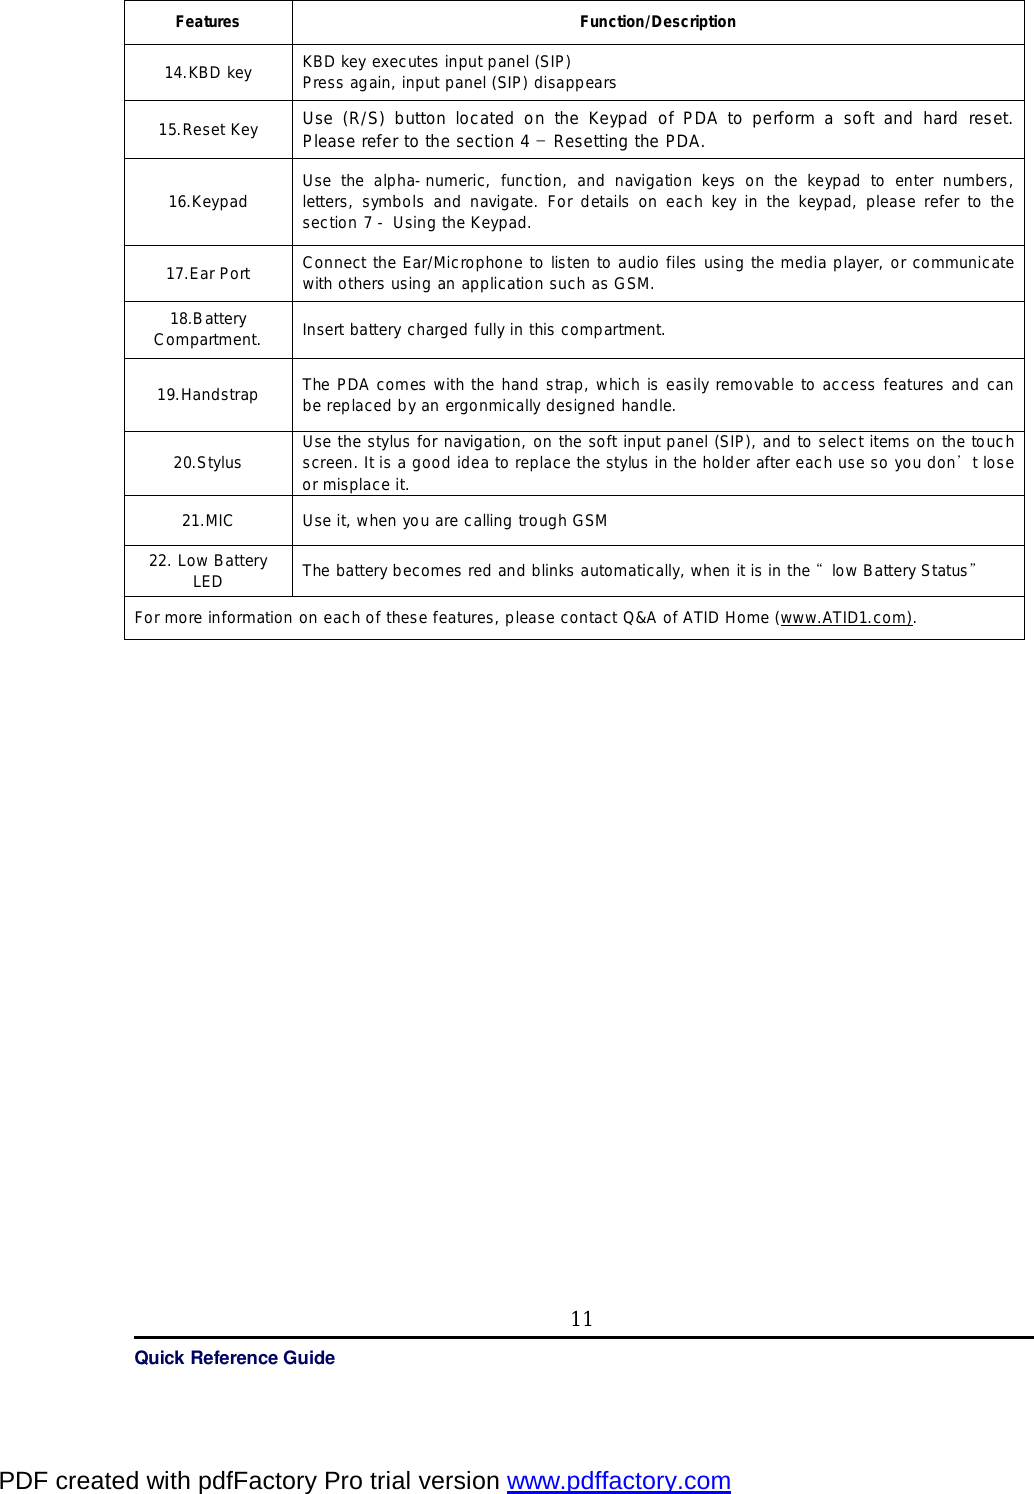
revised users manual
Navigation menu
Upload a User Manual
Namespaces
Wiki Guide
HTML
PDF
Info
Views
User Manual
Discussion / Help
Navigation

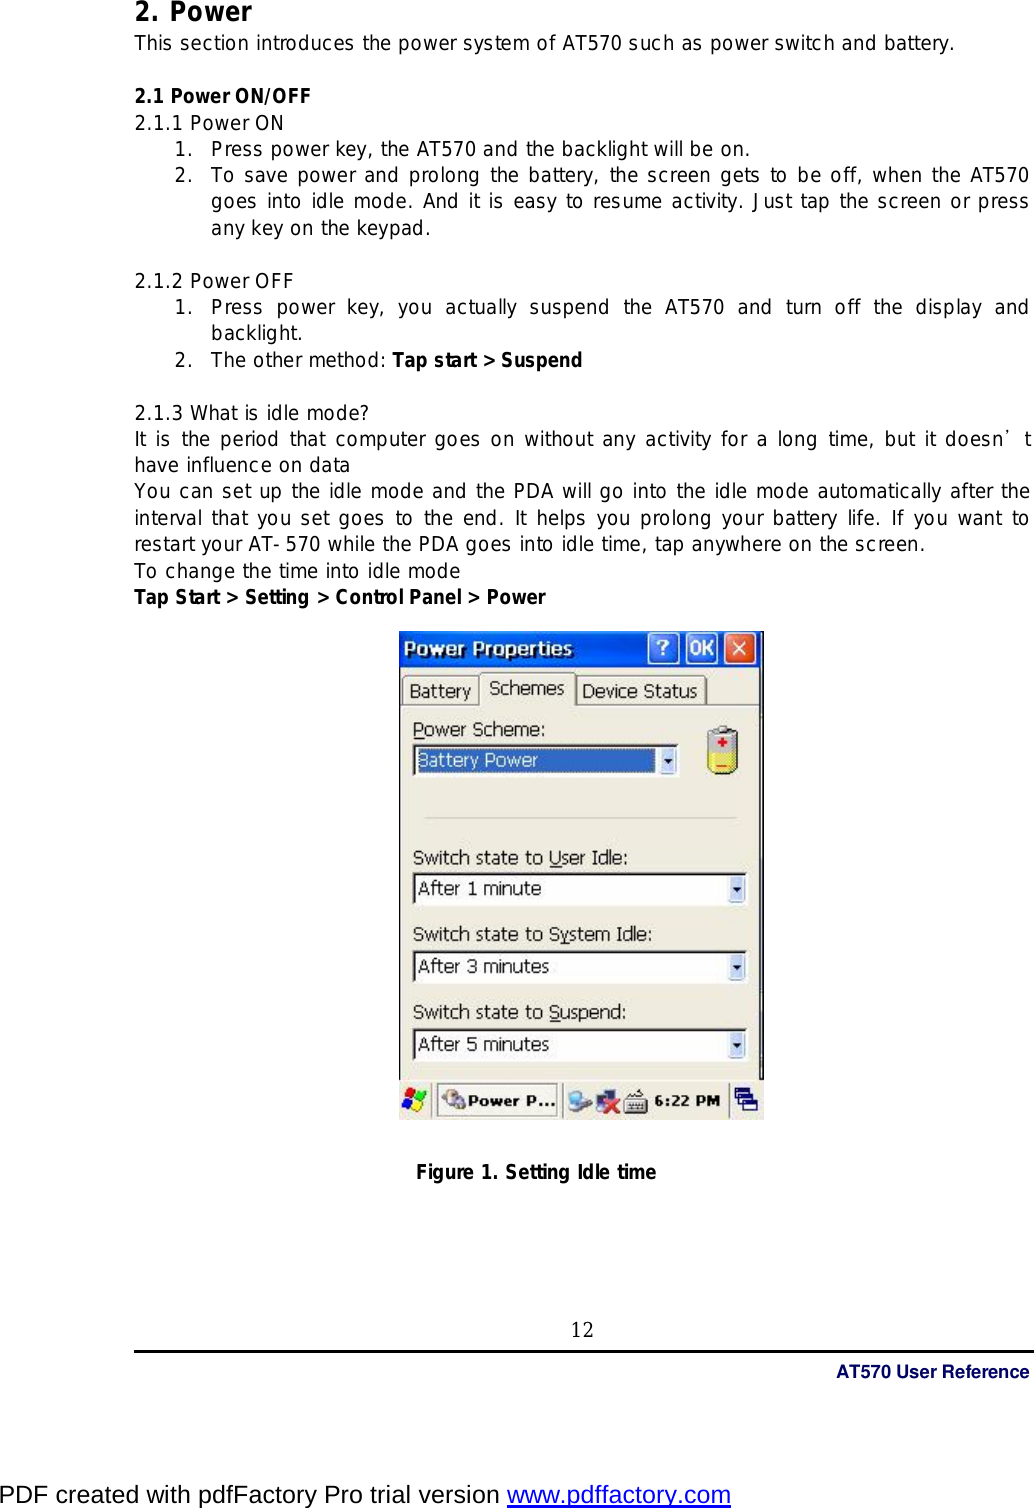
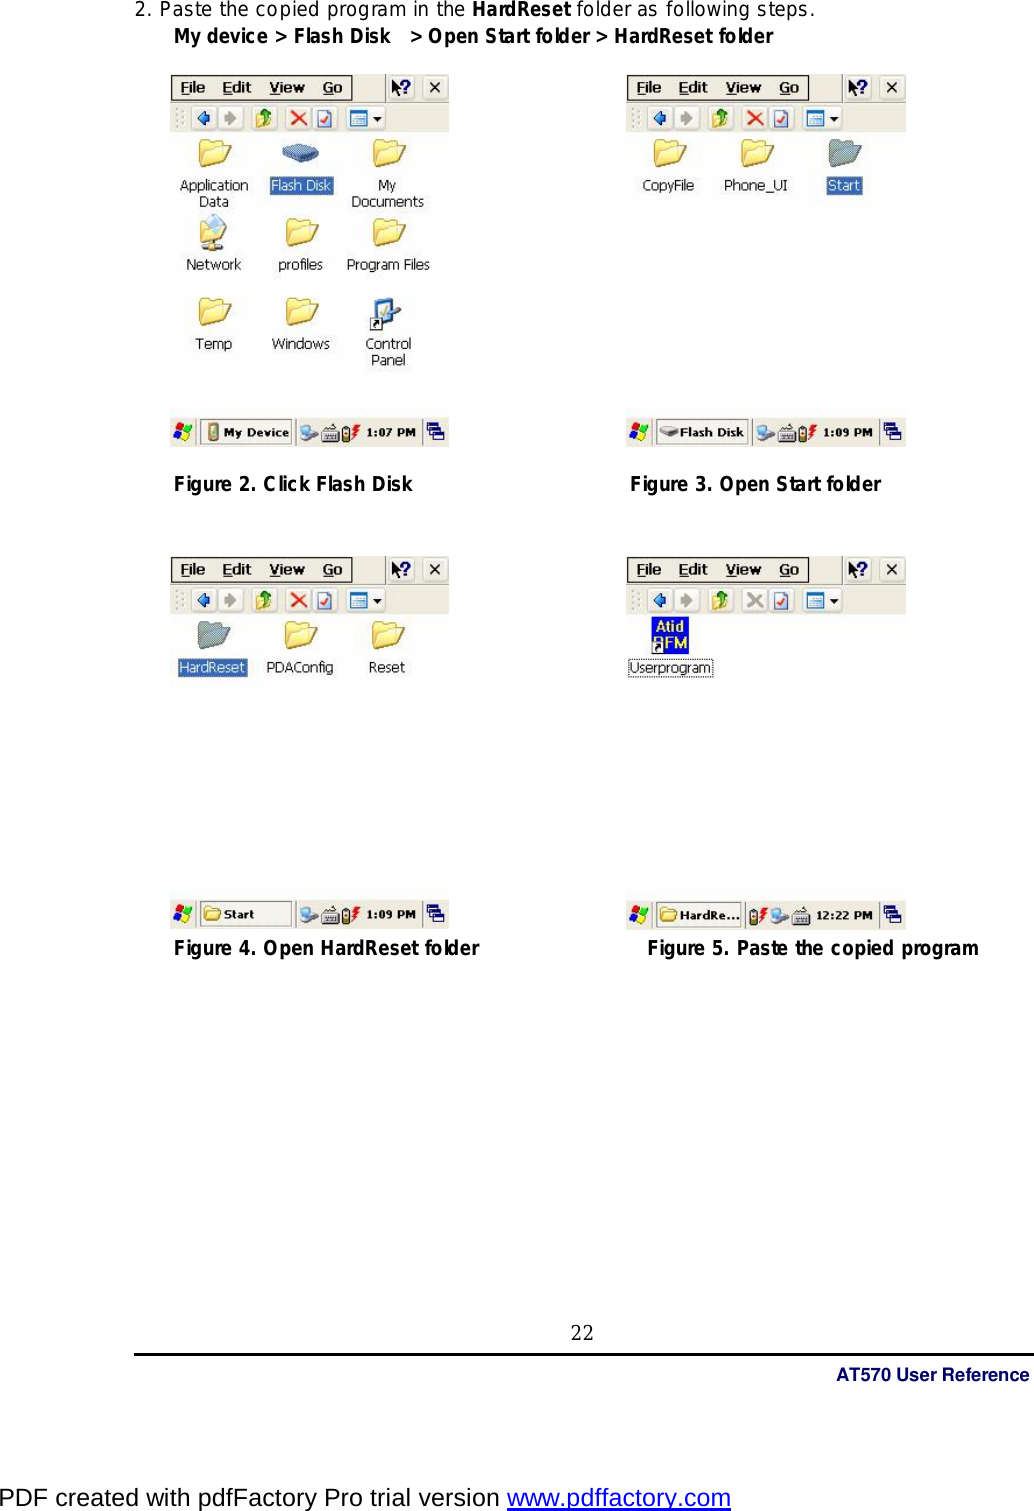
![Quick Reference Guide 13 2.1.4 Suspend mode 1. When you do not use AT-570 for a long time, make your AT-570 go into the suspend mode for saving power. 2. If you want to restart your AT-570, press power key. 2.2 Battery AT570 uses replaceable 4400 mAh, Li-ion batteries. If the battery continues to drop to the “Low Battery Status”, the battery status LED becomes red and blinks. You need to recharge the battery. 2.2.1 Checking Battery Power You can check the battery status by using the power applet. Tap Start > Settings] > Control panel > Power The power control panel applet displays a battery power gauge. 2.2.2 Very Low Battery Status To prevent the AT570 from being discharged completely, your AT-570 will be suspended, when the battery continues to get low. You need to recharge your battery before the battery continues to drop. 2.3 Removing and installing the battery 2.3.1 Removing the battery At first, pull out the hand scrap and then press the battery latch to the above until the battery is released from the AT570, then lift it out. 2.3.2 Installing the battery Insert the bottom of battery into the sunken place located in battery compartment, and press the battery latch to the above until the battery is installed completely. 2.4 Battery discharging Several factors determine the life of your battery such as extreme temperatures, input devices, and your usage, but generally you can use AT-570 for 6~12hours. If the AT-570 is not on external power and battery pack is removed, it will enter suspend mode. 2.5 Recharging the battery Use the adapter provided from ATID to recharge your battery. Caution Your AT-570 can be damaged, in case of using the adapter that is not provided from ATID. 2.5.1 Using the adapter The charge/operating power can be applied to AT-570 by using DC adapter. 1. Connect the adapter to the power cord. 2. Connect the DC power jack to the AT-570. 3. When the battery is charging, the LED becomes red. PDF created with pdfFactory Pro trial version www.pdffactory.com](https://usermanual.wiki/ATID/AT570.revised-users-manual/User-Guide-936488-Page-13.png)


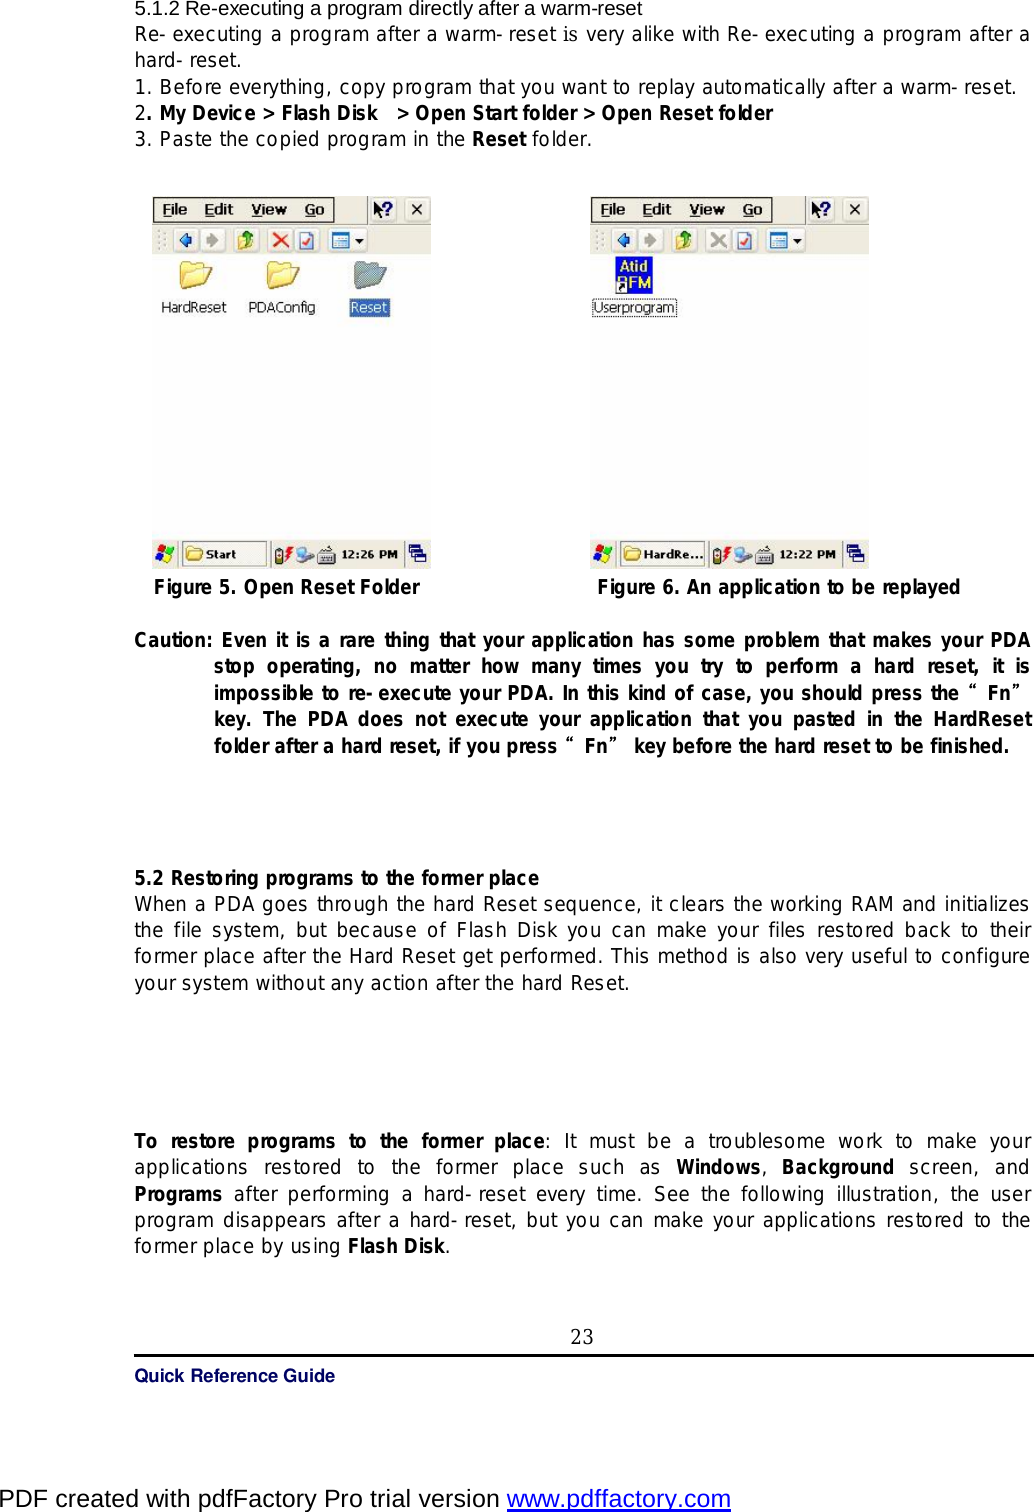
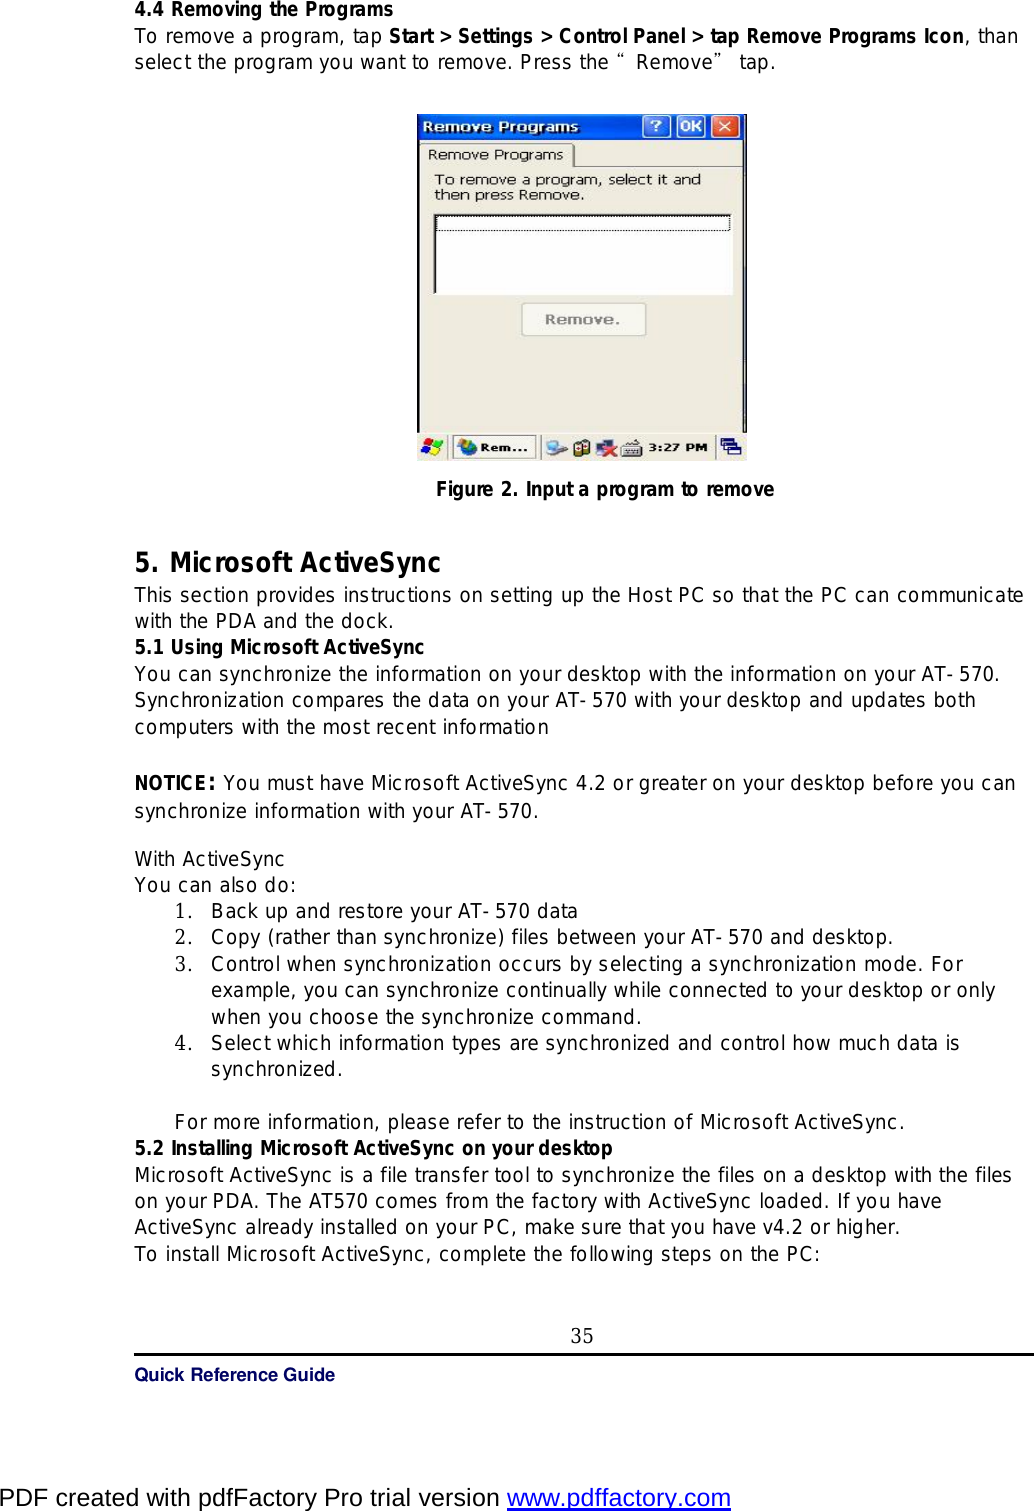
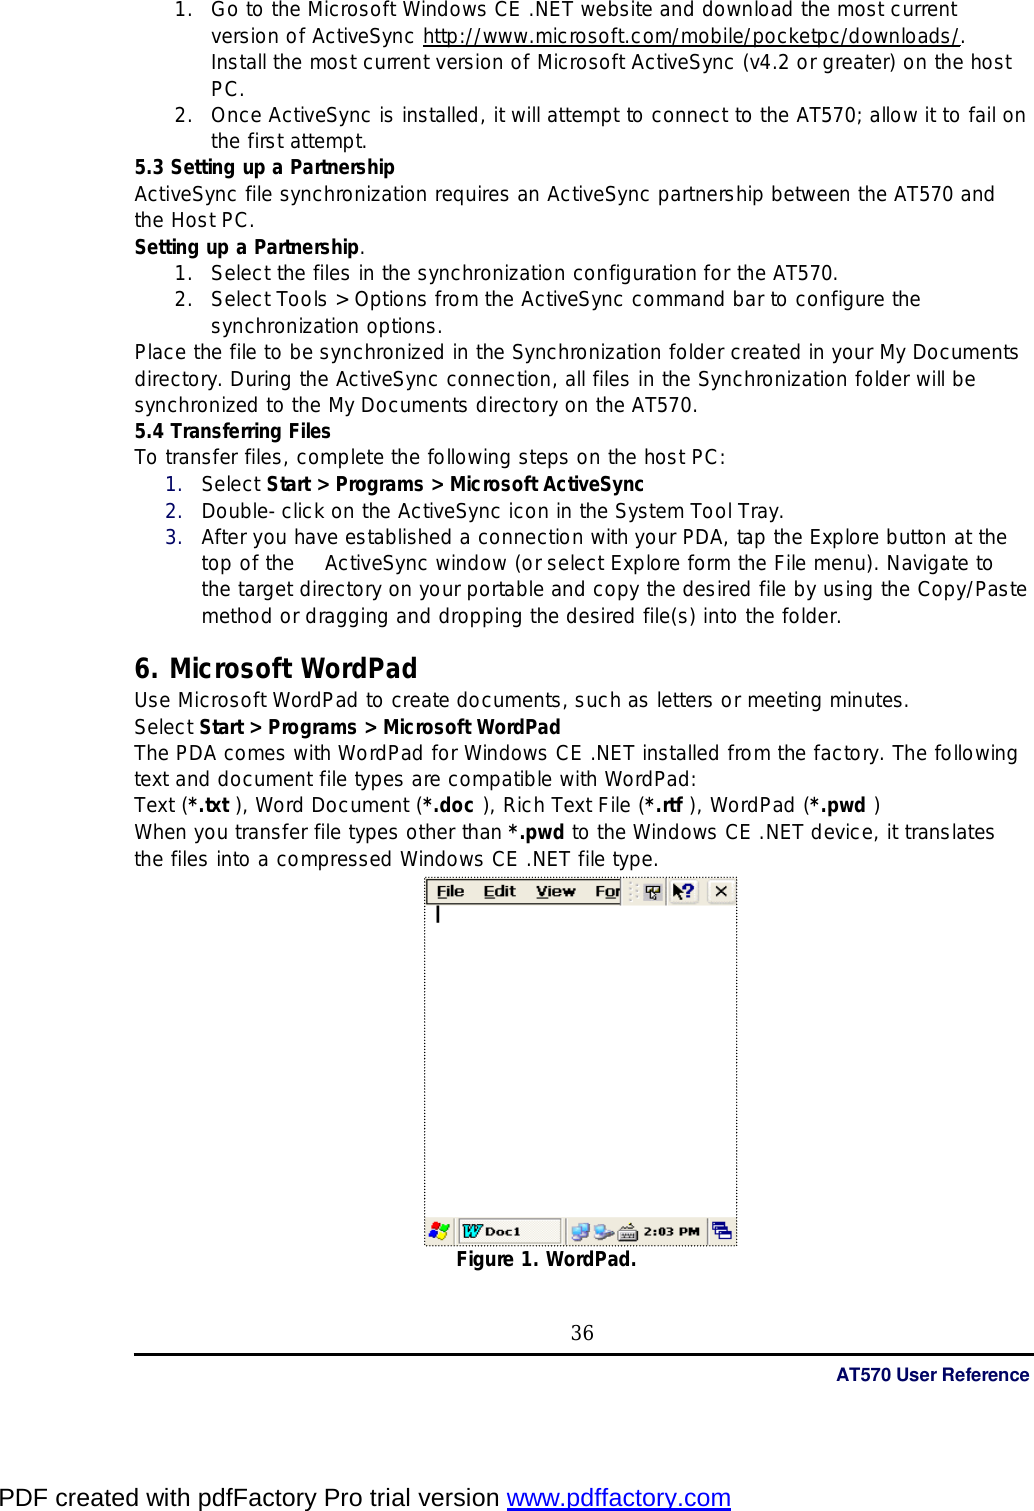
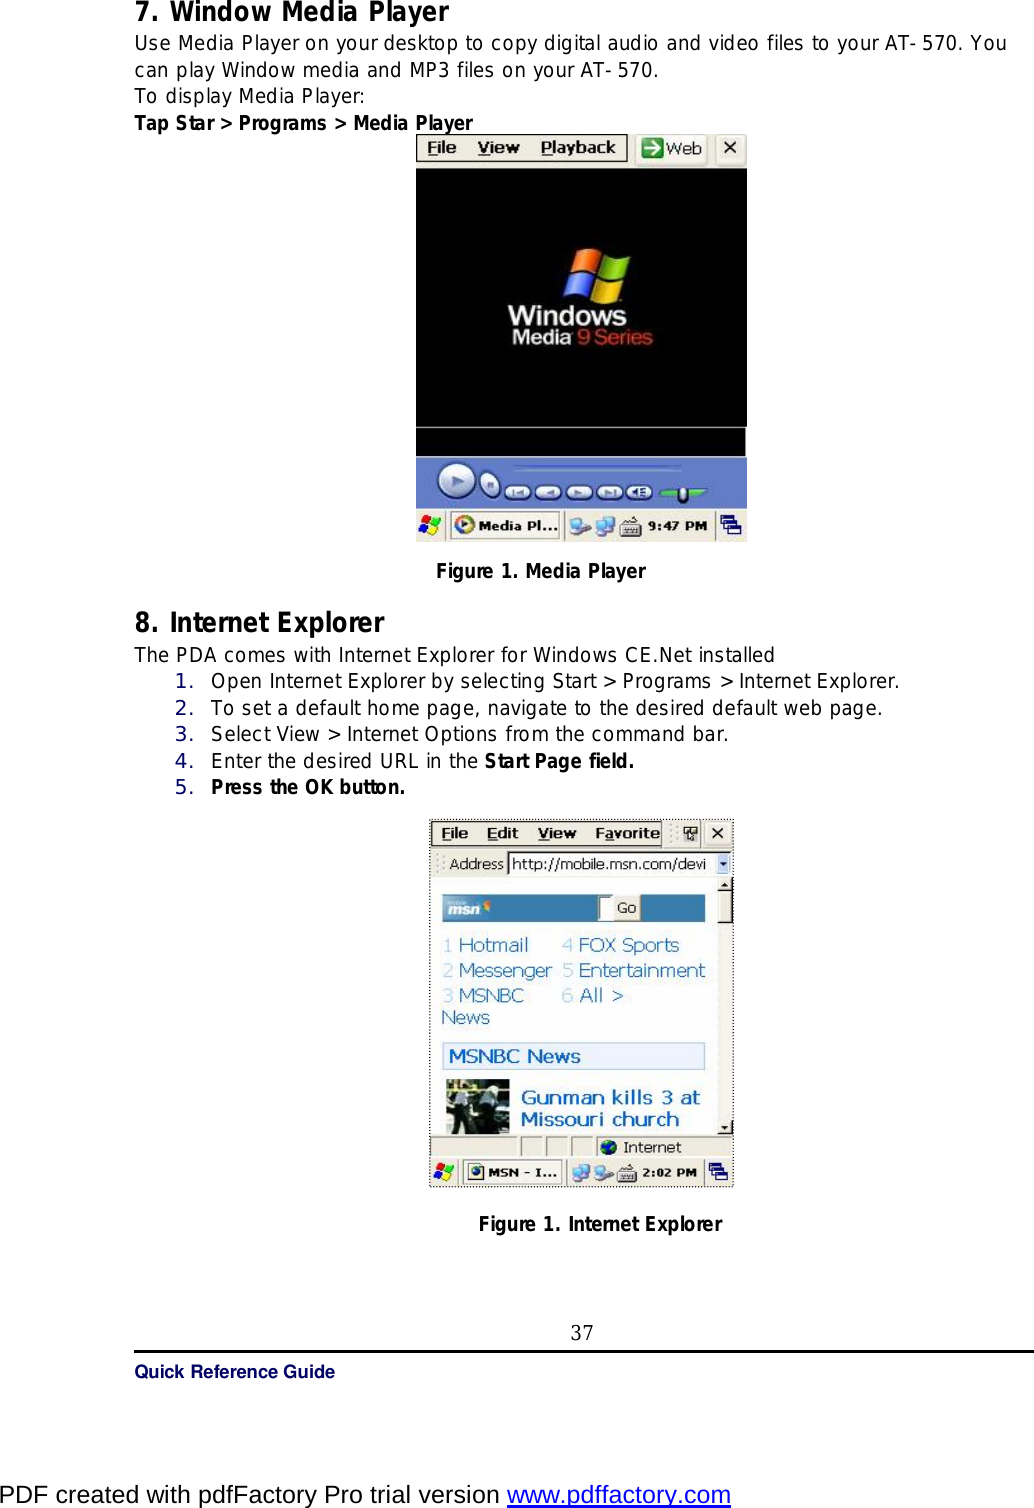
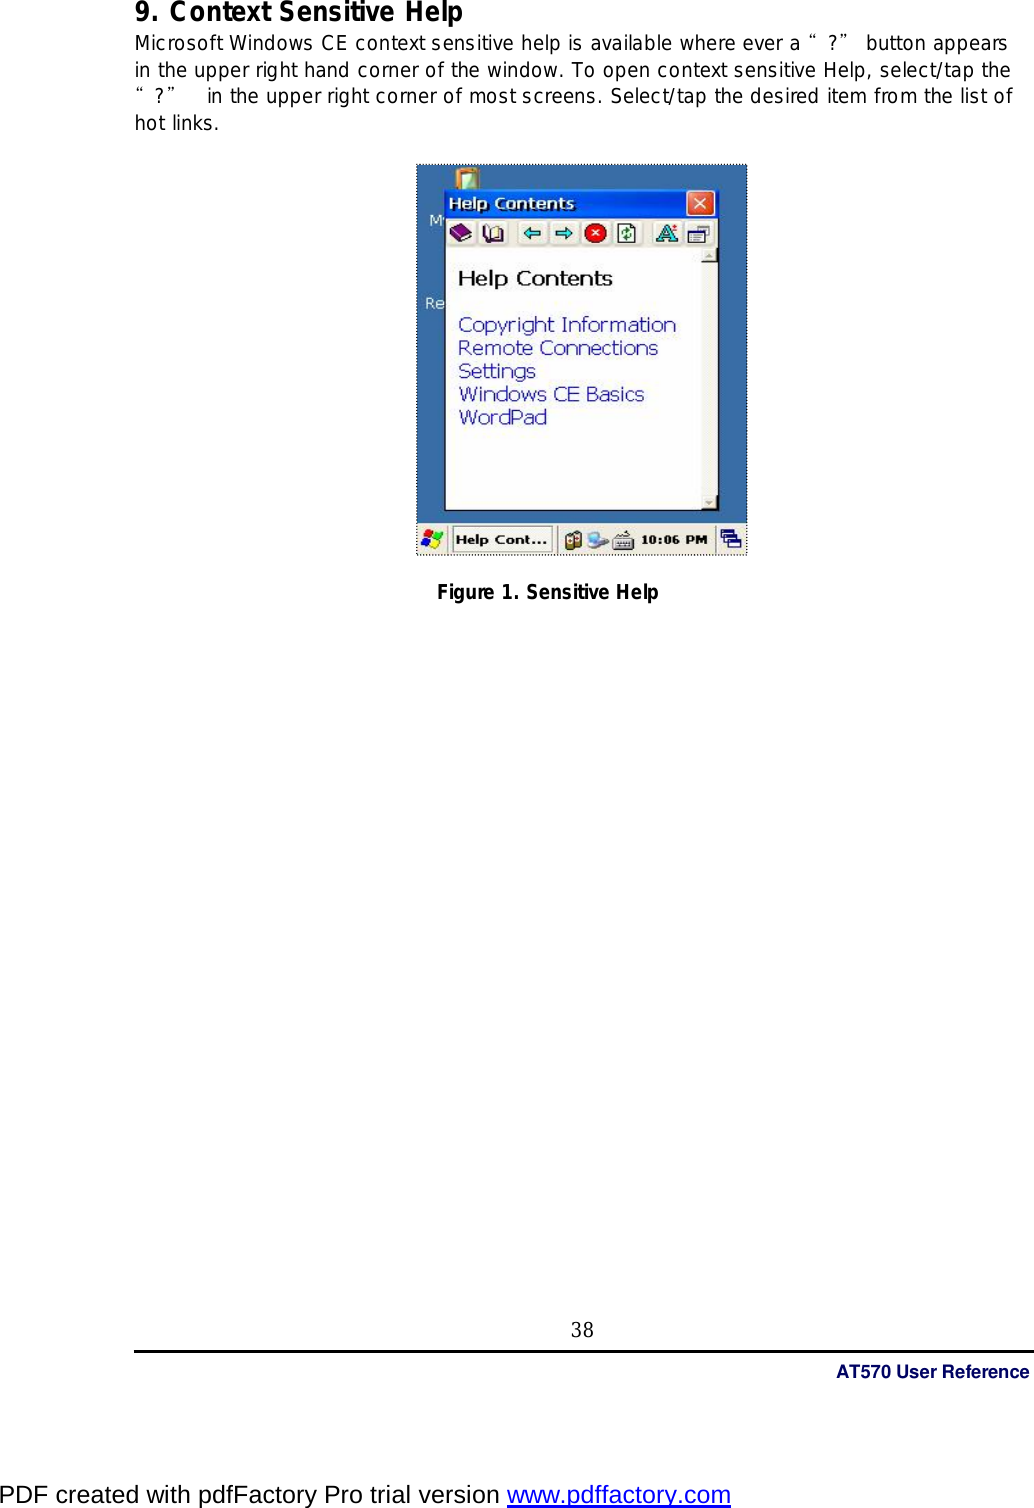
![AT570 User Reference 34 4. Customizing Your AT-570 You can customize your mobile by adjusting setting and installing additional software. 4.1 Adjust settings To adjust settings to fit the way you work: Tap [Start] > [Settings] > [Control Panel] To open a program, you can use the “File” pop-up menu, or double-tap an icon you want execute in the Control Panel. To arrange programs with detail, tap the “View” and select “Detail”, and than tap “Arrange Icons”. If you want to arrange all the icons by description, tap “By Description”, and if you want to arrange all icons by alphabetic order, tap “By Name”. Figure 1. Setting Icons 4.2 Adding or Removing the Programs Programs added to your AT-570 Mobile computer at the factory are stored in ROM (Read Only Memory). You cannot remove this software, and you cannot accidentally lose ROM contents. Applications added to your AT-570 Mobile computer go into the Object Store, Which is located in Flash ROM. You can install any program created for AT-570, as long as there is enough memory. 4.3 Adding the Programs Using ActiveSync 1. Use the Explore in ActiveSync on your desktop computer to explore the files on your PDA, and locate the program. 2. Right-click on the program, then select Create Shortcut. 3. Move the shortcut to the Programs folder in the Windows folder. The shortcut appears on the menu. PDF created with pdfFactory Pro trial version www.pdffactory.com](https://usermanual.wiki/ATID/AT570.revised-users-manual/User-Guide-936488-Page-34.png)
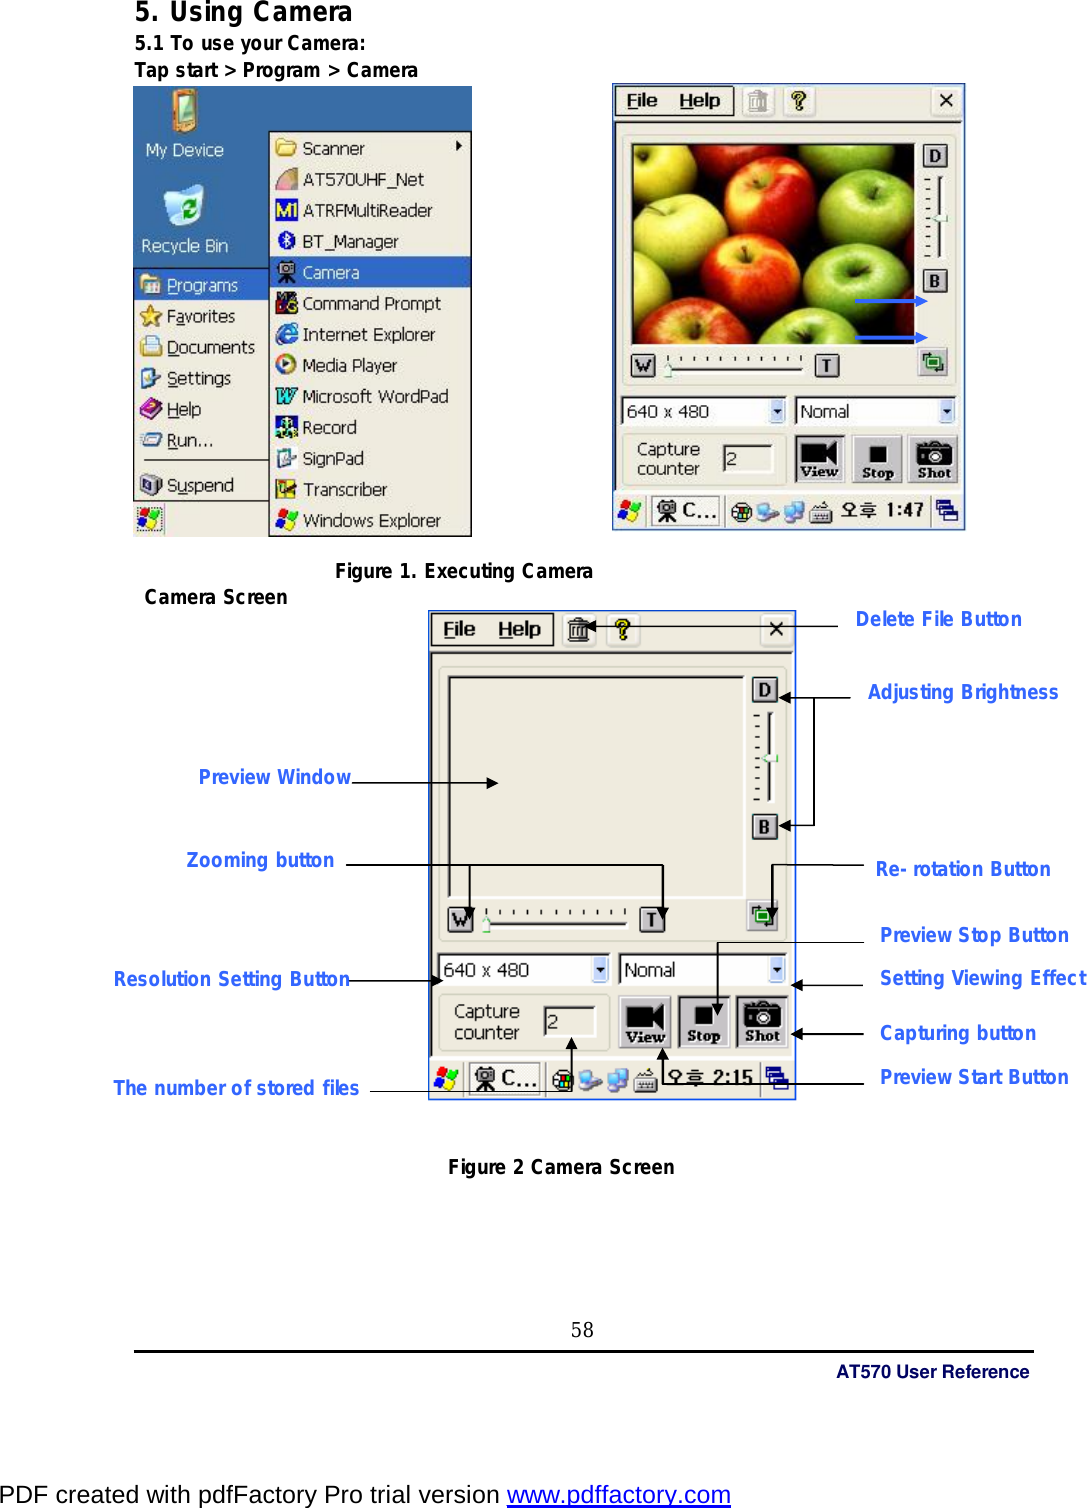
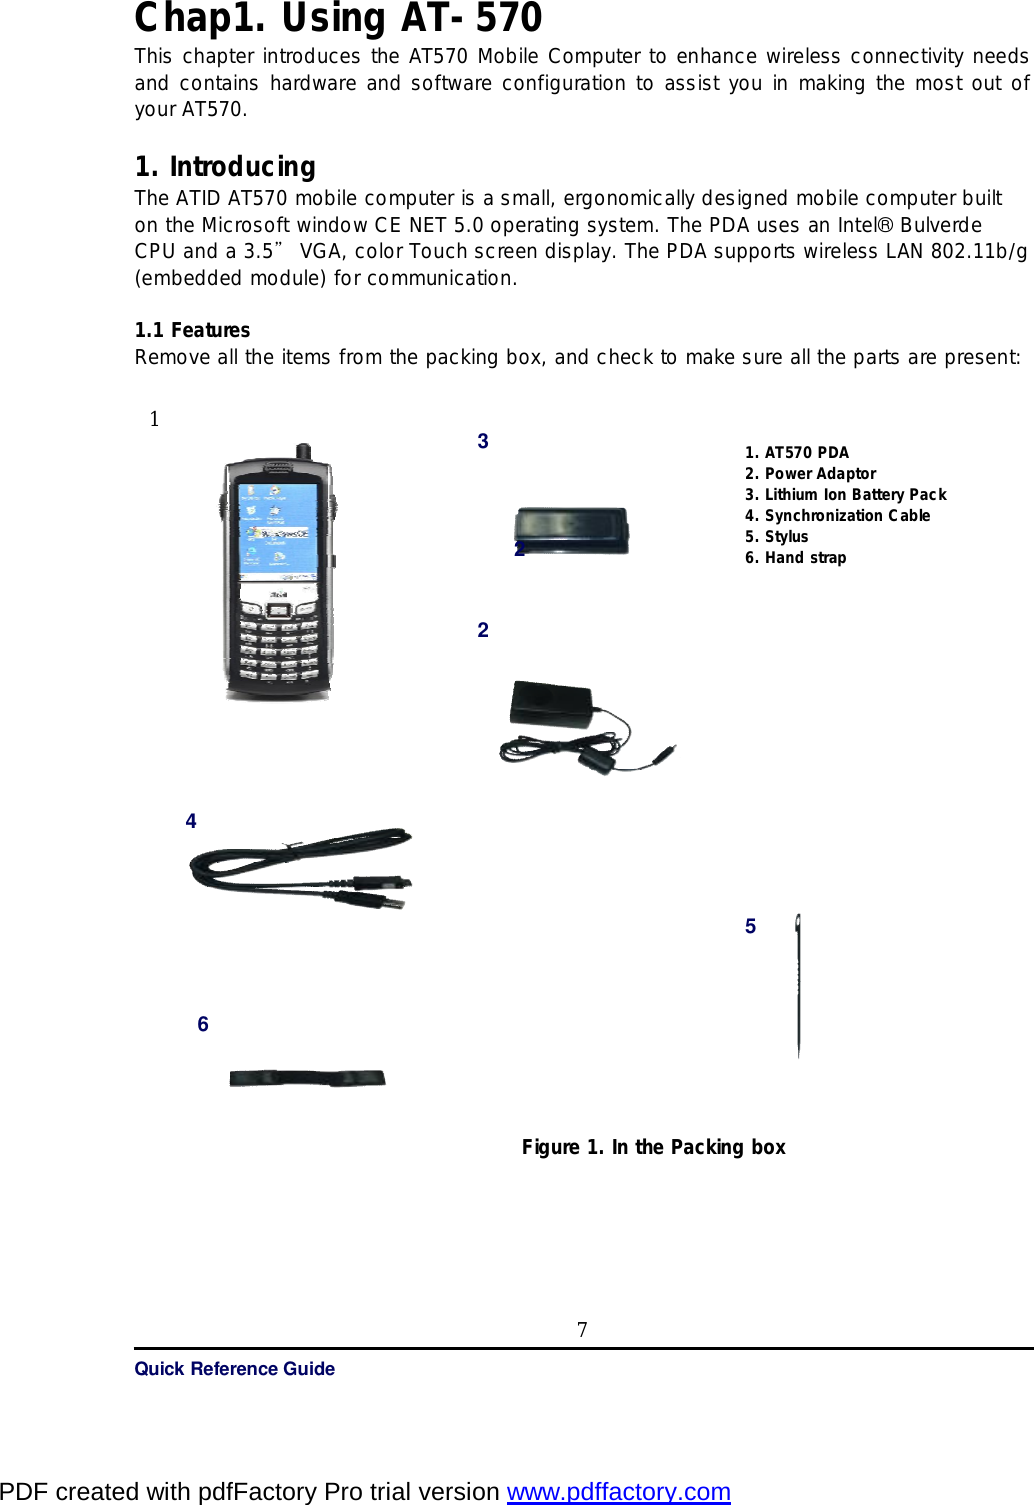
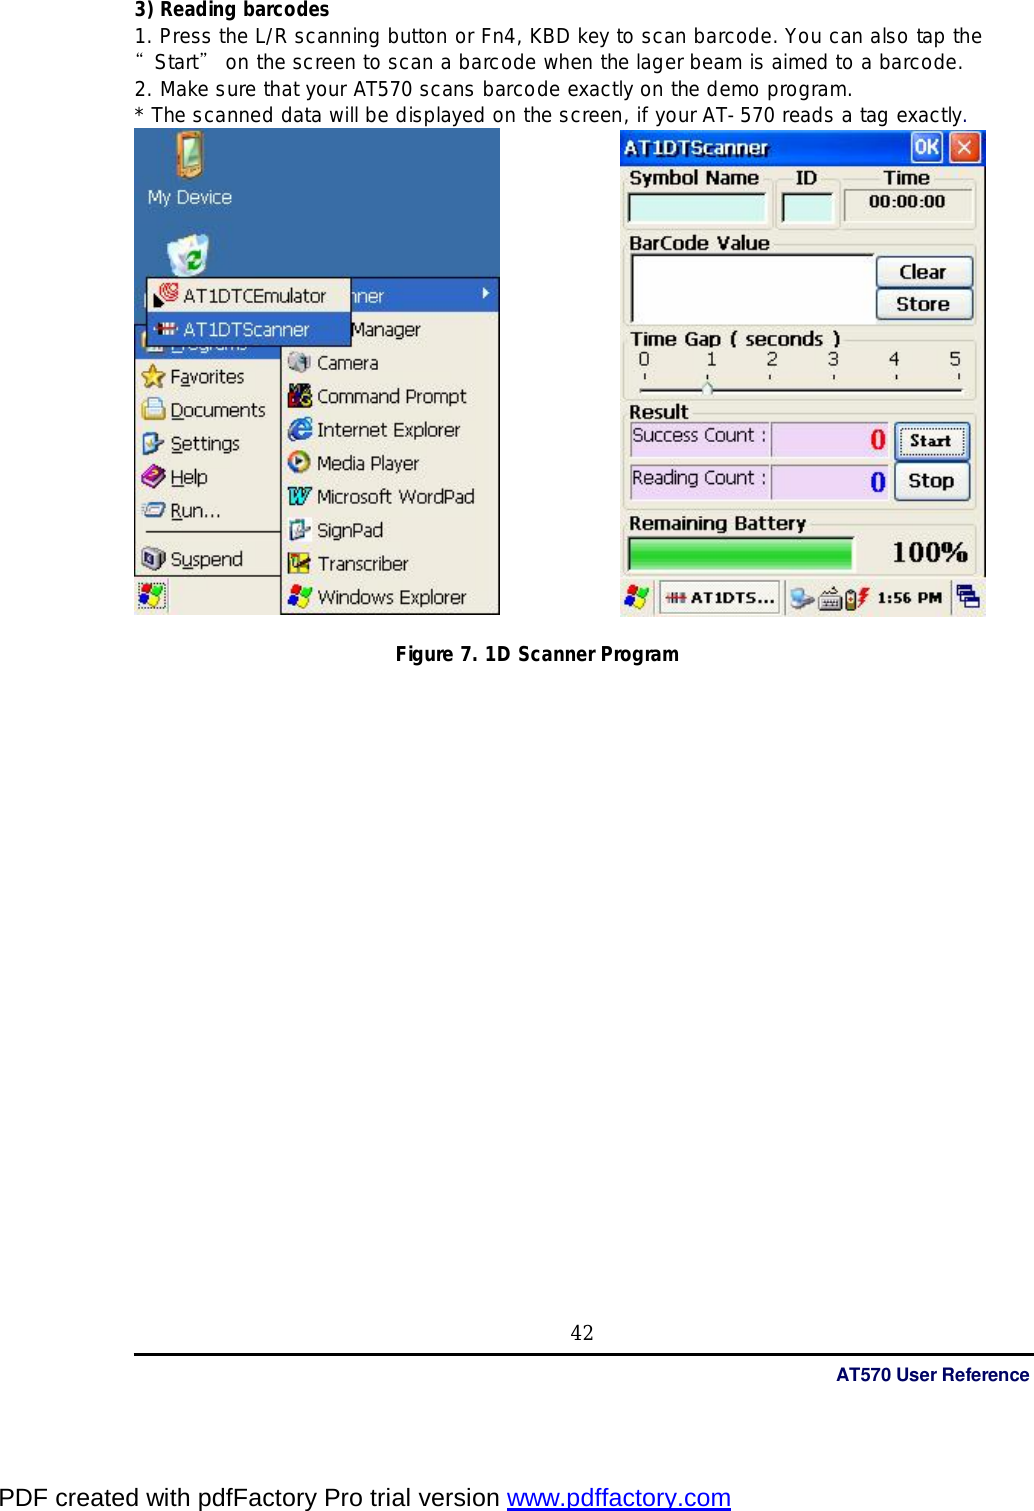
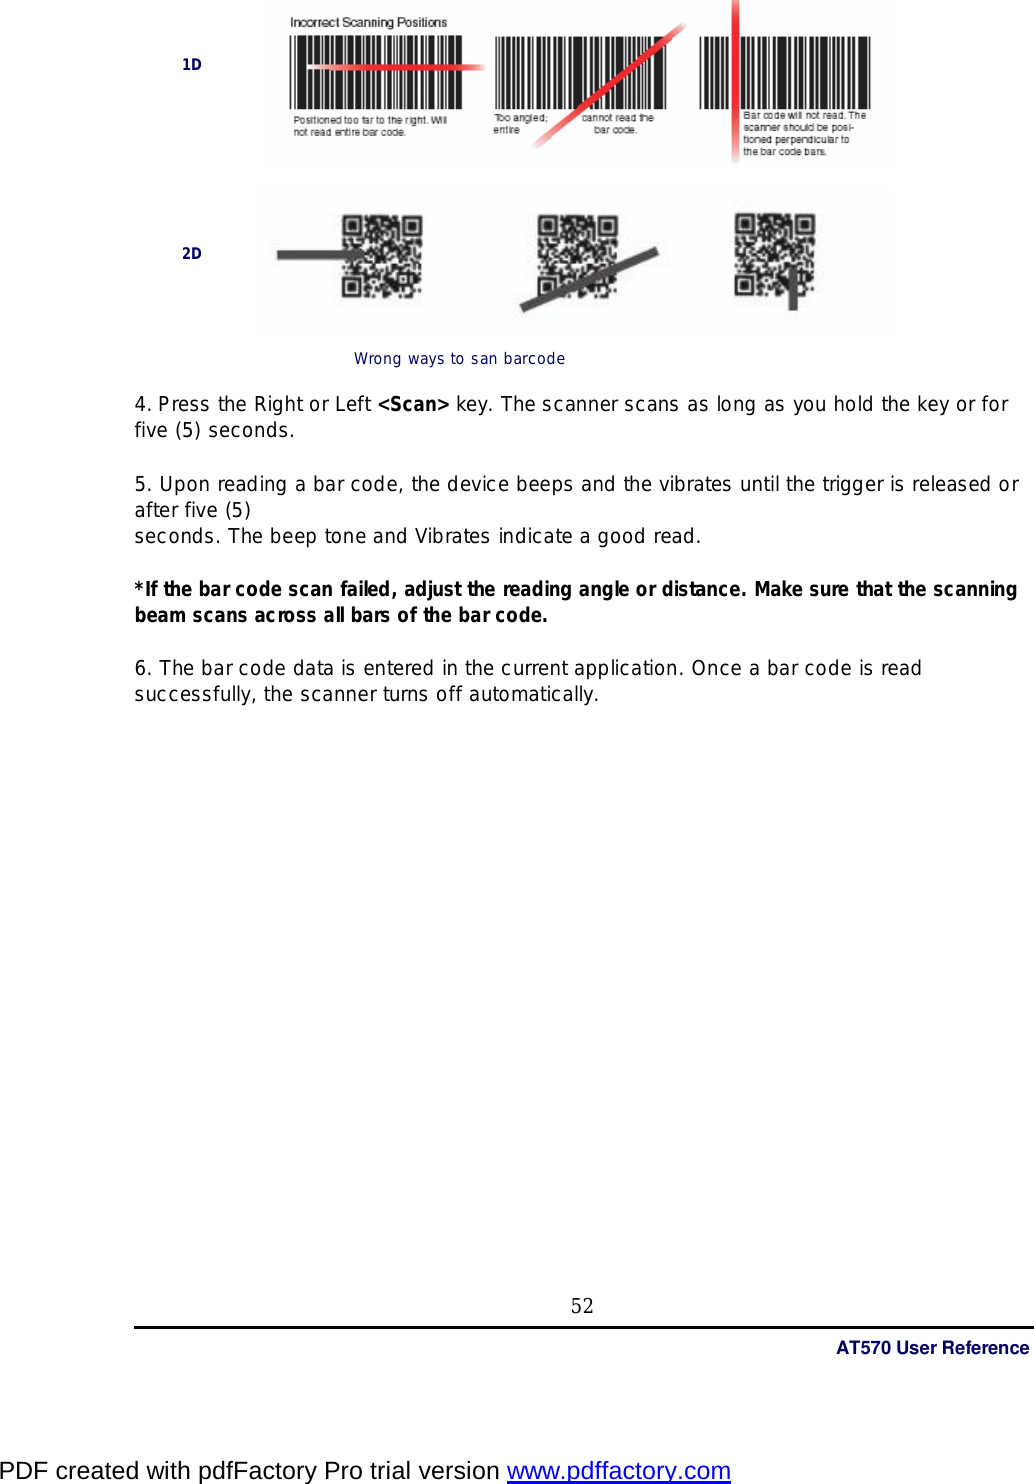
![AT570 User Reference 40 1. 1D barcode Scanner This chapter introduces the AT570 built in with the 1D, 2D barcode Scanner program to assist you in making the most out of your AT570 1.1 1DScanner(Demo program) You can execute AT1DTScanner coded from ATID to make sure that your AT570 scans barcodes exactly. Figure 1. Scan Window for 1D image Figure 2. Scan Window for 2D image 1) To execute Scanner Diagnostics Tap [start] -> [program] -> [Scanner] -> [AT1DTScanner] Note: If you don’t have AT1Dscanner.exe(Ver 1.2) File, please look for our staff or visit ATID web site at www.atid1.com to download. [Program Release Note] 1. Ver 1.2 : can only read barcode 2. Ver 1.0 : can read barcode and set up symbology 2) Reading barcodes 1. Press the L/R scanning button or Fn4, KBD key to scan barcode. You can also tap the “Start” on the screen to scan a barcode when the lager beam is aimed to a barcode. 2. Make sure that your AT570 scans barcode exactly on the demo program. * The scanned data will be displayed on the screen, if your AT-570 reads a tag exactly. Figure 3. 1D Scanner Program(ver 1.2) PDF created with pdfFactory Pro trial version www.pdffactory.com](https://usermanual.wiki/ATID/AT570.revised-users-manual/User-Guide-936488-Page-40.png)
![Quick Reference Guide 43 1.2 Setting up the AT1DEmulator You can input the barcode value you scanned in any application program that has a cursor after setting the AT1Demulator. Like an input device, the AT1Demulator makes data displayed in an application program (see the following figure) Fiture8. Barcode value in the WordPad Program 1) Using the AT1DEmulator Because the AT1DEmulator can apply to all application programs that have a cursor such like Web program, Wordpad and others, you can input the scanned data directly without coding any application program. 2) To executing Emulator Tap [Start] -> [Program] -> [Scanner] -> [AT1DTCEmulator] Figure 9. AT1DTCEmulator.exe Figure 10. Tap this AT1DTCEmulator Icon PDF created with pdfFactory Pro trial version www.pdffactory.com](https://usermanual.wiki/ATID/AT570.revised-users-manual/User-Guide-936488-Page-43.png)
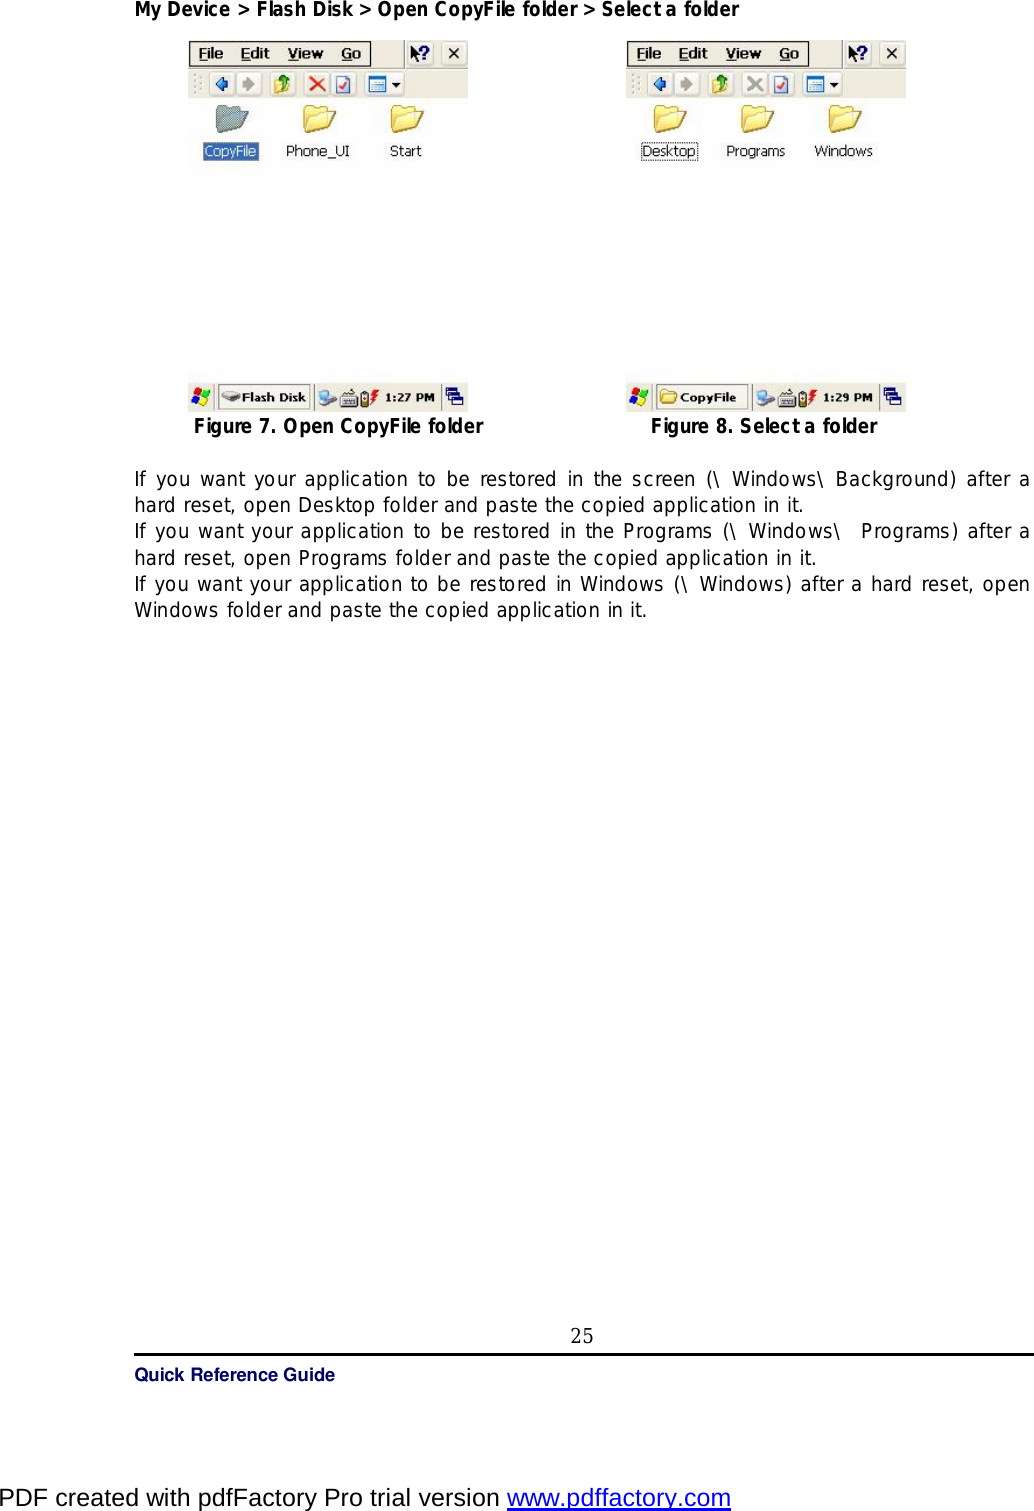
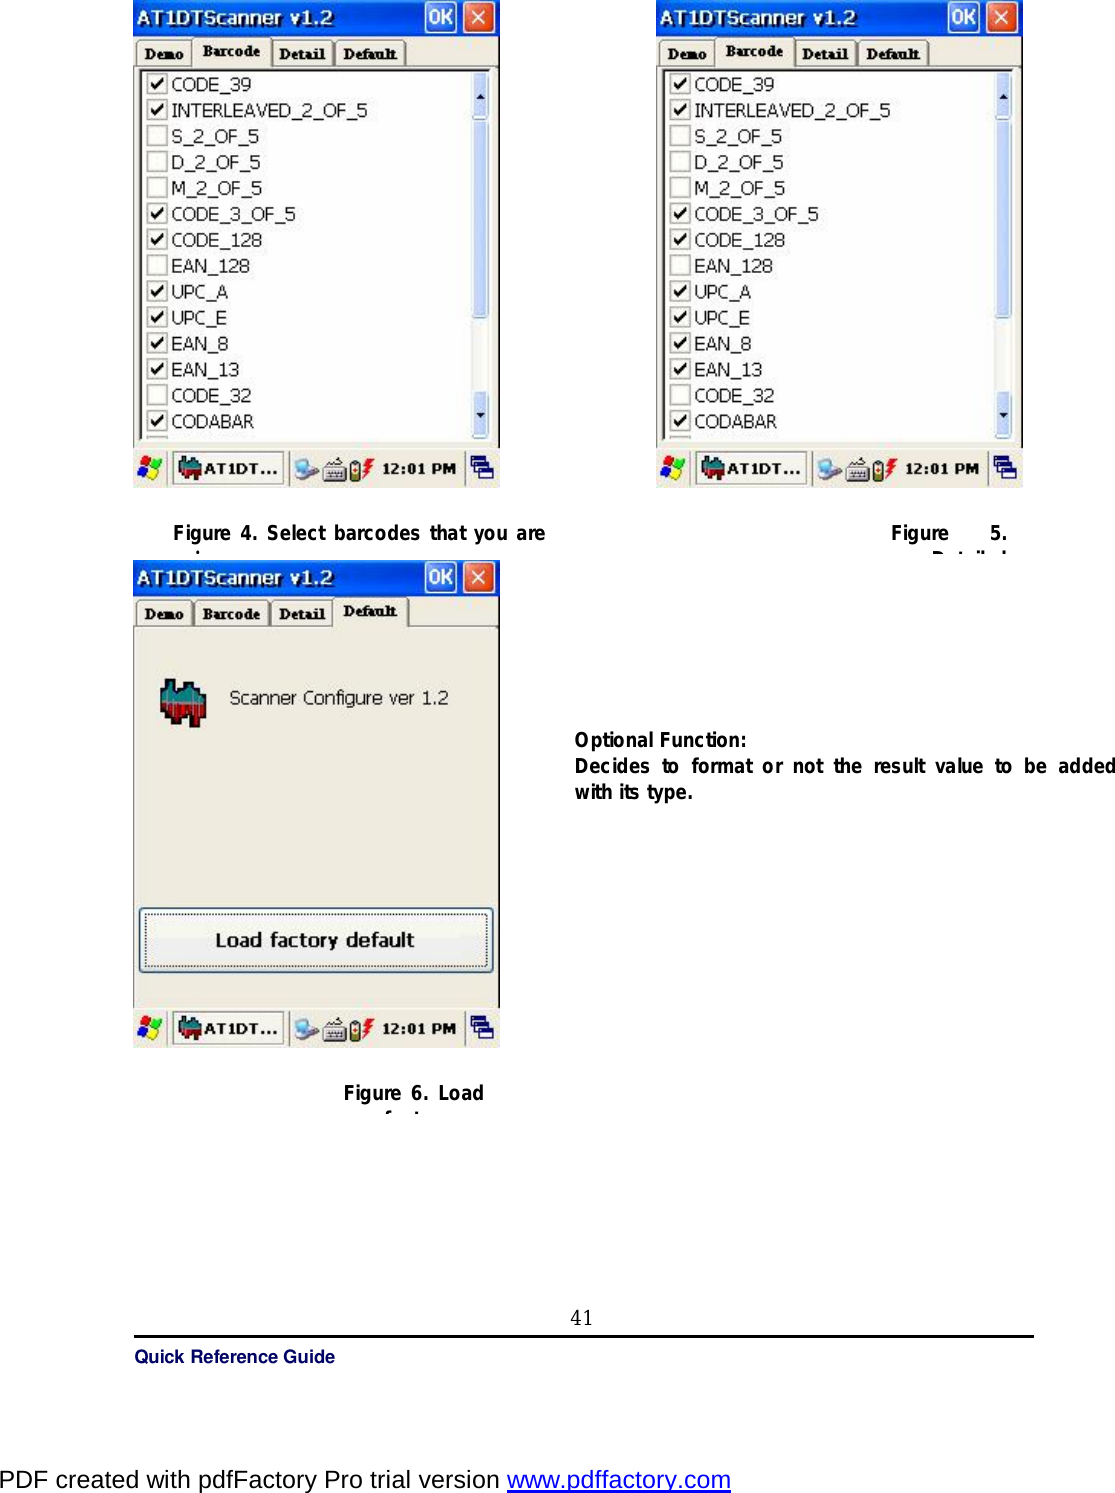
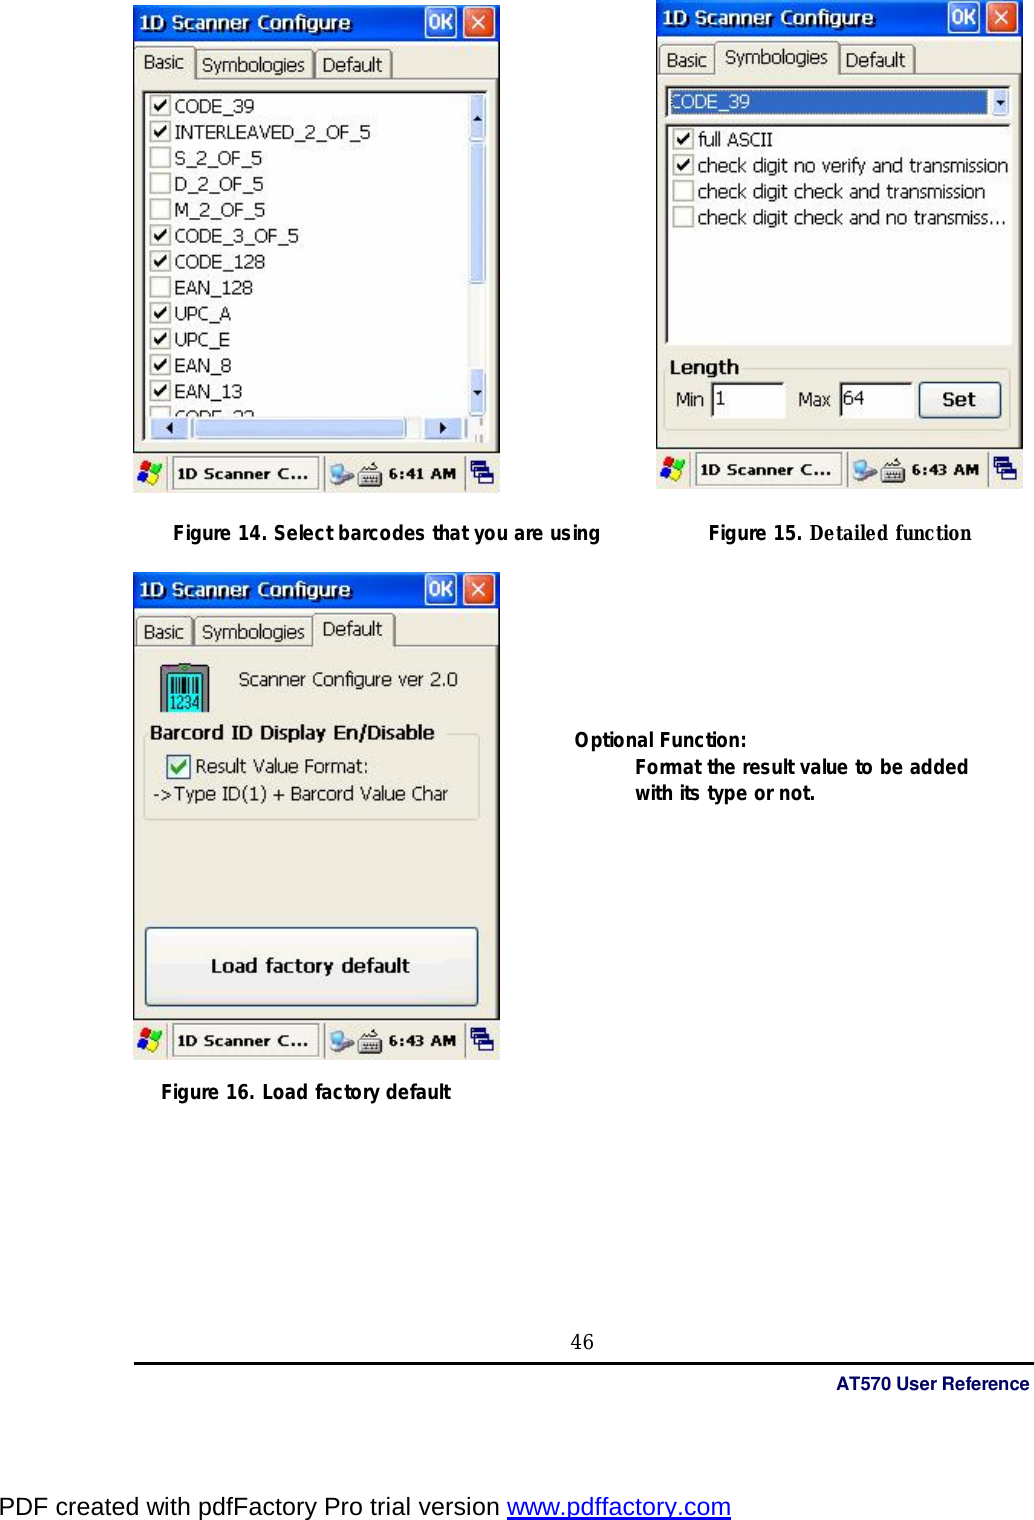
![Quick Reference Guide 45 1.3 Setting up the 1D Barcode Symbology When you are using barcodes that are encoded in a different symbology, you need to enable the symbology on your AT570. Please use ATID application to enable and disable symbologies. This way will help you to improve the performance of your work, for example if you enable only the barcodes that you need to use every day, you don’t need to perform any activity to use that barcodes. You can set the details for all kinds of barcode, as you use 1D Scanner Configure program. [Setting details] 1. Settings for selecting barcodes that you want to enable 2. Settings for the detailed optional function to every barcode. 3. Changing the default of barcode scanner into the factory default. The final state of the default that you set through the “1D Scanner Configure” cannot be initialized after you perform a hard-reset. So if you want to set up the default again, use Symbology Setting program to change the default. 1) Executing Symbology Setting program To execute Symbology Setting program: Start > setting > control panel > 1D Scanner Configure Figure 12. Tap Control Panel Figure 13. Execute 1D Scanner Configure PDF created with pdfFactory Pro trial version www.pdffactory.com](https://usermanual.wiki/ATID/AT570.revised-users-manual/User-Guide-936488-Page-45.png)
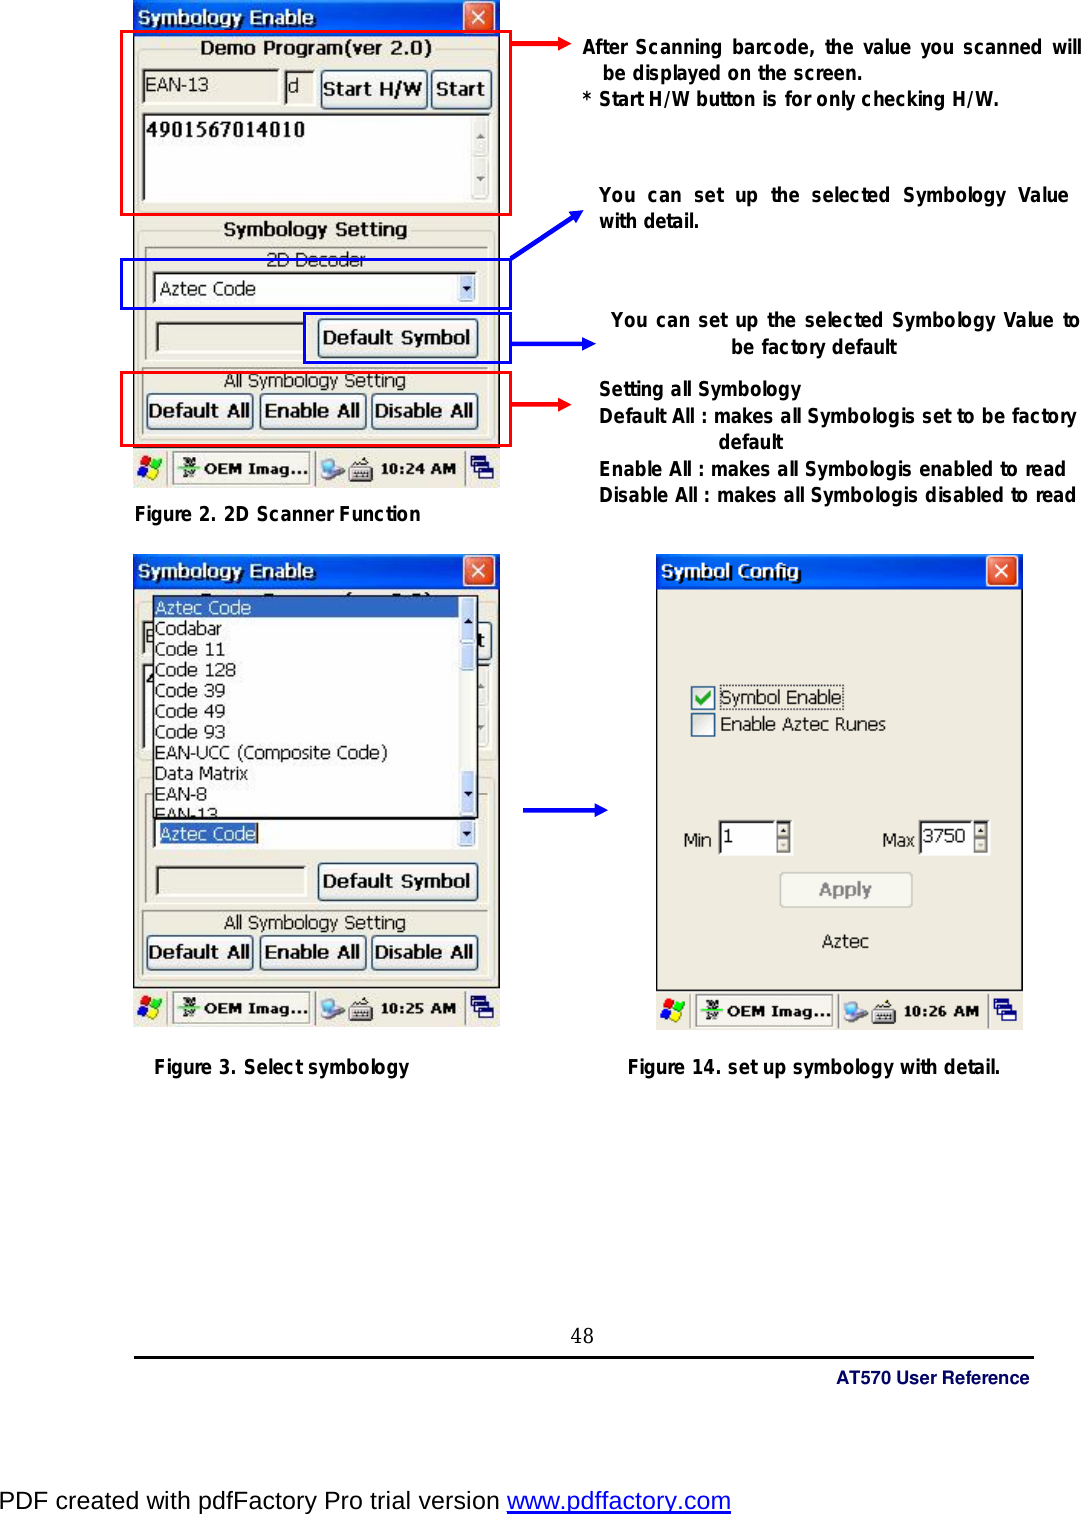
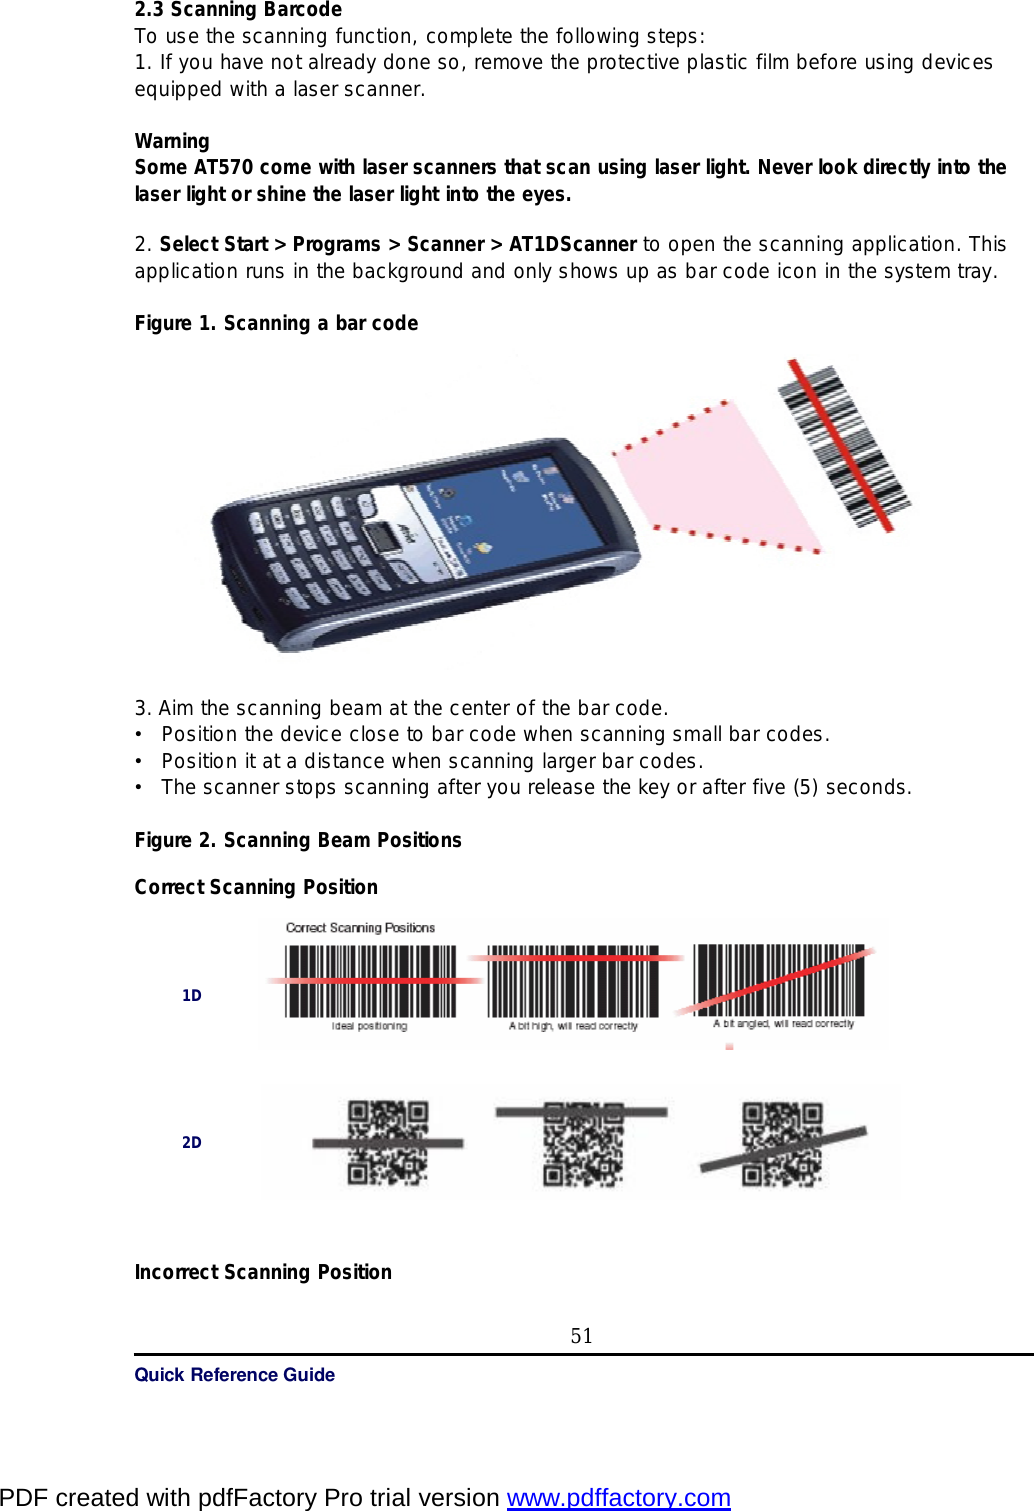
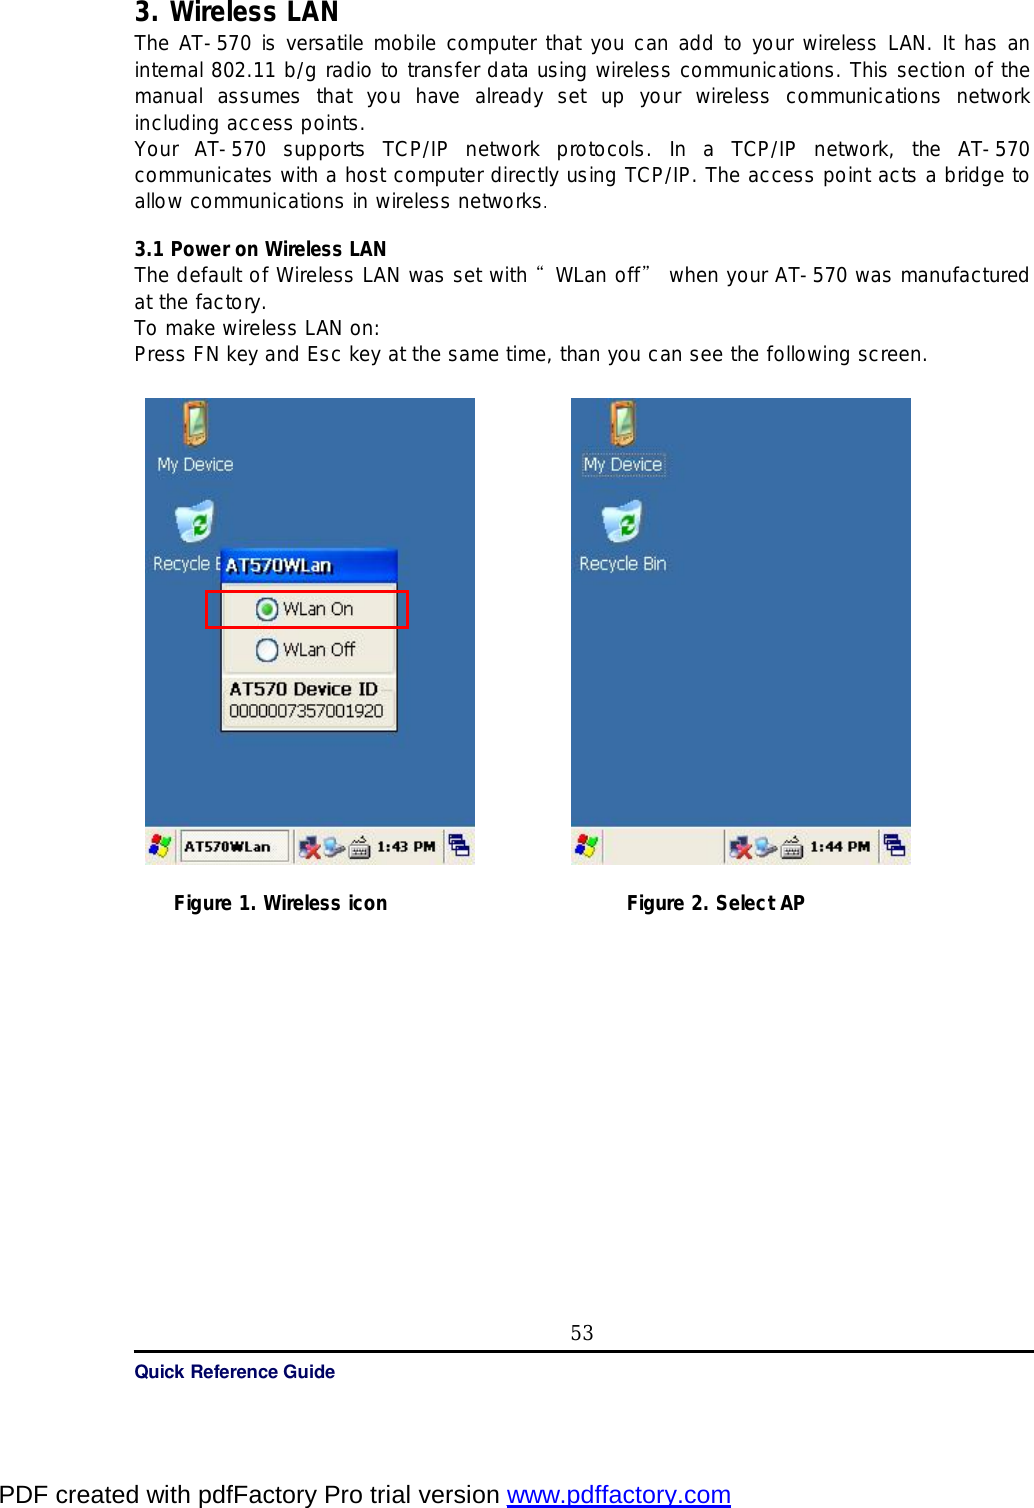
![Quick Reference Guide 47 2. 2D barcode Scanner 2.1 Reading 2D barcode & Symbology Setting You can execute AT2DScanner coded from ATID to make sure that your AT570 scans barcodes exactly. 1) Executing Scanner Diagnostics [Start] -> [Programs] -> [Scanner] -> [AT2DTScanner] Note: If you don’t have AT2Dscanner.exe(Ver 2.0) File, please look for our staff or visit ATID web site at www.atid1.com to download. . [Program Release Note] 1. Ver 1.0 : can only read barcode 2. Ver 2.0 : can read barcode and set up symbology 2) Reading barcode(Ver 2.0) Figure 1. Wait till the program is initialized. 1. Press the L/R scanning button or Fn4, KBD key to scan barcode. You can also tap the “Start” on the screen to scan a barcode when the lager beam is aimed to a barcode. 2. Make sure that your AT570 scans barcode exactly on the demo program. * The scanned data will be displayed on the screen, if your AT-570 reads a tag exactly. * If you stop scanning before your AT-570 reads a tag completely – An abnormal sound comes out. PDF created with pdfFactory Pro trial version www.pdffactory.com](https://usermanual.wiki/ATID/AT570.revised-users-manual/User-Guide-936488-Page-47.png)
![Quick Reference Guide 49 2.2 Setting the AT2DEmulator You can input the barcode value you scanned in any application program that has a cursor after setting the AT1Demulator. Like an input device, the AT1Demulator makes data displayed in an application program (see the following figure) Fiture 5. Barcode value in the WordPad Program 1) Using the AT2DEmulator Because the AT2DEmulator can apply to all application programs that have a cursor such like Web program, Wordpad and others, you can input the scanned data directly without coding any application program. 2) To executing Emulator Tap [Start] -> [Program] -> [Scanner] -> [AT2DTCEmulator] Figure 6. AT2DEmulator.exe Figure 7. Tap this AT2DEmulator Icon PDF created with pdfFactory Pro trial version www.pdffactory.com](https://usermanual.wiki/ATID/AT570.revised-users-manual/User-Guide-936488-Page-49.png)
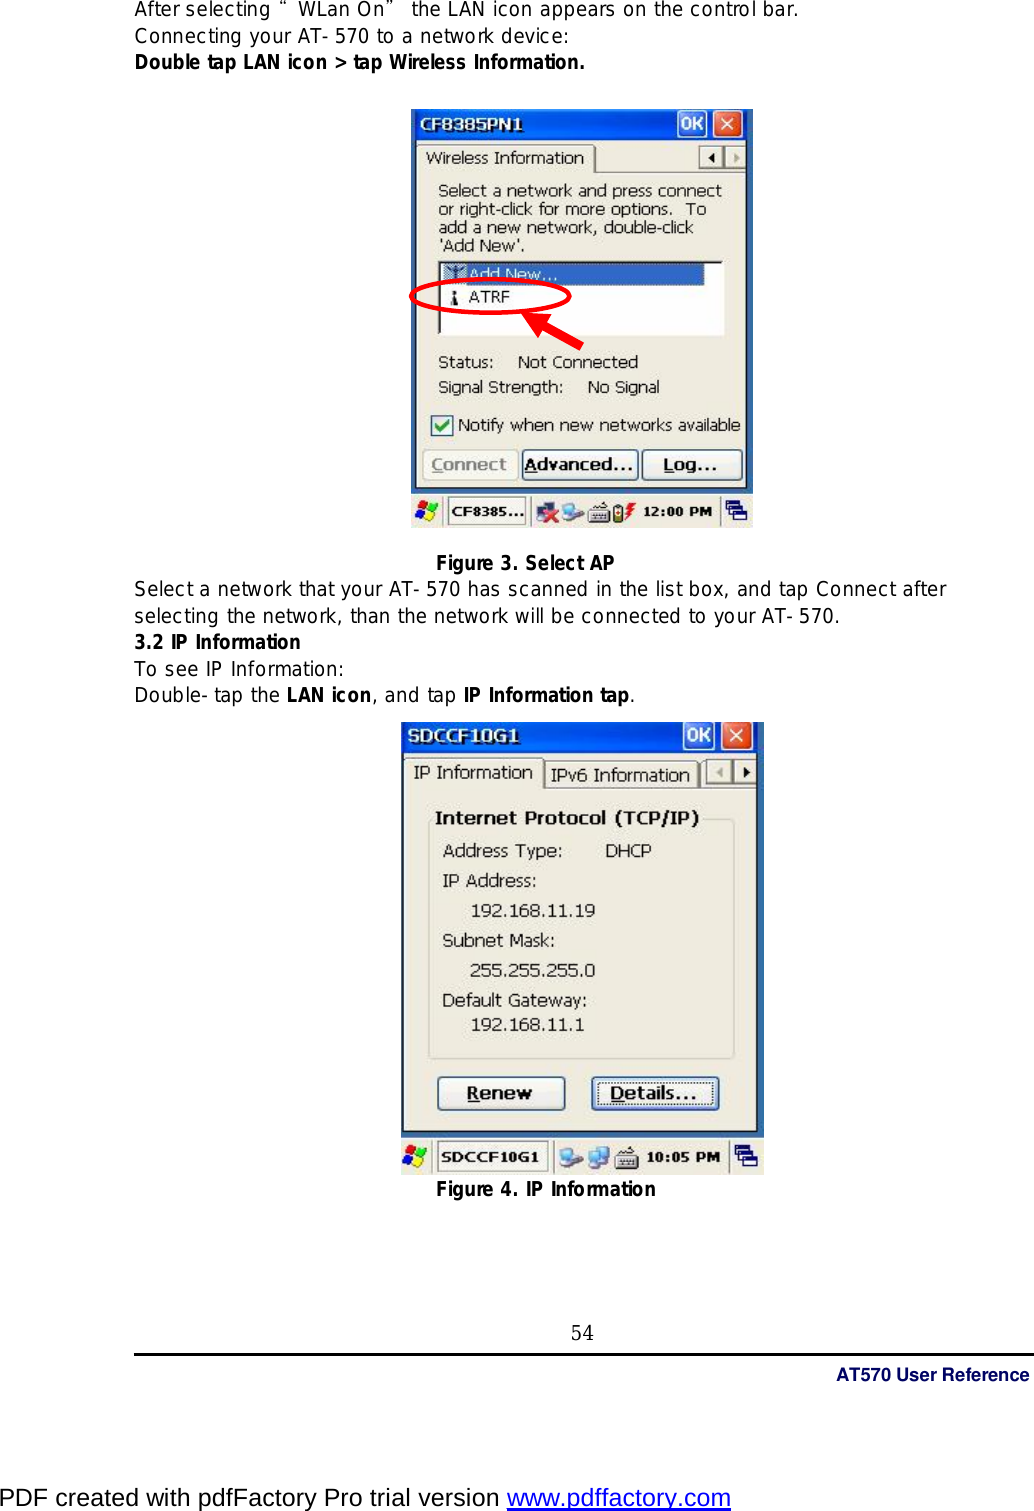
![Quick Reference Guide 57 (1) Status Icons Icon Description Receive Sensitivity Icon Notice Icon for receiving phone Notice Icon for receiving text massage Vibration mode Icon Data Communication state Icon Battery Status Icon (2) Function Icons Function Icons Description Press this icon to refer to the whole telephone number listed in the PDA. Press this icon to search the directory for a number. Press this icon to manage your text massage. Press this icon to use Dial-up Connection for connecting your phone to RAS data communication. (3) Having a phone 1) Press the telephone number you want to call. 2) You can adjust incorrect number and rewrite the number over again to press [CLR] button. 3) Press [SEND] button to have a phone call. Note: If you press [SEND] button without inputting phone number, the phone number list that you has called before appears on the screen. 4) Start to have a telephone call after connection. - The dial tone comes out and you can call. - The talk time will be displayed on the screen. 5) Press [END] button to finish communication. (4) Receiving a phone 1) The bell rings and receiving massage appears when you receive a phone. 2) Press [SEND] button to start to have a phone. 3) The telephone will be disconnected when you press [END] button or the opposite person presses the [END] button. (5) The others 1) You can input the “+” to press [*] button with long time. 2) You can input the “”-space character to press the [0] button with long time. PDF created with pdfFactory Pro trial version www.pdffactory.com](https://usermanual.wiki/ATID/AT570.revised-users-manual/User-Guide-936488-Page-57.png)