ATID AT870A Industrial PDA User Manual 1
ATID Co., Ltd Industrial PDA 1
UserManual.wiki
>
ATID
>
AT870A User Manual
User Manual
Navigation menu
Upload a User Manual
Namespaces
Wiki Guide
HTML
PDF
Info
Views
User Manual
Discussion / Help
Navigation
![&KDSWHU%DVLFIXQFWLRQ12 Automatic Power OFF The device will be automatically entered to low power mode (Sleep mode) if user does not use it for the designated time. User can change the designated time at the control panel and power as below. If user sets proper time-out, the device can be protected from the situation of power-on without user and battery can be prolonged. [Menu] -> [Application] -> [Settings] -> [Display] –> [Sleep mode] Enters to the Sleep mode by double-clicking Display Screen appears by pressing power button after Automatic Power OFF. Turn off the device in case of discharging the battery If the system cannot be used by electric discharge, it will be automatically entered into low-power mode (sleep mode). In this case, user have to charge the battery or connect the adaptor with the adaptor connecting jack of main body, then press the <Power> button to turn on the system since it won`t be turned on despite of pressing the <POWER> button.](https://usermanual.wiki/ATID/AT870A/User-Guide-3971916-Page-12.png)
![&KDSWHU%DVLFIXQFWLRQ13 Checking battery gauge Ǹ NOTE: Using time for battery will be influenced by way of use, surrounding environment. In general, you can use the device from 6 hours to 12 hours after 2,970 mA battery is fully charged. Checking the Gauge Remained [Menu] -> [Application] -> [Settings] -> [About phone] –> [Status] Caution for low battery If the system is unavailable for low-battery, caution screen for lack of battery will be came out. In this situation, please turn off the device by pushing <POWER> button and then charge as soon as possible. . Changing the battery You need to purchase a new battery if existing battery got damaged or reached to its life. ˛ CAUTION Please discard the expired battery at the designated location.](https://usermanual.wiki/ATID/AT870A/User-Guide-3971916-Page-13.png)
![&KDSWHU%DVLFIXQFWLRQ14 Please do restart the system when the application doesn`t work properly or system receives no response. Hard reset In need of Hard reset Hard reset which is called cold reset can be used for initializing the hardware completely. Registry value, copied file and installed program can be remained originally even though user uses the hard reset, but please note that time/date will be initialized. Therefore, please do reset the time if user uses the hard rest. [Process of hard reset] Please press the power button and reset button with stylus pen simultaneously and then, unhand those buttons. [Result of Hard Reset] - Systems will be restarted - OS will be restarted](https://usermanual.wiki/ATID/AT870A/User-Guide-3971916-Page-14.png)

![&KDSWHU%DVLFIXQFWLRQ17 Set screen brightness Brightness of the screen affects the power consumption the most, so it is recommended to be set as required by the user. [Setting the screen brightness] [Menu] -> [Application] -> [Settings] -> [Display] -> [Brightness] Brightness : adjust the screen brightness Wallpaper : choose the wallpaper Auto-rotate screen : set the auto-rotate screen function Sleep mode : adjust the time period to enter into sleep mode Font size : adjust the font size of PDA Adjusting screen After using the device for a while or long time, you may adjust screen through ‘Touch Calibration’ if not being pressed the right place with one pointed by stylus pen. Adjusting touch screen [Menu] -> [Application] -> [Touch Calibration] Press the middle of target with stylus pen of 5 times.](https://usermanual.wiki/ATID/AT870A/User-Guide-3971916-Page-17.png)
![&KDSWHU%DVLFIXQFWLRQ18 Set sound volume The volume is set to 80% when it is dispatched. The user can set the different features of sound settings from [Menu] -> [Application] -> [Settings] -> [Sound].](https://usermanual.wiki/ATID/AT870A/User-Guide-3971916-Page-18.png)
![&KDSWHU%DVLFIXQFWLRQ19 Keypad is an input method editor that inputs numbers or alphabetic characters easily. Use keypad To change the current input language, follow the steps below. [Menu] -> [Application] -> [Settings] -> [Language & input] Or change the select input method.](https://usermanual.wiki/ATID/AT870A/User-Guide-3971916-Page-19.png)

![&KDSWHU2SWLRQDOPRGXOHSetting barcode emulator Can input the read barcode values (Notes, Internet Explorer…) where the cursors are located. Sets the barcode value input method, scan button, scan sound etc. using Barcode Emulator program. When opening the Barcode Emulator, if other Barcode programs are being run, please close the program first to run the Barcode Emulator. [Menu] -> [Application] -> [Settings] -> [Language & input]](https://usermanual.wiki/ATID/AT870A/User-Guide-3971916-Page-25.png)
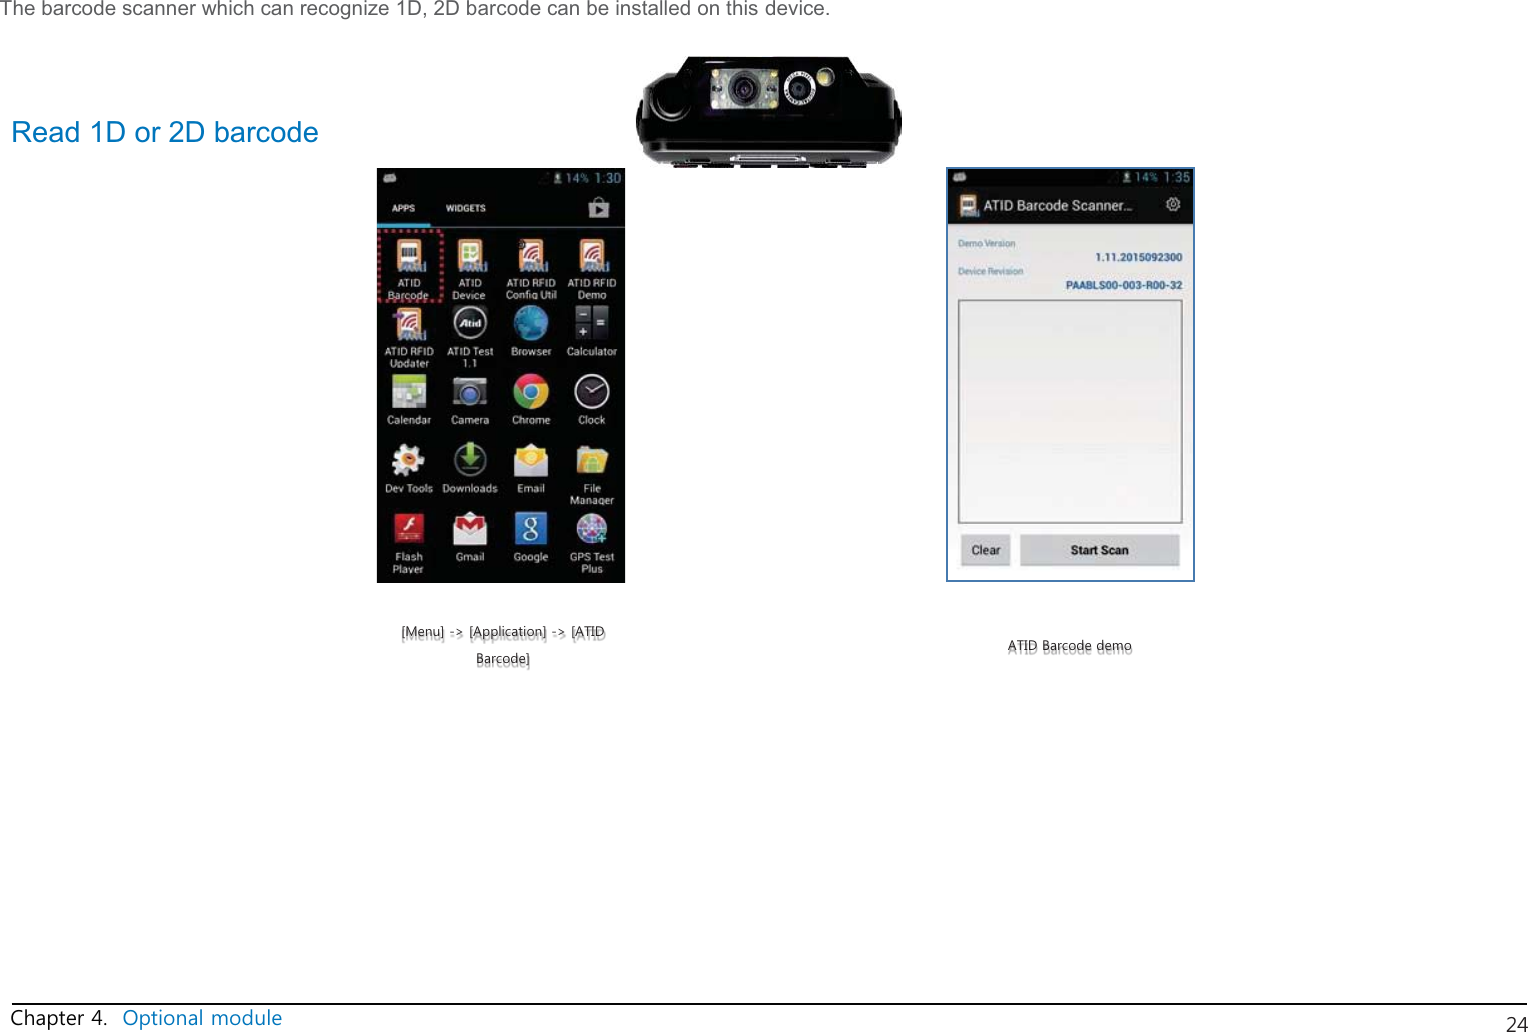
![&KDSWHU2SWLRQDOPRGXOHBarcode scanning Remove protection film on barcode scanner Run the scanning application Place beam in the middle of the barcode to read Adjust distance fits to the barcode Scanning stops automatically after 5 seconds from getting out of readable distance [Correct barcode reading] 1. The small barcode should be closer to the device. This device is read at the distances of 40~300mm. If the reading not working well, please adjust angle or distance. 2. Laser beam appears as a dark red line when shined to barcode label. [Incorrect barcode reading] 1. Laser beam should cross the barcode. 2. If only part of the barcode is shined by the laser beam, it won’t be recognized.](https://usermanual.wiki/ATID/AT870A/User-Guide-3971916-Page-27.png)
![&KDSWHU2SWLRQDOPRGXOH AT870A enable to explain wireless communication including APN since it can communicate through 802.11 a/b/g/n radio. AT870A supports the TCP/IP network protocol and AT870A directly uses the TCP/IP and host computer at this protocol. WiFi connection and termination [Menu] -> [Application] -> [Settings] -> [Wi-Fi]](https://usermanual.wiki/ATID/AT870A/User-Guide-3971916-Page-28.png)
![&KDSWHU2SWLRQDOPRGXOH This document consist of contents applied of ‘BCM4329 COMBO’ module in AT870A. Bluetooth connection and termination [Menu] -> [Application] -> [Settings] -> [Bluetooth] 1. Bluetooth](https://usermanual.wiki/ATID/AT870A/User-Guide-3971916-Page-29.png)
![&KDSWHU2SWLRQDOPRGXOH AT870A can install the GPS system as an option, and GPS Module will be installed on top of AT870A into Built-in shape GPS demo program execution [Menu] -> [Application] -> [GPS Test] GPS Test Execution GPS Test Screen Confirm GPS reception Data: 1. Check if GPS reception is normally worked in the open place 2. Actual GPS Data can be different with surrounding environment (Around 3 ~ 10 Minutes) Device can receive the GPS Data easily, after its GPS data is the one that was received in the past](https://usermanual.wiki/ATID/AT870A/User-Guide-3971916-Page-30.png)
![&KDSWHU2SWLRQDOPRGXOH AT870A is installed with 5.0 mega pixel and brightness, resolution revision, screen capture and so on can be adjusted by user. Use of camera [Menu] -> [Application] -> [Camera] Camera execution. Camera screen](https://usermanual.wiki/ATID/AT870A/User-Guide-3971916-Page-31.png)
![&KDSWHU2SWLRQDOPRGXOH UHF 900Mhz RFID program [Menu] -> [Application] -> [Settings] -> [ATUHF Demo] ATUHF Demo execution ATUHF Demo screen](https://usermanual.wiki/ATID/AT870A/User-Guide-3971916-Page-32.png)