ATrack Technology ATVT1549 Vehicle telematics User Manual
ATrack Technology Inc. Vehicle telematics
UserManual.wiki
>
ATrack Technology
>
ATVT1549 User Manual
User manual
Navigation menu
Upload a User Manual
Namespaces
Wiki Guide
HTML
PDF
Info
Views
User Manual
Discussion / Help
Navigation


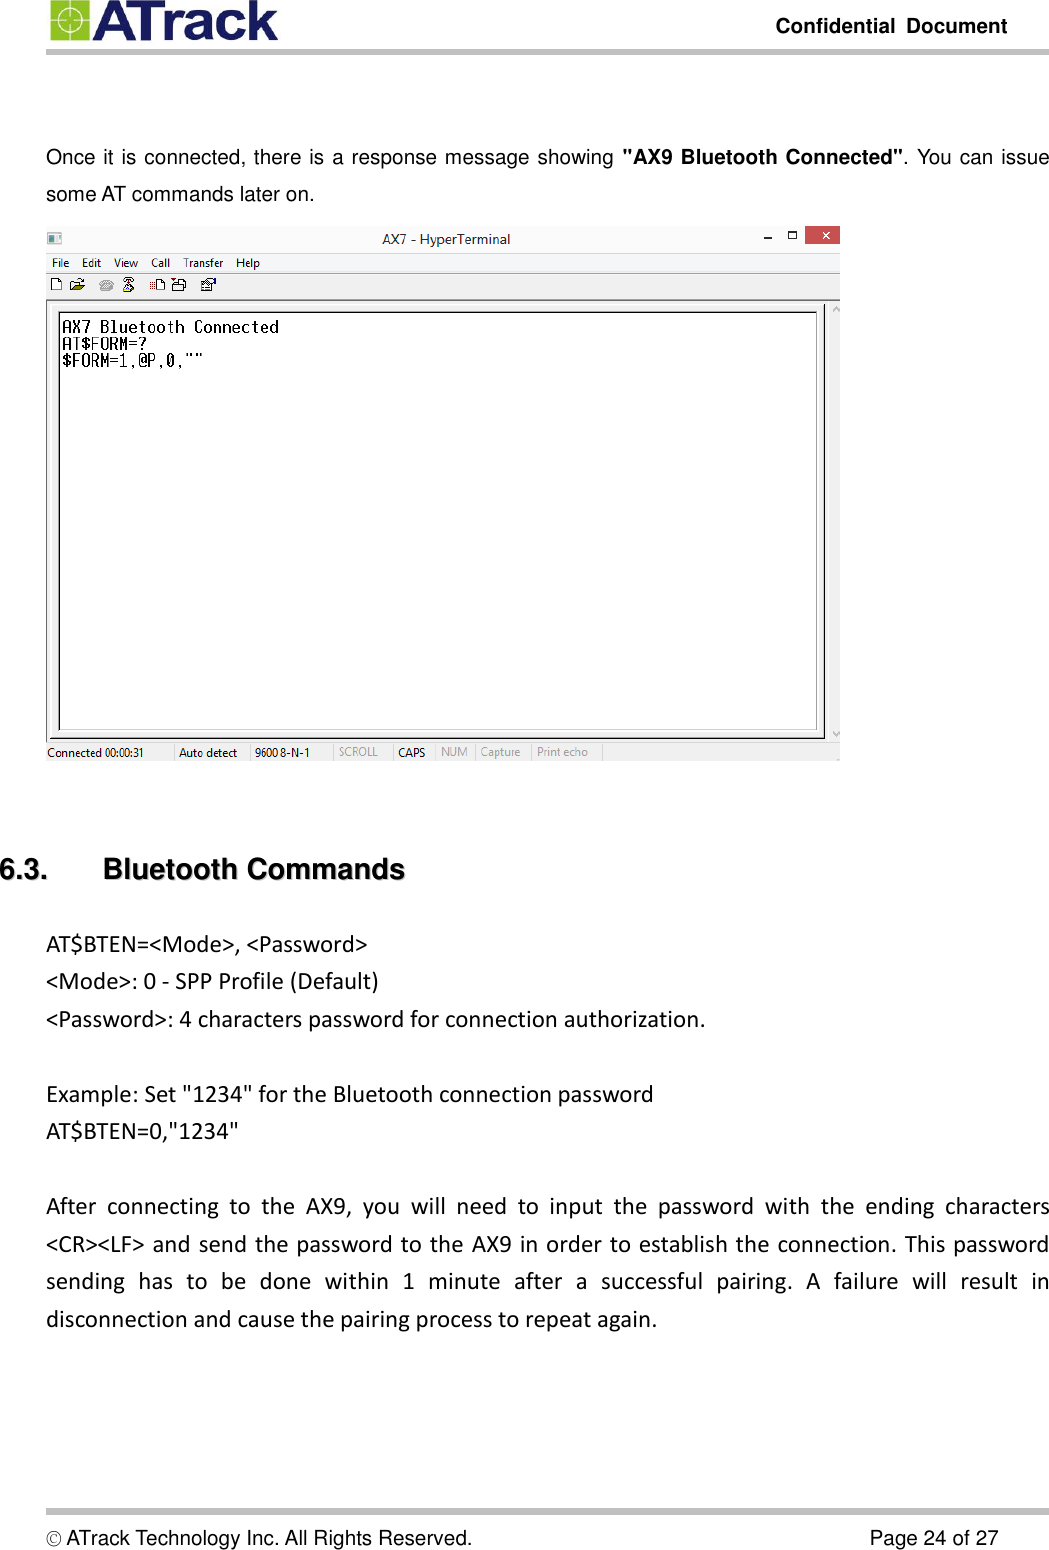
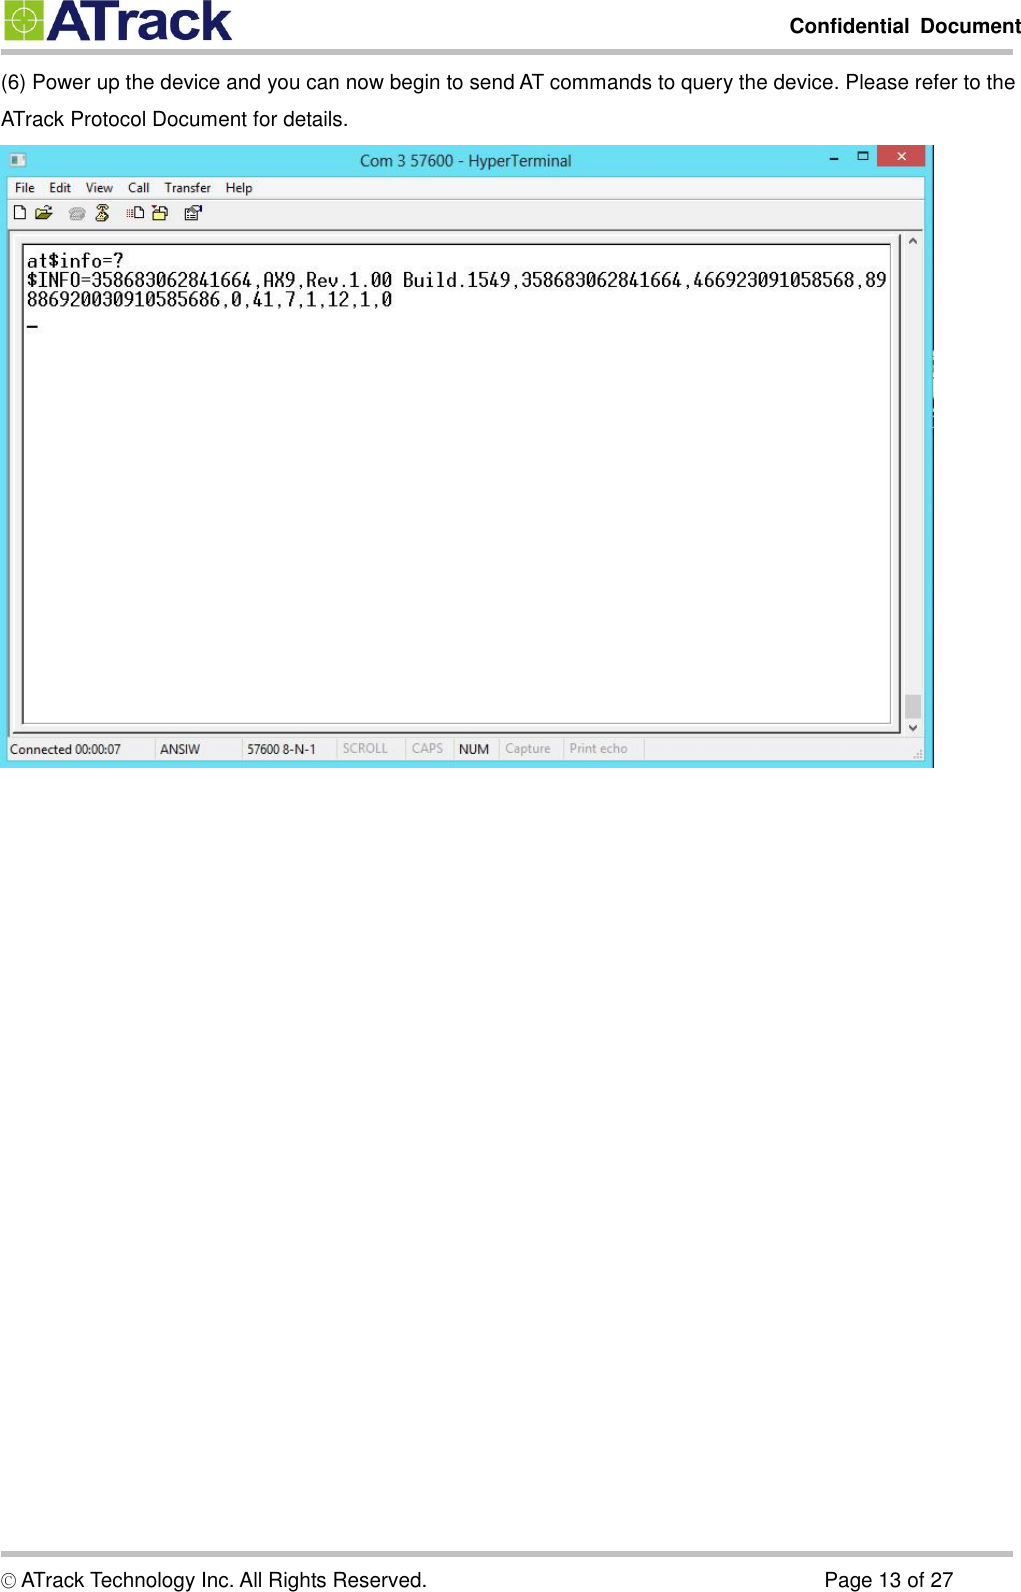
![Confidential Document © ATrack Technology Inc. All Rights Reserved. Page 10 of 27 55.. CCoonnffiigguurraattiioonn You can explore many of AX9’s great features through AT commands. The commands can be sent to AX9 via USB, SMS or cellular network (e.g. GPRS/CDMA/UMTS). 55..11.. CCoonnnneeccttiinngg aa DDeevviiccee UUssiinngg HHyyppeerrTTeerrmmiinnaall The following example shows how to connect the AX9 through Hyper Terminal. You may use other popular terminal emulators such as Putty or Tera Term Pro to establish a console session with the AX9. (1) Run HyperTerminal and select the correct COM port and click on the [Configure…] button.](https://usermanual.wiki/ATrack-Technology/ATVT1549/User-Guide-2932825-Page-10.png)
![Confidential Document © ATrack Technology Inc. All Rights Reserved. Page 11 of 27 (2) Port Settings should be as follows. Click on the [OK] button to close the Properties window. (3) Click on [File][Properties] Bits per second: 57600 Data Bits: 8 Parity: None Stop Bits: 1 Flow Control: None](https://usermanual.wiki/ATrack-Technology/ATVT1549/User-Guide-2932825-Page-11.png)
![Confidential Document © ATrack Technology Inc. All Rights Reserved. Page 12 of 27 (4) Click on the [Settings] tab and click on the [ASCII Setup…] button. (5) Check the following options and click on the [OK] button.](https://usermanual.wiki/ATrack-Technology/ATVT1549/User-Guide-2932825-Page-12.png)
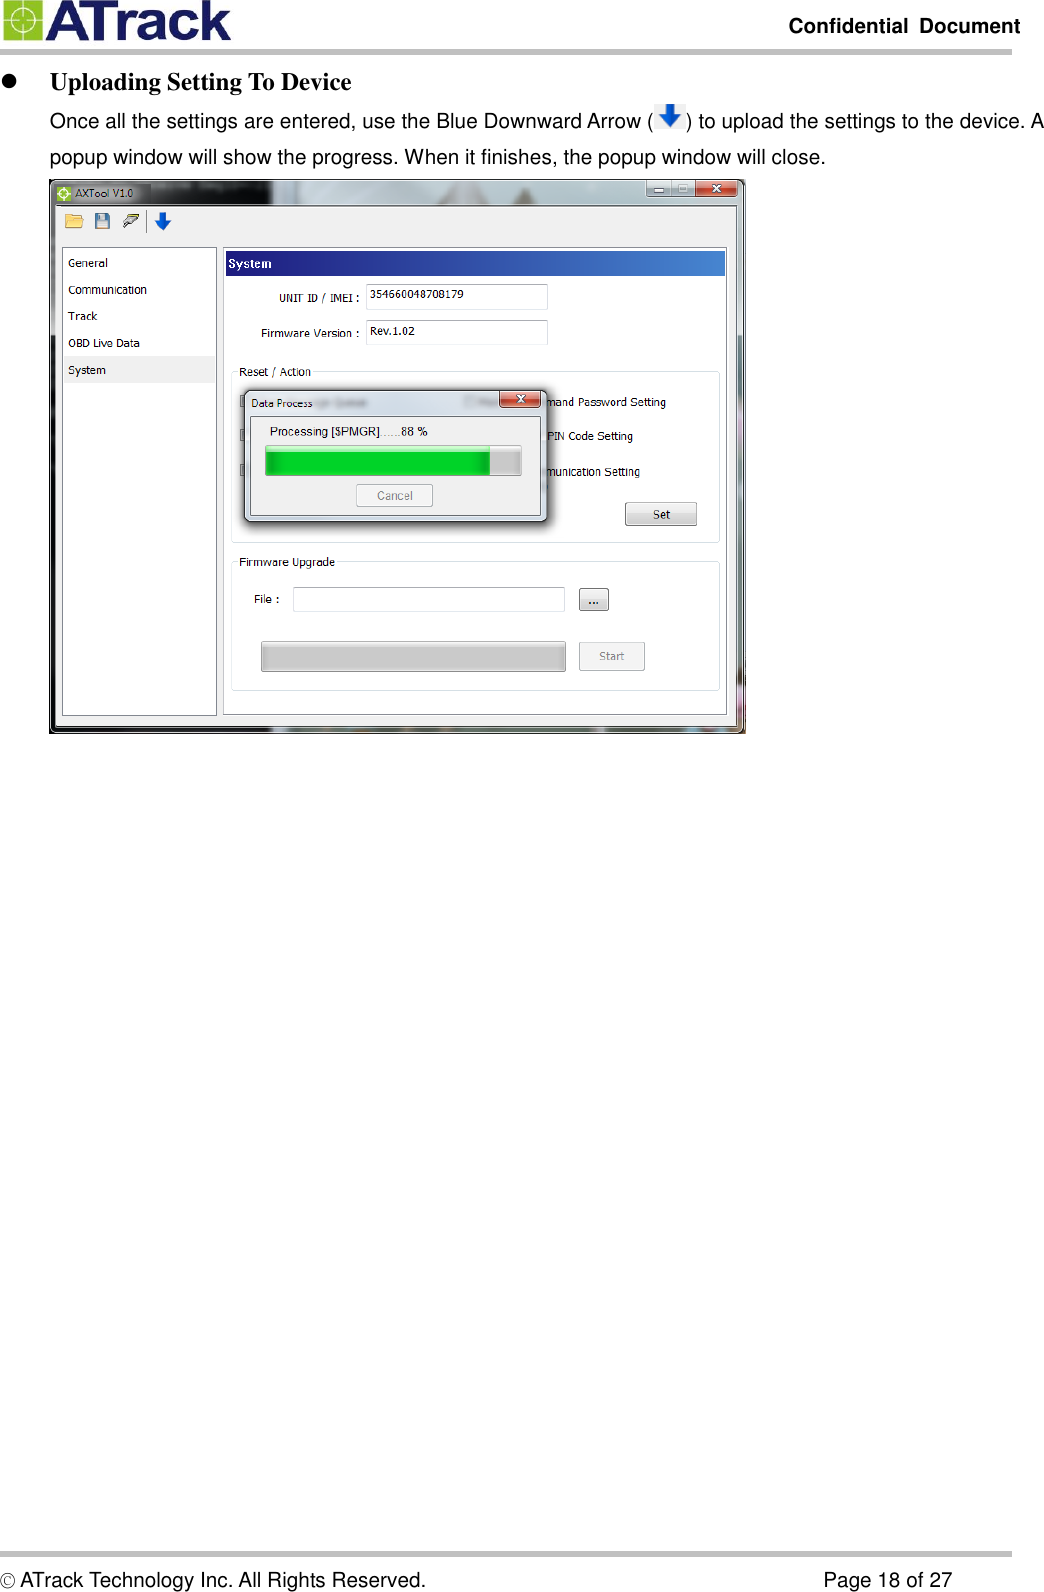
![Confidential Document © ATrack Technology Inc. All Rights Reserved. Page 14 of 27 55..22.. CCoonnnneeccttiinngg aa DDeevviiccee UUssiinngg AAXXTTooooll The AXTool is a simple configuration tool which is useful for users to configure the basic settings of the AX9. For advanced configurations, please refer to the ATrack Protocol Document for details. General Setting [Device Password]: The device password is used for protecting device configurations. You can have the maximum of 6 characters. [SIM Card PIN Code]: Enter the PIN code of a SIM card if you a PIN code enabled. [Position Format]: Select position format for all reports. [Power Saving Mode]: Enable/Disable the power saving mode. When the power saving mode is enabled, the AX9 device will go into deep sleep mode after 1 minute of engine off.](https://usermanual.wiki/ATrack-Technology/ATVT1549/User-Guide-2932825-Page-14.png)
![Confidential Document © ATrack Technology Inc. All Rights Reserved. Page 15 of 27 Communication Setting [GPRS Enable]: Enable GPRS communication [Socket Type]: Select TCP or UDP for GPRS communication [APN]: Access Point Name for GPRS connection. (Please contact your cellular network carrier for the information) [Host IP]: Enter the IP address or domain name of host server [Host Port]: Enter Port number of the remote host server [User Name]: The GPRS user name. (Please contact your cellular network carrier for the information) [Password]: The GPRS password. (Please contact your cellular network carrier for the information)](https://usermanual.wiki/ATrack-Technology/ATVT1549/User-Guide-2932825-Page-15.png)
![Confidential Document © ATrack Technology Inc. All Rights Reserved. Page 16 of 27 Track Setting You may configure a tracking interval when the vehicle engine is ON. When [Time Mode] and [Distance Mode] are both selected, the tracking behavior will operate in AND condition.](https://usermanual.wiki/ATrack-Technology/ATVT1549/User-Guide-2932825-Page-16.png)
![Confidential Document © ATrack Technology Inc. All Rights Reserved. Page 17 of 27 OBD Live Data When the AX9 is connected to a vehicle’s OBD-II port, you will see the OBD live data such as VIN, Speed, RPM, MAF air flow rate, Engine Load, Throttle Position, Engine Temperature, Fuel Level, MIL Status, Odometer, Fuel Used, and Main Voltage. System Setting The [System] setting will show the current connected device information. The [Reset/Action] function can be used to reset parameters or clear buffered messages of the device.](https://usermanual.wiki/ATrack-Technology/ATVT1549/User-Guide-2932825-Page-17.png)
![Confidential Document © ATrack Technology Inc. All Rights Reserved. Page 19 of 27 55..33.. FFiirrmmwwaarree UUppggrraaddee Open the AXTool program and click on [System] on the menu. Browse the firmware file which is provided by ATrack and click on the [Start] button. When you see “Upgrade Successfully!!”, that means the device firmware is upgraded.](https://usermanual.wiki/ATrack-Technology/ATVT1549/User-Guide-2932825-Page-19.png)