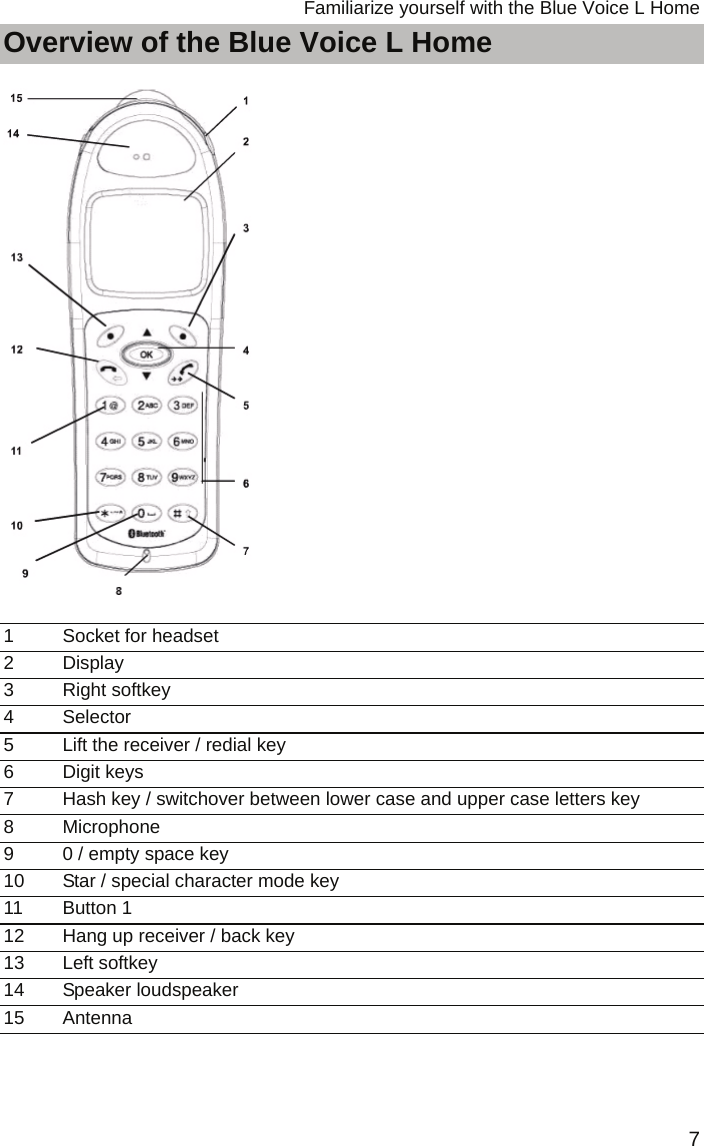
Avaya BLUEVOICEL Blutooth Handset User Manual BlueVoiceLHome gb
AVAYA Blutooth Handset BlueVoiceLHome gb
UserManual.wiki
>
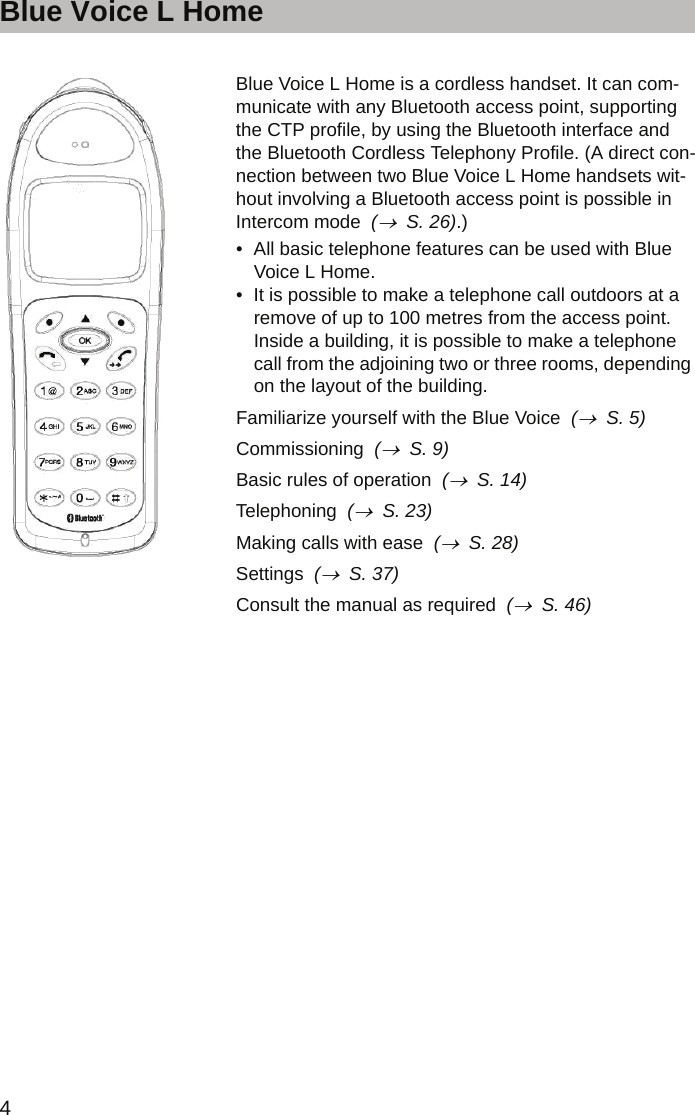
Avaya
>
BLUEVOICEL User Manual
User Manual
Navigation menu
Upload a User Manual
Namespaces
Wiki Guide
HTML
PDF
Info
Views
User Manual
Discussion / Help
Navigation


![Conformity54Consult the manual as required.FCC ID: TYM-BLUEVOICEL This device complies with Part 15 of the FCC Rules. Operation is subject to the follo-wing two conditions: 1. this device may not cause harmful interference, and2. this device must accept any interference received, including interference that may cause undesired operation.Changes or modifications not expressly approved by the party responsible for com-pliance could void the user’s authority to operate the equipment.Important note: FCC Radiation Exposure Statement: The Blue Voice L Home handset (FCC ID: TYM-BLUEVOICEL) is in compliance with the Federal Communications Commission (FCC) Guidelines [OET 65] for uncontrolled exposure.Body worn operationThis device was tested for body-worn operations. To maintain compliance with FCC RF exposure requirements, use only belt-clips, holsters or similar accessories that does not contain metallic components in its assembly. The use of accesories that do not satisfy these requirements may not comply with FCC RF exposure requirements and should be avoided.](https://usermanual.wiki/Avaya/BLUEVOICEL/User-Guide-698053-Page-51.png)