Avaya BLUEVOICEL Blutooth Handset User Manual BlueVoiceLHome gb
AVAYA Blutooth Handset BlueVoiceLHome gb
Avaya >
User Manual
Blue Voice L Home
4
Blue Voice L Home
Blue Voice L Home is a cordless handset. It can com-
municate with any Bluetooth access point, supporting
the CTP profile, by using the Bluetooth interface and
the Bluetooth Cordless Telephony Profile. (A direct con-
nection between two Blue Voice L Home handsets wit-
hout involving a Bluetooth access point is possible in
Intercom mode (
→
S. 26).)
• All basic telephone features can be used with Blue
Voice L Home.
• It is possible to make a telephone call outdoors at a
remove of up to 100 metres from the access point.
Inside a building, it is possible to make a telephone
call from the adjoining two or three rooms, depending
on the layout of the building.
Familiarize yourself with the Blue Voice (
→
S. 5)
Commissioning (
→
S. 9)
Basic rules of operation (
→
S. 14)
Telephoning (
→
S. 23)
Making calls with ease (
→
S. 28)
Settings (
→
S. 37)
Consult the manual as required (
→
S. 46)

5
Familiarize yourself with the Blue Voice L Home
Important notes
Familiarize yourself with the Blue Voice L Home
Important notes
Where you may use Blue Voice
The Blue Voice is suitable for use in the office, outdoors or in a dusty environment. It
complies with the IP 54 protection class and is splashproof and dustproof.
Do not leave the telephone in direct sunlight. Doing so could cause damage to the
telephone, thus making it inoperable.
Operating the battery
Your Blue Voice comes fitted with a Li-ion battery.
• Charge the battery completely the first time you use it.
• Insert the Blue Voice into the charger repeatedly during the first week of use.
The new battery attains its full capacity after it has been charged, used and charged
again a few times.
Avaya is not liable for damage which occurs due to inappropriate handling of the bat-
tery.
Repairs
The device may only be opened or repaired by qualified technicians. Do not open the
telephone yourself. Doing so could cause damage to the telephone, thus making it
inoperable.
Efficient use of the handset
Your Blue Voice comes fitted with an antenna. The antenna projects into the casing
projection on the upper rear side of the device.
Do not cover up the antenna unnecessarily. Particularly when making a call.
This reduces the signal range, the connection quality and the talk time, as your
device must then operate at a higher transmission power.
It is recommended to switch your Blue Voice off if you intend to have it away from the
charger for a long period of time. When switched off, Blue Voice remains on standby
for up to 20 days before the battery is finally flat.
Maintenance
Please clean your telephone with a soft, lint-free cloth. If required the cloth can be
moistened with a mild household or plastic cleanser or disinfectant. Do not clean with
scrubbing cleansers or solvents.

Important notes
6
Familiarize yourself with the Blue Voice L Home
Always dispose of old equipment correctly - keep our environment tidy
Old electrical and electronic equipment marked with this symbol can
contain substances hazardous to human beings and the environment.
Never dispose of these items together with unsorted municipal waste
(household waste). In order to protect the environment, public collec-
tion points have been set up to ensure the correct disposal of old elec-
trical and electronic equipment marked with this symbol.
To reduce the risk of these substances being released into the envi-
ronment and to reduce the burden on natural resources, it is also pos-
sible to participate in Avaya-Tenovis’ used equipment return system.
This system ensures the correct recycling of old equipment as well as
the re-utilisation of individual components.
7
Familiarize yourself with the Blue Voice L Home
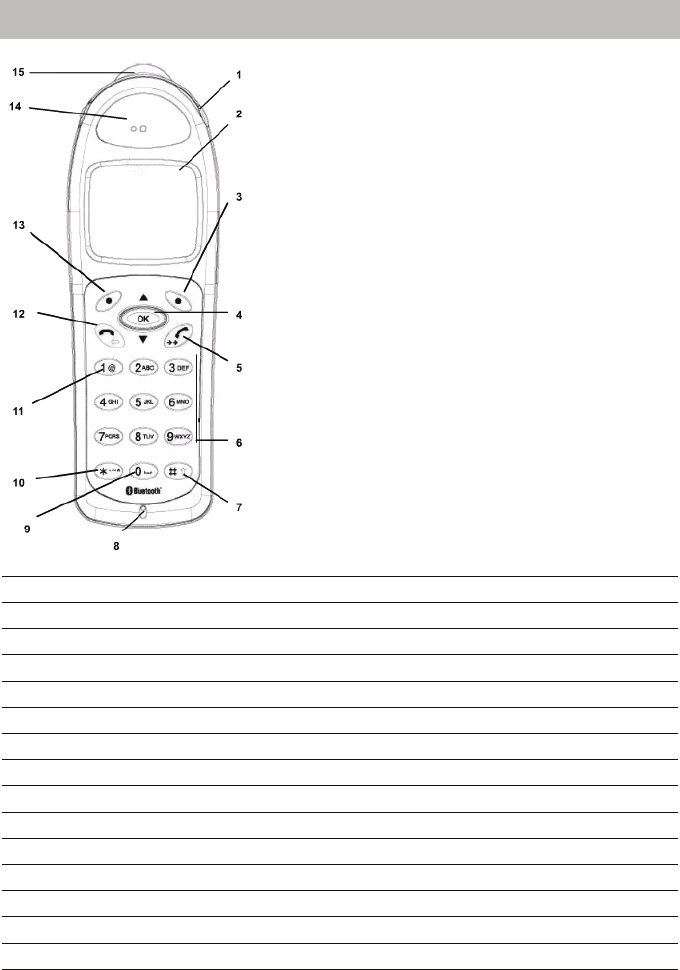
Overview of the Blue Voice L Home
Overview of the Blue Voice L Home
1 Socket for headset
2 Display
3 Right softkey
4Selector
5 Lift the receiver / redial key
6 Digit keys
7 Hash key / switchover between lower case and upper case letters key
8 Microphone
9 0 / empty space key
10 Star / special character mode key
11 Button 1
12 Hang up receiver / back key
13 Left softkey
14 Speaker loudspeaker
15 Antenna
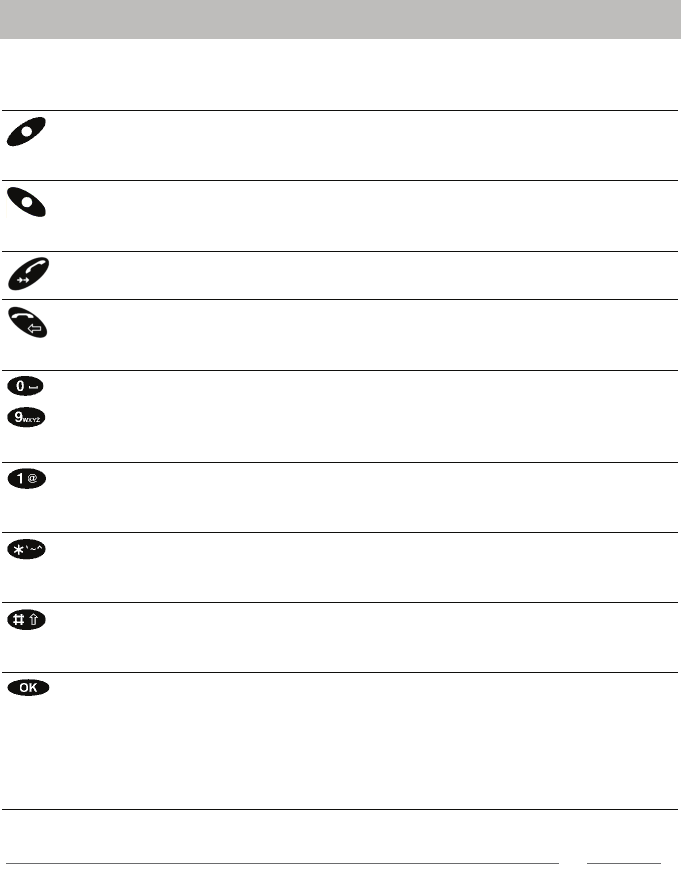
All keys at a glance
8
Familiarize yourself with the Blue Voice L Home
All keys at a glance
Many keys have two functions. According to the status of Blue Voice, the appropriate
function is active.
i
Note
It normally does not matter if a key is pressed quickly or held down for a longer
period. Longer pressing is only necessary for the use of some special functions.
Left softkey Function depends on status
Second function (press and hold down
key): Switch off
Right softkey Function depends on status
Second function (press and hold down
key): Switch on
Lift the receiver Dials the call number entered
Second function: Redial
Hang up Ends call
Second function: Cancel / back to last
menu displayed
... Digit keys with letters For dialling call numbers and entering
text
Second function (press and hold down
key): Direct entry into phone book
Button 1 Digit / special characters
Second function (press and hold down
key): Direct entry into phone book
Star button For special function
Second function: Calls up the menu for
the entry of special characters
Hash key For special function
Second function: Switching between
upper case and lower case letters
Selector Pressing the key strongly:Opens a sel-
ected menu item or confirms an input.
Press the rocker switch up or down:
Moves the highlight in the display accor-
dingly. If a scroll bar is shown, the display
scrolls up or down.


Positioning of the charger
10
Commissioning
Positioning of the charger
Place the charger on a solid, even surface, for example, on a table. Choose a loca-
tion that is protected from direct sunlight and dampness.
• Plug the small plug of the connecting cord into the back of the charger.
• Plug the plug-in power supply into a socket.
The charger is ready for operation.
i
Note
• You may only use the charger with the standard 6.2 V 620 mA plug-in power sup-
ply, reference number 4.999.109.002.
• The plug-in power supply must be accessible and close to the charger. In case of
danger it has to be unplugged from the socket.
• You are therefore advised to use an antiskid surface for your charger, in particular
with new furniture or furniture that has been refreshed using varnish preservation
agents. Varnishes or varnish preservation agents may contain substances that sof-
ten the feet of the device, thus leaving unsightly stains on the surface of your furni-
ture. Avaya cannot assume liability for damage of this kind.

11
Commissioning
Charging the battery
Charging the battery
Simply place the Blue Voice into the charger. It may be switched on or off. It will
remain in the same condition during charging. You will hear a confirmation tone if
Blue Voice is switched on.
The battery symbol with three arrows shown here is displayed until the battery is
completely charged.
i
Note
• You can leave the handset in the charger permanently, if you wish. The battery will
be loaded until it is full and then loaded no more - it cannot be ’overloaded’.
• When the battery is being charged, it will become slightly warm. This is perfectly
normal.
• If the battery is completely flat (for example, if the Blue Voice has not been char-
ged for many weeks), you should leave the battery in the charger for at least 30
minutes before switching on and using Blue Voice.

Connect the Blue Voice to your access point
12
Commissioning
Connect the Blue Voice to your access point
Before you can make calls with your Blue Voice, a communication connection (bon-
ding) between the Blue Voice and the access point must be set up.
This procedure need only be carried out once. After ending a connection, the Blue-
tooth connection will be automatically re-established.
First you should prepare your access point for connection (bonding) (
→
S. 13),
then you should connect (bond) your Blue Voice. (
→
S. 13)

13
Commissioning
Connect the Blue Voice to your access point
Making the access point recognisable for other Bluetooth devices
Configure your access point in a way, that it is recognisable for other Bluetooth
devices. Make use of the user manual of your access point.
Connecting (bonding)
Your access point must already be in "Discovery mode".
Blue Voice is switched off.
Press the right softkey for a long period.
Blue Voice starts up. The display shows No device or changes between Search
devices and No device.
Press the "Search all" left softkey.
The display first shows Search available devices. The search can last appro-
ximately one minute. The device available or a list of all devices available will then be
displayed.
Select the device if necessary.
Confirm.
"Device details" are displayed:
Press the "Enrolment" right softkey.
... Enter the PIN of your access point and confirm with the "Enrolment"
right softkey.
The message Registering with ... successful appears and Blue Voice
goes into idle state.
i
Note
• Only those Bluetooth devices with the CTP profile are displayed.
• If more than one device is shown, compare the Bluetooth device addresses of the
device details. You will find this number in the documents of your access point.
• If the system search was not successful, you can try again using the "Retry" soft-
key. Ensure that the access point is in Discovery mode.

Switching the telephone on and off
14
Basic rules of operation
Basic rules of operation
Switching the telephone on and off
Switching on the telephone
The telephone is switched off.
Press the right softkey for a long period.
You will be automatically connected with the last access point upon which you were
last online.
Switching off the telephone
The telephone is idle.
Press the left softkey for a long period.
i
Note
• If your Blue Voice cannot re-establish the last connection, the display alternates
between showing Search devices and No device.
Approach closer to your access point. Check whether your access point is
functioning correctly.
• You can also switch off your Blue Voice by using the menu.
15
Basic rules of operation
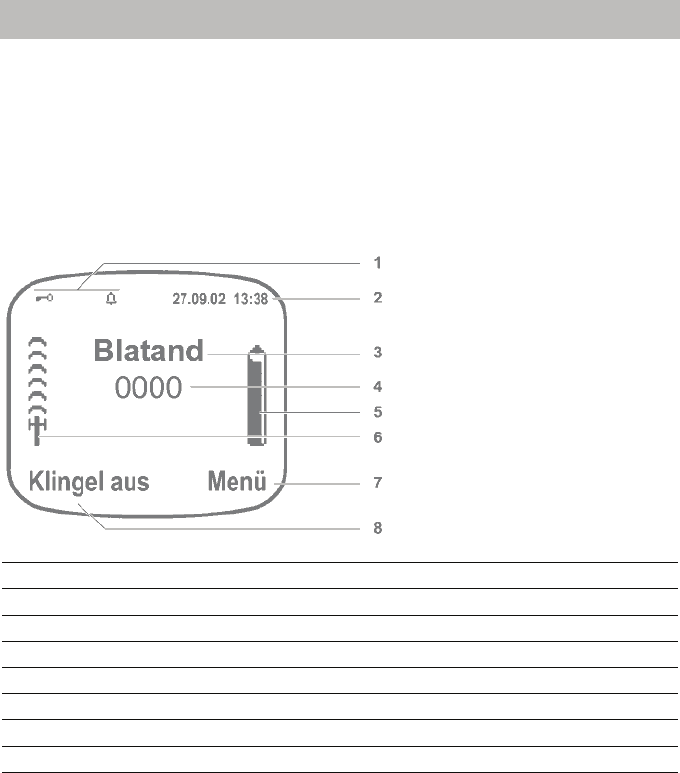
The display
The display
In the idle state, (
→
S. 15) the display uses symbols to show important settings and
information.
You can access settings by using various menus. Menus (
→
S. 17) are always con-
structed in the same manner.
When you are using Blue Voice, the display is highlighted in blue. This lighting is
automatically switched off after ten seconds in order to save electricity.
Idle display
1 Symbols (
→
S. 47)
2 The date and time (
→
S. 41)
3 Username (
→
S. 42)
4 Call number (
→
S. 42)
5 Battery display (
→
S. 16)
6 Field strength display (
→
S. 16)
7 Right softkey (
→
S. 18), current function
8 Left softkey (
→
S. 18), current function
The display
16
Basic rules of operation
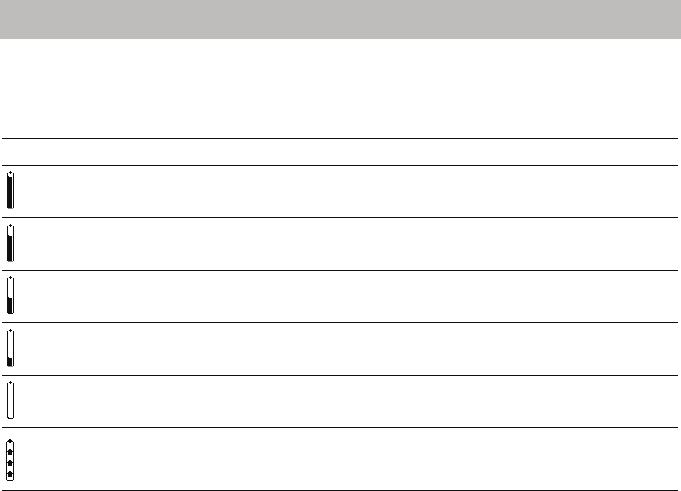
Battery display
The degree to which the symbol is ’full’ indicates the charge status of the battery.
Five levels are displayed:
Field strength display
The field strength display on the left hand side of the display shows the radio link to
the access point. The number of radio waves (maximum of five) indicates how good
the link is. Even the presence of a single radio wave still indicates a sufficiently good
radio link.
Chrg disp. Remaining charge
100 %
75 %
50 %
25 %
0 %
The battery is being charged.
17
Basic rules of operation
The display
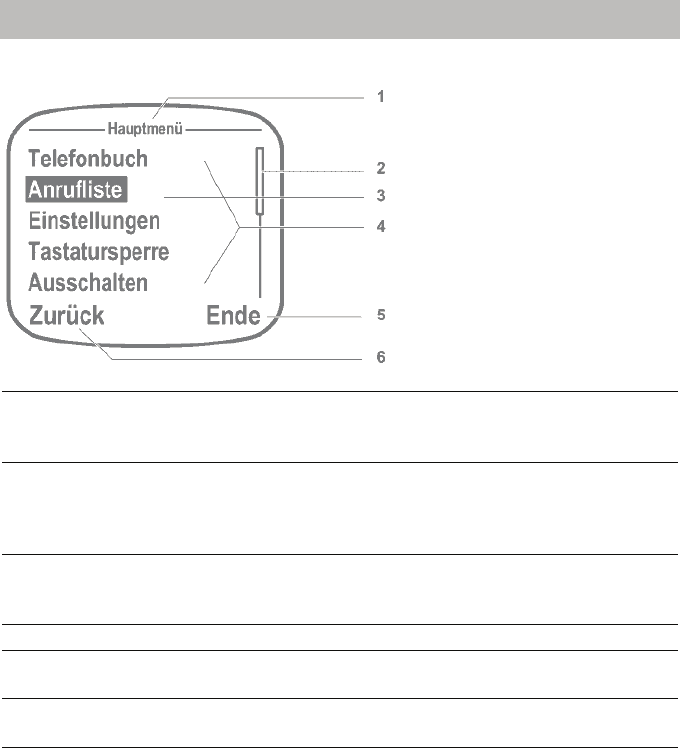
Layout of menus in the display
1 Menu name Name of the menu or
designation of the setting which can be adjusted
here.</br>
2 Scroll bar Only appears when not all menu entries can be
displayed at the same time. It serves as an indi-
cation that further menu entries will follow.
Disappears after a few seconds.</br>
3 Selected menu item Select: Press the selector up or down.
Invoking the selected menu item: Press the sel-
ector.
4 Menu items List with all setting possibilities in this menu
5 Current function of right
softkey
"End": Back to idle state
6 Current function of left soft-
key
"Back": Back to the previous menu

Functions in the menu
18
Basic rules of operation
Functions in the menu
Many functions and settings of your Blue Voice can be accessed using the display
contents (menu). The menu is set out in such a way that most of the menu items lead
to submenus.
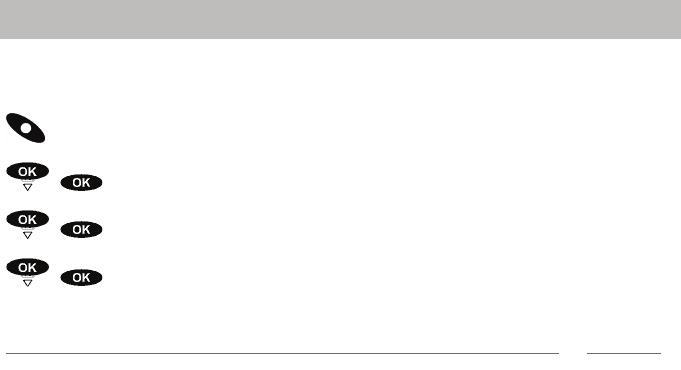
Selecting functions
Call up the menu using the right softkey.
Press either the selector either up or down to select the desired menu
item, e.g. Settings.
Call up the menu item by using the selector.
Calling up higher-ranked menu levels
Use the left softkey to a access higher-ranked menu level or to exit the main
menu.
Submenus
Submenus are operated in exactly the same way as the main menu.
Using softkeys
The functions of softkeys change according to the situation. The function is always
shown in the display directly above the key, e.g., Menu or Cut off.
The right softkey is used, for example, for switching on, for calling up menus or
when confirming a setting.
The left softkey is used, for example, to exit a menu item or to cancel.
Cancelling or exiting an action
Press the Hang up key This action is cancelled without saving.
Pressing and holding down a key: Return to idle display.

19
Basic rules of operation
Entering text
Entering text
The numeric keys can also be used to enter letters and symbols, e.g., for names in
the phone book. The letters are printed on the digit keys. Your telephone switches
automatically to entry of letters and numbers when this is necessary.
You may select special characters by using a Special character dialogue (
→
S. 20).
An overview of all symbols that may be entered by using numeric keys and the Spe-
cial character dialogue may be found in the Table of characters (
→
S. 48).
You may change all text, symbols and call numbers entered.
Example: Enter the name "John":
Press the JKL button once. J appears in the display.
Press the MNO button three times. Jo appears in the display.
Press the GHI button twice. Joh appears in the display.
Press the MNO button twice. John appears in the display.
Switch to upper case letters
Enter text
Press the Hash key. The next character entered will be upper case.
To finish entry
Press the selector. The characters are accepted.
Cancelling an entry
Press the back key. The entry is stopped.
i
Note
• The first letter is always upper case in the case of names.
• Before entering a second letter with the same key, you must wait a moment until
the cursor moves forward.

Entering text
20
Basic rules of operation
Text, symbols and call numbers entered
Text and call numbers may be changed in the same way as on a normal mobile
phone.
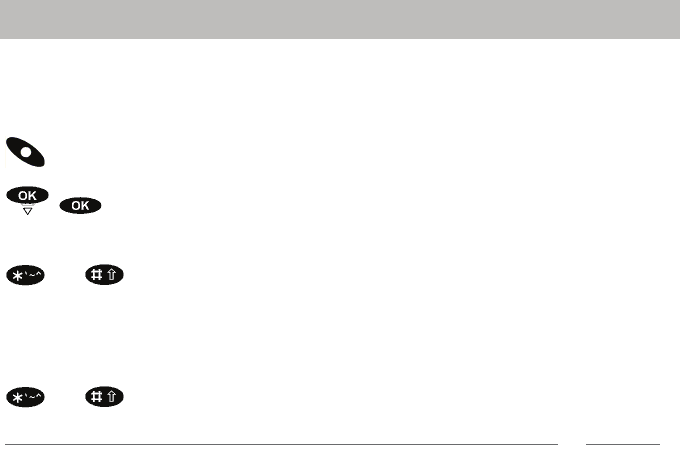
Moving the cursor
should be pressed briefly.
The cursor moves one step to the left or to the right.
Deleting a character or digit
should be pressed briefly.
The character left of the cursor is deleted.
Deleting a line
should be held down.
All characters left of the cursor up as far as the next empty space are deleted.
Entering a character or digit
Newly entered characters are entered at the position of the cursor.
i
Note
When setting the date or time, you may delete the digits one-by-one starting from the
left, you may delete all digits together or you may overwrite individual digits.
Entering special characters
Blue Voice is in text input mode (e.g., when entering a name):
should be pressed briefly.
An overview of all special characters available is displayed
Using the left and right softkeys and the selector (up or
down), select the character desired.
Confirm your selection.
The character is added next to the last character entered.
Cancelling the entry of a special character
Press the back key.
i
Note
• You can use the hash key to switch between upper and lower case, as usual.
21
Basic rules of operation
Locking the keypad
Locking the keypad
You can set your Blue Voice to ignore key presses. You will thus prevent calls being
made or settings from being changed by inadvertent key presses.
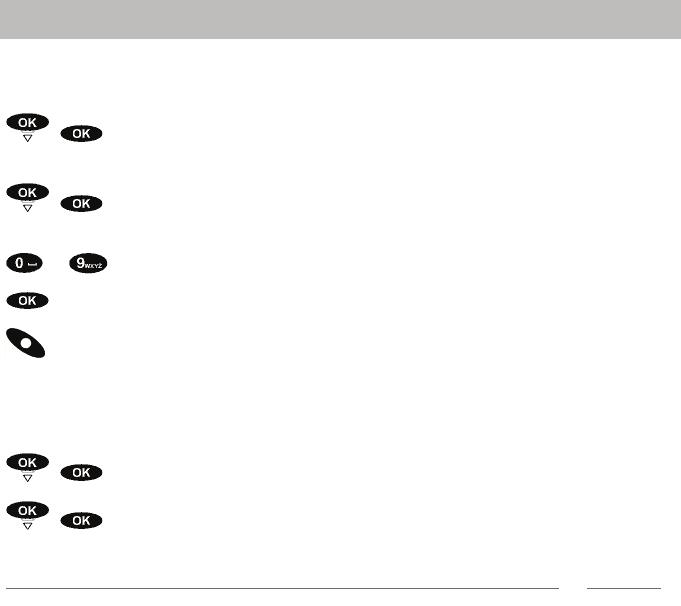
... by using the menu
Call up the menu using the right softkey.
Select the Key lock menu item and confirm.
... by key press
and pressing and holding down at the same time.
You will briefly be shown a message stating that the key lock can be switched off by
pressing the star and hash keys simultaneously.
Unlocking the keyboard
and pressing and holding down at the same time.
i
Note
When the keyboard is locked, the corresponding symbol appears in the idle display.

Charge level of the battery
22
Basic rules of operation
Charge level of the battery
Your Blue Voice sounds signal tones to let you know that the battery is almost flat:
• Single signal tone: The remaining charge in the battery will soon be used up.
Please charge the battery immediately.
• Double signal tone: There is no charge left in the battery and Blue Voice will switch
off presently.
i
Note
• No battery warning tones are sounded during a call.

23
Telephoning
Making calls
Telephoning
Making calls
You may use your Blue Voice to telephone in the usual manner.
• Depending an the telephone line, your access point is connected to, you have to
dial the external line code in front of the call number.
Dial the call number you wish to call, e.g. 1276.
Pick up the handset.
Cancelling a call
Press.
End call
Replace the handset.
i
Note
• You can easily redial call numbers which you have recently called using the Redial
list (
→
S. 35) .

Answering calls
24
Telephoning
Answering calls
When you are being called, this is signalled as per the settings in the Call signalling
(
→
S. 37) menu.
Accepting a call
Your Blue Voice rings.
The call number and, if the call number is stored in the phone book, then also the
name of the caller are displayed.
Pick up the handset.
Deactivating the call tone
Your Blue Voice rings.
Ringer off. The call is still waiting.

25
Telephoning
Establishing several connections
Establishing several connections
During an active call the right softkey is an "R"-button. Some access points support
the "R"-button to control features like callback, brokering and forwarding. Refer to
the user manual of your access point to get the supported features.
i
Note
• Blue Voice supports DTMF tones.

Making calls in Intercom mode
26
Telephoning
Making calls in Intercom mode
In Intercom mode, a direct connection can be made to a second Bluetooth device
which is also in Intercom mode. The access point is not necessary for this.
In Intercom mode, only simple calls can be made (Basic call connection). No Com-
fort features can be used.
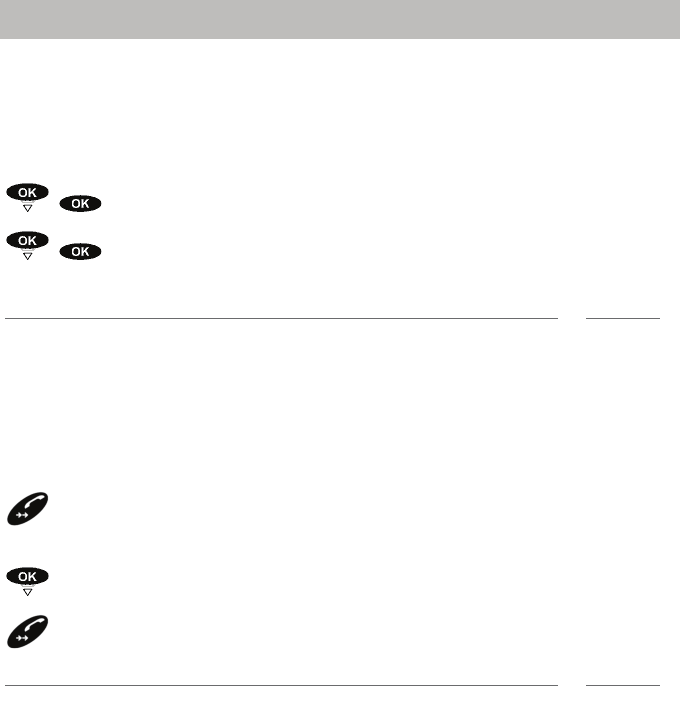
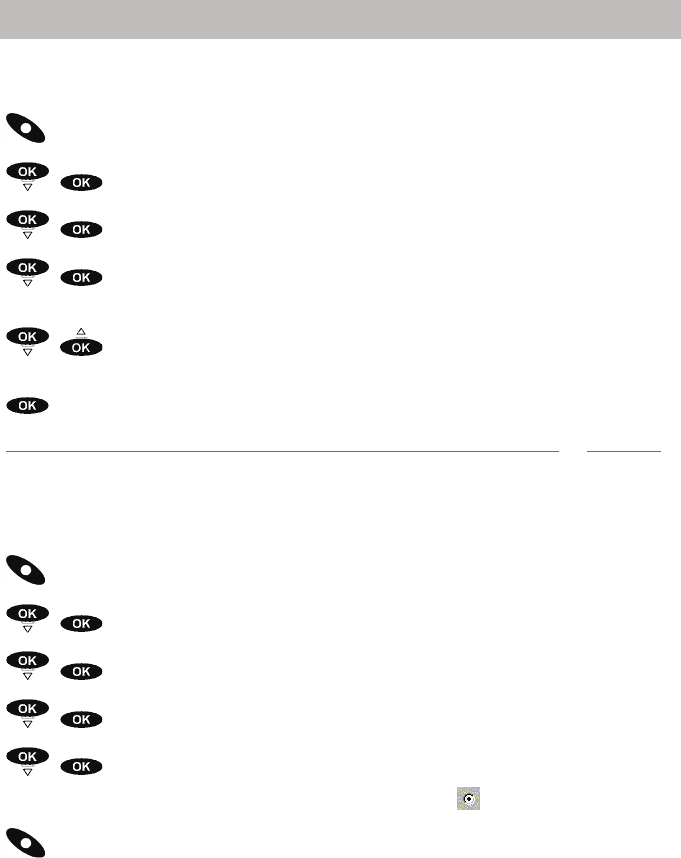
Switch on Intercom mode
Call up the menu using the right softkey.
Select the Settings menu item and confirm.
Select the System and confirm.
Select the Intercom mode menu item and confirm.
Blue Voice switches to Intercom mode. Blue Voice can now be recognised by other
handsets. The display shows INTERCOM MODE.
i
Note
• If Blue Voice has no connection to the access point, you can select the "System"
menu item from the main menu.
• No menu is available in Intercom mode.
• You can exit Intercom mode by using the "End" right softkey.

27
Telephoning
Making calls in Intercom mode
Telephoning
In Intercom mode, you can only make a call with a Bluetooth device which is itself
also in Intercom mode.
Searching for accessible Bluetooth devices
Press the "Search" left softkey.
A list is displayed of all Bluetooth devices found which are in Intercom mode. The
names of the devices for Blue Voice consist of the last digits of their Bluetooth
addresses.
Connecting
You can now choose the device you wish to use to make calls.
Call the device by using the "Dialling" right softkey.
When the countercell picks up, Connected is displayed.
Ending a call
Press the "Cut off" left softkey.
The call is ended.
i
Note
• A search for other Bluetooth devices is automatically ended after 15 seconds. A
call attempt is also ended after 15 seconds. These procedures can not be interrup-
ted earlier.

Making calls in Intercom mode
28
Making calls with ease
Making calls with ease
Blue Voice also has its own lists of call numbers and names. The lists inform you and
allow easy selection. The call list (
→
S. 33) and the redial list (
→
S. 35) are crea-
ted automatically. You can set up the phone book (
→
S. 29) yourself.

29
Making calls with ease
Phone book
Phone book
You may store up to 50 numbers with names in your phone book. This phone book is
only available on your Blue Voice.
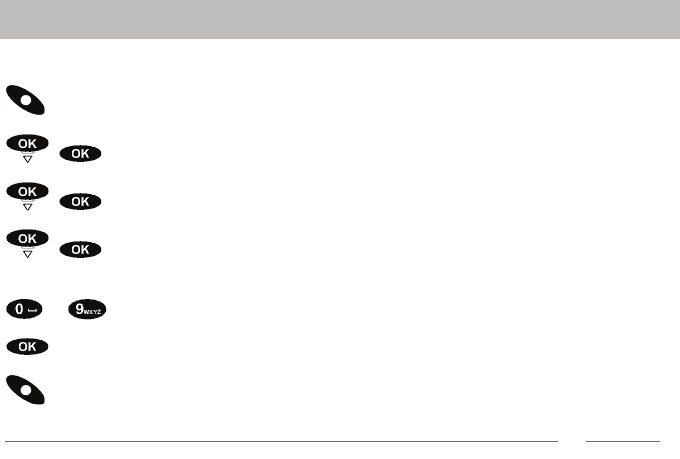
Searching for and calling the entry
Call up the menu using the right softkey.
Select the Phone book menu item and confirm.
Press the right softkey.
... Enter one or more of the first letters of the name.
Search (Right softkey).
The phone book shown the first entry which begins with this (or these) letters. If there
is no corresponding entry, the next entry alphabetically is shown.
Calling up an entry.
i
Note
• You can also scroll to the desired entry using the arrow keys.
• The entries are stored in the telephone book as follows: Special characters, digits,
letters (the difference between upper and lower case is not taken account of;
accents are ignored).
• You can also call up a highlighted entry by first confirming with "OK" and then sel-
ecting the Call menu item and confirming.
• The phone book menu can also be called up from the idle display by using the left
softkey.
•Accessing the phone book quickly: Press and hold down the digit key with the
first letter of the name you are looking for. The first entry which matched the first
letter on the key is shown.

Phone book
30
Making calls with ease
Creating a new entry
Call up the menu using the right softkey.
Select the Phone book menu item and confirm.
Select the --General information-- menu item and confirm.
Select the New entry menu item and confirm.
... Enter name.
Confirm.
... Dial the call number.
Confirm.
Saving a new entry in the phone book.
i
Note
• The name may contain a maximum of 32 letters and the call number up to 24
digits.
• An empty phone book has only the New entry menu item.
Editing entries
Call up the menu using the right softkey.
Select the Phone book menu item and confirm.
Select the entry that you want to change, e.g., Mozart, and confirm.
Select the Change menu item and confirm.
Select the entry that you want to change, e.g., Mozart and confirm.
... Modifying the name or call number.
Confirm.
If necessary, change the name or the call number in the same way.
Save the changes using the right softkey.

31
Making calls with ease
Phone book
Deleting an entry
Call up the menu using the right softkey.
Select the Phone book menu item and confirm.
Select the entry that you want to delete, e.g., Mozart, and confirm.
Select the Delete menu item.
Deleting an entry.
Delete all entries
Call up the menu using the right softkey.
Select the Phone book menu item and confirm.
Select the --General information-- menu item and confirm.
Select the Delete all menu item and confirm.
You are asked to confirm by using the right softkey whether you really wish to
delete all entries.
All entries in the phone book are deleted.
Phone book
32
Making calls with ease
Capacity
You can see how many memory places are still free in the phone book.
Call up the menu using the right softkey.
Select the Phone book menu item and confirm.
Select the --General information-- menu item and confirm.
Select the Capacity menu item and confirm.
The free and occupied capacity is displayed.
i
Note
The telephone book has a capacity of 50.

33
Making calls with ease
Call list
Call list
If you do not answer a call, the call is stored in the call list along with its date and
time.
i
Note
• No new entries can be made to the call list when you are making a call.
• Blue Voice must be switched on and have radio contact to the access point in
order to make an entry to the call list.
• When there are entries in the call list, the corresponding symbol appears in the idle
display.
• The call list shows the 32 most recent entries.
Viewing entries
Call up the menu using the right softkey.
Select the Call list menu item and confirm.
Select an entry, e.g., Saleri, and confirm.
Select the Details menu item and confirm.
How often this caller has called and when he/she last called is displayed.
i
Note
• If there are new entries in the call list, you can call up the call list directly from the
idle display by using the left softkey.
• The list entries are sorted by date and the most recent entry is shown first.
Selecting an entry
You have the call list open.
Select an entry, e.g. Saleri.
Calling up an entry.
i
Note
After a successful recall, an entry is automatically deleted from the call list.
Call list
34
Making calls with ease
Transferring an entry to the phone book
Open the call list or the redial list.
Select the entry that you want to add to the phone book, e.g.,
006912346789, and confirm.
Select the Add to phone book menu item and confirm.
The name (empty) and call number are displayed on the idle display.
... Entering name.
Confirm.
Save the entry to the phone book by using the right softkey.
Deleting an entry
You have the redial list or the call list open.
Select an entry, e.g., Saleri, and confirm.
Select the Delete menu item and confirm.
The entry is deleted from the list.
i
Note
• If you want to delete all entries at once: Select the "Delete all" menu item and con-
firm.
• After a successful recall, an entry is automatically deleted from the call list.
35
Making calls with ease
Redial
Redial
The last 10 call numbers and names that you have dialled are entered into the redial
list.
Deleting an entry
You have the redial list or the call list open.
Select an entry, e.g., Saleri, and confirm.
Select the Delete menu item and confirm.
The entry is deleted from the list.
i
Note
• If you want to delete all entries at once: Select the "Delete all" menu item and con-
firm.
• After a successful recall, an entry is automatically deleted from the call list.
Dialling a call number again.
The handset is in idle state.
press.
A list of the last ten numbers dialled is shown.
Select an entry, e.g. Saleri.
Selecting an entry
i
Note
Entries from the redial lost can be directly added to the phone book. (
→
S. 34).
Using the headset
36
Making calls with ease
Using the headset
You can connect a headset to your Blue Voice by using a cord. All calls are then
made using the headset. The loudspeaker and microphone of your Blue Voice are
then switched off.
Function of the cord key of the headsets
i
Note
• You can connect the HSG D3 headset (Catalogue number 4.999.046.312).
• When the headset is plugged in, a symbol in the display indicates this during calls.
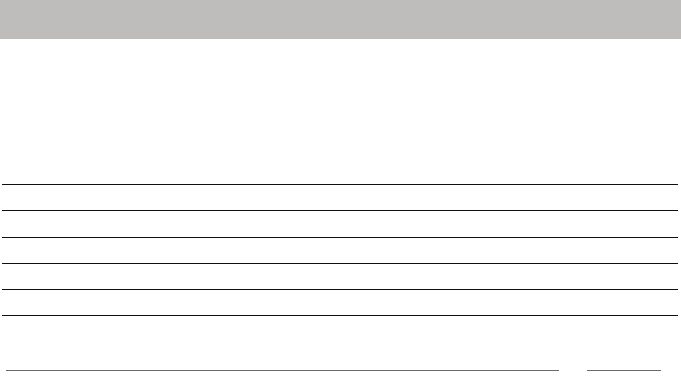
Status Function
There is an incoming call The call is answered
During a call The call is terminated
In idle state No function
For an call on hold Forwarding the current call
37
Settings
Acoustic settings
Settings
Acoustic settings
Call signalling
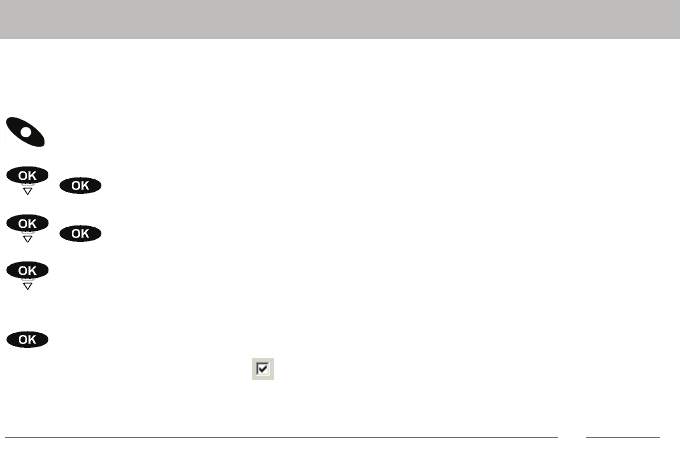
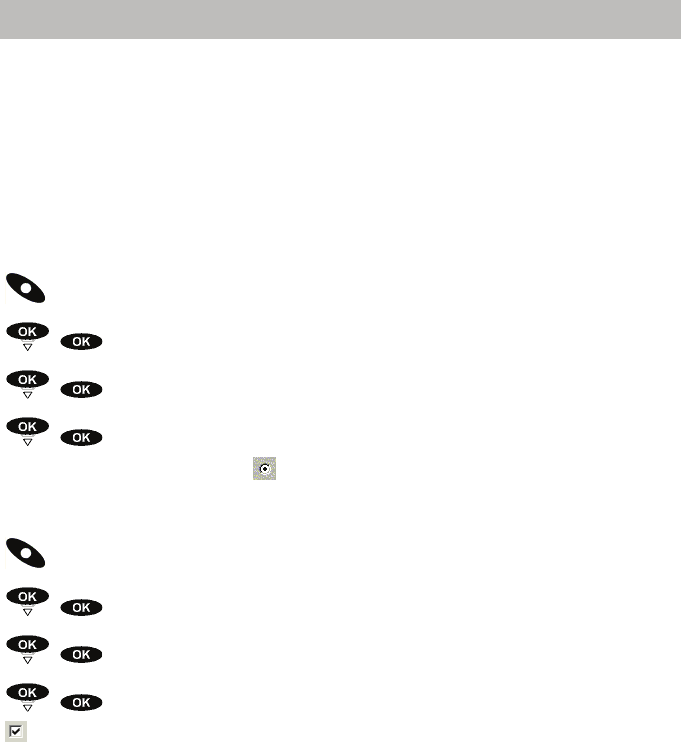
You can determine how your Blue Voice should signal an incoming call.
Call up the menu using the right softkey.
Select the Settings menu item and confirm.
Select the Call signalling menu item and confirm.
Select how a call should be signalled (call tone, vibrator). Select the menu item
desired, for example Vibrator.
Modifying settings.
The corresponding control box is highlighted or the highlighting is removed. The
new setting takes immediate effect.
i
Note
• To choose a ring tone, there is a list of tones from which you can select your favou-
rite tone (
→
S. 38).
• Call tone and vibrator can be switched either on or off independently of each other.
• You can deactivate the call tone using the left softkey while your Blue Voice is rin-
ging.
• A symbol in the idle display indicates whether call tone is deactivated.
Acoustic settings
38
Settings
Ringer volume
You can select from four volume levels.
Call up the menu using the right softkey.
Select the Settings menu item and confirm.
Select the Volume menu item and confirm.
Select the Ringer volume menu item and confirm.
The volume is displayed and the call tone sounds at the volume set.
Increase or reduce volume.
The call tone sounds at the volume set and the volume is displayed, e.g., Stage 3.
Accept the new settings.
i
Note
You can also adjust the ringer volume using the Call signalling menu (
→
S. 37) .
Dial tone
Call up the menu using the right softkey.
Select the Settings menu item and confirm.
Select the Call signalling menu item and confirm.
Select the Melody selection menu item and confirm.
Select an entry, e.g., Elise, and confirm.
The melody is played and the corresponding option field is highlighted.
Save the melody using the right softkey.

39
Settings
Acoustic settings
Headset volume
You can select from five volume levels.
Call up the menu using the right softkey.
Select the Settings menu item and confirm.
Select the Volume menu item and confirm.
Select the Speaker volume menu item and confirm.
The volume is displayed and a test tone sounds at the volume set.
Increase or reduce volume.
The test tone sounds at the volume set and the volume is displayed, e.g., Stage 4.
Accept the new settings.
Acoustic settings
40
Settings
During a call, your may adjust the speaker volume by using the selector (pressing up
or down). The new volume is applied immediately to the current call.
Infotones
Your Blue Voice can confirm every keypress with a tone (
→
S. 40).
Blue Voice can warn you when the radio link (
→
S. 40) has been broken and you
are thus no longer reachable.
Key beeps
Call up the menu using the right softkey.
Select the Settings menu item and confirm.
Select the Infotones menu item and confirm.
Select and confirm how keypresses should be signalled, e.g., Click.
The corresponding option field is highlighted and the setting is saved.
Linkloss
Call up the menu using the right softkey.
Select the Settings menu item and confirm.
Select the Infotones menu item and confirm.
Scroll to the Linkloss control box and confirm.
The control box is highlighted and the setting is saved.
41
Settings
Setting the date and time
Setting the date and time
In the idle state, your Blue Voice displays the time and date. You may adjust both.
Call up the menu using the right softkey.
Select the Settings and confirm.
Select the Time/Date menu item and confirm.
Select the time or date entry that you want to change, e.g., 01.01.03,
and confirm.
... Changing the date or time (
→
S. 20).
Confirm.
Save the settings using the Store right softkey.
i
Note
Even when your Blue Voice is switched off and the accu is completely charged, the
clock continues to run for about 10 days.

Entering your own call number and name
42
Settings
Entering your own call number and name
You can change the call number and name which Blue Voice displays when it is in
the idle state.
Caution: These items serve only as user information on the idle state display.
Your call number does not change. The call number and name which are sent to
your call partner remain unchanged. Such settings can only be changed in your
telephone system.
Call up the menu using the right softkey.
Select the Settings and confirm.
Select the Settings and confirm.
Select the entry that you want to change, e.g., the call number
12345678, and confirm.
... Modifying the name and call number. (
→
S. 20).
Confirm the new name or call number.
Save the settings using the right softkey.
i
Note
The name can be up to 16 characters long, depending on the width of the letters
used.

43
Settings
Selecting the display language
Selecting the display language
You have a choice of six languages for the display.
Call up the menu using the right softkey.
Select the Settings and confirm.
Select the Language menu item and confirm.
Select language, e.g. English.
Confirm entry.
The corresponding option field is selected. The display language is changed
immediately.

Further system settings
44
Settings
Further system settings
Changing the access point
You can log your Blue Voice onto another access point. It must already be logged off
the previous access point.
On the access point:
Switch the access point, to which you wish to log Blue Voice on, to "Discovery
mode".
On Blue Voice:
Call up the menu using the right softkey.
Select the Settings and confirm.
Select the System and confirm.
Select the Change device menu item and confirm.
You are notified that the current device data could be deleted.
Press the "Alternate" right softkey.
Blue Voice searches for all available Bluetooth devices. The search can last approxi-
mately one minute. The device available or a list of all devices available will then be
displayed.
Select new device if necessary.
Confirm.
Device details are displayed.
Press the "Enrolment" right softkey.
... Enter the PIN of your access point.
Confirm using the "Enrolment" right softkey.
The message Registering with ... successful appears and Blue Voice
goes into idle state.
i
Note
• If the device change did not work, Blue Voice remains logged on to the original
access point.

45
Settings
Further system settings
Displaying Software-Version and Hardware-Info
Concerning the hardware, you can have the following displayed:
• The Bluetooth address of the Blue Voice and
• the serial number.
Concerning the software, you can have the following displayed:
• Date and release of the handset software,
• Bootloader version and
• Bluetooth firmware version.
Call up the menu using the right softkey.
Select the Settings menu item and confirm.
Select the System and confirm.
Select the Hardware-Info or Software version menu item and
confirm.
Information about hardware and software is then displayed.

Menu overview
46
Consult the manual as required.
Consult the manual as required.
Menu overview
By using the right softkey, you can switch from idle state to the menu.
The left hand side column of the following table contains all menu items of the main
menu. If there is a menu item hidden behind a submenu, the submenu will be to the
right of the menu item and indicated with "-->".
Phone book (
→
S. 29) --> -- General information --> Search
--> New entry
--> Capacity
--> Delete all
--> Search (Right softkey) --> Name
--> Selected entry --> Change
--> Delete
--> Making calls
Call list (
→
S. 33) --> Selected entry --> Call
--> Details
--> Transfer phone book
--> Delete
--> Delete all
Settings --> Volume Ringer volume (
→
S. 38)
Speaker volume (
→
S. 39)
--> Call signal. (
→
S. 37) --> Melody selection
Call tone
--> Ringer volume
Vibrator
--> Language (
→
S. 43)
--> Infotones (
→
S. 40)
--> Time/Date (
→
S. 41) Time
Date
--> User info (
→
S. 42) Call number
Name
--> System --> Device change (
→
S. 44)
--> Software version (
→
S. 45)
--> Hardware-Info (
→
S. 45)
--> Intercom mode (
→
S. 26)
Key lock (
→
S. 21)
Switch off (
→
S. 14)
Games (
→
S. 51)

47
Consult the manual as required.
Meaning of symbols
Meaning of symbols
Entry present in call list
Conversation
Call tone deactivated
Keyboard locked
Conversation using the headset

Table of characters
48
Consult the manual as required.
Table of characters
Key Characters Additional characters
DF GBE I NL
1 Upper case letters . : , ? ! / @
Lower case letters . : , ? ! / @
2 Upper case letters A B C 2 Ä À Â Æ
Ç
Á À Ç À Ä Á À Â
Ç
Lower case letters a b c 2 ä à â æ ç á à ç à ä á à â
ç
3 Upper case letters D E F 3 È É Ê Ë È É È É È É Ê Ë
Lower case letters d e f 3 è é ê ë è é è é è é ê ë
4 Upper case letters G H I 4 Î Ï Í Ï Í Ï Í Ì Î
Lower case letters g h i 4 î ï í ï í ï í ì î
5 Upper case letters J K L 5
Lower case letters j k l 5
6 Upper case letters M N O 6 Ö Ñ Ô Œ Ñ Ó Ò Ò Ö Ó Ò
Ô
Lower case letters m n o 6 ö ñ ô œ ñ ó ò ò ö ó ò ô
7 Upper case letters P Q R S 7
Lower case letters p q r s 7 ß
8 Upper case letters T U V 8 Ü Ù Û Ú Ü Ú Ü Ú Ù Û
Lower case letters t u v 8 ü ù û ú ü ú ü ú ù û
9 Upper case letters W X Y Z 9 Ÿ
Lower case letters w x y z 9 ÿ
0 Upper case letters <Empty
space> 0
Lower case letters <Empty
space> 0
49
Consult the manual as required.
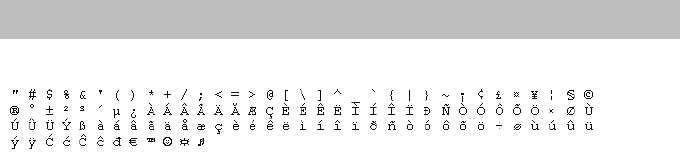
Table of characters
Special characters

Using MSN
50
Consult the manual as required.
Using MSN
Many access points allow to connect more than one telephone. MSN numbers can
be used to assign to each telephone an individual call number. For further informa-
tion refer to the user manual of your access point.

51
Consult the manual as required.
Playing DMove
Playing DMove
With your Blue Voice, you can test your powers of reasoning and prediction by play-
ing this game.
The aim of the DMove game is to rearrange scrambled letters into the correct
sequence. You have to achieve this in as few moves as possible.
One move: Moving of the two letters beside a position digit to be entered. Two letters
are always moved together: the one left of the position digit is moved to the front of
the sequence and the one right of the position digit to the end of the sequence. And
that is where the fun begins...
You can read more about the game in the help for DMove.
Call up the menu using the right softkey.
Select the Game menu item and confirm.
Call up "Help".

FAQ - Frequently asked questions
52
Consult the manual as required.
FAQ - Frequently asked questions
Blue Voice cannot automatically re-establish the last connection after swit-
ching on
Approach closer to your access point. Check whether your access point is
functioning correctly.
Exist negative effects of Bluetooth and WLAN interaction?
Both radio standards use the same frequencies (ISM band, 2,4 GHz), therefore the
quality of speech transmission may degrade. Please avoid to use Bluetooth equip-
ment and WLAN equipment simultanously and nearby. A list of FAQs, which is
updated constantly, can be found in
www.avaya.de/gcm/emea/de/products/offers/integral_mobile_blue.htm&View=ProdResources

53
Consult the manual as required.
Conformity
Conformity
We, Avaya GmbH & Co. KG, declare that the Blue Voice L Home (Bluetooth) product
complies with the basic requirements and other relevant rules in accordance with EU
directive 1999/5/EU (radio and telecommunication terminal equipment, R&TTE).
This device is intended for connection to radio interfaces (Bluetooth) in the EU and
meets the fundamental requirements formulated in the EU directive 1999/5/EU
(Radio and Telecommunication Terminal Equipment, R&TTE).
This Bluetooth product, for home and office use, operates in the non-harmonised fre-
quency range of 2.4 GHz. Faults are possible in isolated cases as this frequency
range is used by various other services in EU countries.
Due to its design, this device is not intended for direct operation on interfaces to
public telecommunications networks.
If any problems happen to occur during operation, please first contact your specialist
dealer or your system administrator.
The complete declaration of conformity can be obtained at the following internet
address: http://www.avaya.de/gcm/emea/de/includedcontent/conformity.htm or
under index look for the key words: ’Konformität’ or ’conformity’.
notes for operation
The radiation of Blue Voice L home into the human body (specific absorption rate)
was tested by an accredited laboratory. The measured values are far below the limit
value of 2 W/kg, which is defined by the EU. Average values of about 0,1 W/kg have
been measured, which is only about 5% of the limit. However, in case of any pro-
blems during operation, please contact your dealer first.

Conformity
54
Consult the manual as required.
FCC ID: TYM-BLUEVOICEL
This device complies with Part 15 of the FCC Rules. Operation is subject to the follo-
wing two conditions:
1. this device may not cause harmful interference, and
2. this device must accept any interference received, including interference that
may cause undesired operation.
Changes or modifications not expressly approved by the party responsible for com-
pliance could void the user’s authority to operate the equipment.
Important note:
FCC Radiation Exposure Statement:
The Blue Voice L Home handset (FCC ID: TYM-BLUEVOICEL) is in compliance
with the Federal Communications Commission (FCC) Guidelines [OET 65] for
uncontrolled exposure.
Body worn operation
This device was tested for body-worn operations. To maintain compliance with FCC
RF exposure requirements, use only belt-clips, holsters or similar accessories that
does not contain metallic components in its assembly. The use of accesories that do
not satisfy these requirements may not comply with FCC RF exposure requirements
and should be avoided.

55
Consult the manual as required.
Specifications
Specifications
Standard Bluetooth™
Dimensions 137 x 46 x 21 mm plus antenna
Weight approx. 100 g
Battery type: Lithium-Ion;950 mAh
Service life of Blue Voice L Home
(with full battery):
Speaking: min. 11 hours
Stand-by: min. 43 hours
Charge time: approx. 3 hours
Frequency range: 2.4 - 2.483 GHz (ISM frequency band)
Transmitting power: up to max. 100 mW, up to max. +20 dBm
Permissible operating tempera-
ture:
Handset: -5 °C to +45 °C
Charger: +5 °C to +40 °C
Storage temperature: -25 °C to +55 °C
Transport temperature: -25 °C to +60 °C
Protection category: IP54, splashproof and dustproof
Accessories: Charger, plug-in power supply, HSG D3 head-
set, D3 protective case incl. rotation clip, D3
case, (belt pouch), D3 case (quiver case), rota-
tion clip for D3 protective case with adhesive
holder. Ask your dealer for availability.