AVC Technology SNM500 MP3 Player User Manual
AVC Technology Limited MP3 Player
Users Manual
SIGNEO SN-M500
User’s Manual
Contents
1. Points to learn before Use
1) Precautions
2) Features
3) Components
4) Names of Parts
5) LCD Screen Layout
2. Preparation
1) Downloading Files from PC to Player
2) Disconnecting Player from PC
3) Charging Battery
3. Basic Functions
1) Power ON/OFF
2) Music File Playback
3) Lock Setting
4) Volume Control
5) EQ, Playback Order Selection
6) Interval Repeat Setting
7) Searching Music File
8) PLAYLIST Setting/Playback
9) Deleting File/Folder
10) M3U (PC Playlist) Playback
11) Mode Selection
12) FM Radio Recording and Playback
13) Voice Recording and Playback
14) Recording and Playback from External Device
15) Viewing Image Files
4. Setting up of Menu
1) How to set up Menu
2) Menu Structure
3) Functions of Menu Items
5. Others
1) Upgrade Firmware Procedure
2) Player Format
3) About Image Editor
6. Customer Support
1) FAQ
2) Specifications
This device complies with part 15 of the FCC Rules.
Operation is subject to the following two conditions:
(1) This device may not cause harmful interference, and
(2) This device must accept any interference received, including interference that may cause undesired operation.
Keep this manual safely for reference in case of technical change.
The manufacturer has the right to make technical modifications for improvement of product without prior notice.
The manufacturer is not responsible for nay errors in this manual.
Any modification to this manual may not be notified in advance. All trademarks mentioned belong to their respective
companies.
The logos of Microsoft Windows Media and Windows are trademarks of Microsoft Corp. in USA and other regions.
WinAmp and WinAmp logo are trademarks of Nullsoft Company. All others are their respective owners’ brands or
trademarks.

1. Points to learn before Use
1) Precautions
The manufacturer is not responsible for any damage or loss due to lack of thorough familiarity of the precautions below. The
precautions must be read carefully and the product be used properly.
- Do not leave the player in a location of high temperature and humidity, high fluctuation of temperature or high
magnetic forces.
- Do not leave the player in a place subject to direct sunlight or in a location near heat sources.
- Keep the player away from excessive impact and vibration.
- Avoid contacting the player with liquid.
- Do not use chemical cleaners. It can cause external damage.
- Make sure that all connections are secure before operation.
- Do not dismantle, repair or modify the player. After-service, both free of charge and with a fee, could be denied.
- Stored data could be damaged or lost in case of break down or repair. The manufacturer is not responsible for this
damage or loss of data.
Copyright
Copying MP3 file without permission is against the international copyrights.
Device Modification Warning
This device generates and uses radio frequency energy. If repaired or modified in a manner not in accordance with
the instruction in the manual, this device could cause harmful interference. In this case, the user may lose the right
to use the device
On Headphones and Earphones
Do not use headphones/earphones while driving, cycling or operating any motorized vehicle. It may create a traffic
hazard and is illegal in some areas. It can also be potentially dangerous to play your headphones/earphone at high
volume while walking, especially at pedestrian crossings.
Preventing hearing damage
Avoid using headphones/earphones at high volume. Hearing experts advise against listening to continuous, loud
and extended play. If you experience a ringing in your ears, reduce volume or discontinue use.

Other considerations
Keep the volume at a moderate level. This will allow you to hear outside sound and to be considerate of the people
around you.
2) Features
- Multi-Format
Supports
MP3, WMA, WMA with DRM and WAV file formats.
- Colour Graphic LCD
Image files can be enjoyed with 4,000 Colour Graphic LCD.
- USB 2.0
Fast file download is possible.
- SRS Sound
Rich 3D surround sound developed by SRS Lab is supported.
- Multi-language
Different languages can be used for menu and file names.
- FM Radio and Recording
Auto selection and favorite station memory functions make it easy for listening FM radio, and recording is possible while
listening.
- Voice Recording
Voice can be easily recorded anytime anywhere.
- Direct Encoding
Music from external devices can be converted to MP3 file without going through PC.
- PC Playlist Support
M3U Playlist created in PC can be played back.
- Internal Rechargeable Lithium Polymer Battery
Internal rechargeable battery can be easily charged with USB connection.
3) Components
- Main Body
- Stereo Earphones
- USB Cable
- Line-In Cable
- User’s Manual
- Warranty Card
- Installation CD
(Components can be changed for improvement of performance and quality without prior notice.)
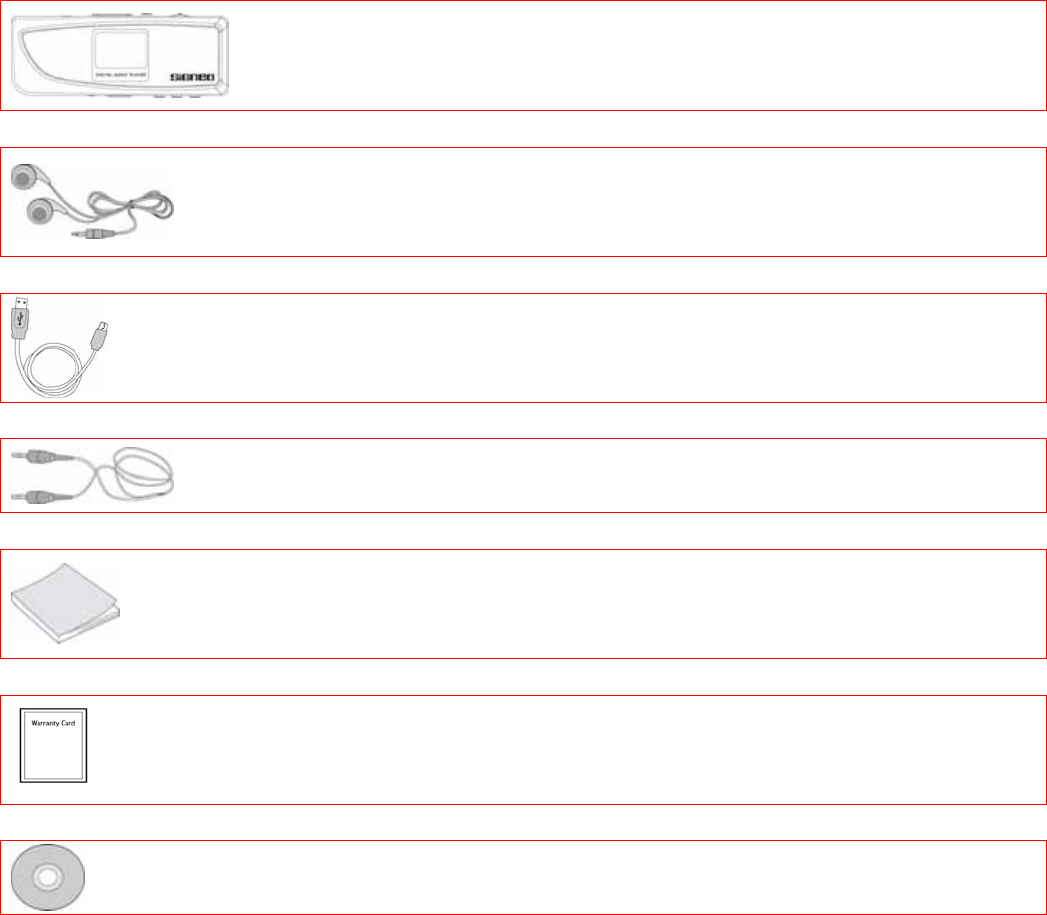
4) Names of Parts
- Line in: To connect Line in cable.
- - Volume +: To adjust sound volume.
- ▶/■: To power on the player or activate Play/Stop.
- | Menu |: To search file or go to Navigation/Menu function.◀◀ ▶▶
- Mic: Socket for microphone for recording.
- : Socket for USB Cable
- : Socket for earphones.
- : To set Lock/Unlock.
- REC/A<->B: To activate Voice Recording/FM Radio Recording/Interval Repeat.
- EQ/Repeat: To set up EQ/Repeat.
- Mode: To activate Mode/Playlist.
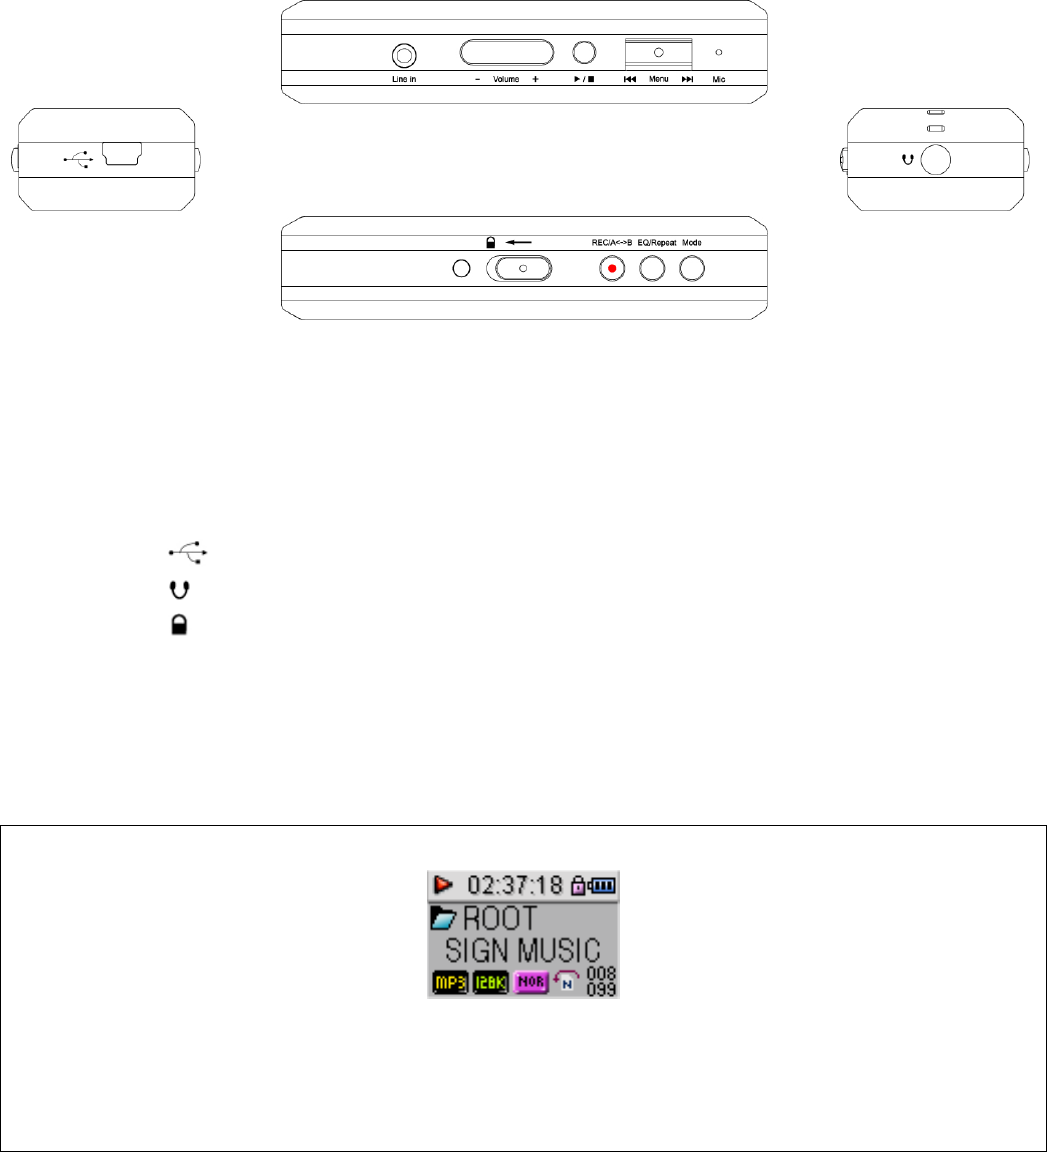
5) LCD Screen Layout
MUSIC PLAYER
line 1 : Play/Pause/Stop, Playing Time, Lock, Battery
line 2 : Folder Indicator
line 3 : File Indicator
line 4 : File Format, Bit Rate, EQ, Playback Order, Track Number

2. Preparation
1) Downloading Files from PC to Player
PC Environment
The following PC environment is required for the Player operation.
- Pentium 133MHz and above
- Window 98SE/ME/2000/XP
- Minimum 40MB hard disc space
- CD-ROM drive
- USB port
For Windows ME/2000/XP Users
Windows ME/2000/XP will recognize the Player as a portable disk without a separate driver.
For Windows 98SE Users
Windows 98SE does not support portable storage device and, therefore, MP3 software in the supplied Installation
CD must be installed before use.
1. Connect Player to PC with USB Cable.
(! Incorrect connection of USB cable could cause malfunction of the player.)
2. Window as below will appear when Player is properly connected to PC.
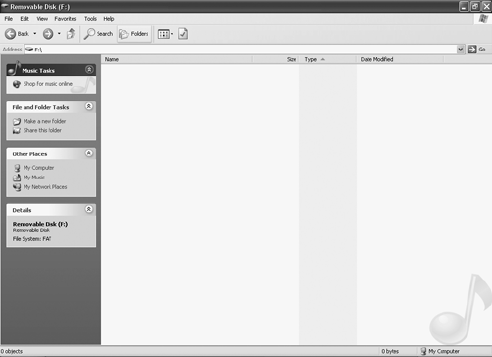
3. A “Removable Disk” will be added in “My Computer”. Open the “Removable Disk” folder.
4. Locate the files you wish to copy from the computer to your Player.
5. Drag and Drop the selected file to the “Removable Disk”.
6. These files will now be copied into your Player.
(! Do not disconnect Player from PC during file transfer. It could cause damage to Player.)
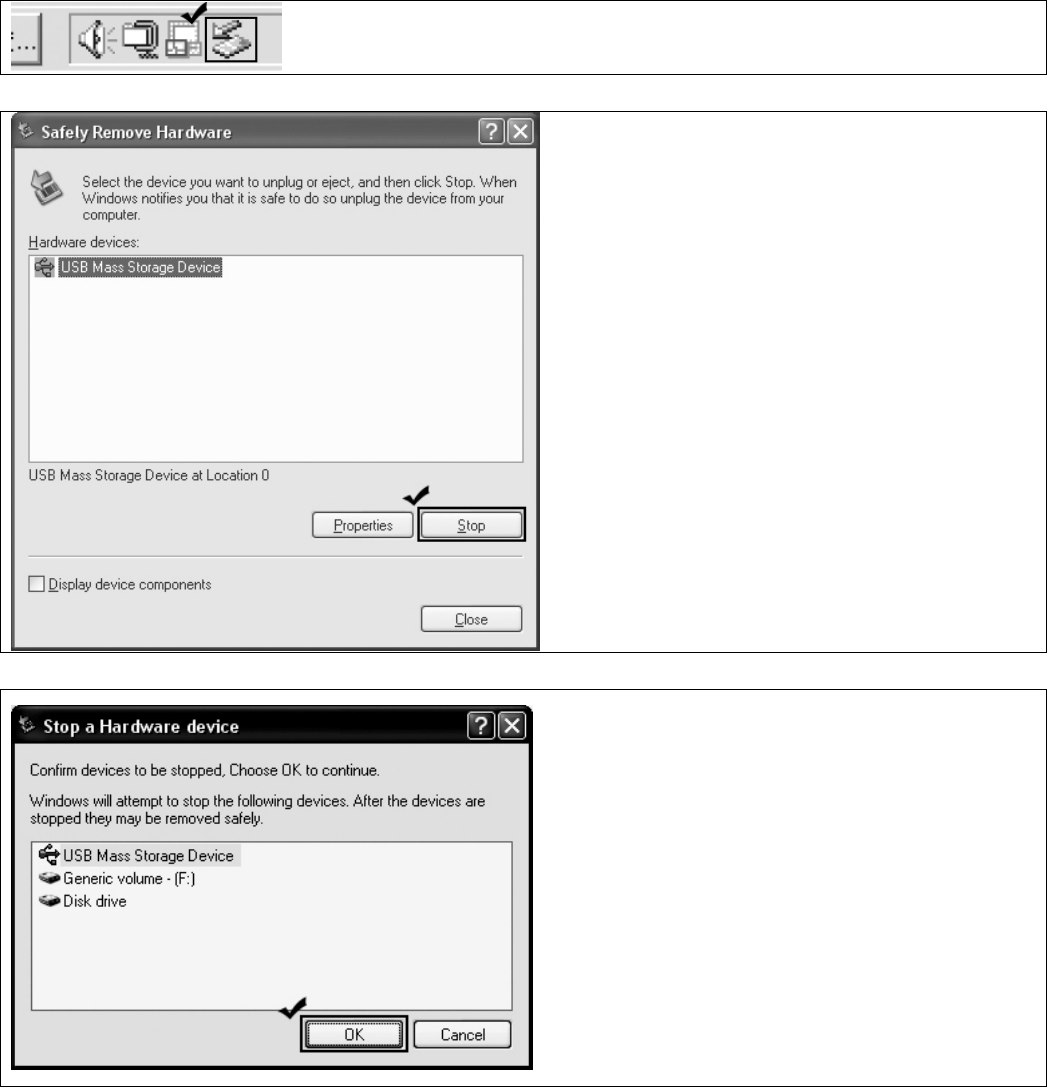
2) Disconnecting Player from PC
1. Click the “Safely Remove Hardware” icon in the System Tray.
2. Click “Stop” after selecting the device to be separated in the “Safely Remove Hardware” window.
3. Click “OK” in the “Stop a Hardware device” pop-up window as below.
4. Click “OK” after confirming the “Safe to Remove Hardware” message.

5. Disconnect the USB Cable from PC and Player.
(! Disconnecting Player improperly could cause malfunction or damage to Player.)
3) Charging Battery
1. Connect the Player using USB Cable to PC.
2. PC Connect message will appear in the LCD window and charging will start with Battery icon gradually filling.
- While charging, the green LED blinks.
- When fully charged, the Battery icon in the LCD window will be fully filled and the green LED will stay on.
- It takes about 3 hours to fully charge the battery.
3. Basic Functions
1) Power ON/OFF
Press ▶/■ button to turn the power on.
Press ▶/■ button again for a couple of seconds to turn the power off.
2) Music File Playback
During the waiting mode, press ▶/■ button to playback music file.
During the playing mode, press ▶/■ button to pause music playing.
3) Lock Setting
Push (HOLD) button to the left to set up the Lock.
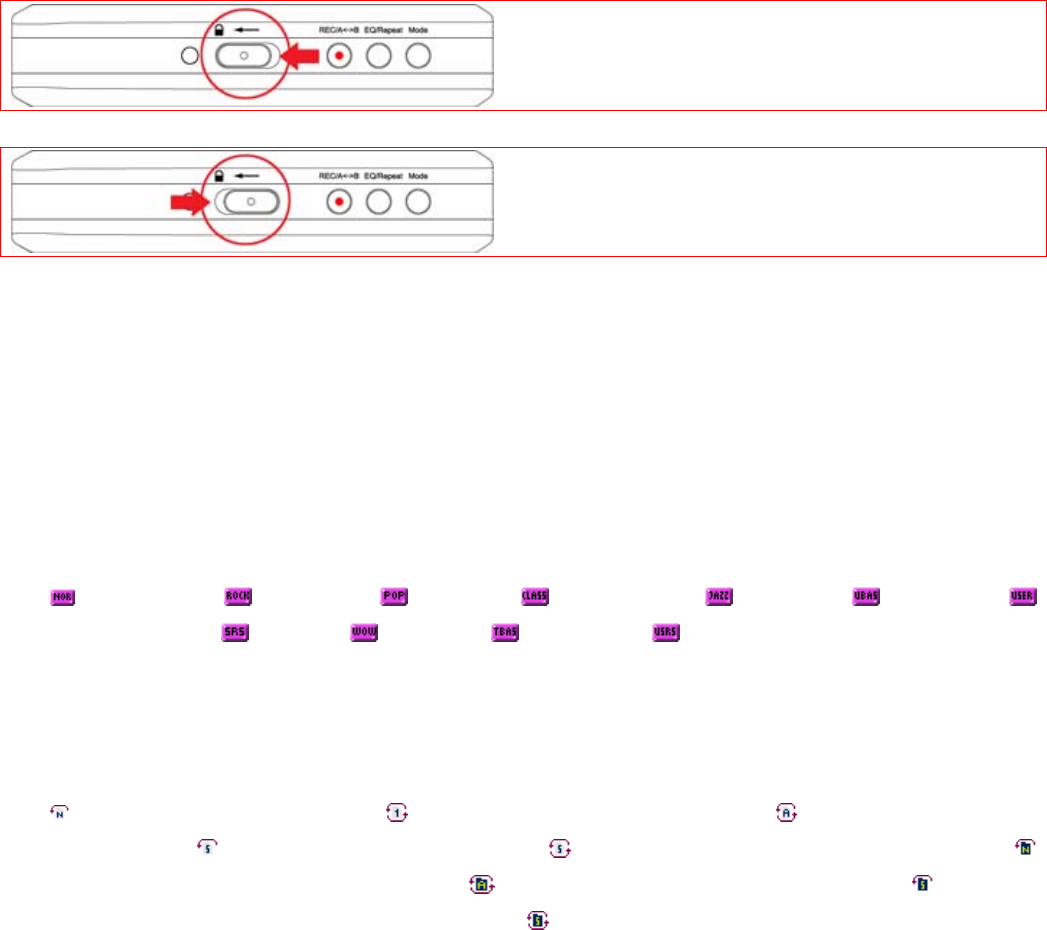
When Lock is set, the Player will not operate with any buttons.
Push (HOLD) button to the right to release the Lock.
4) Volume Control
Press (+, -) button to adjust the volume to desired level.
5) EQ, Playback Order Selection
During Playback of a music file, pressing EQ/Repeat button can change the order of EQ or Playback.
- Each short pressing of EQ/Repeat button will change the order of EQ as below.
NORMAL -> ROCK -> POP -> CLASSIC -> JAZZ -> UBass ->
USER EQ -> SRS -> WOW -> TruBass -> User SRS
- Each long pressing of EQ/Repeat button will change the order of Playback as below.
NORMAL(normal playback) -> REPEAT ONE(repeat one track) -> REPEAT ALL(repeat all
tracks) -> SHUFFLE(random playback) -> SHUFFLE ALL(random repeat playback) ->
FOLDER NORMAL(folder playback) -> FOLDER ALL(folder repeat playback) -> FOLDER
SHUFFLE(random playback within folder) -> FOLDER SHUFFLE ALL(random repeat playback
within folder)
6) Interval Repeat Setting
During playback, click REC/A<->B button to set A point (start point).
Click REC/A<->B button again to set B point (end point).
When Interval Repeat function is set up, the interval between A and B points will repeat playback.
Click REC/A<->B button to come out of Interval Repeat.
7) Searching Music File

Click Menu button and move to Navigation Mode.
Press ◀◀/▶▶ button and search file.
After selecting desired music, press Menu button or ▶/■ button to playback the music.
z To enter Folder: Select desired folder and press Menu button.
z To exit Folder: Press EQ/Repeat button while in the folder.
! To exit the Navigation Mode, press EQ/Repeat button.
! After selecting a folder, pressing ▶/■ button will playback the music from the first tack.
8) PLAYLIST Setting/Playback
- PLAYLIST Setting -
Click Menu button and move to Navigation Mode.
Select desired file by pressing ◀◀/▶▶ button and press Mode button to save as PLAYLIST.
Press Mode button again to cancel PLAYLIST.
! icon in front of file name will indicate the files saved as PLAYLIST.
- PLAYLIST playback -
In Music Player Mode, move to PLAYLIST Mode by long pressing the Mode button.
Press ◀◀/▶▶ button to select desired file and press ▶/■ button to playback the PLAYLIST.
! During playback of PLAYLIST, each long pressing of EQ/Repeat button will change the order of playback.
PLAYLIST NORMAL(normal playback) -> PLAYLIST ONE(repeat one track) -> PLAYLIST ALL(repeat
all tracks) -> PLAYLIST SHUFFLE(random playback) -> PLAYLIST SHUFFLE ALL(random repeat
playback)
! Without files saved as PLAYLIST, PLAYLIST can not be played.
! To exit the PLAYLIST mode, change the mode or select desired file in Navigation mode and press Playback button.
9) Deleting File/Folder
Click Menu button and move to Navigation Mode.
Press ◀◀/▶▶ button to select desired File/Folder. Delete warning will be shown on screen when REC/A<->B
button is pressed. Press Menu button after selecting “Yes” to delete the File/Folder. Select “No” to cancel.
! Folder cannot be deleted if there are files in it. To delete a folder, make sure that there are no files remain in it.
10) M3U(PC Playlist) playback
Create M3U file Playlist in PC.
Save M3U file and music in M3U in the Player.
Move to Navigation mode by clicking Menu button
Select M3U file with icon and press Menu button or ▶/■ button to playback the music file.
! To play music, you should have music files saved as M3U file and applicable path in the Player.
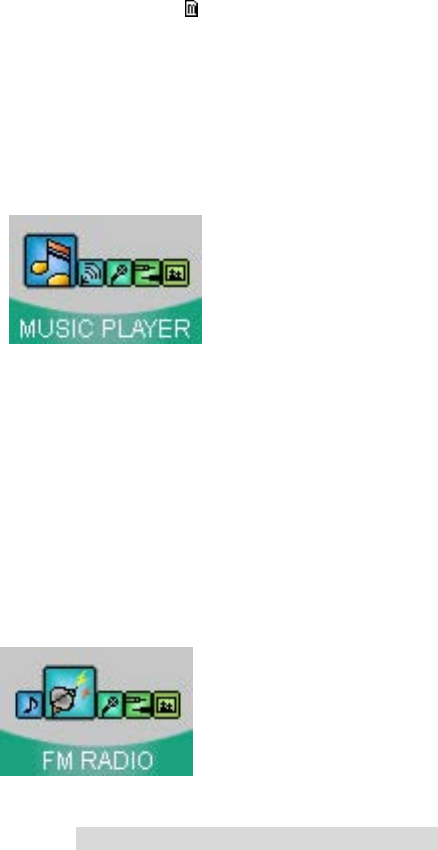
11) Mode Selection
Click MODE button to move to Mode Selection screen.
Press ◀◀/▶▶ button to select desired Mode.
MUSIC PLAYER / FM RADIO / VOICE RECORD / LINE-IN / MY ALBUM
! To move back to previous Mode without Mode change, press EQ/Repeat button.
12) FM Radio Recording and Playback
Click Mode button and move to Mode Selection Screen.
Press ◀◀/▶▶ button to select FM RADIO and press Menu button.
- Scan Mode (Search frequency manually)
1. Search frequency with ◀◀/▶▶ button.
2. A long push of ◀◀/▶▶ button searches automatically the next or previous frequency.
3. A short push of ▶/■ button stores the frequency.
4. A long push of Mode button operates AUTO SCAN function to search and store automatically up to 20 channels.
! Some channels may not be stored in areas of poor reception.
- Preset Mode (Search stored frequency)
Select desired channel out of stored frequencies with ◀◀/▶▶ button.
* Click Menu button to switch between SCAN MODE(Search frequency manually) and PRESET
MODE(Search stored frequency)
* Press EQ/Repeat button to choose between Stereo and Mono sound.
!) Reception could be poor in some areas of weak signal.
- FM Radio Recording
1. During FM Radio play, press REC/A<->B button to start recording.
2. During recording, press ▶/■ button to pause recording. Press ▶/■ button again to continue recording.
3. Press REC/A<->B button to stop recording.
- FM Radio Playback
1. FM record files are stored in order of recording.
2. FM Radio record files are stored in the form of F001.mp3, F002.mp3.
3. Move to Navigation Mode and select desired file in FM folder and press ▶/■ button for playback.
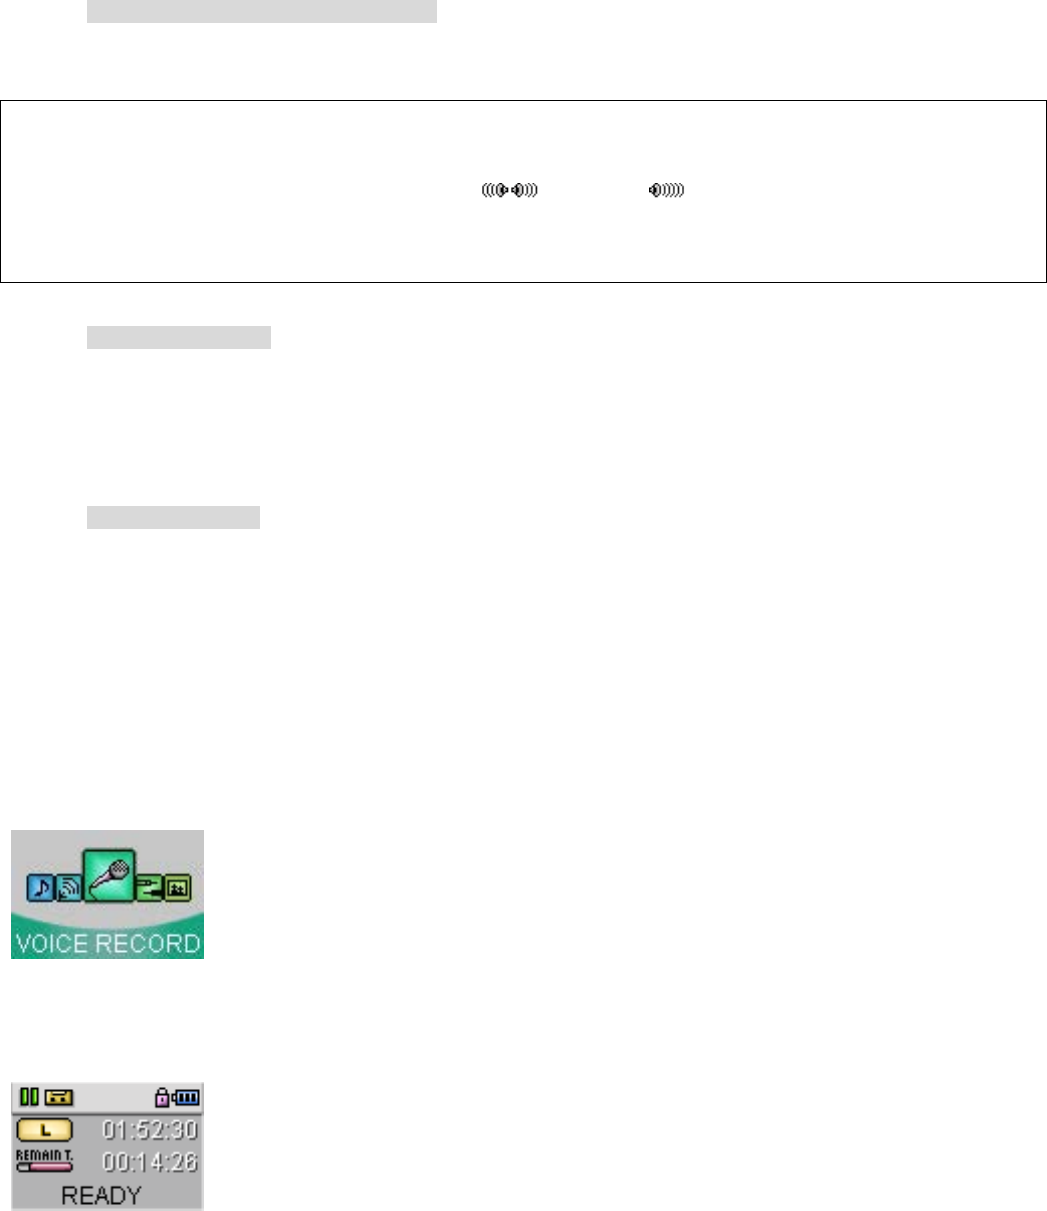
13) Voice Recording and Playback
Click Mode button and move to Mode Selection Screen.
Select VOICE RECORD with ◀◀/▶▶ button and press Menu button.
Voice Record Ready window appears as below.

Line 2: Recording Quality / Recording Time
Line 3: Remain time bar / Remain Time
- Voice Recording
1. Press REC/A<->B button to start Voice Recording.
2. During recording, press ▶/■ button to pause recording. Press ▶/■ button again to continue recording.
3. Press REC/A<->B button to stop recording.
- Voice record file Playback
1. Voice record files are stored in Voice folder in order of recording.
2. Voice record files are stored in the form of V001.mp3, V002.mp3.
3. Move to Navigation Mode and select desired file in Voice folder and press ▶/■ button for playback.
14) Recording and Playback from External Device
Click Mode button and move to Mode Selection Screen.
Select LINE-IN with ◀◀/▶▶ button and press Menu button.
- Recording External Device
1. Connect the Player to External Device with Line-in cable.
2. Press REC/A<->B button to start External Device Recording.
3. During recording, press ▶/■ button to pause recording. Press ▶/■ button again to continue recording.
4. Press REC/A<->B button to stop recording.
- Playback External Device recording
1. External Device recording files are stored in LINE-IN folder in order of recording.

2. External Device recording files are stored in the form of L001.mp3, L002.mp3.
3. Move to Navigation Mode and select desired file in LINE-IN folder and press ▶/■ button for playback.
15) Viewing Image File
The format of image on the Player is BMP file and 96x64 pixels are most suitable.
Image Editor program in the supplied CD can be used to edit the image easily.
For more details on Image Editor, refer to page ( ).
Click Mode button and move to Mode Selection Screen.
Select MY ALBUM with ◀◀/▶▶ button and press Menu button.
- Viewing Image File
Shows the name of stored Image File.
(! When there are no image files stored, ‘No File’ message will show.)
Select desired image file name with ◀◀/▶▶ button and press Menu button to display the image.
During viewing, press ◀◀/▶▶ button to select next/previous image.
Press Menu button again to show the name of Image File.
- Image Slide Show
After selecting Image File, press ▶/■ button to start “Image Slide Show” where images move automatically at the
set interval of time.
Press Menu button again to show the name of Image File.
(! Interval time for “Image Slide Show“ can be changed by Menu.)
- Deleting Image File
Select the name of Image file to be deleted with ◀◀/▶▶ button.
Press REC/A<->B button for message confirming delete.

Press “YES” to delete image and press “NO” to cancel.
4. Setting up of Menu
You can set up detail functions of the Player to your own requirement.
1) How to set up Menu
Move to Menu Setup Screen with a long push on Menu button.
Select desired Menu with ◀◀/▶▶ button.
Press down Menu button to move to detail item of Menu or save the set Menu.
Press EQ/Repeat button to move back to previous stage.
2) Menu Structure
(! Menu Structure may be different depending on the Firmware Version.)
3D EFFECT
SOUND EQUALIZER
LANGUAGE
ID3 TAG
SCROLL SPEED
PLAY TIMER
BACKLIGHT
SLIDESHOW TIMER
DISPLAY
CONTRAST
RESUME
PLAYBACK AUTO PLAY
REC QUALITY
FM SETTING
SLEEP
3) Functions of Menu Items
1. SOUND

- 3D EFFECT
: You can enjoy 3D stereo/rich bass sound and select suitable speakers appropriate to your environment.
- SRS: Playback in 3D stereo sound.
- WOW: Playback in 3D boosted bass sound.
- TruBass: Playback in boosted bass sound.
- USER SRS: Sets SRS, TruBass and FOCUS (Clarity of Sound) to taste.
(! How to set up USER SRS: ◀◀/▶▶ button: Select USER SRS item
+, - volume button: Select level of selected USER SRS)
- SPEAKER
EARPHONE: Selected for listening using earphones.
HEADPHONE: Selected for listening using headphones.
SMALL SPEAKER: Selected for listening using small speakers.
MEDIUM SPEAKER: Selected for listening using medium speakers.
BIG SPEAKER: Selected for listening using big speakers.
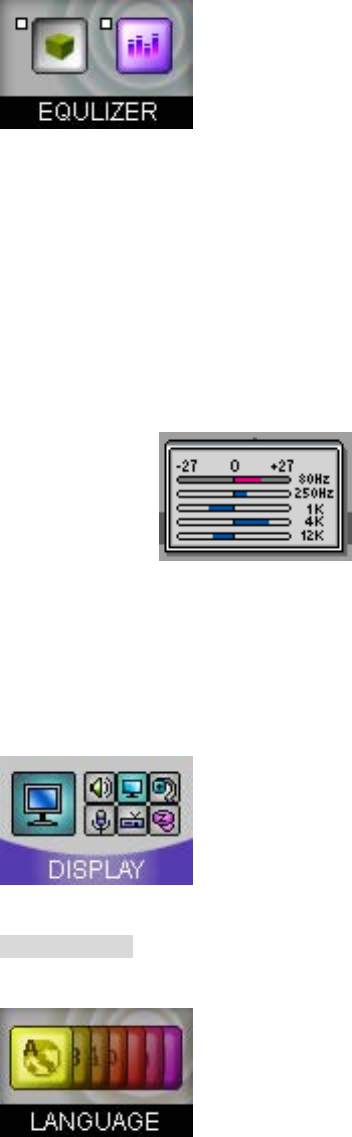
- EQUALIZER
: Choose EQ for different style of music.
- NORMAL: Playback in basic EQ.
- ROCK: Playback in Rock.
- POP: Playback in Pop.
- JAZZ: Playback in Jazz.
- CLASSIC: Playback in Classic.
- UBASS: Playback in Ultra Bass.
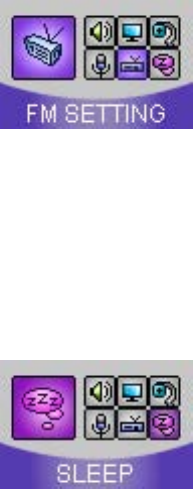
- USER: Playback in EQ set by User.
(! How to set USER EQ: ◀◀/▶▶ button: Select frequency range
+, - volume button: dB adjustment in each frequency range)
2. DISPLAY
- LANGUAGE
: Shows Menu, display and ID3 Tag information in respective language.
- ENGLISH: in English
- JAPANESE: in Japanese
- S. CHINESE: in Simplified Chinese

- T. CHINESE: in Traditional Chinese
- KOREAN: in Korean
- FRENCH: in French
- GERMAN: in German
- SPANISH: In Spanish
- ITALIAN: in Italian
- DUTCH: in Dutch
(! Menu for the European region is shown in English.)
- ID3 Tag
: During file playback, shows file name or ID3 Tag information.
- OFF: Shows file name.
- ON: Shows ID3 Tag.
- SCROLL SPEED
: During file playback, file name or ID3 Tag information selects Scroll Speed.
- 1x: Scrolls in 1x speed.
- 2x: Scrolls in 2x speed.
- 4x: Scrolls in 4x speed.
- PLAY TIMER
: During file playback, indicates playback time.

- NORMAL: Indicates playback time.
- REMAIN: Indicates remaining time of the file.
- BACKLIGHT
: Sets up backlight time.
- OFF: No backlight.
- ALWAYS: Backlight on all the time.
- 1~30(sec): Sets up backlight time for 1 ~ 30 seconds. (1~30 seconds backlight is set with +, - volume control.)
- SLIDE SHOW TIMER
: In MY ALBUM Mode, sets time for showing automatically the next image in Slide Show.
- 1~10(sec): Sets Slide Show time for 1 to 10 seconds.
- CONTRAST
: Sets screen contrast.
- 0~10: Sets screen contrast between 0 ~ 10.
3. PLAYBACK

- RESUME
: Remembers the last location of the file played before the Player was turned off and playback from that point.
- NO: RESUME function is not set. When powered on, playback starts from the beginning of the file.
- YES: RESUME function is set. When powered on, playback starts from the last playback location.
- AUTO PLAY
: Determines Playback after Power ON.
- NO: after Power ON, press ▶/■ button for playback.
- YES: after Power ON, automatic playback of file.
4. REC RESOLUTION
: Sets quality of recording of FM Radio, Voice and External Device.
- LOW: Sets for low quality. (44.1KHz, 96Kbps)
- MIDDLE: Sets for normal quality. (44.1KHz, 112Kbps)
- HIGH: Sets for high quality. (44.1KHz, 128Kbps)
(! Higher quality record files take up more memory space than lower quality ones.)
5. FM SETTING
: Selects FM frequencies appropriate for the region.
- WORLD WIDE: Receives frequency range of 87.5~108MHz.
- JAPAN: Receives frequency range of 76~108MHz.
6. SLEEP
: Sets Player’s function of Power OFF at pre-arranged time.
OFF ~ 60(min): Sets SLEEP function to OFF ~ 60 minutes.
(! After Power OFF, SLEEP function is always reset to OFF.)
5. Others
1) Upgrade Firmware Procedure
Occasionally, new software (firmware) may be released for this unit enhancing its functionality. For more information,
please go to the web site at (www.signeo.net) for downloading procedure and downloading the latest firmware.
2) Player Format
1. Select Portable Disk, right click the mouse and select Format.
2. Press Start button to start formatting.
(! Format deletes all data in disk.)
3) About Image Editor
: Image Editor is a program to change size and format of image file to fit the Player.
- Image Editor Installation
1. Install Image Editor program in the supplied installation CD.
2. After installation, double click Image Editor icon on the screen and run the program.
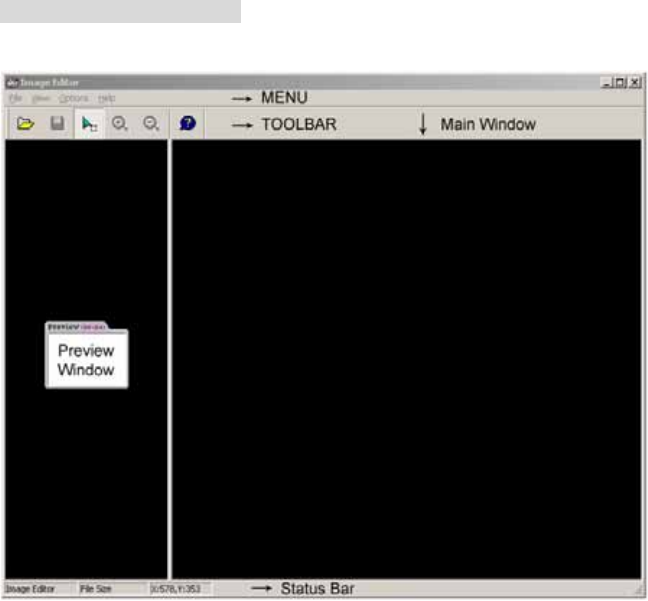
- How to use Image Editor
1. Description of each section
① Menu section
- File
Open: Brings in image file.
Save Edit Image: Saves image file.
Exit: Finishes Image Editor.
- View
Toolbar: Selects Toolbar View/Hide.
Status Bar: Selects Status Bar View/Hide.
- Options
Fixed Magnification: When Fixed Magnification is selected, image size can be adjusted within fixed
dimension of rectangle suitable for the Player.

- Help
About: Shows information on Image Editor.
② Toolbar
- (File Open): Opens image file.
- (Save Edit Image): Saves image file.
(Edit Area mode): When Edit Area mode icon is selected; image size can be adjusted within fixed
dimension of rectangle suitable for the Player.
- (Magnify): Magnifies image.
- (Diminish): Diminishes image.
- (About): Shows information on Image Editor.
③ Preview Window
: Shows image in size to be seen on the Player.
④ Main Window
: Shows brought in image. Size can be adjusted to fit the Player.
⑤ Status Bar
: Shows Pixel, Size and Coordinates of original image.
2. How to use Image Editor
① Press button to open image file.
② When selected image is shown in Main Window, select desired image range with mouse for saving in
the Player.
③ Check if the selected range of image is appropriate in Preview Window.
④ Press button to save modified image.
(Image is stored in 96X64 pixels, BMP format.)
6. Customer Support
1) FAQ
Symptom Possible Cause Solution
Power
does not
come on
_ Check battery status. _ Charge battery.
_ Check if earphones jack is properly
connected.
_ Reconnect earphones.
_ Check if volume is set at zero (0). _ Increase volume.
_ Check battery status. _ Charge battery.
_ Check if earphones jack is dirty or
corroded.
_ Clean earphones jack.
No sound
from
earphones
_ Check if MP3 or WMA file is damaged. _ Download a normal file again.
_ Check if language setting is correct. _ Set up appropriate language in
Language Setup Mode.
Strange
letters
appear on
the screen
_ Unsupported language. _ Check for new Firmware Version by
visiting website for update.
_ Check if signal is weak. _ Adjust the position of Player and
earphones.
Poor FM
reception
_ Check for interference from other
electronic device.
_ Switch off other device.
_ Move away from the device causing
the interference.
_ Check battery status. _ Charge battery.
_ Check USB plugs connecting PC and
Player.
_ Try connecting USB plugs properly
to PC and Player.
_ Damaged USB cable. _ Replace USB cable.
MP3/WMA/
WAV file
download
or upload
failure _ Memory is full. _ Try again after deleting some files
to secure memory space.
Voice or
FM Radio
recording
_ Memory is full. _ Try again after deleting some files
to secure memory space.
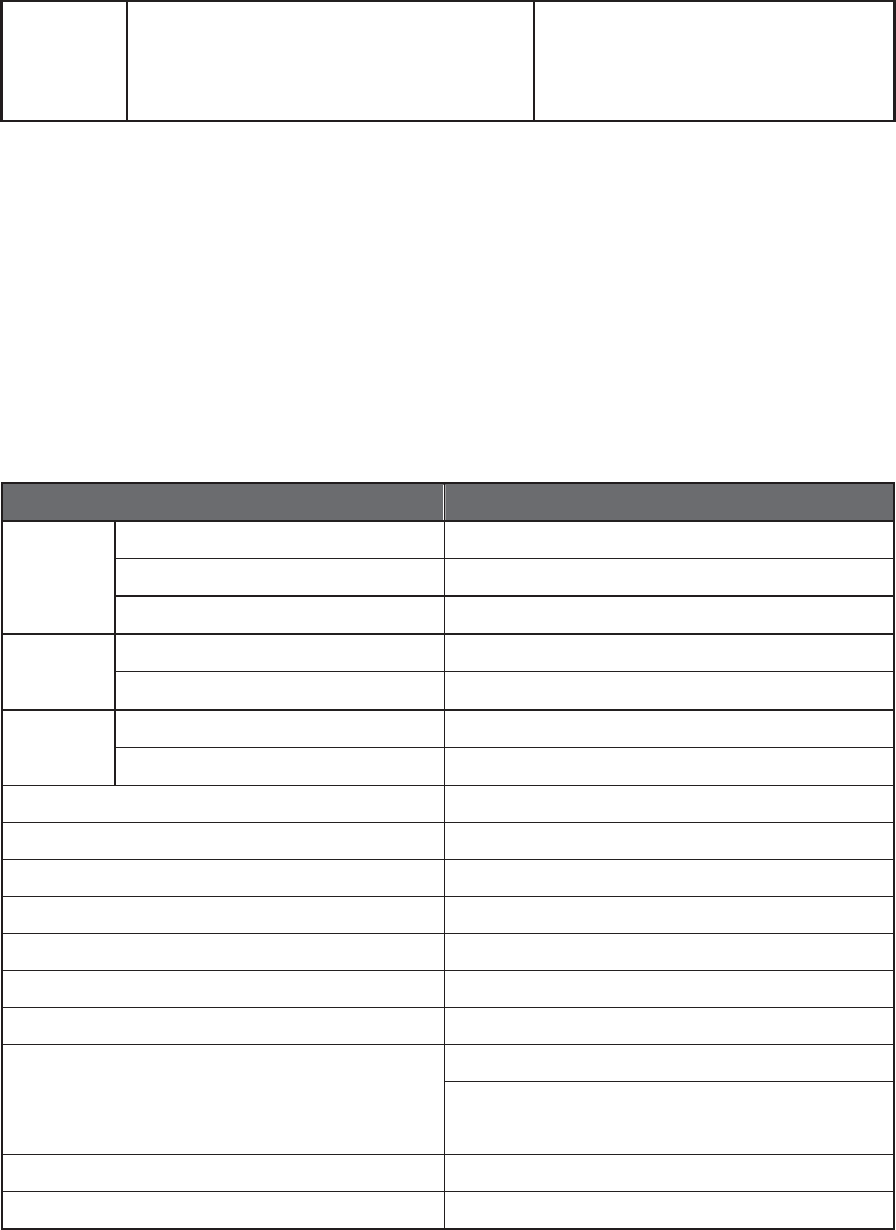
failure
(! Static electricity or other electronic interferences could cause temporary malfunction to the Player.
Re-initializing the Player will bring it back to normal.
To reinitialize the Player, press MODE button and REC/A<->B button at the same time.
Then, turn the Power On for normal operation.)
2) Specifications
* Specifications may be changed without prior notice.
Category Specifications
Frequency range 20Hz - 20KHz
Earphone output 10mW+10mW, 16ohm
Audio
Signal/Noise ratio 85dB
Format MP3, WMA, WAV
File
Support ID3 Tag ID3 V1, ID3 V2 2.0, 3.0, 4.0
FM Frequency range 76MHz - 108 MHz
FM Radio Signal/Noise ratio 55dB
Dimension 85 x 31 x 18mm
Weight Approx. 60g
Battery Internal Lithium Polymer rechargable battery
LCD Graphic Color Display
USB USB 2.0
Internal Memory 128MB / 256MB / 512 MB / 1G
Continuous Playtime Over 30 hours(128kbps, MP3 standard)
Win 98SE (requires driver)
Operating System Microsoft Windows ME/2000/XP
Mac OS X 10.2.8 and above
Firmware Upgrade possible
Operating temperature -5℃~ 40℃
(! Since the system and firmware uses small part of internal memory for system operation, actual usable
memory is a little less than indicated.)