Abocom Systems MR1K Digital Media Adapter User Manual dma
Abocom Systems Inc Digital Media Adapter dma
Manual
-- 1
Copyright
This publication, including all photographs, illustrations and software, is protected under interna-
tional copyright laws, with all rights reserved. Neither this manual, nor any of the material con-
tained herein, may be reproduced without written consent of the author.
Copyright 2005
Version 1.0
Disclaimer
The information in this document is subject to change without notice. The manufacturer makes no
representations or warranties with respect to the contents hereof and specifically disclaims any
implied warranties of merchantability or fitness for any particular purpose. The manufacturer
reserves the right to revise this publication and to make changes from time to time in the content
hereof without obligation of the manufacturer to notify any person of such revision or changes.
Trademark recognition
Other product names used in this manual are the properties of their respective owners and are
acknowledged.
Federal Communications Commission (FCC)
This equipment has been tested and found to comply with the limits for a Class B digital device,
pursuant to Part 15 of the FCC Rules. These limits are designed to provide reasonable protection
against harmful interference in a residential installation. This equipment generates, uses, and can
radiate radio frequency energy and, if not installed and used in accordance with the instructions,
may cause harmful interference to radio communications. However, there is no guarantee that
interference will not occur in a particular installation. If this equipment does cause harmful inter-
ference to radio or television reception, which can be determined by turning the equipment off
and on, the user is encouraged to try to correct the interference by one or more of the following
measures:
• Reorient or relocate the receiving antenna.
• Increase the separation between the equipment and the receiver.
• Connect the equipment onto an outlet on a circuit different from that to which the receiver is
connected.
• Consult the dealer or an experienced radio/TV technician for help.
Shielded interconnect cables and a shielded AC power cable must be employed with this equip-
ment to ensure compliance with the pertinent RF emission limits governing this device. Changes
or modifications not expressly approved by the system's manufacturer could void the user's
authority to operate the equipment.
2 --
Declaration of conformity
This device complies with part 15 of the FCC rules. Operation is subject to the following condi-
tions:
• This device may not cause harmful interference, and
• This device must accept any interference received, including interference that may cause
undesired operation.
About this manual
This manual provides information for setting up and configuring the DMA. This manual is
intended for home users.

Regulatory Approvals
FCC Statement
This equipment has been tested and found to comply with the limits for a Class B digital
device, pursuant to Part 15 of the FCC Rules. These limits are designed to provide reasonable
protection against harmful interference in a residential installation.
This equipment generates, uses and can radiate radio frequency energy and, if not installed and
used in accordance with the instructions, may cause harmful interference to radio communica-
tions. However, there is no guarantee that interference will not occur in a particular installation.
If this equipment does cause harmful interference to radio or television reception, which can be
determined by turning the equipment off and on, the user is encouraged to try to correct the
interference by one of the following measures:
Reorient or relocate the receiving antenna.
Increase the separation between the equipment and receiver.
Connect the equipment into an outlet on a circuit different from that to which the receiver
is connected.
Consult the dealer or an experienced radio/TV technician for help.
To assure continued compliance, any changes or modifications not expressly approved by the
party responsible for compliance could void the user's authority to operate this equipment.
(Example - use only shielded interface cables when connecting to computer or peripheral
devices).
FCC Radiation Exposure Statement
This equipment complies with FCC RF radiation exposure limits set forth for an uncontrolled
environment. This equipment should be installed and operated with a minimum distance of 20
centimeters between the radiator and your body.
This device complies with Part 15 of the FCC Rules. Operation is subject to the following two
conditions:
(1) This device may not cause harmful interference, and
(2) This device must accept any interference received, including interference that may cause
undesired operation.
This transmitter must not be co-located or operating in conjunction with any other antenna or
transmitter.
The antennas used for this transmitter must be installed to provide a separation distance of at
least 20 cm from all persons and must not be co-located or operating in conjunction with any
other antenna or transmitter.
Channel
The Wireless Channel sets the radio frequency used for communication.
•Access Points use a fixed Channel. You can select the Channel used. This allows you to
choose a Channel which provides the least interference and best performance. In the USA
and Canada, 11 channel are available. If using multiple Access Points, it is better if adjacent
Access Points use different Channels to reduce interference.
• In "Infrastructure" mode, Wireless Stations normally scan all Channels, looking for an
Access Point. If more than one Access Point can be used, the one with the strongest
signal is used. (This can only happen within an ESS.)
• If using "Ad-hoc" mode (no Access Point), all Wireless stations should be set to use the
same Channel. However, most Wireless stations will still scan all Channels to see if there
is an existing "Ad-hoc" group they can join.
CAUTION:
1) To comply with FCC RF exposure compliance requirements, a separation
distance of at least 20 cm must be maintained between the antenna of this
device and all persons.
2) This transmitter must not be co-located or operating in conjunction with
any other antenna or transmitter.
-- 3
Table of Contents
Getting Started with the DMA .................................................................... 5
Unpacking and Checking the Contents ....................................................................... 5
Identifying Components ............................................................................................... 6
Front-right View . . . . . . . . . . . . . . . . . . . . . . . . . . . . . . . . . . . . . . . . . . . . . . . . . . . . . . . . . . 6
Rear View . . . . . . . . . . . . . . . . . . . . . . . . . . . . . . . . . . . . . . . . . . . . . . . . . . . . . . . . . . . . . . . 6
Remote Control............................................................................................................ 7
Inserting the Remote Control Batteries . . . . . . . . . . . . . . . . . . . . . . . . . . . . . . . . . . . . . . . . 7
Remote Control Functions . . . . . . . . . . . . . . . . . . . . . . . . . . . . . . . . . . . . . . . . . . . . . . . . . . 8
Connecting the DMA.................................................................................................... 9
Connect to a TV Set or a Projector . . . . . . . . . . . . . . . . . . . . . . . . . . . . . . . . . . . . . . . . . . . . 9
Wired LAN connection . . . . . . . . . . . . . . . . . . . . . . . . . . . . . . . . . . . . . . . . . . . . . . . . . . . . 10
DC Adapter connection . . . . . . . . . . . . . . . . . . . . . . . . . . . . . . . . . . . . . . . . . . . . . . . . . . . 10
Installation ................................................................................................ 11
Software Installation .................................................................................................. 11
Configuring the Utility (PC) ........................................................................................ 14
Shared Folder tab ...................................................................................................... 15
Security tab................................................................................................................ 16
Media Server Name tab............................................................................................. 16
File Type Tab............................................................................................................. 17
Exploring the DMA Menus ....................................................................... 19
The Main Menu.......................................................................................................... 19
The VIDEO Menu ...................................................................................................... 20
The Album Menu . . . . . . . . . . . . . . . . . . . . . . . . . . . . . . . . . . . . . . . . . . . . . . . . . . . . . . . . 21
The Genre Menu . . . . . . . . . . . . . . . . . . . . . . . . . . . . . . . . . . . . . . . . . . . . . . . . . . . . . . . . . 21
The Playlist Menu . . . . . . . . . . . . . . . . . . . . . . . . . . . . . . . . . . . . . . . . . . . . . . . . . . . . . . . . 22
The All Videos Menu . . . . . . . . . . . . . . . . . . . . . . . . . . . . . . . . . . . . . . . . . . . . . . . . . . . . . 22
The MUSIC Menu ...................................................................................................... 23
The Artist Menu . . . . . . . . . . . . . . . . . . . . . . . . . . . . . . . . . . . . . . . . . . . . . . . . . . . . . . . . . 24
The Genre Menu . . . . . . . . . . . . . . . . . . . . . . . . . . . . . . . . . . . . . . . . . . . . . . . . . . . . . . . . . 24
The Album Menu . . . . . . . . . . . . . . . . . . . . . . . . . . . . . . . . . . . . . . . . . . . . . . . . . . . . . . . . 25
The Playlist Menu . . . . . . . . . . . . . . . . . . . . . . . . . . . . . . . . . . . . . . . . . . . . . . . . . . . . . . . . 25
The All Music Menu . . . . . . . . . . . . . . . . . . . . . . . . . . . . . . . . . . . . . . . . . . . . . . . . . . . . . . 26
The PHOTO Menu..................................................................................................... 26
The Album Menu . . . . . . . . . . . . . . . . . . . . . . . . . . . . . . . . . . . . . . . . . . . . . . . . . . . . . . . . 27
The Playlist Menu . . . . . . . . . . . . . . . . . . . . . . . . . . . . . . . . . . . . . . . . . . . . . . . . . . . . . . . . 28
The All Photos Menu . . . . . . . . . . . . . . . . . . . . . . . . . . . . . . . . . . . . . . . . . . . . . . . . . . . . . 28
The SERVER Menu................................................................................................... 29
The Shared Folders Menu . . . . . . . . . . . . . . . . . . . . . . . . . . . . . . . . . . . . . . . . . . . . . . . . . . 30
The USB Menu .......................................................................................................... 30
4 --
The OPTION Menu.................................................................................................... 31
The Wired LAN Settings Menu . . . . . . . . . . . . . . . . . . . . . . . . . . . . . . . . . . . . . . . . . . . . . 33
The Wireless LAN settings Menu . . . . . . . . . . . . . . . . . . . . . . . . . . . . . . . . . . . . . . . . . . . 34
The TV Settings Menu . . . . . . . . . . . . . . . . . . . . . . . . . . . . . . . . . . . . . . . . . . . . . . . . . . . . 37
The Language settings Menu . . . . . . . . . . . . . . . . . . . . . . . . . . . . . . . . . . . . . . . . . . . . . . . 38
The Reset the settings Menu . . . . . . . . . . . . . . . . . . . . . . . . . . . . . . . . . . . . . . . . . . . . . . . . 38
The Software setting Menu . . . . . . . . . . . . . . . . . . . . . . . . . . . . . . . . . . . . . . . . . . . . . . . . . 39
Operation ................................................................................................. 41
Power on.................................................................................................................... 41
Language Settings..................................................................................................... 41
TV Settings ................................................................................................................ 42
Start DiXiM Media...................................................................................................... 42
View data source and change settings ...................................................................... 43
VIDEO . . . . . . . . . . . . . . . . . . . . . . . . . . . . . . . . . . . . . . . . . . . . . . . . . . . . . . . . . . . . . . . . 43
MUSIC . . . . . . . . . . . . . . . . . . . . . . . . . . . . . . . . . . . . . . . . . . . . . . . . . . . . . . . . . . . . . . . . 44
PHOTO . . . . . . . . . . . . . . . . . . . . . . . . . . . . . . . . . . . . . . . . . . . . . . . . . . . . . . . . . . . . . . . . 45
SERVER . . . . . . . . . . . . . . . . . . . . . . . . . . . . . . . . . . . . . . . . . . . . . . . . . . . . . . . . . . . . . . . 46
USB . . . . . . . . . . . . . . . . . . . . . . . . . . . . . . . . . . . . . . . . . . . . . . . . . . . . . . . . . . . . . . . . . . . 46
OPTION . . . . . . . . . . . . . . . . . . . . . . . . . . . . . . . . . . . . . . . . . . . . . . . . . . . . . . . . . . . . . . . 47
Appendix .................................................................................................. 49
Specification .............................................................................................................. 50
Trouble Shooting ....................................................................................................... 51
Common problems and solutions . . . . . . . . . . . . . . . . . . . . . . . . . . . . . . . . . . . . . . . . . . . . 51
Tips for troubleshooting . . . . . . . . . . . . . . . . . . . . . . . . . . . . . . . . . . . . . . . . . . . . . . . . . . . 52
Audio problems . . . . . . . . . . . . . . . . . . . . . . . . . . . . . . . . . . . . . . . . . . . . . . . . . . . . . . . . . 52
Having the DMA serviced . . . . . . . . . . . . . . . . . . . . . . . . . . . . . . . . . . . . . . . . . . . . . . . . . 52
Cleaning the DMA...................................................................................................... 53
GETTING STARTED WITH THE DMA
This section covers the following topics:
• “Unpacking and Checking the Contents” on page 5
• “Identifying Components” on page 6
• “Remote Control” on page 7
• “Connecting the DMA” on page 9
Unpacking and Checking the Contents
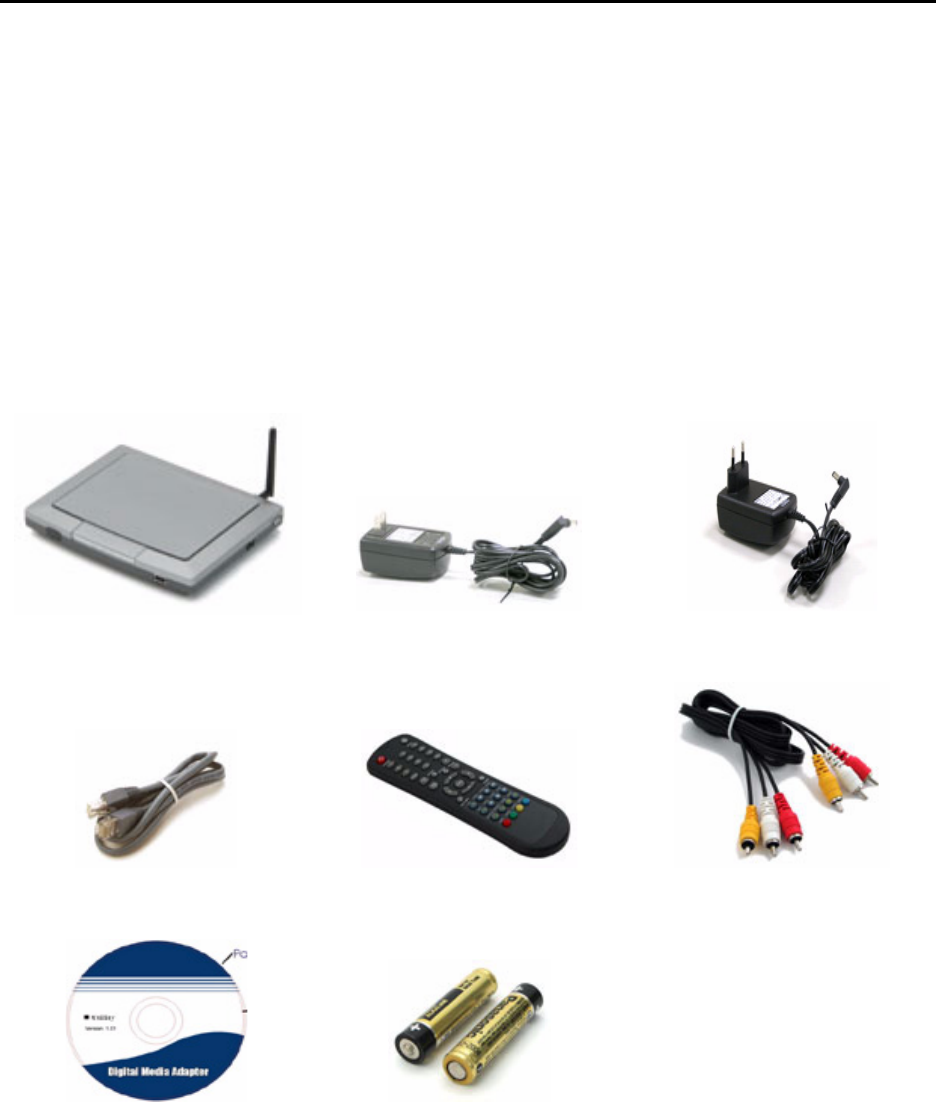
Unpack the DMA and check that the following items are included:
If any item is missing or damaged, repack the DMA and return it to your reseller.
DMA American Power Adapter European Power Adapter
RJ-45 Cable Remote Control RCA Cable
Utility CD-ROM Two AAA Batteries Quick Installation Guide
6 -- Getting Started with the DMA
Identifying Components
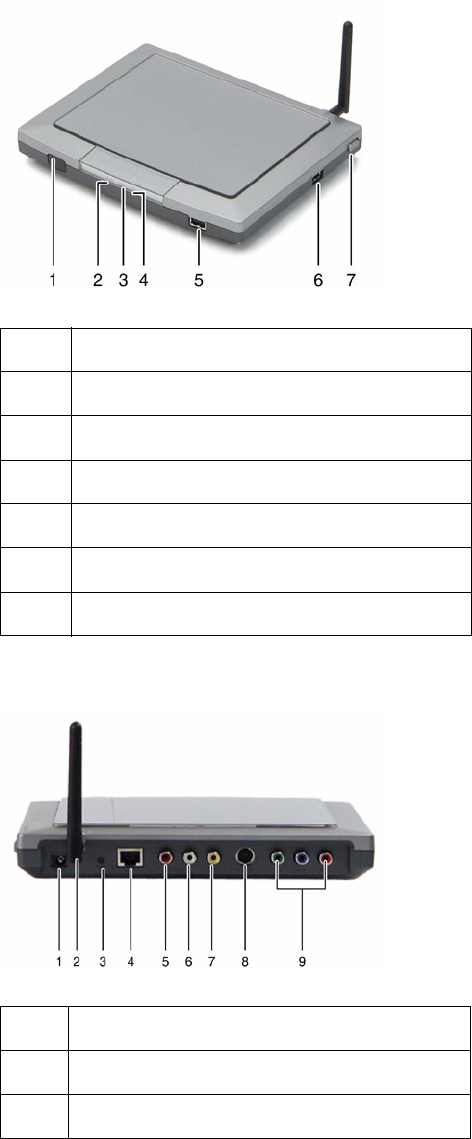
The following illustrations show the front-right and rear views of the DMA.
FRONT-RIGHT VIEW
REAR VIEW
1IR Receiver
2WLAN LED
3LAN LED
4Power LED
5USB
6USB
7Power Switch
1Power Socket
2Antenna
3Reset
Getting Started with the DMA -- 7
Remote Control
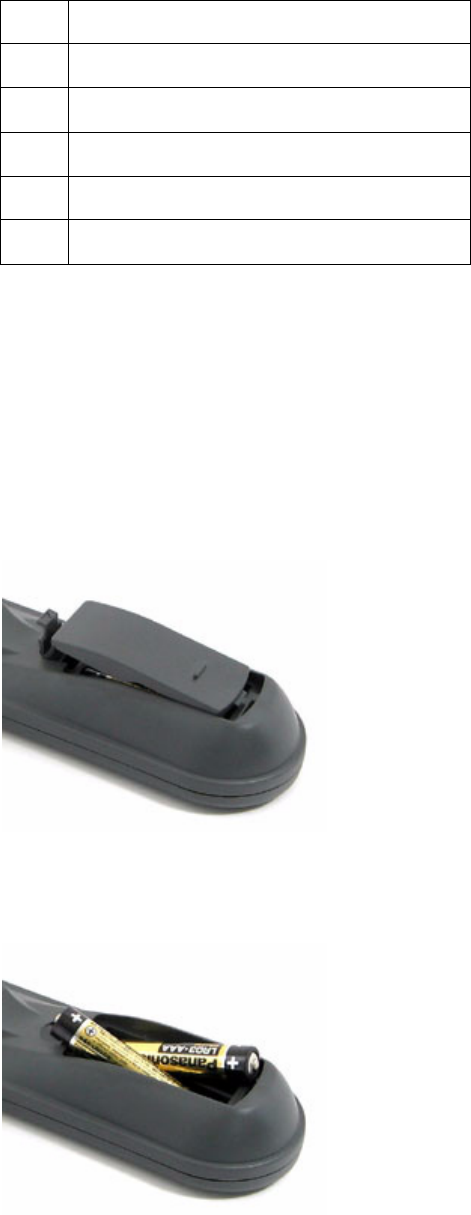
The DMA ships with a battery operated, infrared (IR) remote control.
INSERTING THE REMOTE CONTROL BATTERIES
You must insert the two AAA batteries that come with the DMA into the remote control before
you can use it.
1. Remove the cover from the remote control.
2. Insert the two AAA batteries with the correct polarity as indicated on the battery compart-
ment.
3. Replace the cover.
4RJ-45 Port
5Right Audio
6Left Audio
7Composite Video
8S-Video
9Component Video
8 -- Getting Started with the DMA
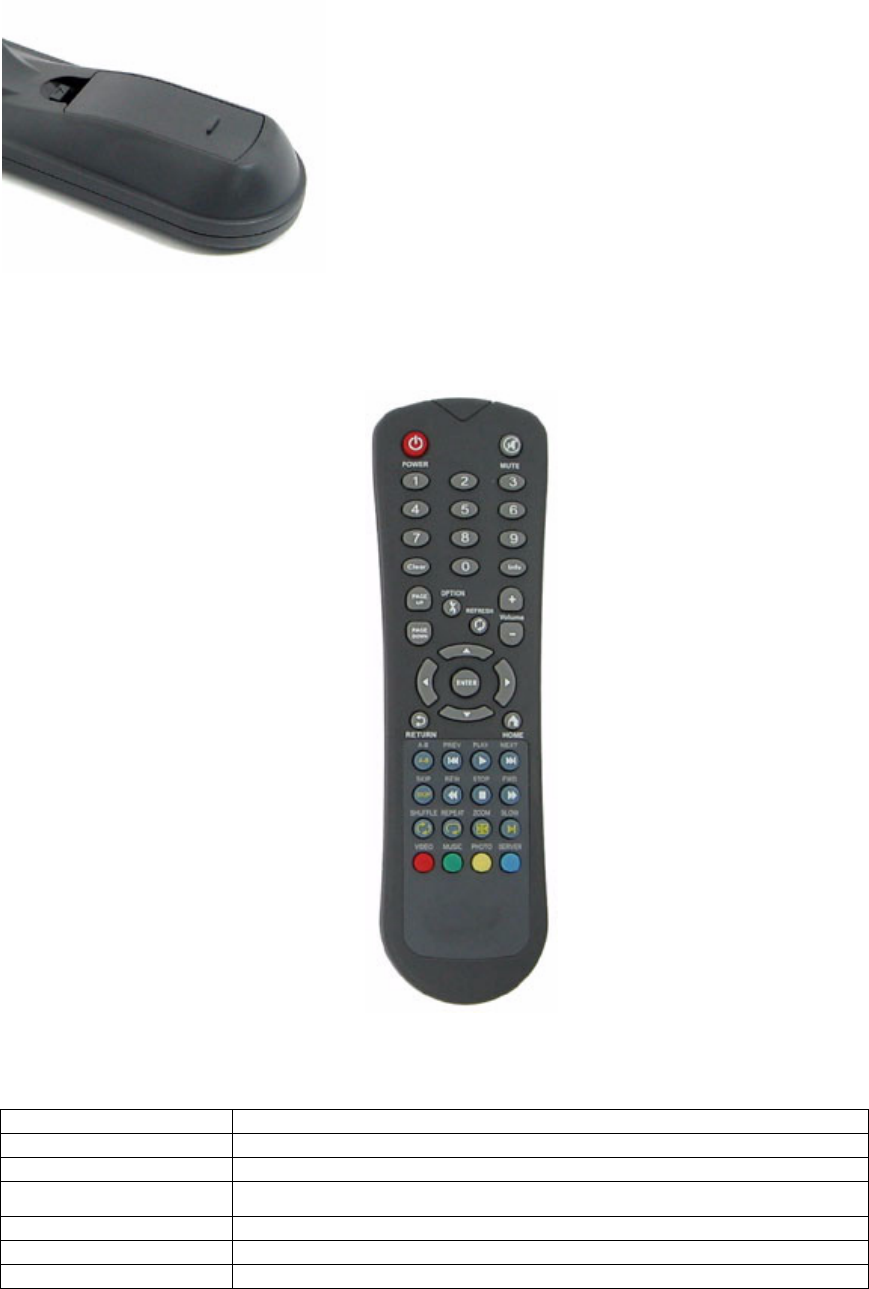
REMOTE CONTROL FUNCTIONS
Button Description
Power Turn on/off the power.
Mute Mute volume.
Number (0-9) Enter 0 - 9 to select items in VIDEO/MUSIC/PHOTO menus.
Clear Clear text/number from selected entry field.
Info Show the status of files.
PAGE UP Go up a page.

Getting Started with the DMA -- 9
Connecting the DMA
CONNECT TO A TV SET OR A PROJECTOR
RCA CABLE CONNECTION
1. Connect the red (R) and white (L) audio RCA connectors to the corresponding colored
AUDIO OUT connectors on the rear of the DMA unit.
2. Connect the other end to the corresponding RCA AUDIO INPUT sockets on the rear of your
TV.
3. Connect the yellow RCA cable to the RCA VIDEO OUT socket on the rear of the DMA unit.
4. Connect the other end to the VIDEO INPUT socket to the rear of your TV Set.
S-VIDEO CONNECTION
1. Connect the S-video cable to the VIDEO OUT S-VIDEO connector to the rear of the DMA
unit.
2. Connect the other end to the VIDEO IN S-VIDEO connector to the rear of the TV Set.
3. Connect the red (R) and white (L)audio RCA connectors to the corresponding colored
AUDIO OUT connectors on the rear of the DMA unit.
4. Connect the other ends to the corresponding RCA AUDIO INPUT sockets on the rear of your
TV.
COMPONENT VIDEO CONNECTION
1. Connect the component video cable to the YPbPr sockets on the rear of the DMA unit.
PAGE DOWN Go down a page.
OPTION OPTION menu opens
HOME Go to the main menu.
Volume(+) Volume up.
Volume(-) Volume down.
ENTER Confirm/enter settings/commands.
Arrows keys (up,
down, left, right)
Navigate input field in on-screen menus.
RETURN Return to the last screen.
MENU A tool menu pops up.
A-B Play repeatly between two chose points in the disc, press again
to disable.
PREV Go back to the last song/video/photo.
PLAY / PAUSE Start playing / pausing music or video.
NEXT Go to the next song/video/photo.
SKIP Skip the file.
REW Rewind the video.
STOP Stop the selected file action.
FWD Fast forward music/video.
SHUFFLE Shuffle during playback.
REPEAT Toggle repeat function during playback.
ZOOM Increase zoom.
SLOW Toggle between slow motion speeds.
VIDEO VIDEO menu shows.
MUSIC MUSIC menu shows.
PHOTO PHOTO menu shows.
SERVER SERVER menu shows.
10 -- Getting Started with the DMA
2. Connect the other end to the rear of your TV Set.
3. Connect the red (R) and white (L)audio RCA connectors to the corresponding colored
AUDIO OUT connectors on the rear of the DMA unit.
4. Connect the other ends to the corresponding RCA AUDIO INPUT sockets on the rear of your
TV.
WIRED LAN CONNECTION
Connect the LAN socket at the rear of DMA unit, and connect the other end to the DHCP router.
DC ADAPTER CONNECTION
Connect the DC adapter plug at the rear of DMA unit, and connect the other end to the power out-
let.
INSTALLATION
This section covers the following topics:
• “Software Installation” on page 11
• “Configuring the Utility (PC)” on page 14
• “Shared Folder tab” on page 15
• “Security tab” on page 16
• “Media Server Name tab” on page 16
• “File Type Tab” on page 17
Software Installation
You need to have a computer to serve as your data source. Install the DiXiM Media Server soft-
ware on this computer (This software can only run under XP Home Edition and Professional Edi-
tion). The software is on the accessory CD.
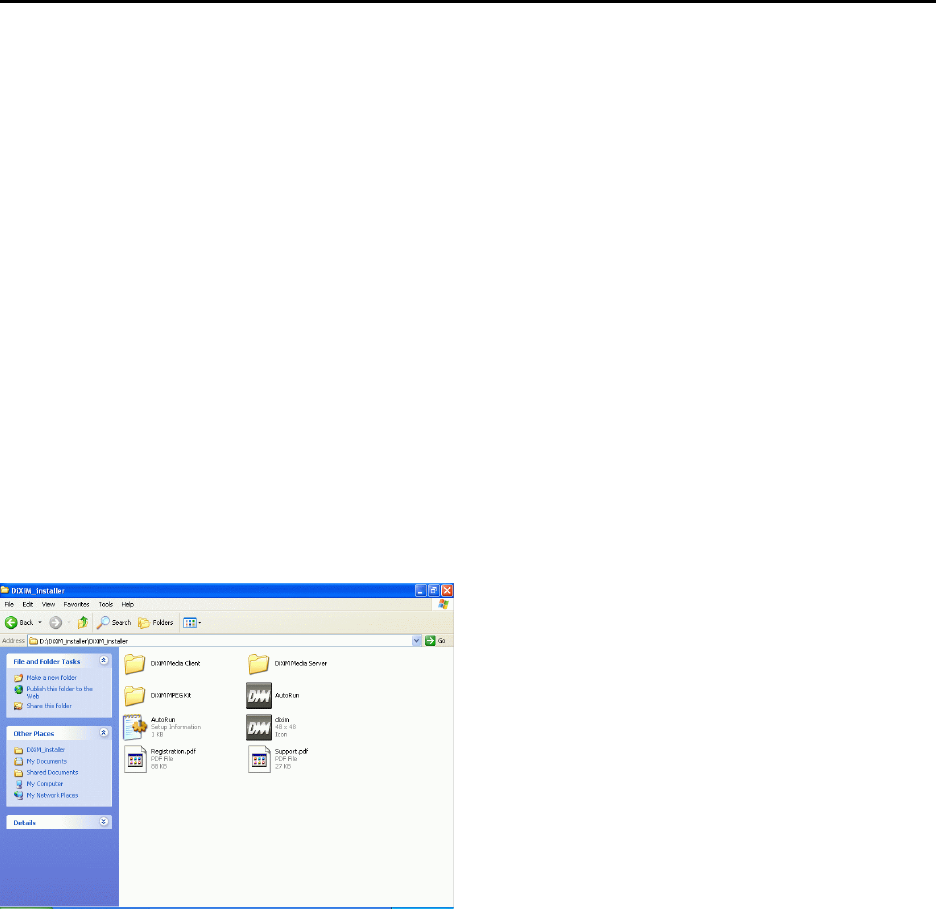
1. Insert the accessory Driver & Utility CD into the CD-ROM drive of your computer, double-
click the AutoRun icon in the following screen.
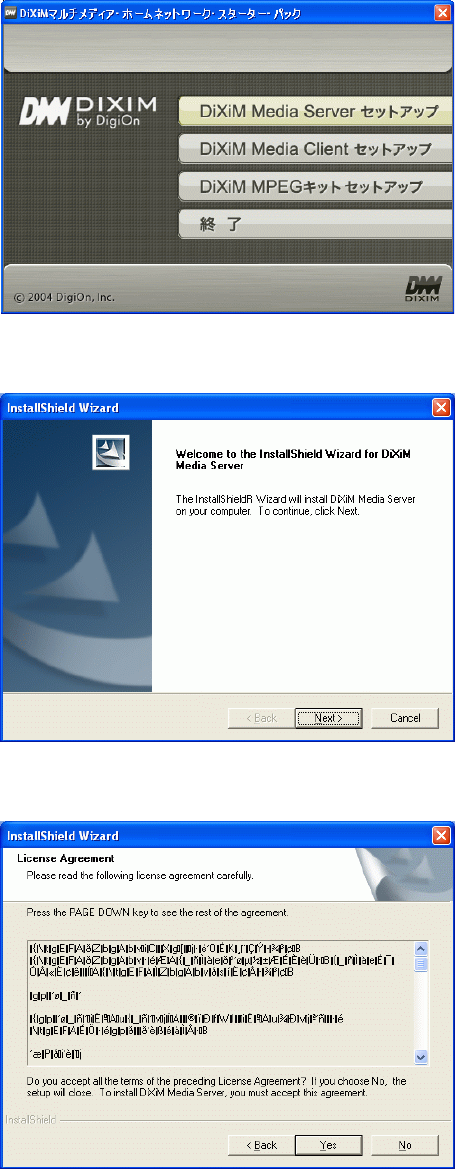
2. When the main menu screen appears, click DiXiM Media Server to start software installa-
tion.
12 -- Installation
3. The Welcome screen will be displayed, click Next to continue.
4. View the License Agreement screen, and then click Ye s to continue.
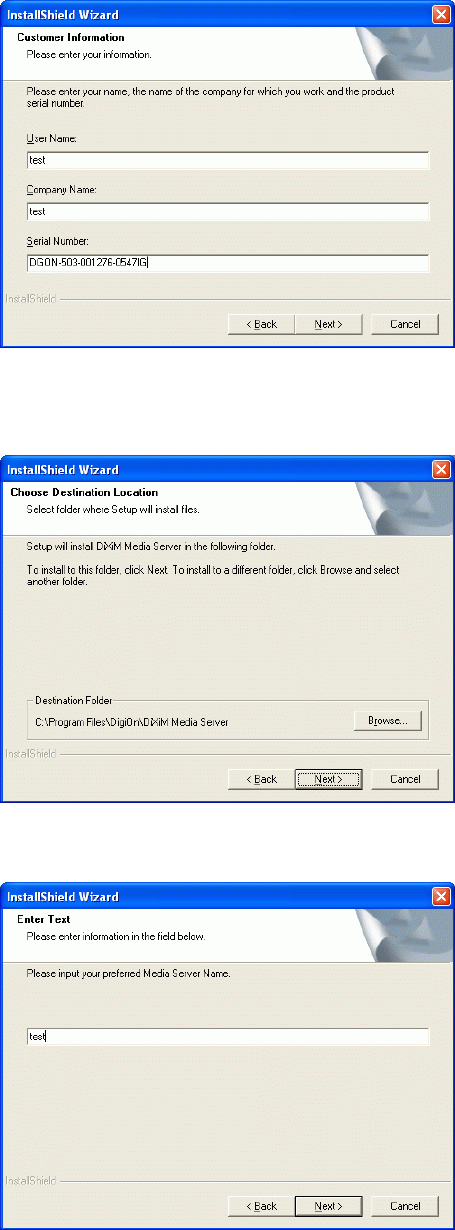
5. Input the User name, Company Name and copy the Serial Number, which is provided in the
Driver & Utility CD contents. Click Next to continue.
Installation -- 13
6. The system will automatically direct the needed files to the destination shown in this screen,
click Next to continue.
7. You may input the preferred name for your Digital Media Adapter in this screen.
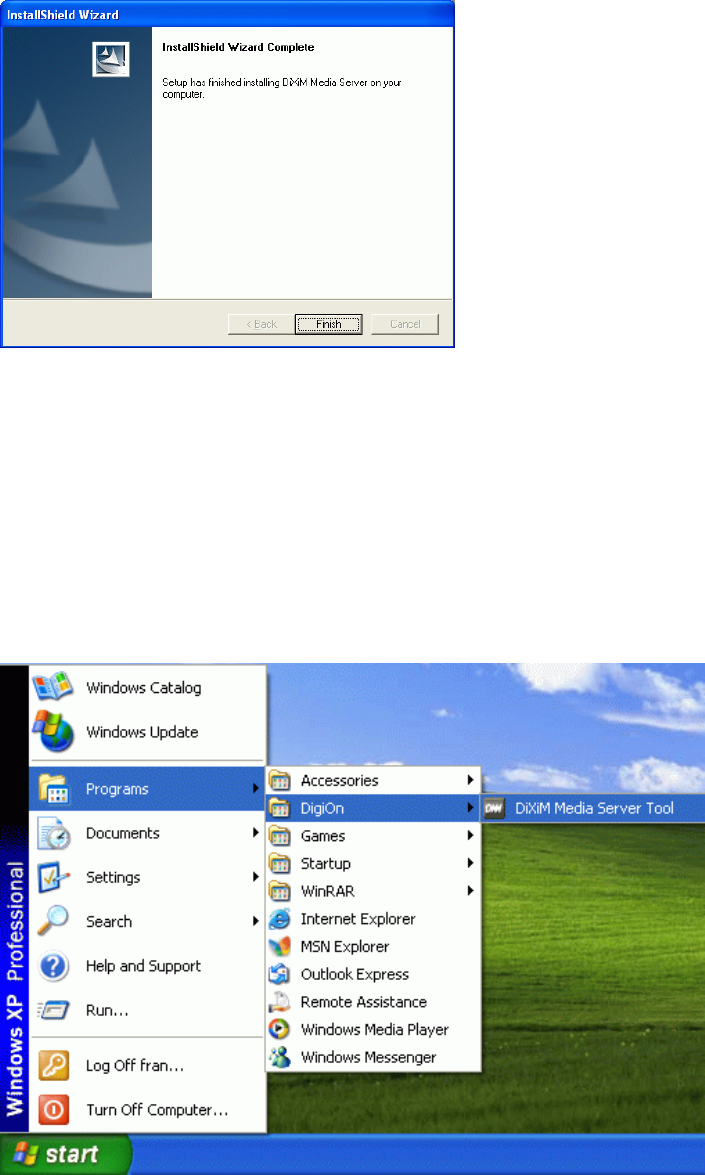
8. When the following screen appears, click Finish to complete the software installation.
14 -- Installation
9. Connect this computer to the DHCP router.
10. Execute DiXiM Media Server.
11. On DiXiM Media Server menu bar, select Edit/Reference. On the left-hand side of the pop-
up window, you will see a set of options that you can select to set up your server.
Configuring the Utility (PC)
1. After the driver & utility has been installed in your PC, you may start to configure the utilities.
Go to Start→Programs→DigiOn→DiXiM Media Server Tool to open the utility configura-
tion screens.
Installation -- 15
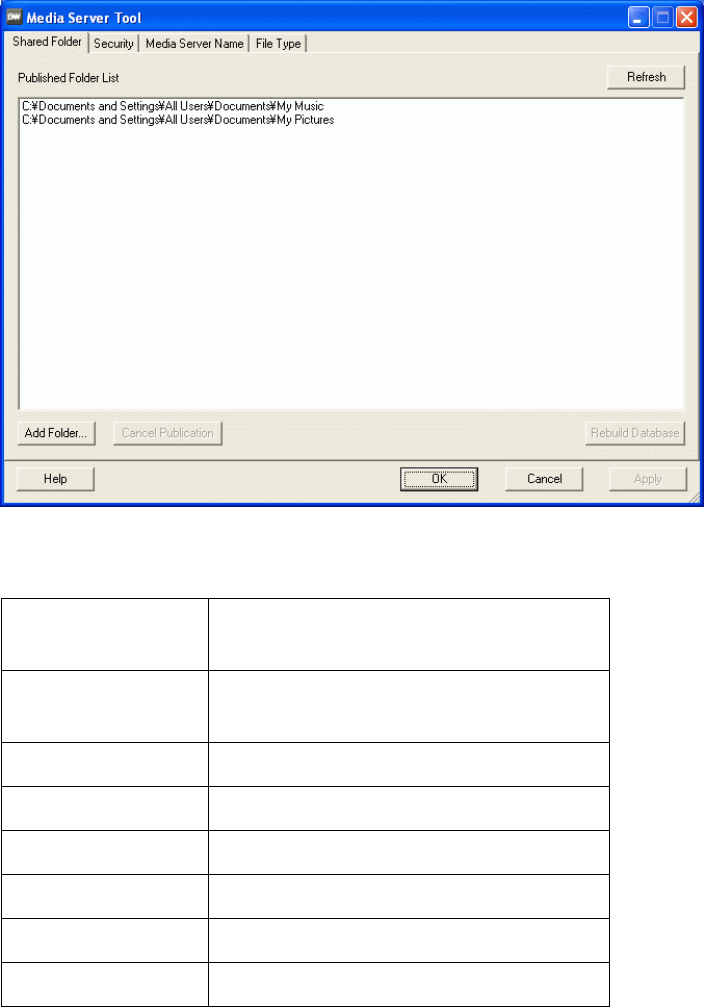
Shared Folder tab
Add the folders you would like to share. Only shared folders can be viewed on your TV or projec-
tor.
Add folder Add folders to share in the Published
Folder List.
Cancel Publication Remove the folders added in the Pub-
lished Folder List.
Rebuild Database Apply the database setting.
Help Help files.
OK Close the Media Server Tool menu.
Cancel Close the Media Server Tool menu.
Apply Apply the changes.
Refresh Refresh the Media Server Tool menu.
16 -- Installation
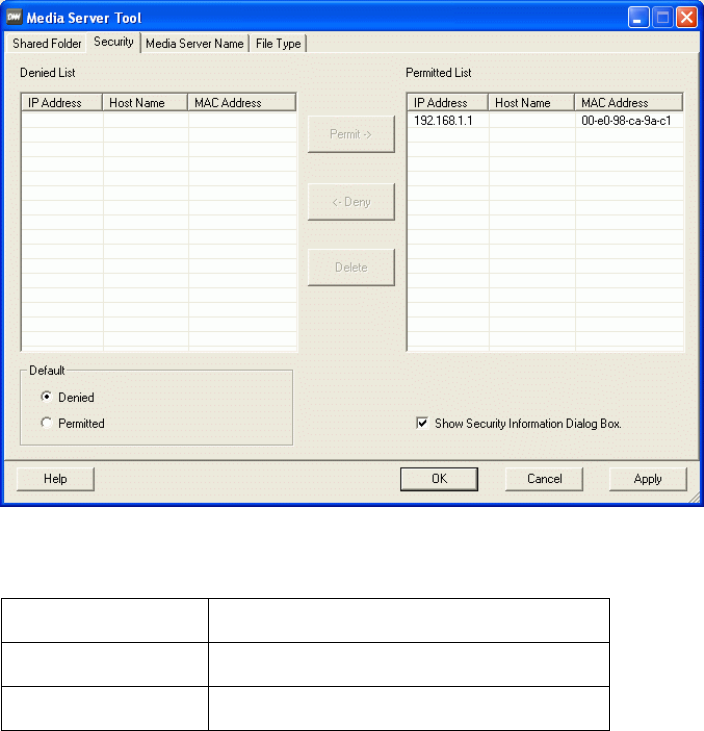
Security tab
This screen enables you to manage file access condition, with this function, you can decide to let
certain computers access your files or not.
Media Server Name tab
This screen shows the device (Digital Media Adapter) name.
Permit Share data with external computers.
Deny No data shared.
Delete Remove the selected folders.

Installation -- 17
File Type Tab
This tab lets you define the file extension and MIME-TYPE, you can add, delete or edit items in
this list.
Media Server Name Enter the name of your server.

18 -- Installation
Add Add new support files. Enter the file
name in Extension area, and file type
in the MIME-TYPE area.
Edit Change the name or type of selected
file.
Delete Remove the file from the list.
EXPLORING THE DMA MENUS
This section covers the following topics:
• “The Main Menu” on page 19
• “The VIDEO Menu” on page 20
• “The MUSIC Menu” on page 23
• “The PHOTO Menu” on page 26
• “The SERVER Menu” on page 29
• “The USB Menu” on page 30
• “The OPTION Menu” on page 31
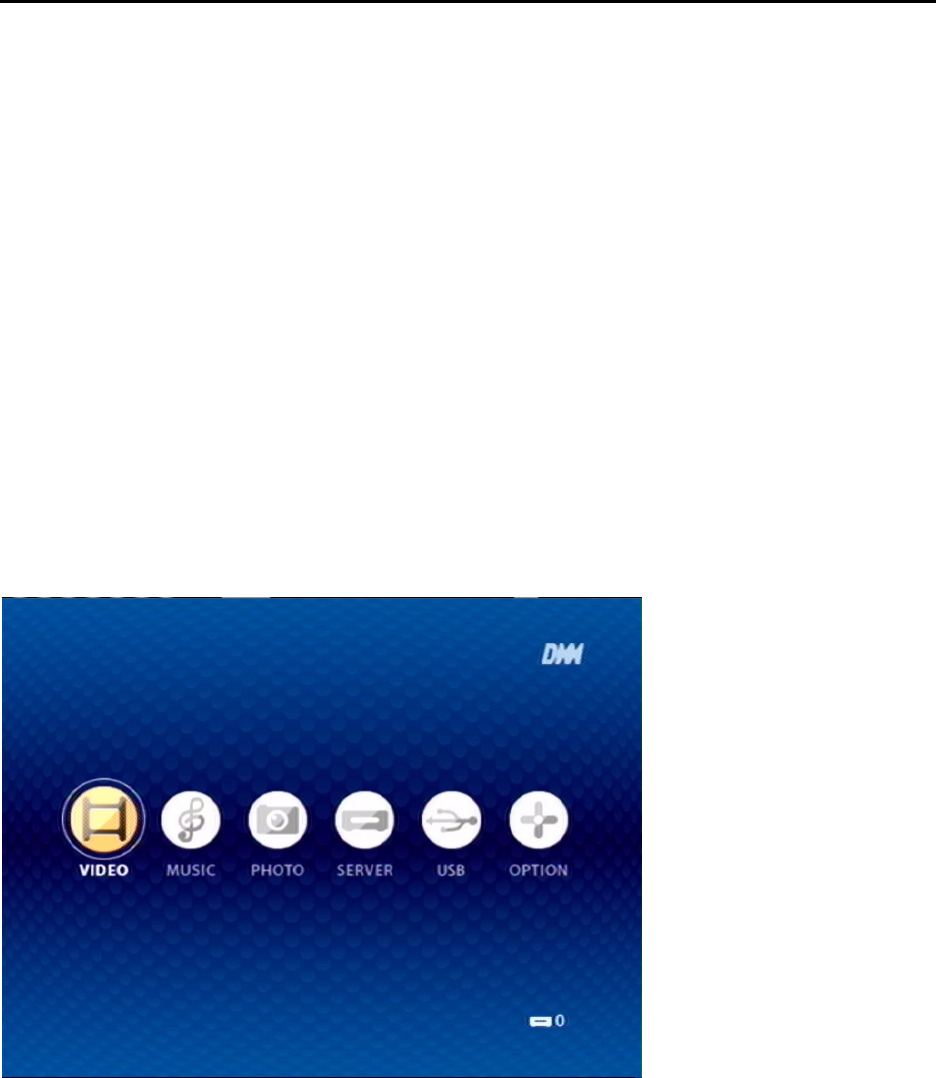
The Main Menu
When you access the DMA menu, the Main Menu opens.
ED Question: 1. Can we rename the playlists and add more playlists in Video
and Music?
Use the left/right arrow buttons on the remote control to browse the following screens.
20 -- Exploring the DMA Menus
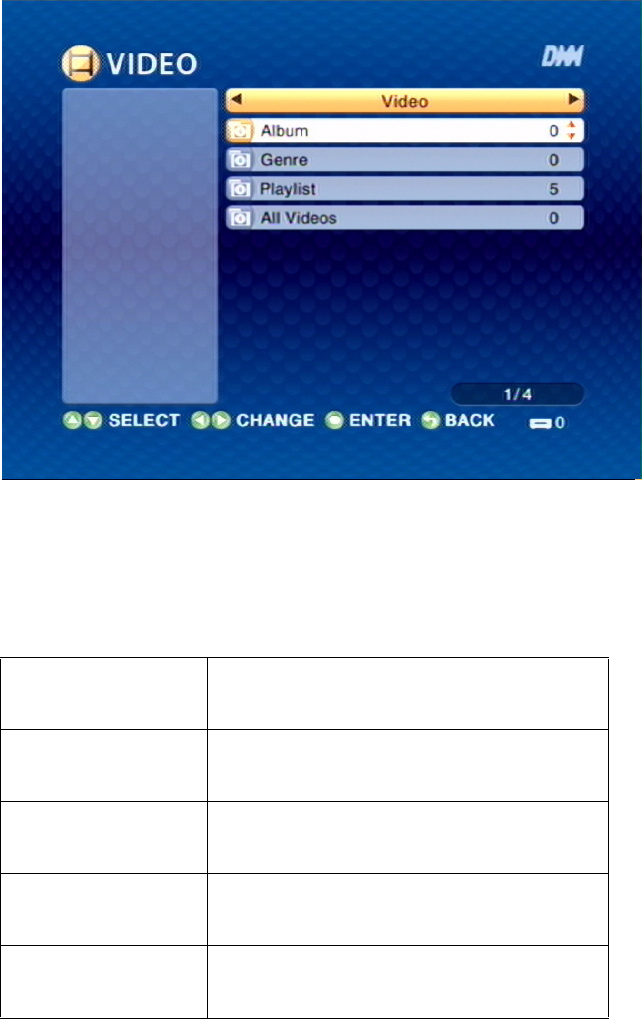
The VIDEO Menu
Use the left/right arrow buttons on the remote control to select VIDEO. The VIDEO Menu
opens.
Use the up/down arrow buttons to select items in the menu. Use the left/right arrow buttons to
move to the next menu.
Video Press the up/down arrow buttons to
select the Video sub-menus.
Album Press ENTER and the up/down arrow
buttons to select albums.
Genre Press ENTER and the up/down arrow
buttons to select play mode.
Playlist Press ENTER and the up/down arrow
buttons to select the playlists.
All Videos Press ENTER and the up/down arrow
buttons to select videos.
Exploring the DMA Menus -- 21
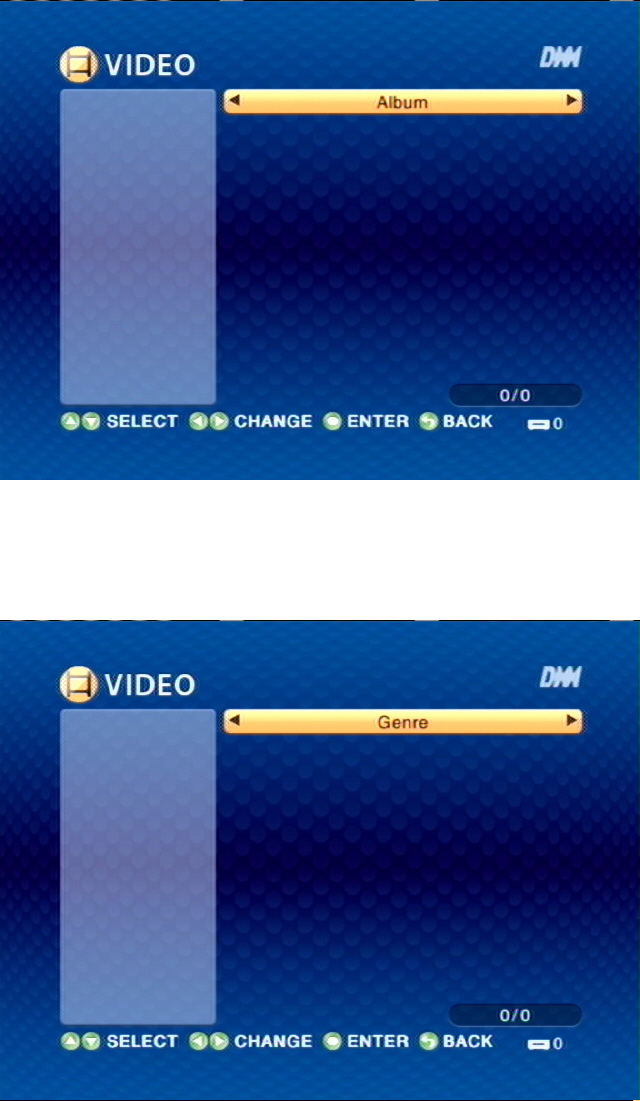
THE ALBUM MENU
Select album by pressing ENTER.
THE GENRE MENU
ED Question: 1. Please provide some more infomation about “Genre”.
22 -- Exploring the DMA Menus
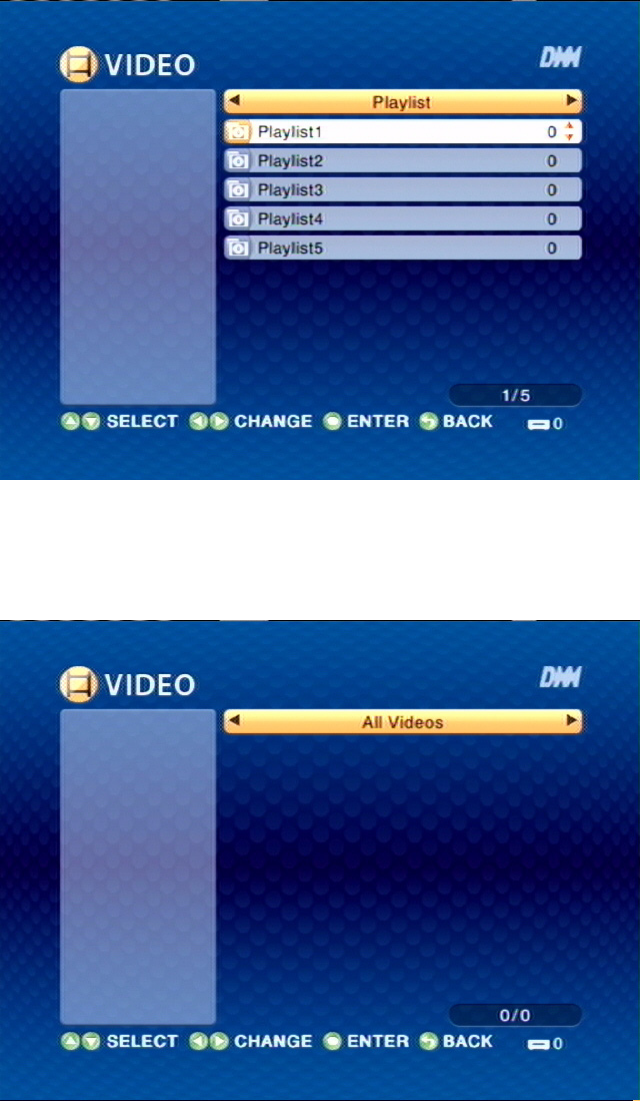
THE PLAYLIST MENU
Select playlist by pressing ENTER.
THE ALL VIDEOS MENU
Select video by pressing ENTER.
Exploring the DMA Menus -- 23
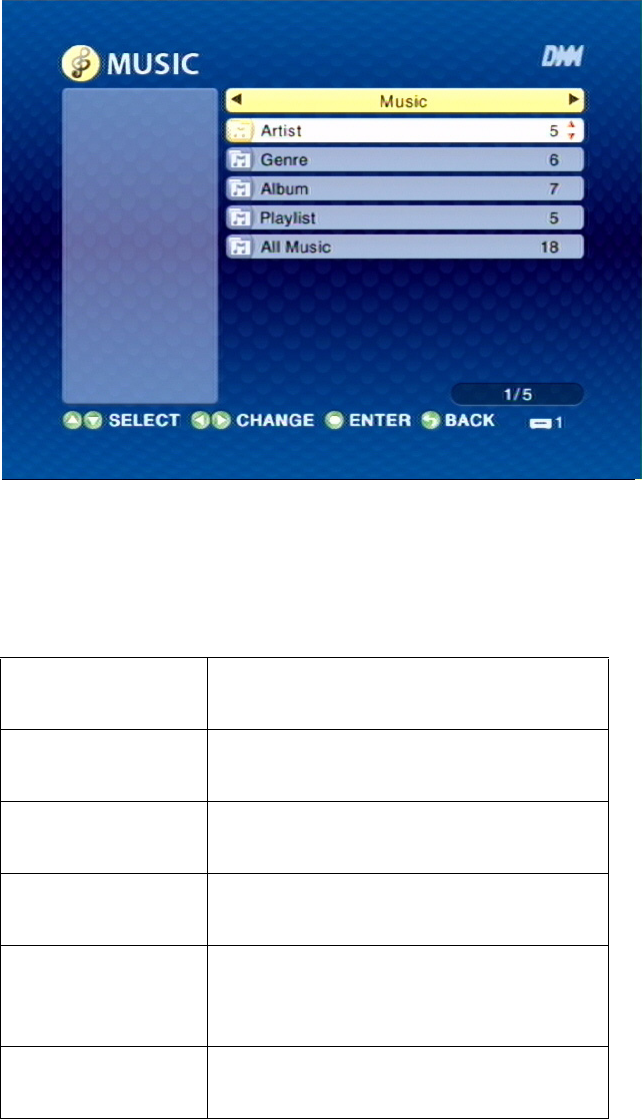
The MUSIC Menu
Use the left/right arrow buttons on the remote control to select MUSIC. The MUSIC Menu
opens.
Use the up/down arrow buttons to select items in the menu. Use the left/right arrow buttons to
move to the next menu.
Music Press the up/down arrow buttons to
select the Music sub-menus.
Artist Press ENTER and the up/down arrow
buttons to select artists.
Genre Press ENTER and the up/down arrow
buttons to select play mode.
Album Press ENTER and the up/down arrow
buttons to select albums.
Playlist Press ENTER and the up/down
arrow buttons to select the pre-stored
songs in the 5 playlists.
All Music Press ENTER and the up/down arrow
buttons to select songs.
24 -- Exploring the DMA Menus
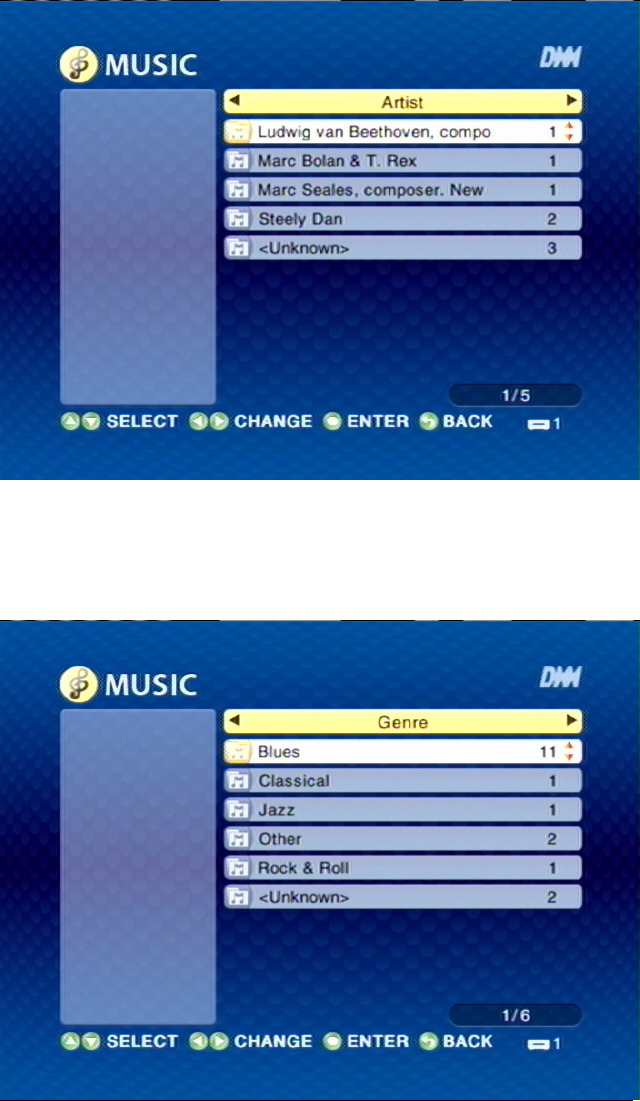
THE ARTIST MENU
Select the artist in the list by pressing ENTER.
THE GENRE MENU
Select the genre in the list by pressing ENTER.
Exploring the DMA Menus -- 25
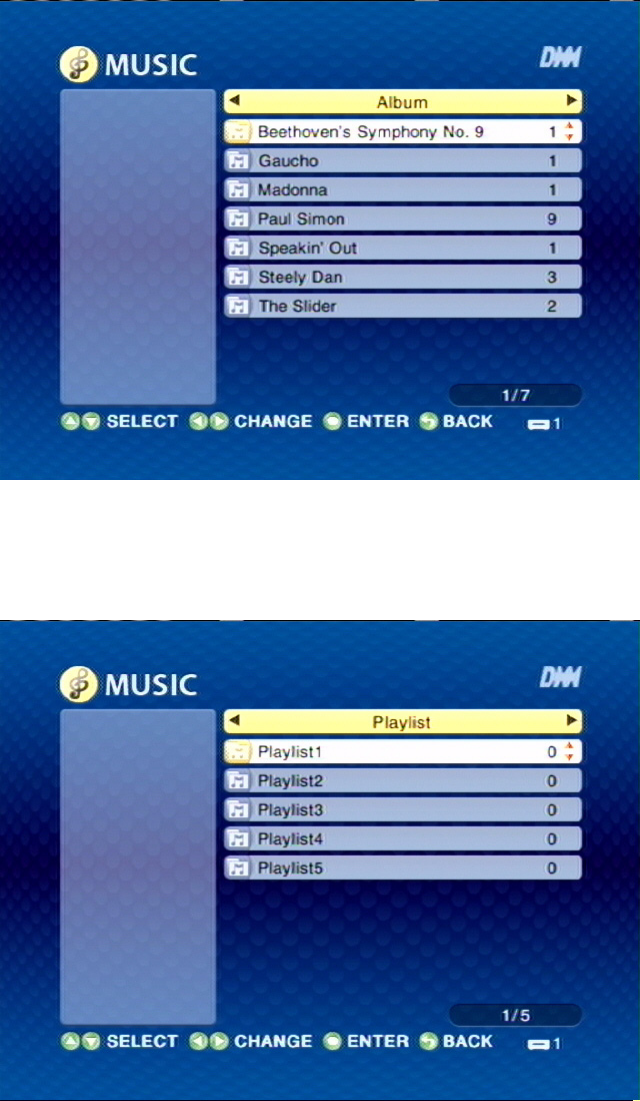
THE ALBUM MENU
Select the album in the list by pressing ENTER.
THE PLAYLIST MENU
Select the playlist in the list by pressing ENTER.

26 -- Exploring the DMA Menus
THE ALL MUSIC MENU
Select song in the list by pressing ENTER.
The PHOTO Menu
Use the left/right arrow buttons on the remote control to select PHOTO. The PHOTO Menu
opens.