Abocom Systems WAP5508 802.11 b/g/n universal-linker User Manual
Abocom Systems Inc 802.11 b/g/n universal-linker
User Manual
4
2. Installing USB Ethernet 10/100 Driver
2.1. Install to Windows XP
Follow the below steps to install the USB Ethernet 10/100 driver. It needs about 1 minute to complete.
1. Power on your computer and make sure that the USB port is enabled and working properly.
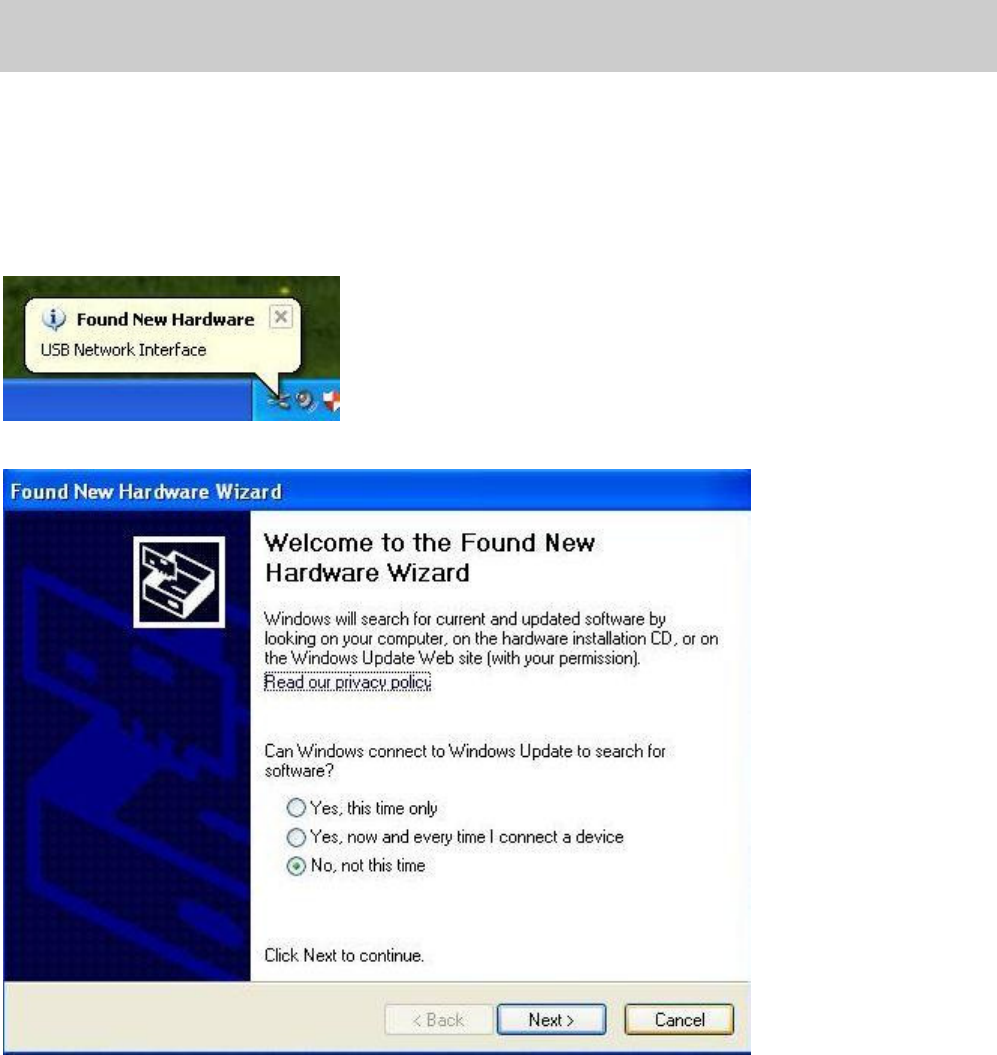
2. Plug the Universal Linker in PC’s USB port, there appears a windows about ”Found New Hardware” on the desktop.
3. It will popup installation wizard, please select “No, not this time”, and click “Cancel”.
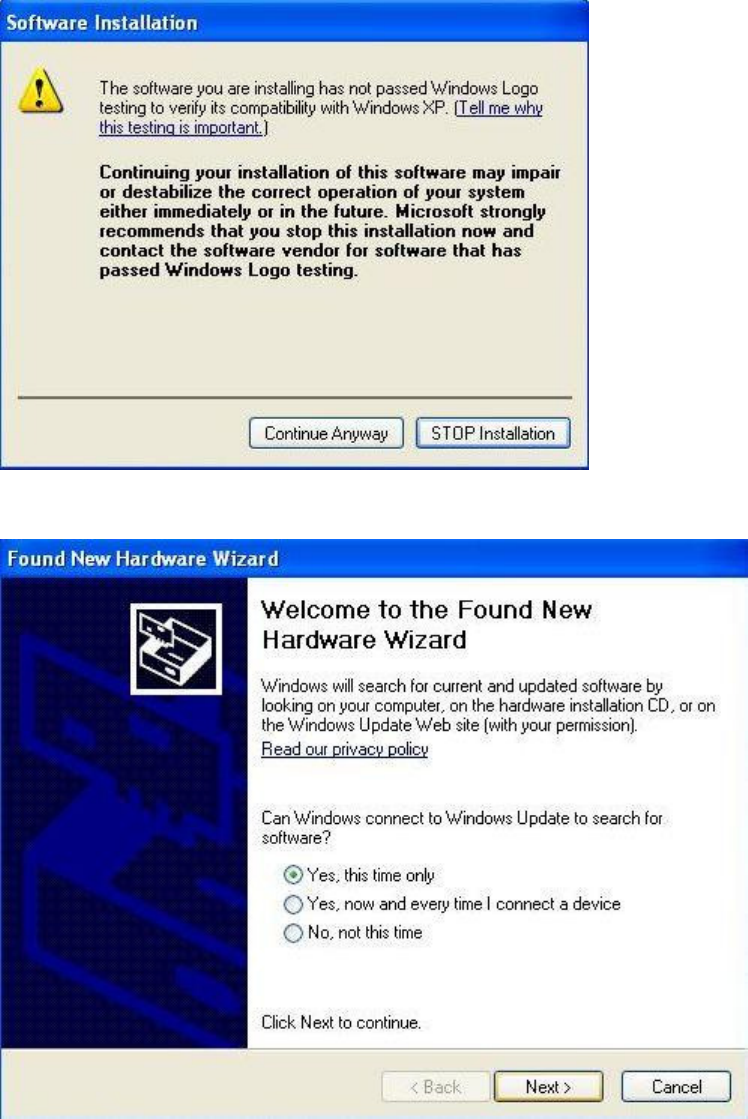
4. After popup the warring message, please click “Continue Anyway”.
Abocom
WAP5508
5
5. It will popup hardware installation wizard again, please select “Yes, this time only” and click “Next >”.
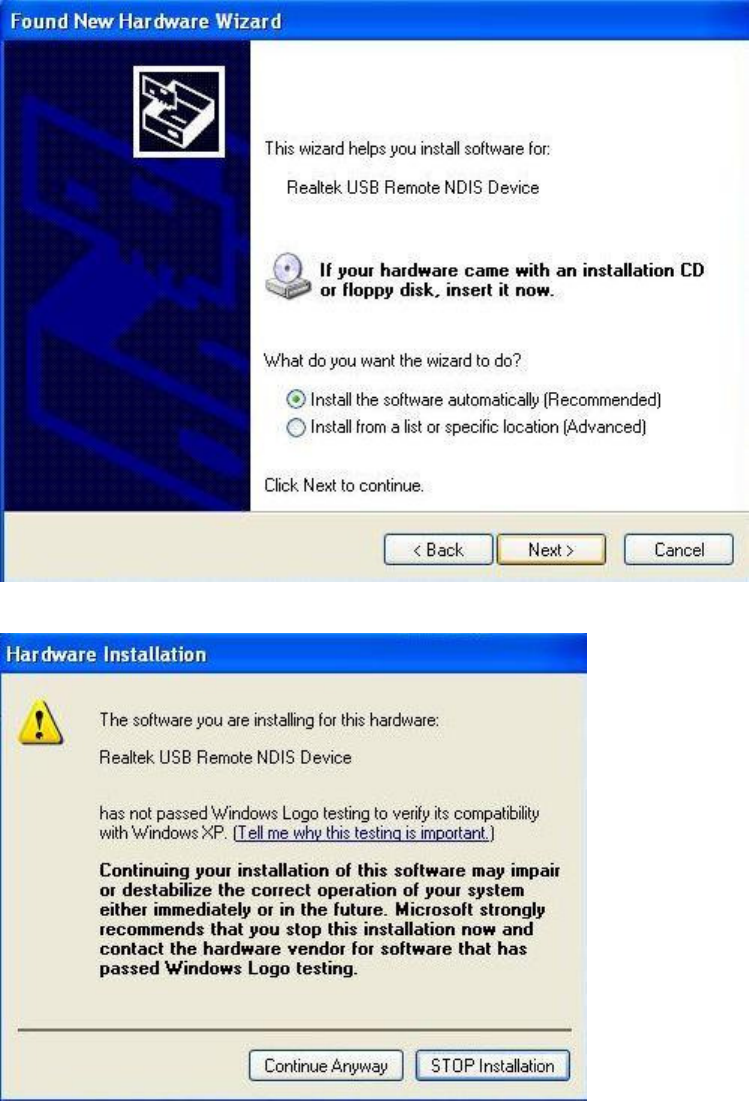
6. Please select “Install the software automatically (Recommended)”, and click “Next >”.
6
7. Click “Continue Anyway” to install Realtek USB Remote NDIS Device.
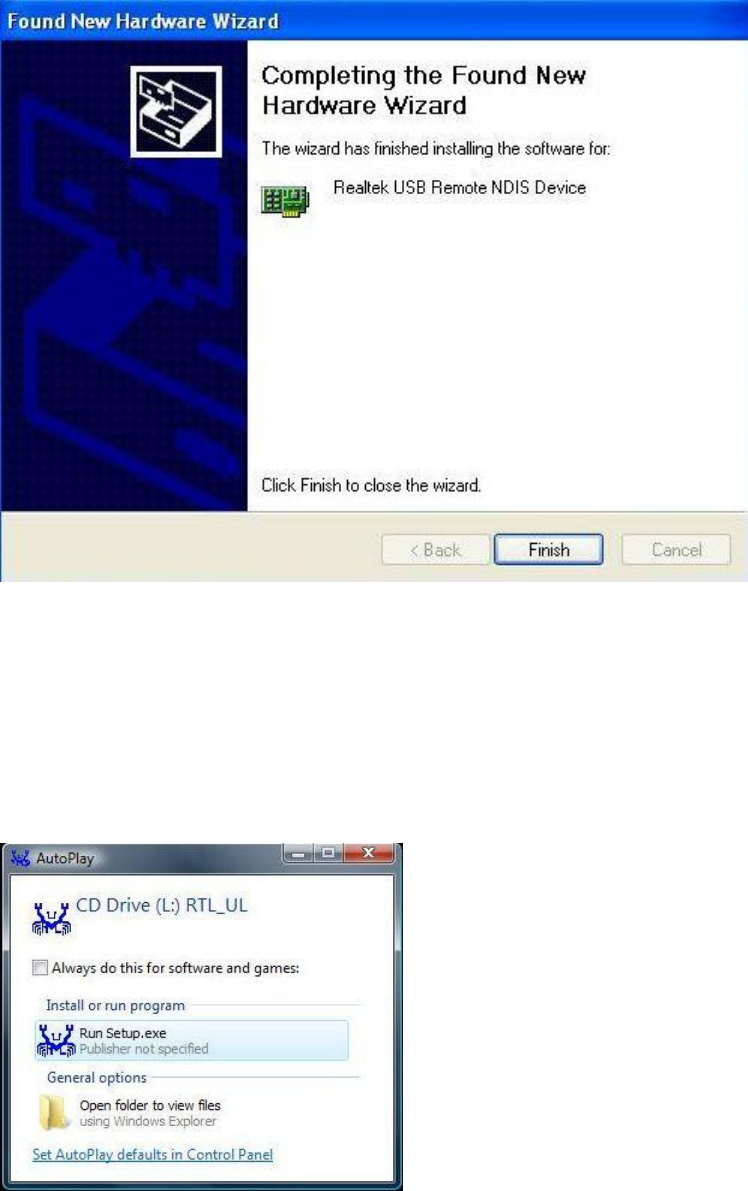
8. Click “Finish” to complete the installation.
©
7
2.2. Install to Windows Vista
Follow the below steps to install the USB Ethernet 10/100 driver. It needs about 1 minute to complete.
1. Power on your computer and make sure that the USB port is enabled and working properly.
2. Plug the Universal Linker in the PC’s USB port, there appears a windows about AutoPlay, please click “Run Setup.exe”
3. After popup the warring message, please click “Install the driver software anyway”.
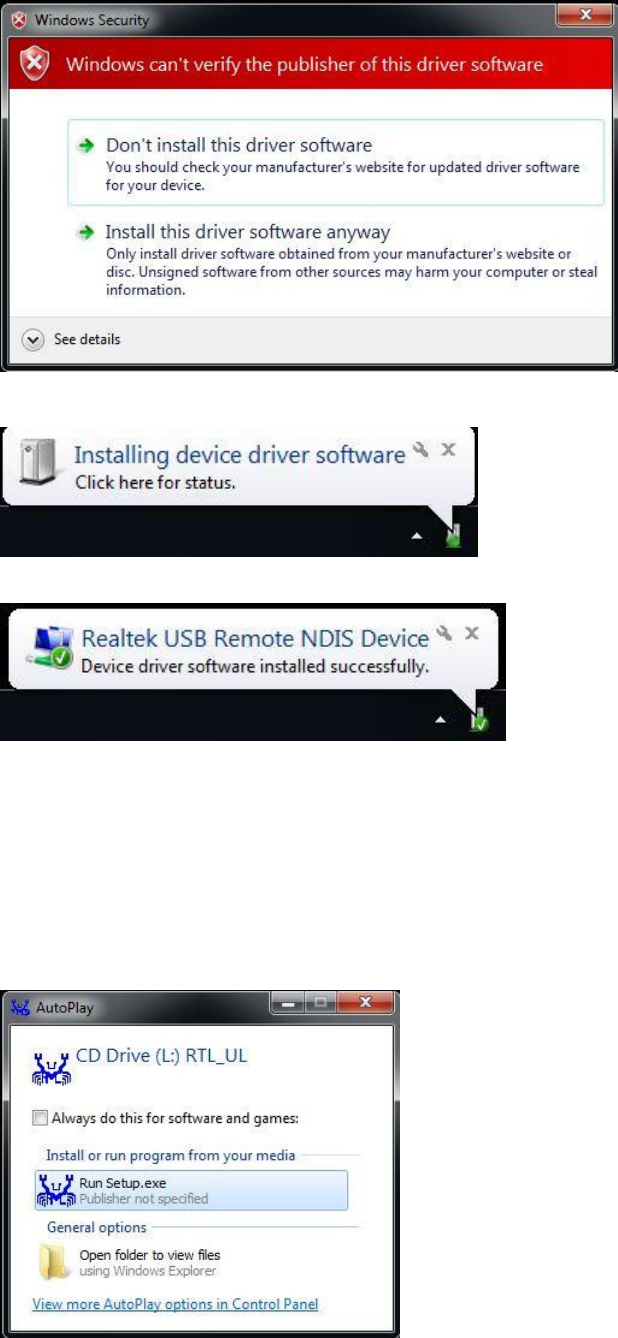
8
4. It will popup a message to indicate the installing status.
5. When installation done, it will popup a notice.
2.3. Install to Windows 7
Follow the below steps on installing the USB Ethernet 10/100 driver. It needs about 1 minute to complete.
6. Power on your computer and make sure that the USB port is enabled and working properly.
7. Plug the Universal Linker in the PC’s USB port, there appears a windows about AutoPlay, please click “Run Setup.exe”
8. After popup the warring message, please click “Install the driver software anyway”.
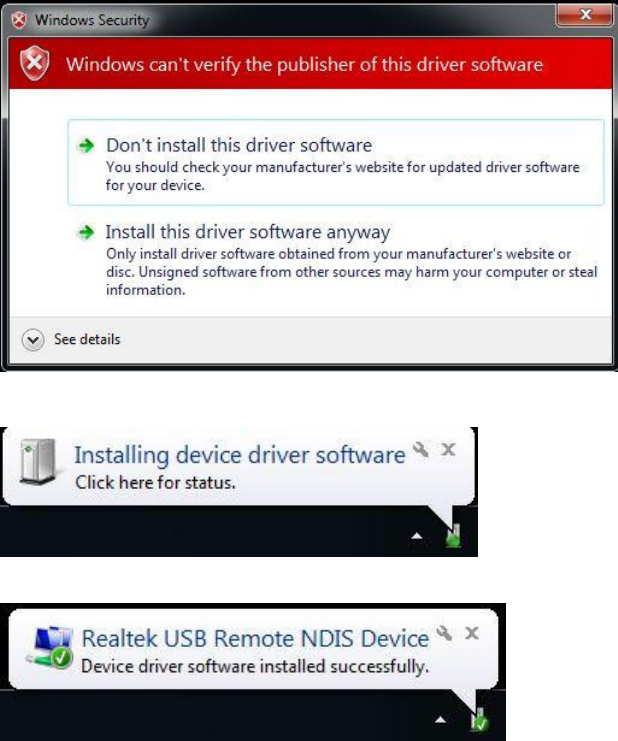
9
9. It will popup a message to indicate the installing status.
10. When installation done, it will popup a notice.
2.4. Install to Linux
Linux has built in driver, you can just plug the Universal Linker in PC’s USB port and use.
2.5. Install to Mac OSX
OSX has built in driver, user can just plug the Universal Linker in PC’s USB port and use.
10
3. Auto Mode
Universal Linker can detect user’s current network environment and choose a mode from
client/router/AP. In this section, we describe the scenarios of auto mode. If you want select mode by
yourself, please refer section 4.1 to disable auto mode.
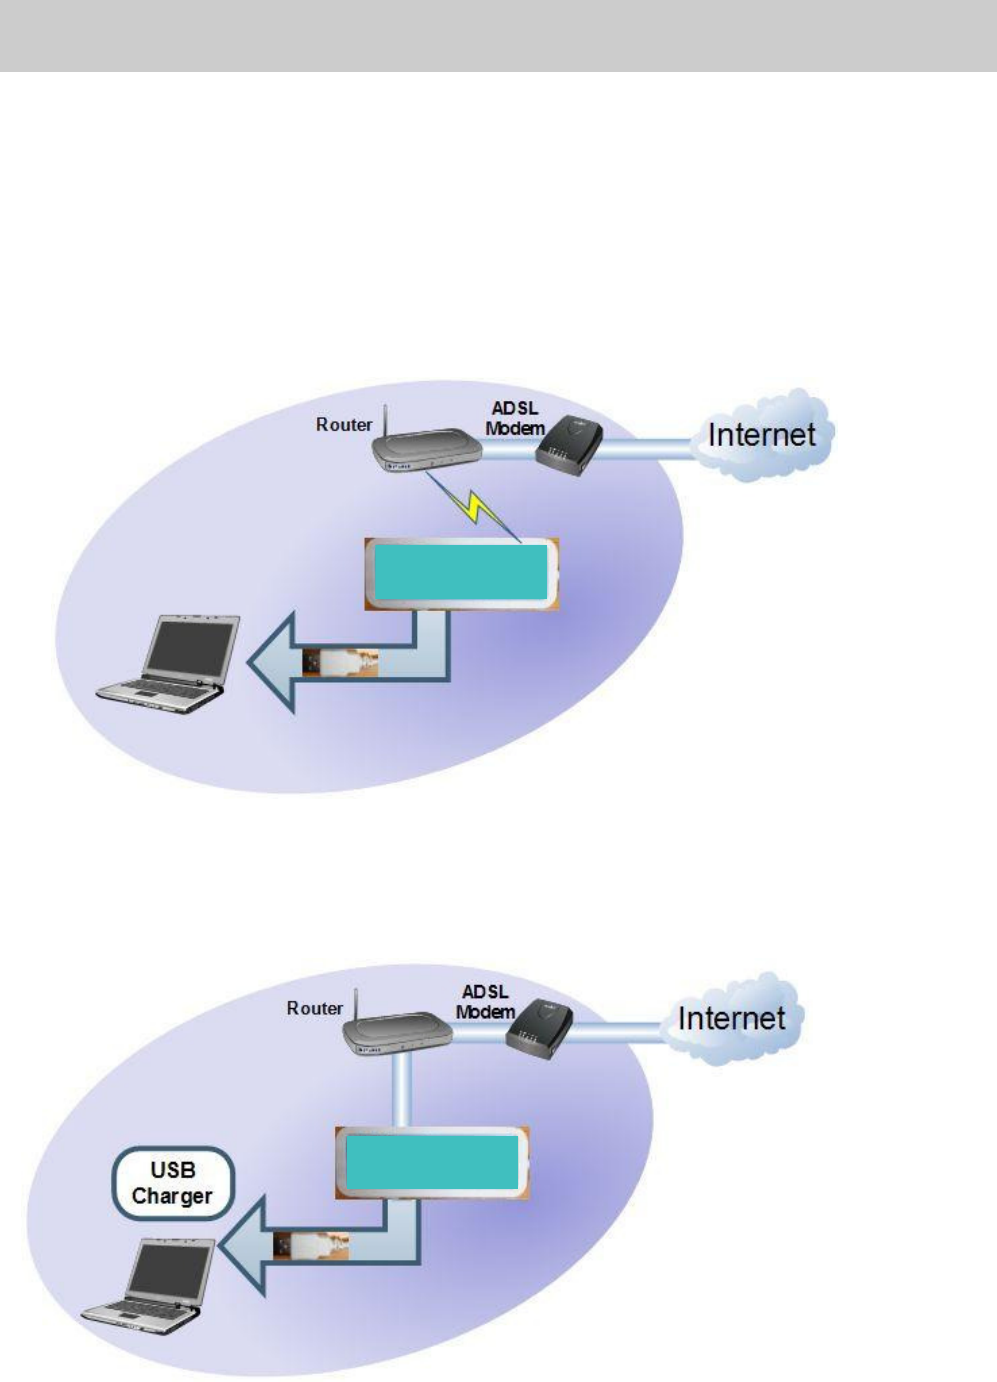
3.1. Client Mode
When Universal Linker connect to PC, but no wired ether link, it will run in client mode. In this
case, Universal Linker is a bridge, wifi interface will connect to a wifi Router and get IP from the
router.
3.2. DHCP Router Mode
When Universal Linker connect to PC or USB charger with wired link, and get IP from router, it
will run in DHCP router mode. In this case, Universal Linker will share IP to connected PC.
11
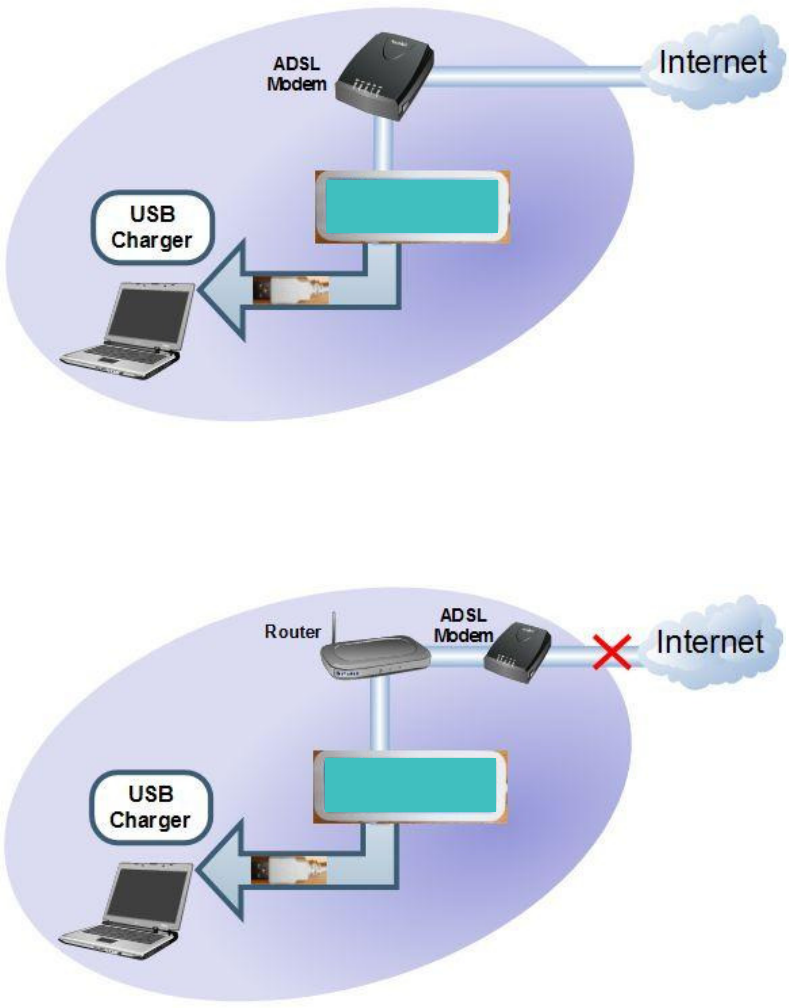
3.3. PPPoE Router Mode
When Universal Linker connect to PC or USB charger with wired link, and can do PPPoE
discovery successfully. Universal Linker will try to use ppp dial-up to get IP. In this case,
Universal Linker is a router, it will share IP to connected PC.
3.4. AP Mode
- When Universal Linker connect to PC or USB charger with wired link, it neither get IP nor
finish PPPoE discovery. In this case, Universal Linker is a bridge.
3.5. Repeater Mode
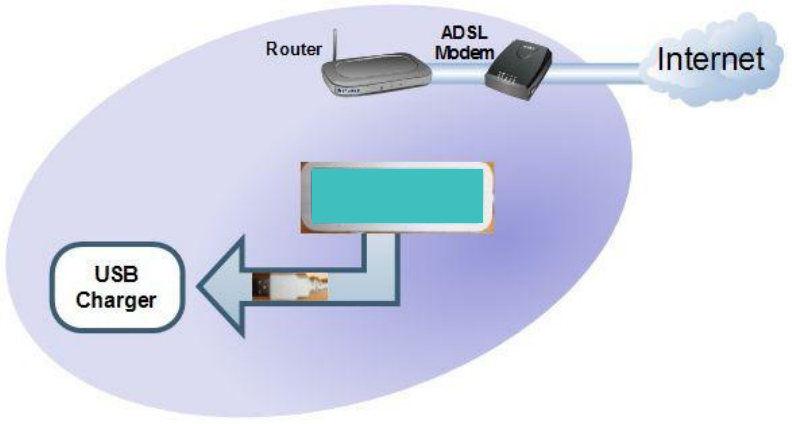
- When Universal Linker connect to USB charger, but no wired ether link, it is a repeater.
12
FCC Statement:
Federal Communication Commission Interference Statement
This equipment has been tested and found to comply with the limits for a Class B digital device,
pursuant to Part 15 of the FCC Rules. These limits are designed to provide reasonable protection
against harmful interference in a residential installation. This equipment generates, uses and can
radiate radio frequency energy and, if not installed and used in accordance with the instructions, may
cause harmful interference to radio communications. However, there is no guarantee that interference
will not occur in a particular installation. If this equipment does cause harmful interference to radio or
television reception, which can be determined by turning the equipment off and on, the user is
encouraged to try to correct the interference by one of the following measures:
● Reorient or relocate the receiving antenna.
● Increase the separation between the equipment and receiver.
● Connect the equipment into an outlet on a circuit different from that to which the receiver is
connected.
● Consult the dealer or an experienced radio/TV technician for help.
FCC Caution: Any changes or modifications not expressly approved by the party
responsible for compliance could void the user’s authority to operate this equipment.
This device complies with Part 15 of the FCC Rules. Operation is subject to the following two
conditions: (1) This device may not cause harmful interference, and (2) this device must accept any
interference received, including interference that may cause undesired operation.
For product available in the USA/Canada market, only channel 1~11 can be operated. Selection of
other channels is not possible.
This device and its antenna(s) must not be co-located or operation in conjunction with any other
antenna or transmitter.
IMPORTANT NOTE:
Federal Communication Commission (FCC) Radiation Exposure Statement
This EUT is compliance with SAR for general population/uncontrolled exposure limits in ANSI/IEEE
C95.1-1999 and had been tested in accordance with the measurement methods and procedures
specified in OET Bulletin 65 Supplement C. This equipment should be installed and operated with
minimum distance 0.5 cm between the radiator & your body.
13