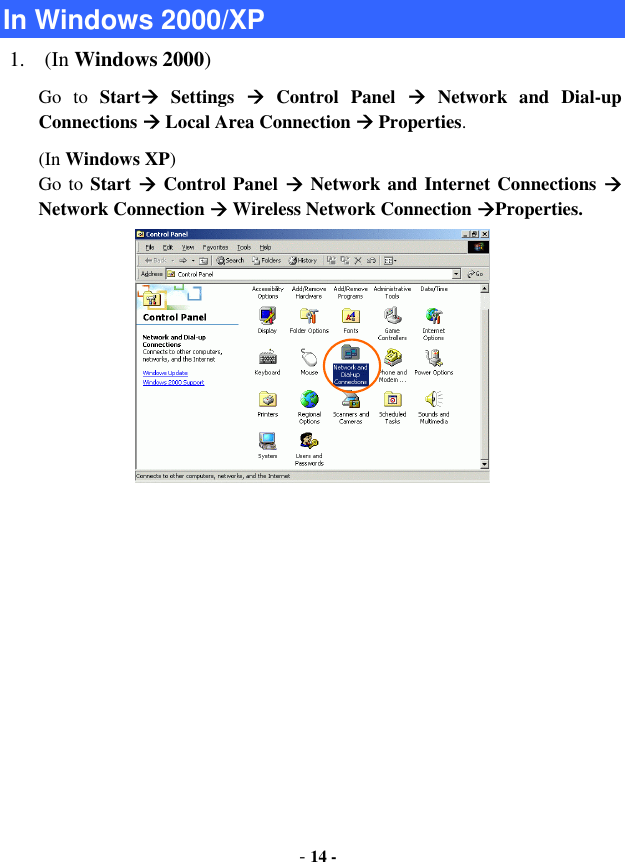
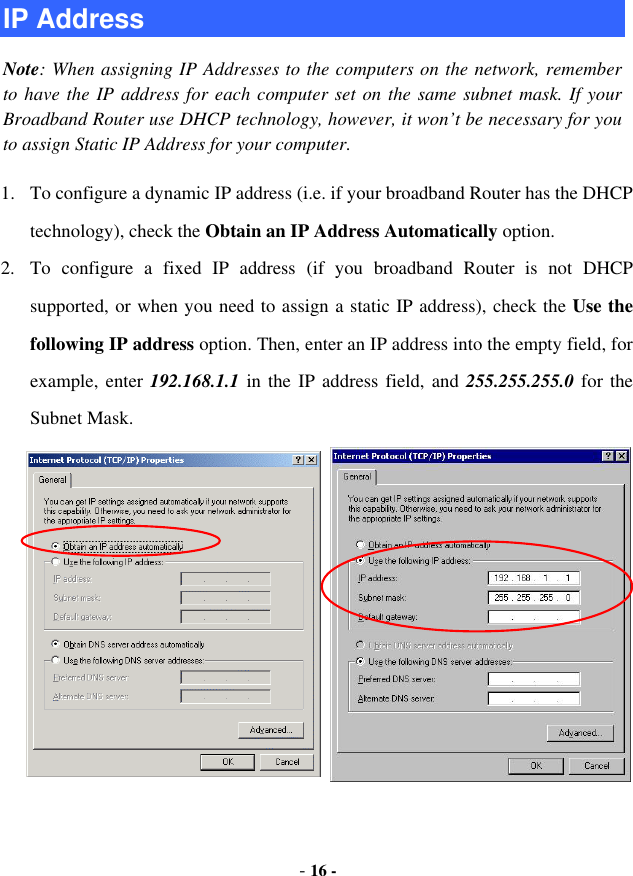
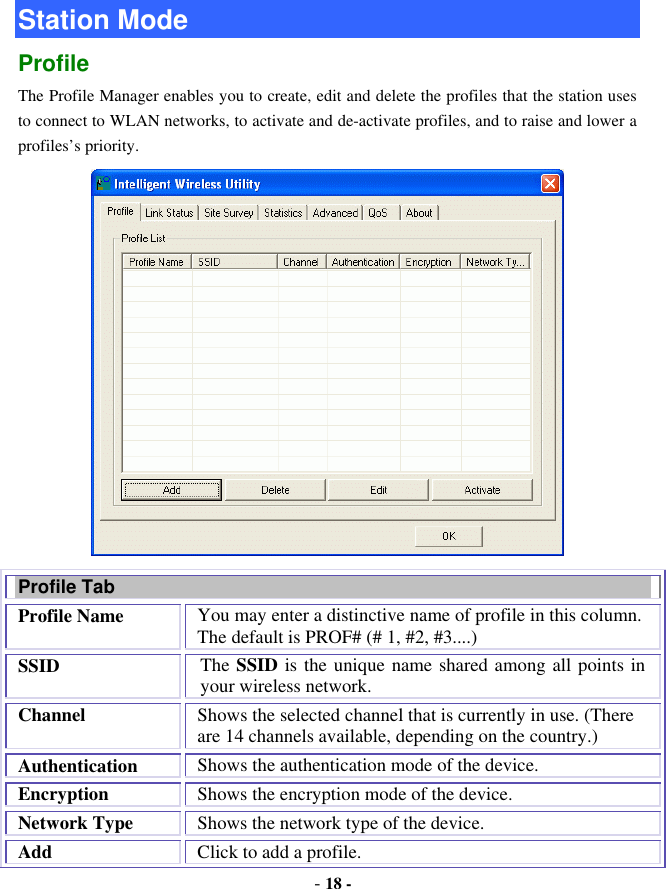
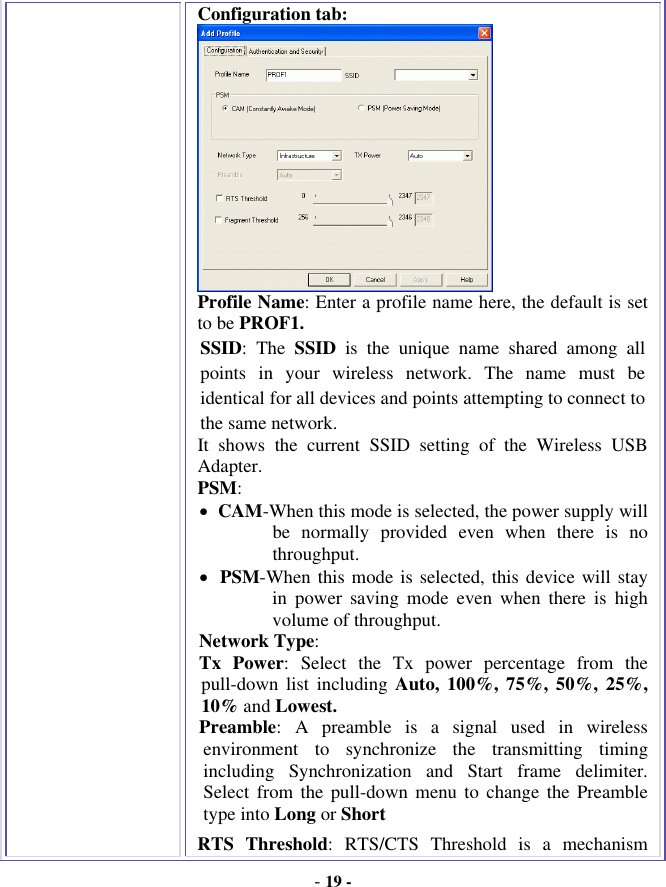
Abocom Systems WCU5102 High-Gain 802.11b/g Wireless USB Adapter User Manual
Abocom Systems Inc High-Gain 802.11b/g Wireless USB Adapter
UserManual.wiki
>
Abocom Systems
>
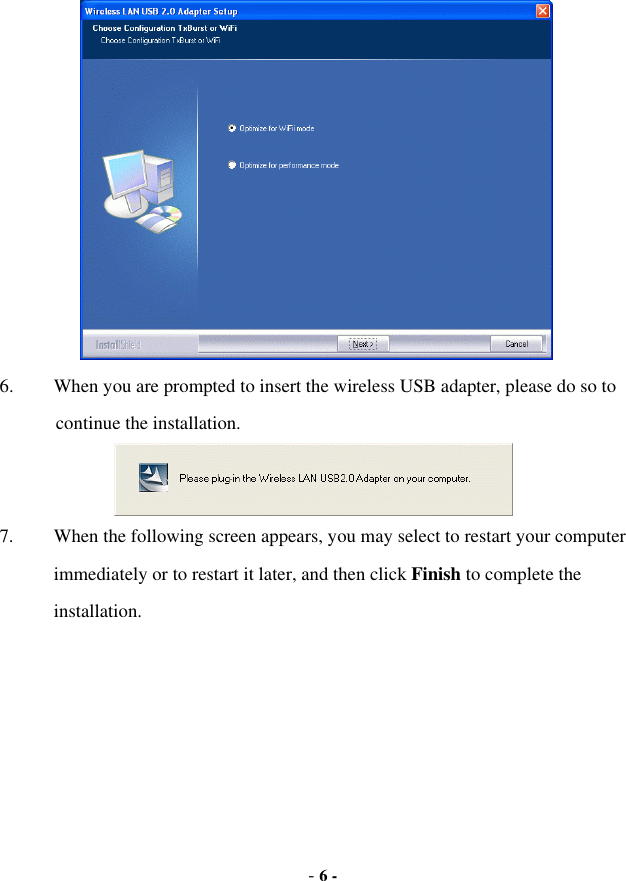
WCU5102 User Manual
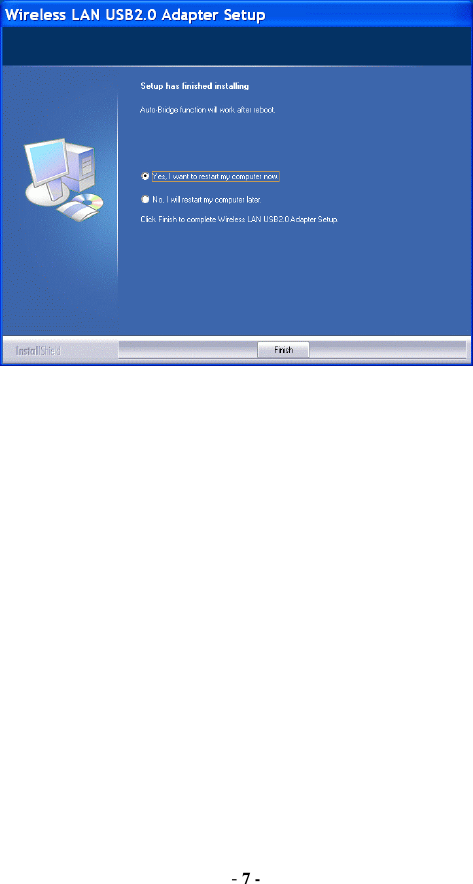
User Manual
Navigation menu
Upload a User Manual
Namespaces
Wiki Guide
HTML
PDF
Info
Views
User Manual
Discussion / Help
Navigation


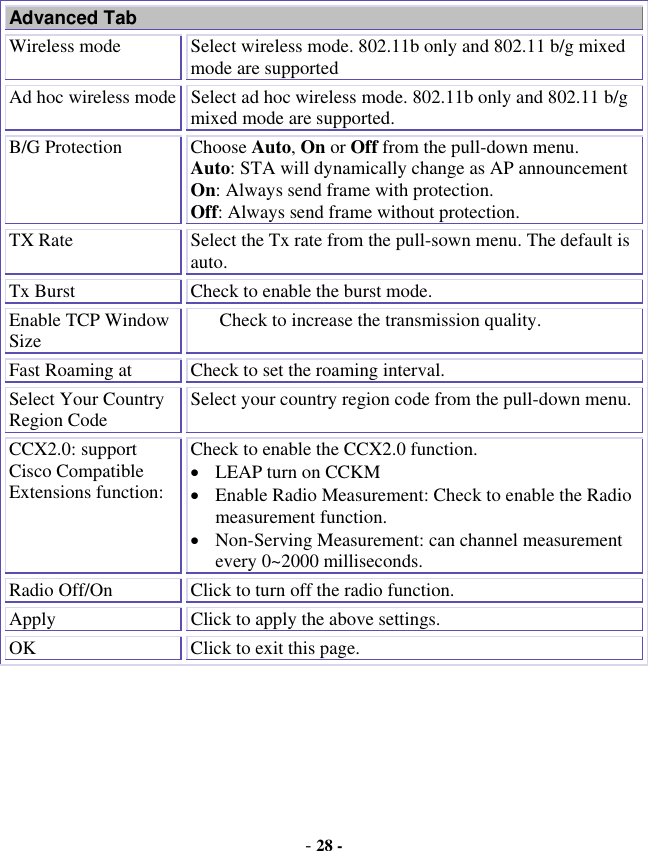
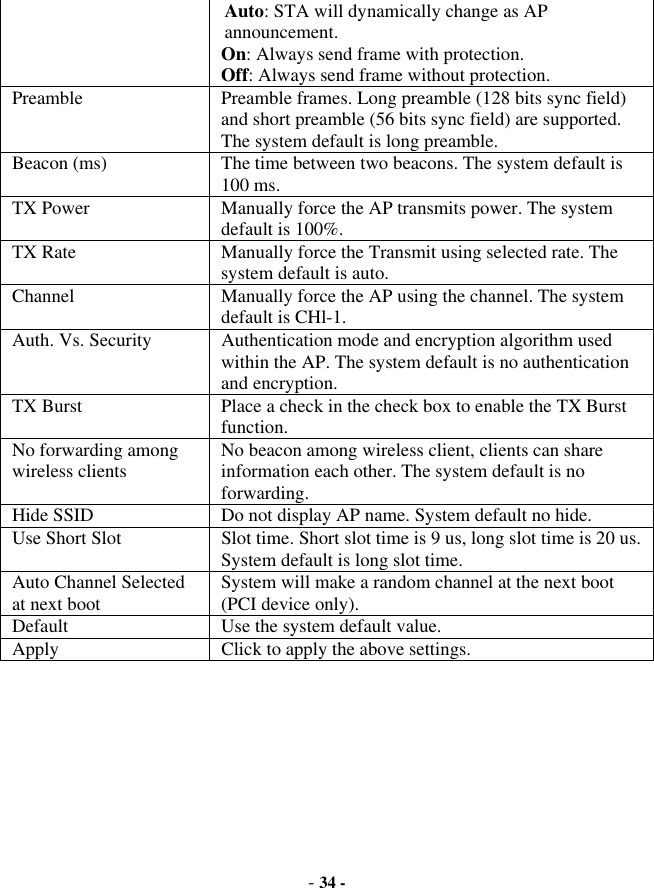
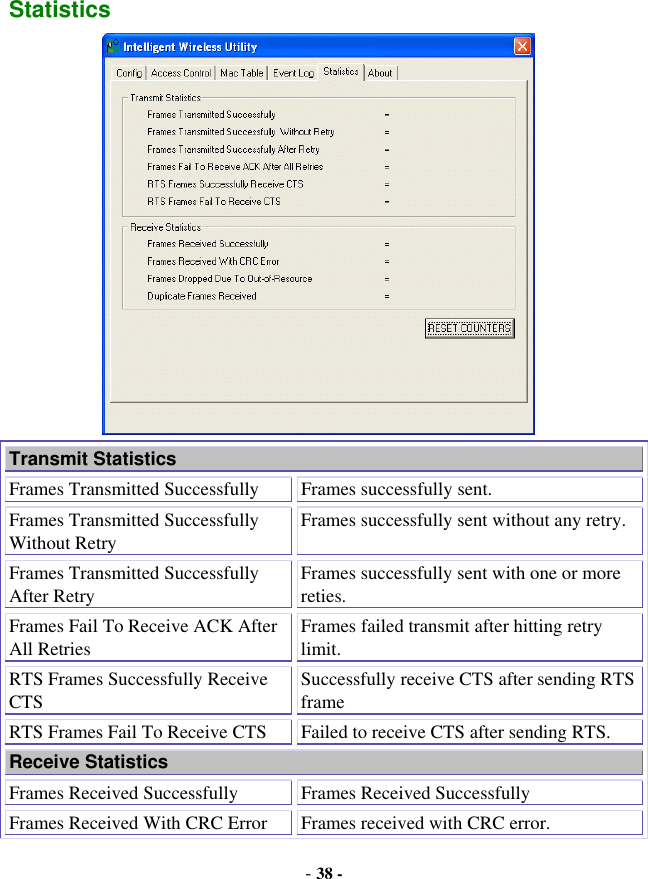
![- 33 - Soft AP mode Config Wireless mode Select wireless mode.802.11 b/g mixed, 802.11b only and 802.11g only mode are supported. System default is 802.11 b/g mixed. SSID AP name of user type. User also can select [Use Mac Address] to display it. System default is SoftAP-31. Country Region Code Eight countries to choose. Country channel list: Classification Range 0: FCC (Canada) CH1 ~CH11 1: ETSI CH1 ~CH13 2: SPAIN CH10 ~CH11 3: FRANCE CH10 ~CH13 4: MKK CH14 ~CH14 5: MKKI (TELEC) CH1~CH14 6: ISRAEL CH3 ~CH9 7: ISRAEL CH5 ~CH13 B/G Protection ERP protection mode of 802.11G definition. User can chose Auto, on, or off, the system default is Auto.](https://usermanual.wiki/Abocom-Systems/WCU5102/User-Guide-704231-Page-38.png)