Accton Technology 3CRWE41196 OfficeConnect 11Mbps Wireless Access Point User Manual 3c00857 ug
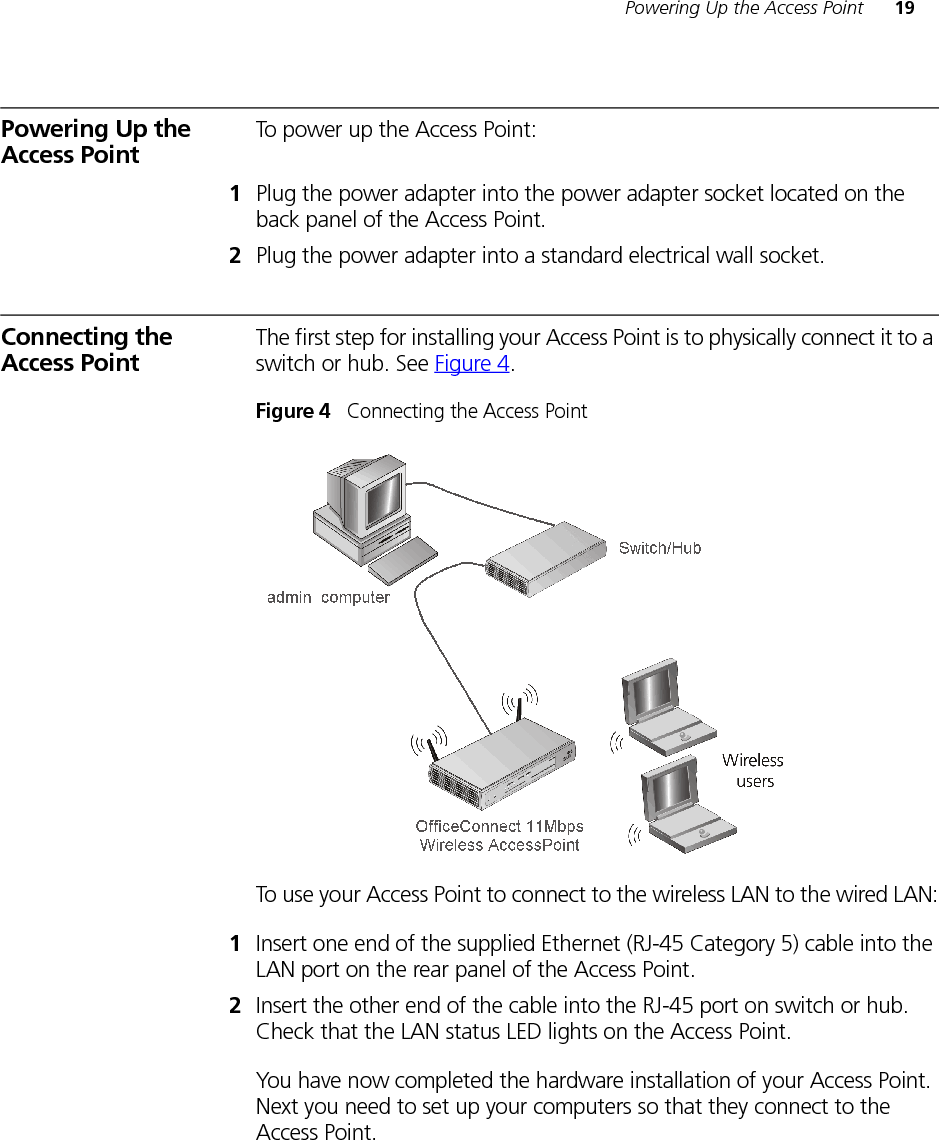
Accton Technology Corp OfficeConnect 11Mbps Wireless Access Point 3c00857 ug
Contents
- 1. User Guide Part 1
- 2. User Guide Part 2
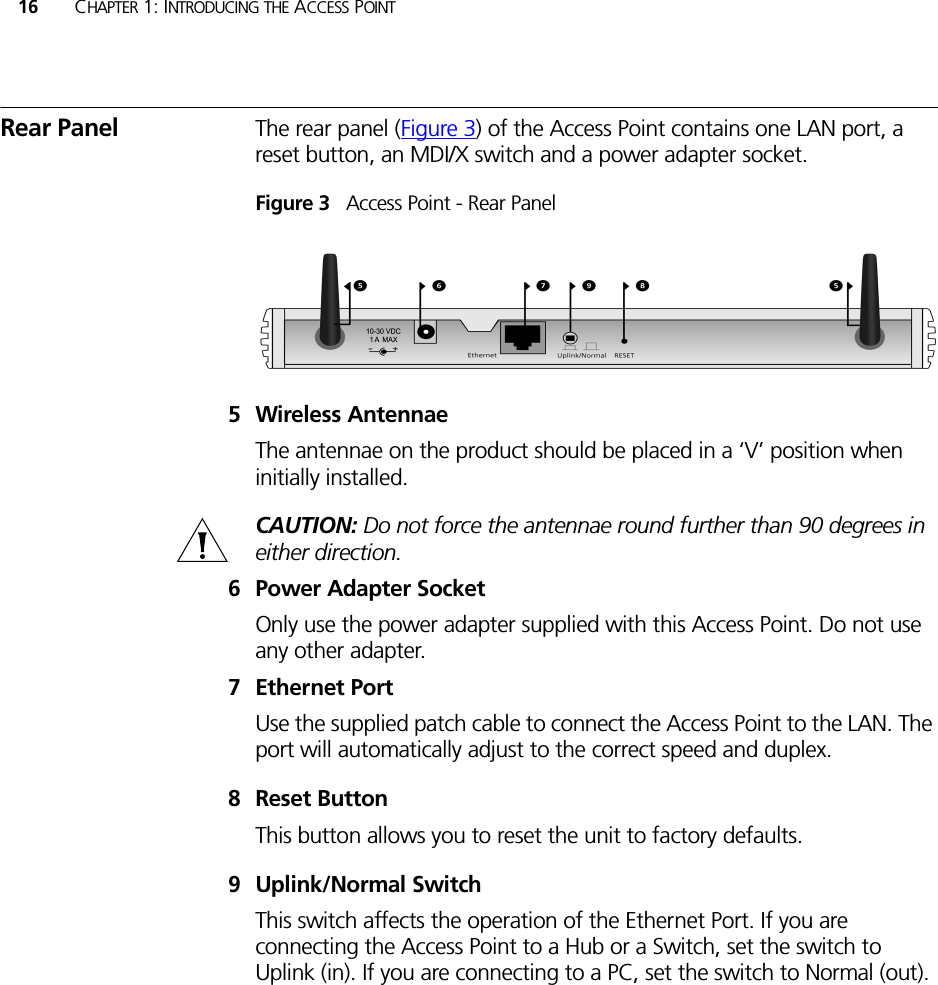
- 3. User Guide Part 3
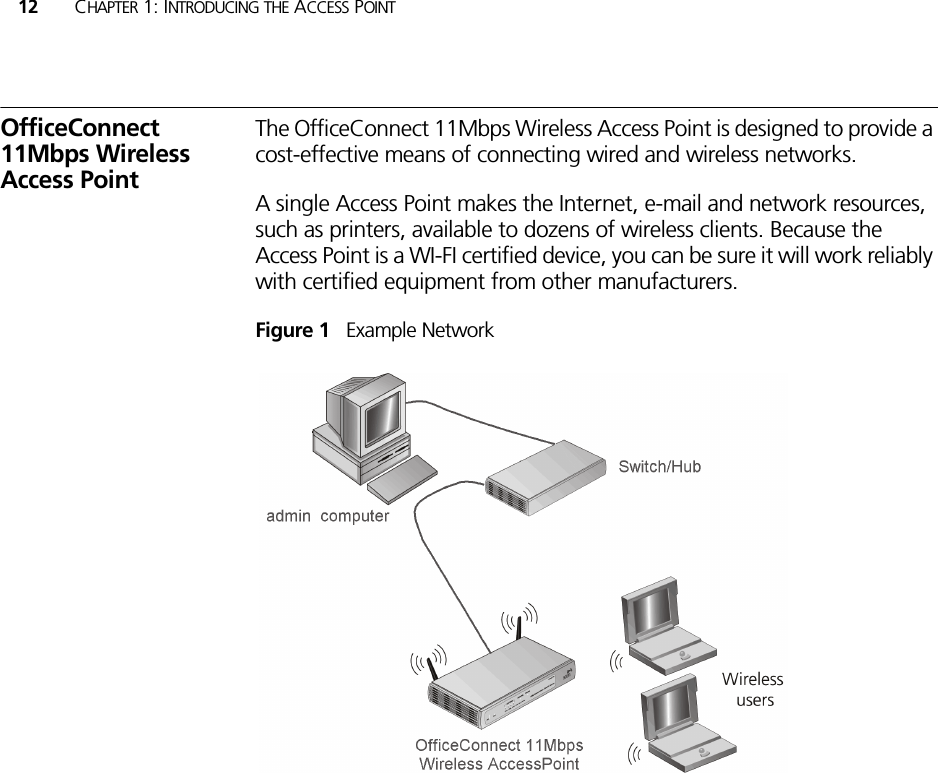
User Guide Part 1