Accton Technology ML60PRS4601 Metrolinq 60GHz Module User Manual 60G OK
Accton Technology Corp Metrolinq 60GHz Module 60G OK
UserManual.wiki
>
Accton Technology
>
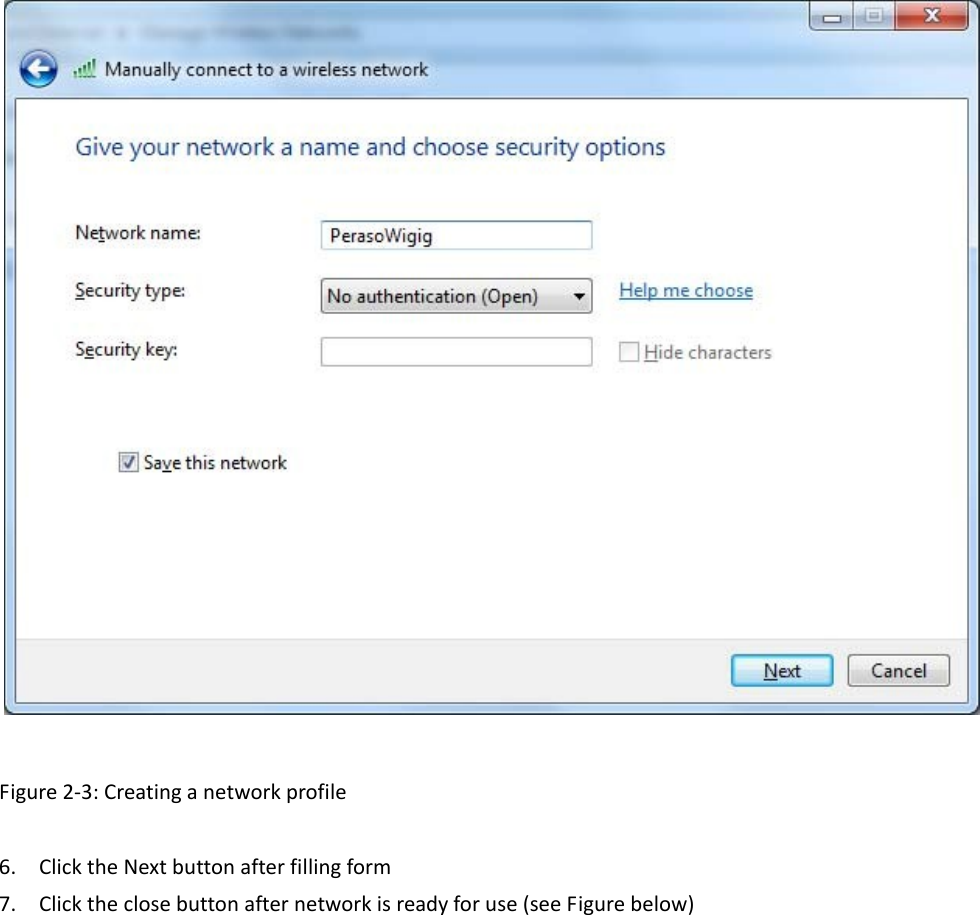
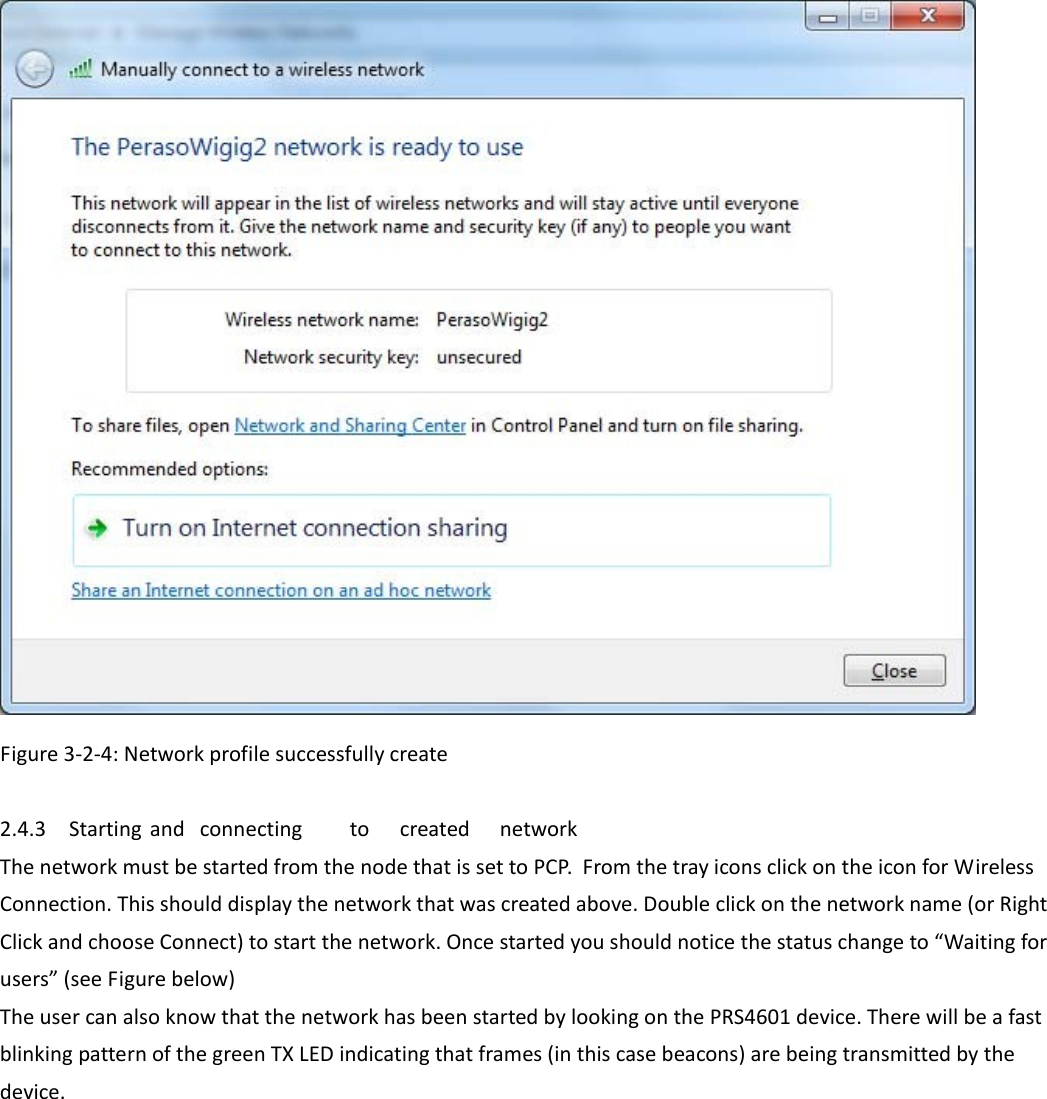
ML60PRS4601 User Manual
User Manual
Navigation menu
Upload a User Manual
Namespaces
Wiki Guide
HTML
PDF
Info
Views
User Manual
Discussion / Help
Navigation