Acer orporated A1402 Tablet Computer User Manual User Guide
Acer Incorporated Tablet Computer User Guide
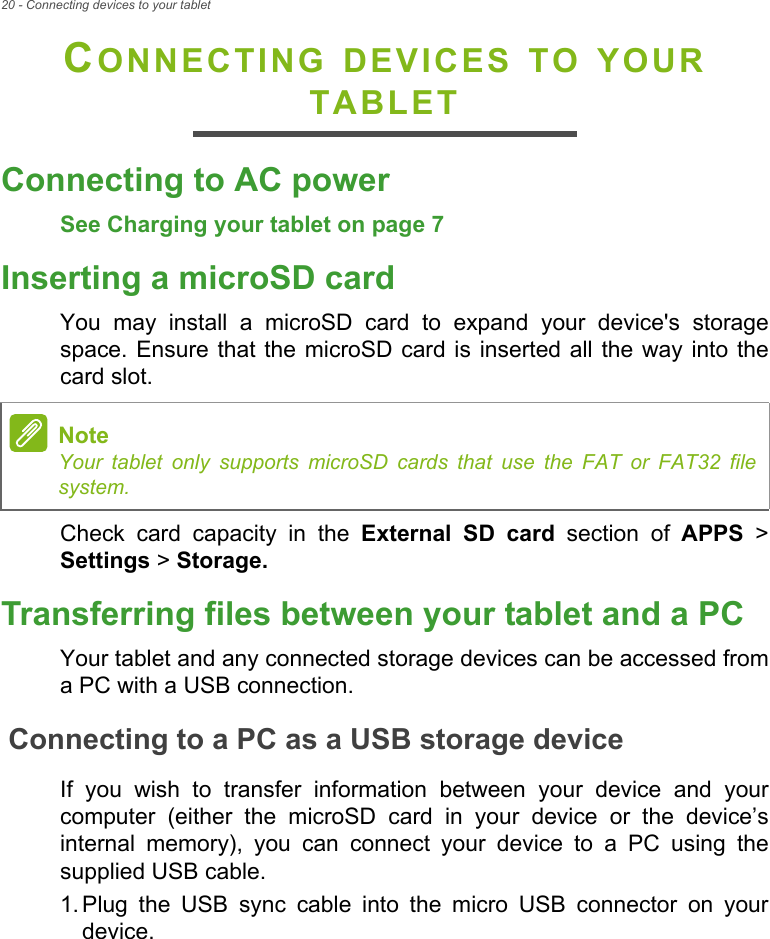
UserManual.wiki
>
Acer orporated
>
A1402 User Manual
>
User Manual.PDF
Contents
1.
User Manual.PDF
2.
Users Manual (Statement).PDF
User Manual.PDF
Navigation menu
Upload a User Manual
Namespaces
Wiki Guide
HTML
PDF
Info
Views
User Manual
Discussion / Help
Navigation
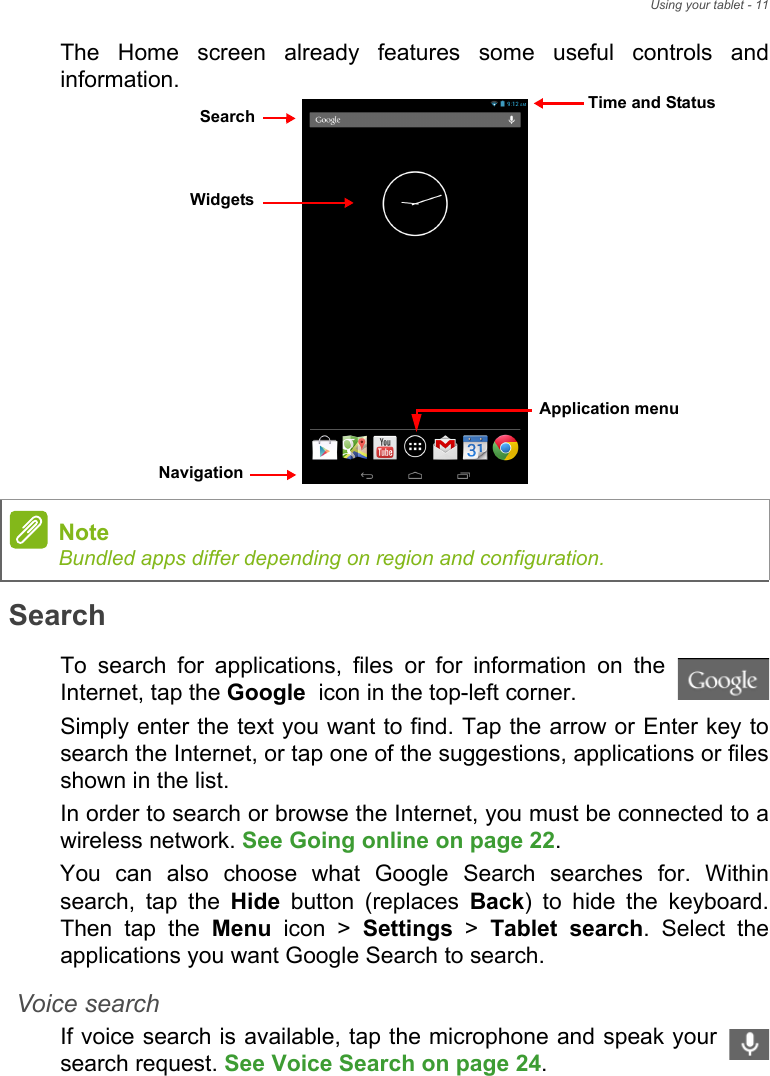

![Advanced settings - 41Internet; the information on your tablet cannot be changed directly, you must change the information stored in the Internet account.Tap APPS > Settings > [Account] to manage the synchronization of individual accounts.Some applications, such as Gmail and Calendar, have additional synchronization settings. Open the application and tap the Menubutton (three dots) and then tap Settings.Multiple Google accountsIf you have multiple Google accounts, such as separate accounts for personal and business contacts, you can access and synchonize them from the Accounts settings section. Tap APPS > Settings > Add account.Changing language and text optionsSet your location and language input preferences by tapping APPS > Settings > Language & input.SystemSetting the date and timeTo set the date and time, tap APPS > Settings > Date & time.Setting alarmsThere are two predefined alarms on your tablet by default. To add or edit alarm settings, tap Clock in the application menu and tap . Tap the ON/OFF switch next to a preset alarm to turn it on or off or tap the Menu button > Add alarm to create a new alarm.Tap a preset alarm to edit it. You can:NoteIf you travel frequently or live in an area that uses daylight saving time, and have mobile network access, activate Automatic date & time from this menu. Your tablet will set the date and time based on information it receives from the network.](https://usermanual.wiki/Acer-orporated/A1402.User-Manual-PDF/User-Guide-2239763-Page-41.png)