Acer orporated A700 Tablet Computer User Manual User Guide
Acer Incorporated Tablet Computer User Guide
UserManual.wiki
>
Acer orporated
>
A700 User Manual
>
User Manual -1
Contents
1.
User Manual -1
2.
User Manual -2
3.
User Manual -3
4.
user manual 1
5.
user manual 2
6.
user manual 3
User Manual -1
Navigation menu
Upload a User Manual
Namespaces
Wiki Guide
HTML
PDF
Info
Views
User Manual
Discussion / Help
Navigation
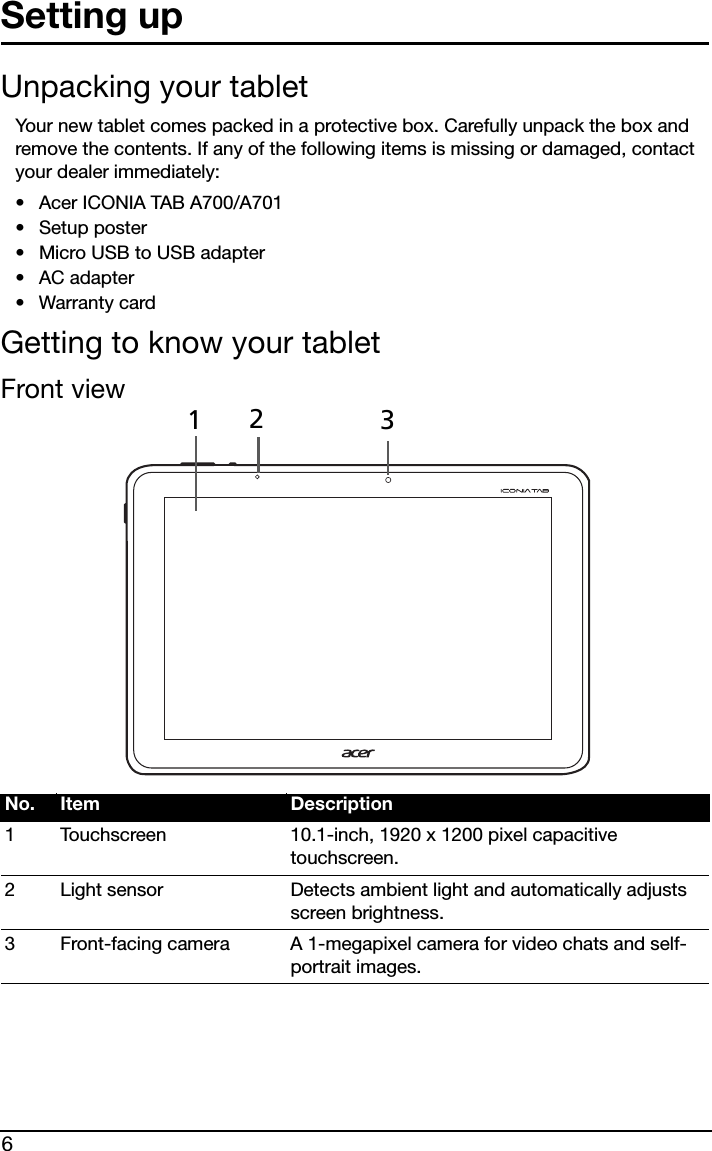
![8Back132 viewLED Indicators 3 Microphone Receives audio for video chats and Internet calls.4 Speakers Emits stereo audio.5 Reset button Insert a small thin object (such as a paperclip) to reset power to the tablet.6 Multi-function connector This is a multi-function connector featuring power charging and hyper USB [host and slave] for data transferring. See "Connecting devices to your tablet" on page 25.No. Item Description1 Rear-facing camera A 5-megapixel camera for taking high-resolution images.2 Microphone Receives audio for video chats and Internet calls.3 Speakers Emits stereo audio.LED color State DescriptionOff Tablet is off.White Steady The tablet is booting up, waking up, or fully charged.Orange Steady Tablet is charging.Orange Flashing Charging error.No. Item Description](https://usermanual.wiki/Acer-orporated/A700.User-Manual-1/User-Guide-1700247-Page-8.png)