Acer orporated DME400 SMART HANDHELD User Manual Acer E400 UM EN 2009
Acer Incorporated SMART HANDHELD Acer E400 UM EN 2009
Contents
- 1. USER MANUAL 1
- 2. USER MANUAL 2
- 3. USERS MANUAL 1
- 4. USERS MANUAL 2
USER MANUAL 1

1
Acer beTouch E400
User Guide
© 2010 All Rights Reserved
Acer beTouch E400 Smartphone User Guide
First issue: 03/2010
Acer beTouch E400 Smartphone
Model number: __________________________________
Serial number: ___________________________________
Date of purchase: ________________________________
Place of purchase: ________________________________

1
End User Licence Agreement
IMPORTANT-READ CAREFULLY: THIS END USER LICENSE AGREEMENT ("AGREEMENT") IS A LEGAL AGREEMENT BETWEEN
YOU (EITHER AN INDIVIDUAL OR A SINGLE ENTITY), AND ACER INC. INCLUDING ITS SUBSIDIARIES ("ACER") FOR THE
SOFTWARE (WHETHER PROVIDED BY ACER OR BY ACER'S LICENSORS OR SUPPLIERS) THAT ACCOMPANIES THIS
AGREEMENT, INCLUDING ANY ASSOCIATED MEDIA, PRINTED MATERIALS AND RELATED USER ELECTRONIC
DOCUMENTATION WHICH MAY BE BRANDED "ACER" ("SOFTWARE"). AGREEMENTS RELATING TO ANY OTHER PRODUCT
OR TOPIC ARE NEITHER INTENDED NOR SHOULD THEY BE IMPLIED. BY INSTALLING THE ACCOMPANYING SOFTWARE OR
ANY PORTION THEREOF, YOU AGREE TO BE BOUND BY THE TERMS AND CONDITIONS OF THIS AGREEMENT. IF YOU DO
NOT AGREE TO ALL OF THE TERMS AND CONDITIONS OF THIS AGREEMENT, DO NOT CONTINUE THE INSTALLATION
PROCESS AND IMMEDIATELY DELETE ALL INSTALLED FILES, IF ANY, OF THE ACCOMPANYING SOFTWARE FROM YOUR
PHONE.
IF YOU DO NOT HAVE A VALIDLY-LICENSED COPY OF THE APPLICABLE SOFTWARE, YOU ARE NOT AUTHORIZED TO
INSTALL, COPY OR OTHERWISE USE THE SOFTWARE, AND HAVE NO RIGHTS UNDER THIS AGREEMENT.
The Software is protected by U.S. and international copyright laws and conventions as well as other intellectual property
laws and treaties. The Software is licensed, not sold.
GRANT OF LICENSE
Acer grants to you the following non-exclusive and non-transferable rights with respect to the Software. Under this
Agreement, you may:
1. Install and use the Software only on a single designated phone. A separate license is required for each phone on
which the Software will be used;
2. Make one copy of the Software solely for backup or archival purposes;
3. Make one hardcopy of any electronic documents included in the Software, provided that you receive the
documents electronically.
RESTRICTIONS
You may NOT:
1. Use or copy the Software except as provided in this Agreement;
2. Rent or lease the Software to any third party;
3. Modify, adapt, or translate the Software in whole or in part;
4. Reverse engineer, decompile, or disassemble the Software or create derivative works based upon the Software;
5. Merge the Software with any other program or modify the Software, except for your personal use; and
6. Sublicense or otherwise make the Software available to third parties, except that you may, after prior written
notification to Acer, transfer the Software as a whole to a third party so long as you do not retain any copies of the
Software and such third party accepts the terms of this Agreement.
7. Transfer your rights under this Agreement to any third parties.
8. Export the Software in contravention of applicable export laws and regulations, or (i) sell, export, re-export,
transfer, divert, disclose technical data, or dispose of, any Software to any prohibited person, entity, or destination
including, without limitation, Cuba, Iran, North Korea, Sudan and Syria; or (ii) use any Software for any use
prohibited by the laws or regulations of the United States.
SUPPORT SERVICES
Acer is not obligated to provide technical or other support for the Software.
ACER LIVE UPDATE
Certain of the software contains elements that enable the use of the Acer Live Update service, which allows for updates
for such software to be automatically downloaded and installed on your phone. By installing the software, you hereby
agree and consent that Acer (or its licensors) may automatically check the version of such software that you are using on
your phone and may provide upgrades to such software that may be automatically downloaded on to your phone.
OWNERSHIP AND COPYRIGHT
Title, ownership rights and intellectual property rights in and to the Software and all copies thereof shall remain with Acer
or Acer's licensors or suppliers (as applicable). You do not have or shall not gain any proprietary interest in the Software
(including any modifications or copies made by or for you) or any related intellectual property rights. Title and related
rights in the content accessed through the Software is the property of the applicable content owner and may be protected
by applicable law. This license gives you no rights to such contents. You hereby agree
1. Not to remove any copyright or other proprietary notices from the Software;
2. To reproduce all such notices on any authorized copies you make; and
3. To use best efforts to prevent any unauthorized copying of the Software.
TRADEMARKS
This Agreement does not grant to you any rights in connection with any trademarks or service marks of Acer or of Acer's
licensors or suppliers.
DISCLAIMER OF WARRANTIES
TO THE MAXIMUM EXTENT PERMITTED BY APPLICABLE LAW, ACER, ITS SUPPLIERS, AND ITS LICENSORS, PROVIDE THE
SOFTWARE "AS IS" AND WITH ALL FAULTS, AND HEREBY DISCLAIM ALL OTHER WARRANTIES AND CONDITIONS, EITHER
EXPRESS, IMPLIED OR STATUTORY, INCLUDING, BUT NOT LIMITED TO, ANY IMPLIED WARRANTIES, DUTIES OR
CONDITIONS OF MERCHANTABILITY, OF FITNESS FOR A PARTICULAR PURPOSE, OF ACCURACY OR COMPLETENESS OF
RESPONSES, OF RESULTS, OF WORKMANLIKE EFFORT, OF LACK OF VIRUSES, AND OF LACK OF NEGLIGENCE, ALL WITH
REGARD TO THE SOFTWARE AND THE PROVISION OF OR FAILURE TO PROVIDE SUPPORT SERVICES. ALSO, THERE IS NO

2
WARRANTY OR CONDITION OF TITLE, QUIET ENJOYMENT, QUIET POSSESSION, CORRESPONDENCE TO DESCRIPTION OR
NON-INFRINGEMENT WITH REGARD TO THE SOFTWARE.
EXCLUSION OF INCIDENTAL, CONSEQUENTIAL AND CERTAIN OTHER DAMAGES
TO THE MAXIMUM EXTENT PERMITTED BY APPLICABLE LAW, IN NO EVENT SHALL ACER, ACER'S SUPPLIERS, OR ACER'S
LICENSORS, BE LIABLE FOR ANY SPECIAL, INCIDENTAL, INDIRECT, PUNITIVE, OR CONSEQUENTIAL DAMAGES
WHATSOEVER (INCLUDING, BUT NOT LIMITED TO, DAMAGES FOR LOSS OF PROFITS OR CONFIDENTIAL OR OTHER
INFORMATION, FOR BUSINESS INTERRUPTION, FOR PERSONAL INJURY, FOR LOSS OF PRIVACY, FOR FAILURE TO MEET ANY
DUTY INCLUDING OF GOOD FAITH OR OF REASONABLE CARE, FOR NEGLIGENCE, AND FOR ANY OTHER PECUNIARY OR
OTHER LOSS WHATSOEVER) ARISING OUT OF OR IN ANY WAY RELATED TO THE USE OF OR INABILITY TO USE THE
SOFTWARE, THE PROVISION OF OR FAILURE TO PROVIDE SUPPORT SERVICES, OR OTHERWISE UNDER OR IN CONNECTION
WITH ANY PROVISION OF THIS AGREEMENT, EVEN IN THE EVENT OF THE FAULT, TORT (INCLUDING NEGLIGENCE), STRICT
LIABILITY, BREACH OF CONTRACT OR BREACH OF WARRANTY OF ACER OR ITS SUPPLIERS OR LICENSORS, AND EVEN IF
ACER AND ITS SUPPLIERS AND LICENSORS HAVE BEEN ADVISED OF THE POSSIBILITY OF SUCH DAMAGES.
LIMITATION OF LIABILITY AND REMEDIES
NOTWITHSTANDING ANY DAMAGES THAT YOU MIGHT INCUR FOR ANY REASON WHATSOEVER (INCLUDING, WITHOUT
LIMITATION, ALL DAMAGES REFERENCED ABOVE AND ALL DIRECT OR GENERAL DAMAGES), THE ENTIRE LIABILITY OF
ACER, ITS SUPPLIERS, AND ITS LICENSORS, UNDER ANY PROVISION OF THIS AGREEMENT, AND YOUR EXCLUSIVE REMEDY
FOR ALL OF THE FOREGOING, SHALL BE LIMITED TO THE AGGREGATE AMOUNT PAID BY YOU FOR THE SOFTWARE. THE
FOREGOING LIMITATIONS, EXCLUSIONS AND DISCLAIMERS (INCLUDING DISCLAIMER OF WARRANTIES AND EXCLUSION OF
INCIDENTAL, CONSEQUENTIAL AND CERTAIN OTHER DAMAGES ABOVE) SHALL APPLY TO THE MAXIMUM EXTENT
PERMITTED BY APPLICABLE LAW, EVEN IF ANY REMEDY FAILS ITS ESSENTIAL PURPOSE; PROVIDED, HOWEVER, THAT
BECAUSE SOME JURISDICTIONS DO NOT ALLOW THE EXCLUSION OR LIMITATION OR LIABILITY FOR CONSEQUENTIAL OR
INCIDENTAL DAMAGES, THE ABOVE LIMITATION MAY NOT APPLY TO YOU.
TERMINATION
Without prejudice to any other rights, Acer may immediately terminate this Agreement without notice if you fail to
comply with any terms and conditions of this Agreement.
In such event, you must:
1. Cease all use of the Software;
2. Destroy or return to Acer the original and all copies of the Software; and
3. Delete the Software from all phones on which it was resident.
All disclaimers of warranties and limitation of liability set forth in this Agreement shall survive termination of this
Agreement.
GENERAL
This Agreement represents the complete agreement between you and Acer relating to this license for the Software and
supersedes all prior agreements, communications, proposals and representations between the parties and prevails over
any conflicting or additional terms of any quote, order, acknowledgement or similar communication. This Agreement may
only be modified by a written document signed by both parties. If any provision of this Agreement is held by a court of
competent jurisdiction to be contrary to law that provision will be enforced to the maximum extent permissible and the
remaining provisions of this Agreement will remain in full force and effect.
ADDITIONAL PROVISIONS APPLICABLE TO THIRD PARTY SOFTWARE AND SERVICES
Software provided hereunder by Acer's licensors or suppliers ("Third Party Software") is made available to you for your
personal, non-commercial use only. You may not use the Third Party Software in any manner that could damage, disable,
overburden, or impair the services provided by Acer's licensors or suppliers hereunder ("Third Party Services").
Furthermore, you may not use the Third Party Software in any manner that could interfere with any other party's use and
enjoyment of the Third Party Services, or the services and products of Acer's licensors' or suppliers' third party licensors.
Your use of the Third Party Software and Third Party Services is also subject to additional terms and conditions and policies
which can be accessed through our global website.
Privacy policy
During registration you will be asked to submit some information to Acer. Please refer to Acer’s privacy policy at http://
www.acer.com or your local Acer website.

3
Table of Contents
End User Licence Agreement
Getting to know your smartphone
Features and functions . . . . . . . . . . . . . . . . . . . . . . . . . . . . . . . . . . . . . . . . . . . . 5
Product registration . . . . . . . . . . . . . . . . . . . . . . . . . . . . . . . . . . . . . . . . . . . . . . . 5
Setting Up
Unpacking your smartphone . . . . . . . . . . . . . . . . . . . . . . . . . . . . . . . . . . . . . . . .6
Getting to know your smartphone . . . . . . . . . . . . . . . . . . . . . . . . . . . . . . . . . . .6
Installing or removing the battery . . . . . . . . . . . . . . . . . . . . . . . . . . . . . . . . . . .8
Installing a SIM or microSD card . . . . . . . . . . . . . . . . . . . . . . . . . . . . . . . . . . . . . 9
Using your smartphone
Turning on for the first time . . . . . . . . . . . . . . . . . . . . . . . . . . . . . . . . . . . . . . .10
Locking your smartphone . . . . . . . . . . . . . . . . . . . . . . . . . . . . . . . . . . . . . . . . .10
Using the touchscreen . . . . . . . . . . . . . . . . . . . . . . . . . . . . . . . . . . . . . . . . . . . . 11
The Home screen . . . . . . . . . . . . . . . . . . . . . . . . . . . . . . . . . . . . . . . . . . . . . . . . 14
Managing contacts
Managing your contacts . . . . . . . . . . . . . . . . . . . . . . . . . . . . . . . . . . . . . . . . . .17
Making Calls
Before making a call . . . . . . . . . . . . . . . . . . . . . . . . . . . . . . . . . . . . . . . . . . . . . 19
Making a call . . . . . . . . . . . . . . . . . . . . . . . . . . . . . . . . . . . . . . . . . . . . . . . . . . .19
The voice call screen . . . . . . . . . . . . . . . . . . . . . . . . . . . . . . . . . . . . . . . . . . . . . 20
Onscreen call options . . . . . . . . . . . . . . . . . . . . . . . . . . . . . . . . . . . . . . . . . . . . .20
Messaging
Creating a new message . . . . . . . . . . . . . . . . . . . . . . . . . . . . . . . . . . . . . . . . . .22
Replying to a message . . . . . . . . . . . . . . . . . . . . . . . . . . . . . . . . . . . . . . . . . . . .23
MMS messages . . . . . . . . . . . . . . . . . . . . . . . . . . . . . . . . . . . . . . . . . . . . . . . . . . 24
Going online
Browsing the Internet . . . . . . . . . . . . . . . . . . . . . . . . . . . . . . . . . . . . . . . . . . . . 25
Online applications . . . . . . . . . . . . . . . . . . . . . . . . . . . . . . . . . . . . . . . . . . . . . . 26
Using the Camera
Camera icons and indicators . . . . . . . . . . . . . . . . . . . . . . . . . . . . . . . . . . . . . . . 29
Taking a photo . . . . . . . . . . . . . . . . . . . . . . . . . . . . . . . . . . . . . . . . . . . . . . . . . . 30
Shooting a video . . . . . . . . . . . . . . . . . . . . . . . . . . . . . . . . . . . . . . . . . . . . . . . . 30
Viewing photos and videos . . . . . . . . . . . . . . . . . . . . . . . . . . . . . . . . . . . . . . . . 30
Advanced Settings
Acer Settings . . . . . . . . . . . . . . . . . . . . . . . . . . . . . . . . . . . . . . . . . . . . . . . . . . . 31
Putting your smartphone in airplane mode . . . . . . . . . . . . . . . . . . . . . . . . . . . 31
Adjusting connection settings . . . . . . . . . . . . . . . . . . . . . . . . . . . . . . . . . . . . . . 32
Phone settings . . . . . . . . . . . . . . . . . . . . . . . . . . . . . . . . . . . . . . . . . . . . . . . . . . 34
Connecting to a PC . . . . . . . . . . . . . . . . . . . . . . . . . . . . . . . . . . . . . . . . . . . . . . . 34
Multimedia playback . . . . . . . . . . . . . . . . . . . . . . . . . . . . . . . . . . . . . . . . . . . . .34
Resetting your smartphone . . . . . . . . . . . . . . . . . . . . . . . . . . . . . . . . . . . . . . . . 38
Accessories and Tips
Using the headset . . . . . . . . . . . . . . . . . . . . . . . . . . . . . . . . . . . . . . . . . . . . . . . 39

4
Using a Bluetooth headset . . . . . . . . . . . . . . . . . . . . . . . . . . . . . . . . . . . . . . . . 39
Using your smartphone as a modem . . . . . . . . . . . . . . . . . . . . . . . . . . . . . . . . 39
Inserting a microSD Card . . . . . . . . . . . . . . . . . . . . . . . . . . . . . . . . . . . . . . . . . . 40
Appendix
FAQ and troubleshooting . . . . . . . . . . . . . . . . . . . . . . . . . . . . . . . . . . . . . . . . .41
Other sources of help . . . . . . . . . . . . . . . . . . . . . . . . . . . . . . . . . . . . . . . . . . . . .42
Warnings and precautions . . . . . . . . . . . . . . . . . . . . . . . . . . . . . . . . . . . . . . . . .42
Emergency calls . . . . . . . . . . . . . . . . . . . . . . . . . . . . . . . . . . . . . . . . . . . . . . . . . 45
Disposal and recycling information . . . . . . . . . . . . . . . . . . . . . . . . . . . . . . . . . 45
Taking care of your smartphone . . . . . . . . . . . . . . . . . . . . . . . . . . . . . . . . . . . .45
Specifications . . . . . . . . . . . . . . . . . . . . . . . . . . . . . . . . . . . . . . . . . . . . . . . . . . .47
Regulatory information . . . . . . . . . . . . . . . . . . . . . . . . . . . . . . . . . . . . . . . . . . .49
Index

5Features and functions
Getting to know your smartphone
Features and functions
Your new smartphone offers leading, easy-to-access multimedia and
entertainment features. You can:
• Access your email while on the move.
• Connect to the Internet at high speed, via HSDPA (7.2 Mbps), HSUPA (2
Mbps) or Wi-Fi.
• Keep in touch with your friends via your Contacts and social networking
applications.
Product registration
When using your product for the first time, it is recommended that you
immediately register it. This will give you access to some useful benefits, such
as:
• Faster service from our trained representatives
• Membership in the Acer community: receive promotions and participate
in customer surveys
• The latest news from Acer
Hurry and register, as other advantages await you!
How to register
To register your Acer product, please visit mobile.acer.com. Click Product
Registration and follow the simple instructions. You can also register directly
from your smartphone by tapping the Acer Registration icon.
After we receive your product registration, you will be sent a confirmation
email with important data that you should keep in a safe place.
6
Setting Up
Unpacking your smartphone
Your new smartphone comes packed in a protective box. Carefully unpack the
box and remove the contents. If any of the following items is missing or
damaged, contact your dealer immediately:
• Acer beTouch E400 Smartphone
• Battery
• Quick Guide
• Companion CD
• USB cable
• AC adapter
• Headset
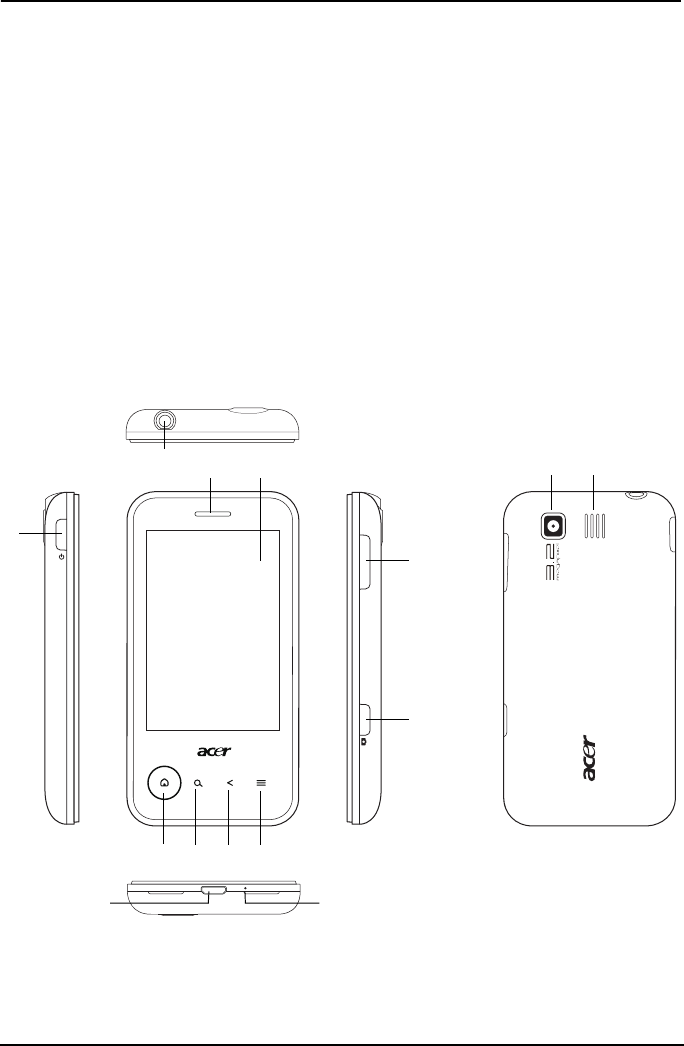
Getting to know your smartphone
Views
1
43
5678
11
12
13 142
910
7Getting to know your smartphone
Home button indicator
The Home button is surrounded by a colored ring that indicates power status.
No. Item Description
1 Power button Press to turn the screen on/off or enter sleep mode;
press and hold for more than three seconds to turn
the smartphone off.
2 3.5 mm headset jack Connect to a headset.
3 Phone speaker
Suitable for normal phone use.
4 Touchscreen 480 x 320 pixel capacitive touchscreen to display
data, phone content and enter information.
5 Home button Return to the Home screen; tap and hold to view
recently-used applications.
6 Search button Open the Quick Search box.
7 Back button Go back one menu step.
8 Menu button Opens the option menu.
9 Micro USB connector Connect to a USB cable/charger.
10
Microphone Internal microphone.
11 Volume control Increase or decrease the ringer/system volume.
12 Camera button Activate the camera or take a picture.
13 Camera A 3.2-megapixel camera for taking high-resolution
images.
14 Handsfree speaker Emits audio from your smartphone; suitable for
handsfree use.
Color State Description
White Steady (10
seconds)
The device is waking up.
Slow flashing New event (missed call, new message, voicemail etc.)
Red Steady Battery is charging.
Flashes rapidly Battery level is critically low.
Green Steady Battery is fully charged.
8
Installing or removing the battery
Your smartphone uses a replaceable battery to provide power. It is packed
seperately from your smartphone and needs to be inserted and charged before
you can use the smartphone.
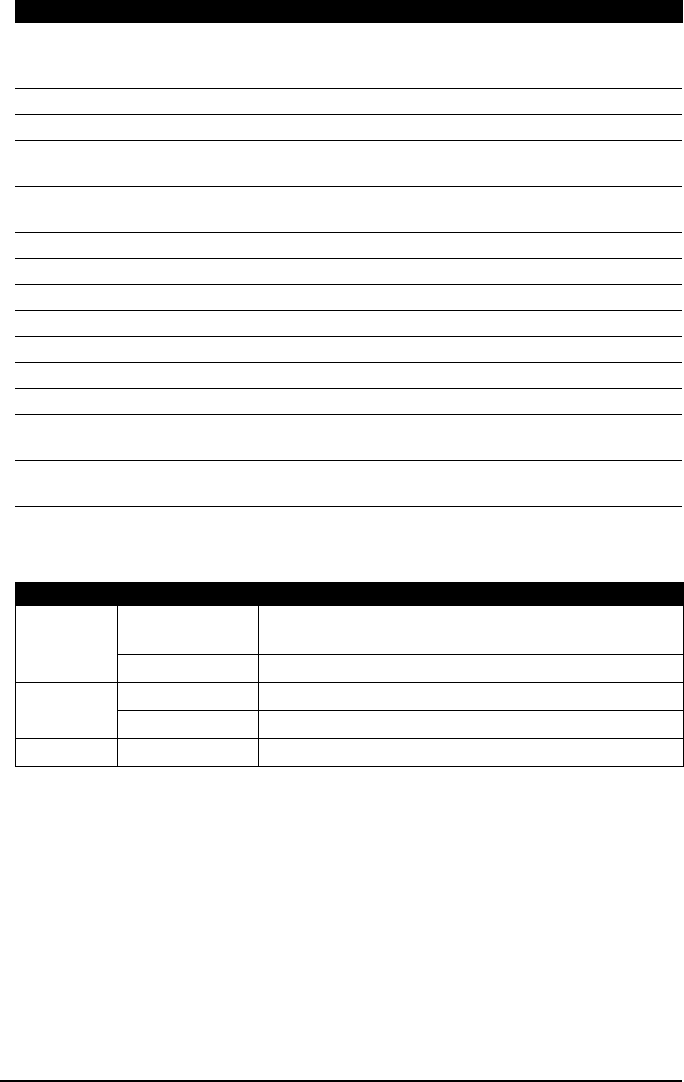
Installing the battery
Insert your fingernail into the cutout
between the battery cover and the
phone. Unclip the cover and lift off
the battery cover.
Place the battery into the battery
compartment, lining up the battery
connectors with those at the side of
the compartment.
Insert the tabs on the bottom of the
battery cover into the slots in the
phone. Carefully press the top of the
cover until the clips on the side of the
cover click in place.
CAUTION: RISK OF EXPLOSION IF BATTERY IS REPLACED BY AN INCORRECT TYPE.
DISPOSE OF USED BATTERIES ACCORDING TO THE INSTRUCTIONS.
Charging the battery
For initial use, you need to charge your smartphone for eight hours. After that
you can charge it each day to recharge the battery to full capacity.
Connect the AC adapter cord to the micro USB connector on your smartphone.
1
2

9Installing a SIM or microSD card
Removing the battery
Open the battery compartment as
shown in “Installing the battery“ on
page 8. Lift the battery out of the
compartment using the clip on the
top of the battery.
Replace the battery cover as
described above.
Installing a SIM or microSD card
To take full advantage of your smartphone’s telephony capabilities, you must
install a SIM card. The SIM card holder is located at the bottom of the battery
bay.
Additionally, you may wish to increase your smartphone’s storage by inserting a
microSD card into the slot provided. This is next to the SIM card slot.
1. Turn off the phone by pressing and holding the power button.
2. Open the cover and remove the
battery as described in “Removing
the battery“ on page 9.
3. Insert the SIM or microSD card as
shown.
4. Replace the battery and battery
cover.
NOTE: Ensure that the microSD card is inserted all the way into the card slot.
SIM card lock
Your smartphone may come with a SIM card lock, i.e., you will only be able to
use a SIM card provided by your network operator.
To cancel the SIM lock, contact your network provider.
1
2
SIM
microSD

10
Using your smartphone
Turning on for the first time
To turn on your smartphone for the first time, press and hold the power button
until the screen turns on. You will then be asked to configure some settings
before you can use your smartphone.
To start, tap the green android on the screen; if you prefer a different
language tap ‘Change language’.
Follow the rest of the instructions as they are displayed on the screen.
Entering your PIN
When you install a SIM card for the first time, you may need to enter a PIN
using the onscreen number pad.
Important: Depending on your settings, you may be required to enter your PIN each
time you switch on the phone function.
Activating a new SIM card
If you are using your SIM card for the first time, it may require activation.
Contact your network operator for details on how to do this.
Sign in to or create a Google account
If you have Internet access, your smartphone allows you to synchronize
information with a google account.
During the start-up process, you may create or sign in to your account, which
will be used to synchonise your contact list, email, calendar and other
information. If you do not yet have Internet access, or do not want to use this
feature, then tap Skip.
Locking your smartphone
If you will not our smartphone for a while, briefly press the power button to
lock access. This saves power and ensures your smartphone does not
unintentionally use any services. Your smartphone will lock automatically if it is
not used for two minutes.
Waking your smartphone
If the screen is off and the smartphone does not react to any taps on the screen
or front panel buttons, it may have been locked and is in sleep mode.
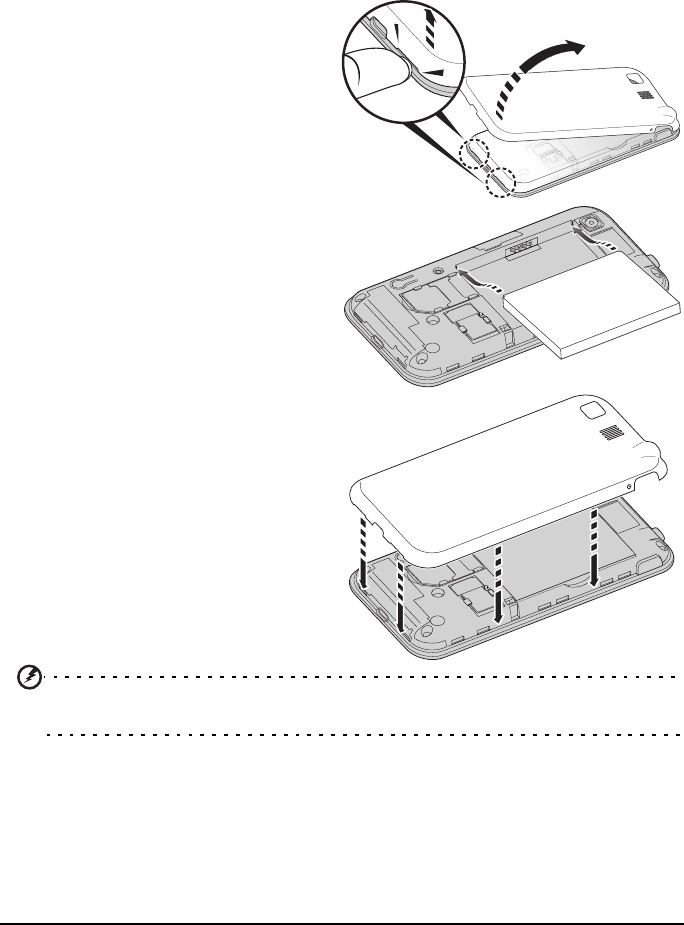
11Using the touchscreen
To wake your smartphone, press any button on the edge
of the device (e.g. power, volume or camera). Your
smartphone will display the locked screen; drag the
padlock icon to the right to enter the Home screen.
For additional security, you may set an unlock pattern, a
set of dots that must be tapped in the correct order to
access the phone. Open the Applications tab, scroll down
the menu and tap Settings > Location & security > Set
unlock pattern.
Using the touchscreen
Your smartphone uses a touchscreen for selecting items and entering
information. Use your finger to tap the screen.
Tap: Touch the screen once to open items and select options.
Drag: Hold your finger on the screen and drag across the screen to select text
and images.
Tap and hold: Tap and hold an item to see a list of actions available for that
item. On the pop-up menu that appears, tap the action you want to perform.
Scroll: To scroll up or down the screen, simply drag your finger up or down the
screen in the direction that you want to scroll.
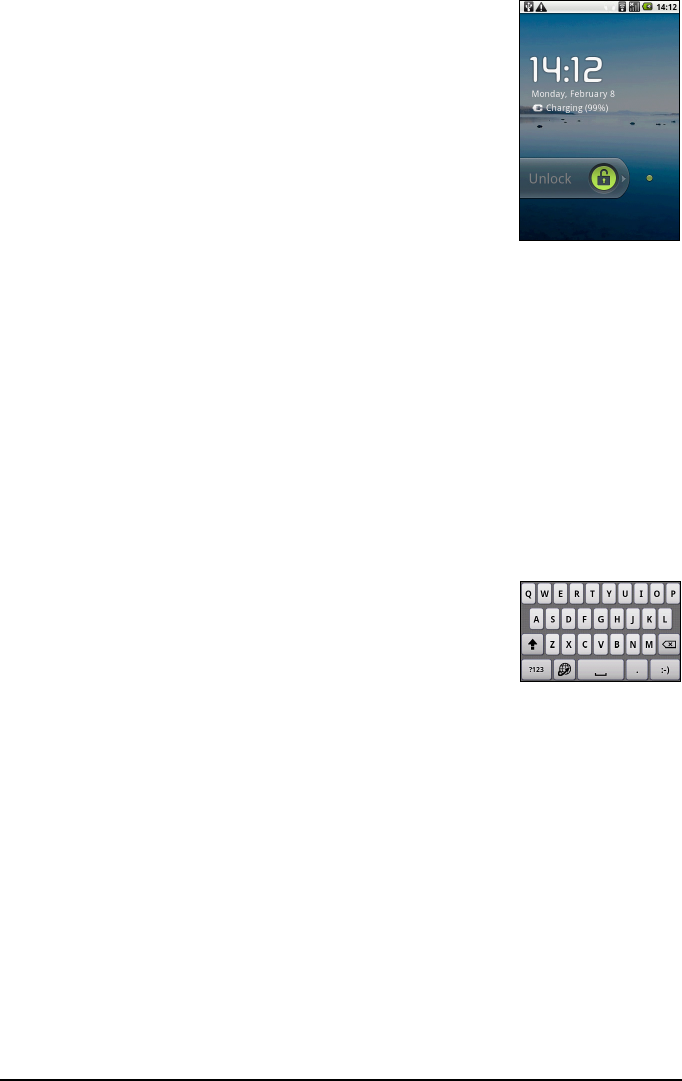
The onscreen keyboard
When you tap a text box to enter text, an onscreen
keyboard will appear. Simply tap on keys to enter text. If
you require a larger keyboard, turn your smartphone 90
degrees to the left to use landscape mode.
The layout of the keyboard varies slightly, depending on
the application and information that is required.
Changing the text input method
To change the input method, tap and hold a text box, then select Input
method. This will open a menu listing the text input methods available on your
phone. Tap your prefered input method. Typically three options are available:
XT9 Text input, Android Keyboard and Penpower Input Method.
Predictive text
Both XT9 Text Input and Android keyboard provide a keyboard with predictive
text. As you tap the letters of the word, a selection of words are displayed
above the keyboard that would continue the sequence of letters tapped, or are
a close match allowing for errors. The word list changes after every key press. If
the word you need is displayed, you can tap on it to insert it into your text.
12
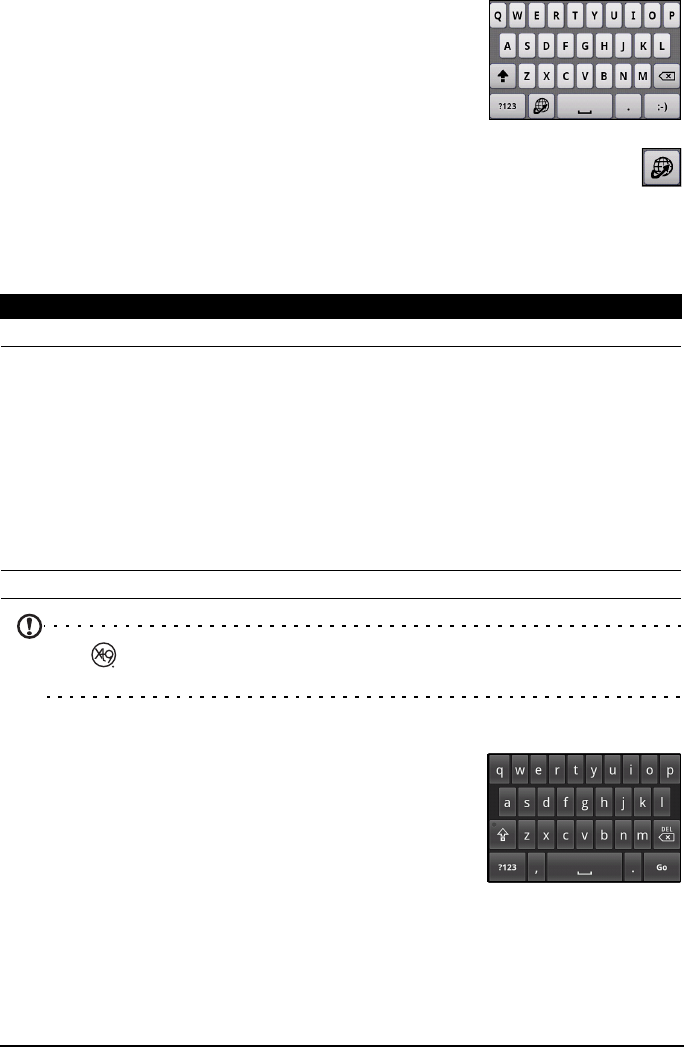
XT9 Text Input
The XT9 Text Input keyboard has various features that
assist you to enter correct text.
Tap the ?123 button to see numbers and special
characters, and then tap the Alt key to see even more.
Tap and hold a key to select alternative characters,
such as letters with accents.
Additional keys vary depending on the type of text you enter. E.g. a key
to add a smiley is available when typing a text message, or a key to
change the languages used for the dictionary and keyboard. Like other
keys, tap and hold for additional options.
Tap Menu > Settings > Language & keyboard > XT9 Text Input. From here you
can enable or disable the following:
Note: XT9 and XT9 logo are registered trademarks of Nuance Communications,
Inc. or its subsidiaries in the United States of America and/or other countries.
Android keyboard
The standard Android keyboard has various features
that assist you to enter correct text.
Tap the ?123 button to see numbers and special
characters, and then tap the Alt key to see even more.
Tap and hold a key to select alternative characters,
such as letters with accents.
Additional keys vary depending on the type of text you enter. E.g. a key to add
a smiley is available when typing a message.
Tap Menu > Settings > Language & keyboard > Android keyboard. From here
you can enable or disable the following:
Function Description
Languages Set the languages that will be available.
Keyboard layouts Select the keyboard layout you prefer. There are three layouts
available:
• Keyboard: A full QWERTY (or language specific)
keyboard.
• Reduced keyboard: Two letters are available on each
key. The predictive text options will display possible
words from the combination of keys you have selected.
• Phone keypad: Three letters are available on each key.
Tap and hold the key to select a letter, including
special characters.
Preferences Change your text input preferences.
13Using the touchscreen
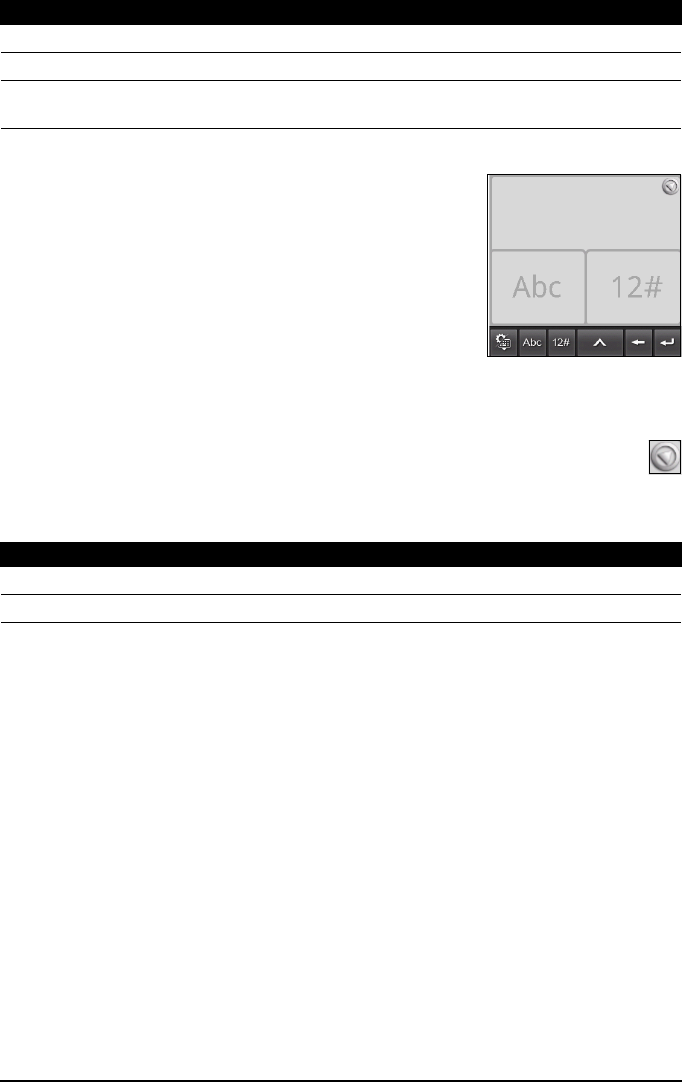
Penpower Input Method
The Penpower Input Method allows you to draw
letters and characters on the screen, one at a time. This
is especially useful for languages that use many
complex characters.
Draw the character in the rectangle that appears on
the screen. After a short delay, a selection of
characters will be proposed below the input area. Tap
a character to enter it into the text.
Draw a letter in the Abc rectangle to limit the
proposed characters to the alphabet, or in the 12# rectangle to limit the
proposed characters to numbers or text symbols.
Tap the circle and triangle symbol to expand the input area so that it takes
the whole screen. Tap the Abc or 12# keys to display a keyboard.
Tap Menu > Settings > Language & keyboard > Penpower Input Method. From
here you can enable or disable the following:
Function Description
Quick fixes Corrects commonly typed mistakes.
Show suggestions Shows suggested words while you are typing.
Auto-complete Inserts the suggested word whenever you tap space or a
punctuation mark.
Function Description
Output Character Set Select Traditional, Simplified or Both sets of chinese characters.
Timout for Writing Change the delay before a character is processed.
14
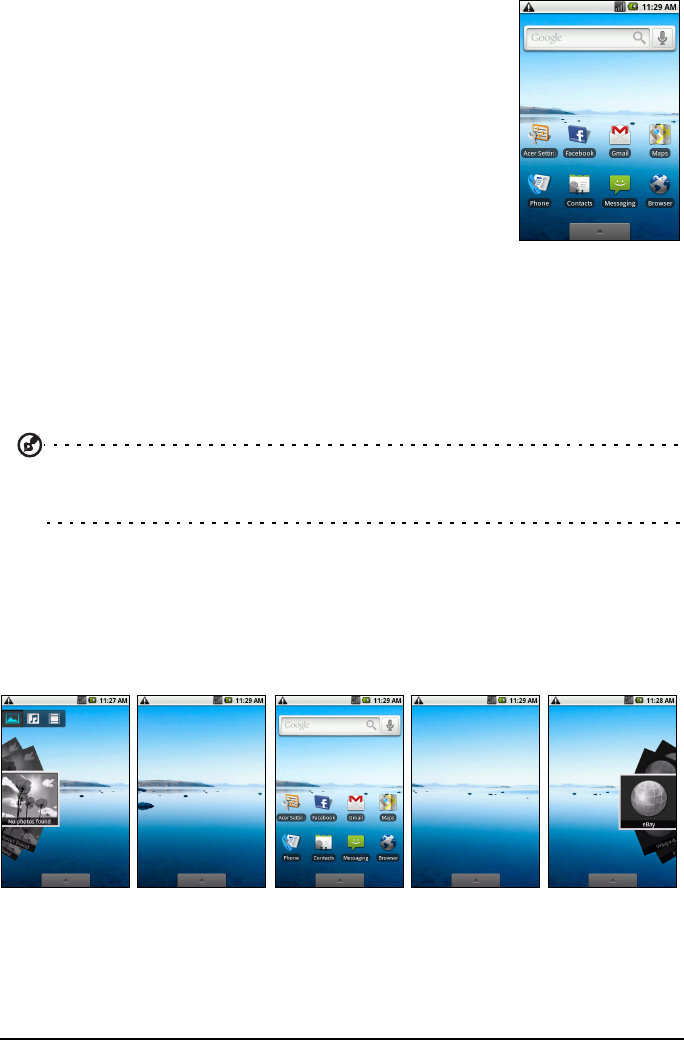
The Home screen
After the first start process is completed, your smartphone
will display the Home screen. This screen gives you quick,
icon-based access to many of the frequently-used features
of your smartphone.
The Home screen already features some useful icons and
widgets. The Search widget is at the top of the screen, and
a selection of icons in the middle.
At the bottom of the screen is the Applications tab which
lists all the applications you have installed. Drag the tab up
the screen, or tap the tab, to open the Applications menu.
Tap an icon to open the application.
Multitasking
You can have multiple applications open at the same time. To open a new
application, press the Home button to return to the Home screen, then start the
new application.
To view your active applications, press and hold the Home button. Then tap an
icon to go to the application.
Tip: To prolong battery life, it is better to close an application when you’ve finished
using it. Do this by either pressing the Back key or the Menu button and selecting Exit
(if available).
The extended Home screen
The Home screen extends to either side of the screen, giving you more room to
add icons, widgets or features. To view the extended Home screens drag the
screen to the left or right. A total of five pages are available, two to the left and
two to the right. To change or add widgets on any of the screens see
“Personalizing the Home screen“ on page 15.
15The Home screen
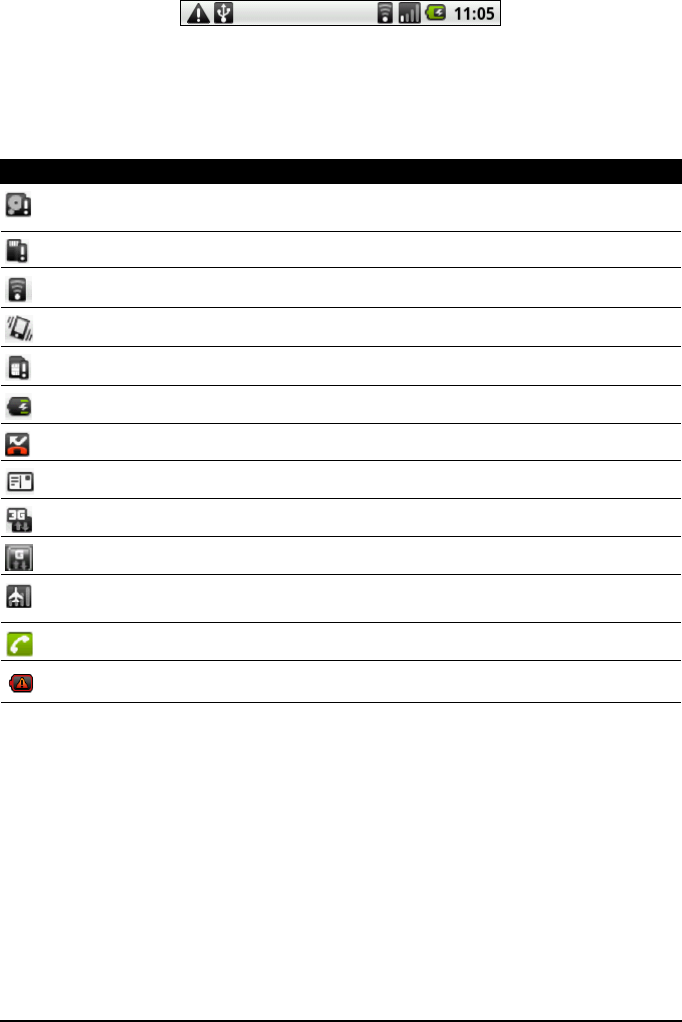
Notification area
The Notification area is at the top of the screen.
This area contains a variety of icons to inform you of your phone’s status. The
left side of the Notification area displays event icons that indicate a new event
(such as a new message). The icons on the right side indicate connectivity and
battery status. Drag the Notification area down the screen, or tap the area, to
view more information about new events.
Personalizing the Home screen
You may personalize your Home screen by adding or removing icons, shortcuts
or widgets, or changing the wallpaper.
Adding or removing icons
You can set icons for installed applications on the Home screen. Tap and hold
an icon in the Applications tab to copy it to the Home screen. To remove an
icon from the Home screen, tap and drag the icon from the Home screen to the
trash tab that appears at the bottom of the screen.
Icon Description
Indicates that storage is running low. Remove programs or files to increase the
available storage.
SD Card removed.
WLAN signal strength.
Vibrate mode enabled.
SIM card not installed/invalid.
Battery status.
Missed call.
New/unread message.
3G connected: You may make a call.
Connected to a 2G network: You may make a call.
Airplane mode: Wireless connectivity disconnected. Please disable airplane
mode before trying to make a call.
Incoming call or active call.
Charging has temporarily stopped to prevent overheating/overcharging.

16
Adding or removing shortcuts or widgets
To add shortcuts or widgets, tap and hold anywhere on
the Home screen to open the Add to Home screen menu.
Shortcuts
Tap Shortcuts to open a list of quick links to applications
and settings you can add to the Home screen.
Widgets
Tap Widgets to open a list of small applications that you
can add to your Home screen. Widgets display useful
information and provide simple controls for certain
applications.
Folders
You can also add folders to your Home screen. Some pre-
defined folders are available or you can add a New folder.
This will be placed on your Home screen, named ‘Folder’.
To change the name, tap the folder to open it, then tap
and hold the name bar at the top of the folder window.
This opens a dialog box that will allow you to rename the
folder.
Removing an item from the Home screen
To remove a Shortcut, Widget or folder, tap and hold the
item until it is selected, then drag it to the trash can at the
bottom of the screen.
17Managing your contacts
Managing contacts
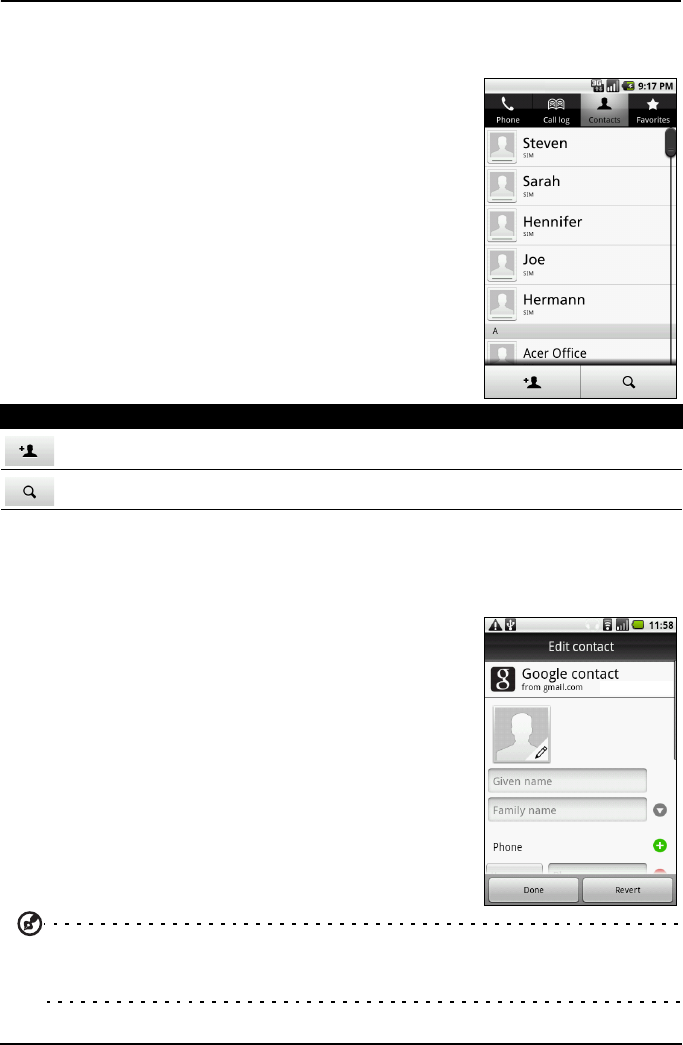
Managing your contacts
Your smartphone features an address book that
allows you to save contacts to either the internal
memory or onto your SIM card.
Tap Contacts from the Home screen or the Contacts
tab from the Dialer to view your contacts.
If you don’t have any contacts stored on your phone,
you can import your Google account contacts, add a
new contact or import any SIM contacts. Press the
Menu button to open the menu.
Adding a contact
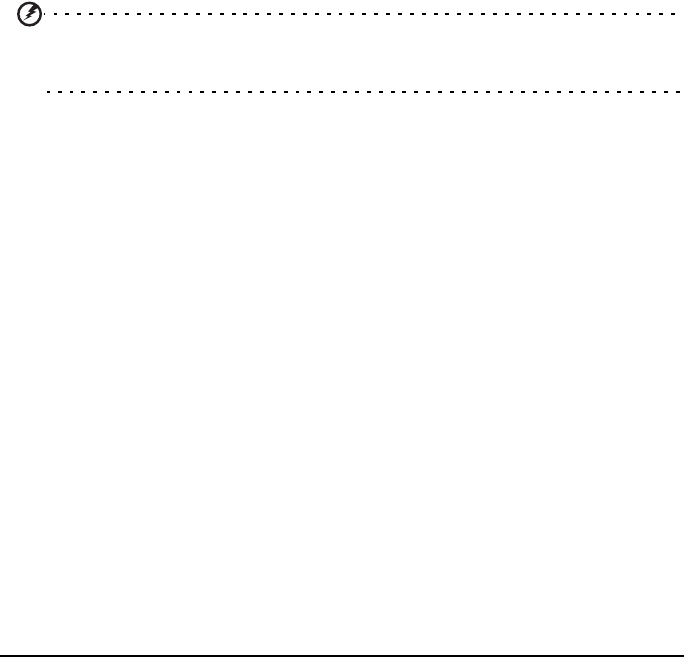
Tap Add contact to add a new contact. You will be asked if you want to create
a Phone, Google or SIM contact.
To create a contact, you will be asked to enter the
contact’s:
• Given and Family name.
• Phone numbers.
• Email addresses.
•IM addresses.
• Postal addresses.
• Organizations.
To assign an image to your contact, tap the silhouette
and select an images from your smartphone’s picture
gallery, or to take a new photo.
Tip: Set the phone number to match the type of network as this can determine some
functions. I.e. certain applications only recognise ‘Mobile’ numbers as they require a
mobile network.
Icon Description
Add a new contact.
Search for a contact.
18
Editing a contact
To see the information stored for a contact, tap on the contact’s name. Then to
add the contact to your Favorites list, tap the star next to the contact’s name.
Tap Menu then Edit contact to add or change information. Tap the green plus
sign to add an entry; you may enter multiple entries in each category.
Tap Menu then Options to set special entries for your smartphone.
• Assign the contact to one or more groups.
• Set a ringtone for calls recieved from the contact.
• Send any calls from the contact directly to your voicemail.
Editing a contact on your computer
If you have synchonised your Google account and contacts, you can use your
computer to access and edit your contact list. Open the Internet browser on
your computer and go to mail.google.com. Sign in to your account and click
Contacts. Select and edit contacts from the list; the next time your smartphone
synchonizes with your computer, these changes will also be made to your
smartphone’s contact list.
Warning: Backup your contacts before making any changes. You may do this from
the Contacts tab: Tap Menu and select Import/Export. You may then Export your
contact list to the SD card in your smartphone.
19Before making a call
Making Calls
This chapter shows you how to make phone calls, and the various options
available to you during your call.
Before making a call
Check that the phone function is on before you make a call. You can confirm
the phone status from the icon on the right-hand side of the Notification area.
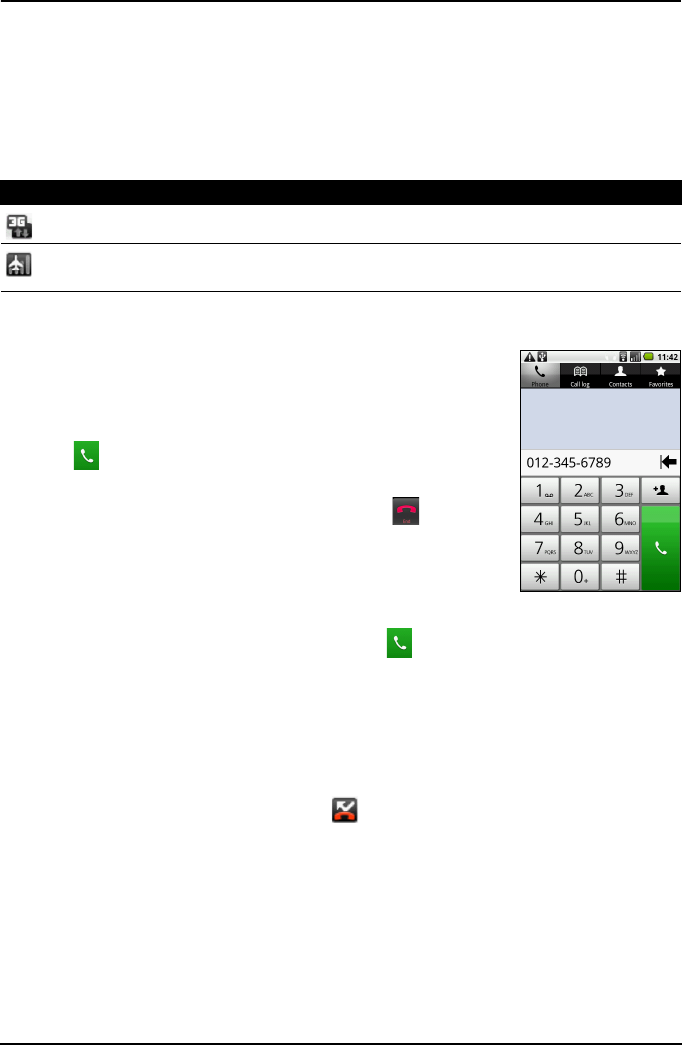
Making a call
1. From the Home screen tap Phone or open Phone from
the applications menu to open the onscreen number
pad.
2. Enter the number you wish to dial.
3. Tap to make the call.
4. To end the call, press the Power button, or if the screen
is active, press the Menu button, then tap .
Dialing a number from the Call Log
Your call history can be viewed by tapping the Call Log
tab. It displays recent received, dialed, and missed calls.
To redial any number in the call history, tap next to the log entry. You may
also tap and hold the number to open a menu with other options: Call <the
number>; View contact; Edit number before call; Send text message; Add to
contacts or Remove from call log.
Viewing missed calls
Missed calls will be displayed by the call indicator on the top of your phone and
in the Notification area with the icon .
You can also view missed calls from the Notification area.
1. Open the notification list by dragging the Notification area downwards to
display the details of the missed calls.
2. Select the call from the list and tap Return call to return the missed call.
You can save phone numbers to your Contacts from the Call Log. Please refer to
“Adding a contact“ on page 17 for further details.
Icon Description
3G connected: You may make a call.
Airplane mode: Wireless connectivity disconnected. Please disable airplane mode
before trying to make a call.
20
Making a call to one of your contacts
1. Tap the Contacts tab in the dialer or Contacts from the Home screen to view
your contacts.
2. Tap a contact. A dialog will open, asking if you want to Call the contact or
send the contact an message.
Dialing an international number
When dialing international numbers, there is no need to enter the
international direct dialing prefix (‘00’ etc.) before the country code. Simply tap
and hold 0+ on the onscreen number pad until + appears on screen.
Warning: International call rates can vary greatly depending on the country you are
calling and your network provider. We suggest you check all call rates with your
network provider, to avoid excessive phone bills. If you are using your smartphone
abroad, roaming charges will apply. Consult your network provider for roaming rates
specific to the country you are visiting before you leave.
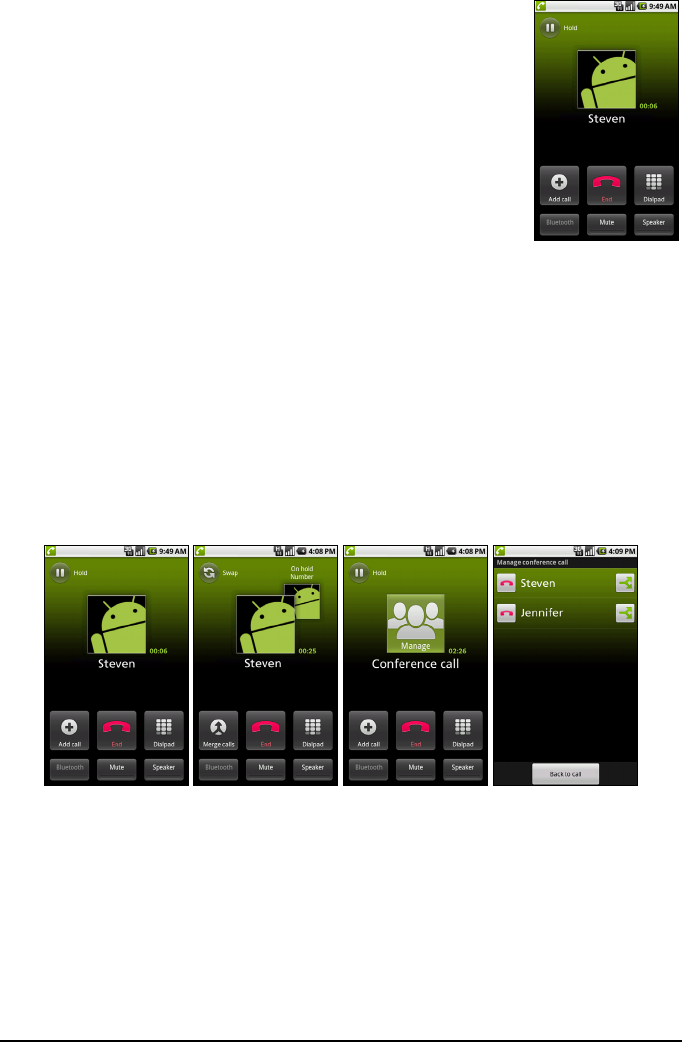
The voice call screen
Once you have dialed your number the voice call screen appears, which displays
the number/contact you are talking to, the call duration and the dialpad tab.
Onscreen call options
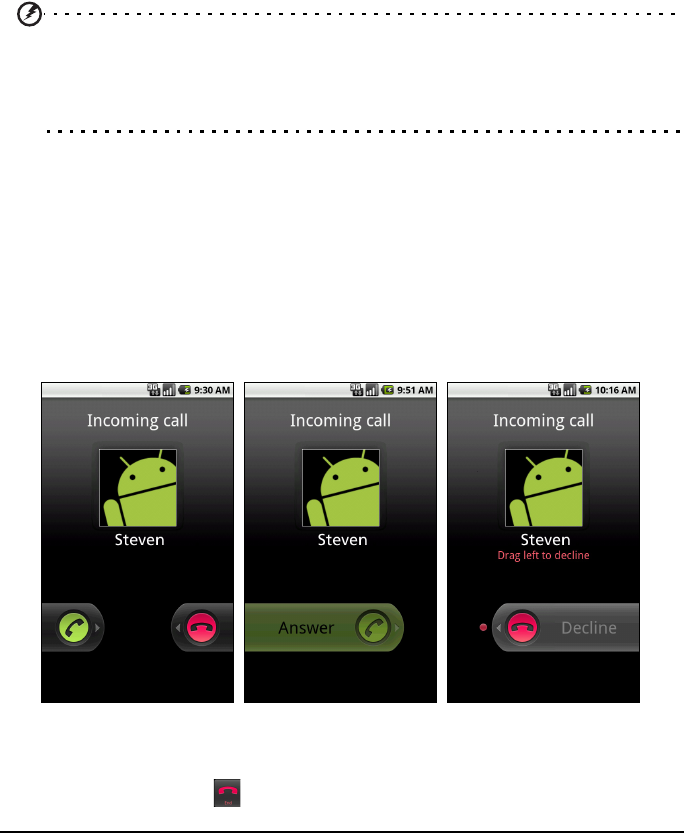
Answering or declining a call
When you have an incoming call, the number will be shown on the screen. To
accept or decline the call, drag the appropriate button across the screen.
Ending a call
To end the call, press the Power button, or if the screen is active, press the
Menu button, then tap .
21Onscreen call options
Using the speakerphone
The speakerphone function allows you to make calls
without having to hold your smartphone. This handsfree
function is especially useful for multitasking.
To activate the speakerphone, press the Menu button, then
tap Speaker. Tap Speaker again to disable the
speakerphone.
Muting a call
To mute a call, tap Mute on the voice call screen to switch
off the microphone. Tap Mute again to switch the
microphone back on.
Saving a dialed number to contacts
You can save a number you have dialed to your contacts for future use.
1. Select the number from the Call log tab, and tap Add to contacts.
2. Tap Create new contact and select how to complete the action. Please refer
to “Adding a contact“ on page 17.
Conference calls
If you have one call on hold and another online, you can combine both calls to
create a conference call.
After the first call is established, tap Add call to add a second call. Tap Merge
calls to start the conference call.
Tap Manage to split the conference call or end one of the calls.
22
Messaging
This chapter shows you how to set up and use the SMS and MMS functions of
your smartphone.
SMS and MMS messages are accessed via Messaging. Messaging automatically
arranges received and sent messages into threads.
To access Messaging tap Messaging on the Home screen.
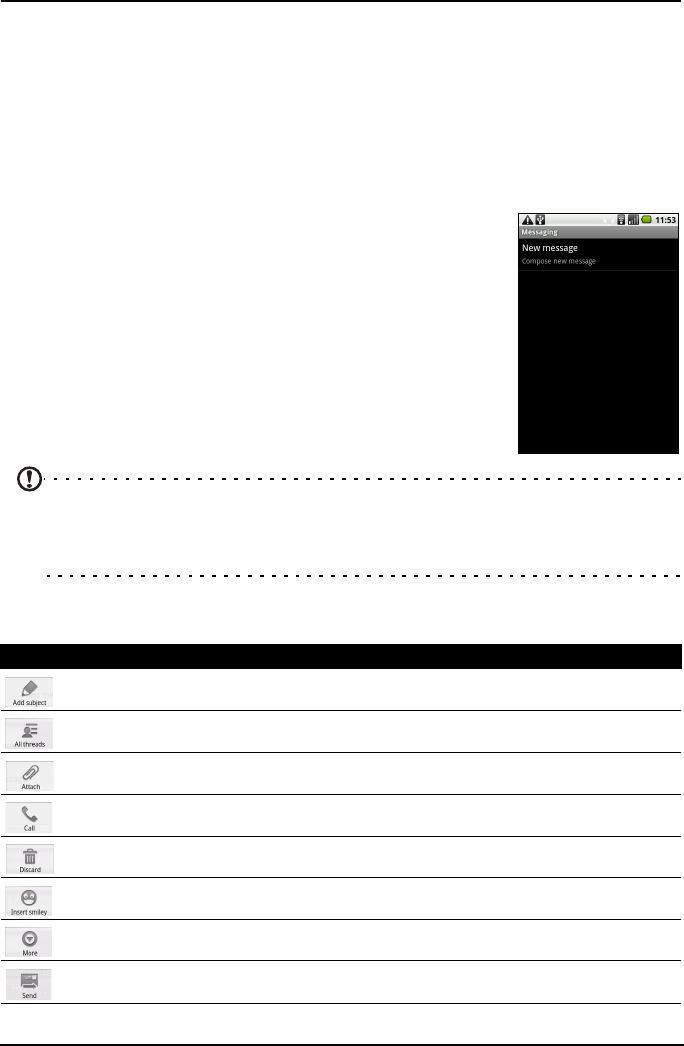
Creating a new message
You can use your phone to compose SMS or MMS
messages.
Tap New message to compose a new message.
Enter the recipient’s phone number or name in the To
field. Suggested contacts will be displayed in a drop-down
list below the text field. To select a suggested contact, tap
the contact’s name.
Once you have entered the recipient, enter your message
in the text box labeled Type to compose.
Note: An SMS message is normally limited to 160 characters. If your message is longer
than 160 characters, it will be sent as multiple linked messages. Most phones will
automatically join the linked messages to present the recipient with a single long
message, however, some older phones do not have this ability.
Press the Menu button to see what options are available when creating a new
message.The options change depending on the status of the message.
Icon Description
Convert the SMS to an MMS, allowing you to add a subject to the message.
View all the threads currently on your phone.
Convert the SMS to an MMS, allowing you to attach a file to the message.
Open the Dialer to call the recipient.
Discard the message.
Insert a smiley/emoticon into your message text.
Show other available options.
Send the message.
23Replying to a message
Replying to a message
When a new text message arrives a message icon appears in the Notification
area and the message icon on the top of the phone lights up.
Tap Messaging on the Home screen to view the message list or expand the
Notification area to see a summary of the message. Tap the summary to open
the message list.
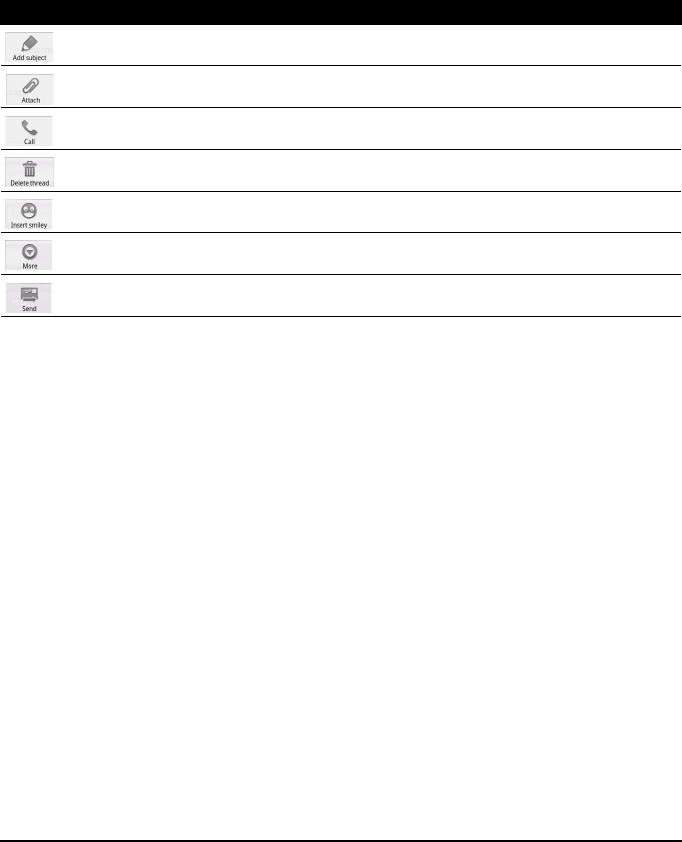
To reply to an SMS or MMS message, open the message from the message list.
Enter your text in the text box labeled Type to compose. Press the Menu button
to see available options.
Icon Description
Convert the SMS to an MMS, allowing you to add a subject to the message.
Convert the SMS to an MMS, allowing you to attach a file to the message.
Open the Dialer to call the recipient.
Delete the thread.
Insert a smiley/emoticon into your message text.
Show other available options.
Send the message.
24
MMS messages
MMS messages are similar to text messages but also allow you to attach
multimedia files such as pictures, audio or video clips. Each MMS message can
be up to 300 kB in size.
Note: You need to set up an MMS profile before you can send MMS messages.
Normally, your smartphone will set up the profile for you based on information
retrieved from your provider.
Tip: Ask your network provider for the necessary information if you need to manually
set up the MMS profile.
Receiving MMS messages
When a new MMS message arrives, a message icon appears at the top of the
screen and a notification message is displayed.
1. Open Messaging to view a summary of the message.
2. Tap Download to download the message content.
Note: Downloads can take a long time, depending on your connection quality. If you
reply or open another application, the download will be stopped.
Important: You may be charged to download message content, especially if you are
roaming. Please contact your provider if you have any questions.
3. Tap the message to view the content.
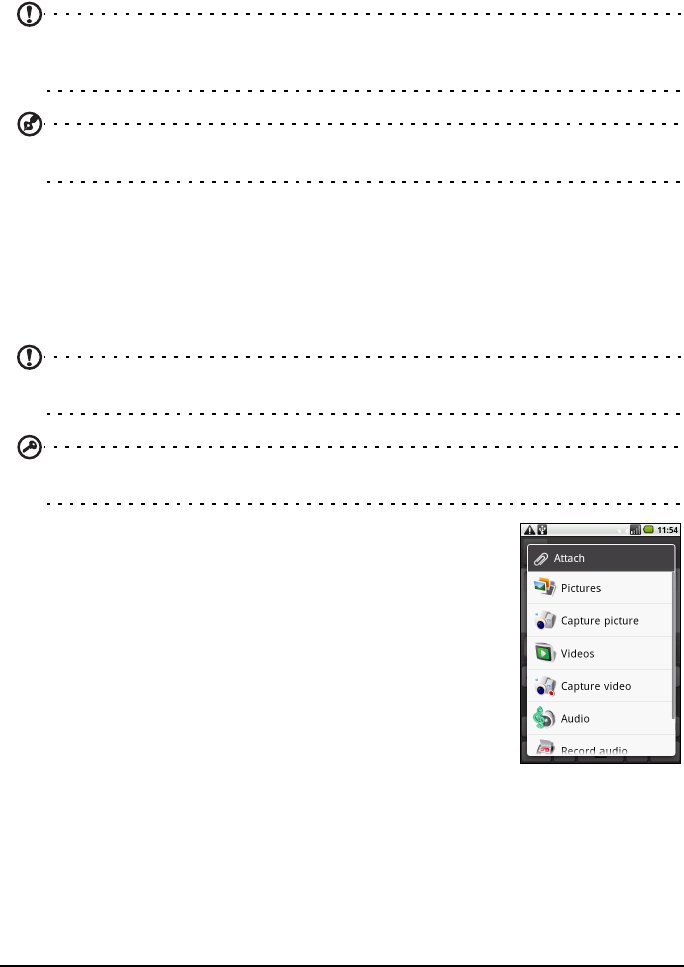
4. Press the Menu button and tap Reply to reply to the
message. The message window will appear. Simple text
replies will be sent as SMS messages. If you wish to
attach a file, press the Menu button and tap Attach.
You will be presented with a menu of options.
5. When you have finished composing the message, press
the Menu button and tap Send.
25Browsing the Internet
Going online
Browsing the Internet
In order to browse the Internet with your smartphone, you must be connected
to a data or wireless network.
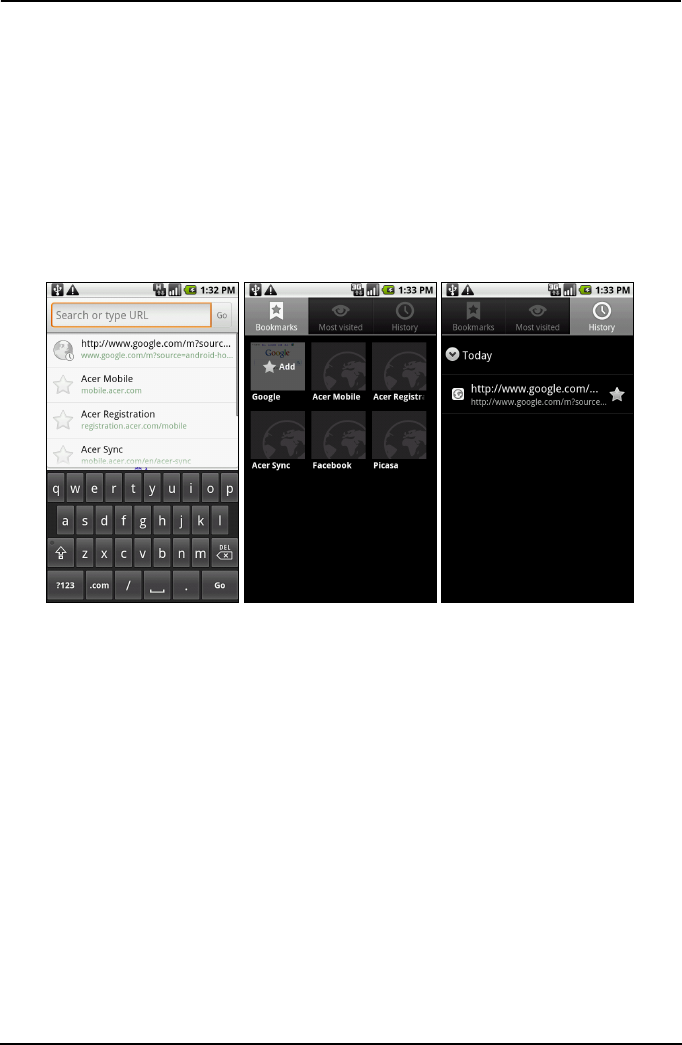
Using the browser
Tap Browser on the Home screen to start browsing. To open a new website, tap
the address box at the top of the page. Enter the address using the keyboard
and tap Go.
To view your browsing history, bookmarks or frequently visited sites, open the
browser then press and hold the back button.
You may open multiple pages. When a page is open, press the Menu button
and tap New window from the menu that opens. Tap Windows to view all the
windows that are open.
You can zoom in or out of pages using the zoom buttons that appear when you
tap the screen. Double-tap to zoom in to an area on the screen, double-tap
again to zoom out and see the entire page. Tap and hold an item on a page to
open a contextual menu.

26
Voice Search
You can search the Internet using your voice. Open Voice Search from the
applications tab.
When you see the “Speak now” prompt, state your query clearly into the
microphone. You will soon see search results.
Note: Voice search is available only in some regions.
Setting up Email
Your smartphone enables you to access your email. Most
popular ISPs can be set up in two steps. Tap the
Applications tab and then Email to start setting up your
email access.
If necessary, enter your email address and tap Manual
setup to enter the parameters manually. Tap Next to finish
the setup process.
The combined inbox feature of your smartphone allows
you to view emails from multiple accounts in a single
inbox.
Note: If you want to access email from a Google mail account you should use the
Gmail application.
Online applications
Your smartphone has a variety of applications installed on it from the factory.
Note: Applications installed may vary according to your region.
These applications may include:
•Acer Sync: Sync your data between your computer and the Google
servers.
27Online applications
•Facebook: View your Facebook profile and keep up-to-date with your
friends.
•Maps:Get easy-to-follow directions using Google Maps.
•YouTube: View the Most viewed and Most discussed video clips on
TouTube.
Android market
Note: The Android Market may not be available in all countries and regions.
Note: You need to have a Google account set up and active on your phone before you
can use the Android Market.
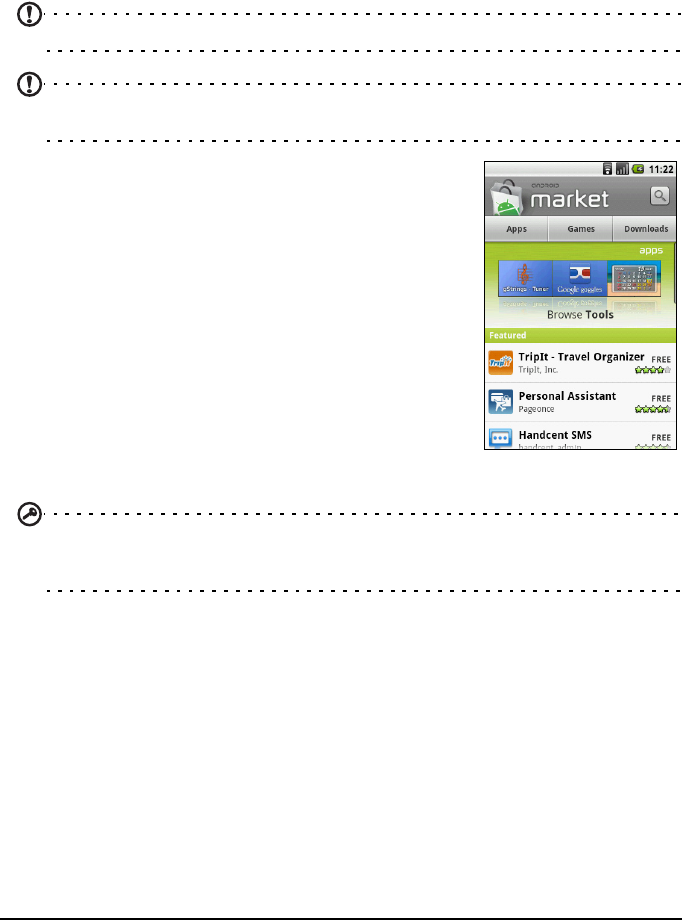
Tap Market from the applications tab to open the
Android Market. Here you can obtain a variety of add-
on programs and applications to enhance the
functionality of your smartphone. The first time you
access the Android Market, you will need to read and
accept the Terms of Service.
You can browse the market by category or tap the
search icon to search for a specific application.
Once you have selected an application, tap the Install
button to download and install the application. You
will be told which services on your phone that the
application has access to. Tap OK to proceed with the
installation.
You may keep track of the download progress from the Notification Area.
Important: Some applications may require payment before you can download them.
You will need to have a Google Checkout account in order to pay for these
applications.
Uninstalling downloaded applications
Once you’ve downloaded and installed an application, you may uninstall the
application by tapping Settings from the Applications tab. Select Applications >
Manage applications. Tap the application you wish to uninstall, tap Uninstall
and confirm the uninstall.
28
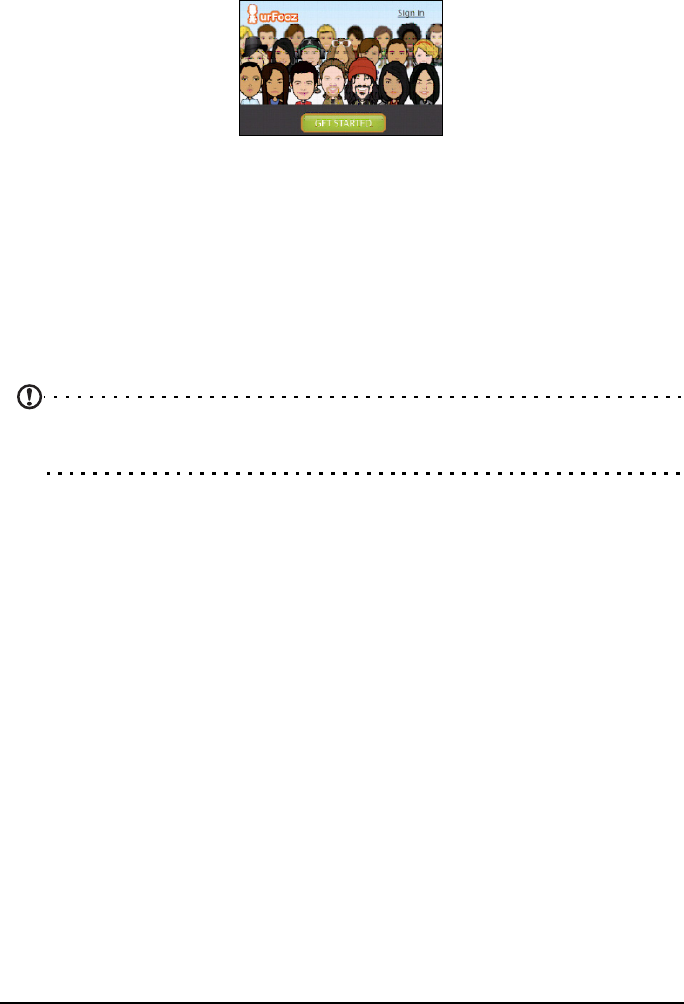
urFooz
urFooz is a portable avatar that lets you share information across your favorite
social networks, blogs and more.
Easily organize your Web favorites, such as photos, videos, bookmarks and
more, with a urFooz ID. urFooz gives you:
• One identity for all your online activities;
• An avatar that represents the "virtual" you; and
• A single connection for all your Web favorites.
To start urFooz, open the application menu and tap UrFooz.
Additional tools on the urFooz Internet site let you edit and manage your Fooz
avatar(s), create new avatars and share them on Facebook, MySpace, blogs and
more. Go to www.urfooz.com.
Note: Fuhu, Spinlets, Spinlet, urFooz, Fooz Avatars, Fooz Creator, Fooz Card, and Fooz
World are trademarks or registered trademarks of Fuhu, Inc. in the U.S. and/or other
countries.
29Camera icons and indicators
Using the Camera
Your smartphone features a 3.2-megapixel digital camera mounted on the rear.
This section will take you through all the steps in taking photos and videos with
your smartphone.
Note: You need to have a microSD card inserted into the microSD slot before you can
use the camera.
To activate the camera, press the camera button or tap the Applications tab >
Camera.
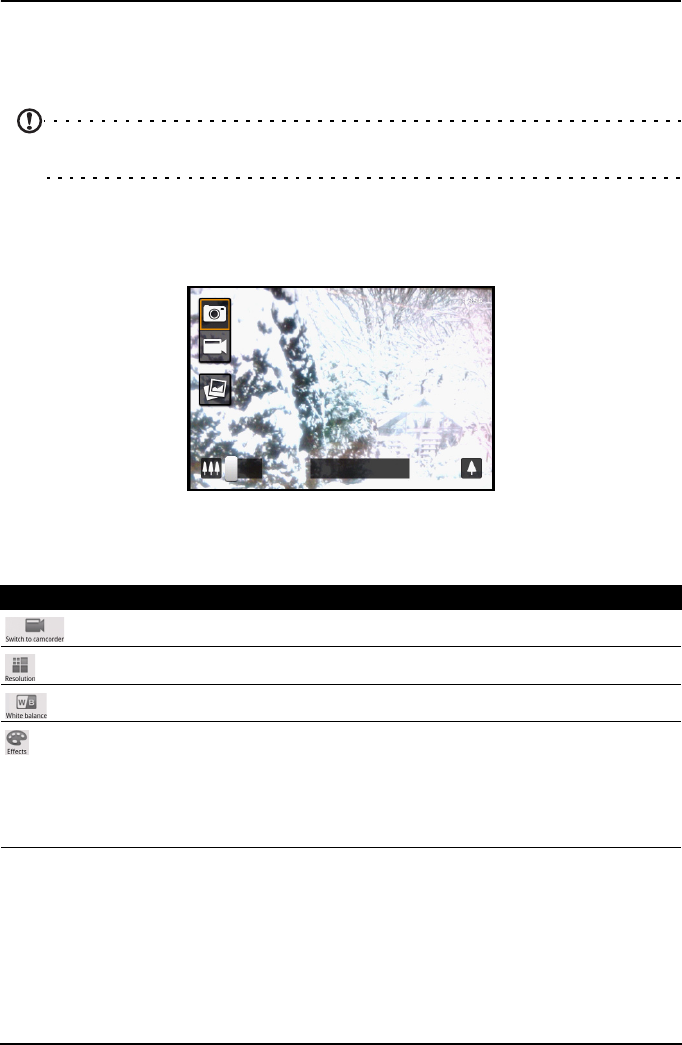
Camera icons and indicators
In the camera window, the four icons on the left show you the current settings.
Use the zoom slider at the bottom of the screen to adjust the zoom.
To adjust the settings, press the Menu button. The menu options are:
Icon Description
Switch to camcorder mode to shoot video.
Set the photo resolution.
Adjust the white balance.
Apply an effect to the photo/video. Effects are:
• Mono: Black and white.
• Negative: Uses negative colors.
• Solarize: Highlights green and blue hues.
• Sepia: Gives a brown/sepia tint.
• Posterize: Highlights the red hues.
• Aqua: Gives an aqua tint.
30
Taking a photo
1. Ensure you have adjusted the parameters described above.
2. Frame your subject and steady your smartphone.
3. Zoom in or out as needed.
4. Press the camera button down to take the photo.
Shooting a video
Turn on camcorder mode by tapping the video icon from the camera menu.
1. Ensure you have adjusted the parameters described above.
2. Frame your subject and steady your smartphone.
3. Zoom in or out as needed.
4. Press the camera button down to begin recording.
5. Press the camera button down a second time to stop recording.
Supported formats
The following file formats are supported:
Viewing photos and videos
After you have taken your photo or video, it is automatically saved.
Once you have taken a photo or video, you can view the it in Gallery by tapping
. Alternatively, open the Applications tab and tap Gallery. From Gallery you
can share the file directly via Acer Share (to Flickr or Facebook), Gmail,
Messaging, Picasa, YouTube or as a Roadsync message.
Note: Share options vary depending on the file type.
Change the default settings. Settings are:
• Store GPS data in pictures:
• JPEG quality: Set the JPG quality.
• Anti banding: Set anti banding.
• Focus settings: Set auto or infinity focus.
• Resolution: Set the photo resolution.
• Effects: Apply an effect to the photo.
• White balance/lighting: Adjust the white balance.
• Contrast: Adjust the contrast.
• Brightness: Set the brightness.
• ISO: Set the ISO.
• Self timer: Adjust the self timer.
Type Formats
Image JPEG
Video 3GP, MPEG-4, H.263
Icon Description
31Acer Settings
Advanced Settings
Acer Settings
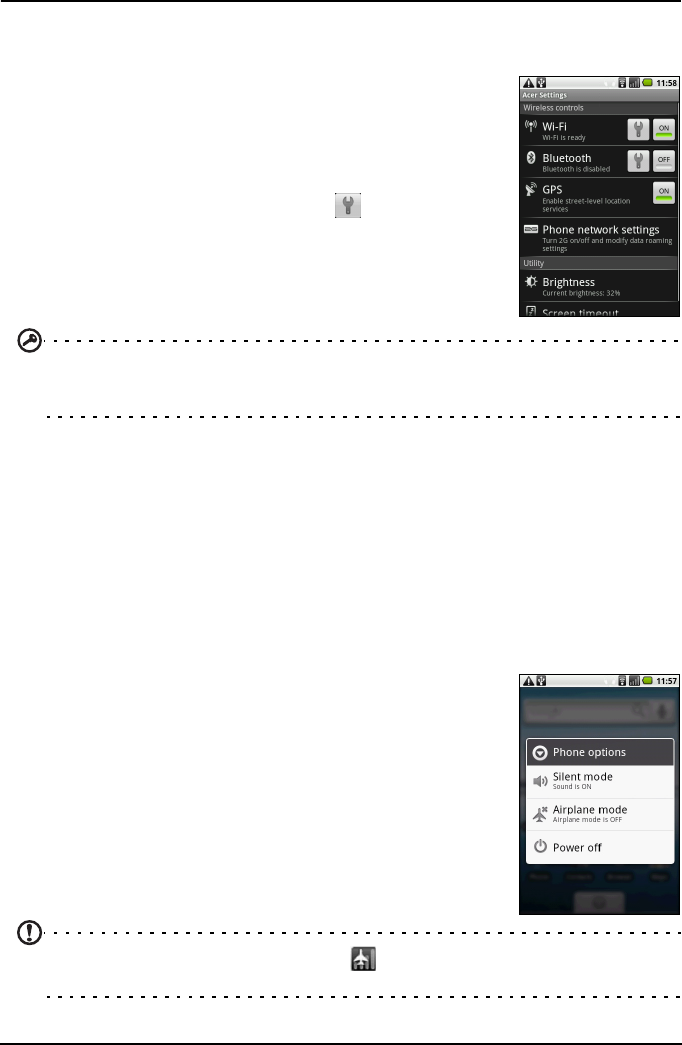
Acer Settings is a convenient all-in-one place for you to
adjust commonly-used settings on your phone. Open the
Applications tab and tap Acer Settings, or tap Acer
Settings on the home screen.
From this screen you can turn Wi-Fi and Bluetooth on or
off or adjust their settings by tapping .
You can also set your Phone network settings, set the
screen Brightness or Screen Timeout.
Important: If your phone is in Airplane mode, the options to turn Wi-Fi and Bluetooth
on will be disabled. Please refer to “Putting your smartphone in airplane mode“ on
page 31 for instructions on turning Airplane mode on or off.
Putting your smartphone in airplane mode
You can enter airplane mode (also known as flight mode) to turn off
telephone, Bluetooth and wireless LAN functions and use your smartphone as a
handheld device during a flight. Check with your airline to make sure this is
permitted onboard.
Switch your smartphone off during takeoff and landing as it may interfere with
aircraft electronic systems.
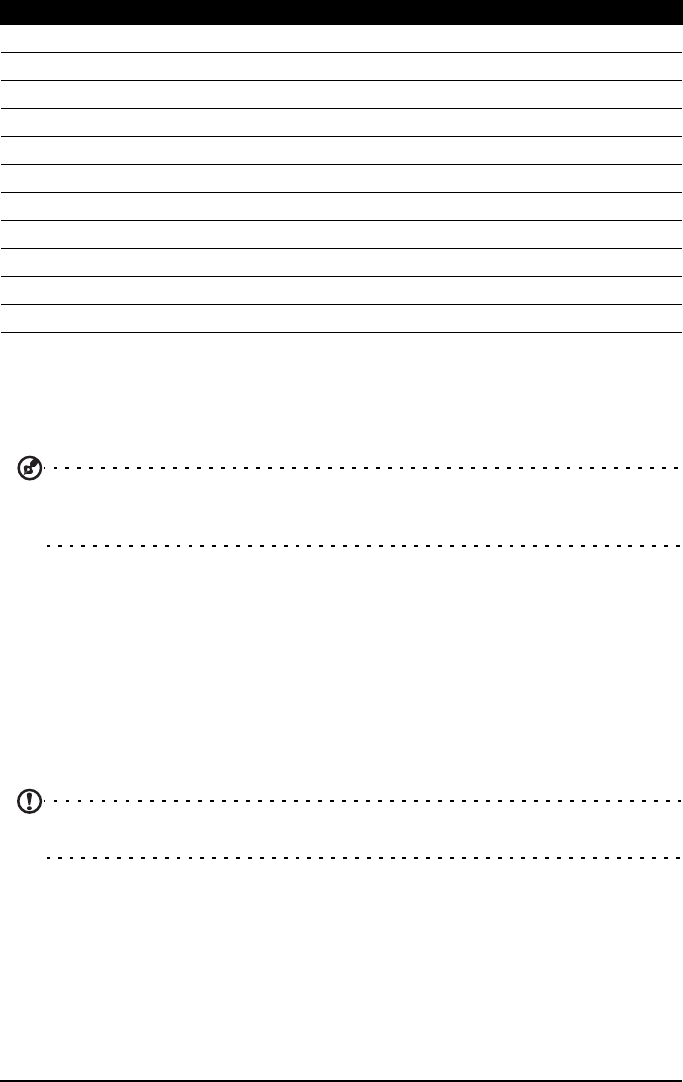
Turning airplane mode on or off
1. Press and hold the power button until you get the
phone options menu.
2. Tap Airplane mode to switch it ON or OFF.
Note: When Airplane mode is active, the
icon will be displayed in the Notification
area.

32
Activating or deactivating connections
Open the Applications tab and tap Settings > Wireless & networks to manage
your connection settings. You can choose to activate one or all connections
from the .
Each connection icon will be highlighted when turned on.
Important: If your phone is in Airplane mode, the option to turn Bluetooth on will be
disabled. Please refer to “Putting your smartphone in airplane mode“ on page 31 for
instructions on turning Airplane mode on or off.
Phone network settings
Tap Mobile networks to adust your network settings. You can turn data
connection on or off when roaming. Restrict the connection to 2G networks
only, specify a network operator and define access point names. Please refer to
“Selecting a network“ on page 33.
Adjusting connection settings
This section will show you how to adjust detailed settings for your phone, data,
Wi-Fi and Bluetooth connections.
Sound & display
Once you have inserted a SIM card, your smartphone will automatically detect
your network provider.
You can adjust your phone settings by tapping Settings > Sound & display.
Item Description
Airplane mode Disable all wireless connections so you can safely use this device
onboard an aircraft.
Wi-Fi Turn the Wi-Fi function on or off.
Wi-Fi settings Set up and manage your wireless access points.
Bluetooth Turn the Bluetooth function on or off.
Bluetooth settings Manage your Bluetooth connections, set a device name and
discoverability.
VPN settings Set up and manage Virtual Private Networks.
Mobile networks Set your options for connecting to mobile networks.
Item Description
Silent mode Turn off all sounds except for alarms and media.
Ringer volume Adjust the ringer volume.
Media volume Set the playback volume for media.
Phone ringtone Set your phone’s ringtone.
Phone vibrate Turn on the vibrate function.
33Adjusting connection settings
Selecting a network
Your phone wil automatically detect your carrier/network settings when you
insert a new SIM card. However, you may prefer to manually select a network.
This may be a good idea when roaming.
Tip: When you are traveling, manually selecting a network may help to reduce your
roaming charges. Check with your home service provider for the network offering the
most competitive rates at your destination.
Selecting a network
1. Open the Applications tab and tap Settings > Wireless & networks > Mobile
networks > Network operators.
2. Your phone will search for available networks.
3. Select your preferred network from the list generated. You phone will
attempt to register on the selected network.
4. Tap Select automatically to connect to the available network with the
strongest signal. This may lead to your phone jumping between networks
when you move around.
Note: Contact your service provider should you have any problems obtaining voice
mail and the text message service center numbers.
Adjusting Bluetooth settings
You can use Bluetooth to exchange information between your smartphone and
other mobile devices.
Bluetooth connections
For all Bluetooth settings, open the Applications tab and tap Settings > Wireless
& networks > Bluetooth settings. Here you can switch Bluetooth on or off, set a
Notification ringtone Set a ringtone for notifications.
Audible touch tones Play tones when using dial pad.
Audible selection Play a sound whenever a screen selection is made.
Haptic feedback Vibrate on certain actions to provide feedback.
SD card notifications Play a sound for SD card notifications.
Orientation Switch screen orientation when the smartphone is rotated.
Animation Animate when opening or closing windows.
Brightness Adjust screen brightness.
Touch screen calibration Calibrate the screen if it is not responding accurately.
Low battery brightness Adjust the brightness of the screen for low battery
Screen timeout Set a delay before the screen will be turned off.
Item Description

34
device name and discoverability. Tap Scan for devices to scan for available
devices.
To connect to a device, tap the device in the list of available devices. You may
be asked to enter a PIN on both devices to establish the connection.
Phone settings
Many phone settings are automatically configured by your smartphone when
you insert a SIM card. The device will communicate with your service provider
and automatically obtain all necessary settings, such as network name, voice
mail and text message center numbers.
You can also view and modify these settings manually through the Phone
Settings screen.
Open the Applications tab and tap Settings > Call settings.
Connecting to a PC
You can connect your phone to a PC using th e supplied USB cable. Plug the USB
sync cable into the mini USB connector on your smartphone. Plug the USB client
connector into an available USB port on your computer.
Tap USB Notification > USB connected. Click Mount.
Synchronizing your calendar
You can sync your calendar on your phone with your Google calendar. Tap
Calendar from the Applications tab to connect to your Google calendar and
sync appointments.
Multimedia playback
Your smartphone comes supplied with a variety of programs that you can use
to enjoy multimedia content.
nemoPlayer
Open nemoPlayer from the applications tab to play media you have stored on
your phone.
nemoPlayer enables you to listen to music, view video clips and pictures in the
following formats.
Type Formats
Audio playback MP3, AAC, AMR, WMA
Ringtone MP3, MIDI, iMelody, WAVE, WMA
Video recording 3GP, MPEG-4, H.263
Video playback 3GP, MPEG-4, H.263, H.264, WMV
35Multimedia playback
Spinlets
Spinlets gives you access to your favorite music, movie and television content.
Get your favorite music, photos and videos from your mobile phone and share
your favorite Spinlets on social networks, websites and more.
Note: Some contents may not be available in some countries.
Launching Spinlets
To launch the Spinlets application, tap Spinlets in the applications tab.
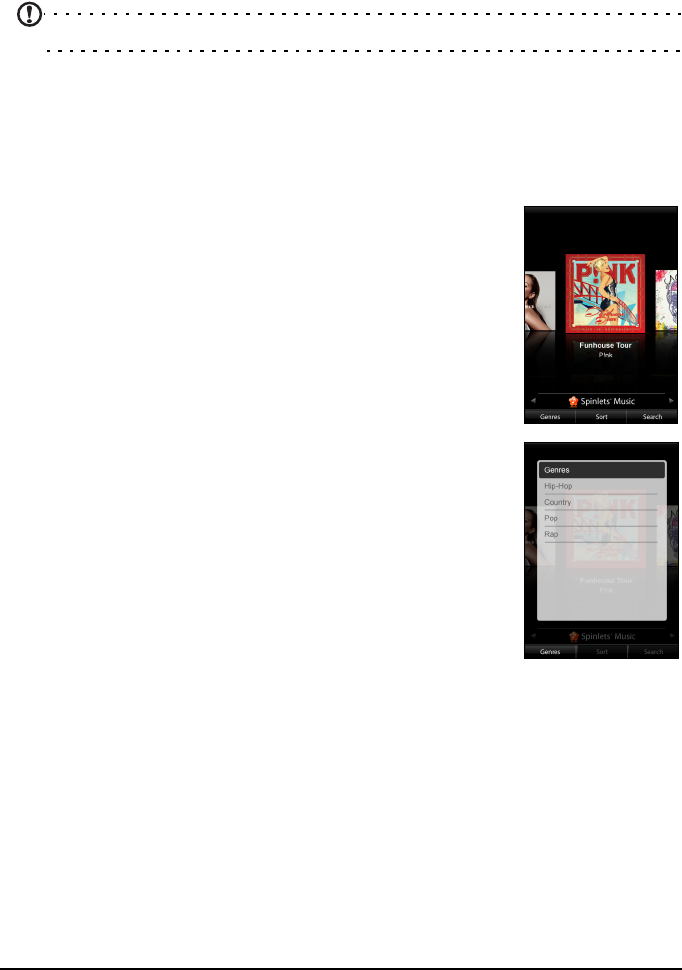
Browsing Spinlets gallery
You can sort or search your media content by albums or genres.
Browsing albums
Once Spinlets is opened, you will see a display of featured
albums. Browse this display by sliding your finger
horizontally (left or right), and select an album by tapping it.
Browsing genres
To browse the Gallery by genre, tap the Genres button on
the bottom left corner of the screen. You will see a new
screen with a list of different genres. Tap on the genre you
wish to view.
Sort
To sort through Spinlets by Name, Ratings, or Newest
content, select the Sort button at the bottom of the screen.
Search
To search the Gallery for a specific name, select the Search button at the
bottom right corner of the screen. Type the name of an artist in the search box
and find potential matches.
36
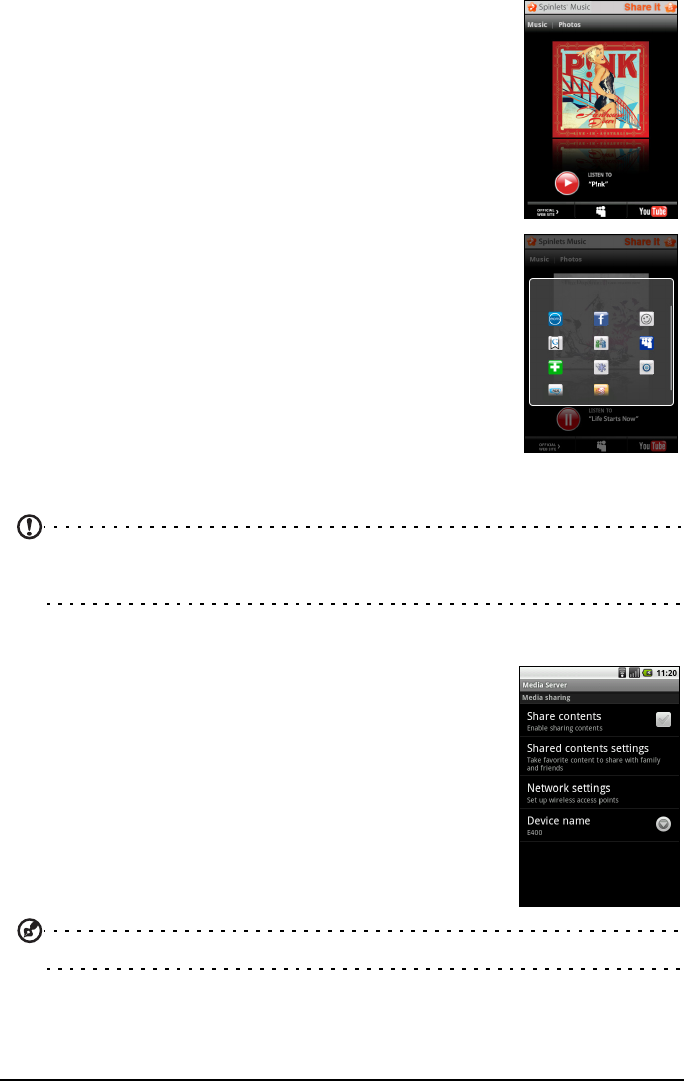
Exploring Spinlets widgets
When you select an album, you will see a Spinlet.
To play the featured song, select the red Play button.
To play selected songs, select the Music tab and choose
which songs you would like to play.
To view artist photos, select the Photos tab.
To visit the artist's social networks and websites, select the
icons located along the bottom of the screen.
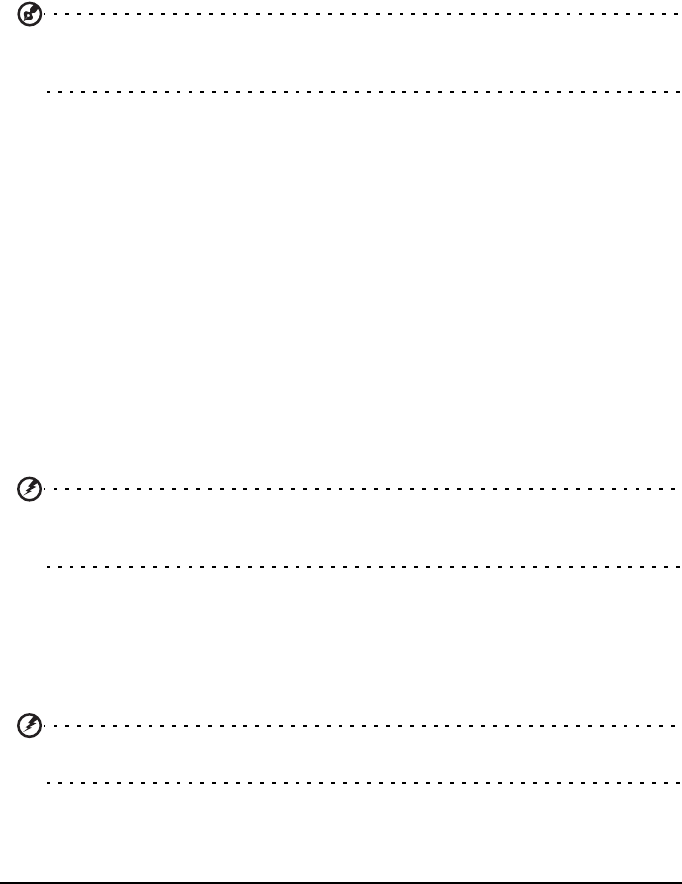
Sharing your Spinlets
You can share your favorite Spinlets in two ways.
To post the Spinlet you are currently viewing to your social
networks, blogs, or other websites, tap Share It at the top
right corner of the Spinlet. Select Post it and tap the icon
of the social network site or blog you want to post the
widget to. Log in to your social network account or blog
page and follow the steps.
Another way you can share Spinlets is through email. Tap
Share It at the top right corner of the Spinlet, select Send
it, and enter your name and your friend’s email address.
Note: Fuhu, Spinlets, Spinlet, urFooz, Fooz Avatars, Fooz Creator, Fooz Card, and Fooz
World are trademarks or registered trademarks of Fuhu, Inc. in the U.S. and/or other
countries.
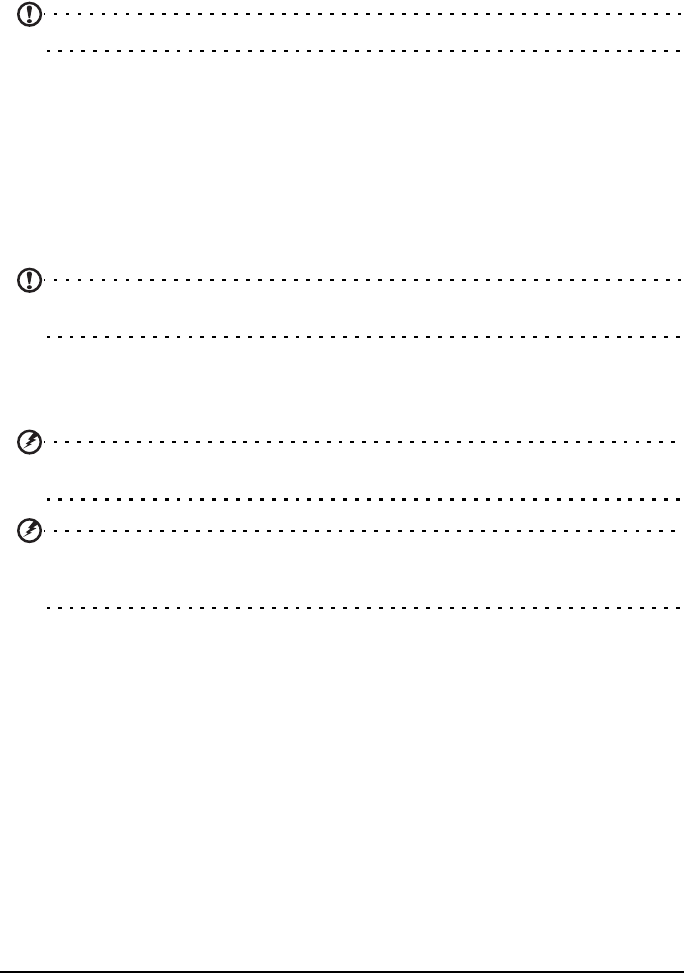
Digital media server
Your phone can act as a digital media server using DLNA
technology. This means that you can use it to send media
content to other DLNA-enabled home entertainment
devices that are connected to a home wireless network.
To set up the media server, open the Applications tab and
tap Media server.
You will need to enable Share Contents before you can
start using the service.
You may select to share your Video, Photo or Playlist
content from Share Content Settings.
Tip: For more information on DLNA, please refer to www.dlna.org/home
37Multimedia playback
Adjusting the volume
Adjust the volume of your phone using the volume button on the side of the
phone. Alternatively, you can set the Ringer volume and Media volume by
opening the Applications tab and going to Settings > Sound & display.
Setting the date and time
Set the date and time by opening the Applications tab and going to Settings >
Date & time.
Tip: If you travel frequently or live in an area that uses daylight saving time, activate
Automatic from this menu. This will enable your smartphone to set the date and time
based on information it receives from the network.
Setting alarms
There are three predefined alarms on your phone by default. To edit alarm
settings, tap Alarm clock in the Applications tab. You may:
• Turn the alarm on or off.
• Set the alarm time.
• Set a ringtone.
• Enable or disable vibrate.
• Set which days to repeat the alarm.
• Give it a label.
Changing location and text options
Set your location and language input preferences by opening the Applications
tab and going to Settings > Locale & text.
Managing applications
Warning! Make sure you trust the source of any program you install. If you are not
sure of the source, do not install a program. Installing programs from unknown
sources increases your risk of virus attacks and theft of personal and private data.
You can remove programs installed on your smartphone to free up extra
storage memory. Open the Applications tab and going to Settings >
Applications.
Here you can allow programs from Unknown sources to be installed and
Manage applications.
Warning! You should only remove programs if you are familiar with the Android
operating system.
38
Obtaining and installing applications
Your smartphone uses the open-source Android platform. To obtain and install
applications for your smartphone, you can tap Market from the applications tab
to open the Google marketplace.
Note: This requires a Gmail/Google mail account.
Resetting your smartphone
You may have to perform a reset if your smartphone fails to respond when
buttons are pressed or the screen is tapped.
Pressing the Reset button interrupts power and restarts the smartphone; it will
not erase personal information, but you may lose information from open
applications. The Reset button is found under your smartphone’s battery cover,
next to the SIM slot.
Note: Before performing a reset, ensure that your smartphone is not locked. Press any
key or tap the screen to see if the phone responds.
Clean boot
A clean boot will restore your smartphone to the factory settings.
Warning! You should only perform a clean boot when all other options have failed to
restore your smartphone to an operational state.
Warning! This will erase all your personal information, any contacts stored on your
phone and any programs you installed.
It will not erase information from the microSD memory card.
If your phone is responding to screen input
Open Settings from the Applications tab, then tap Privacy > Factory data reset;
click Reset phone and then Erase everything to format your phone.
If your phone is not responding to screen input
Turn off your smartphone; to do this you may need to reset your smartphone
(described above).
Press the power button while pressing both the Search and Menu keys. After
the phone has vibrated twice, release all the keys. Your smartphone will clear
settings and then restart.
39Using the headset
Accessories and Tips
This chapter shows you how to use accessories with your smartphone, as well as
provide useful tips for when you are using your smartphone.
Using the headset
Your smartphone comes packaged with a headset with built-in microphone for
handsfree use when making calls.
To use the headset, plug it into the 3.5 mm headphone jack on the phone.
When the headset is plugged in, all audio is routed to the headset, and the
speakers are turned off.
• To answer an incoming call, press the button on the microphone.
• Adjust the volume using the volume up/down button on the
smartphone.
• End the call by pressing the button again.
Using a Bluetooth headset
Your smartphone’s Bluetooth functions make it fully compatible with all
Bluetooth headsets. This allows you to use the unit handsfree when making
calls, without the inconvenience of wires.
Using your smartphone as a modem
Note: When using your smartphone as a modem, the data connection on the device
will be disabled. To enable it again, please disconnect your smartphone from PC or
notebook.
When connected to your PC, your smartphone can function as a modem via
GPRS or 3G connection.
When you insert your SIM card, your phone will automatically configure itself
to use your provider’s GPRS/3G/EDGE service.
Setting up the modem on your PC
Connect your smartphone to a PC via USB, and do the following steps:
1. Install Acer Easy Link on your PC or notebook.
2. When finished, please click Start > All Programs > Acer > Acer Easy Link >
Acer Easy Link to run the application.
3. Press Choose Device.
4. Choose Acer Android Phone. If there are no items in the list, press Refresh to
update it.
5. Press OK.
6. Press Connect when go back to the main screen.
40
7. When the connection status turns to green, it means that the connection is
successful.
8. You can now connect to the Internet using your PC or notebook.
9. When finished, press Disconnect in the main screen.
Note: If the connection fails, please try to restart and reconnect your smartphone to
your PC, and then repeat the installation.
Note: Acer Easy Link can run in the following operation systems: Windows XP/Vista
(32-/64-bit) / Windows 7 (32-/64-bit).
Note: Updates are available at the Acer website. Visit mobile.acer.com.
Creating a new access point
When you need to add another GPRS/3G/EDGE connection on your phone,
obtain the access point name and settings (including username and password if
required) from your wireless service provider.
1. Open the Applications tab and tap Settings > Wireless & networks > Mobile
networks > Access Point Names.
2. Press the Menu button and tap New APN.
3. Enter the APN settings. Tap an item to adjust it.
4. When you have finished press the Menu button and tap Save.
Important: Some providers and countries do not allow the use of a smartphone as a
modem over HSDPA. Please check with your provider before attempting to do so.
Inserting a microSD Card
Your smartphone features a memory expansion slot that accepts a microSD card
to expand memory and storage capacity.
Please refer to “Installing a SIM or microSD card“ on page 9 for proper
instructions on installing a microSD Card.

41FAQ and troubleshooting
Appendix
FAQ and troubleshooting
This section lists frequently asked questions that may arise during the use of
your smartphone, and gives easy answers and solutions to these questions.
Aspect Question Answer
Audio Why is there no sound
coming from the
device?
If the headset is plugged into the device,
the speaker is automatically shut off.
Disconnect the headset.
Check that the device volume setting is not
muted.
Check that the volume control is not at its
lowest setting.
Multimedia files Why can’t I view my
picture files?
You may be trying to view an image that is
not supported. Refer to “Multimedia” on
page 47 for more information.
Why can’t I view my
video files?
You may be trying to view a video that is
not supported. Refer to “Multimedia” on
page 47 for more information.
Why can’t I play my
music files?
You may be trying to play a file that is not
supported. Refer to “Multimedia” on
page 47 for more information.
System information
and performance
How do I check the OS
version of my device?
Tap Menu > Settings > About phone to
check the OS version (Kernel/build number)
and other hardware and software
information.
Power I couldn’t turn on the
device.
The battery power may be depleted.
Recharge the device. Refer to “Charging the
battery” on page 8 for more information.
Heat The phone heats up
when charging or
making long duration
calls.
It is normal for the phone to heat up when
charging. When charging is complete, it will
return to its normal temperature.
It is also normal for the phone to heat up
during long periods of use, such as watching
a video or a long phone conversation.
All Acer phones are factory tested before
release.

42
Other sources of help
Warnings and precautions
• Do not use this product near water.
• Do not place this product on an unstable cart, stand or table. If the product falls,
it could be seriously damaged.
• Slots and openings are provided for ventilation to ensure reliable operation of
the product and to protect it from overheating. These openings must not be
blocked or covered. The openings should never be blocked by placing the product
on a bed, sofa, rug or other similar surface. This product should never be placed
near or over a radiator or heat register, or in a built-in installation unless proper
ventilation is provided.
• Never push objects of any kind into this product through cabinet slots as they
may touch dangerous voltage points or short-out parts that could result in a fire
or electric shock. Never spill liquid of any kind onto or into the product.
• To avoid damage of internal components and to prevent battery leakage, do not
place the product on a vibrating surface.
• Never use this product when engaging in sporting activities, exercising, or in any
vibrating environment which may cause a short circuit or damage, and even a risk
of explosion from the battery pack.
CAUTION when listening to music
To protect your hearing, follow these instructions.
• Increase the volume gradually until you can hear clearly and comfortably.
• Do not increase the volume level after your ears have adjusted.
• Do not listen to music at high volumes for extended periods.
• Do not increase the volume to block out noisy surroundings.
• Decrease the volume if you can’t hear people speaking near you.
Battery information
This product uses a Lithium Polymer battery. Do not use it in a humid, wet and/or
corrosive environment. Do not put, store or leave your product in or near a heat source,
in a high temperature location, in strong direct sunlight, in a microwave oven or in a
pressurized container, and do not expose it to temperatures over 60 °C (140 °F). Failure to
follow these guidelines may cause the battery to leak acid, become hot, explode or ignite
and cause injury and/or damage. Do not pierce, open or disassemble the battery. If the
battery leaks and you come into contact with the leaked fluids, rinse thoroughly with
water and seek medical attention immediately. For safety reasons, and to prolong the
For information on: Refer to:
Programs on your smartphone and
additional programs that can be installed
on your smartphone
This User Guide, which provides online
reference for using your smartphone.
Up-to-date information regarding your
smartphone
www.acer.com
mobile.acer.com
Service enquiries www.acer.com/support/
43Warnings and precautions
lifetime of the battery, charging will not occur at low (below 0 °C/32 °F) or high (over 40
°C/104 °F) temperatures.
The full performance of a new battery is achieved only after two or three complete
charge and discharge cycles. The battery can be charged and discharged hundreds of
times, but it will eventually wear out. When the talk and standby times are noticeably
shorter than normal, buy a new battery. Use only Acer approved batteries, and recharge
your battery only with Acer approved chargers designated for this device.
Unplug the charger from the electrical plug and the device when not in use. Do not leave
a fully charged battery connected to the ac charger, since overcharging may shorten its
lifetime. If left unused, a fully charged battery will lose its charge over time. If the battery
is completely discharged, it may take a few minutes before the charging indicator
appears on the display or before any calls can be made.
Use the battery only for its intended purpose. Never use any charger or battery that is
damaged.
Do not short-circuit the battery. Accidental short-circuiting can occur when a metallic
object such as a coin, clip, or pen causes direct connection of the positive (+) and negative
(-) terminals of the battery. (These look like metal strips on the battery.) This might
happen, for example, when you carry a spare battery in your pocket or purse. Short-
circuiting the terminals may damage the battery or the connecting object.
Leaving the battery in hot or cold places, such as in a closed car in summer or winter
conditions, will reduce the capacity and lifetime of the battery. Always try to keep the
battery between 15 °C and 25 °C (59 °F and 77 °F). A device with a hot or cold battery may
not work temporarily, even when the battery is fully charged. Battery performance is
particularly limited in temperatures well below freezing.
Do not dispose of batteries in a fire as they may explode. Batteries may also explode if
damaged. Dispose of batteries according to local regulations. Please recycle when
possible. Do not dispose as household waste.
Replacing the battery pack
Your smartphone uses lithium batteries. Replace the battery with the same type as that
which came bundled with your product. Use of another battery may present a risk of fire
or explosion.
Warning! Batteries may explode if not handled properly. Do not disassemble or
dispose of them in fire. Keep them away from children. Follow local regulations when
disposing of used batteries.
Additional safety information
Your device and its enhancements may contain small parts. Keep them out of the reach of
small children.
Operating environment
Warning! For safety reasons, turn off all wireless or radio transmitting devices when
using your smartphone device under the following conditions. These devices may
include, but are not limited to: wireless LAN (WLAN), Bluetooth and/or 3G.

44
Remember to follow any special regulations in force in any area, and always switch off
your device when its use is prohibited or when it may cause interference or danger. Use
the device only in its normal operating positions. Do not cover the antenna with metal
and you should position the device at the above-stated distance from your body. To
successfully transmit data files or messages, this device requires a good quality connection
to the network. In some cases, transmission of data files or messages may be delayed until
such a connection is available. Ensure that the above separation distance instructions are
followed until the transmission is completed. Parts of the device are magnetic. Metallic
materials may be attracted to the device, and persons with hearing aids should not hold
the device to the ear with the hearing aid. Do not place credit cards or other magnetic
storage media near the device, because information stored on them may be erased.
Medical devices
Operation of any radio transmitting equipment, including wireless phones, may interfere
with the functionality of inadequately protected medical devices. Consult a physician or
the manufacturer of the medical device to determine if they are adequately shielded
from external RF energy or if you have any questions. Switch off your device in health
care facilities when any regulations posted in these areas instruct you to do so. Hospitals
or health care facilities may be using equipment that could be sensitive to external RF
transmissions.
Pacemakers. Pacemaker manufacturers recommend that a minimum separation of 15.3
cm (6") be maintained between wireless devices and a pacemaker to avoid potential
interference with the pacemaker. These recommendations are consistent with the
independent research by and recommendations of Wireless Technology Research. Persons
with pacemakers should do the following:
• Always keep the device more than 15.3 cm (6") from the pacemaker.
• Not carry the device near your pacemaker when the device is switched on. If you
suspect interference, switch off your device, and move it.
Hearing aids. Some digital wireless devices may interfere with some hearing aids. If
interference occurs, consult your service provider.
Vehicles
RF signals may affect improperly installed or inadequately shielded electronic systems in
motor vehicles such as electronic fuel injection systems, electronic antiskid (antilock)
braking systems, electronic speed control systems, and air bag systems. For more
information, check with the manufacturer, or its representative, of your vehicle or any
equipment that has been added. Only qualified personnel should service the device, or
install the device in a vehicle. Faulty installation or service may be dangerous and may
invalidate any warranty that may apply to the device. Check regularly that all wireless
equipment in your vehicle is mounted and operating properly. Do not store or carry
flammable liquids, gases, or explosive materials in the same compartment as the device,
its parts, or enhancements. For vehicles equipped with an air bag, remember that air bags
inflate with great force. Do not place objects, including installed or portable wireless
equipment in the area over the air bag or in the air bag deployment area. If in-vehicle
wireless equipment is improperly installed, and the air bag inflates, serious injury could
result. Using your device while flying in aircraft is prohibited. Switch off your device
before boarding an aircraft. The use of wireless teledevices in an aircraft may be
dangerous to the operation of the aircraft, disrupt the wireless telephone network, and
may be illegal.

45Emergency calls
Potentially explosive environments
Switch off your device when in any area with a potentially explosive atmosphere and
obey all signs and instructions. Potentially explosive atmospheres include areas where you
would normally be advised to turn off your vehicle engine. Sparks in such areas could
cause an explosion or fire resulting in bodily injury or even death. Switch off the device at
refueling points such as near gas pumps at service stations. Observe restrictions on the use
of radio equipment in fuel depots, storage, and distribution areas; chemical plants; or
where blasting operations are in progress. Areas with a potentially explosive atmospheres
are often, but not always, clearly marked. They include below deck on boats, chemical
transfer or storage facilities, vehicles using liquefied petroleum gas (such as propane or
butane), and areas where the air contains chemicals or particles such as grain, dust or
metal powders.
Follow any restrictions. Do not use the device where blasting is in progress.
Emergency calls
Important: Wireless phones, including this device, operate using radio signals, wireless
networks, landline networks, and user-programmed functions. Because of this,
connections in all conditions cannot be guaranteed. You should never rely solely on any
wireless device for essential communications like medical emergencies.
If certain features are in use, you may first need to turn those features off before you can
make an emergency call. Consult this guide or your service provider for more information.
When making an emergency call, give all the necessary information as accurately as
possible. Your wireless device may be the only means of communication at the scene of
an accident. Do not end the call until given permission to do so.
Disposal and recycling information
Do not throw this electronic device into the trash when discarding.
To minimize pollution and ensure utmost protection of the global
environment, please recycle. For more information on the Waste from
Electrical and Electronics Equipment (WEEE) regulations, visit
www.acer-group.com/public/Sustainability/sustainability01.htm
Mercury advisory
For projectors or electronic products containing an LCD/CRT monitor or display:
Lamp(s) inside this product contain mercury and must be recycled or disposed of
according to local, state or federal laws. For more information, contact the
Electronic Industries Alliance at www.eiae.org. For lamp-specific disposal
information, check www.lamprecycle.org.
Taking care of your smartphone
1. DO take care not to scratch the screen of your smartphone. Keep the screen clean.
When working with your smartphone, use your finger or fingernail. Never use an
actual pen or pencil or other sharp object on the screen surface.
2. DO NOT expose your smartphone to rain or moisture. Do not let water enter the
circuitry through the front panel buttons or expansion slots. In general, treat your
smartphone as you would a mobile phone or other small electronic device.
3. DO be careful not to drop your smartphone or subject it to any strong impact. Do not
place your smartphone in your back pocket.

46
4. DO NOT expose your smartphone to extreme temperatures. For example, do not leave
your smartphone on the dashboard of a car on a hot day or when temperatures are
below freezing point. Also, keep it away from heaters and other sources of heat.
5. DO NOT use or store your smartphone in any location that is dusty, damp or wet.
6. DO use a soft, damp cloth to clean your smartphone. If the surface of the screen
becomes soiled, clean it with a soft cloth moistened with diluted window-cleaning
solution.
7. DO NOT press down on the screen with force, otherwise you may crack the screen.
47Specifications
Specifications
Performance
• Qualcomm QSD 7227, 600 MHz
• System memory:
• 256 MB of SDRAM
• 512 MB of Flash ROM
• Google Android operating system
Display
• 3.5” TFT-LCD resistive touchscreen
• 480 x 320 resolution
• 65K colors support
Multimedia
• CD-quality stereo output
• Mono speaker 0.5 W (max)
• Omni-directional microphone
• Formats supported
USB connector
• Micro-USB connector
• USB Client
• DC power-in (5 V, 1 A)
Connectivity
• Bluetooth 2.1+EDR
• IEEE Wi-Fi 802.11 b/g WLAN
• GSM/GPRS/EDGE 850 / 900 / 1800 / 1900
• HSDPA / HSUPA
• Europe: HSPA/WCDMA 900 / 2100 MHz
• United States: HSPA/WCDMA 850 / 1900 / 2100 MHz
Camera
• 3.2-megapixel
Expansion
• microSD memory card (up to 32 GB)
Type Formats
Audio playback MP3, AAC, AMR
Ringtone MP3, MIDI, DLS, iMelody, WAVE
Video recording 3GP, MPEG-4, H.263
Video playback 3GP, MPEG-4, H.263, H.264

48
Battery
• High density, rechargeable 1090 mAh Li-Ion Polymer / Li-Ion battery
(replaceable)
Note: Length of battery operation will depend on power consumption which is based
on system resource use. For example, constantly using the backlight or using power-
demanding applications will shorten battery life between charges.
Dimensions
• Stylish, light and robust design
Height 115 mm
Width 59.3 mm
Thickness 12 mm (12.6 mm at camera area)
Weight <125 g (with battery)

49Regulatory information
Regulatory information
LCD pixel statement
The LCD unit is produced with high-precision manufacturing techniques. Nevertheless,
some pixels may occasionally misfire or appear as black or red dots. This has no effect on
the recorded image and does not constitute a malfunction.
Radio device regulatory notice
Note: Regulatory information below is for models with wireless LAN and/or Bluetooth only.
General
This product complies with the radio frequency and safety standards of any country or
region in which it has been approved for wireless use. Depending on configuration, this
product may or may not contain wireless radio devices (such as wireless LAN and/or Blue-
tooth modules). Information below is for products with such devices.
Wireless operation channels for different domains
FCC regulations
This mobile phone complies with part 15 of the FCC Rules. Operation is subject to the
following two conditions: (1) This device may not cause harmful interference, and (2) this
device must accept any interference received, including interference that may cause
undesired operation.
This mobile phone has been tested and found to comply with the limits for a Class B
digital device, pursuant to Part 15 of the FCC Rules. These limits are designed to provide
reasonable protection against harmful interference in a residential installation. This
equipment generates, uses and can radiated radio frequency energy and, if not installed
and used in accordance with the instructions, may cause harmful interference to radio
communications. However, there is no guarantee that interference will not occur in a
particular installation If this equipment does cause harmful interference to radio or
television reception, which can be determined by turning the equipment off and on, the
user is encouraged to try to correct the interference by one or more of the following
measures:
• Reorient or relocate the receiving antenna.
• Increase the separation between the equipment and receiver.
• Connect the equipment into an outlet on a circuit different from that to which
the receiver is connected.
• Consult the dealer or an experienced radio/TV technician for help.
Changes or modifications not expressly approved by the party responsible for compliance
could void the user's authority to operate the equipment.
N. America 2.412-2.462 GHz Ch01 through Ch11
Japan 2.412-2.484 GHz Ch01 through Ch14
Europe ETSI 2.412-2.472 GHz Ch01 through Ch13

50
RF exposure warning:
The equipment complies with FCC RF exposure limits set forth for an uncontrolled
environment.
The antenna(s) used for this transmitter must not be co-located or operating in
conjunction with any other antenna or transmitter.
RF exposure information (SAR)
This mobile phone meets the government's requirements for exposure to radio waves.
This phone is designed and manufactured not to exceed the emission limits for exposure
to radio frequency (RF) energy set by the Federal Communications Commission of the U.S.
Government.
The exposure standard for wireless mobile phones employs a unit of measurement known
as the Specific Absorption Rate, or SAR. The SAR limit set by the FCC is 1.6W/kg.
Tests for SAR are conducted using standard operating positions accepted by the FCC with
the phone transmitting at its highest certified power level in all tested frequency bands.
Although the SAR is determined at the highest certified power level, the actual SAR level
of the phone while operating can be well below the maximum value. This is because the
phone is designed to operate at multiple power levels so as to use only the poser required
to reach the network. In general, the closer you are to a wireless base station antenna,
the lower the power output.
The highest SAR value for the model phone as reported to the FCC when tested for use at
the ear is 1.38 W/kg and when worn on the body, as described in this user guide, is 0.686
W/kg.
Important: Body-worn measurements differ among phone models, depending upon available
enhancements and FCC requirements.
While there may be differences between the SAR levels of various phones and at various
positions, they all meet the government requirements.
The FCC has granted an Equipment Authorization for this model phone with all reported
SAR levels evaluated as in compliance with the FCC RF exposure guidelines. SAR
information on this model phone is on file with the FCC and can be found under the
Display Grant section of
www.fcc.gov/oet/ea/fccid after searching on FCC ID: HLZDME400.
For body worn operation, this phone has been tested and meets the FCC RF exposure
guidelines for use with accessories that contain no metal and that position the handset a
minimum of 1.5 cm from the body. Use of other accessories may not ensure compliance
with FCC RF exposure guidelines. If you do not use a body-worn accessory and are not
holding the phone at the ear, position the handset a minimum of 1.5 cm from your body
when the phone is switched on.
Using your phone with a hearing aid device
Your E400 device is compliant with the FCC Hearing Aid Compatibility (HAC)
requirements. When some wireless phones are used near some hearing devices (hearing
aids and cochlear implants) users may detect a buzzing, humming, or whining noise.
Some hearing devices are more immune than others to this interference noise, and
phones also vary in the amount of interference they generate. The wireless telephone
industry has developed ratings for some of their mobile phones, to assist hearing-device
users in finding phones that may be compatible with their hearing devices. Not all phones

51Regulatory information
have been rated. Phones that have been rated have a label on the box. Your E400 has
been tested for hearing aid device compatibility and has an M3 and/or T3 rating.
These ratings are not guarantees. Results will vary, depending on the level of immunity of
your hearing device and the degree of your hearing loss. If your hearing device happens
to be vulnerable to interference, you may not be able to use a rated phone successfully.
Trying out the phone with your hearing device is the best way to evaluate it for your
personal needs.
M-Ratings: Phones rated M3 or M4 meet FCC requirements and are likely to generate less
interference with hearing devices than phones that are not labeled. M4 is the better/
higher of the two ratings.
T-Ratings: Phones rated T3 or T4 meet FCC requirements and are likely to be more usable
with a hearing device's telecoil ("T Switch" or "Telephone Switch") than unrated phones.
T4 is the better/higher of the two ratings.
Note: Not all hearing devices contain telecoils.
The more immune your hearing aid device is, the less likely you are to experience
interference noise from your wireless phone. Hearing aid devices should have ratings
similar to those of phones. Ask your hearing health-care professional for the rating of
your hearing aid.
Hearing devices may also be measured for immunity to this type of interference. Your
hearing device manufacturer or hearing health professional may help you find results for
your hearing device. The more immune your hearing aid is, the less likely you are to
experience interference noise from wireless devices.
For additional information about the FCC's actions with regard to hearing aid compatible
wireless devices and other steps the FCC has taken to ensure that individuals with
disabilities have access to telecommunications services, please go to www.fcc.gov/cgb/dro

52
Index
B
battery
charging ...........................................8
information ....................................48
Bluetooth
connections ....................................33
headset ...........................................39
C
call history ..............................................19
calls
answering .......................................20
ending ............................................20
onscreen options ............................20
camera
icons and indicators .......................29
information ....................................47
shooting a video ............................30
supported formats .........................30
taking a photo ...............................30
conference calls ......................................21
connectivity ............................................47
contacts
adding and editing ........................17
making calls to a contact ...............20
D
display .....................................................47
E
email .......................................................26
F
FAQs ........................................................41
G
Google ....................................................10
H
help
sources ............................................42
I
international numbers ...........................20
K
keyboard .................................................11
L
LED indicators ...........................................7
M
MMS messages .......................................24
P
performance ...........................................47
phone
connections ..............................32, 33
settings ...........................................34
S
safety regulations ..................................42
speakerphone .........................................21
specifications ..........................................42
spinlets ....................................................35
T
troubleshooting .....................................41
turning on ..............................................10
U
urFooz .....................................................28
USB connector ........................................47
V
views
left .....................................................7
voice calls
the voice call screen .......................20
voice search ............................................26
volume
adjusting .........................................37