Acer orporated MS2130BG Notebook Computer with WLAN User Manual TM370 backup
Acer Incorporated Notebook Computer with WLAN TM370 backup
Contents
- 1. Manual 1 revised
- 2. Manual 2 revised
- 3. Installation manual
- 4. Updated manual page 71
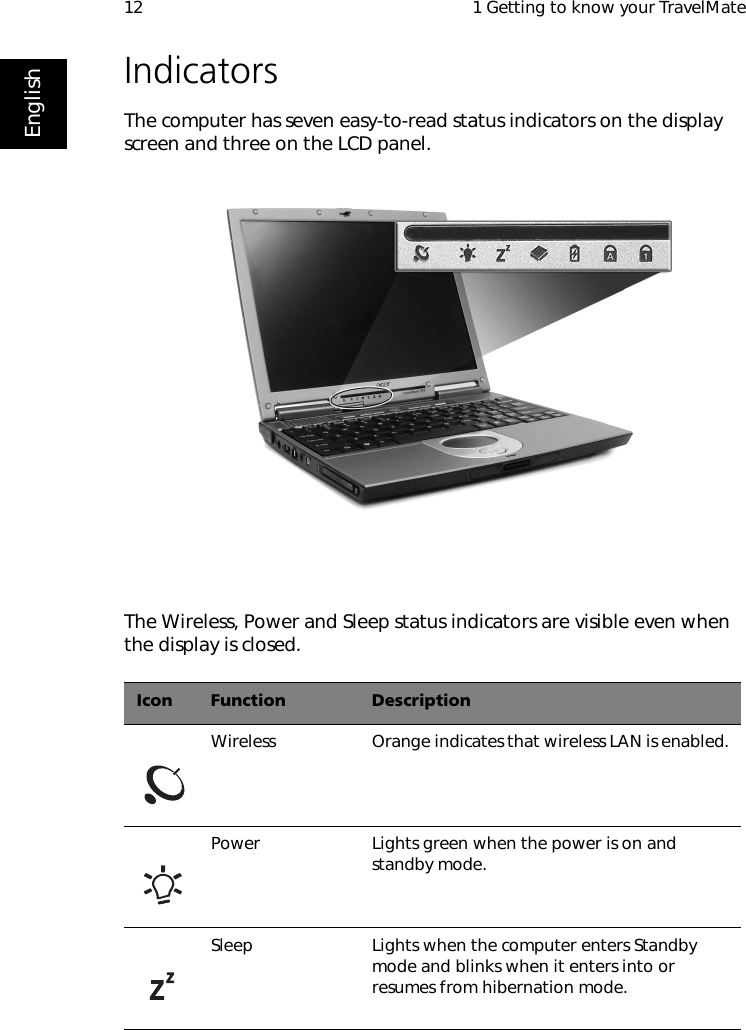
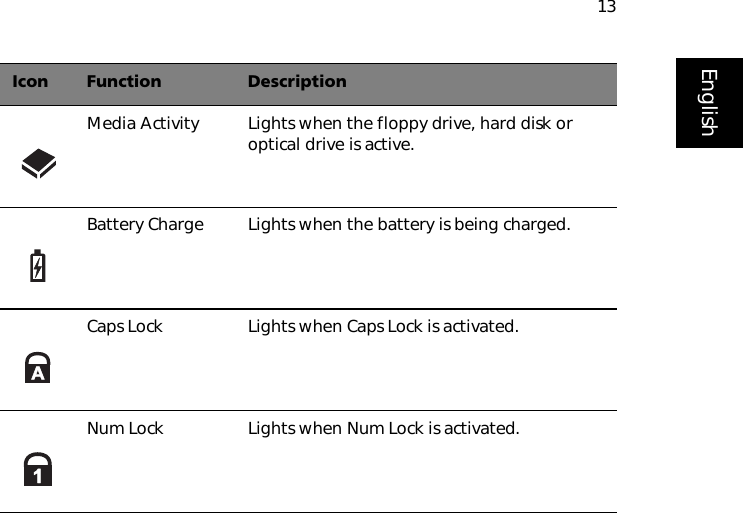
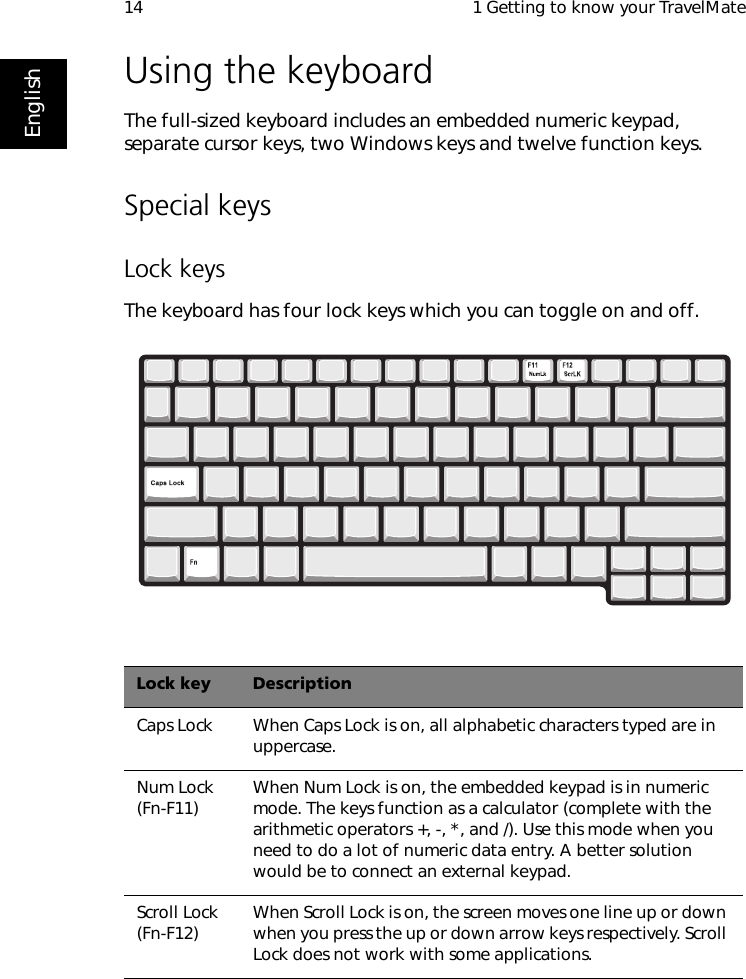
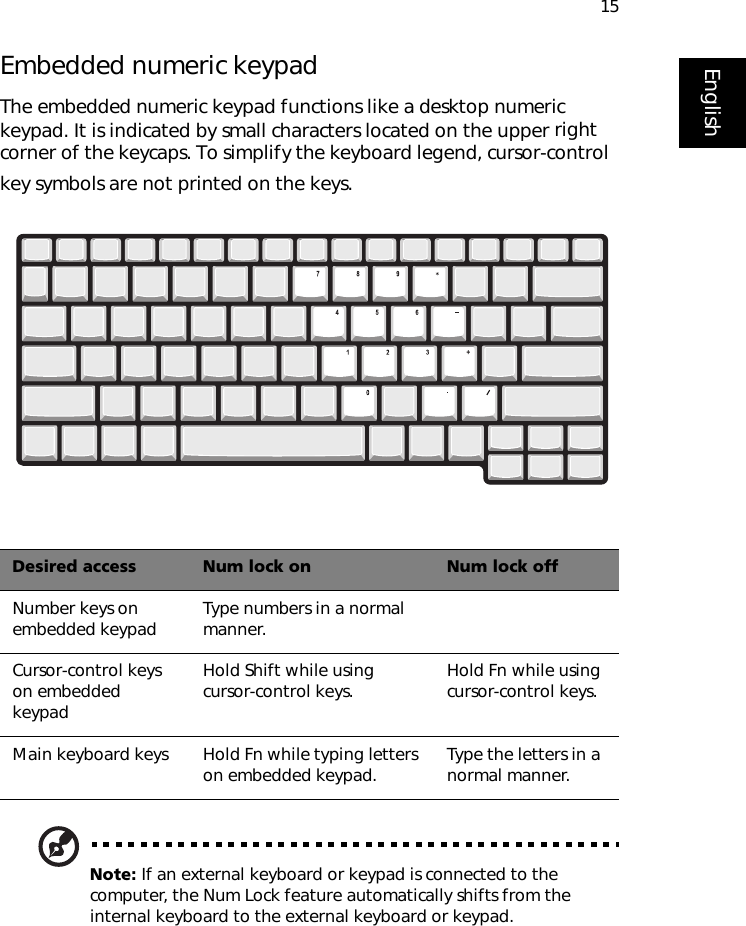
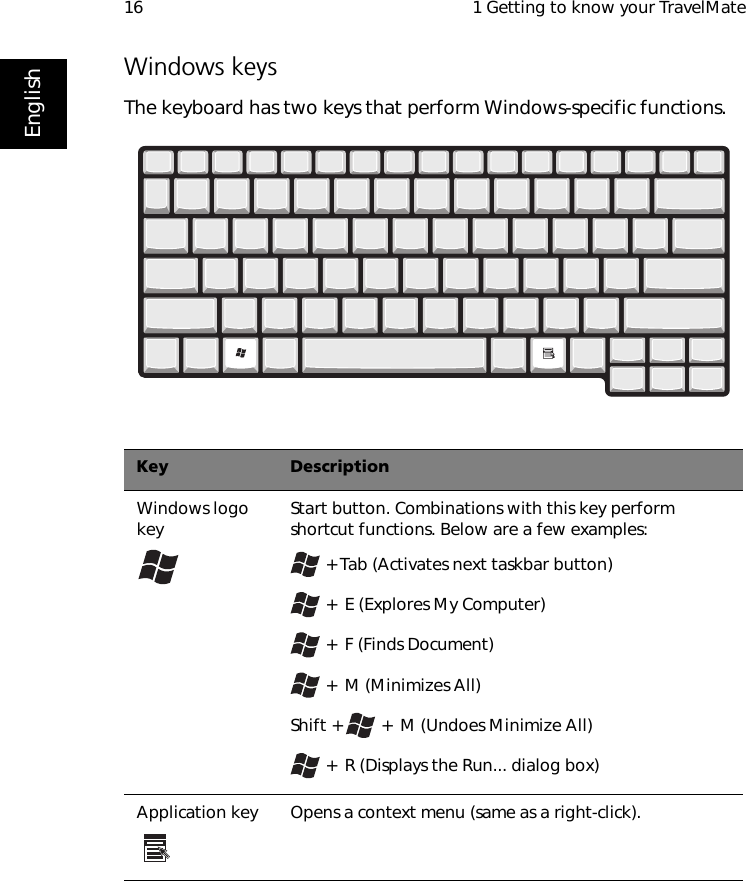
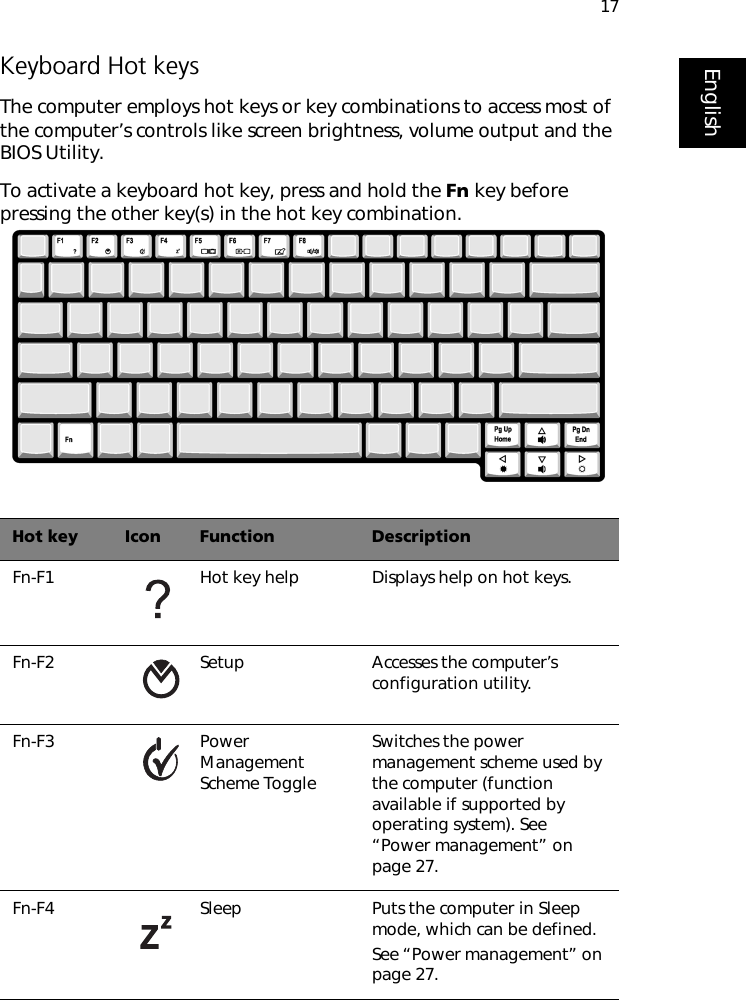
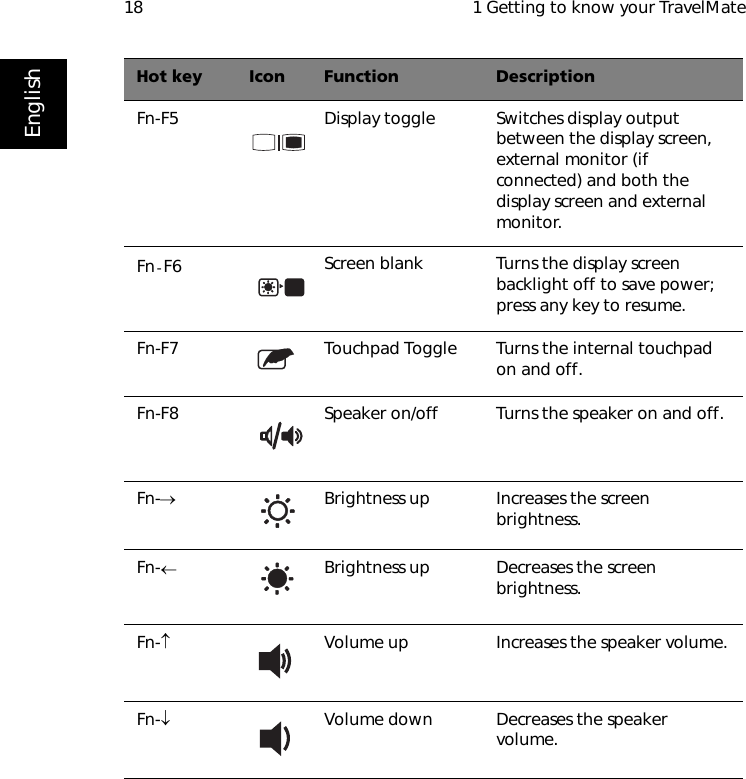
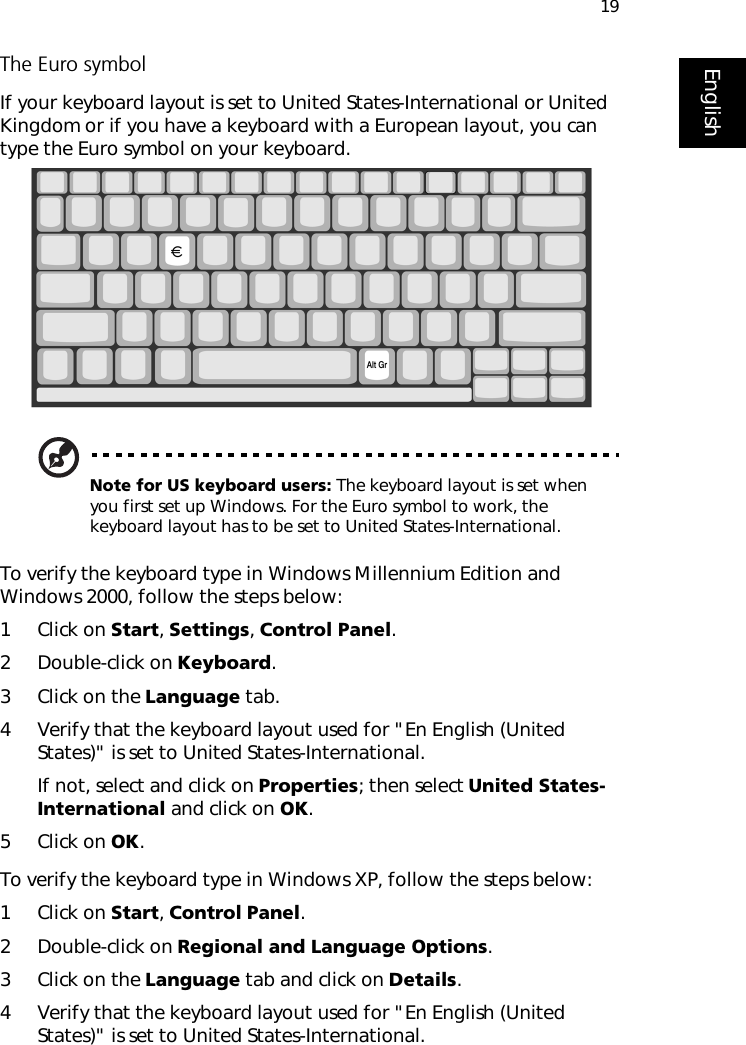
Manual 1 revised