Acer orporated SHM900 Smart Handheld User Manual AcerM900 ForVerifyV2 ENG
Acer Incorporated Smart Handheld AcerM900 ForVerifyV2 ENG
UserManual.wiki
>
Acer orporated
>
SHM900 User Manual
UserMan 20090324 rev
Navigation menu
Upload a User Manual
Namespaces
Wiki Guide
HTML
PDF
Info
Views
User Manual
Discussion / Help
Navigation
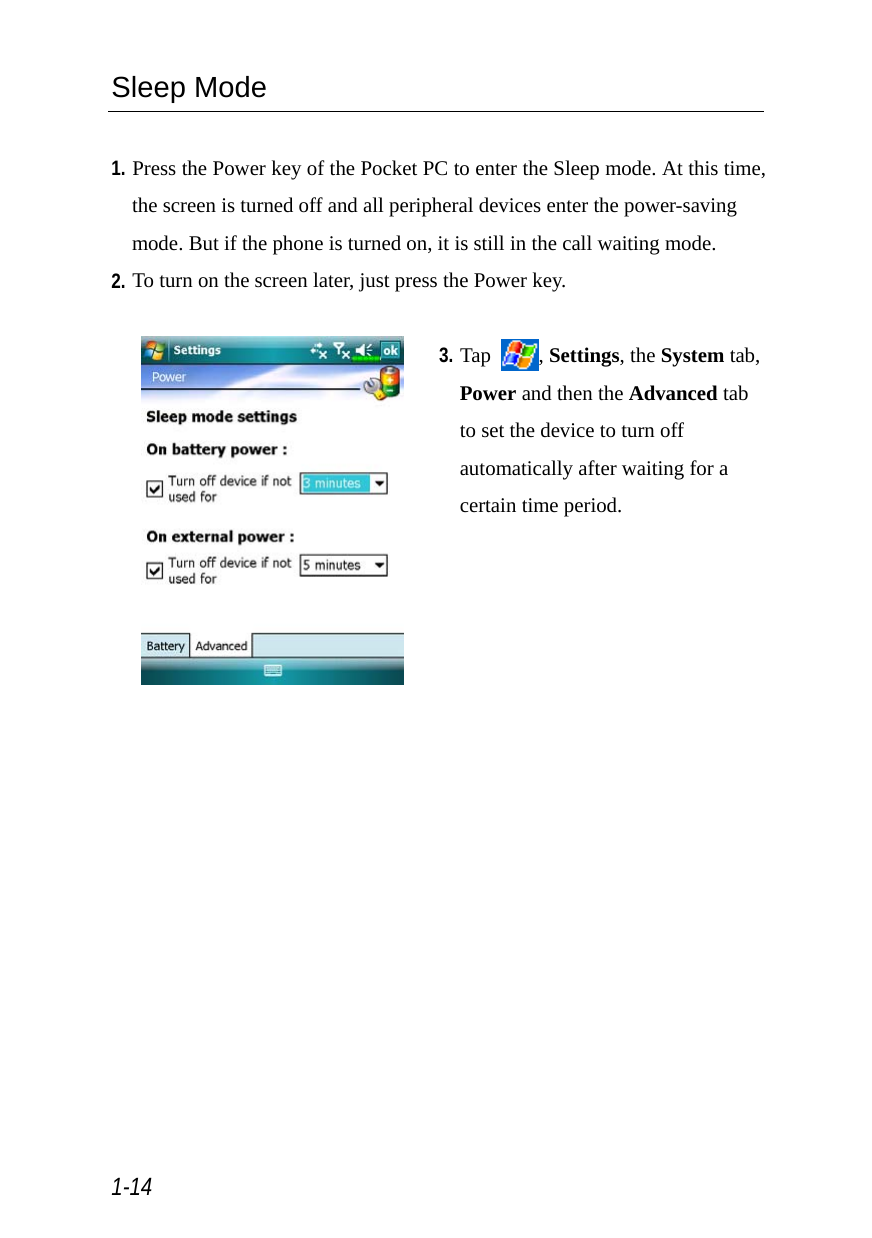
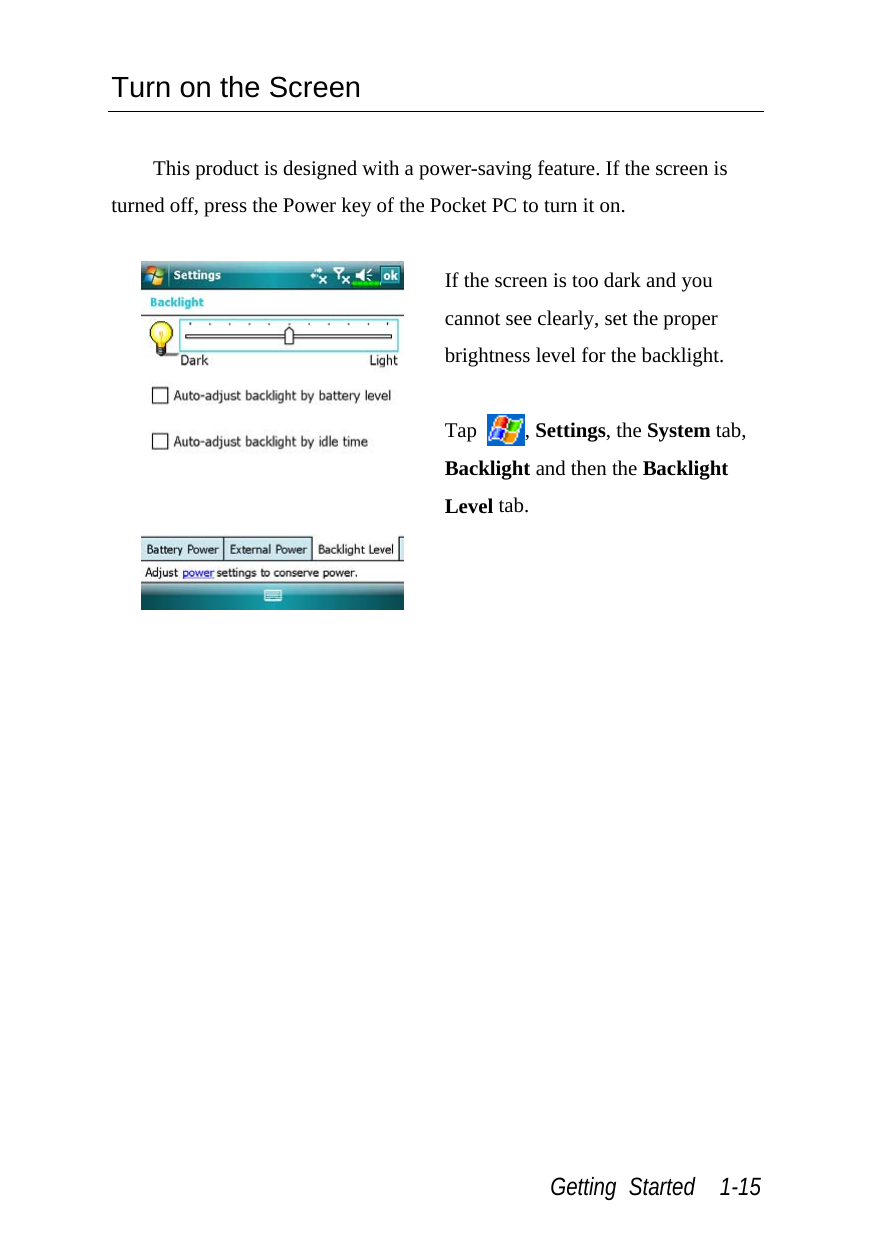


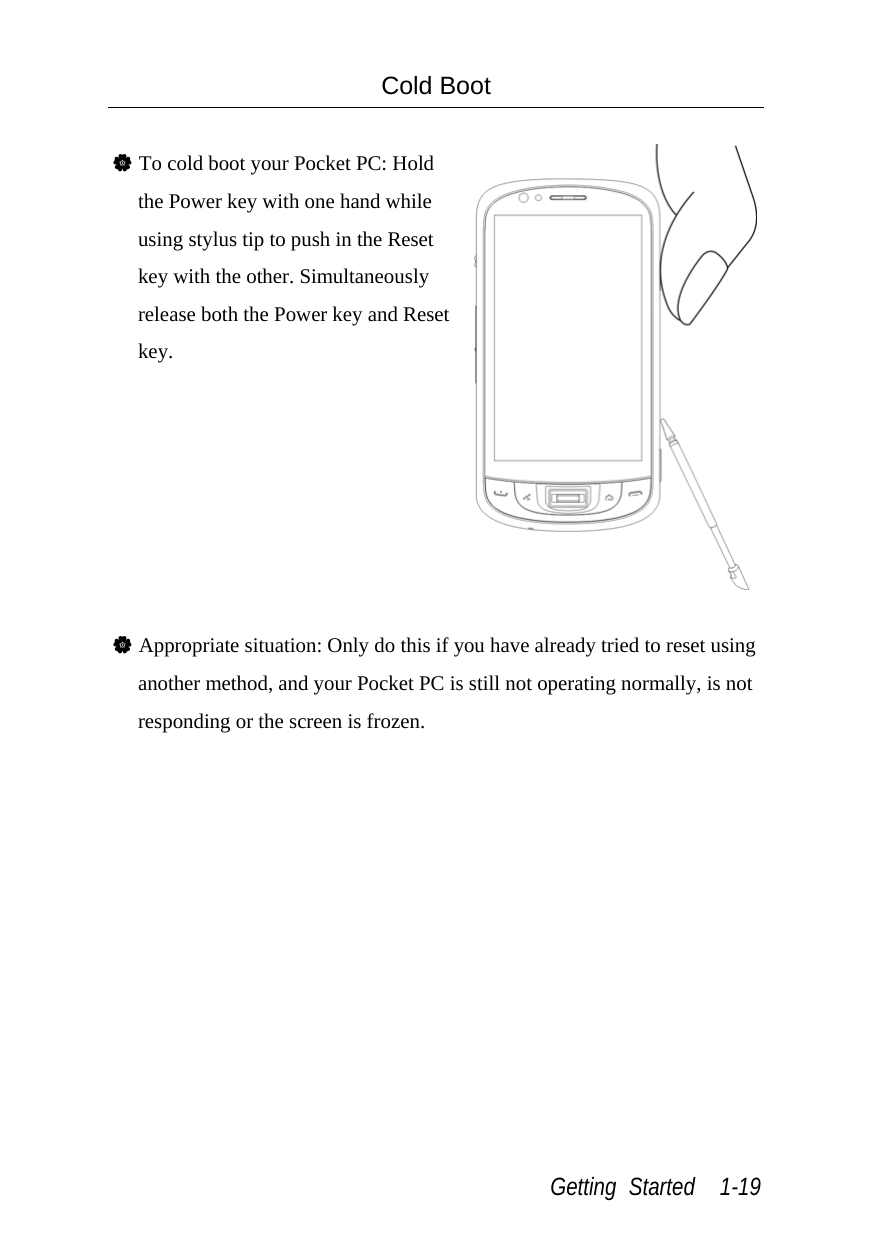
![1-20 Clean Boot V Appropriate situation: If you have tried the previous methods, and they have not solved the problem, then you may clean boot your Pocket PC. V Result: This will reinstall Microsoft Windows Mobile and factory-installed applications. Other settings such as your own data, installed programs and other custom settings will be erased. 1. Press and hold both Power key and Reset key for a while, then release them simultaneously. 2. Wait for a few seconds until the screen wakes up displaying the model name, firmware version and firmware build date of your device, instantly press and hold Record key. 3. Continue pressing Record key and release it when you see this message shown on the screen. Â Erase all data and load default?Yes [press CAMERA button]](https://usermanual.wiki/Acer-orporated/SHM900/User-Guide-1084926-Page-24.png)
![Getting Started 1-21 The operation “Erase all data and load default?” will delete all the data you stored on your device and restore it back to factory default settings. If you press Camera hot key upon seeing the line “Yes [press CAMERA button]” at the bottom of screen, all the data you stored, programs you installed and customized settings you made on your Pocket PC will be cleared. Follow the onscreen instructions to complete the resetting after the Pocket PC reboots. Without your confirmation of this operation as pressing Camera hot key, the Pocket PC will cancel this procedure after a few seconds idle.](https://usermanual.wiki/Acer-orporated/SHM900/User-Guide-1084926-Page-25.png)

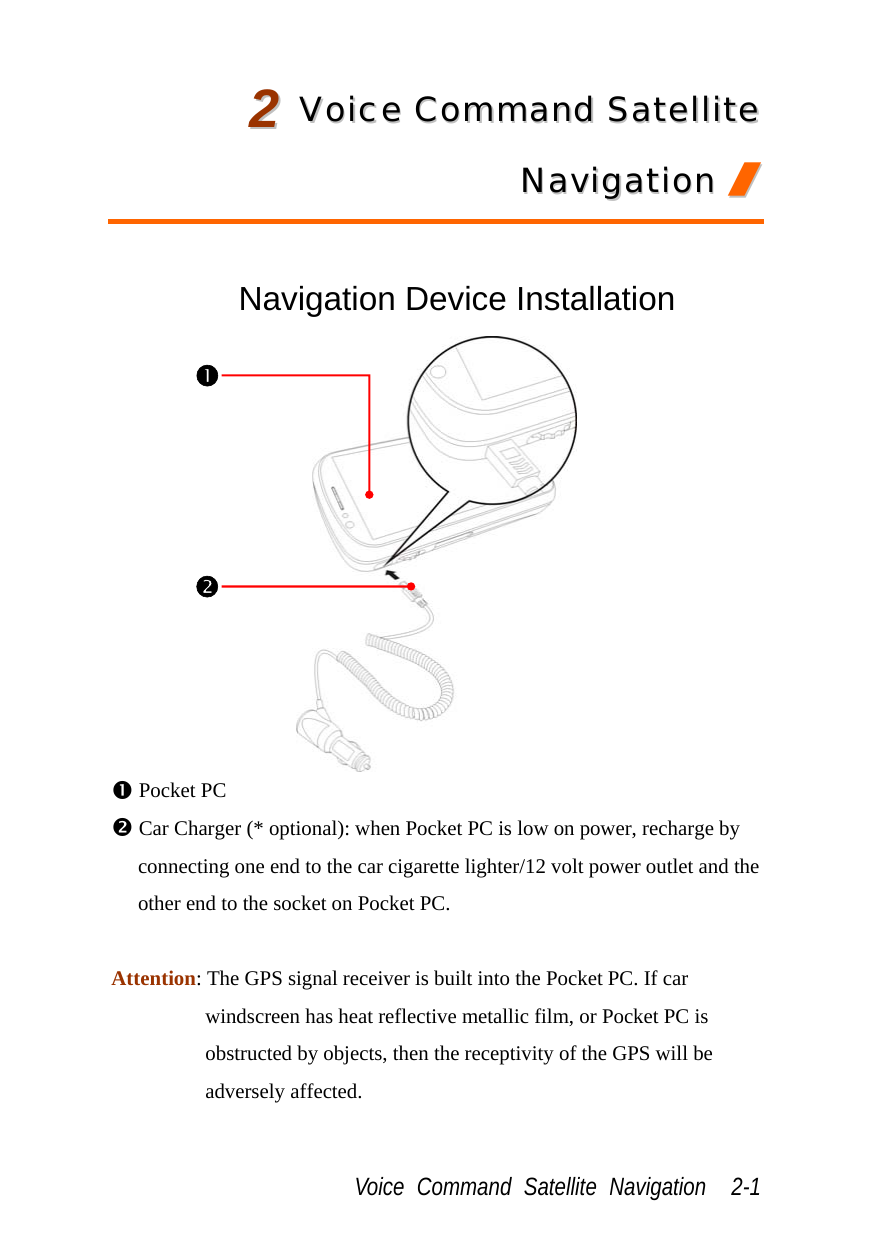
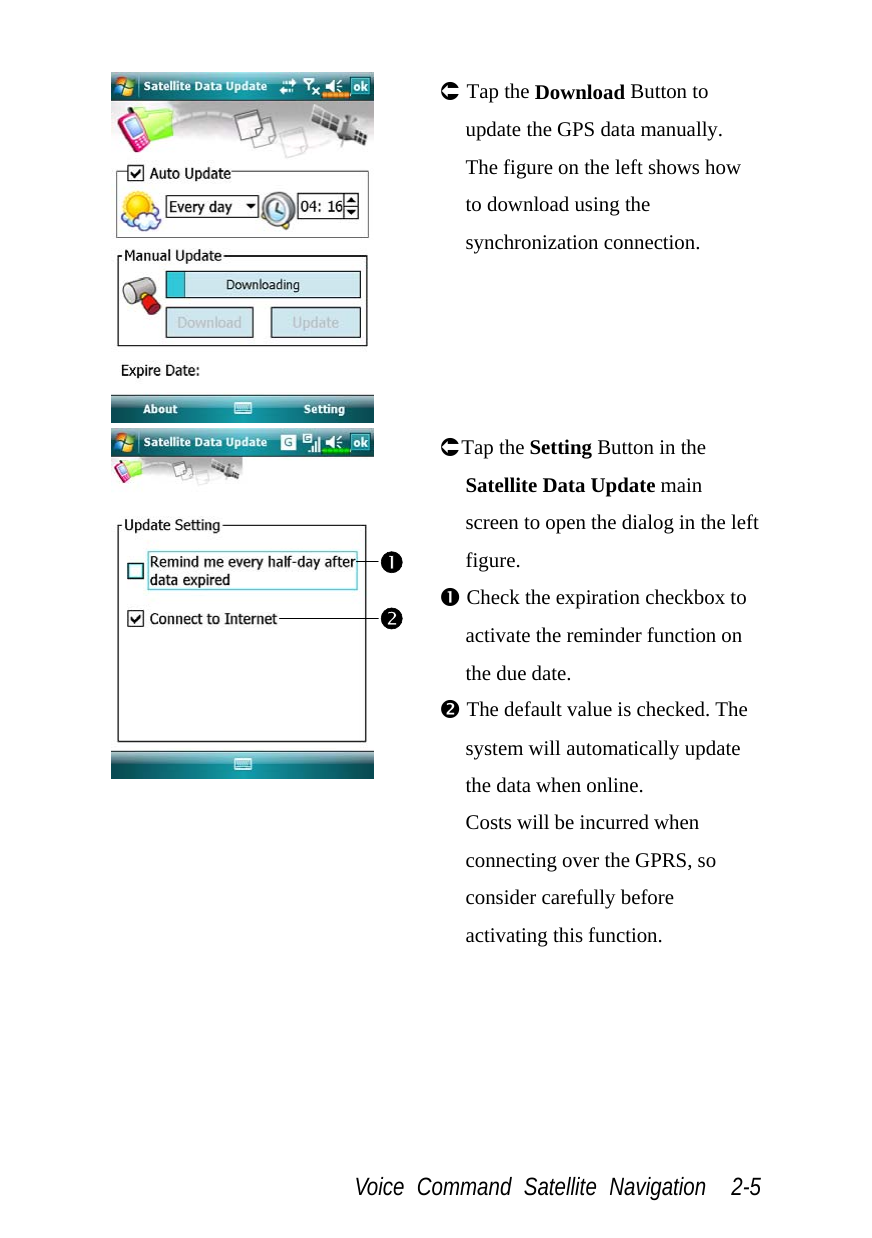
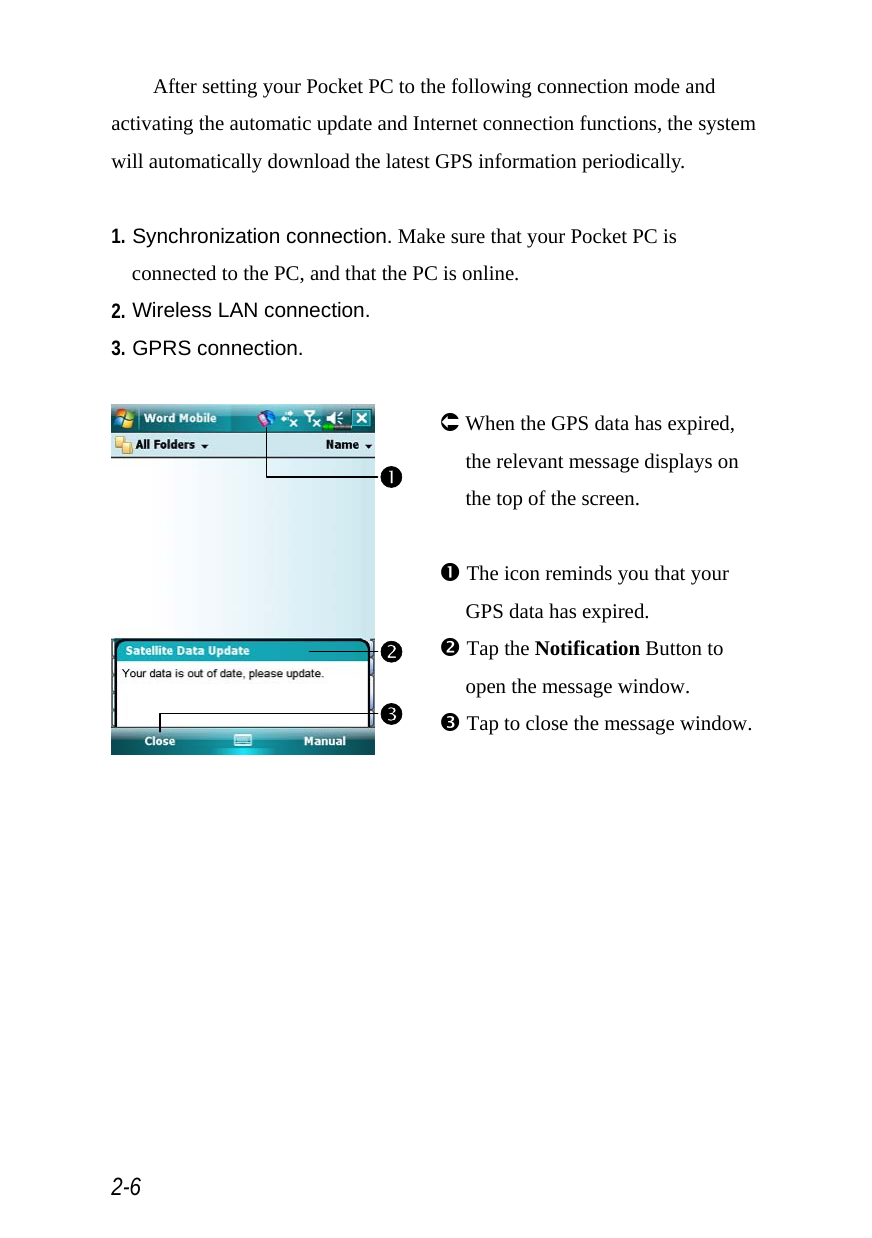
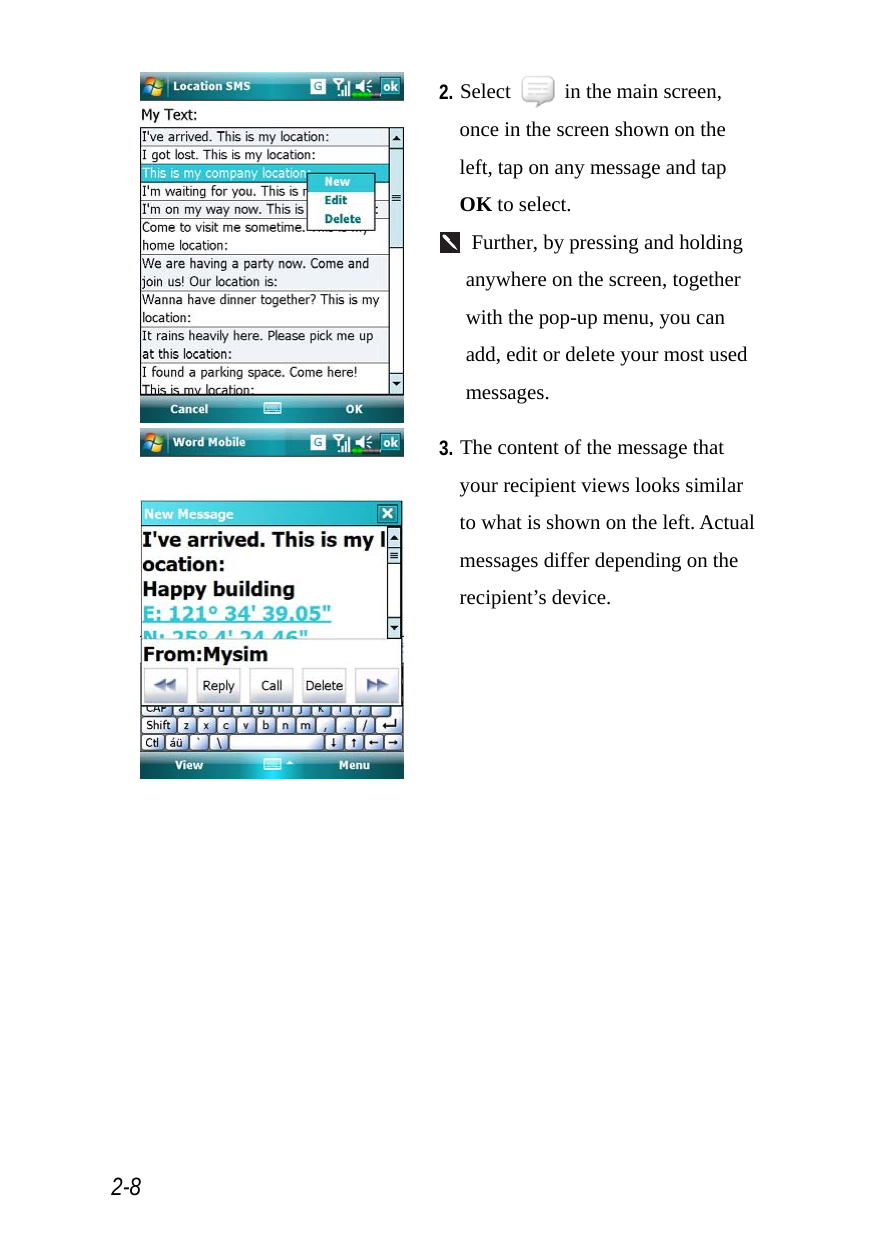
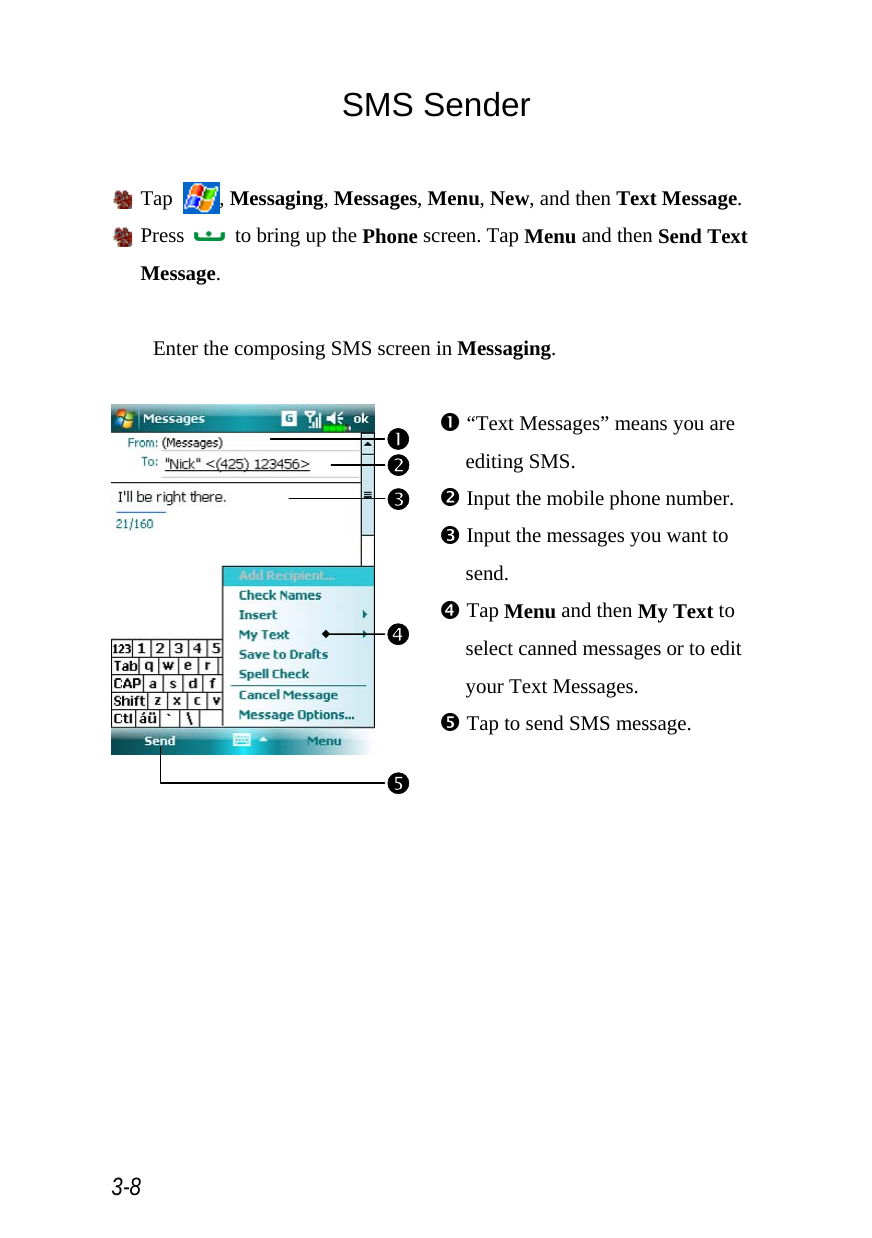
![Voice Command Satellite Navigation 2-7 Location SMS Tap , Programs, GPS, and then Location SMS. You can utilize the GPS function offered by your Pocket PC, to send the matching location automatically found by this program and the necessary message to your contacts. This could be helpful in preventing kidnapping, reporting disastrous situations, calling for help in emergencies or locating an individual. In addition, we have formulated many SMS templates based on different situations for your convenience. 1. It is better to execute this program at a location with clear signal. n Tap to open the Contacts screen, if set up in advance, you can choose contacts directly. o You can directly enter mobile phone number in the To area. If there is more than one recipient, please use “;” to separate recipients. p You can directly enter your message in this area, such as landmarks, features or street names. [ Automatically searches for GPS information. \ Tap to allow you to select, add, edit, or delete your most used messages. ] Tap to allow you to send SMS messages and report your location. onp\[]](https://usermanual.wiki/Acer-orporated/SHM900/User-Guide-1084926-Page-33.png)