Acer orporated TMDMA500 Tablet Computer User Manual Acer Picasso UM EN
Acer Incorporated Tablet Computer Acer Picasso UM EN
Contents
- 1. User manual 1 of 3
- 2. User manual 2 of 3
- 3. User manual 3 of 3
User manual 2 of 3
31Online applications
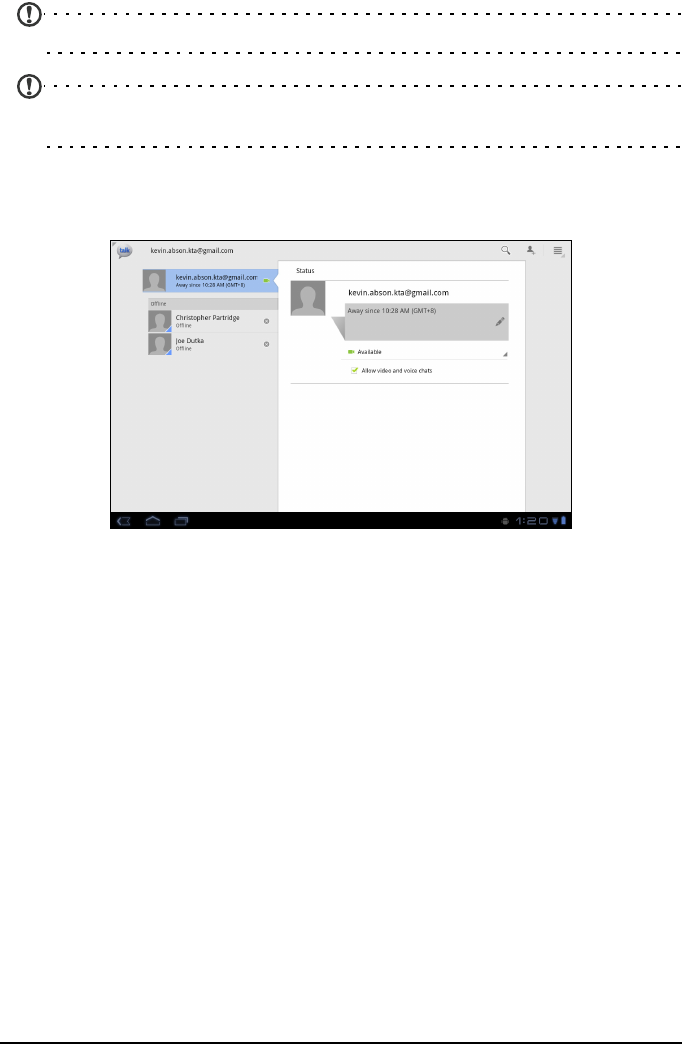
Google Talk
Note: Google Talk may not be available in all countries and regions.
Note: You need to activate a Google account before you can use Google
Talk.
Tap Gtalk from application menu to open Google Talk. Here you can see a list
of your contacts connected to Google Talk services. Tap on a contact to open a
chat session. After you have connected, you can open a video chat session.
Video Chat
The recommended use for the front-facing camera is for video chat. Use the
camera so the person you call can see you while you can see them on the
screen.
32
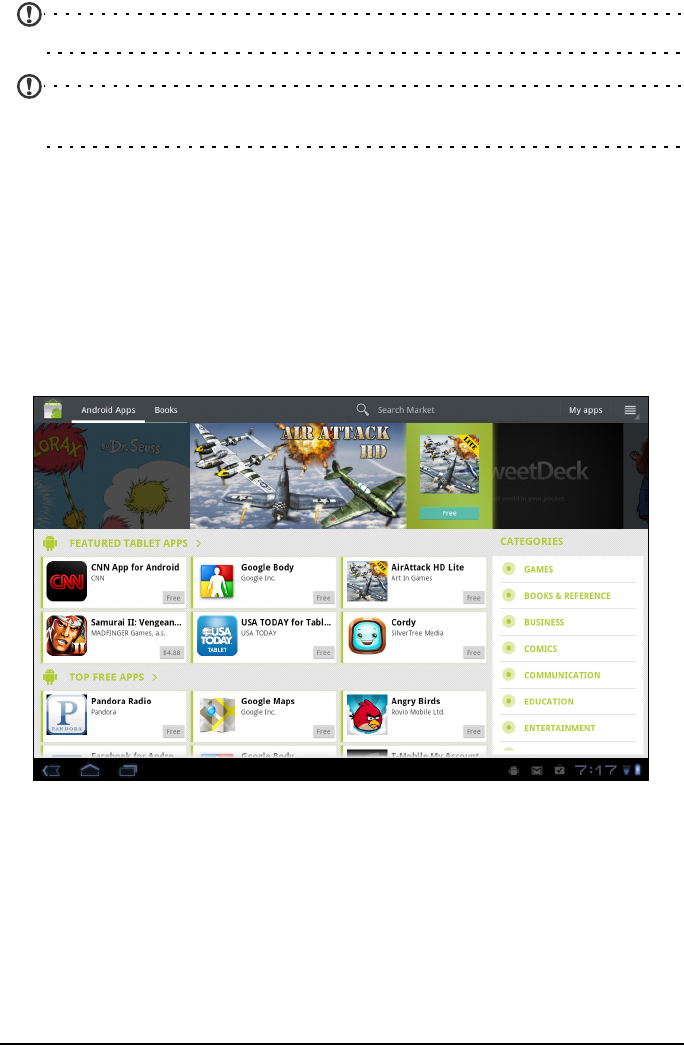
Android market
Note: The Android Market may not be available in all countries and regions.
Note: You need to activate a Google account before you can use the
Android Market.
Tap Market from the home screen or application menu to open the
Android
Market
. Here you can obtain a variety of add-on programs and applications to
enhance the functionality of your tablet.
You may also browse for books that you may read with LumiRead or the
Google Books application.
The first time you access the Android Market, you will need to read and accept
the Terms of Service.
You can browse the market by category or tap the search icon to search for a
specific application.
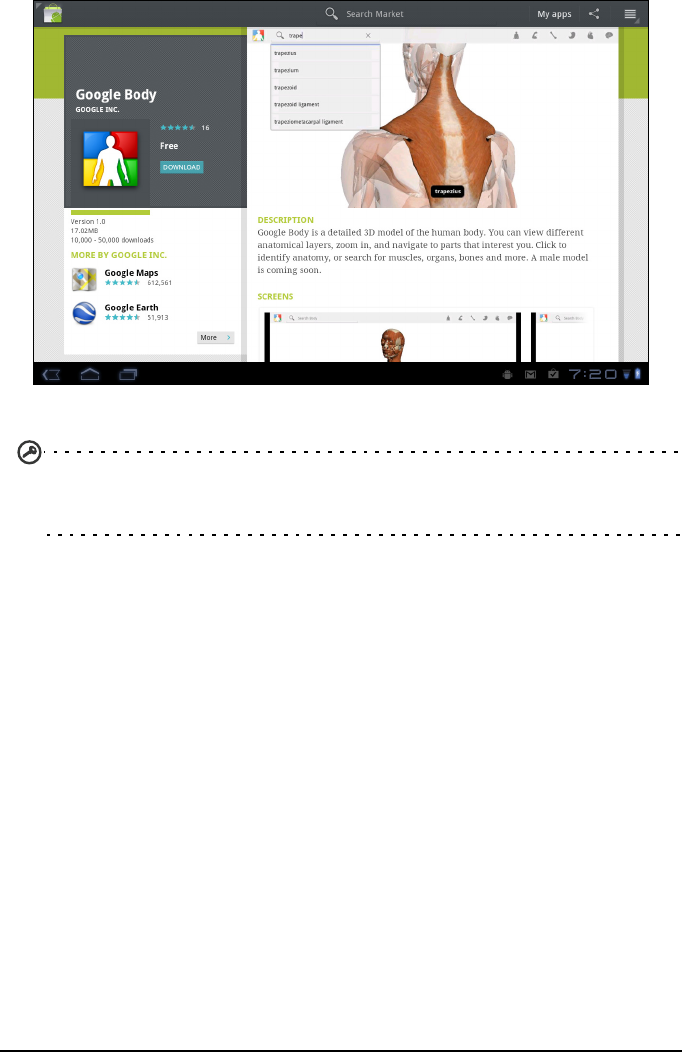
Once you have selected an application, tap the DOWNLOAD button to
download and install the application. You will be told which services (contact
information, wireless access, GPS, etc.) the application requires access in order
to function correctly. If none of these services seem unusual, tap OK to proceed
with the installation.
33Online applications
You may keep track of the download progress from the Notification Area.
Important: Some applications may require payment before you can
download them. You will need to have a Google Checkout account in order
to pay for these applications.
Using downloaded applications
Once you’ve downloaded and installed an application, you may find it in the
My apps or All sections of the Application menu.
Certain applications also provide widgets, or only provide a widget (with no
application icon). Widgets can be found in the Widget section when
personalizing your Home screen. See “Personalizing the Home screen” on
page 20.
Uninstalling downloaded applications
Once you’ve downloaded and installed an application, you may uninstall the
application by pressing and holding the application icon and dragging it to the
trash can located on the top-right corner of the screen.
Alternatively, you can go to Settings from the application menu and select
Applications > Manage applications. Tap the application you wish to uninstall,
tap Uninstall and confirm the uninstall.

34
Acer SocialJogger
Acer SocialJogger combines your
social network updates in one
location, allowing you to quickly
follow what your friends are doing
across several platforms.
From the application menu, tap Acer
SocialJogger to launch the program.
Select Sign in to enter your account
information. When you are finished
press Start.
Slide the disc, located on the right, up and down to cycle through the
notification updates.
Tap on a notification to view more details and make a comment.
Tap the left and right arrows, located on the top, to cycle between the
categories: My Page, Photos, Link and any added pages.
Tap the Menu button to access account settings, refresh the page, auto play,
and add or remove custom pages.
Location Plus: If you upload a picture with the SocialJogger uploader through
the gallery or from the camera review screen, the uploaded picture will display
its geotag.
Note: For geotag to display, pictures must be taken with Store Location
activated in the camera settings.
urFooz
urFooz is a portable avatar that lets you share information across your favorite
social networks, blogs and more.

35Online applications
Easily organize your Web favorites, such as photos, videos, bookmarks and
more, with a urFooz ID. urFooz gives you:
• One identity for all your online activities.
• An avatar that represents the "virtual" you.
• A single connection for all your Web favorites.
To start urFooz, open the application menu and tap urFooz.
Additional tools on the urFooz Internet site let you edit and manage your Fooz
avatar(s), create new avatars and share them on Facebook, MySpace, blogs and
more. Go to www.urfooz.com.
Note: urFooz, Fooz Avatars, Fooz Creator, Fooz Card, and Fooz World are
trademarks or registered trademarks of Fuhu, Inc. in the U.S. and/or other
countries.
36
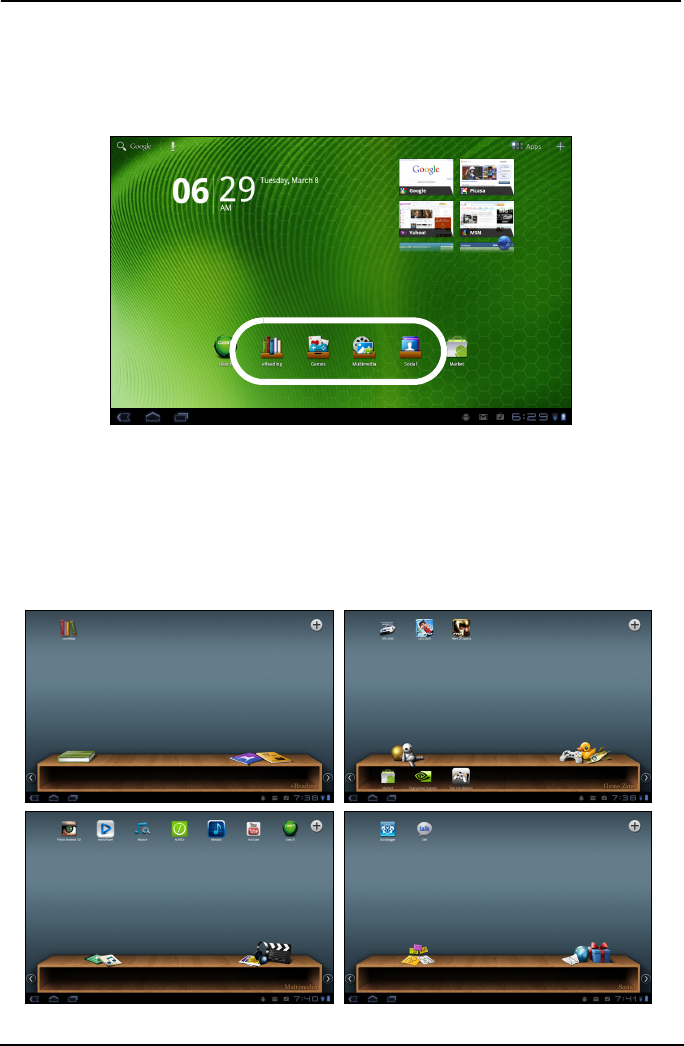
Acer libraries
Your tablet includes application libraries that allow you to easily organize and
access your favorite applications.
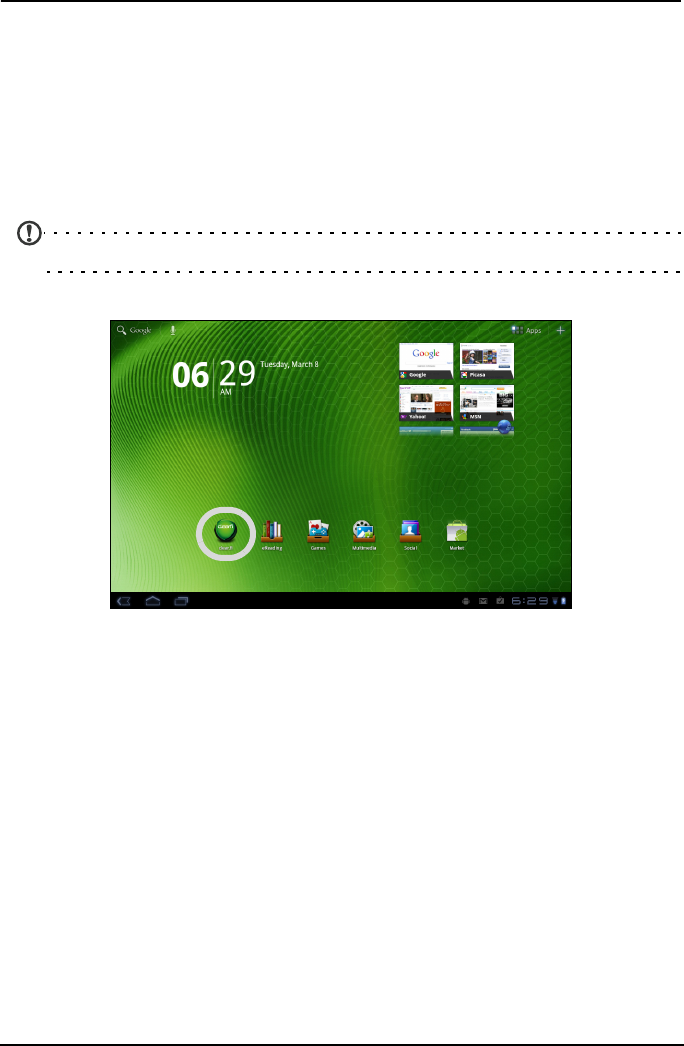
Choose one of the four categories on the Home screen or application menu:
eReading, Games, Multimedia or Social.
Tap the shortcut to open a screen containing applications from that category.
Using the libraries
Each category already contains shortcuts to essential applications. Simply tap a
shortcut to open the application. The shelves along the bottom of the screen
may contain links to portals that allow you to download related applications
from trustworthy publishers.
37
Selecting a library
The library shortcuts on the home screen or Application menu give you direct
access to any of the four categories. If you have opened a category, you can
easily change category by swiping the screen to the left or right.
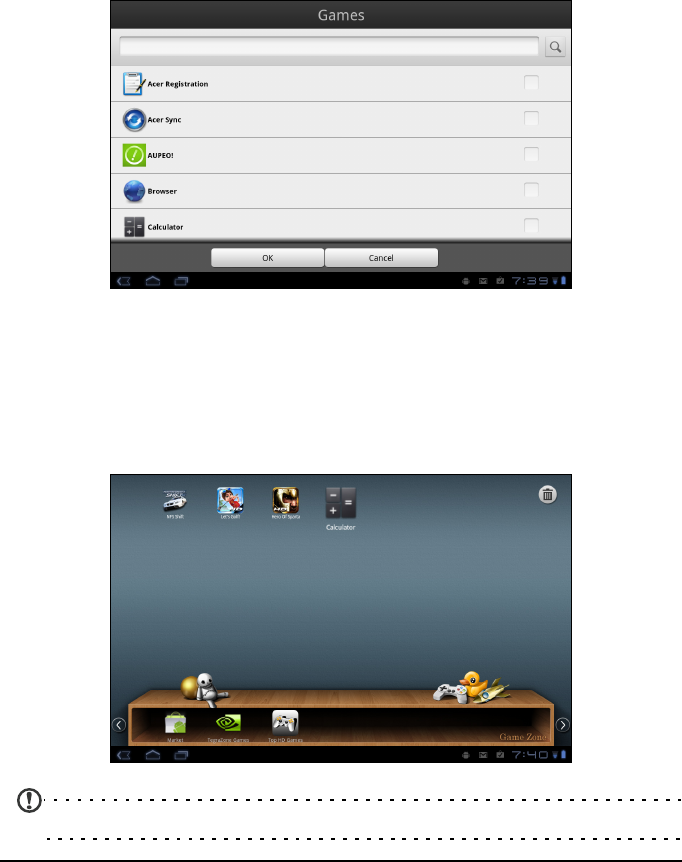
Adding
You can add applications to any library. Tap the Plus sign in the bottom left
corner and select one or more applications from the list. Tap OK to add
shortcuts for the selected applications.
You may view up to twenty shortcuts on a single screen. If you add more than
twenty shortcuts, swipe the screen up to see additional shortcuts.
Moving or removing
Tap and hold an item to select it. Drag it to an new position to change the
order, or to the trash can in the bottom left corner to remove the shortcut from
the screen.
Note: Certain pre-loaded applications may not be removed.
38
Playing music and video
Multimedia playback
Your tablet comes supplied with a variety of programs that you can use to
enjoy multimedia content.
Acer clear.fi
With Acer clear.fi, you can browse and stream remote multimedia content from
connected devices on your tablet.
Note: You must be connected to a wireless network.
Tap clear.fi.
Acer clear.fi
will automatically detect devices that are connected to a wireless
network and display them at the bottom of the screen, with your tablet as the
default device on the leftmost corner. Tap any of the connected devices and
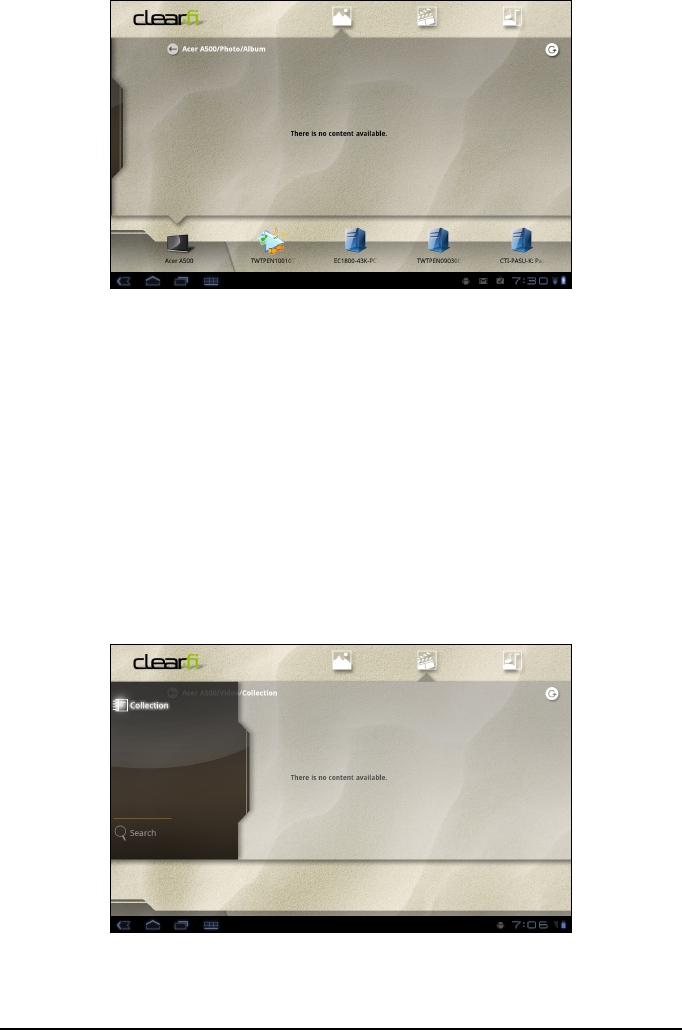
39Multimedia playback
then tap Photo, Video, or Music to browse media files on that connected
device.
Drag the bar on left side for more viewing options.
clear.fi photos
Tap the photo album to view the thumbnails. Tap and hold an album or photo
thumbnail to view the menu panel.
You can view photos found on any of the connected devices and save them.
Tap and hold a photo thumbnail, then tap and hold any of the connected
device showing an arrow. Select Play or Save.
To upload a photo to Facebook, or Flickr via Acer Photo Uploader, or to paired
devices using Bluetooth, tap and hold a photo thumbnail, then tap Share.
clear.fi videos
Tap a folder under Collection to view the thumbnails. Tap and hold a folder or
video thumbnail to view the menu panel.
You can play videos found on any of the connected devices and save them. Tap
and hold a video thumbnail, then tap and hold any of the connected device
showing an arrow. Select Play or Save.

40
To send video files as an MMS attachment or to paired devices using Bluetooth
or to YouTube, tap and hold a photo thumbnail, then tap Share.
clear.fi music
Tap a folder to list the audio files. Tap and hold a folder or audio file to view
the menu panel.
You can listen to any audio file found on any of the connected devices and save
them. Tap and hold an audio thumbnail, then tap and hold any of the
connected device showing an arrow. Select Play or Save.
To send audio files as an email attachment using Google or RoadSync Mail, or
to paired devices using Bluetooth, tap and hold a photo thumbnail, then tap
Share.
nemoPlayer
Open nemoPlayer from the application menu to play media you have stored on
your phone.
nemoPlayer enables you to listen to music, view video clips and pictures in all
the formats supported by your tablet. See “Multimedia” on page 64.

41Multimedia playback
Spinlets
Spinlets gives you access to your favorite music, movie and television content.
Get your favorite music from your tablet and share your favorite Spinlets on
social networksand by email.
Note: Some contents may not be available in some countries.
Launching Spinlets
To launch the Spinlets application, tap Spinlets in the application menu.
Browsing Spinlets gallery
You can sort or search your media content by albums or genres.
Browsing albums
Once Spinlets is opened, you will see a display of featured albums. Browse this
display by sliding your finger horizontally (left or right), and select an album by
tapping it.
Browsing genres
To browse the Gallery by genre, tap the Genres button on the bottom left
corner of the screen. You will see a new screen with a list of different genres.
Tap on the genre you wish to view.
Sort
To sort through Spinlets by Name, Rating, or Newest content, select the Sort
button at the bottom of the screen.
Search
To search the Gallery for a specific name, select the Search button at the
bottom right corner of the screen. Type the name of an artist in the search box
and find potential matches.
Exploring Spinlets widgets
When you select an album, you will see a Spinlet.
To play the featured song, select the red Play button.
To play selected songs, select the Music tab and choose which songs you would
like to play.
To view artist photos, select the Photos tab.
To visit the artist's website, select the icons located along the bottom of the
screen.
Sharing your Spinlets
You can share your favorite Spinlets in two ways.
To post the Spinlet you are currently viewing to your social networks, blogs, or
other websites, tap Share It at the top right corner of the Spinlet. Select Post It

42
and tap the icon of the social network site or blog you want to post the widget
to. Log in to your social network account or blog page and follow the steps.
Another way you can share Spinlets is through email. Tap Share It at the top
right corner of the Spinlet, select Send It, and enter your name and your
friend’s email address.
Note: Fuhu, Spinlets, Spinlet, urFooz, Fooz Avatars, Fooz Creator, Fooz Card,
and Fooz World are trademarks or registered trademarks of Fuhu, Inc. in the
U.S. and/or other countries.
Media server
Your phone can act as a digital media server using UPnP technology. This means
that you can use it to send media content to other UPnP-enabled home
entertainment devices that are connected to a home wireless network.
To set up the media server, open the application menu and tap Media server.
You will need to enable Share contents before you can start using the service.
You may select to share your Video, Photo or Music content from Shared
content settings.
Dolby Mobile 2
To access Dolby Mobile settings go to the application menu and tap Settings >
Dolby Mobile. Here you can switch Dolby Mobile on or off, set Treble, Natural
Bass, Music EQ and Video EQ.
43
Managing Contacts
Your tablet features an address book that allows you to save contacts to the
internal memory, SIM card or your Google account.
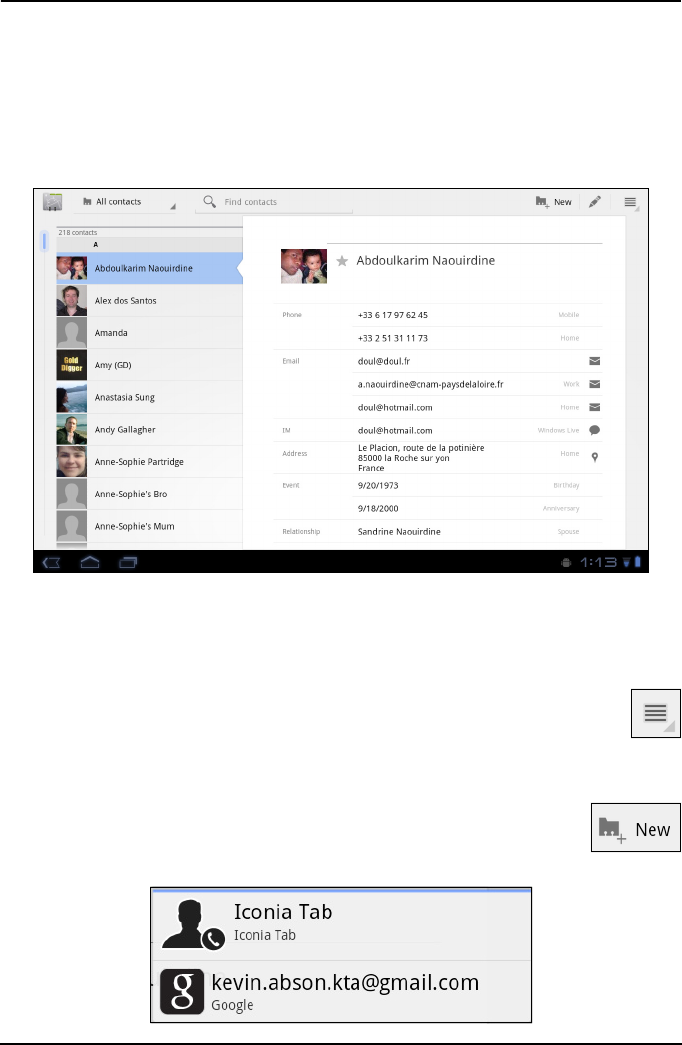
Tap Contacts from the application menu to view your contacts.
If you don’t have any contacts stored on your tablet, you can sync with your
Google account contacts, import contacts from a contact data file (vCard or csv)
or add a new contact. .
If you have activated a Google account that includes contacts, your contacts will
be synchronised automatically. See “Synchronization” on page 59.
Importing contacts
Tap the
Menu
button and select Import/Export. Tap the option that
describes where you contacts are stored. When the contacts are found,
confirm to import the contacts in a new group.
Adding a new contact
Tap New to add a new contact. You will be asked which account
you want to use to store the contact. If you select the name of your
tablet it will be stored in the tablet’s internal memory, and not
synchonised with other accounts.
44
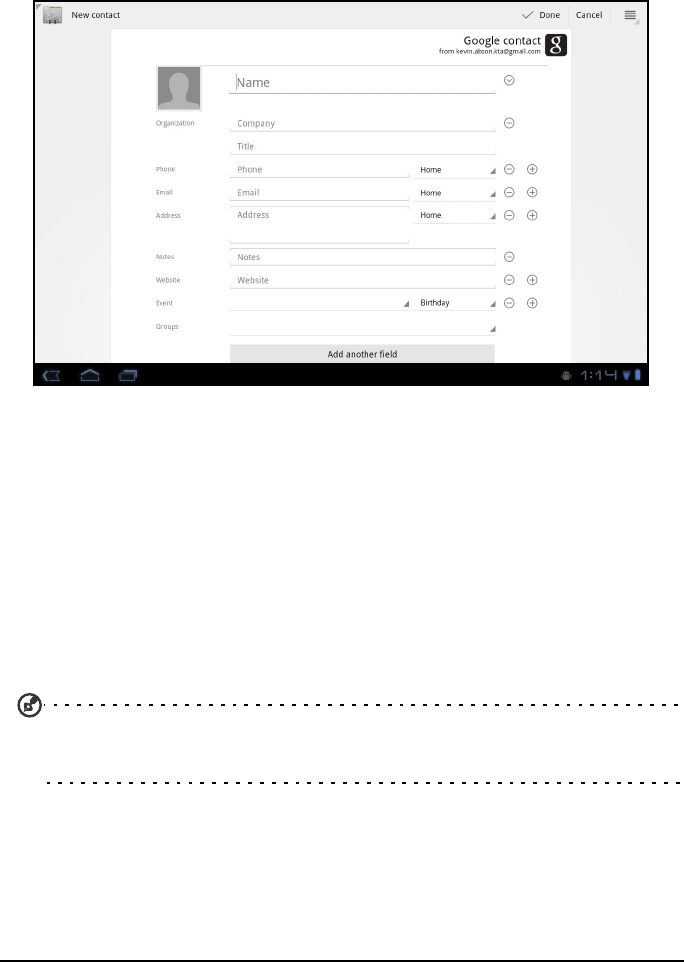
You may now edit the new contact entry.
Editing a contact
If you have opened an new or existing contact you can enter information about
the contact:
Simply tap on a box and type the appropriate information. Click on the arrow
next to the name entry to see options, such as adding a name prefix or phonetic
name.
To enter multiple entries, such as separate entries for mobile and home phone
numbers, tap the plus sign to create a second entry. Tap the minus sign to
remove an entry.
Tap Add another field for more categories.
To assign an image to your contact, tap the silhouette and select an images
from your tablet’s picture gallery (select Gallery if requested). You may also
take and crop a new photo.
Tap Done to finish and save the contact.
Tip: Set each phone number to match the type of network as this can determine some
functions. I.e. certain applications only recognise ‘Mobile’ numbers as they require a
function only available on a mobile network.
Opening a contact
To see the information stored for a contact, tap on the contact’s name in the list
on the left.
45
Tap on an entry (such as an email address) to open the application linked to
that type of entry. For example, tap an email address to open the Gmail
application.
To add or change information, tap the pencil icon.
Tap Done to save changes, or Cancel to discard them.
Starred contacts
You may quickly access your favorite contacts by adding a
star
. First open the
contact, then tap the star next to the contact’s name. Tap All contacts and
select Starred to see only your favorite contacts.
Editing a contact on your computer
If you have synchronised your Google account and contacts, you can use your
computer to access and edit your contact list. Open the Internet browser on
your computer and go to mail.google.com. Sign in to your account and click
Contacts. Select and edit contacts from the list; the next time your tablet
synchronizes with your computer, these changes will also be made to your
tablet’s contact list.
Warning: Backup your contacts before making any changes. Tap the
Menu
button and select Import/Export. You may then Export your contact list to
the internal memory in your tablet, or .