Aclara Technologies 2013001 LLB2013001 TRANSCEIVER MODULE User Manual
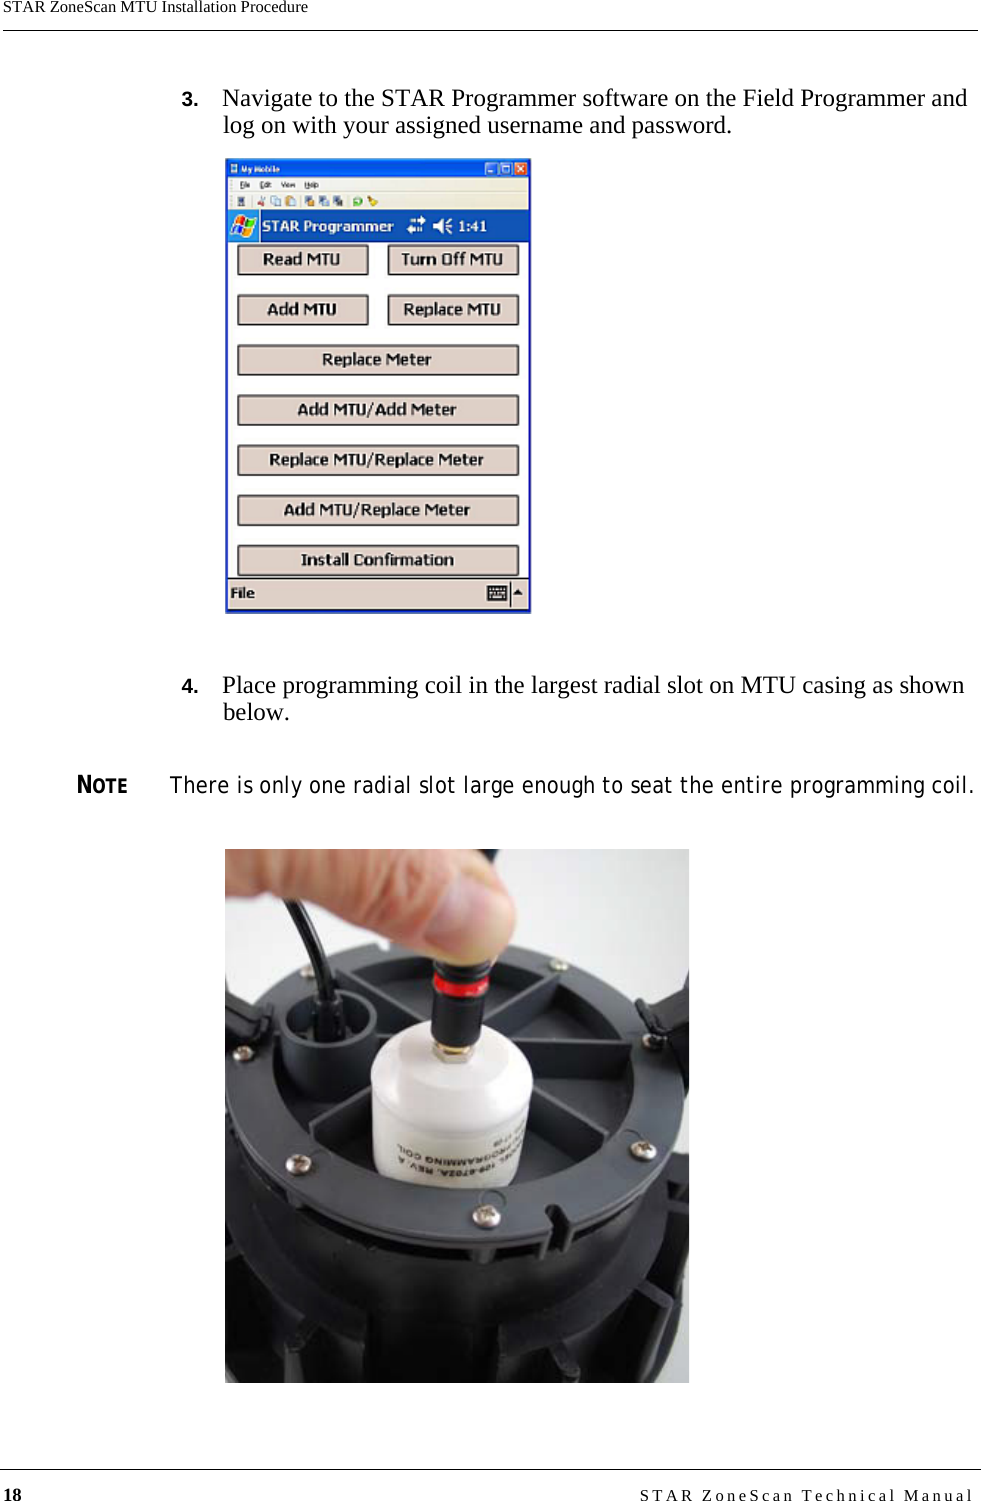
Aclara Technologies LLC LLB2013001 TRANSCEIVER MODULE Users Manual
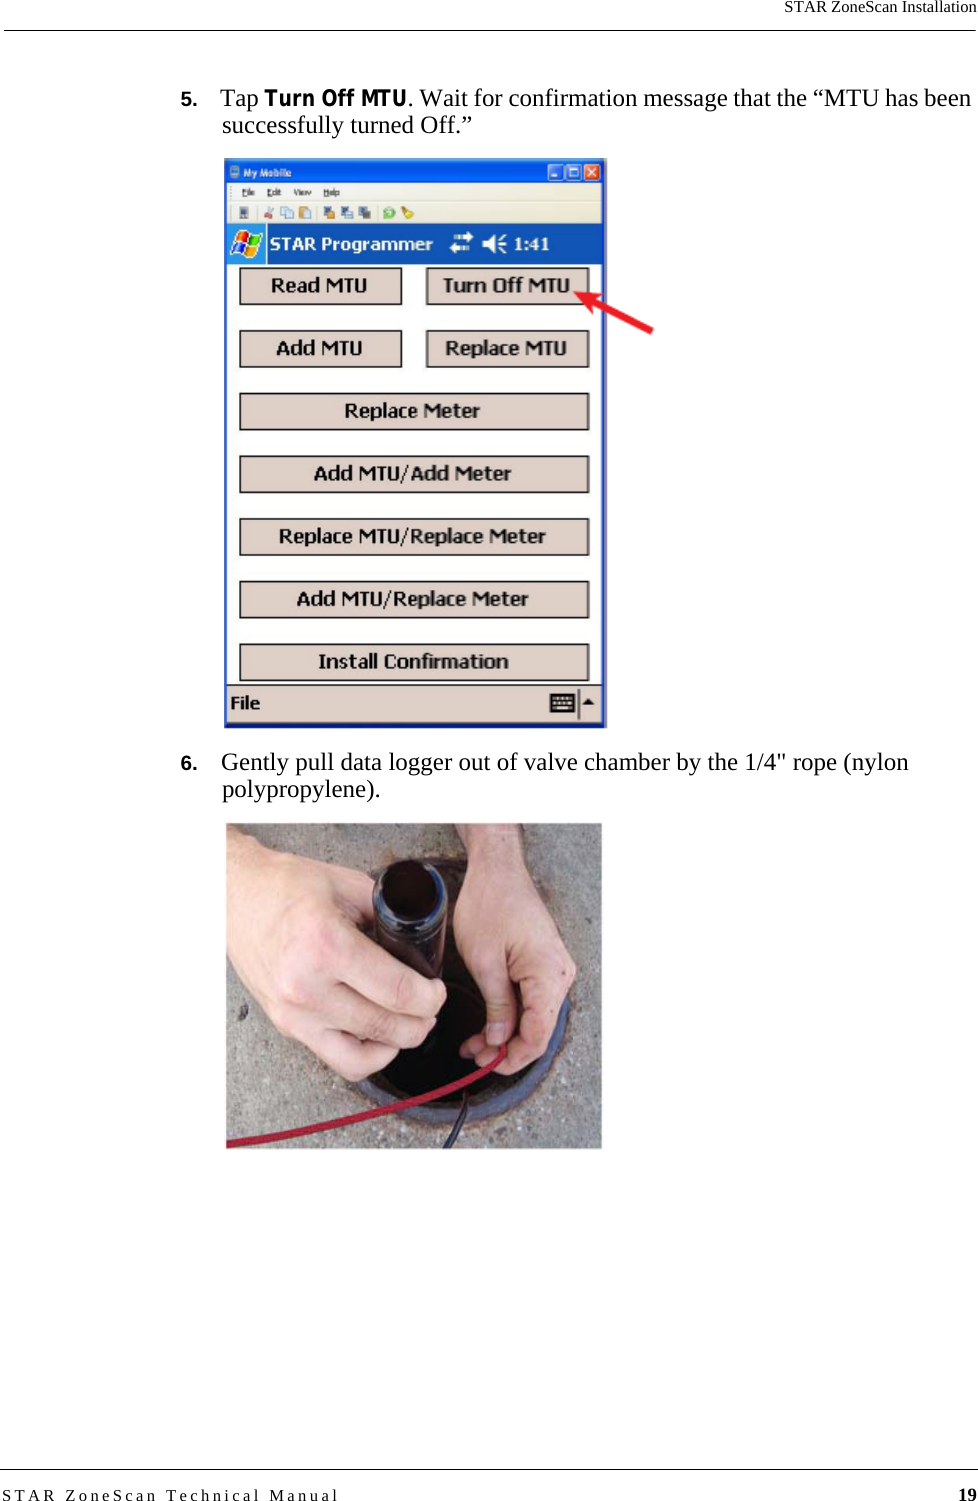
UserManual.wiki
>
Aclara Technologies
>
2013001 User Manual
>
Users Manual
Contents
1.
Users Manual
2.
Field Manual
Users Manual
Navigation menu
Upload a User Manual
Namespaces
Wiki Guide
HTML
PDF
Info
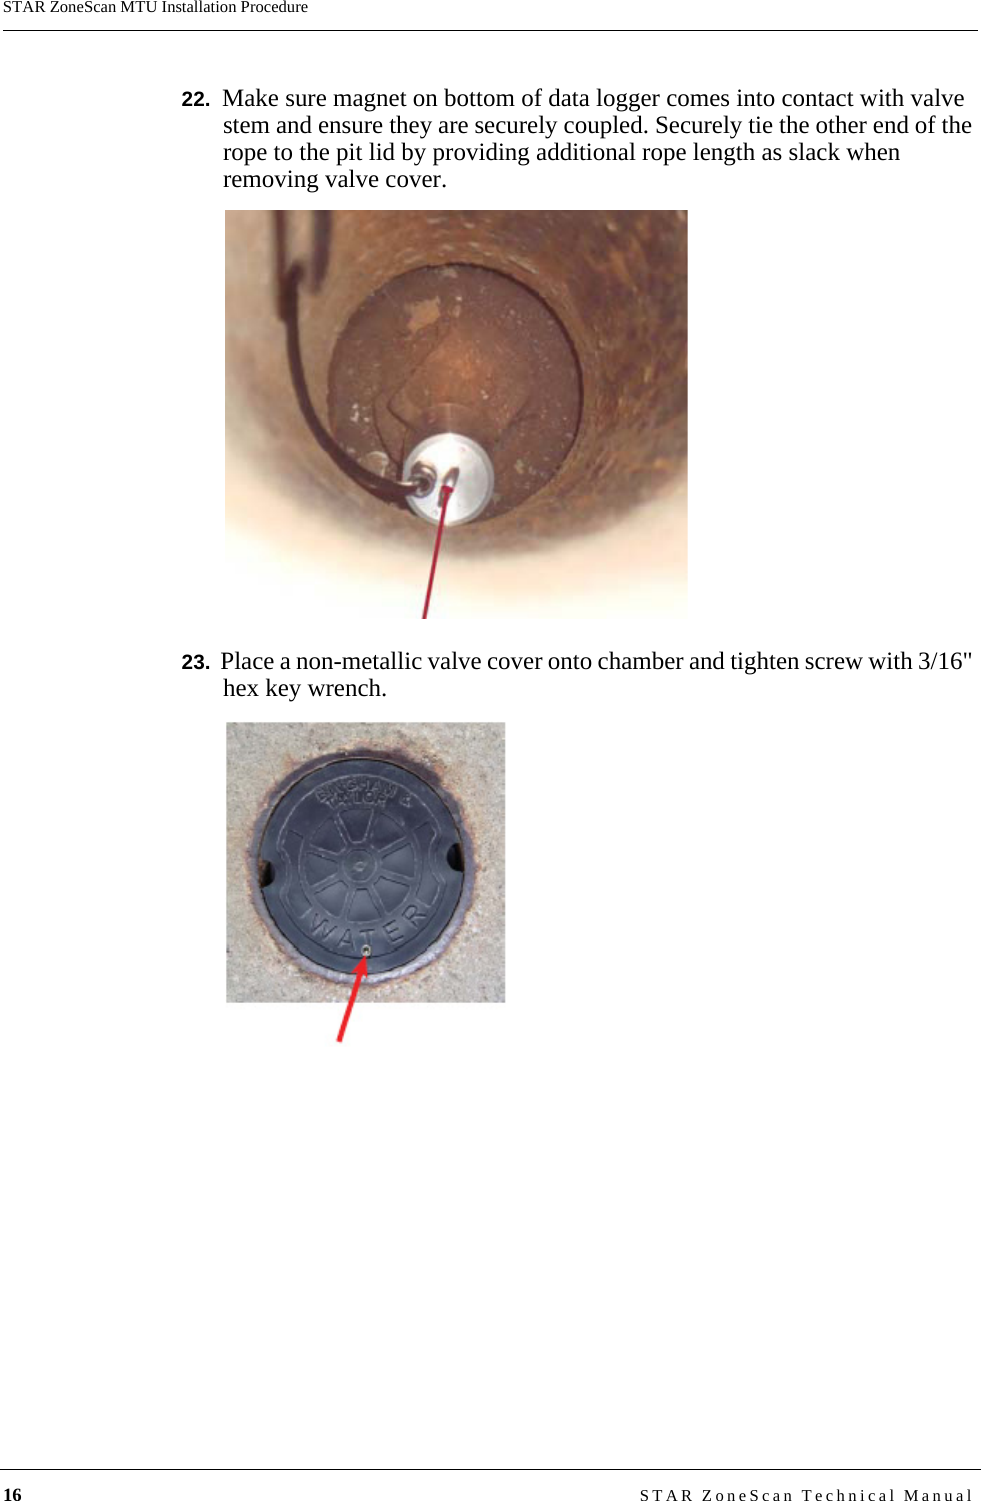
Views
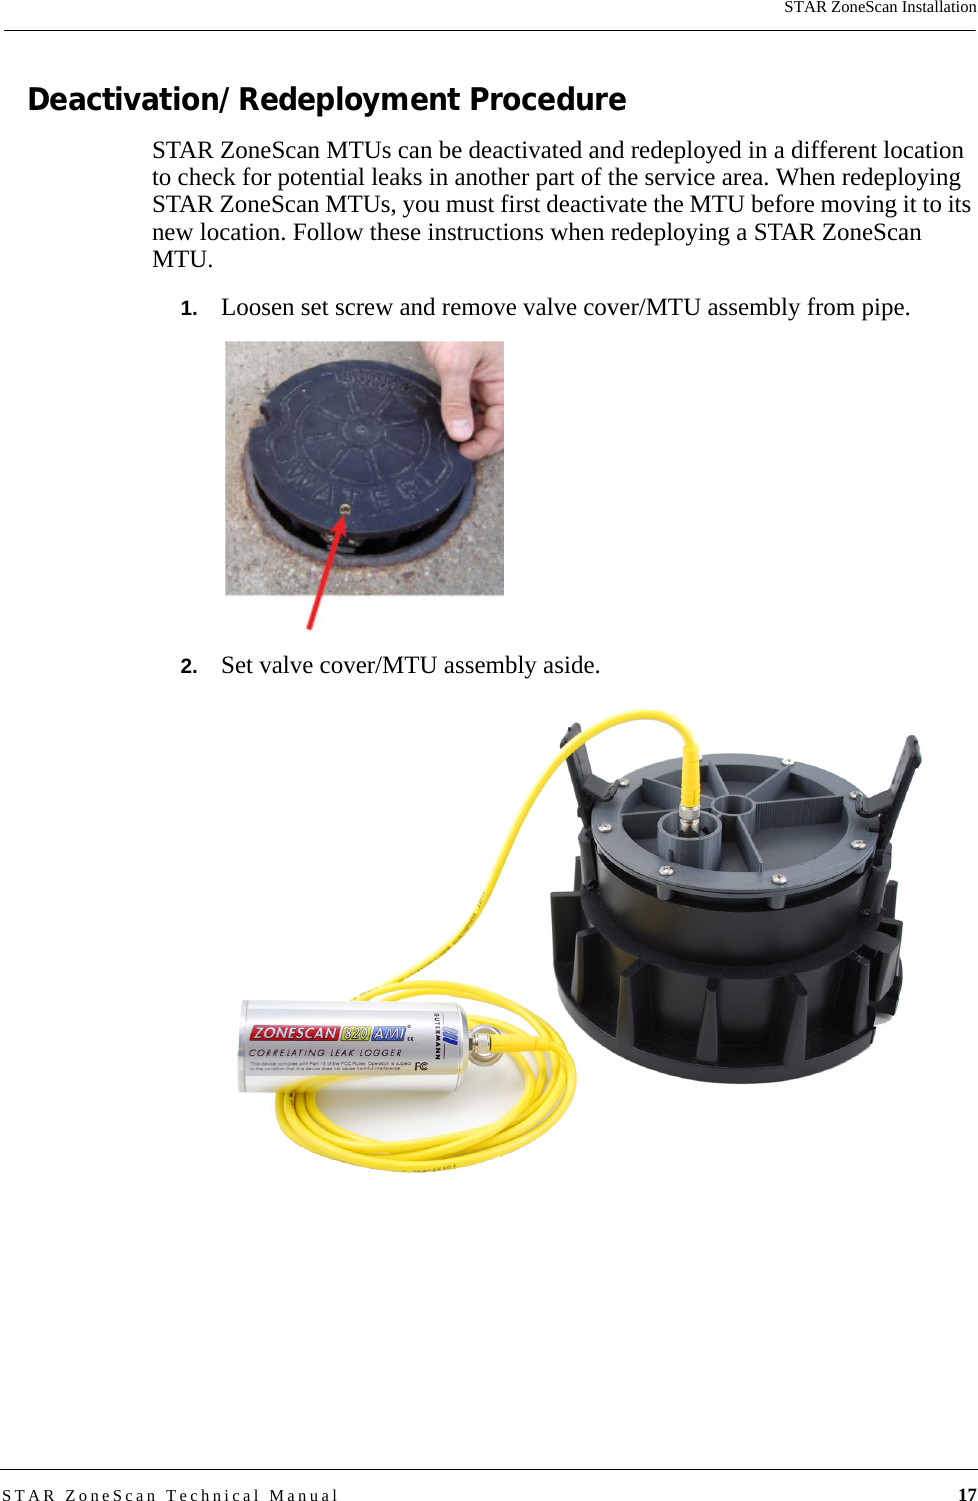
User Manual
Discussion / Help
Navigation
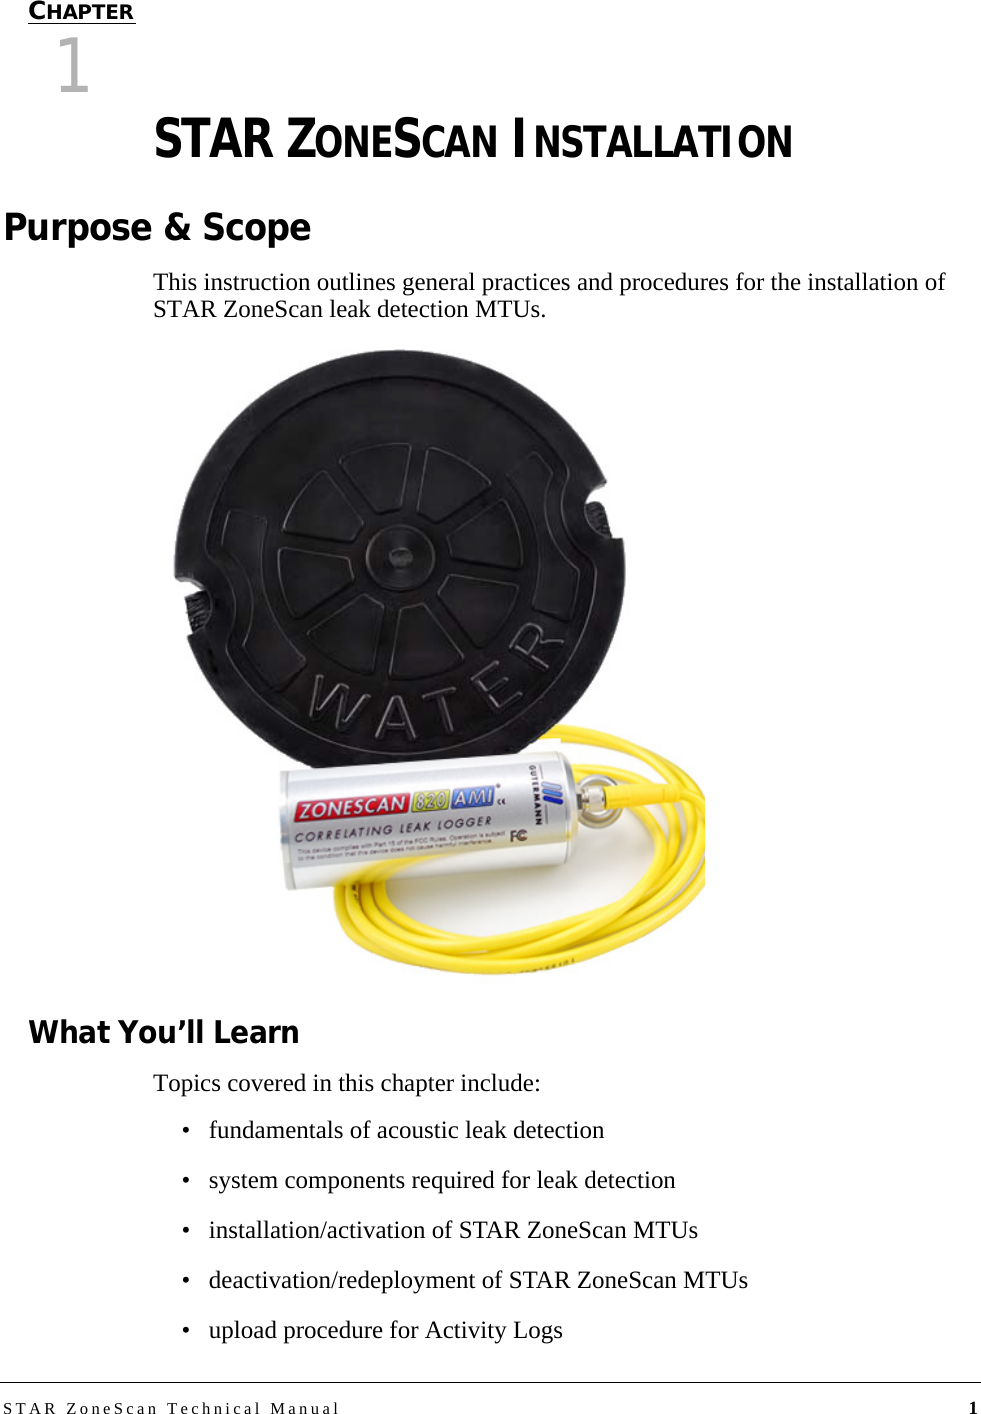
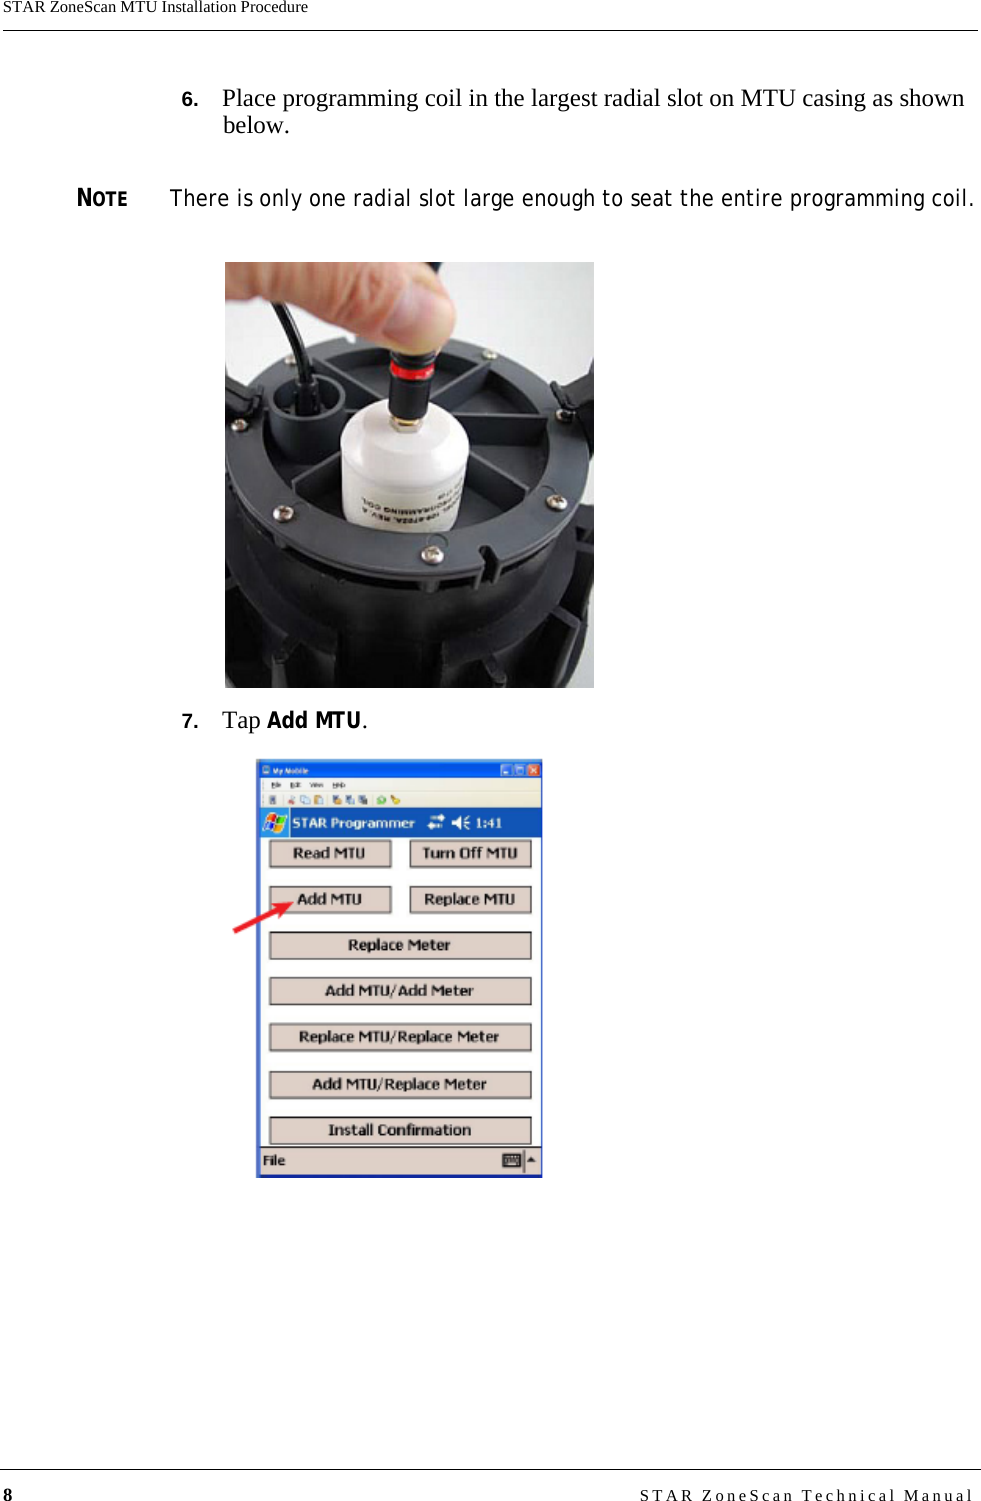
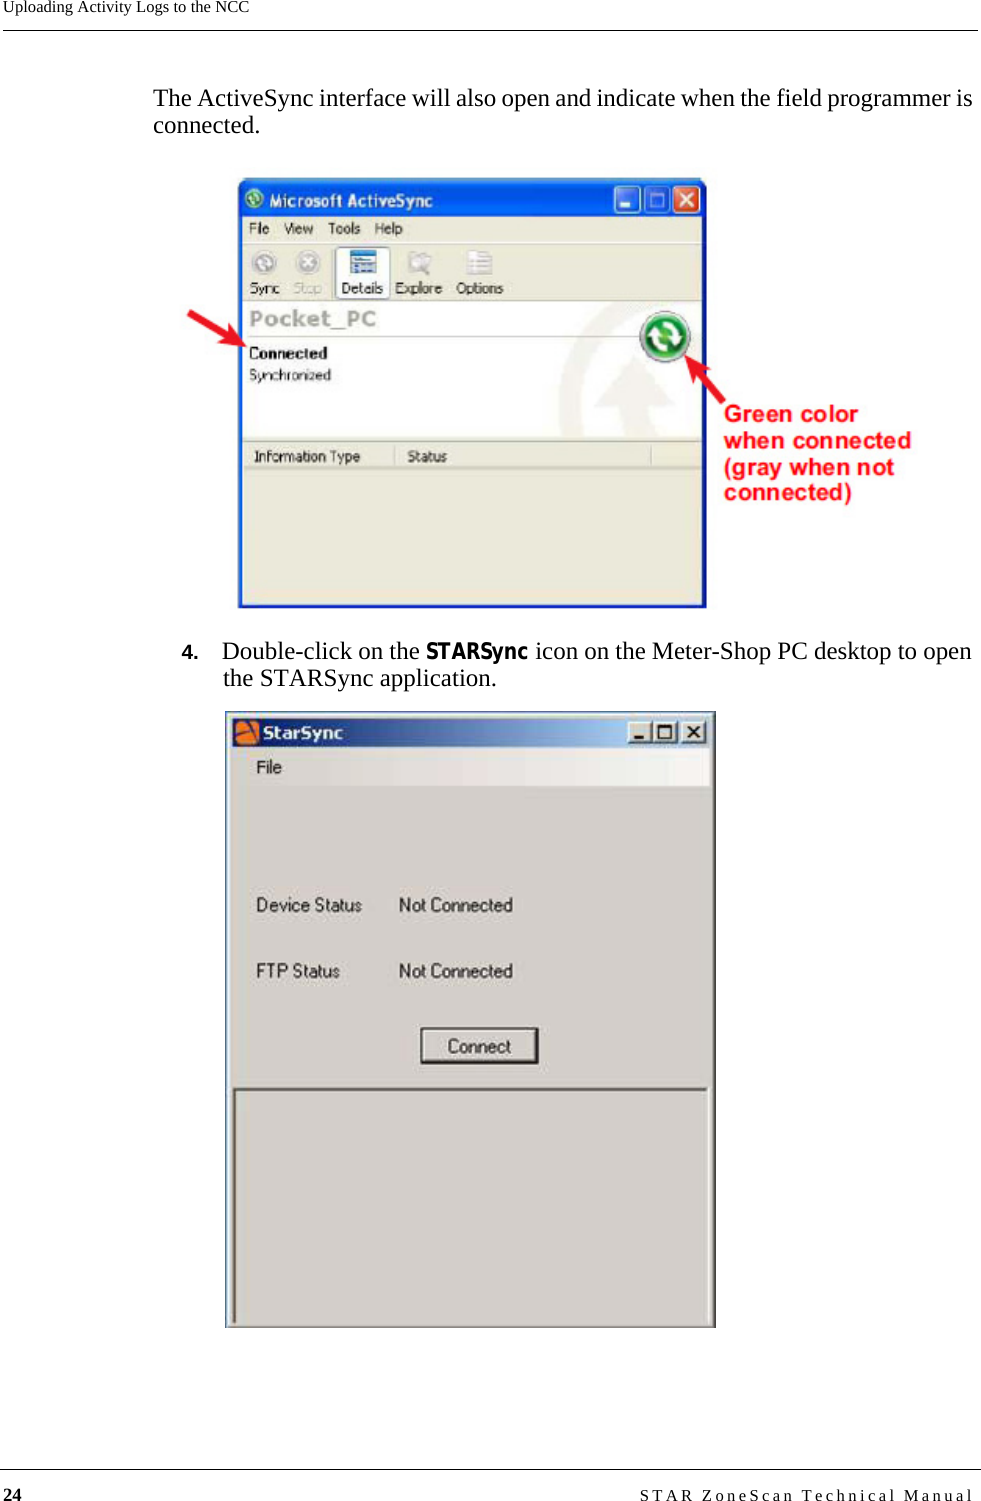
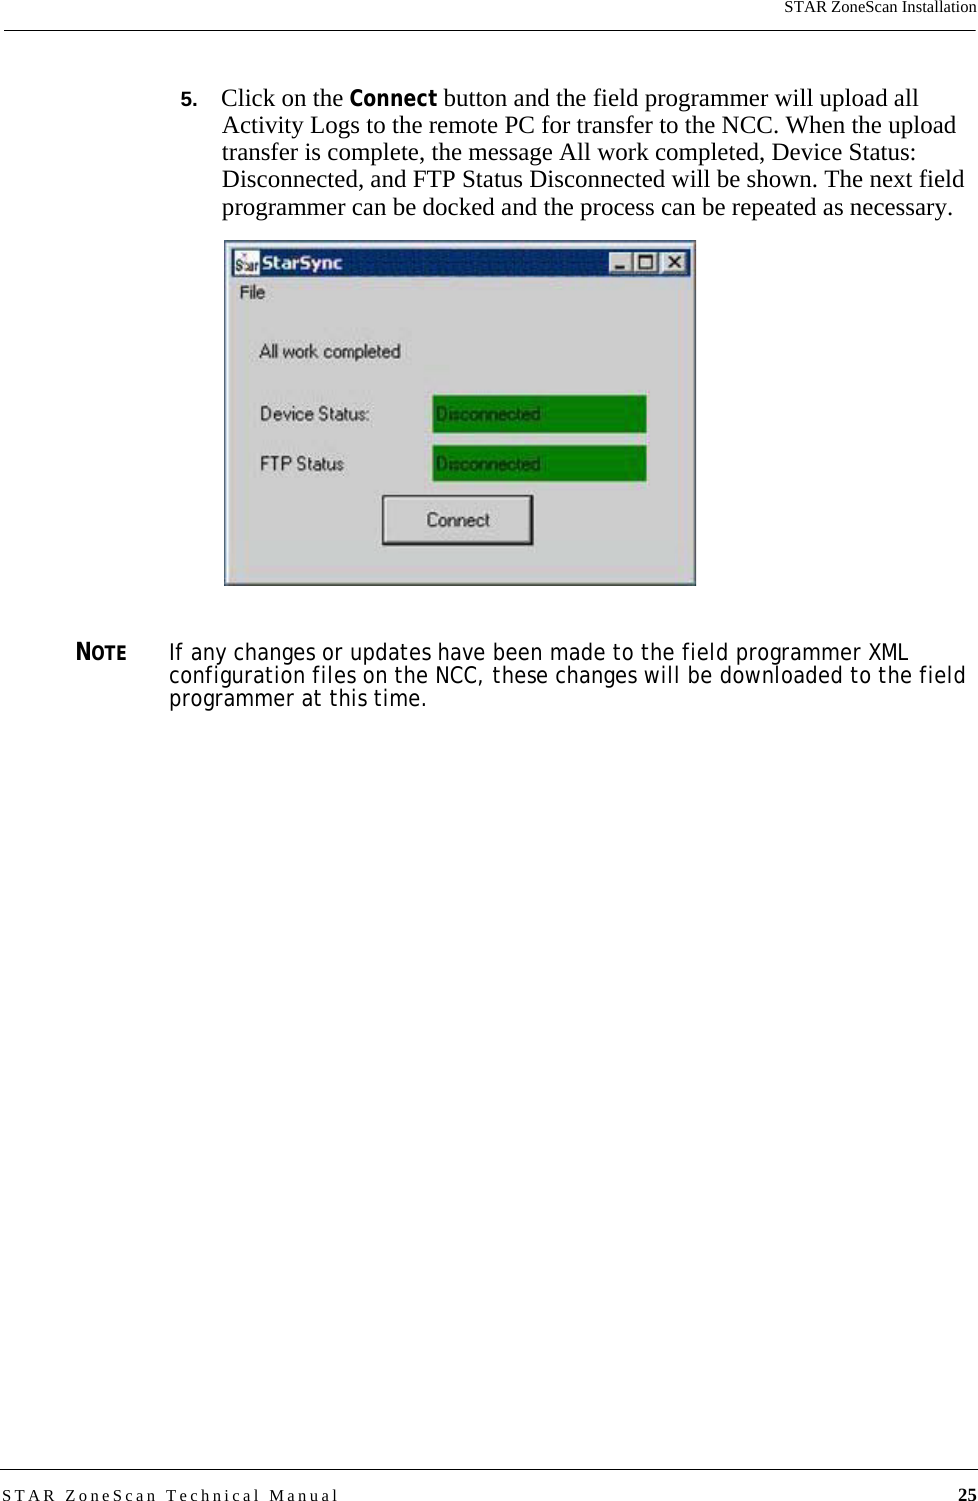
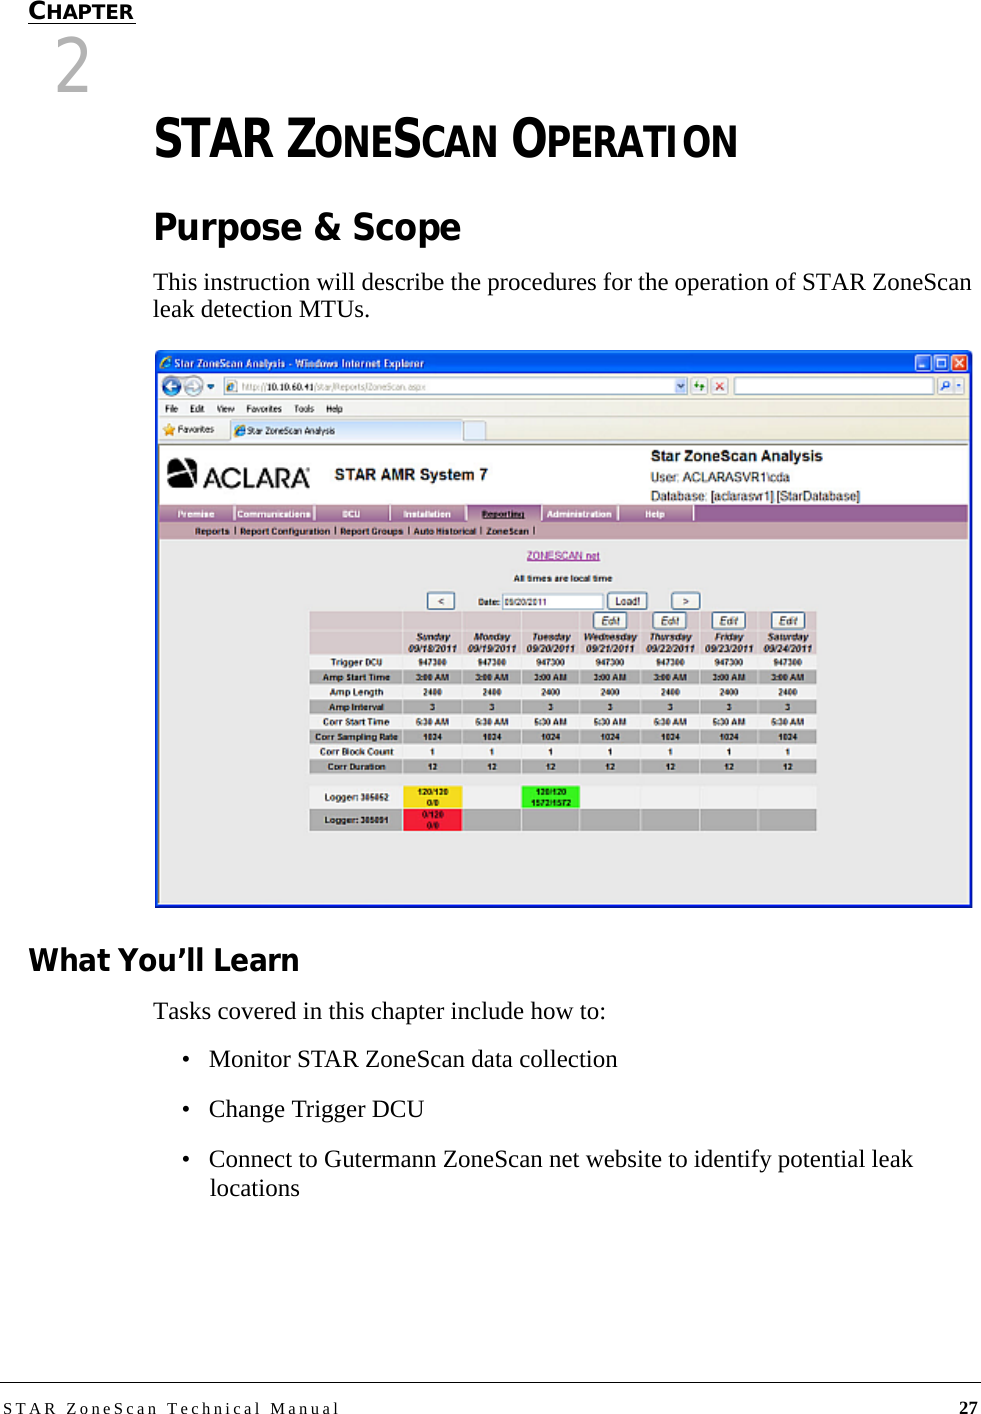
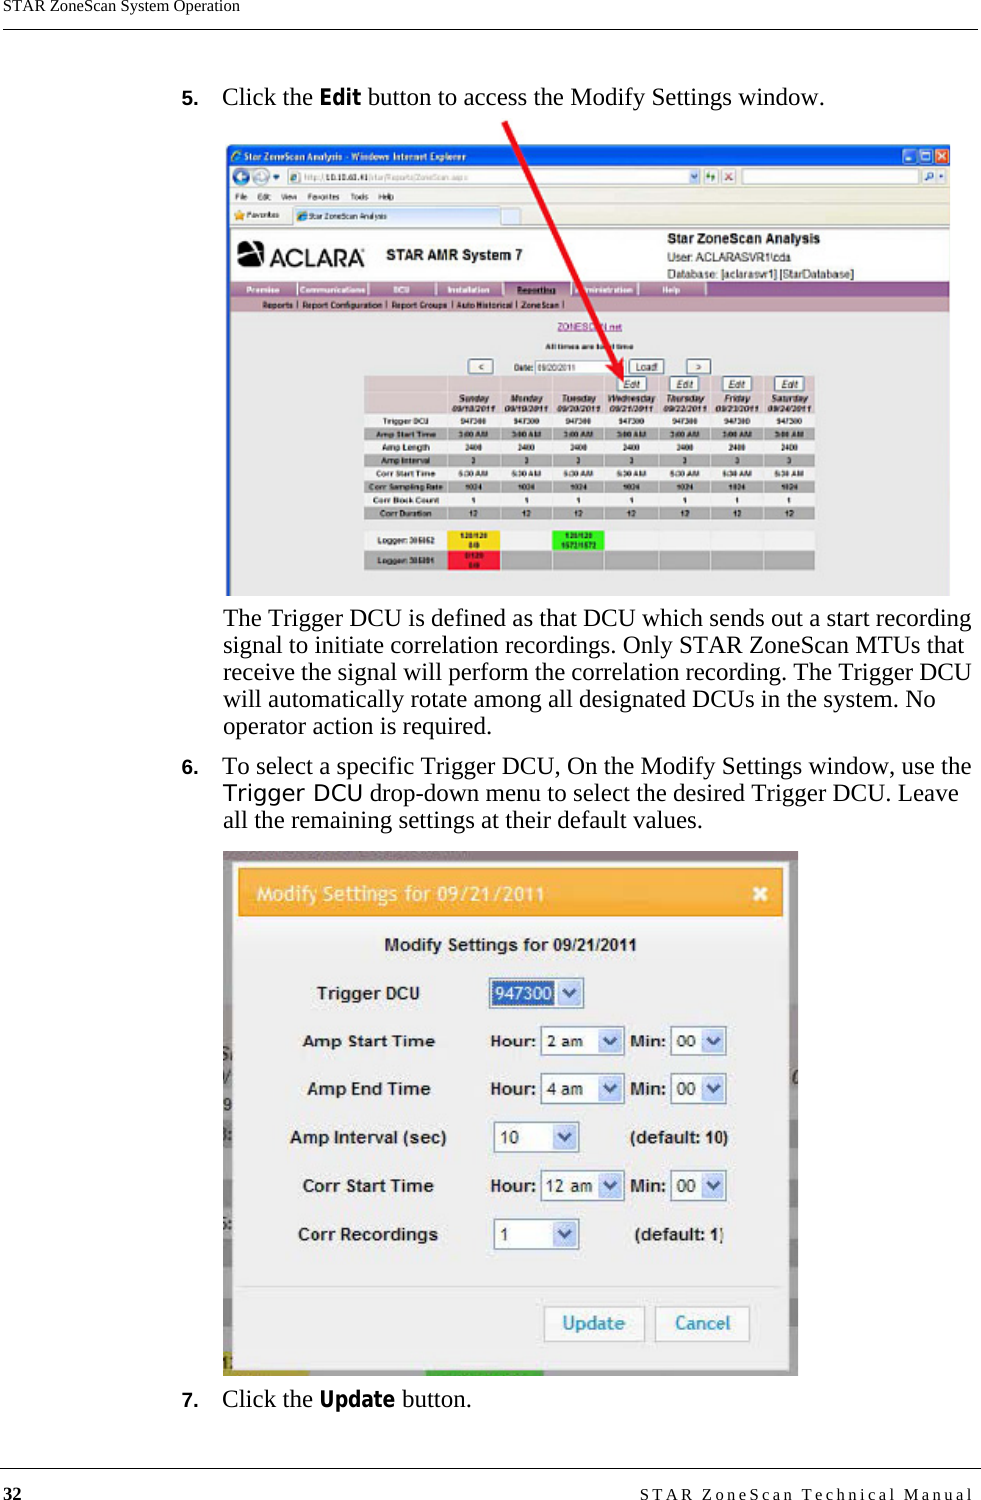
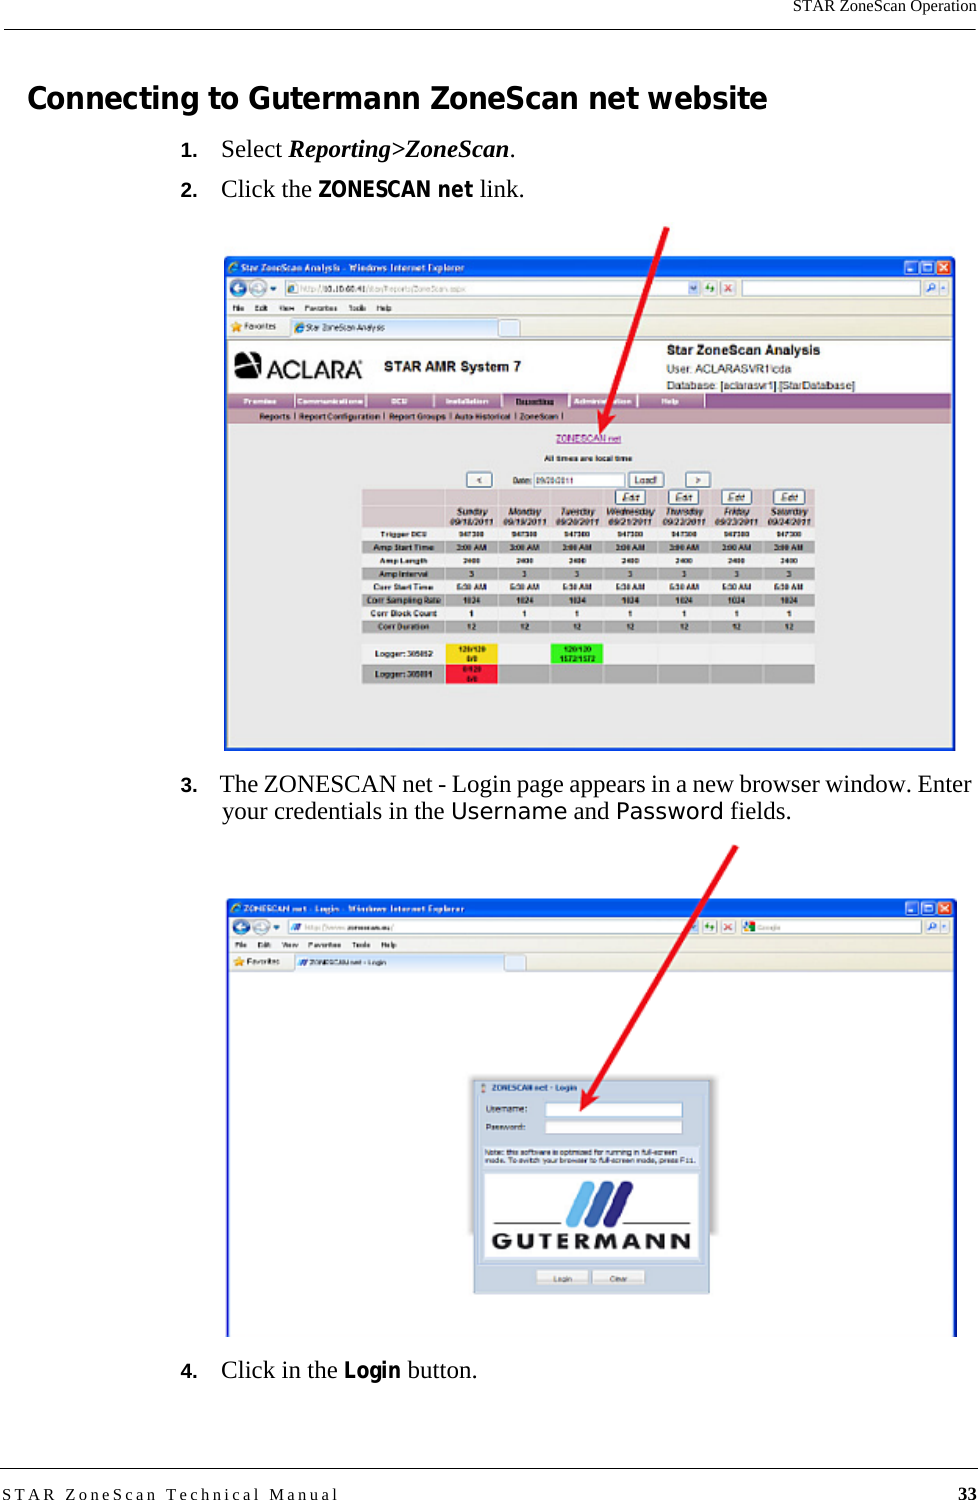
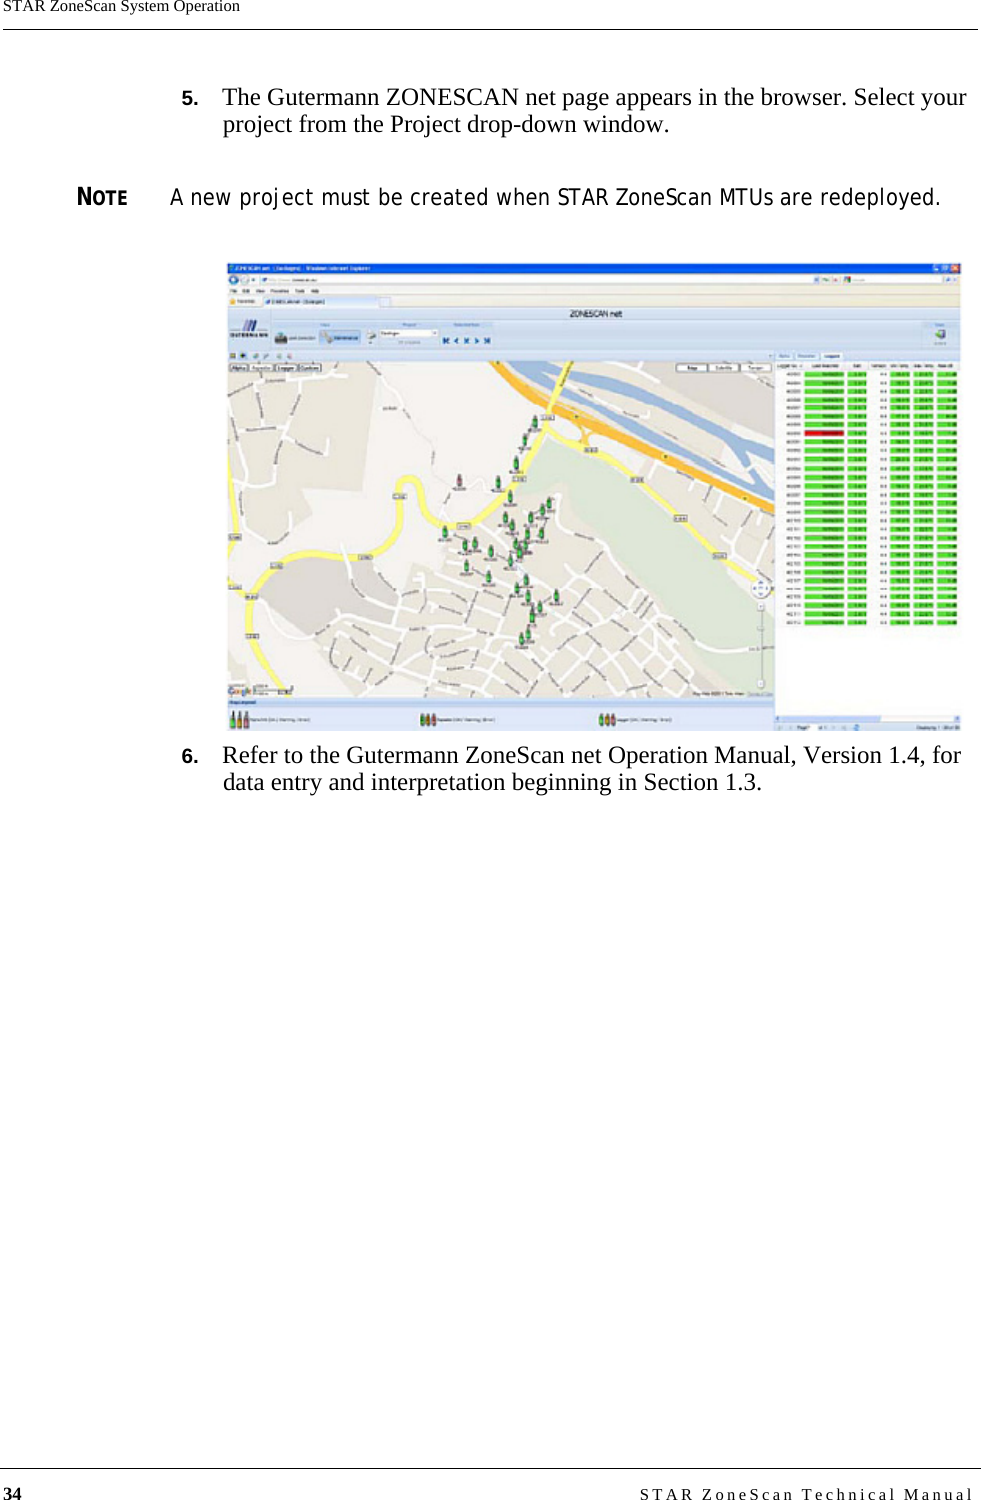
![STAR ZoneScan InstallationSTAR ZoneScan Technical Manual 3STAR ZoneScan Leak Identification ProcessData loggers are devices that continuously monitor and analyze leak noise in a water distribution system. They are attached to valve stems on water mains throughout the pipeline network. Each data logger is cable-connected to an Aclara STAR ZoneScan MTU that mounts on the underside of a non-metallic valve cover.Acoustic data collected by the logger is transmitted by the STAR ZoneScan MTU to Data Collector Units (DCUs) and on to the Network Control Computer (NCC). In addition to displaying system operational data, the NCC makes the acoustical data available to the Gutermann application software.'&8,,078+DQGKHOG1&&2SHUDWLRQV±0+]5),;577%LOOLQJ67$5=RQH6FDQ078/$1=RQH6FDQ$SSOLFDWLRQ6RIWZDUH:::](https://usermanual.wiki/Aclara-Technologies/2013001.Users-Manual/User-Guide-2282063-Page-9.png)