Acrox Technologies MU0010340 Wireless Mouse User Manual MUF Touch On Manual
Acrox Technologies Co., Ltd. Wireless Mouse MUF Touch On Manual
User Manual

Troubleshooting
Troubleshooting
Mouse does not work upon installation
Try one or more of the following:
l For optimal performance, place the receiver at least eight inches or 20
centimeters away from the mouse or other electrical devices, such as the
computer, the computer monitor, or external drive.
l
Make sure you have installed the batteries correctly.
l Check the Channel Switch on both Mouse and Receiver is set to the same
channel No ( for 2 Channel Model Only)..
l If you are working on a metallic surface, try using a mouse pad and turning the
receiver on its side for better reception
Cordless 3D Optical Wheel Mouse
With
Advanced Human Body Detect Technology
USER'S GUIDE
Mous e Not Detected
When using the mouse, it may not be detected by the computer, To remedy this
problem, try the following
l Make sure the receiver cable is plugged into the right mouse port.
l Make sure your mouse port has the proper configuration. Refer to your
computer
documentation for the correct port configuration.
l You may have other system devices(eg. a LAN card) that conflict with your
mouse . Check the IRQ/address settings of these devices for conflicts, and
change the settings as required.
The Screen Cursors Does Not Move Properly
l
Change the position of your radio receiver, because it may be too far from the
mouse ; or the computer monitor,
or a large metal object may be interfering with
the receiver's radio reception. Try moving the receiver and/or mouse t
o improve
reception.
l Make sure that the battery indicator is NOT lit on.
Replace batteries if the low
battery indicator is lit on.
l You may also need to change the channel / ID
for the mouse, Press the Connect
button on the receiver, then press the Connect button on the mouse.
l
If your tabletop surface is red in color or is highly reflective like a mirror, your
tabletop surface may be interfering with the optical sensor of the mouse, Try
using a mouse pad, or use the mouse on a different tabletop surface.
l If
you had stop to operate the mouse for a while, the Mouse maybe in Suspend
Mode. To wake up the mouse, please press anyone key on the mouse.
CAUTION To use this mouse properly, please read
the user's guide before installation
6
For 1 Ch, 256 ID and 2 Ch, 256 ID Models

FCC Compliance and Advisory Statement
Federal Communications Commission (FCC) Notice
This device complies with Part 15 of the FCC rules.
Operation is subject to the
following two conditions
(1) This device may not cause harmful interference, and
(2) This device must accept any interference received, including interference
that
may cause undesired operation.
This equipment has been tested and found to comply with the limits of a Class B
digital device, pursuant to Part 15 of the FCC Rules These limits are designed to
provide reason
able protection against harmful interference in a residential installation
This equipment generates, uses and can radiate radio frequency energy and, if not
installed and used in accordance with the instructions, may cause harmful
interference to radio com
munications, However, there is no guarantee that
interference will not occur in particular installations If this equipment does cause
harmful interference to radio or television reception, which can be determined by
turning the equipment off and on, the us
er is encouraged to try to correct the
interference by one or more of the following measures :
1. Reorient / Relocate the receiving antenna.
2. Increase the distance between the mouse and receiver.
3. Connect the equipment into an outlet on a circuit different from that the receiver is
connected.
4. Consult the dealer or an experienced radio /TV technician for help
CAUTION:
Change or modifications not expressly approved by the manufacturer responsible for
compliance could void the user's authority to operate the equipment
Using your cordless mouse
5
Universal Scroll
Provide the scrolling movement by mouse scroll button. Choose the “ Universal Scroll
“ to adjust the horizontal and Vertical Movement speed by “ Slow-Fast bar “ on the
window.
Zoom
It allow you to a certain pan area by input the numbers in “ Zoomed Size “ from 2 X 2
to 64 X 48 . And, enlarge the content of the pan area by inputting the factor number
from2 to 8 times to” Zoom Factor “.
Application Switching
Choose this function for easy-to-do application change by clicking scroll button.
Launch Default Browser
Mark this function to get the path to access the IE and Netscape application by
pressing the scroll button.
Launch Default E-Mail
Mark this function to get the path to access the E-Mail application by pressing the
scroll button.
Auto Scroll
Give a fixed movement speed for horizontal and Vertical scrolling.
Wheel Cooperate Function
Control ( Office Zoom )
Holding the “ Ctrl “ Key of the keyboard by each pressing down the scroll button.
Shift
Holding the “ Shift “ Key of the keyboard by each pressing down the scroll button.
Switch to Horizontal Wheel
Choose to change the Vertical Scrolling wheel mode to Horizontal Scroll mode by each
pressing down the scroll button.
IE Switching
Backward
Choose to replace the “ Back “ function by each pressing down the scroll button.
Forward
Choose to replace the “ Forward “ function by each pressing down the scroll button.
K.B. Simulation
Choose to simulate the function key of the keyboard (F1~F10, Esc, Backspace,
Enter, … ect.) by each pressing down the scroll button.
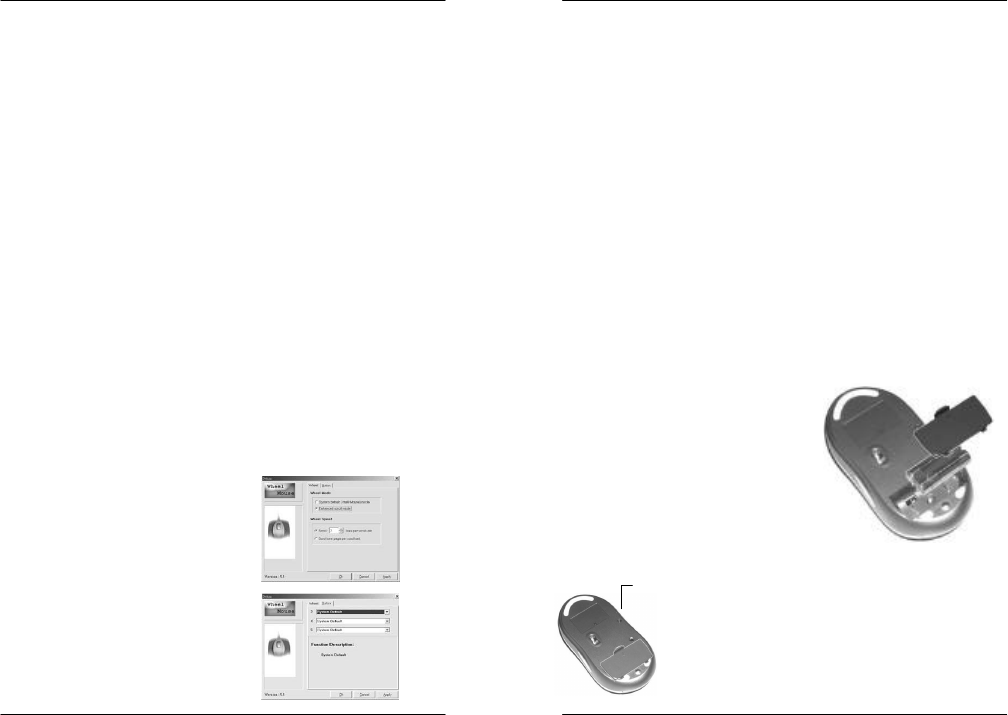
Button Setting :
You can set the button 3~5 by selecting the functions you want in the task. And the
functions you can select are including the system frequently functions and special
powerful functions as below :

Mouse Utility Getting Ready
Welcome
Your mouse uses a newly developed optical sensor that replaces the traditional
mouse ball and uses radio technology to communicate with your computer.
The
optical sensor accurately scans the surface of your de
sktop many times per second
for smooth and fast cursor tracking on your computer screen. And the
digital radio
technology does not require line -of-sight placement and usage.
Your mouse also
come with a wheel, which functions both as a wheel and as a button.
Getting Ready
Installing the Batteries
Step 1 Remove the battery compartment
cover on the bottom of the mouse
by squeezing the cover in from
the tab to release it.
Step 2 Insert the batteries as shown
inside
the battery compartment.
Step 3 Replace the cover.
1
Software Installation
Please follow the following steps to install your mouse driver :
1. Insert your driver disk into the floppy driver.
2. Go to “Start” Menu and select “Run”.
3. Type “A:\Setup” then press the “Enter” button on your keyboard.
4. Follo
w the instruction on screen, then system will install the Driver
automatically.
5. Reboot your system while completing the installation process.
Mouse Utility
Double click the mouse icon on the right-
bottom
corner of the Windows screen. Then the following
window will open.
For more detail description, please review the
each item as below :
Wheel Setting :
Wheel Mode
1. Choose “ System Default Mode “to be
compatible with Intelli-Mouse functions.
2. Choose “ Enhance Scroll Mode “to
support the new useful functions of 8D
Scroll Ball Mouse.
Low Battery Indicator
Low Battery Indicator on bottom
of the
mouse will flash / lit-on if the battery is low
.
Replace battery if the Low Battery Indicator is lit on.
It is recommended that you use alkaline batteries
when you change
batteries to optimize
performance. You may use other battery types,
but
do not mix them with alkaline .
l
To scroll, simply move the wheel .
l To use the wheel like a standard mouse
button.
click (press down) the wheel
Caution : If your tabletop surface is in red color, transparent as glass or highly
reflective like a mirror, your tabletop surface may be interfering with the
optical sensor of the mouse, Try using a mouse pad, or use the mouse
on a different tabletop surface.
Please check the following contents of your Cordless Optical Wheel Mouse
1 x Cordless Optical Wheel Mouse
1X User’s Manual
1X Driver Disk
1 x Receiver,
2 x AA A alkaline Batteries
Advanced Human Body Detect Technology
Your mouse come with advanced human body detect sensor
which can detect the hand touch on the mouse.
The sensor
is on both left and right side of the mouse when your hand
close to or touch the sensor area, mouse works immediately
.
And when your hand move off the mouse over 2 seconds,
Mouse will enter sleep mode for power saving
CAUTION : mouse can not work if your hand does
not touch sensor area.
4
Low Battery
Indicator
Caution :
For saving the batty power, the Mouse will automatically suspend
after you stop operating the mouse for a period of time. To wake up
the mouse, please press the anyone buttons on the mouse.
Left Sensor Area
Right Sensor Area
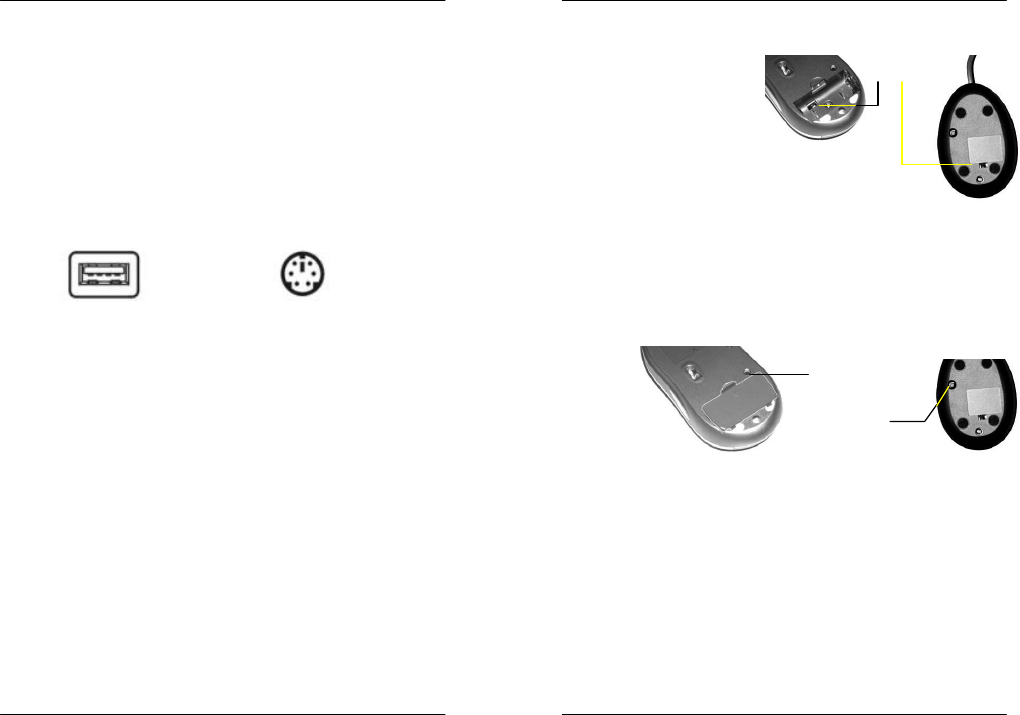
Setting up your cordless mouse
Connecting the Receiver
Setting up your Cordless mouse
After you have installed the receiver, you are ready to place the mouse on your
desktop.
Because the mouse use cordless radio technology, placement of you mouse
is not critical, giving you considerable freedom of movement and a more enjoyable
computing experience.
For optimal performance, place the receiver at least eight inches or 20 cen
timeters
away from the mouse or other electrical devices, such as the computer, the computer
monitor, or external drive.
Connecting the Receiver
The Cordless Mouse uses digital radio technology Communication between the
mouse and your computer is achieved with great reliability using radio waves.
The
cordless mouse do not have bulky cables that can get in the way, the mouse emit
radio frequencies as a means of communicating, which is picked up by the receiver
and passed onto your computer.
The receiver is connected to your computer via a cable. And it plugs into your
computer's USB port or mouse port
CAUTION :
For PS/2 mouse port installation, Before installing the receiver's cable. Turn
off your computer. Plugging and unplugging cables to your computer's
mouse port while the computer is running can damage the mouse port
or your Computer.
For USB port installation
Windows 98 or higher or Macintosh OS 8.6 or higher is required
for USB port installation. Connect the mouse cable to the USB
port of the computer. For Windows, you may be prompted to insert
the Windows software CD. Insert this software CD into the
computer's CD-ROM driver when asked to do so. Then follow the
on-screen instructions
Changing the security IDs
Your mouse comes with multi security IDs, which can let your receiver only listen
to
one mouse. Do following step to change security IDs when you get undesired
interference, changing the batteries or first time installation.
1. Press the ID Switch button on the Receiver
2. Press the ID Switch button on the bottom of the Mouse ONCE and waiting for 10
second.
If the mouse cursor does not move after 10 second, do above steps again.
Note :
If you had changed the security ID successfully,
The LED on the receiver
will be flash several times. If the ID Settin
g is not properly, please check
the channel setting ( for 2 channel Model), and then re set your ID again by
following the above steps. you need to do above steps to re-
connect the
mouse and the receiver each time you replace batteries
Using your cordless mouse
How to use the wheel
You can scroll in Windows 98 / ME / 2000 / NT 4.0 / XP using your Cordless Optical
Wheel Mouse. The following table tells you how to scroll.
Your mouse has a wheel that functions both as a wheel and as a button, Simply click
the wheel like you would with a standard mouse button.
Setting the RF Channels ( For 2 Channel Model)
2
USB Port PS2 Mouse Port
3
Note that the low battery indicator is cali
brated for alkaline batteries only, and
will not give an accurate indication of battery life for batteries other than alkaline.
When you are not using your cordless mouse for long periods of time, remove
the batteries and store them in a dry place at normal room temperature.
If your mouse come with 2
Channel Design , Do check the
Channel Switch on both Mouse
and Receiver is set to the same
channel No. before you starting
changing your Security IDs.
Channel
Switch
ID Switch
ID Switch

Troubleshooting
Troubleshooting
Mouse does not work upon installation
Try one or more of the following:
l For optimal performance, place the receiver at least eight inches or 20
centimeters away from the mouse or other electrical devices, such as the
computer, the computer monitor, or external drive.
l
Make sure you have installed the batteries correctly.
l Check the Channel Switch on both Mouse and Receiver is set to the same
channel No ( for 2 Channel Model Only)..
l If you are working on a metallic surface, try using a mouse pad and turning the
receiver on its side for better reception
Cordless 3D Optical Wheel Mouse
With 5 customizable buttons, Rechargeable Features
USER'S GUIDE
Mouse Not Detected
When using the mouse, it may not be detected by the computer, To remedy this
problem, try the following
l Make sure the receiver cable is plugged into the right mouse port.
l Make sure your mouse port has the proper configuration. Refer to your
computer
documentation for the correct port configuration.
l You may have other system devices(eg. a LAN card) that conflict with your
mouse . Check the IRQ/address settings of these devices for conflicts, and
change the settings as required.
The Screen Cursors Does Not Move Properly
l
Change the position of your radio receiver, because it may be too far from the
mouse ; or the computer monitor,
or a large metal object may be interfering with
the receiver's radio reception. Try moving the receiver and/or
mouse to improve
reception.
l Make sure that the battery indicator is NOT lit on.
Replace batteries if the low
battery indicator is lit on.
l You may also need to change the channel / ID
for the mouse, Press the Connect
button on the receiver, then press the Connect button on the mouse.
l
If your tabletop surface is red in color or is highly reflective like a mirror, your
tabletop surface may be interfering with the optical sensor of the mouse, Try
using a mouse pad, or use the mouse on a different tabletop surface.
l
If you had stop to operate the mouse for a while, the Mouse maybe in Suspend
Mode. To wake up the mouse, please press anyone key on the mouse.
CAUTION To use this mouse properly, please read
the user's guide before installation
6
For 1 Ch, 256 ID and 2 Ch, 256 ID Models

FCC Compliance and Advisory Statement
Federal Communications Commission (FCC) Notice
This device complies with Part 15 of the FCC rules.
Operation is subject to the
following two conditions
(1) This device may not cause harmful interference, and
(2) This device must accept any interference received, including interference
that
may cause undesired operation.
This equipment has been tested and found to comply with the limits of a Class B
digital device, pursuant to Part 15 of the FCC Rules These limits are designed to
provide
reasonable protection against harmful interference in a residential installation
This equipment generates, uses and can radiate radio frequency energy and, if not
installed and used in accordance with the instructions, may cause harmful
interference to ra
dio communications, However, there is no guarantee that
interference will not occur in particular installations If this equipment does cause
harmful interference to radio or television reception, which can be determined by
turning the equipment off and on,
the user is encouraged to try to correct the
interference by one or more of the following measures :
1. Reorient / Relocate the receiving antenna.
2. Increase the distance between the mouse and receiver.
3. Connect the equipment into an outlet on a circuit different from that the receiver is
connected.
4. Consult the dealer or an experienced radio /TV technician for help
CAUTION:
Change or modifications not expressly approved by the manufacturer responsible for
compliance could void the user's authority to operate the equipment
Using your cordless mouse
5
Universal Scroll
Provide the scrolling movement by mouse scroll button. Choose the “ Universal Scroll
“ to adjust the horizontal and Vertical Movement speed by “ Slow-Fast bar “ on the
window.
Zoom
It allow you to a certain pan area by input the numbers in “ Zoomed Size “ from 2 X 2
to 64 X 48 . And, enlarge the content of the pan area by inputting the factor number
from2 to 8 times to” Zoom Factor “.
Application Switching
Choose this function for easy-to-do application change by clicking scroll button.
Launch Default Browser
Mark this function to get the path to access the IE and Netscape application by
pressing the scroll button.
Launch Default E-Mail
Mark this function to get the path to access the E-Mail application by pressing the
scroll button.
Auto Scroll
Give a fixed movement speed for horizontal and Vertical scrolling.
Wheel Cooperate Function
Control ( Office Zoom )
Holding the “ Ctrl “ Key of the keyboard by each pressing down the scroll button.
Shift
Holding the “ Shift “ Key of the keyboard by each pressing down the scroll button.
Switch to Horizontal Wheel
Choose to change the Vertical Scrolling wheel mode to Horizontal Scroll mode by each
pressing down the scroll button.
IE Switching
Backward
Choose to replace the “ Back “ function by each pressing down the scroll button.
Forward
Choose to replace the “ Forward “ function by each pressing down the scroll button.
K.B. Simulation
Choose to simulate the function key of the keyboard (F1~F10, Esc, Backspace,
Enter, … ect.) by each pressing down the scroll button.
Mouse Utility Getting Ready
Welcome
Your mouse uses a newly developed optical sensor that replaces the traditional
mouse ball and uses radio technology to communicate with your computer.
The
optical
sensor accurately scans the surface of your desktop many times per second
for smooth and fast cursor tracking on your computer screen. And the
digital radio
technology does not require line-of-sight placement and usage.
Your mouse come
with a wheel, which functions both as a wheel and as a button.
And also Built with
Rechargeable Feature which can be huge saving for the cost of the Batteries.
1
Software Installation
Please follow the following steps to install your mouse driver :
1. Insert your driver disk into the floppy driver.
2. Go to “Start” Menu and select “Run”.
3. Type “A:\Setup” then press the “Enter” button on your keyboard.
4.
Follow the instruction on screen, then system will install the Driver
automatically.
5. Reboot your system while completing the installation process.
Mouse Utility
The Mouse Utility provides you with easy way to customize
the mouse
operations
. It will be automatically loaded into your system after finishing the
Driver Installation.
Double click the mouse icon on the right-bottom corn
er of the Windows
screen. Then the following window will open.
For more detail description, please review the each item as below :
Wheel Setting :
Wheel Mode
1. Choose “ System Default Mode “to be
compatible with Intelli-Mouse functions.
2. Choose “ Enhance Scr oll Mode “to
support the new useful functions of 8D
Scroll Ball Mouse.
Low Battery Indicator
Low Battery Indicator on bottom of the mouse
will
flash / lit-on if the battery is low. Replace
or Recharge
the batteries if the Low Battery Indicator is lit on. You
may use other battery types Batteries for some
emergency situation, but do not
Recharge the
batteries before you make sure there are
Rechargeable Batteries in your Mouse. It may
cause of fire or explosion if you recharge the
none rechargeable batteries (ie. Alkaline Battery )
Button Setting :
You can set the button 3~5 by selecting the
functions you want in the task. And the
functions you can select are including the
system frequently functions and special
powerful functions as below :
Caution : If your tabletop surface is in red color, transparent as glass or highly
reflective like a mirror, your tabletop surface may be interfering with the
optical sensor of the mouse, Try using a mouse pad, or use the mouse
on a different tabletop surface.
Please check the following contents of your Cordless Optical Wheel Mouse
1 x Cordless Optical Wheel Mouse
1 X Recharging Cradle / Receiver
1X User’s Manual
1X Driver Disk
2 x AA A Rechargeable Batteries
1X Power Adaptor
Getting Ready
How to Recharge the Mouse
You can simply recharge the Mouse Batteries by putting the Optical Mouse back to
the Recharging Cradle / Receiver. Once you put the Mouse on the Cradle, the LED
on the front side of Cradle will be flashing to show the Power Linking is ready
between Mouse and Cradle, and then lit on during Charging Period. And it will be
automatically turned off when the Batteries are full charged.
Installing the Batteries
Step 1 Remove the battery compartment
cover on the bottom of the mouse
by squeezing the cover in from the
tab to release it.
Step 2 Insert the batteries as shown inside
the battery compartment.
Step 3 Replace the cover.
4
Low Battery
Indicator
Warning :
Do Not
Recharge the batteries before you make sure there are
Rechargeable Batteries in your Mouse. When you put the Mouse
on the Cradle, Please Make Sure the Power Linking is ready.
Setting up your cordless mouse
Connecting the Receiver
Setting up your Cordless mouse
After you have installed the receiver, you are re
ady to place the mouse on your
desktop.
Because the mouse use cordless radio technology, placement of you mouse
is not critical, giving you considerable freedom of movement and a more enjoyable
computing experience.
For optimal performance, place the recei
ver at least eight inches or 20 centimeters
away from the mouse or other electrical devices, such as the computer, the computer
monitor, or external drive.
Connecting the Receiver
The Cordless Mouse uses digital radio technology Communication between the
mouse and your computer is achieved with great reliability using radio waves.
The
cordless mouse do not have bulky cables that can get in the way, the mouse emit
radio frequencies as a means of communicating, which is picked up by the receiver
and passed onto your computer.
The receiver is connected to your computer via a cable. And it plugs into your
computer's USB port or mouse port
CAUTION :
For PS/2 mouse port installation, Before installing the receiver's cable. Turn
off your computer. Plugging and unplugging cables to your computer's
mouse port while the computer is running can damage the mouse port
or your Computer.
For USB port installation
Windows 98 or higher or Macintosh OS 8.6 or higher is required
for USB port installation. Connect the mouse cable to the USB
port of the computer. For Windows, you may be prompted to insert
the Windows software CD. Insert this software CD into the
computer's CD-ROM driver when asked to do so. Then follow the
on-screen instructions
Changing the security IDs
Your mouse comes with multi security IDs, which can let your receiver only listen
to
one mouse. Do following step to change security IDs when you get undesired
interference, changing the batteries or first time installation.
1. Press the ID Switch button on the Receiver
2. Press the ID Switch button on the bottom of the Mouse ONCE and waiting for 10
second.
If the mouse cursor does not move after 10 second, do above steps again.
Note :
If you had changed the security ID successfully,
The LED on the receiver
will be fl
ash several times. If the ID Setting is not properly, please check
the channel setting ( for 2 channel Model), and then re set your ID again by
following the above steps. you need to do above steps to re-
connect the
mouse and the receiver each time you replace batteries
Using your cordless mouse
How to use the wheel
You can scroll the Window in Windows OS by using your Cordless Optical Wheel
Mouse . The following table tells you how to scroll.
Setting the RF Channels ( For 2 Channel Model)
l
To scroll, simply move the wheel .
l To use the wheel like a standard mouse
button.
click (press down) the wheel
2
USB Port PS2 Mouse Port
3
Warning :
Do Not Recharge the batteries before
you make sure there are
Rechargeable Batteries in your Mouse. It may cause of fire or
explosion if you recharge the none rechargeable
batteries (ie.
Alkaline Battery )
If your mouse come with 2
Channel Design , Do check the
Channel Switch on both Mouse
and Receiver is set to the same
channel No. before you starting
changing your Security IDs.
Channel
Switch
ID Switch
ID Switch
Caution :
For saving the batty power, the Mouse will automatically suspend
after you stop operating the mouse for a period of time. To wake up
the mouse, please press the anyone buttons on the mouse.