Acrox Technologies RX06 Dongle User Manual DX WLC1401 12 1183 QSG V1 EN ai
Acrox Technologies Co., Ltd. Dongle DX WLC1401 12 1183 QSG V1 EN ai
UserManual.wiki
>
Acrox Technologies
>
RX06 User Manual
>
Manual
Contents
1.
Manual
2.
Users Manual
Manual
Navigation menu
Upload a User Manual
Namespaces
Wiki Guide
HTML
PDF
Info
Views
User Manual
Discussion / Help
Navigation
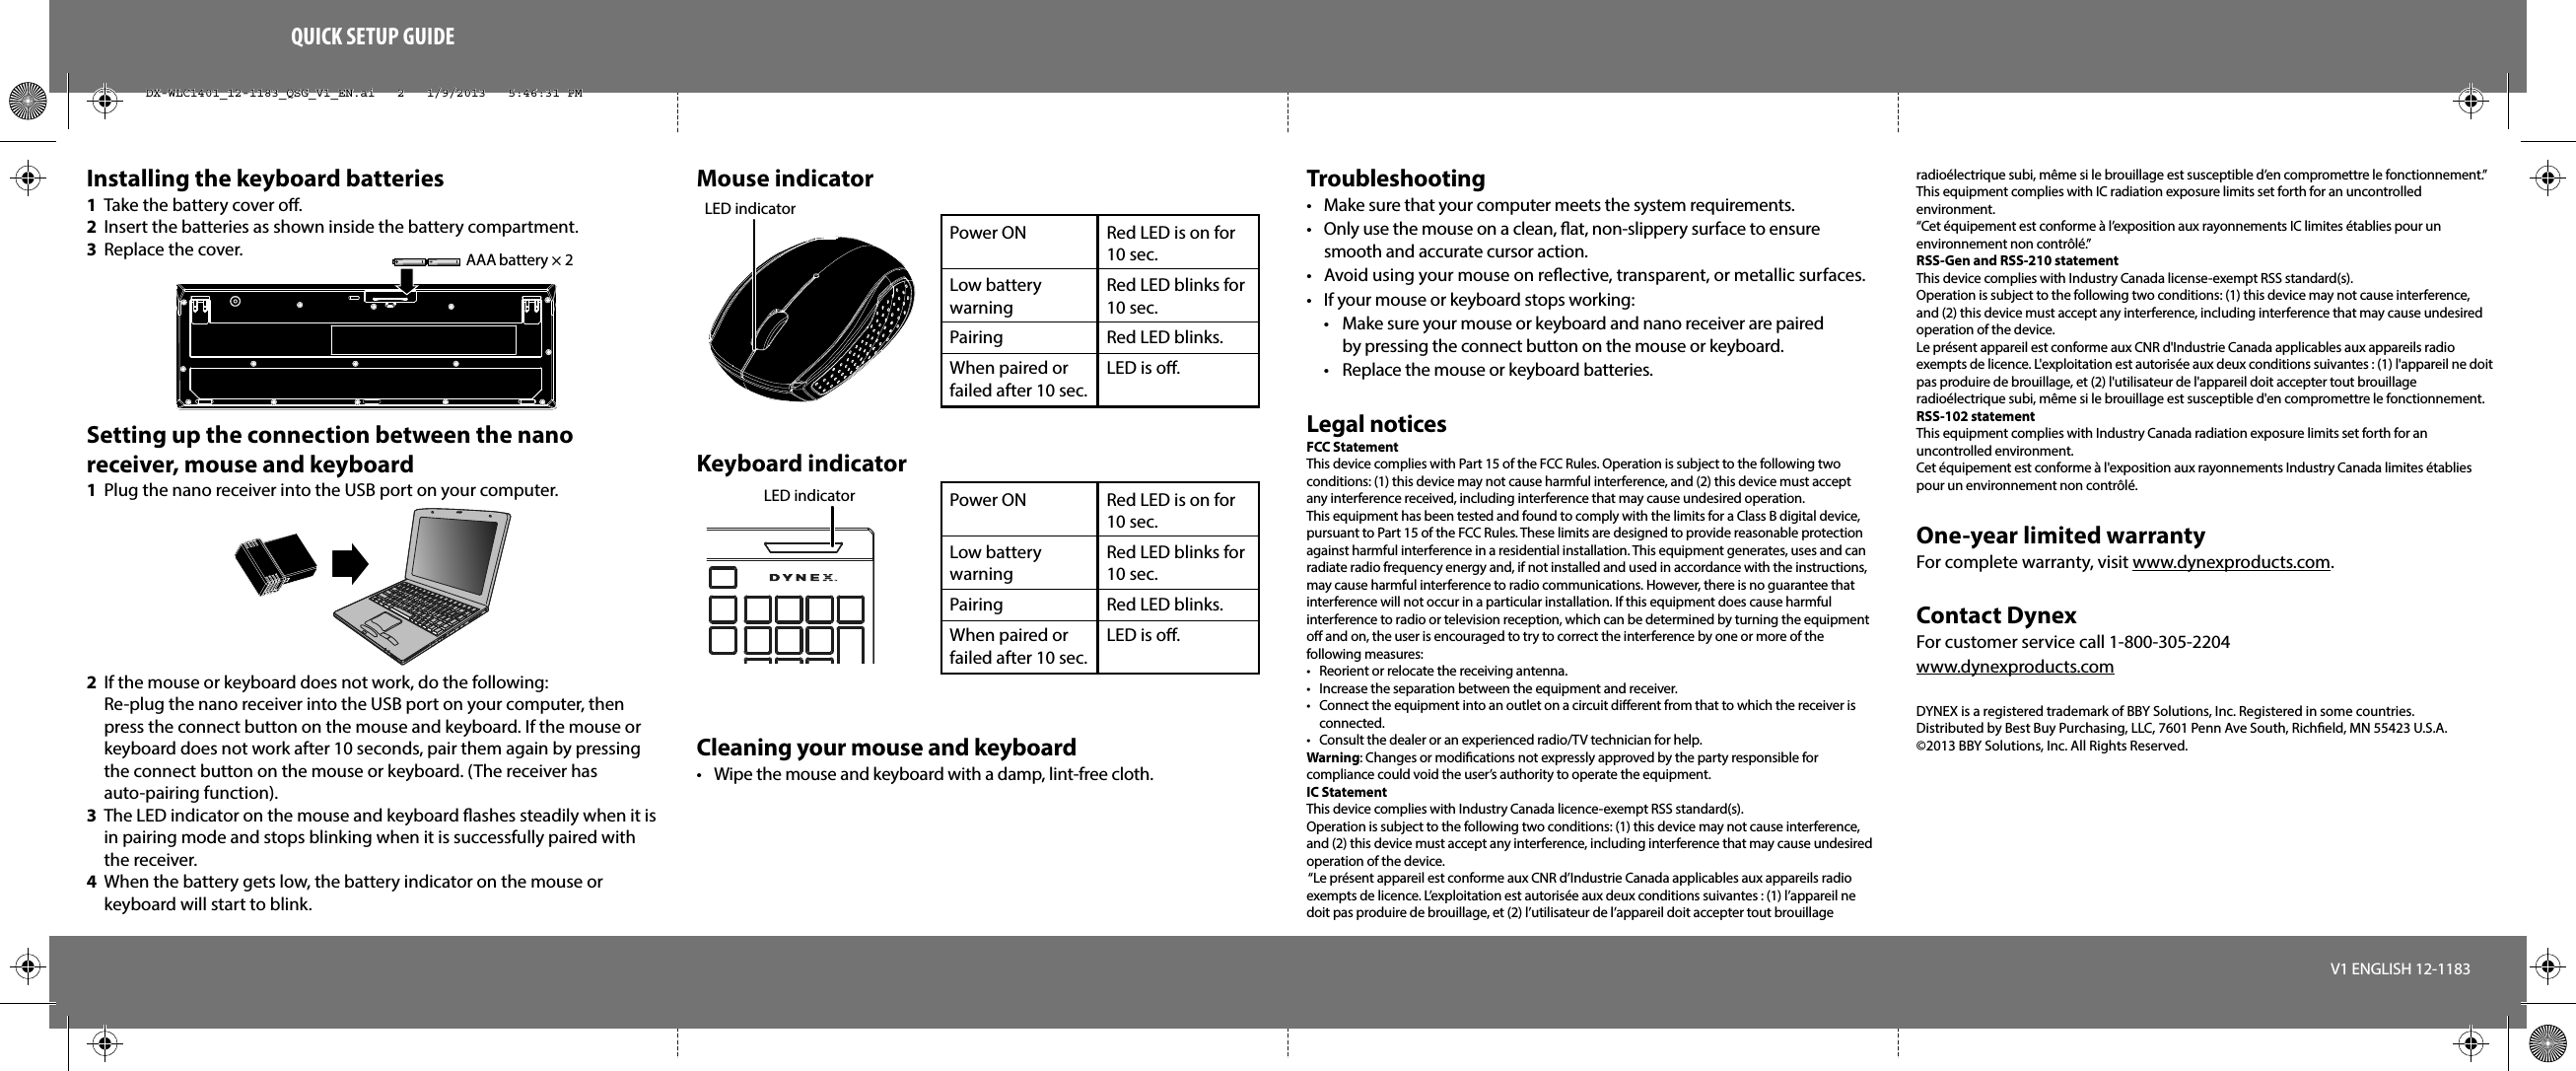
![)0&7^6%5$4#3@2!1`AltAltCtrlShiftEnterCapsLockOU]16Pg Up98/Tab }EnterDelPg DnEndHomeNumLockBackspace~{[(ShiftCtrlDX-WLC1401Wireless Keyboard and Mouse ComboPackage contents• Wireless keyboard• Wireless mouse and nano receiver• Quick Setup GuideSystem requirements• Windows® 8, Windows® 7, Windows Vista®, or Windows® XP • One available USB portFeaturesQUICK SETUP GUIDEInstalling the keyboard batteries1 Take the battery cover o.Troubleshooting• Make sure that your computer meets the system requirements.Installing the mouse batteries and removing the nano receiver1 Take the battery cover o.2 Remove the nano receiver. 3 Insert the batteries as shown inside the battery compartment.4 Replace the cover.Caution: Insert the battery with the correct orientation, according to the instruction label on the mouse.AAA battery × 2 Keyboard buttonsMedia player hot keysradioélectrique subi, même si le brouillage est susceptible d’en compromettre le fonctionnement.”This equipment complies with IC radiation exposure limits set forth for an uncontrolled environment. Connect buttonON/OFF switchBattery coverNano receiverLeft buttonRight buttonScroll wheelLEDindicatorMouse indicatorBefore using your new product, please read these instructions to prevent any damage.AAA batteriesandPullLED indicator# Icon Function1 Play/Pause2 Stop (Media)3 Previous4 Next5 Volume down (Voice-)6 Volume up (Voice+)7 Mute8 Calculator9 LED indicator10 Connect button11 Battery coverDescriptionSwitch between playing and pausing media.Stop playing the media in the media player.Switch to the previous media track.Switch to the next media track.Decrease the computer’s sound volume.Increase the computer’s sound volume.Mute (turns o) the computer’s sound.Start Microsoft calculator.Low battery and pairing indicator.Press to initiate pairing with your computer.Remove to install or replace the batteries.)0&7^6%5$4#3@2!1`AltAltCtrlShiftEnterCapsLockOU]16Pg Up98/Tab }EnterDelPg DnEndHomeNumLockBackspace~{[(ShiftCtrlDX-WLC1401_12-1183_QSG_V1_EN.ai 1 1/9/2013 5:46:10 PMDX-WLC1401_12-1183_QSG_V1_EN.ai 1 1/9/2013 5:46:10 PMV1FINALFOR PRINT](https://usermanual.wiki/Acrox-Technologies/RX06.Manual/User-Guide-1892713-Page-1.png)